Written byStevenUpdated on Mar 19, 2025
How to Recover Lost Data on MacBook Pro: 5 Proven Methods (2025 Guide)
Approved byGerhard Chou
Before we start: Donemax Data Recovery for Mac is a powerful data recovery application for MacBook Pro. It can completely and easily recover deleted, formatted, inaccessible or lost data from your MacBook Pro (Intel-based, Apple T2 Security and Apple silicon MacBook Pro).
PAGE CONTENT:
Losing important files on your MacBook Pro can feel like a disaster, but don't panic - there are proven ways to get your data back. Common issues like accidental deletion, erasing or formatting the disk, software errors, or even water damage don't have to mean losing your files forever. There are simple fixes like checking the Trash, advanced tricks with Terminal commands, and even what to do if your Mac won't turn on. You will learn how to easily and completely recover deleted, formatted or lost data from your MacBook Pro.
Immediate Steps After Data Loss on Your MacBook Pro
Don't panic - act fast! Here's what to do first to save your files.
Losing files on your MacBook Pro feels scary, but acting quickly can save your data. Whether you accidentally deleted photos or your Mac crashed, these steps will help you avoid making things worse. Let's start with the basics.
Stop Using Your MacBook Pro Immediately to Prevent Overwriting:
Imagine your deleted files are hiding under a pile of new stuff - the more you use your Mac, the harder they are to find. Here's why stopping matters:
- Turn off Wi-Fi to stop apps like iCloud or Dropbox from syncing (this could overwrite files).
- Close all programs - even typing a document could write new data over old files.
- Don't restart unless your Mac is frozen. Restarting might trigger updates that erase more data.
If your Mac won't turn on, don't keep pressing the power button. Unplug it and skip to the next step.
Check Trash and Recent Backups (iCloud/Time Machine):
Most "lost" files are just misplaced. Let's check the obvious spots first:
- Look in the Trash
- Open the Trash from your Dock.
- Right-click any file and select Put Backto restore it.
- Check iCloud Backups
- Go to iCloud.com on another device.
- Open Drive or Photos to find missing files.
- Use Time Machine
- Connect your backup drive.
- Click the Time Machine icon (top-right menu bar) > Enter Time Machine (or Browse Time Machine Backups).
- Scroll through backup dates to find your files.
💡 Tip: If your Mac won't start, use Recovery Mode (hold Command + R or Power button while turning it on) to restore from Time Machine backup.
What If You Don't Have a Backup?
No backup? Don't worry - third-party tools like Donemax Data Recovery for Mac can scan your drive for leftover file fragments.
Best 5 Methods to Recover Lost Data from a MacBook Pro
Now, we will show the details about MacBook Pro data recovery, from recovering from trash bin to using advanced data recovery software.
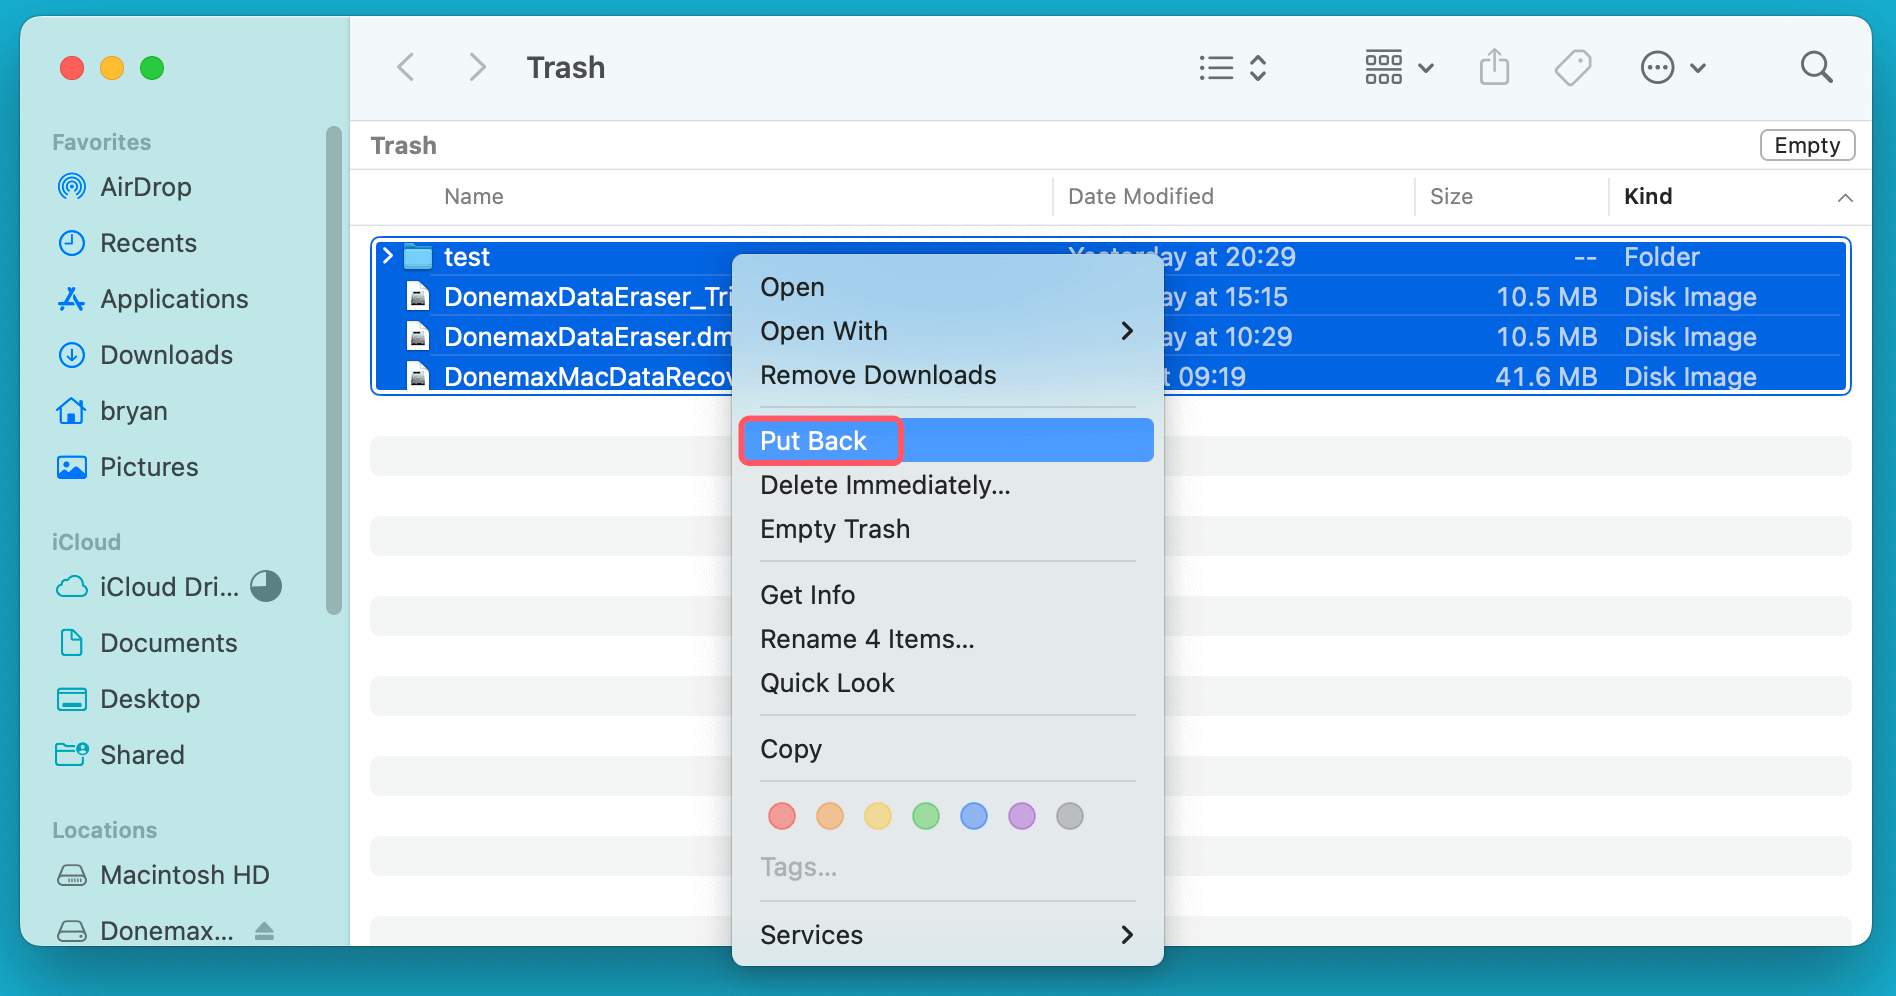
Method 1. Recover Deleted Files from Trash Bin on MacBook Pro
If you can find the deleted files in trash bin, you can easily restore them.
- Click Trash icon on Dock to open trash bin.
- Find the deleted files you want to restore, right-click them.
- Choose Put Back or just drag them to the desktop.
![Recover Lost Data on MacBook Pro]()
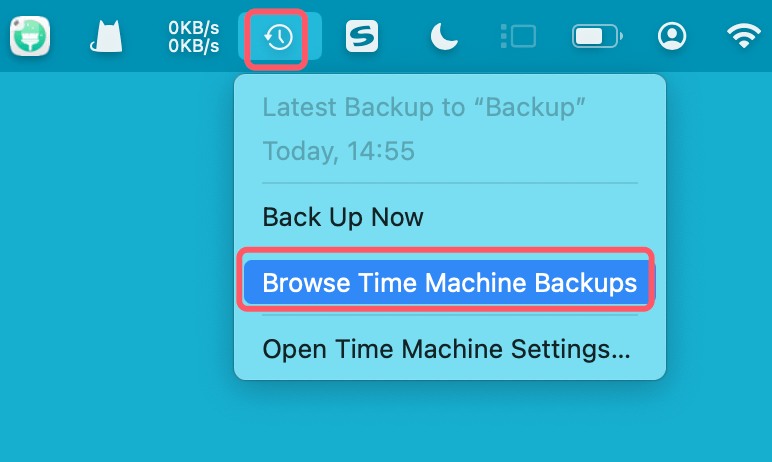
Method 2. Restore Data Using Time Machine
Losing files on your MacBook Pro doesn't have to be permanent if you've used Time Machine backup. Whether you're using an older Intel Mac or a newer M1-M4 model, here's how to restore your data and fix common errors.
- Connect the Time Machine backup disk to your MacBook Pro.
- Open the location where you delete or lose the files.
- Go to System Settings > General > Time Machine.
- Click Time Machine icon on Apple menu bar, choose Enter Time Machine or Browse Time Machine Backups.
![Recover Lost Data on MacBook Pro]()
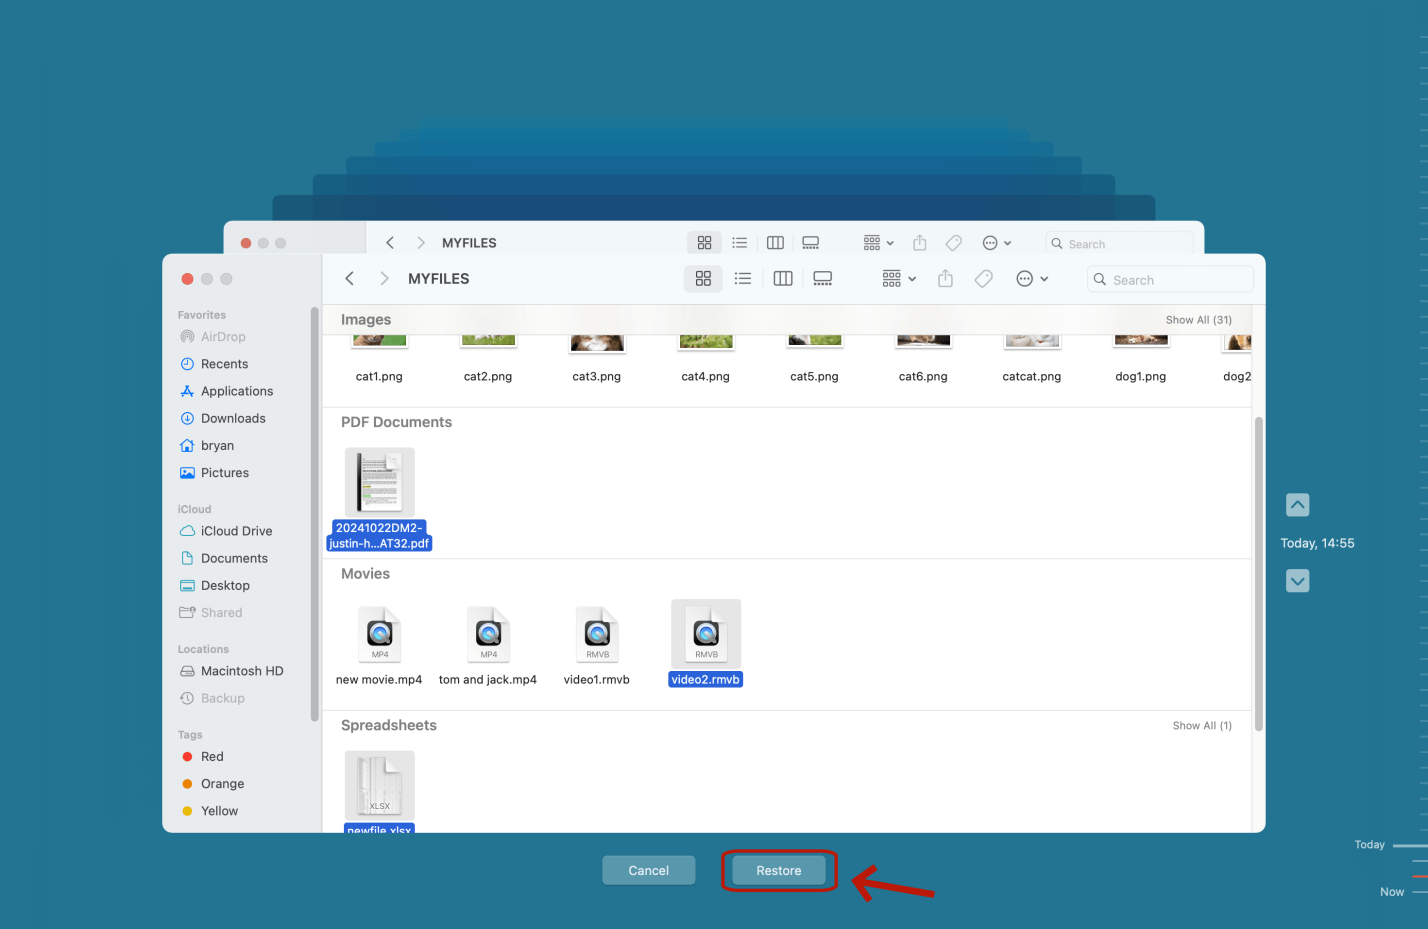
- Find the files you want to restore and select them.
- Click on Restore button.
![Recover Lost Data on MacBook Pro]()
You also can restore your MacBook Pro from a Time Machine backup in macOS Recovery mode:
For Intel Macs:
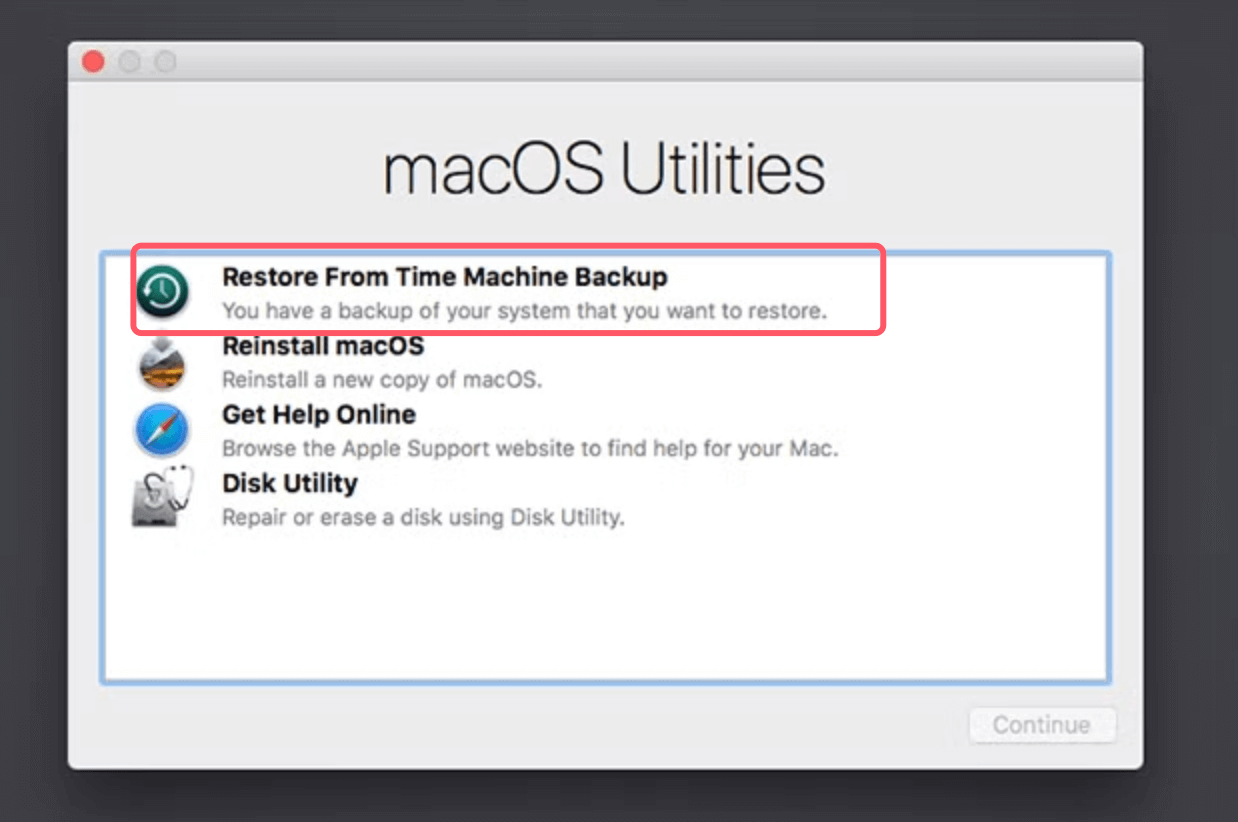
- Restart your Mac and hold Command + R until the Apple logo appears.
- In macOS Utilities, select "Restore from Time Machine Backup."
![Recover Lost Data on MacBook Pro]()
- Pick your backup drive and choose the date when your files were safe.
- Click Restore and wait - your Mac will reboot with your old files.
For Apple silicon Macs:
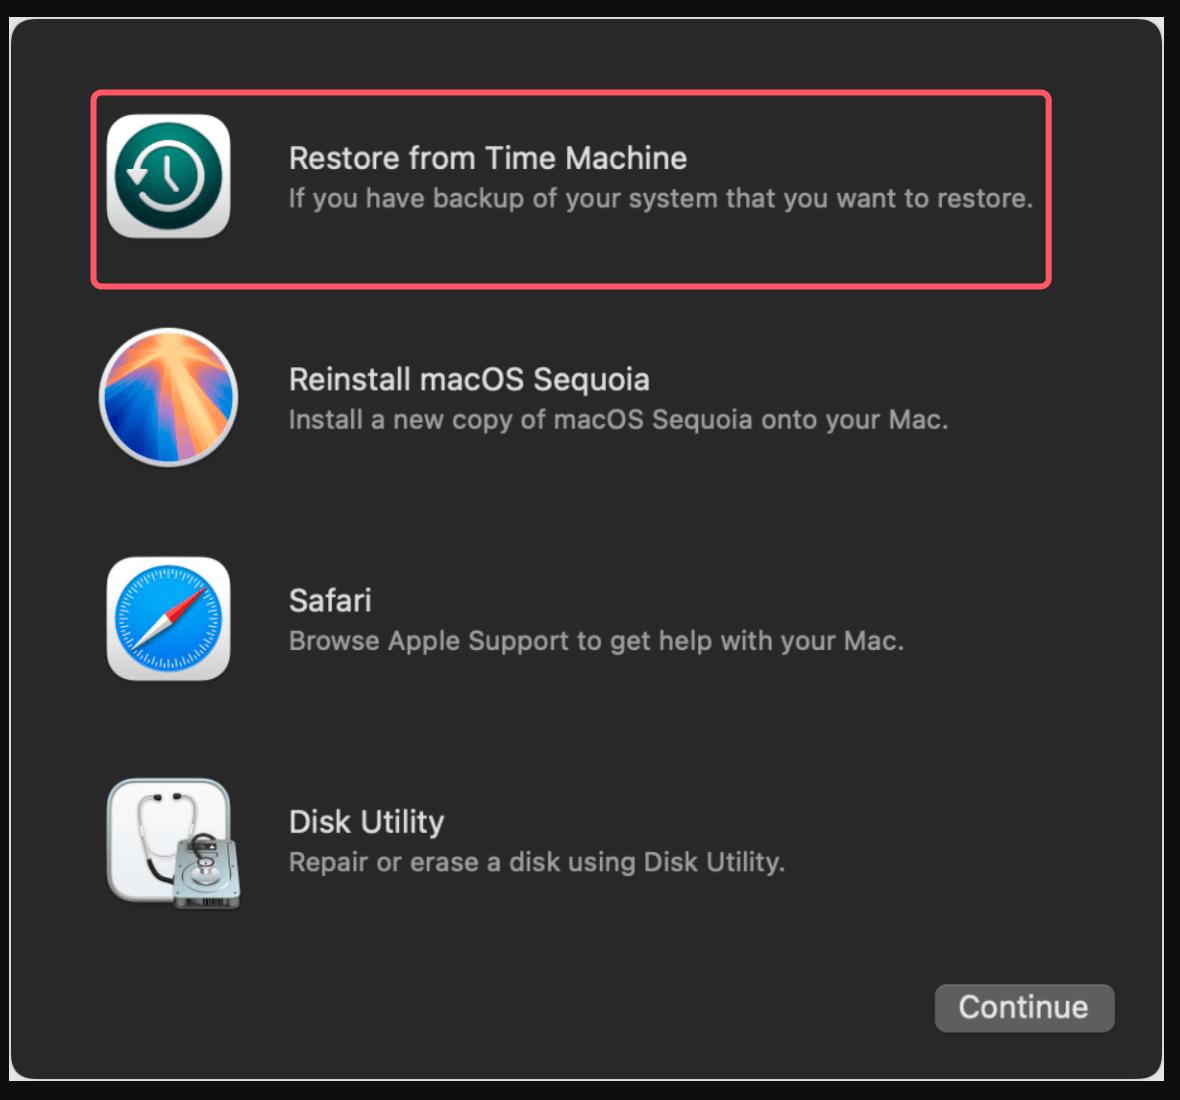
- Shut down your MacBook Pro.
- Hold the Power button until "Loading Startup Options" appears.
- Click Options > Continue to enter Recovery Mode.
- Select Restore from Time Machine and follow the prompts.
![Recover Lost Data on MacBook Pro]()
💡 Note: Apple's support warns you might need to reinstall macOS first if your system is damaged. Don't worry - Time Machine won't erase newer files unless you tell it to!
Troubleshooting Time Machine Backup Errors
If Time Machine acts up, try these fixes:
- "Backup Failed" or "Disk Full" Errors
- Check your backup drive's space: It needs double your Mac's storage.
- Delete old backups: In Time Machine settings, right-click the backup disk > Delete Backup.
- Stuck on "Preparing Backup"?
- Cancel the backup: Open Time Machine settings > Click the X next to the progress bar.
- Delete hidden files: Go to your backup drive > Backups.backupdb folder > Trash any .inProgress files.
- Time Machine Won't Recognize Your Drive
- Restart your Mac and reconnect the drive.
- Check the file system: Open Disk Utility > Select the drive > Click First Aid.
- Backup Freezes Mid-Process
- Exclude Spotlight: In Time Machine settings > Options > Add /System/Library/CoreServices/Spotlight to excluded folders.
- Disable antivirus software temporarily - it might block backups.
Pro Tips:
- For M-chip Macs, avoid using hubs - plug the backup drive directly into your MacBook Pro.
- If Time Machine still fails, use Terminal to force a backup:
sudo tmutil startbackup --auto
Need More Help?
If errors persist, tools like Donemax Data Recovery for Mac or Stellar Data Recovery can extract files directly from your Time Machine drive.
Method 3. Use Data Recovery Software for MacBook Pro Data Recovery
When Time Machine isn't enough, Mac data recovery software like Donemax Data Recovery for Mac and Stellar Data Recovery can rescue files from corrupted drives, formatted disks, or crashed systems. Let's compare the top options and show you how to use them.
Donemax Data Recovery for Mac: Best MacBook Pro Data Recovery Software
Donemax Data Recovery for Mac is a fan favorite for its simplicity and power. Here's why it's great for MacBook Pro users:
- Works on Apple silicon Macs: No compatibility issues - just download and scan.
- Recovers 2000+ File Types: Photos, videos, docs - even niche formats like .PSD or .RAW.
- Free Preview: See recoverable files before paying (free version recovers up to 200MB).
How to recover files with Donemax Data Recovery for Mac:
Step 1: Download and install Donemax Data Recovery for Mac on your MacBook Pro.
Step 2: Select your drive (even a corrupted drive) and click on Scan button.

Step 3: Donemax Data Recovery for Mac will deeply scan the MacBook Pro and find all recoverable files including existing files, inaccessible files, deleted files, formatted/erased and lost files.

Step 4: Preview found files, select what you need, and click on Recover button to save to a different drive.

Stellar Data Recovery: M1/M2 Chip Compatibility Guide
Stellar Data Recovery shines on newer Macs with M-series chips, but it has quirks:
Why choose Stellar?
- M1/M2 Optimization: Handles Apple's T2 security chips without hiccups.
- Deep Scans: Finds fragments of deleted files other tools miss.
- Affordable Plans: Starts at $59.99/year, with a free trial version.
How to use Stellar on M1/M2 Macs:
Step 1: Download and launch Stellar. Select file types (e.g., Photos, Documents).
Step 2: Pick the drive or folder where files were lost. Click "Scan."
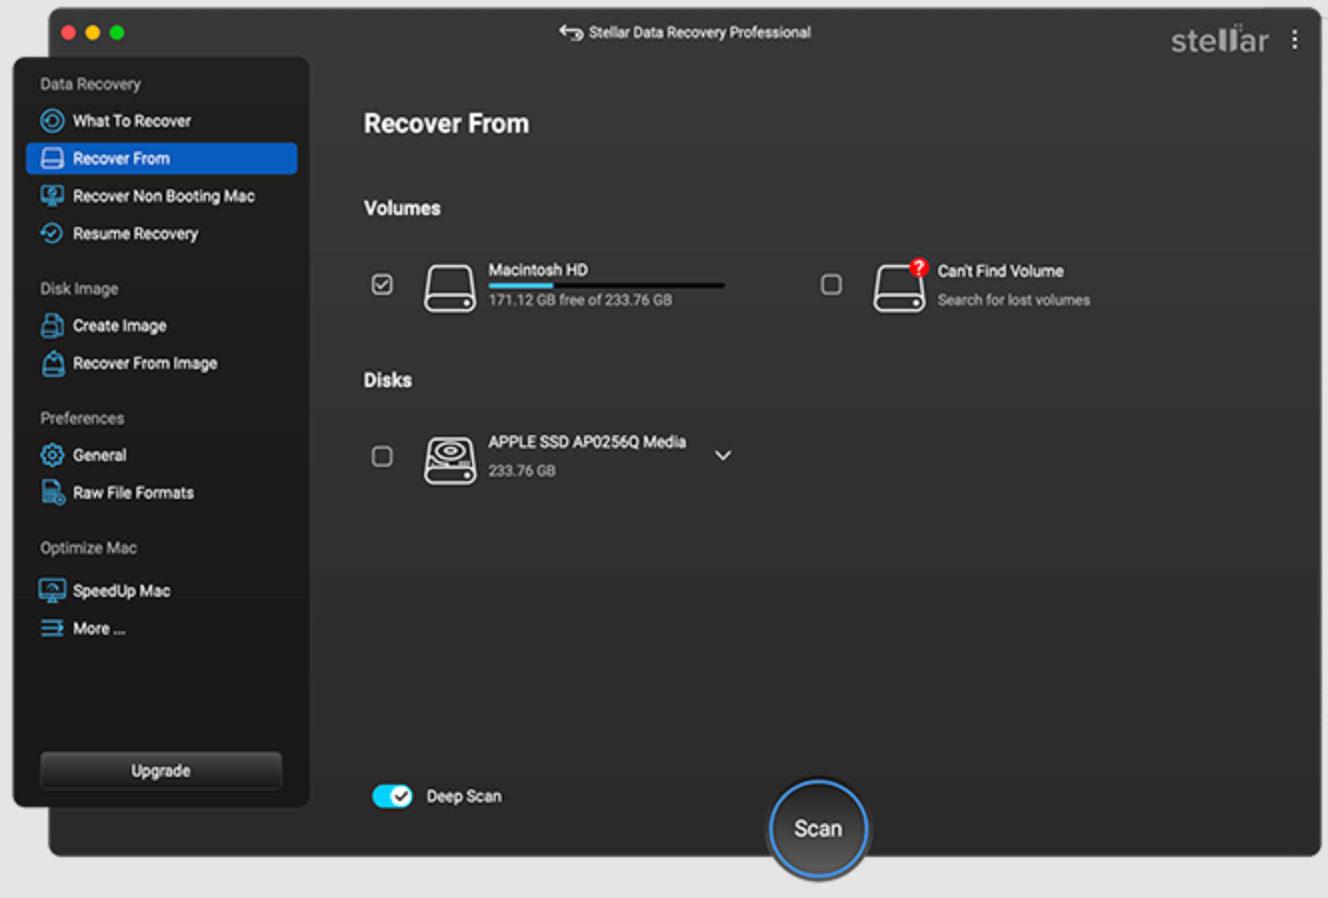
Step 3: Preview results and recover to an external drive - never the original.
⚠️ Warning: Stellar sometimes crashes during deep scans. Save progress frequently!
Method 4. Advanced Recovery Methods
No backup? No problem. Let's dig deeper.
Losing files without a backup feels like a nightmare, but tools like Terminal data recovery and Target Disk Mode can still save your data. Here's how to use them - even if your MacBook Pro is physically damaged.
Using Terminal Commands for Deleted File Recovery
Terminal isn’t just for coders! Follow these steps to recover files:
- Open Terminal (Applications > Utilities).
- Type diskutil list to see all drives. Note your Mac's main drive (e.g., disk2).
- Use cd /Volumes/YourDriveName to navigate to the drive.
- Run sudo rm -R .Trashes to force-empty Trash (sometimes files get stuck here).
- For deeper scans, install TestDisk via Terminal:
brew install testdisk
Then run testdisk /dev/disk2 to search for deleted partitions.
⚠️ Warning: Terminal can delete files permanently if misused. Double-check commands!
Target Disk Mode for Physically Damaged Macs
If your MacBook Pro won't turn on, Target Disk Mode lets you access its drive from another Mac:
For Intel Macs:
- Connect both Macs via Thunderbolt or USB-C.
- Hold T while turning on the damaged Mac.
- Its drive will appear on the working Mac’s desktop—copy files off immediately.
For Apple silicon Macs:
- Apple removed Target Disk Mode, but you can use Recovery Mode:
- Hold the Power button > Options > Utilities > Share Disk.
- Connect via USB-C and access files through Finder on another Mac.
💡 Pro Tip: For water-damaged Macs, skip rice - use silica gel packs and don't charge it.
Method 5. Model-Specific Recovery Strategies
M1/M2/M4/M4 vs. Older Macs: Tailored fixes for your device.
Apple's newer chips and security features make recovery trickier. Here's how to adapt:
T2 Security Chip Limitations and Workarounds
T2-chip Macs (2018–2020 models) encrypt data by default:
1. FileVault Must Be Off:
If enabled, you'll need the password to decrypt files.
2. Use Apple Configurator 2:
Restore firmware on T2 Macs to bypass encryption (erases data).
💡 Note: Older Intel Macs without T2 chips are easier to recover - no encryption hurdles.
Water-Damaged or Non-Responsive Mac Recovery
1. Dry Your Mac:
Unplug it, remove the bottom case (if possible), and let it air-dry for 48 hours.
2. Remove the SSD:
For 2016–2020 MacBook Pros, unscrew the SSD and use a USB-C adapter to read it on another Mac.
3.Professional Recovery Services:
Companies like DriveSavers specialize in M1 MacBook data loss from liquid damage (cost: $500–$2,500).
Prevent Future Data Loss on Your MacBook Pro
Stop data loss before it happens. Here's how.
Setting Up Automated Backups (Time Machine/iCloud)
1. Time Machine:
Connect an external drive > Open System Settings > General > Time Machine > Add Backup Disk.
Set backups to run hourly/daily.
2. iCloud:
Enable Desktop & Documents Folders in System Settings > [Your Name] > iCloud > iCloud Drive.
💡 Tip: Use both—iCloud for recent files, Time Machine for full-system restores.
Monitoring Drive Health with Disk Utility
- Open Disk Utility (Applications > Utilities).
- Select your drive > Click Info (top toolbar).
- Check S.M.A.R.T. Status:
- "Verified" = Healthy.
- "Failing" = Backup immediately and replace the drive.
- For SSDs, use Trim Enabler (free app) to optimize performance.
MacBook Pro Data Recovery FAQs
1. Can I recover files after emptying Trash on MacBook Pro?
Yes, but act fast! When you empty the Trash, macOS marks the space as available but doesn't erase files immediately. Here's how to recover them:
- Use data recovery software: Tools like Donemax Data Recovery for Mac or Stellar scan your drive for recoverable files.
- Check iCloud or Time Machine:
- Log in to iCloud.com > Restore Files.
- Use Time Machine backups via Recovery Mode (hold Command + R or Power button).
⚠️ Warning: SSDs with TRIM erase deleted data faster - recovery chances drop daily.
2. How to recover data from a dead MacBook Pro?
Try these steps before giving up:
- For Intel Macs:
- Target Disk Mode: Hold T while booting, connect to another Mac via Thunderbolt/USB.
- Recovery Mode: Boot with Command + R > Use Terminal to run recovery software like Stellar Data Recovery for Mac.
- For Apple silicon Macs:
- Share Disk: Hold the power button > Options > Utilities > Share Disk.
- Time Machine: Reinstall macOS, then restore from a backup.
No backup? Remove the SSD (2016–2020 models) and use a USB-C adapter to read it elsewhere.
Costly but reliable: Professional services like DriveSavers charge $500–$3,000 for water damage or encrypted drives.
Is professional recovery worth the cost?
It depends:
- Worth it: If files are critical (family photos, work docs) and DIY tools fail.
- Not worth it: For replaceable data or minor issues ($300–$1,000 for logical failures).
Cost factors:
- Physical damage: $500–$3,000 (requires cleanroom tools).
- Encrypted drives: T2/M1-M4 Macs often need pros to bypass encryption.
DIY vs. Pro:
- Software: $50–$100 (EaseUS, Donemax Data Recovery for Mac).
- Pros: $300+/hour but higher success rates for severe cases.
3. What is the best data recovery software for MacBook Pro?
Here are top 5 data recovery tools that can recover lost data on MacBook Pro:
- Donemax Data Recovery for Mac
- Stellar Data Recovery
- Do Your Data Recovery for Mac
- TestDisk
- Magoshare Data Recovery for Mac
4. How to recover formatted data from MacBook Pro?
Follow these steps to unformat a hard drive on your MacBook Pro:
- Download and install Donemax Data Recovery for Mac, run it from Launchpad.
- Choose the formatted hard drive to start data recovery.
- Click on Scan button to deeply scan the formatted hard drive.
- Preview and recover lost/formatted files after scanning.
Conclusion
Losing files on your MacBook Pro can feel overwhelming, but now you know how to recover lost data on MacBook Pro using proven methods like Time Machine backups, third-party tools (Donemax Data Recovery for Mac), and even Terminal commands. Whether it's accidental deletion, a crashed system, or water damage, acting fast and using the right approach can save your files.
Key solutions include restoring from iCloud or Time Machine, scanning with recovery software for corrupted drives, and leveraging Target Disk Mode for older models. For newer M-chip Macs, professional services might be needed if backups aren't available.
Prevent future losses by setting up automatic backups and monitoring your SSD's health. Remember, quick action and regular backups are your best defense against data disasters. Stay calm, follow these steps, and you'll keep your MacBook Pro's data safe!
Donemax Data Recovery for Mac
Donemax Data Recovery for Mac is one of the best Mac data recovery software. It is easy-to-use and can help in recovering deleted, formatted, inaccessible or lost data from Mac HDD/SSD, external disk, USB drive, SD card, camera or other storage devices.
Related Articles
- Nov 29, 2024Mac Trash Recovery: A Comprehensive Guide to Recovering Deleted Files on Mac
- Mar 06, 2025[5 Methods] Recover Lost Data from WD External Hard Drive on Mac
- Jan 30, 2024Fixes for Uninitialized External Hard Drive on Mac
- Feb 29, 2024SDHC Card Recovery on Mac: Completely Recover Deleted/Formatted Data
- Nov 29, 2024Application Support Folder Deleted/Missing on Mac, 5 Methods to Recover It
- Feb 11, 20252025 Guide: Top 4 Methods to Recover Lost Data from SD Card on Mac

Contributing Writer
Steven
Steven has been a senior writer & editor of Donemax software since 2020. He's a super nerd and can't imagine the life without a computer. Over 6 years of experience of writing technical solutions and software tesing, he is passionate about providing solutions and tips for Windows and Mac users.

Editor in chief
Gerhard Chou
In order to effectively solve the problems for our customers, every article and troubleshooting solution published on our website has been strictly tested and practiced. Our editors love researching and using computers and testing software, and are willing to help computer users with their problems