PAGE CONTENT:
Owning a Mac can feel like a breath of fresh air, especially with its sleek design, smooth operating system, and streamlined interface. But even on the most user-friendly platform, mundane tasks such as managing files and emptying the trash can be confusing to some. If you're new to Mac or have been using it for years but never quite understood the intricacies of the Trash bin, this guide is for you.
In this article, we will break down every aspect of the Trash feature on Mac - what it does, how it works, and how to efficiently empty it when the time comes. By the end, you'll be equipped to manage your files and disk space effectively, keeping your Mac running smoothly.

What Is the Trash on a Mac?
The Trash on Mac is similar to the Recycle Bin on Windows. It's a designated space where deleted files and folders are temporarily stored before being permanently removed. This serves as a safeguard, allowing users to recover files they've mistakenly deleted.
When you drag a file or folder to the Trash bin or press Command + Delete, it doesn't immediately disappear. Instead, it stays in the Trash until you either manually empty it or set it to automatically empty after a set period of time.
While files are in the Trash, they still occupy disk space, so it's essential to empty it regularly to maintain optimal system performance, especially on machines with limited storage.
How to Access the Trash on a Mac?
Before learning how to empty the Trash, it's helpful to know how to access it in the first place. There are two ways to open the Trash bin on your Mac:
- From the Dock: The Trash icon is located at the far-right side of your Dock. Simply click on this icon, and it will open the Trash window, showing you the files and folders you've deleted.
![Access the Trash on a Mac]()
- Using the Go Menu: In Finder, click "Go" in the menu bar, and then select "Go to Folder." Type in ~/.Trash/ and press Return. This will open the Trash folder directly.
![Access the Trash on a Mac]()
With access to the Trash bin, you're now ready to learn how to manage it, including emptying its contents.
Why Emptying the Trash is Important?
Many Mac users underestimate the significance of emptying the Trash regularly. Here are a few key reasons why this is important:
- Reclaim Storage Space: Files in the Trash still take up valuable space on your hard drive. By emptying the Trash, you free up space that can be used for other purposes, such as storing photos, documents, or installing new apps.
- Enhance Performance: A full hard drive can slow down your Mac's performance. Regularly emptying the Trash can improve the overall speed and responsiveness of your system.
- Maintain Privacy: Deleted files can still be recovered as long as they remain in the Trash. If you have sensitive data you no longer need, emptying the Trash ensures that those files are truly gone, adding an extra layer of privacy and security.
- Organizational Benefits: Keeping your Mac free of unnecessary files helps you stay organized. A clutter-free system is easier to navigate and manage.
Now that you understand the importance of emptying the Trash, let's dive into how to do it.
How to Empty the Trash on Mac? [5 Methods]
There are a few different ways to empty the Trash on your Mac, each suitable for different situations. Here's a breakdown of the most common methods:
1. Manually Emptying the Trash
This is the simplest and most straightforward method for emptying the Trash:
- Step 1: Locate the Trash icon in your Dock and right-click on it.
- Step 2: Select Empty Trash from the context menu.
![Manually Emptying the Trash]()
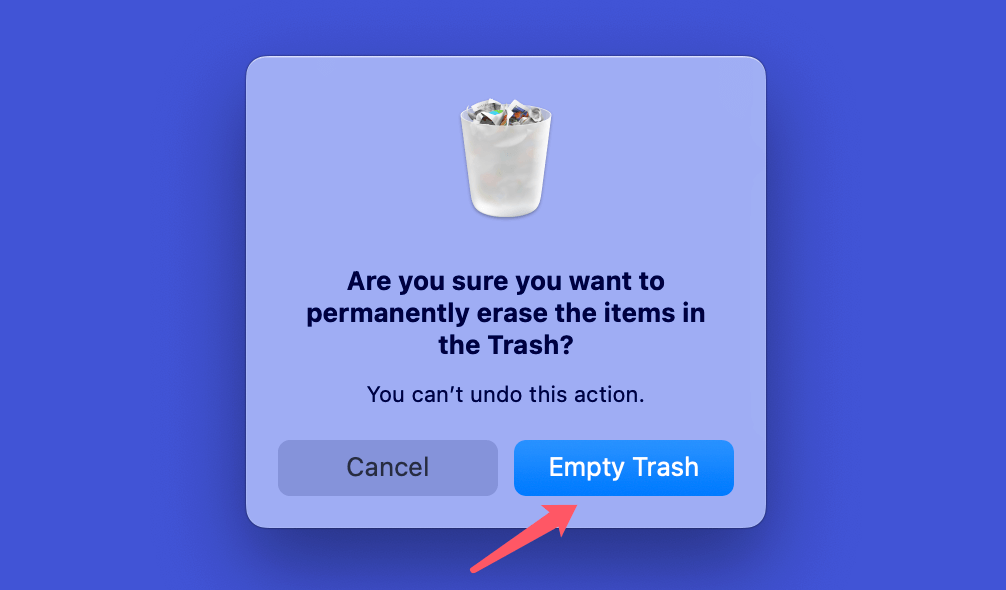
- Step 3: Confirm the action by clicking Empty Trash in the pop-up window.
![Manually Emptying the Trash]()
After completing these steps, the Trash bin will be emptied, and the files it contained will be permanently deleted from your Mac.
2. Using Finder to Empty the Trash
If you prefer to use Finder for this task, here's how:
- Step 1: Open a Finder.
- Step 2: Once the Trash folder is open, click on Finder in the menu bar at the top of the screen.
- Step 3: Select Empty Trash from the dropdown menu.
![Using Finder to Empty the Trash]()
- Step 4: Confirm the deletion by clicking Empty Trash in the pop-up prompt.
This method is useful if you're already working within Finder and want a quick way to empty the Trash without leaving the app.
3. Use a Keyboard Shortcut to Empty the Trash
If you like using keyboard shortcuts, there's one for emptying the Trash on your Mac:
- Step 1: Press Command + Shift + Delete on your keyboard while Finder is active.
- Step 2: Confirm the action by clicking Empty Trash in the pop-up window.
![Use a Keyboard Shortcut to Empty the Trash]()
This method is great for those who prefer to keep their hands on the keyboard and minimize mouse usage.
4. Empty the Trash Securely [for older OS X versions]
For sensitive files that you want to make irrecoverable, you can use a method known as Secure Empty Trash. While this option was available in earlier macOS versions, Apple removed it in macOS 10.12 Sierra. However, you can still secure your files using Terminal, which we'll cover below.

5. Automatically Empty the Trash
If you often forget to empty the Trash, there's an option to automate the process. You can set your Mac to automatically empty the Trash after 30 days. Here's how:
- Step 1: Open Finder and click on Finder in the menu bar.
- Step 2: Select Settings from the dropdown menu.
![Automatically Empty the Trash]()
- Step 3: Navigate to the Advanced tab.
- Step 4: Check the box next to "Remove items from the Trash after 30 days."
![Automatically Empty the Trash]()
Once this is enabled, your Mac will automatically delete items that have been in the Trash for 30 days, freeing up space without you needing to manually empty it.
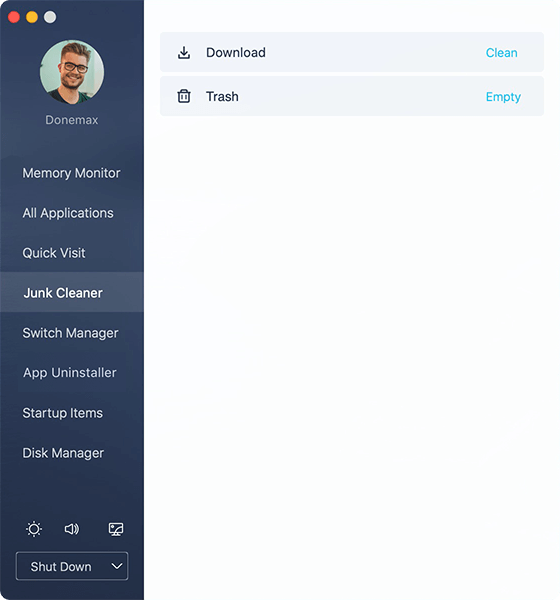
💡 Note: Third-party management or disk cleaning tools can help you quickly empty trash on Mac. For example, you can install DMmenu for Mac, run it. Choose Junk Cleaner, then click Empty to quickly empty trash.

Advanced Options for Emptying Trash
Sometimes, the standard methods of emptying the Trash don't work as expected, especially if certain files are locked, in use, or corrupted. Here are some advanced techniques to force the Trash to empty:
1. Force Empty the Trash Using Option Key
If you can't empty the Trash using the usual methods, try holding the Option key while emptying it. Here's how:
- Step 1: Right-click on the Trash icon in your Dock.
- Step 2: Hold the Option key and click Empty Trash from the context menu.
This action forces the Trash to empty, even if some files are locked or in use.
2. Use Terminal to Force Empty the Trash [for older OS X versions]
For users comfortable with the command line, Terminal provides a powerful way to force-empty the Trash. Follow these steps:
- Step 1: Open Terminal by searching for it in Spotlight or finding it in the Applications > Utilities folder.
- Step 2: Type the following command and press Return:
sudo rm -rf ~/.Trash/*
- Step 3: Enter your administrator password when prompted and press Return again.
This command force-deletes all the files in your Trash, regardless of their status.
3. Dealing with Stubborn Files
If you still encounter files that won't delete, they may be locked. Here's how to unlock them:
- Step 1: Open the Trash and locate the stubborn file.
- Step 2: Right-click the file and select Get Info.
- Step 3: In the Info window, uncheck the box next to Locked.
![Dealing with Stubborn Files]()
Once unlocked, try emptying the Trash again.

Common Issues When Emptying the Trash on Mac
Sometimes, even after following the steps outlined above, users may encounter issues while trying to empty the Trash. Here are some common problems and solutions:
1. "Item Is in Use" Error
This error occurs when the system thinks a file is still being used by an application, even if it’s not. To resolve this, restart your Mac and attempt to empty the Trash again. Alternatively, you can use Terminal to force the deletion, as outlined earlier.
2. "File is Locked" Error
Locked files prevent the Trash from emptying. As mentioned previously, you can unlock these files using the "Get Info" method or by using Terminal.

3. Corrupted Files in the Trash
Corrupted files can prevent the Trash from emptying properly. The best approach here is to force-delete the files using Terminal, as described in the advanced options section.
Frequently Asked Questions (FAQs)
1. Can I recover files after emptying the Trash?
Once the Trash is emptied, recovering files becomes much more difficult. However, recovery software like Donemax Data Recovery for Mac or Time Machine backups can sometimes help you restore deleted files, though this is not guaranteed.
Step 1. Download and install Donemax Data Recovery for Mac on your Mac. It can help you completely recover deleted files on Mac after emptying trash bin.
Step 2. Open Donemax Data Recovery for Mac, select the internal drive (such as Macintosh HD).

Step 3. Click on Scan button to deeply scan the internal drive and find all deleted/erased/lost files.

Step 4. Once the scan is completed, you can preview all recoverable files. Then select the wanted files, click on Recover button to save them.

2. How often should I empty the Trash on my Mac?
There's no one-size-fits-all answer to this. If you frequently delete large files, you should empty the Trash more often to free up space. Otherwise, the automatic 30-day removal option is a good balance.
3. Can I prevent files from going to the Trash and delete them instantly?
Yes, you can bypass the Trash entirely by holding the Option key while deleting a file or using the Command + Option + Delete shortcut. Be cautious, as this permanently deletes the file without placing it in the Trash first.
4. How to wipe trash bin to permanently erase all deleted files on Mac?
To make data recovery be impossible, you can use Mac disk wipe software - such as Donemax Data Eraser for Mac to help you wipe free disk space of the Mac:
- Download and install Donemax Data Eraser for Mac.
- Open Donemax Data Eraser for Mac.
- Choose Erase Free Space mode.
- Select Macintosh HD, click on Erase Now button.
- Wipe all deleted/lost files from the Mac.
Conclusion
Emptying the Trash on a Mac may seem like a simple task, but understanding the different ways to do it and knowing how to troubleshoot common issues can save you a lot of time and headaches. Whether you're looking to manually empty the Trash, automate the process, or force-delete stubborn files, this guide has equipped you with all the knowledge you need.
By regularly emptying the Trash and managing your files effectively, you'll ensure your Mac runs efficiently, stays clutter-free, and retains optimal performance. Happy file managing!
Related Articles
- Jun 28, 20254 Methods to Convert RAR to ZIP on Mac: A Complete Guide
- Jul 20, 202512 Methods to Fix Mouse Disappears on Mac?
- Sep 04, 2025How to Delete iOS Files on Mac?
- Nov 27, 2024How to Add or Delete Photos on Mac?
- Sep 25, 2024Fix Toshiba External Hard Drive Not Mounting on Mac (7 Solutions)
- Jul 07, 2025Not Enough Disk Space to Install macOS Tahoe 26? Fix It Now

Christina
Christina is the senior editor of Donemax software who has worked in the company for 4+ years. She mainly writes the guides and solutions about data erasure, data transferring, data recovery and disk cloning to help users get the most out of their Windows and Mac. She likes to travel, enjoy country music and play games in her spare time.

Gerhard Chou
In order to effectively solve the problems for our customers, every article and troubleshooting solution published on our website has been strictly tested and practiced. Our editors love researching and using computers and testing software, and are willing to help computer users with their problems


