PAGE CONTENT:
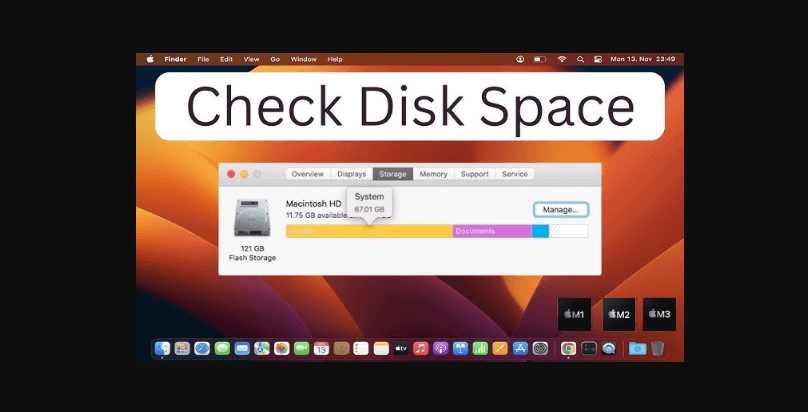
Managing storage on your Mac is crucial for maintaining optimal performance, especially as modern systems and applications require significant space. Over time, you may notice your Mac running slower or find yourself unable to install new programs due to insufficient space. In this article, we will explore various methods to check free disk space on your Mac, offer tips on freeing up storage, and help you understand the importance of monitoring available space regularly.
Why Checking Free Disk Space Matters
Before we dive into how to check disk space, let's first understand why it's so important:
- System Performance: A lack of free space can slow down your Mac significantly. macOS uses free space for tasks like virtual memory and caching. If your Mac is running out of space, these tasks can become less efficient, resulting in sluggish performance.
- Application Functionality: Some apps require a certain amount of free disk space to run properly, especially creative software like Final Cut Pro or Photoshop. If space is limited, these apps might crash or become unresponsive.
- Software Updates: macOS updates often require several gigabytes of free space. Without enough storage, you may not be able to install critical updates, leaving your Mac vulnerable to security risks or software bugs.
- File Storage: You risk running out of room for new files, photos, videos, or any other important data.
How to Check Free Disk Space on macOS [5 Different Ways]
There are several ways to check the free disk space on your Mac. We'll start with the simplest methods and progress to more advanced ones.
1. Using the 'About This Mac' or 'System Settings' Window
One of the easiest ways to see how much free space you have on your Mac is by using the built-in "About This Mac" option. Here's how:
- In the upper-left corner of your screen, click the Apple logo.
- Click the drop-down menu and choose About This Mac.
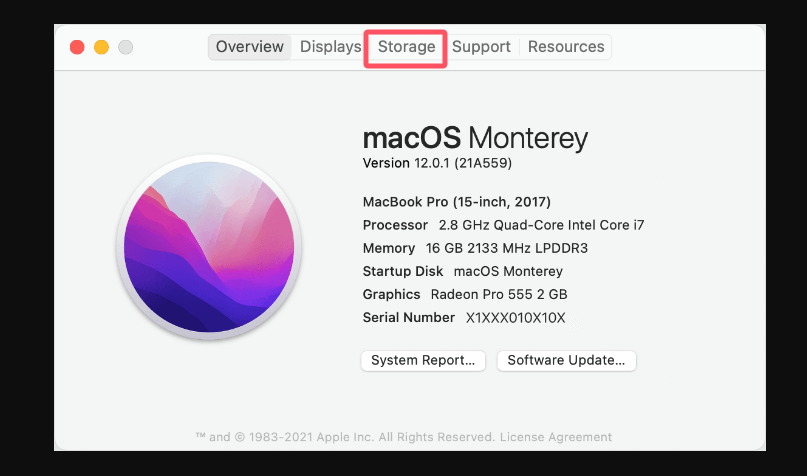
- Select the Storage tab from the popup that pops up.
![Select the Storage tab from the popup that pops up]()
If your Mac is running macOS 13 Ventura or later, click Apple logo, choose System Settings, click General and select Storage.
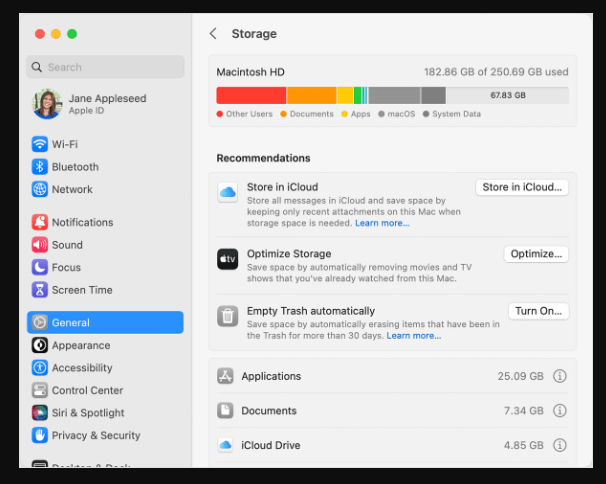
This will show a breakdown of your storage, including how much space is used by system files, apps, photos, and other data. You'll also see how much free space is available.
Pros
- Quick and Simple: Takes only a few seconds.
- Visual Breakdown: Provides a clear, color-coded graph showing how space is allocated.
Cons
- Limited Details: Doesn't provide specific file information or more advanced data, like disk health.
2. Using the Finder Window
The Finder in macOS provides another simple way to check available disk space. Follow these steps:
- Click the Finder icon in your Dock to open a Finder window.
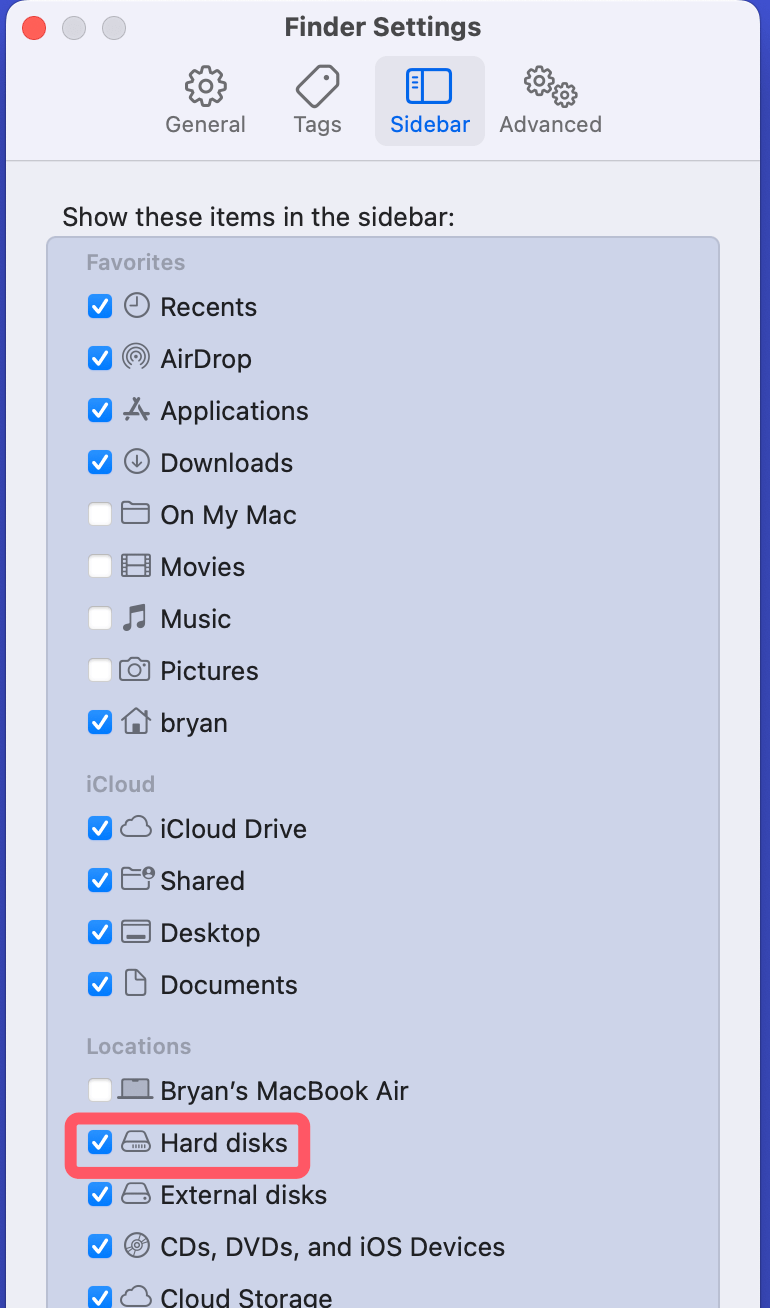
- In the left-hand sidebar, you should see your hard drive listed under Locations. If you don't see it, go to Finder's Preferences or Settings and check the box next to "Hard Disks."
![see your hard drive listed under Locations]()
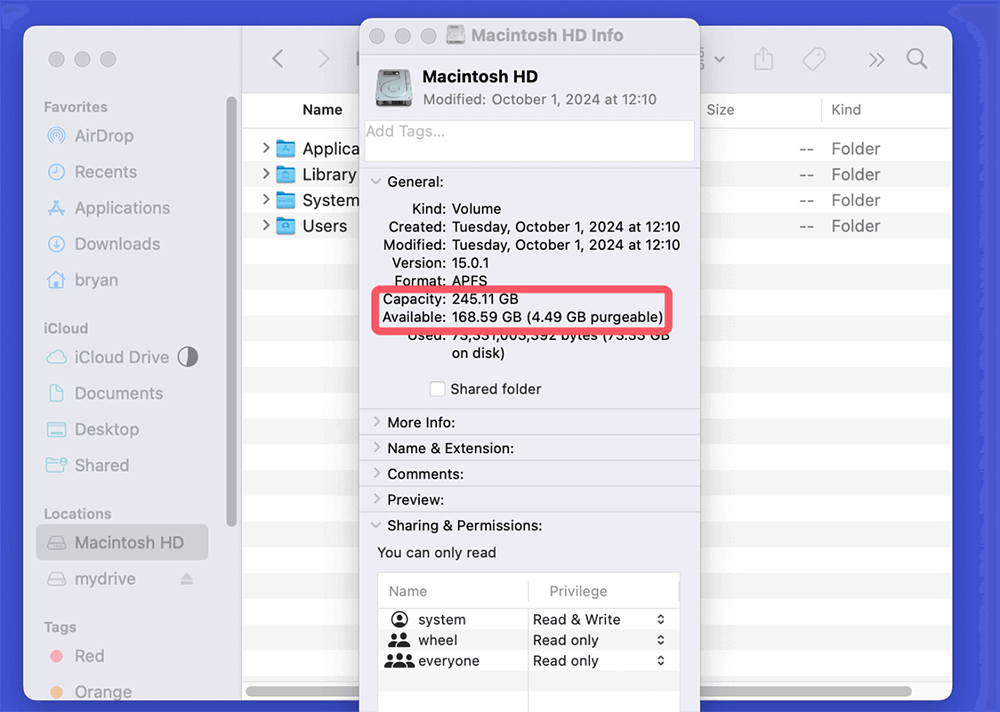
- Right-click on your hard drive (typically called Macintosh HD), choose Get Info, and check the available space.
![check the available space]()
Pros
- Accessible Within Finder: No need to leave the Finder window to check space.
- Simple to Use: Quick and easy access.
Cons
- No Detailed Insights: Doesn't offer a detailed breakdown like the "About This Mac" window.
3. Using Disk Utility
Use Disk Utility to get a more thorough overview of the storage on your disk. This is especially useful if you're trying to check multiple disks or external drives. To do this:
- Open Disk Utility by searching for it in Spotlight (Command + Space, then type "Disk Utility").
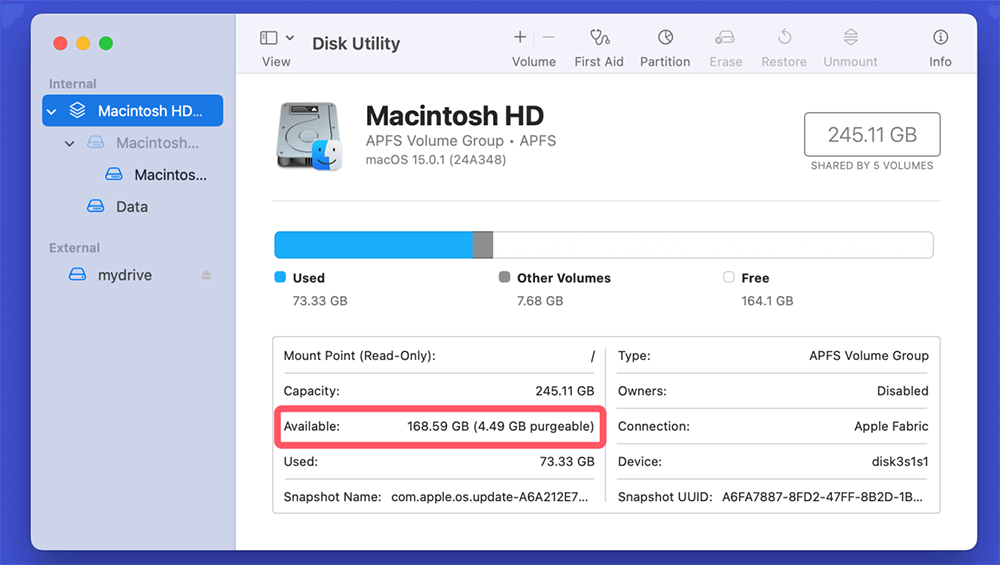
- In the left sidebar, select the drive you want to check (usually called Macintosh HD).
- At the bottom of the Disk Utility window, you'll see the total capacity, available space, and used space.
![Using Disk Utility]()
Pros
- Detailed Information: Offers a more comprehensive view, including additional data like disk health and volume partitions.
- Can Manage External Drives: Check space on external hard drives or USB drives.
Cons
- More Complex: Could be confusing for less tech-savvy users.
4. Using the Terminal
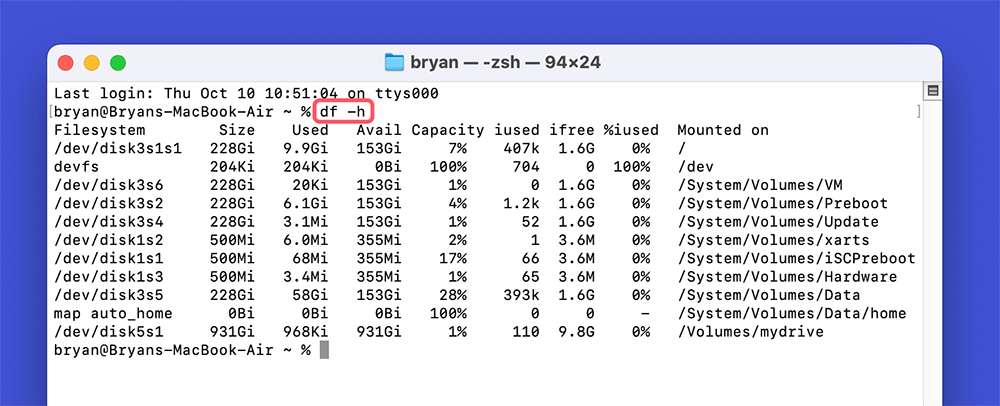
For advanced users, the Terminal offers a command-line approach to checking available disk space. This method gives precise information without any graphical interface.
- Open the Terminal (you can find it via Spotlight search).
- Type the following command and press Enter:
df -h
![Using the Terminal]()
This command displays information about the file system’s disk usage, including available space. The -h option makes the data human-readable by showing the sizes in gigabytes (GB) or megabytes (MB).
Pros
- Very Precise: Offers detailed, real-time information.
- For Advanced Users: Allows you to dive into technical details.
Cons
- Requires Comfort with Terminal: May not be suitable for casual users.
5. Using Third-Party Applications
There are also several third-party applications that can give you a detailed look at your disk space, including tools like DaisyDisk, CleanMyMac X, and Donemax Data Recovery for Mac.
- DaisyDisk: Offers a visual representation of your disk usage, making it easy to see which files or folders are taking up the most space.
- CleanMyMac X: In addition to checking disk space, it helps clean up junk files, uninstall applications, and optimize your Mac’s performance.
- Donemax Data Recovery for Mac: Provides insights into disk health and recovery options, alongside checking available space.
Pros
- User-Friendly: Easy-to-use interfaces and extra features like cleanup and optimization tools.
- Visual Insights: Helps identify large files quickly.
Cons
- Some Are Paid Tools: Advanced features usually require a paid subscription.
- May Be Overkill: Not necessary for casual users just checking free space.
How to Free Up Disk Space on Mac
If you find that you're running low on space, there are several ways to free it up. Here are some effective methods:
1. Remove Unnecessary Files and Applications
Start by cleaning out files and apps you no longer use:
- Open Finder and go to your Applications folder.
- Sort the applications by size to see which ones are taking up the most space.
- Right-click on any unwanted app and select Move to Trash.
- Don't forget to empty your Trash to free up space fully.
For personal files, go through large folders like Downloads and Documents to delete anything you no longer need.
2. Optimize Storage
macOS comes with built-in utilities for storage optimization. This is how you can get to them:
- To access About This Mac, click the Apple logo in the upper-left corner of your screen.
- Select Manage from the Storage tab. (If you are using macOS Ventura or later, go to System Settings > General > Storage)
- A number of options will appear, such as Empty Trash Automatically, Optimize Storage, and Store in iCloud.
These options allow you to store less frequently accessed files in iCloud, automatically delete old TV shows and movies, and clear the trash after 30 days.
3. Use Built-in Cleanup Tools
You can also use macOS's built-in tools like Storage Management to clear out system junk, cache files, and logs:
- Open Finder and select Go from the menu bar.
- Choose Go to Folder and type /Library/Caches.
- Delete files from folders that are no longer needed. Be careful, though - only remove items you are sure about.
4. Manage Large Files
To quickly find large files, open Finder and:
- Go to Finder > File > Find.
- Next to the search field, click the + button and select File Size from the drop-down option.
- Set the size limit to find files larger than a specified amount (e.g., 500MB or 1GB).
Once you identify these files, you can move them to an external drive or delete them.
5. Move Files to an External Drive or Cloud Storage
If you're running out of internal storage but need to keep large files. Think about transferring files to an external hard drive or storing them in the cloud with services like Dropbox, Google Drive, and iCloud.
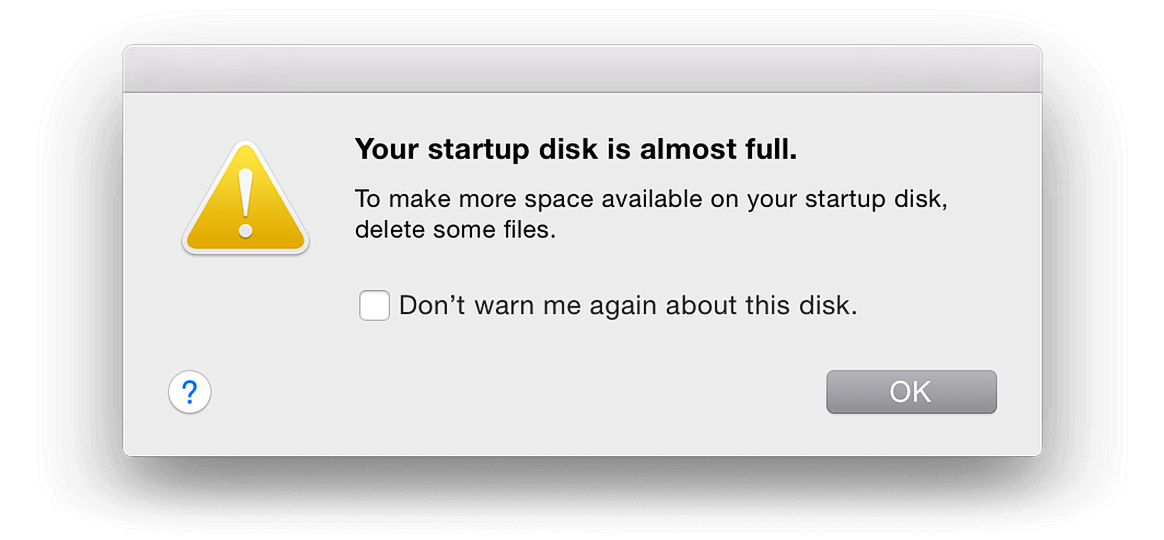
Fix Startup Disk Is Full Issue on Mac
Quickly delete useless data including old files, caches, useless apps on Mac and add more storage on Mac.
Regularly Monitor Your Storage
To avoid running into storage issues in the future, it's essential to regularly monitor your free disk space. Here are a few tips:
- Set Reminders: Schedule a monthly check of your disk space to catch issues before they become problems.
- Enable Storage Notifications: Use third-party apps or macOS's built-in features to alert you when your disk space is low.
- Clean Regularly: Make it a habit to clear out old files and empty the Trash often.
Tips for Managing Disk Space:
Monitoring your disk space is only half the battle; effective management is key to ensuring your Mac runs smoothly.
Regular Maintenance:
- Deleting Unused Files:
- Go through your Downloads folder and other locations where files accumulate. Remove files you no longer need.
- Organizing Storage:
- Use folders to keep your documents organized. Consider archiving older projects or files that are not frequently accessed.
Utilizing Cloud Storage:
Cloud storage can significantly reduce the burden on your local disk.
- Benefits of Offloading Data:
- Freeing up local space can improve performance and keep your Mac running efficiently.
- Recommended Services:
- iCloud Drive: Seamlessly integrates with your Mac, allowing for easy file access.
- Google Drive: Offers ample free storage and is accessible from any device.
Monitoring with Alerts:
Staying proactive about disk space can prevent future issues.
- Setting Up Notifications:
- Use apps that can alert you when disk space is running low.
- Apps that Monitor Disk Usage:
- Some utilities, like Disk Inventory X, can track your disk usage over time and provide insights.
Conclusion
Monitoring and managing your disk space on a Mac is essential for maintaining optimal performance and preventing data loss. By regularly checking your available storage, organizing files, and utilizing tools and cloud services, you can ensure that your Mac runs smoothly and efficiently.
Taking these steps not only improves your user experience but also helps you stay organized in the digital landscape. Whether you use built-in tools like "About This Mac" or third-party applications, the important thing is to stay proactive about your disk space. Make it a habit to check your storage regularly and take action to keep it in check!
Related Articles
- Jan 12, 2025Fix First Aid Found Corruption That Needs to Be Repaired Without Losing Data on Mac
- Jun 12, 2025Steps to Create Bootable macOS Sierra USB Installer
- Mar 21, 2025[8 Fixes] Fix Seagate Ultra Compact SSD Not Mounting on Mac
- May 22, 2025How to Open or Extract RAR File on Mac?
- Nov 29, 2024How to Convert or Reformat an USB Drive to NTFS on Mac?
- Jan 02, 2025Fix AppleAPFSMedia Uninitialized Without Losing Data on Mac

Steven
Steven has been a senior writer & editor of Donemax software since 2020. He's a super nerd and can't imagine the life without a computer. Over 6 years of experience of writing technical solutions and software tesing, he is passionate about providing solutions and tips for Windows and Mac users.

Gerhard Chou
In order to effectively solve the problems for our customers, every article and troubleshooting solution published on our website has been strictly tested and practiced. Our editors love researching and using computers and testing software, and are willing to help computer users with their problems

