Before we start: Download the macOS Sierra installation file and make a bootable USB installer. As an alternative, you can also create a bootable clone backup for running macOS Sierra with Donemax Disk Clone for Mac.
PAGE CONTENT:
Creating a bootable USB installer for macOS Sierra is an incredibly useful tool for any Mac user. Whether you're looking to troubleshoot issues, reinstall macOS, or set up multiple Macs, having a bootable installer on hand gives you flexibility, independence, and a quicker path to recovery.
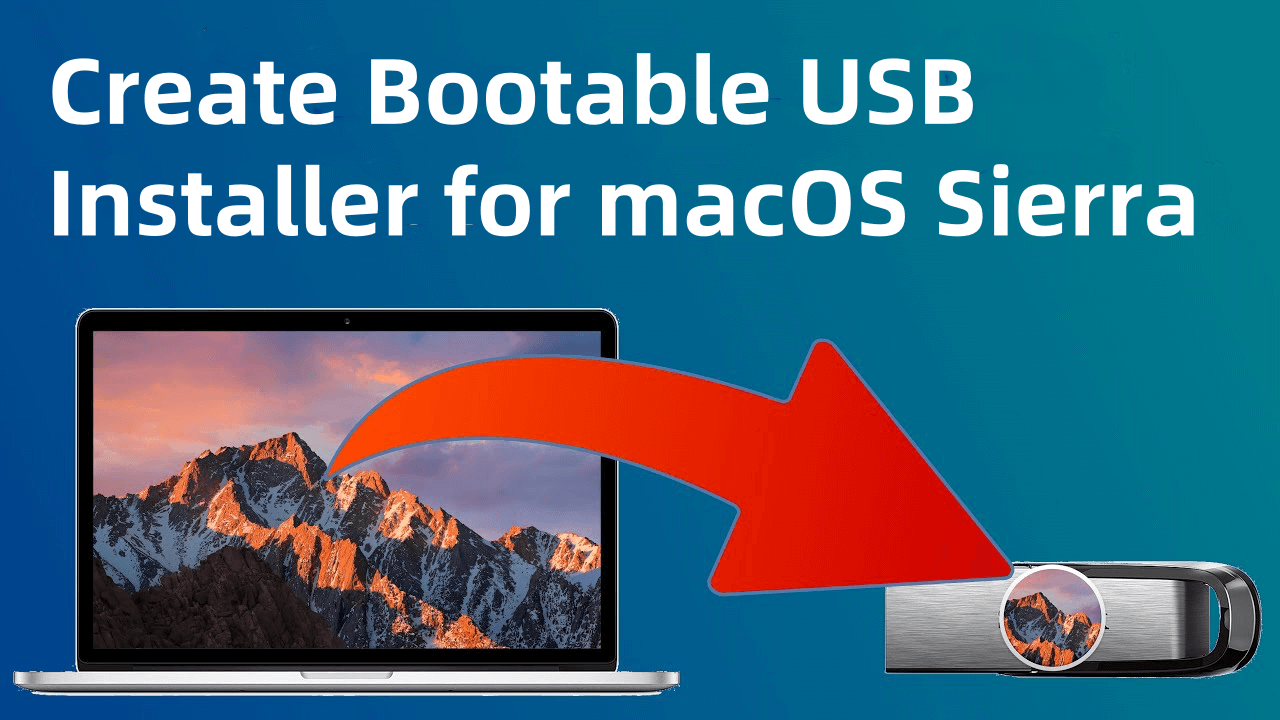
This guide will walk you through every step of the process, from preparing the USB to creating the installer and tackling common issues along the way. By following these steps, you'll have a reliable macOS Sierra bootable installer in no time.
Why Create a Bootable macOS Sierra USB Installer?
Creating a bootable USB installer for macOS Sierra lets you perform clean installations, troubleshoot problems, and quickly set up new or multiple Macs without downloading macOS each time.
This guide ensures you have macOS Sierra installed on your USB drive and ready to go, regardless of network issues or future macOS updates that might make macOS Sierra harder to find. It's also a practical skill for anyone who wants a backup of their operating system.
Steps to Create a Bootable USB Installer for macOS Sierra (macOS 10.12)
Step 1. Preparation: Gather the Necessary Tools
Before diving into the creation of the installer, gather the essentials:
- A USB Drive: You'll need a USB drive with at least 8 GB of storage to hold the macOS Sierra installer. Larger sizes will work, but 8 GB is the minimum.
- A Compatible Mac: The Mac you use should ideally support macOS Sierra, especially if you're creating this installer for a specific Mac.
- Internet Connection: To download macOS Sierra, you'll need internet access.
Lastly, ensure your USB drive is empty or backed up, as formatting it will erase all data.
Step 2. Downloading macOS Sierra
If you're creating this installer for the first time, you may wonder where to find the macOS Sierra installer. Here's how:
- Check the App Store: Search for macOS Sierra in the App Store. Although newer macOS versions often hide older ones, Sierra may still be available in your Purchased section if you've downloaded it before.
- Use Apple's Support Page: Apple provides download links for older macOS versions on their website, including macOS Sierra. Simply go to the official Apple support page and search for "Download macOS Sierra."
Download link: https://archive.org/download/macos_sierra_1012/macos_sierra_1012/InstallOS.dmg
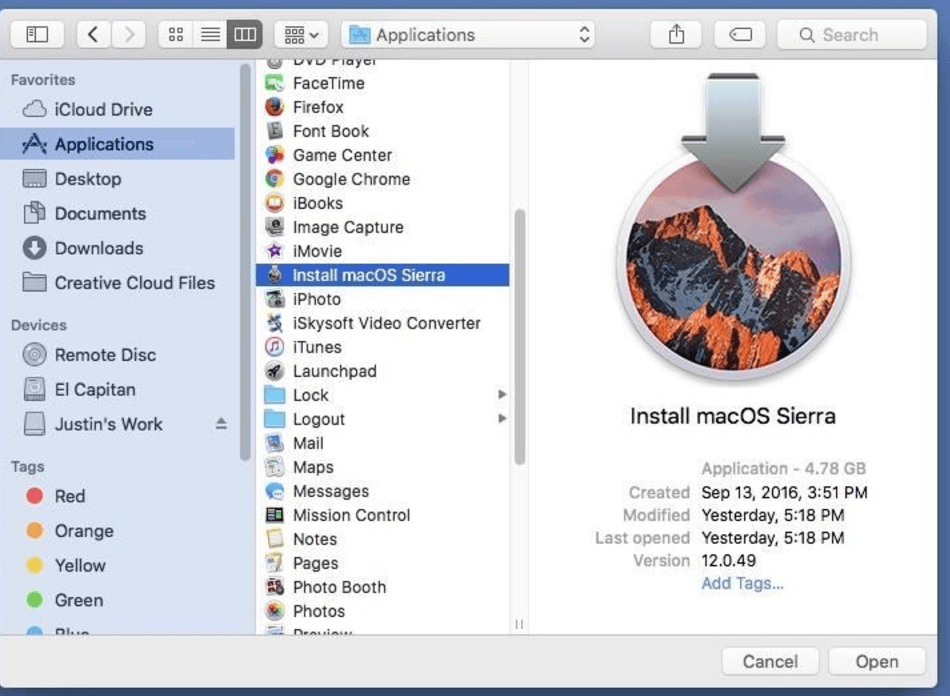
💡 Note: If you can't find macOS Sierra in either location, there are alternative sources, but ensure you use only reputable sites. Once downloaded, the installer should be in your Applications folder as Install macOS Sierra.app.
Step 3. Preparing the USB Drive
To create a bootable installer, your USB drive must be formatted to be compatible with macOS. Proper formatting allows macOS to install without compatibility issues and ensures that your USB drive is ready to store the installer files. It's essential to follow these steps carefully, as incorrect formatting can result in errors when creating the bootable installer later on.
- Open Disk Utility: This tool allows you to erase, partition, and format your USB drive to prepare it for use as a macOS installer.
- Select the USB Drive: In the Disk Utility sidebar, you'll see a list of all connected drives. Locate and select your USB drive from this list. If you have multiple USB devices connected, double-check that you're selecting the correct one, as this process will erase everything on the selected drive.
- Erase and Format the USB Drive:
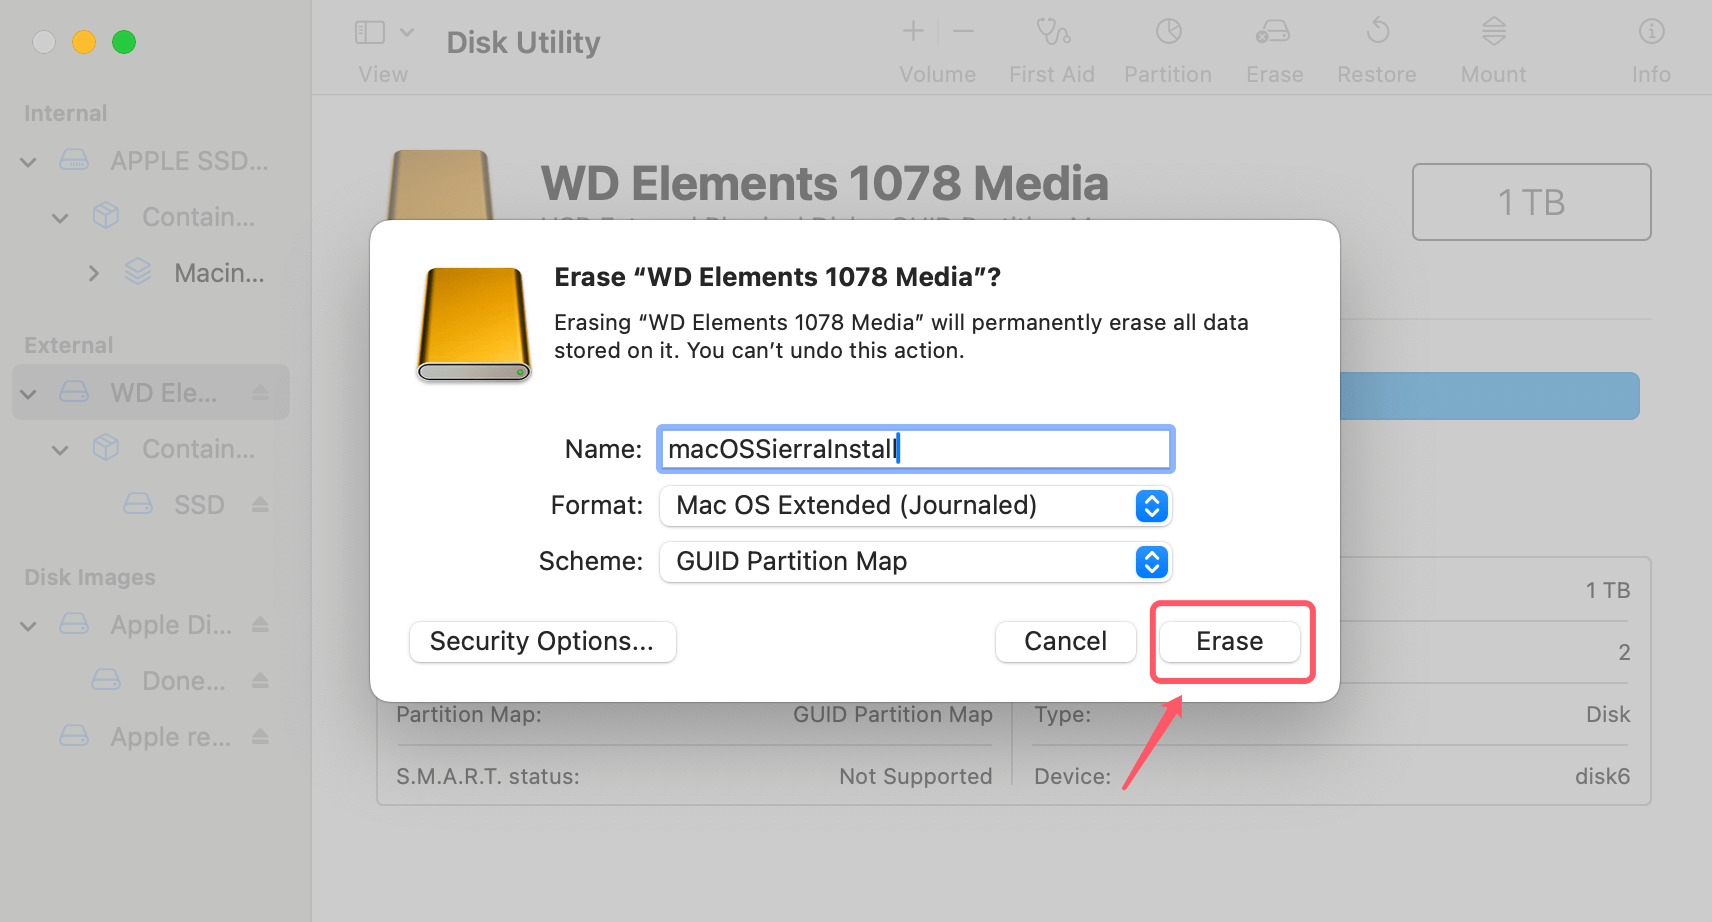
- Click Erase: With your USB drive selected, click the Erase button at the top of the Disk Utility window. This action will open a pop-up window where you can specify the name, format, and scheme.
- Choose a Format: For macOS installers, the recommended format is Mac OS Extended (Journaled). This format is compatible with macOS and ensures that the installer will function correctly.
- Set the Scheme to GUID Partition Map: Under Scheme, select GUID Partition Map. This scheme is essential because it allows your Mac to recognize the USB drive as a bootable device. Without this step, your Mac might not detect the USB drive during startup.
- Name the USB Drive: In the Name field, you can enter a name for the drive, such as "macOSSierraInstall" or "macOSInstaller." This name will be referenced in the Terminal command later, so it's best to keep it simple and memorable.
- Confirm the Format: Before you click Erase, double-check that you have the correct settings:
- Format: Mac OS Extended (Journaled)
- Scheme: GUID Partition Map
- Name: A simple name, such as "InstallMacOSSierra"
- Click Erase: When you're sure everything is correct, click Erase. Disk Utility will reformat the drive, which may take a few seconds. Once completed, the USB drive is now ready for the installation files.
![Creating a bootable USB installer for macOS Sierra]()
- Double-Check Formatting Success: After erasing, verify the format by selecting the USB drive in Disk Utility and checking the information on the right. Ensure it says Mac OS Extended (Journaled) with a GUID Partition Map scheme. This confirmation will help prevent errors during the installer creation process.
Step 4. Creating the Bootable Installer Using Terminal
Now that your USB is formatted and macOS Sierra is downloaded, you're ready to create the installer using the Terminal app. Terminal is a powerful tool for issuing commands to your Mac’s operating system. Here’s how to make it happen:
- Open Terminal: Go to Applications > Utilities > Terminal.
- Enter the Command: Copy and paste the following command into Terminal, ensuring you replace macOSSierraInstall with the name you gave your USB drive earlier:
sudo /Applications/Install\ macOS\ Sierra.app/Contents/Resources/createinstallmedia --volume /Volumes/macOSSierraInstall --applicationpath /Applications/Install\ macOS\ Sierra.app --nointeraction
Understand the Command:
- sudo: Grants superuser permissions to execute the command.
- createinstallmedia: The utility that creates the bootable installer.
- --volume: Specifies the volume (USB drive) where the installer will be created.
- --applicationpath: Points to the location of the macOS Sierra installer in your Applications folder.
- --nointeraction: Runs the process without needing further input, ensuring it completes uninterrupted.
![Creating a bootable USB installer for macOS Sierra]()
- Enter Password: After pressing Enter, you'll be prompted to enter your Mac's administrator password. The process will start, and it may take several minutes. Terminal will inform you once the bootable installer has been successfully created.
Step 5. Verifying the Bootable USB Installer
Now that you've created the installer, it's wise to verify it's ready to use. To confirm, follow these steps:
- Open Finder: In the Finder sidebar, check if your USB drive's name has changed to "Install macOS Sierra." This indicates the installer was copied successfully.
- Try Booting from the USB: Restart your Mac and hold down the Option (or Alt) key as it boots up. A boot menu should appear, showing available startup disks. If the USB installer shows up as "Install macOS Sierra," it's ready to use.
Step 6. Installing macOS Sierra Using the Bootable USB
With a verified bootable installer, you're ready to install macOS Sierra on any compatible Mac. Follow these steps:
- Insert the USB Drive: Insert the bootable USB into the Mac you wish to install macOS Sierra on.
- Restart the Mac: Restart and hold down the Option (or Alt) key during the boot process. This brings up the boot menu.
- Select the Installer: In the boot menu, select the "Install macOS Sierra" USB drive and press Enter.
![Creating a bootable USB installer for macOS Sierra]()
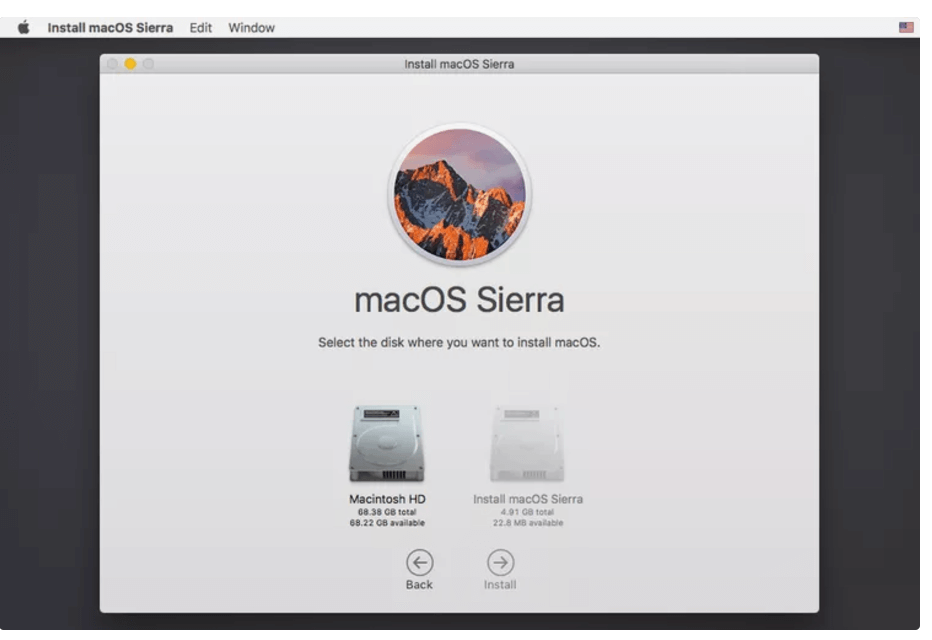
- Follow Installation Steps: Once macOS Sierra launches, you'll be prompted to continue with the installation. You can perform a clean installation by erasing the internal drive or upgrade an existing macOS installation.
- Complete the Installation: Follow on-screen instructions until installation is complete.
Create USB installer for macOS High Sierra and later versions
With Donemax Disk Clone, you can easily make a bootable USB installer for macOS High Sierra and newer macOS systems.
Troubleshooting Common Issues
While creating or using a bootable installer, you might encounter a few issues. Here are some common problems and how to resolve them:
- Formatting Errors: If Disk Utility won't let you format the USB drive or fails to apply changes, try reformatting it on a different Mac or with a different format (such as ExFAT), then switch back to Mac OS Extended (Journaled).
- Command-Line Mistakes: If the Terminal command returns an error, double-check the command for typos. Ensure the USB name is correct and the macOS Sierra installer is located in your Applications folder.
- Installer Not Recognized on Boot: If the Mac doesn't recognize the installer on startup, ensure the USB is correctly formatted and the command was successful. Try plugging the USB into a different port or restarting the process from scratch.
- Installation Failure: If the installation fails partway through, restart the Mac and try again. Some issues might stem from hardware problems or incompatible Mac models.
- Network or Download Problems: If you couldn't download macOS Sierra due to internet issues or App Store restrictions, try using a different Wi-Fi network or connecting via Ethernet.
Benefits of Having a Bootable USB Installer for macOS Sierra
Creating a bootable macOS Sierra USB installer offers numerous advantages:
- Easy Reinstallation: If you're selling your Mac, resetting it for a new user, or fixing issues with your operating system, a bootable installer makes the process fast and straightforward.
- Troubleshooting Tool: When faced with a corrupted OS or startup disk issues, a bootable installer allows you to reinstall macOS without relying on recovery mode or the internet.
- Installing on Multiple Macs: If you manage multiple Macs, a bootable USB allows you to install macOS Sierra on each one without repeatedly downloading the OS.
- Independence from Apple's Servers: If Apple removes macOS Sierra from the App Store or alters compatibility, having your own installer ensures you’re not left scrambling.
- Customizing Your Installations: Some users prefer clean installations, which can help their Mac run smoother by removing clutter from old files or apps. A bootable USB allows you to perform clean installs easily.
Alternative - Make Bootable Clone for macOS Sierra
If you find it's difficult to making the bootable macOS Sierra USB installer, there is an alternative - create a bootable clone for macOS Sierra. It can generate a bootable copy for macOS Sierra directly. You can use the cloned drive to boot Mac without a problem. You need to have a Mac running the system macOS Sierra.
To make a bootable clone backup for macOS Sierra, you need a reliable macOS cloning software first. Fortunately, there are some cloning software that can generate bootable macOS clone. Donemax Disk Clone for Mac is such a tool stands out.
Donemax Disk Clone for Mac
- Professional and reliable macOS cloning software.
- Make bootable clone backup for macOS.
- Easy-to-use and clone macOS within a few clicks.
The software is easy to handle and clone macOS. It will clone everything, including macOS system data, installed applications, settings and all personal data. The software will ensure the copy of macOS will be bootable. Follow the guide below to start the macOS cloning:
Step 1. Run the software Donemax Disk Clone for Mac and ensure to connect an empty USB external drive to the computer. Choose OS Clone mode and you will find the Mac startup disk is selected as source automatically. Just choose the destination drive.

Step 2. Start to cloning the Mac startup disk to the USB external drive. It will copy everything from the Mac drive to the destination disk.

Once the cloning process is done, the macOS and personal data is copied to the destination disk. Also, the cloned drive can be bootable directly.
Conclusion
With a completed and verified macOS Sierra bootable USB installer, you're prepared for almost any issue your Mac could throw at you. Reinstallation, troubleshooting, and even setting up a brand-new Mac are now just a few steps away, thanks to your portable USB installer. Make sure to keep your USB installer in a safe, accessible location for future use; it might come in handy when you least expect it. This guide gives you everything you need to create, verify, and use a macOS Sierra bootable installer confidently.

Donemax Disk Clone for Mac
An award-winning disk cloning program to help Mac users clone HDD/SSD/external device. It also can create full bootable clone backup for Macs.
Related Articles
- Apr 06, 2025Best 7 Solutions to Fix WD My Passport Not Mounting on Mac Without Losing Data
- Mar 21, 2025[8 Fixes] Fix Seagate Ultra Compact SSD Not Mounting on Mac
- Jun 05, 2025Fix Sabrent Rocket External SSD Read-Only on Mac
- Jun 19, 2025How to Use External Hard Drive on Mac?
- Dec 05, 2024Can't Install macOS Sonoma on My Mac, Why and How to Fix It
- Jul 29, 2024How to Fix Mac Cannot Mount An ExFAT Drive?

Christina
Christina is the senior editor of Donemax software who has worked in the company for 4+ years. She mainly writes the guides and solutions about data erasure, data transferring, data recovery and disk cloning to help users get the most out of their Windows and Mac. She likes to travel, enjoy country music and play games in her spare time.

Gerhard Chou
In order to effectively solve the problems for our customers, every article and troubleshooting solution published on our website has been strictly tested and practiced. Our editors love researching and using computers and testing software, and are willing to help computer users with their problems

