Written byStevenUpdated on Apr 06, 2025
Fix support.apple.com/mac/startup 3001F Error on Mac – A Comprehensive Guide
Approved byGerhard Chou
PAGE CONTENT:
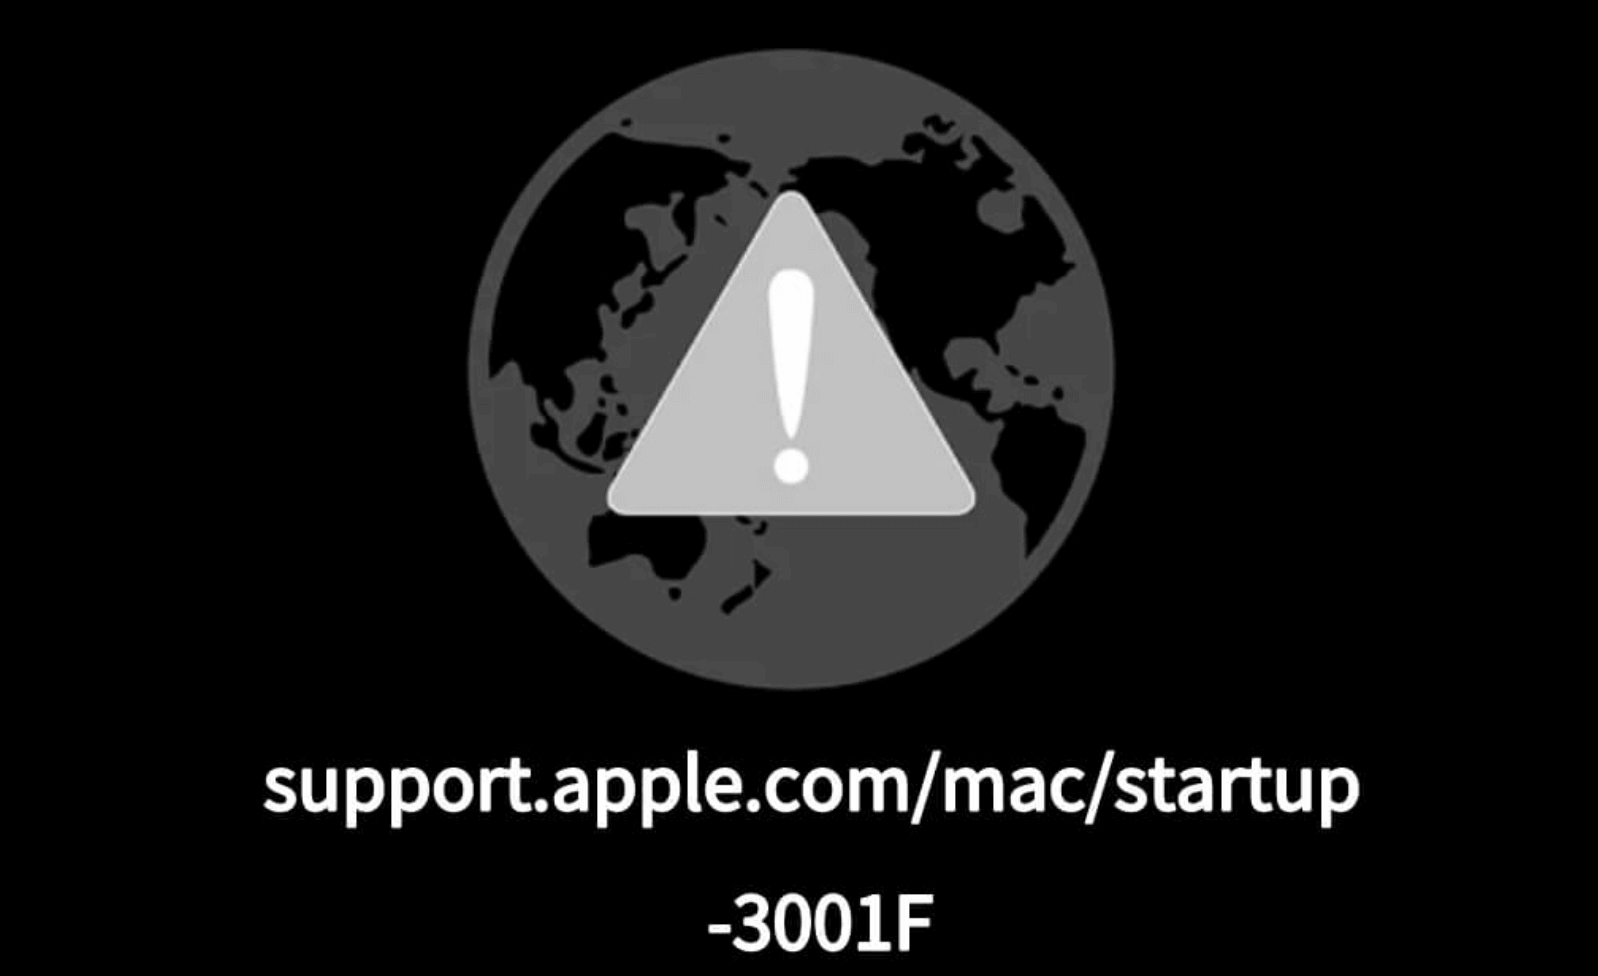
If you're encountering the "support.apple.com/mac/startup 3001F" error on your Mac, you are not alone. This issue typically appears when attempting to use macOS Internet Recovery mode, indicating a problem connecting to Apple's servers. Fortunately, several solutions can help you resolve this error and restore your Mac. In this guide, we will cover the causes of this issue and provide step-by-step instructions to fix it.
Understand the "support.apple.com/mac/startup 3001F" Error
What is the 3001F Error?
The 3001F error appears on Mac when attempting to enter macOS Internet Recovery Mode but fails due to network or server-related issues. When this happens, users are redirected to Apple's support page, where they can find troubleshooting tips.
Why Does This Error Occur?
Several factors can trigger this error, including:
- Unstable or slow internet connection – A weak network connection prevents macOS from downloading recovery data.
- Apple's recovery servers are down – Sometimes, Apple's servers experience temporary outages, leading to recovery failures.
- Corrupt macOS recovery partition – If your Mac's local recovery partition is damaged, Internet Recovery may be required, but it can fail if there are connection issues.
- Hardware issues – Problems with your SSD, RAM, or logic board can also contribute to startup failures.
- Outdated macOS or firmware – Running an older macOS version might lead to compatibility problems when attempting recovery.
8 Common Fixes for the 3001F Error on Mac
1. Check Your Internet Connection
Since Internet Recovery requires a stable internet connection, a weak or disrupted connection can cause the error. Follow these steps:
- Restart your modem/router – After 30 seconds of unplugging your router and modem, reconnect them and try again.
- Switch to a wired connection – For a more reliable connection when utilizing Wi-Fi, try connecting with an Ethernet cable.
- Use a different network – If your home internet isn't working, try connecting to another Wi-Fi network or using a mobile hotspot.
- Disable VPN or firewall – A VPN or firewall can sometimes interfere with network connections. Disable them and try again.
2. Restart Your Mac and Retry Internet Recovery
A simple restart can often resolve minor software glitches.
- Holding down the Power button will cause your Mac to shut off.
- Turn it back on after ten seconds.
- To enter Internet Recovery Mode, press and hold Command (⌘) + Option (⌥) + R right away.If the error persists, proceed to the next step.
3. Reset NVRAM/PRAM and SMC
Your Mac stores certain system settings in NVRAM and PRAM. Resetting these can resolve startup issues.
How to Reset NVRAM/PRAM:
- Turn Off your Mac.
- Immediately after turning it back on, press and hold Option (⌥) + Command (⌘) + P + R for approximately 20 seconds.
- When the startup chime sounds or the Apple logo appears and then vanishes twice, let go of the keys.
How to Reset the SMC (System Management Controller):
The process varies depending on your Mac model:
For Macs with T2 Chip (2018 & later models):
- Turn Off your Mac.
- After seven seconds of holding down Control (⌃) + Option (⌥) + Shift (⇧), press and hold the Power button as well.
- Hold each key for an additional seven seconds before letting go.
- Turn on your Mac.
For Macs without T2 Chip:
- Shut down your Mac.
- Remove the power adapter (if connected).
- For ten seconds, press and hold Shift (⇧) + Control (⌃) + Option (⌥) + Power.
- Let go of the keys and switch your Mac on.
4. Use macOS Recovery via Bootable USB Drive
If Internet Recovery Mode is not working due to a weak internet connection or Apple's server issues, an alternative method to reinstall macOS is by creating a bootable USB installer. This allows you to install macOS directly from a USB flash drive, bypassing the need for Internet Recovery.
Why Use a Bootable macOS USB Installer?
- A bootable macOS USB installer is useful when:
- Internet Recovery isn't working due to network or server issues.
- You need to install macOS on multiple Macs without downloading it repeatedly.
- Your internal drive is corrupted, preventing normal installation.
- You want to downgrade or reinstall macOS without relying on an internet connection.
Requirements for Creating a Bootable USB Installer
Before you start, ensure you have the following:
A USB Flash Drive (at least 16GB) – Any brand will work, but ensure it's fast enough to handle macOS installation.
- A Mac with internet access – You will need to download the macOS installer.
- The correct macOS version – Download the version you want to install (Monterey, Ventura, etc.).
- Basic Terminal knowledge – The process involves running a command in Terminal.
Step-by-Step Guide: Creating a Bootable macOS Installer
Step 1: Download macOS
- Open the Mac App Store or go to Apple's website.
- Search for your macOS version (e.g., "macOS Monterey" or "macOS Ventura").
- Click Download (the file will be stored in /Applications).
💡 Note: The macOS installer will appear as "Install macOS [version].app" in the Applications folder. Do not run it after downloading.
Step 2: Format Your USB Drive
Before using the USB drive for macOS installation, it needs to be properly formatted.
- Connect your Mac to your USB flash drive.
- From Utilities, select Applications, then Disk Utility.
- From the panel on the left, choose your USB drive.
- At the top, select Erase.
- Click Erase, then Done.
Step 3: Create the Bootable Installer via Terminal
Now, it's time to create the bootable macOS installer using Terminal.
- Open Terminal from Utilities via Applications.
- Type the following command, depending on the macOS version you downloaded:
sudo /Applications/Install\ macOS\ version.app/Contents/Resources/createinstallmedia --volume /Volumes/MyUSB
(Replace "MyUSB" with the actual name of your USB drive.)
- Type the administrator password for your Mac after pressing Enter.
- Confirm the erasure of the USB drive by typing Y, then press Enter.
- The process may take a few minutes. Once finished, Terminal will display "Install media now available on MyUSB".
Step 4: Boot Your Mac Using the USB Installer
Once the USB installer is ready, you can use it to reinstall macOS.
- Insert the USB drive into the Mac that needs macOS reinstallation.
- Press and hold the Option (⌥) key as soon as the Mac has restarted.
- When the Startup Manager appears, select the USB drive (it may be labeled "Install macOS Monterey" or similar).
- To install macOS, click Continue and adhere to the on-screen directions.
Your Mac will now install macOS from the USB drive instead of using Internet Recovery!
Bonus: How to Use Terminal to Force Boot from the USB Installer
If your Mac doesn't show the USB drive in Startup Manager, you can force it to boot using Terminal in macOS Recovery Mode.
- Boot into macOS Recovery Mode (Command + R or Power button during startup).
- Open Terminal from the Utilities menu.
- Type the below command and press Enter:
sudo bless --mount /Volumes/MyUSB --setBoot --nextonly && sudo reboot
- Your Mac will restart and boot from the USB installer.
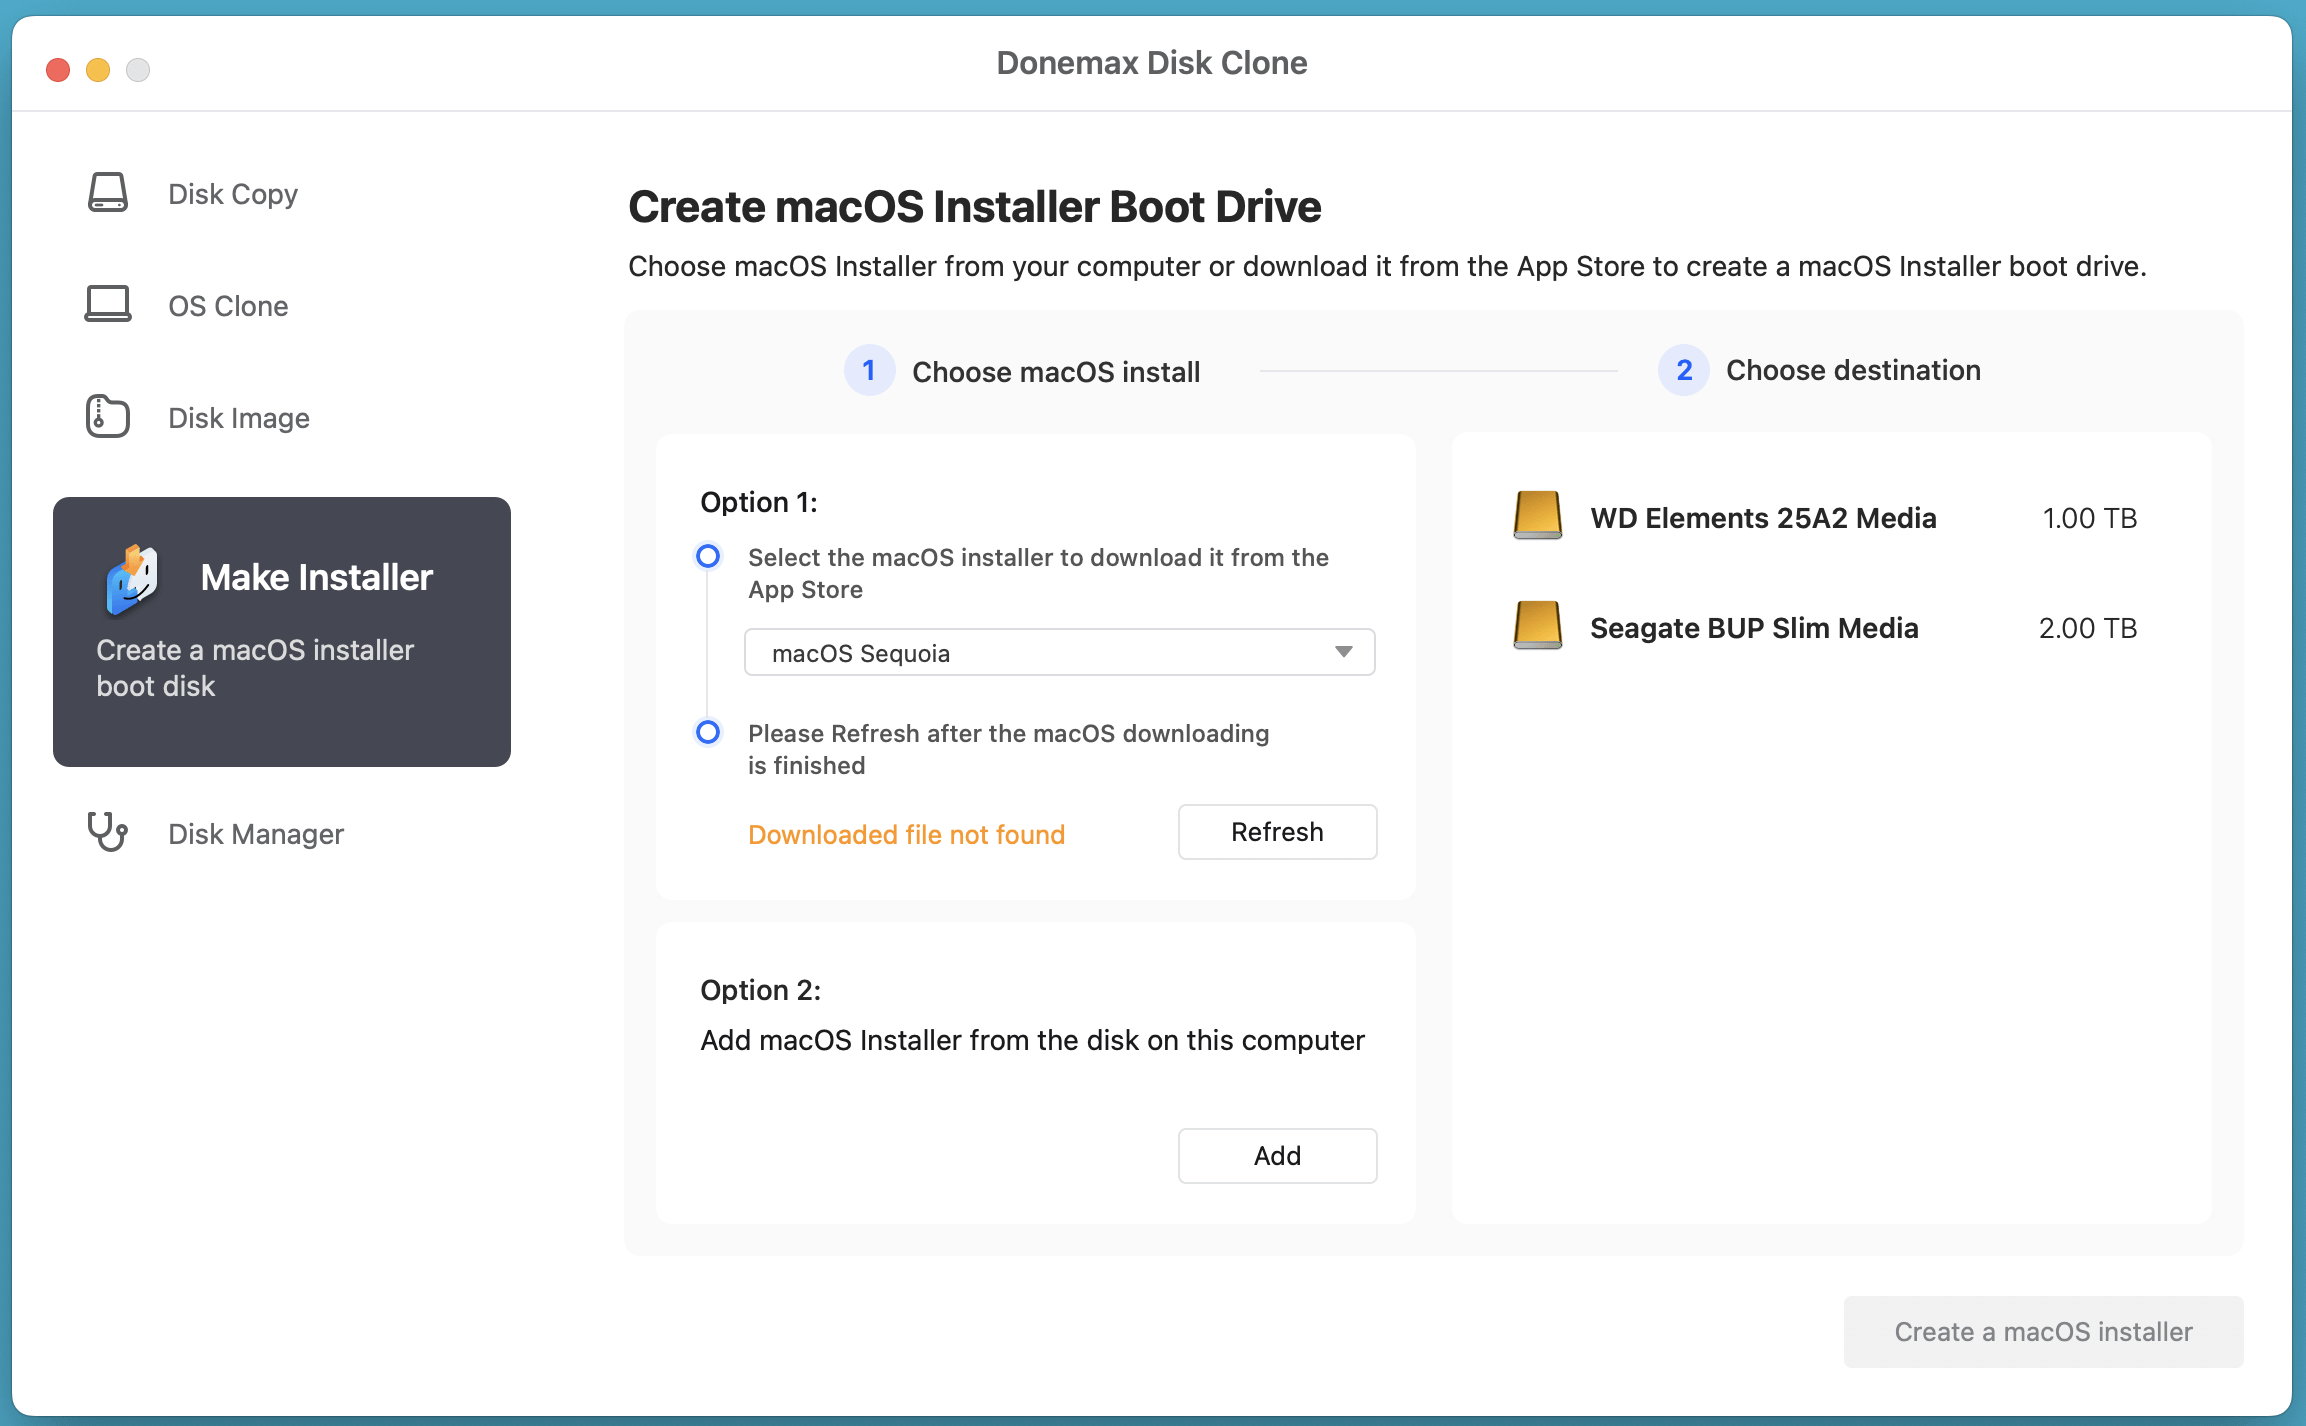
You also can use disk cloning software - such as Donemax Disk Clone for Mac to help you create a macOS installer.
5. Check Apple's System Status Page
Apple’s recovery servers may be down, causing the issue.
- Visit Apple's System Status page.
- Look for macOS Software Update or Apple ID services.
- If the service is down, wait a few hours and try again.
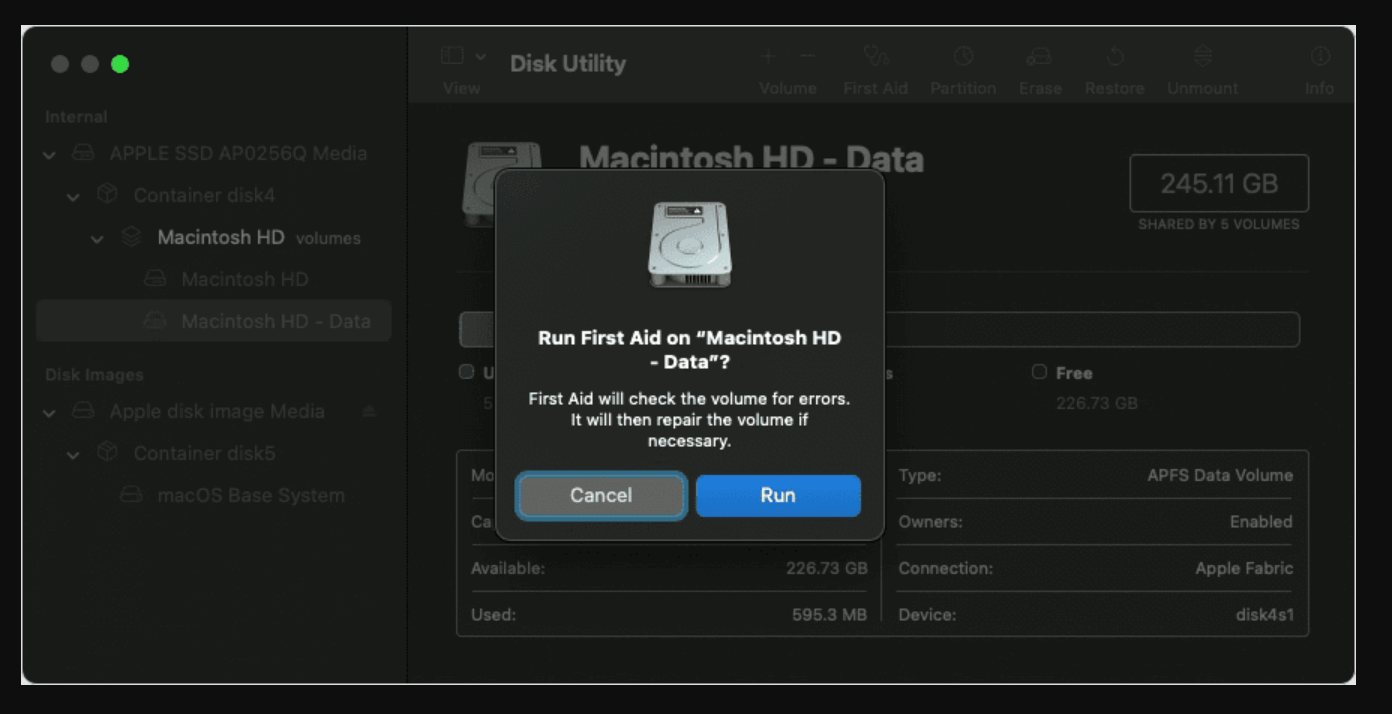
6. Verify and Repair Disk with Disk Utility
If your Mac's disk has errors, it may cause Internet Recovery to fail. You can use Disk Utility to repair it.
- Restart your Mac and hold Command (⌘) + R (for Intel-based Mac) or Power button (for Apple silicon Mac) to enter Recovery Mode.
- Select Disk Utility and click Continue.
- Choose Macintosh HD and click First Aid.
![Fix support.apple.com/mac/startup 3001F Error on Mac]()
- If errors are found, Disk Utility will attempt to repair them.
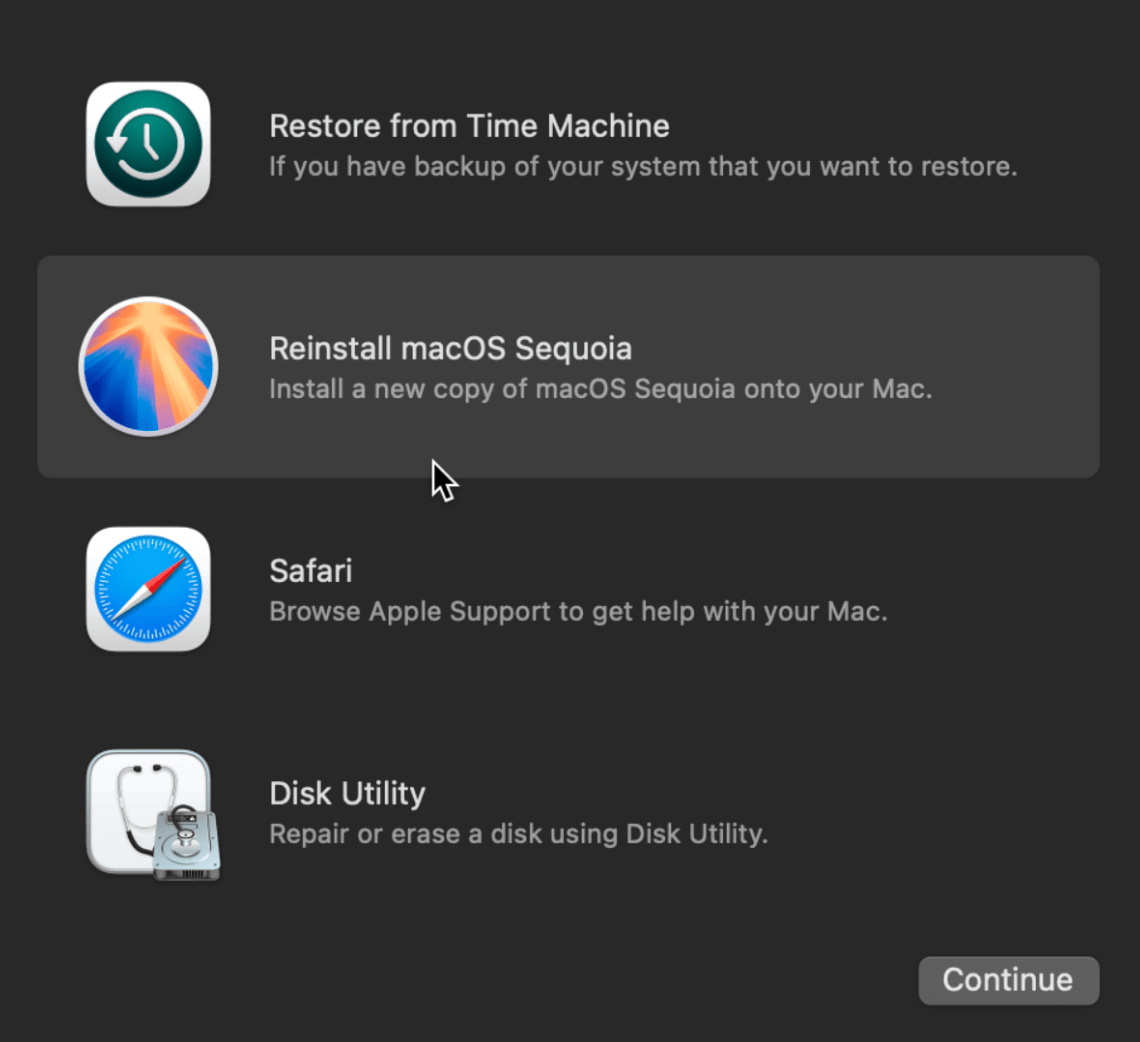
7. Reinstall macOS
If all else fails, reinstalling macOS might be the best solution.
- Enter Recovery Mode. Then choose Options, click Continue.
![Fix support.apple.com/mac/startup 3001F Error on Mac]()
- Click Continue after selecting Reinstall macOS.
- To finish the installation, adhere to the on-screen directions.
💡 Note: If your data is important, back up your Mac using Time Machine before proceeding.
8. Advanced Troubleshooting (If Issue Persists)
If none of the above solutions work, the issue might be related to your Mac's hardware. Here's what you can do:
▪️ Check Your Mac's Hardware
- Run Apple Diagnostics – Restart your Mac and hold the D key to check for hardware issues.
- Check RAM & SSD – If you recently upgraded your RAM or SSD, ensure they are properly installed.
▪️ Contact Apple Support
If the error persists, you may need professional help. Options include:
- Going to an Authorized Service Provider or Apple Store.
- Using Apple Support online chat or phone support.
Recover Lost Data After Fixing 3001F Error on Mac
If you have lost data due to fixing 3001F error on Mac or reinstalling macOS, you can use Mac data recovery software - such as Donemax Data Recovery for Mac to recover the deleted/erased data.
Step 1. Download and install the reliable data recovery software - Donemax Data Recovery for Mac on your Mac.
Step 2. Open Donemax Data Recovery for Mac, select the internal disk (usually named Macintosh HD) to start data recovery.

Step 3. Click on Scan button to deeply scan the selected disk and find all deleted/erased/lost files.

Step 4. Once the scanning process gets finished, you can check what it has found. Then preview the recoverable files, select the wanted ones, click on Recover button to save them.

Conclusion
The "support.apple.com/mac/startup 3001F" error can be frustrating, but it's usually fixable. By following these steps:
- Checking your internet connection
- Restarting your Mac and resetting NVRAM/SMC
- Using a bootable USB for macOS installation
- Running Disk Utility to repair disk errors
- Reinstalling macOS if necessary
You can resolve the issue and get your Mac running again. If the problem persists, checking your hardware or contacting Apple Support is recommended.
Donemax Data Recovery for Mac
Donemax Data Recovery for Mac is one of the best Mac data recovery software. It is easy-to-use and can help in recovering deleted, formatted, inaccessible or lost data from Mac HDD/SSD, external disk, USB drive, SD card, camera or other storage devices.
Related Articles
- Feb 17, 2025Fix XQD Card Not Showing Up or Not Mounting on Mac [10 Fixes]
- Apr 01, 2025How to Use Seagate Ultra Compact SSD on Mac?
- Dec 09, 2024How to Add an External Hard Drive to Dock on Mac?
- Nov 12, 2024[Step-by-step Guide] Create a Bootable USB Installer for macOS Mojave
- Mar 19, 2025How to Fix Mac Error Code -8062: A Comprehensive Guide
- Jul 25, 2024How to Download and Make macOS Sonoma ISO File?

Contributing Writer
Steven
Steven has been a senior writer & editor of Donemax software since 2020. He's a super nerd and can't imagine the life without a computer. Over 6 years of experience of writing technical solutions and software tesing, he is passionate about providing solutions and tips for Windows and Mac users.

Editor in chief
Gerhard Chou
In order to effectively solve the problems for our customers, every article and troubleshooting solution published on our website has been strictly tested and practiced. Our editors love researching and using computers and testing software, and are willing to help computer users with their problems