PAGE CONTENT:
Welcome to Time Machine, where your Mac saves the day by keeping your important files safe. Consider what would happen if your computer could save your important files, photos, and papers. Time Machine does just that. It's like a magical safety net for your digital treasures.
This guide will help you get the most out of Time Machine, no matter how much you know about computers. It's like a superhero cape for your files, ready to save them from mistakes or computer problems. Let's look through the wonderful world of Time Machine together if you're ready for a stress-free ride through the world of easy, breezy backups!
What Does Time Machine Back Up?
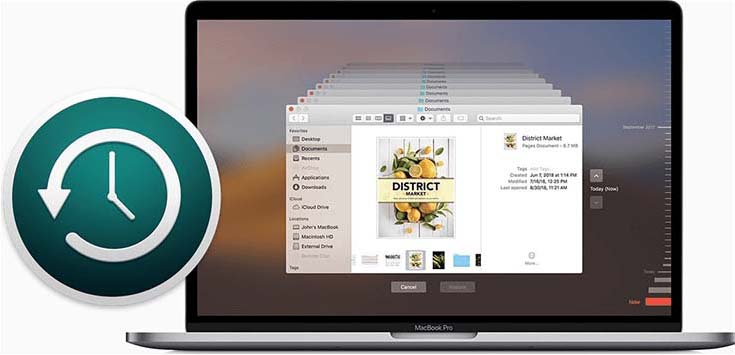
You can use Time Machine to back up your Mac computer's files, like music, apps, papers, photos, emails, and system files. If you turn it on, it will back up your Mac's files automatically every hour, every day, or every week.
Every hour, Time Machine will look for new, changed, and lost files on your computer to make new copies of your Mac. For the past month, the app has been making a daily backup. It will also make weekly backups as long as there is room on the storage device. Back-ups will be deleted when the storage device runs out of room.
Get An External Hard Drive for Time Machine Backup
Prepare an external hard drive (HDD or SSD) for Time Machine backup. If the external hard drive is a NTFS drive or ExFAT drive, just reformat it in Disk Utility:
- Connect the external hard drive to your Mac.
- Go to Launchpad > Other, then find and open Disk Utility.
- Find and select the external hard drive, click Erase.
- Then select APFS (for macOS 10.13 or later) or Mac OS Extended as the file system, click Erase again.
- Once the process gets finished, click Done.
Note: The external hard drive should be at least twice the storage capacity of your Mac and it is only used for Time Machine backup, not for storage of other files.
Set Up A Time Machine Backup on Mac
Set up a Time Machine backup drive by following these steps. Then, you can use the Time Machine app.
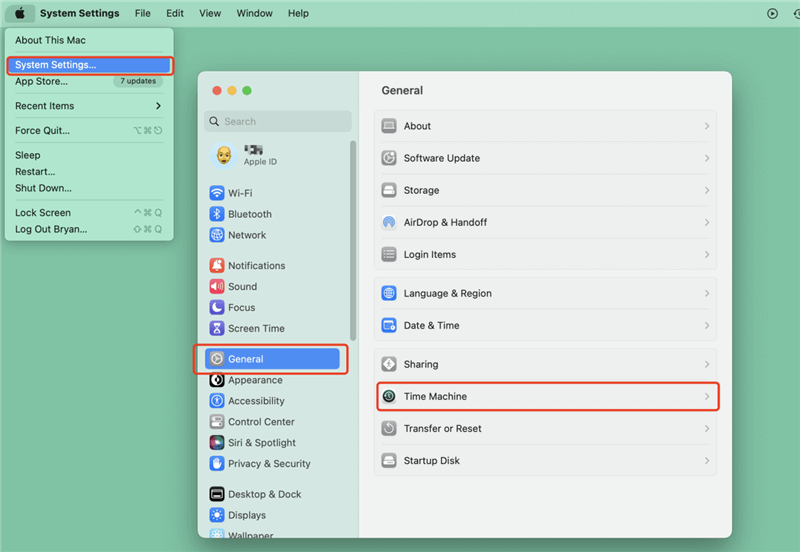
1. Click Apple menu, then choose System Settings.
2. Go to General > Time Machine.
3. Click Add Backup Disk or click + to add a backup disk.
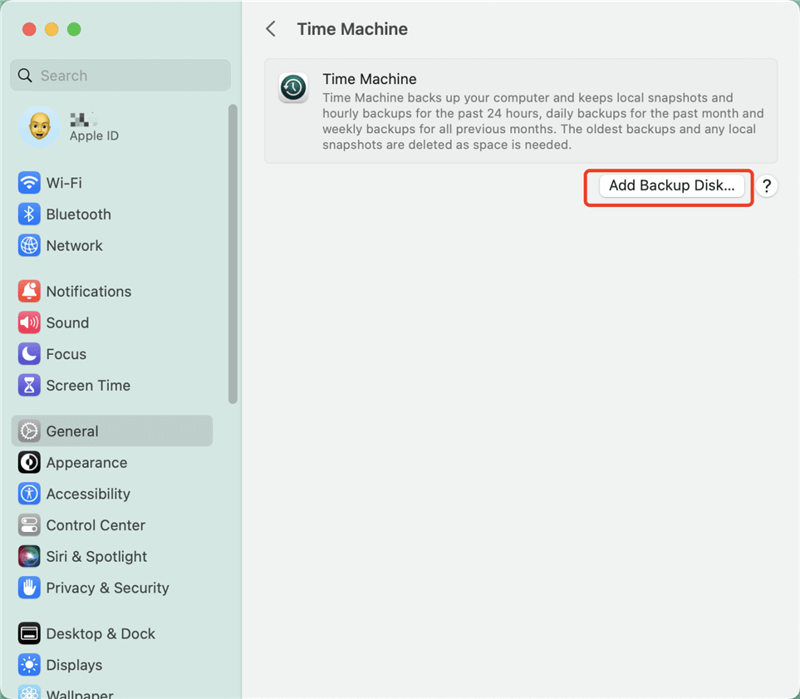
Note: If your Mac runs macOS Monterey or earlier version, click Apple menu> System Preferences > click on Time Machine. After that, click the "Select Backup Disk" button.
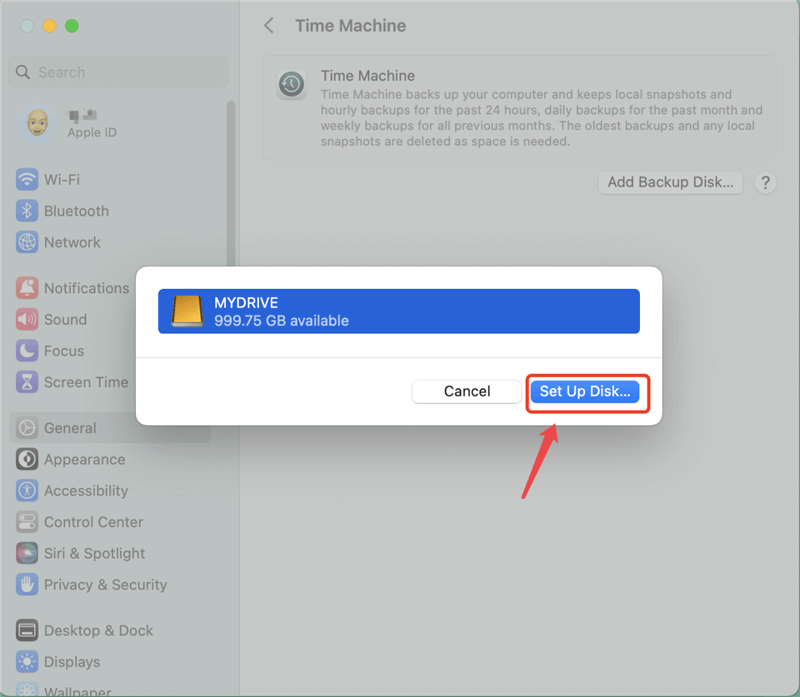
4. Select the external hard drive and click Set Up Disk.
5. Find Time Machine icon on menu bar, then choose Back Up Now to start backing up the Mac.
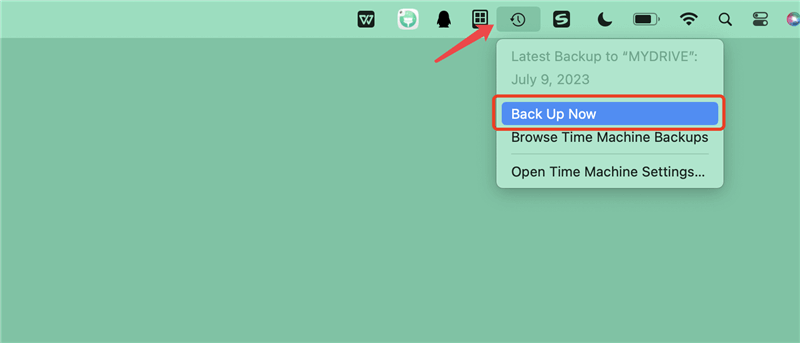
Let the backup finish. The first full backup will take longer, but incremental copies after that will be much faster. After setting up your Time Machine backup drive on your Mac, you will no longer lose any data.
You can also set up more than one Time Machine drive and back up to more than one disk. For that, go to the menu bar and click on the Time Machine button. Then, hold down the Option key and choose Browse Other Backup Disks. Then, select the disk where you want to back up your Mac.
When stored on a network disk, you can check the health of the backups you make with Time Machine. To check the backups, click the Time Machine icon, hold down the Option key, and select the check box.
How to Restore Data Using Time Machine Backup?
1. Recover deleted files.
- Connect the backup drive to your Mac, then open the location where you delete or lose your files on the Mac.
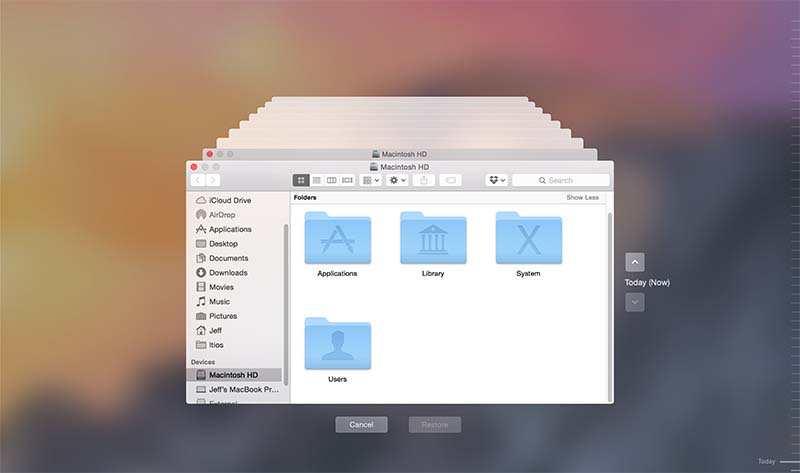
- Go to Launchpad > Other > Time Machine, open it.
- Browse the backups then find the deleted files.
- Select the files you want to restore, then click Restore.
![how to back up Mac data with Time Machine]()
2. Restore macOS from Time Machine Backup in macOS Recovery.
If the macOS gets crashed, you can restore macOS from a Time Machine backup in macOS Recovery mode:
- Shut down your Mac, then turn it on.
- Press and hold the Power button until you see Loading Startup Options. (If you are using an Intel-based Mac, press and hold Command+R)
- Choose Options and click on Continue.
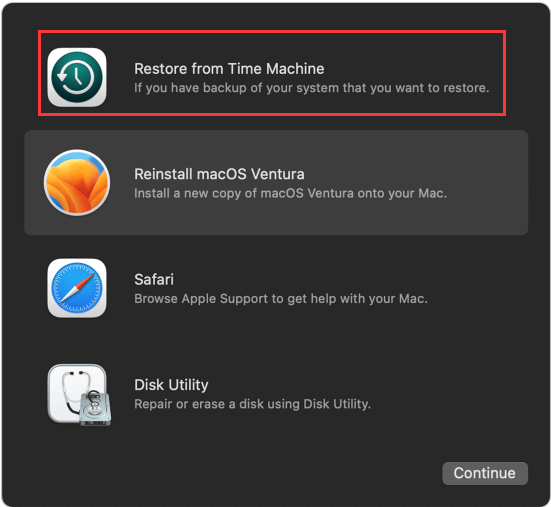
- In utility window, select Restore from Time Machine.
![how to back up Mac data with Time Machine]()
3. Use Migration Assistant
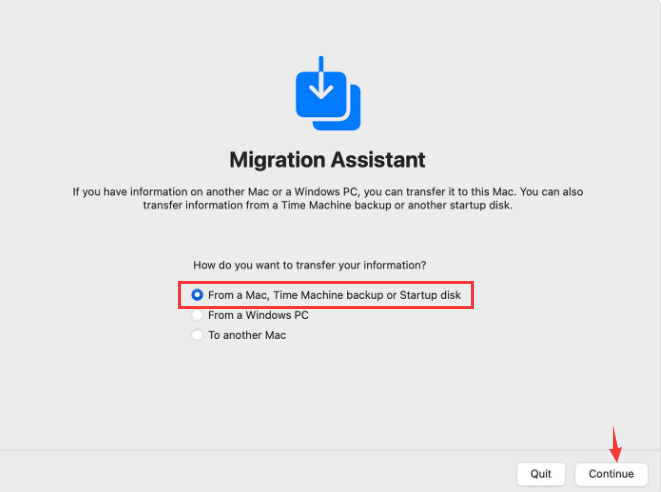
- Go to Applications > Utilities, open Migration Assistant.
- Select the option to transfer from a Mac, Time Machine backup or startup disk. Then click Continue.
- Select the Time Machine backup, then click Continue.
- Choose a backup, click Continue.
- Then follow the onscreen instructions to transfer data from the backup to your Mac.
![how to back up Mac data with Time Machine]()
Fix Common Time Machine Backup Issues on Mac
1. Backup drive is full, what should do?
To fix this issue, you can exclude some useless items from the backup drive.
- Click Apple menu > System Settings > General, then click Time Machine.
- Click Options: To add an item, click the Add button , then select one or more items to add to the list of excluded items. You can also drag items to the list. To remove an item, select it in the list, then click the Remove button.
- Click Save.
And you also can buy a bigger drive and set it as the new Time Machine backup disk for your Mac.
2. Time Machine can’t recognize the backup disk, how to fix it?
If the backup disk is not compatible with Time Machine (such as NTFS or ExFAT), just use Disk Utility to format it to APFS or Mac OS Extended.
If it still does not work, open Time Machine settings and reset the backup disk.
3. Time Machine backup couldn’t be completed, why?
You can turn off the automatic backup in Time Machine, then open Terminal, type in sudo tmutil thinlocalsnapshots / 999999999999999 4 and hit Enter.
Then reconnect the Time Machine backup disk, re-enable Time Machine, test it.
Time Machine Alternative - Mac disk clone software
If you only want to make a copy of your Mac, just try Mac disk clone software - such as Donemax Disk Clone. This software can help you clone everything stored on your Mac to the external hard drive and make a full bootable clone backup.
Step 1. Download and install Donemax Disk Clone on your Mac and connect an external hard drive to your Mac.
Donemax Disk Clone For Mac
- Clone all data from Mac to external hard drive and create bootable clone.
- Clone HDD, SSD and external storage device on Mac.
- Create disk image backup for Mac.
Step 2. Open Donemax Disk Clone for Mac, then choose OS Clone mode. This mode will clone all data (such as macOS, apps, settings, user files) from the Mac startup disk to the external hard drive.
Step 3. Select the external hard drive as the destination drive, then click on Clone Now button to securely clone Mac data to the external hard drive.

Once the cloning process gets finished, you can check the cloned data on the external hard drive.
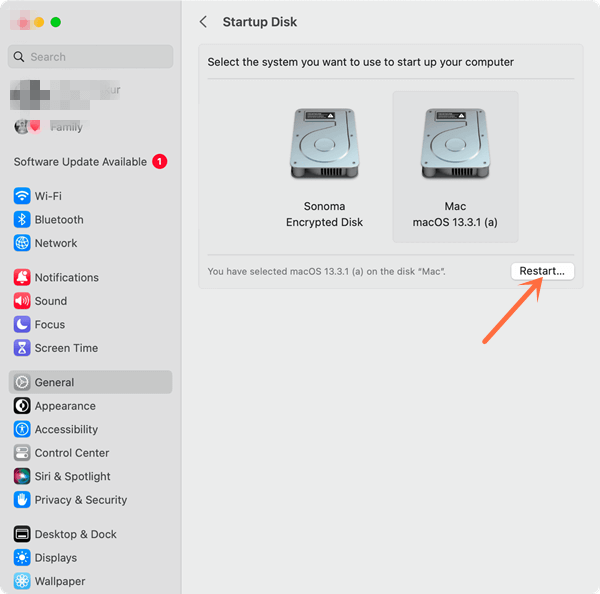
If you want to set the external hard drive as the startup disk on your Mac, go to Apple menu > System Settings > General > Startup Disk, then select the external hard drive as the startup disk, click on Restart button.
Conclusion:
Time Machine is an excellent tool for Mac users because it quickly backs up their files. You can set up Time Machine, change its settings, go through files, and fix any problems that might come up by following this complete guide. The peace of mind from knowing your digital life is safely backed up and easy to recover is yours with Time Machine. Your data will always be safe and easy to find if you regularly monitor and manage your Time Machine files.
Related Articles
- Nov 02, 2023How to Create a Bootable USB Installer for MacOS Sonoma?
- Oct 24, 2024How to Use Time Machine on macOS Sequoia?
- Mar 11, 2024How to Clone Mac Hard Drive to Samsung Portable SSD X5?
- Jun 21, 2023Free Download EaseUS Disk Copy for Mac Alternative Software
- Apr 07, 2024How to Clone An Intel Mac to An External SSD?
- Aug 16, 2023Move Data to A New Mac Using Time Machine

Coco Lin
Coco has been a writer and a chief programmer at Donemax software since 2018. Over 10 years of experience of writing troubleshooting articles in the software industry, she is passionate about programming and loves to providing solutions to Windows and Mac users. Also she enjoys music and palying tennis in her free time.

Gerhard Chou
In order to effectively solve the problems for our customers, every article and troubleshooting solution published on our website has been strictly tested and practiced. Our editors love researching and using computers and testing software, and are willing to help computer users with their problems
