PAGE CONTENT:
Consider performing a clean installation on your new Mac, which involves erasing all data and installing a fresh copy of the operating system before transferring any necessary files from your previous Mac.

How to Transfer Data to Your New Mac Using Time Machine?
Don't panic when setting up a Mac for the first time. Transferring information from an old Mac to a new Mac is not a difficult job. You can transfer data from a PC to a new Mac, from an old Mac to a new Mac, from a backup to a new Mac, etc. Here is the method to help you migrate data to a new Mac using Time Machine backup.
If your Mac has broken down, you can restore your data onto a new computer from a recent backup. It is recommended that you keep regular backups of your Mac's data. If you have used a time machine to copy your important files from your broken MacBook to an external hard drive, migrating to a new Mac will be a breeze. If you have current backups, you can copy them by following these instructions.
Step 1. Connect the old Mac's Time Machine drive to the new one.
Step 2. Go to Applications > Utilities > open Migration Assistant. When you are asked how to transfer data to your new Mac, just select “From a Mac, Time Machine backup or Startup disk.”
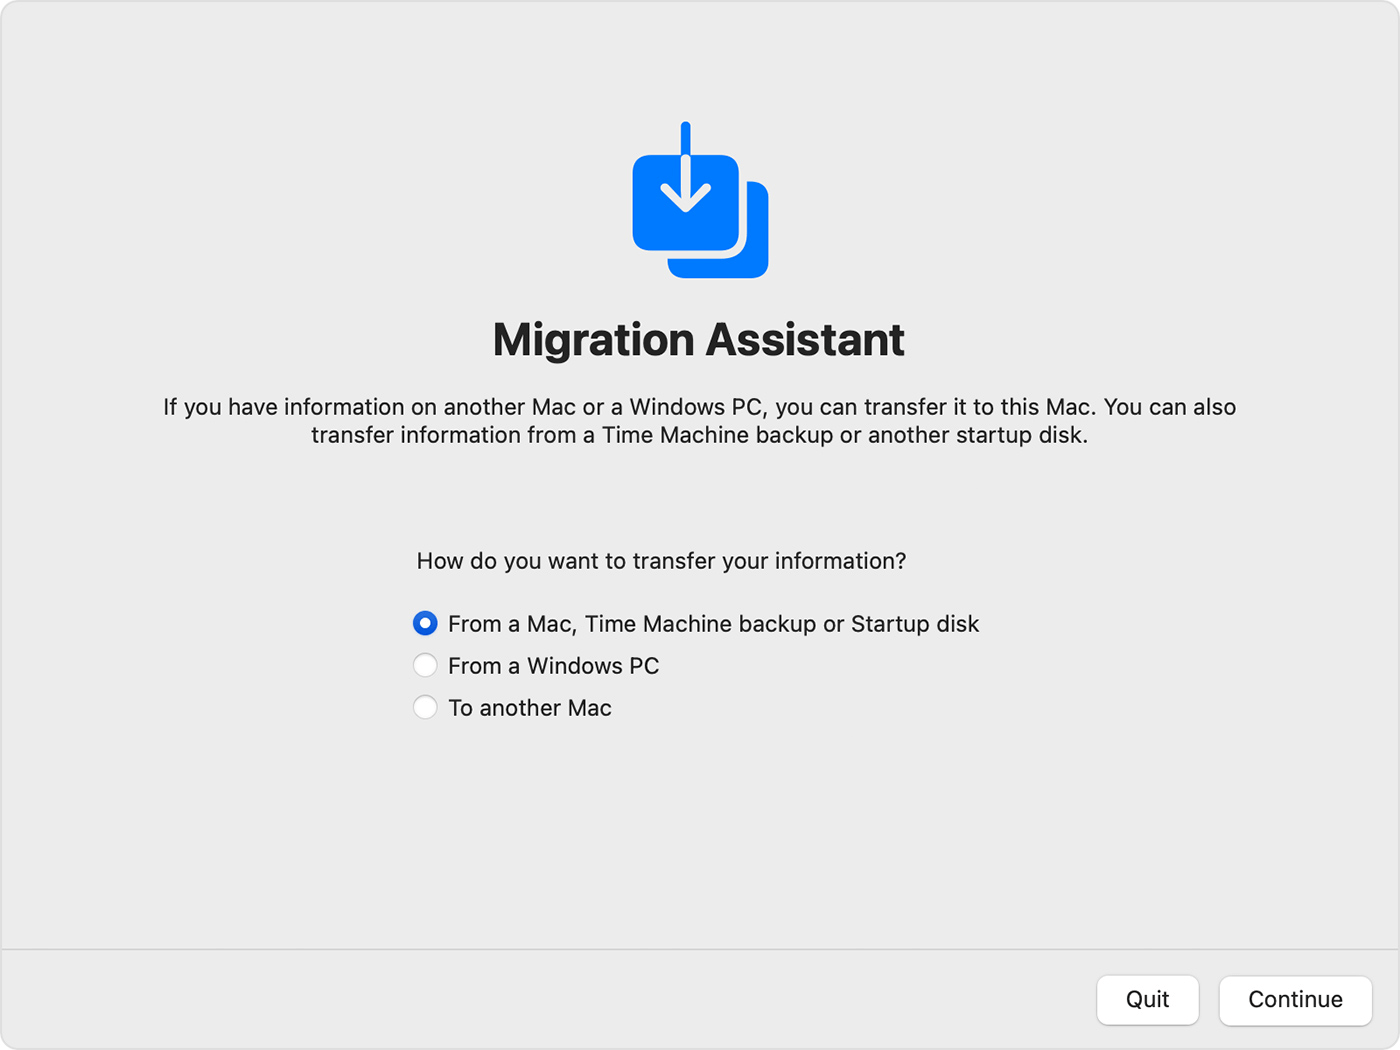
Step 3. Select your Time Machine backup and click on Continue button.
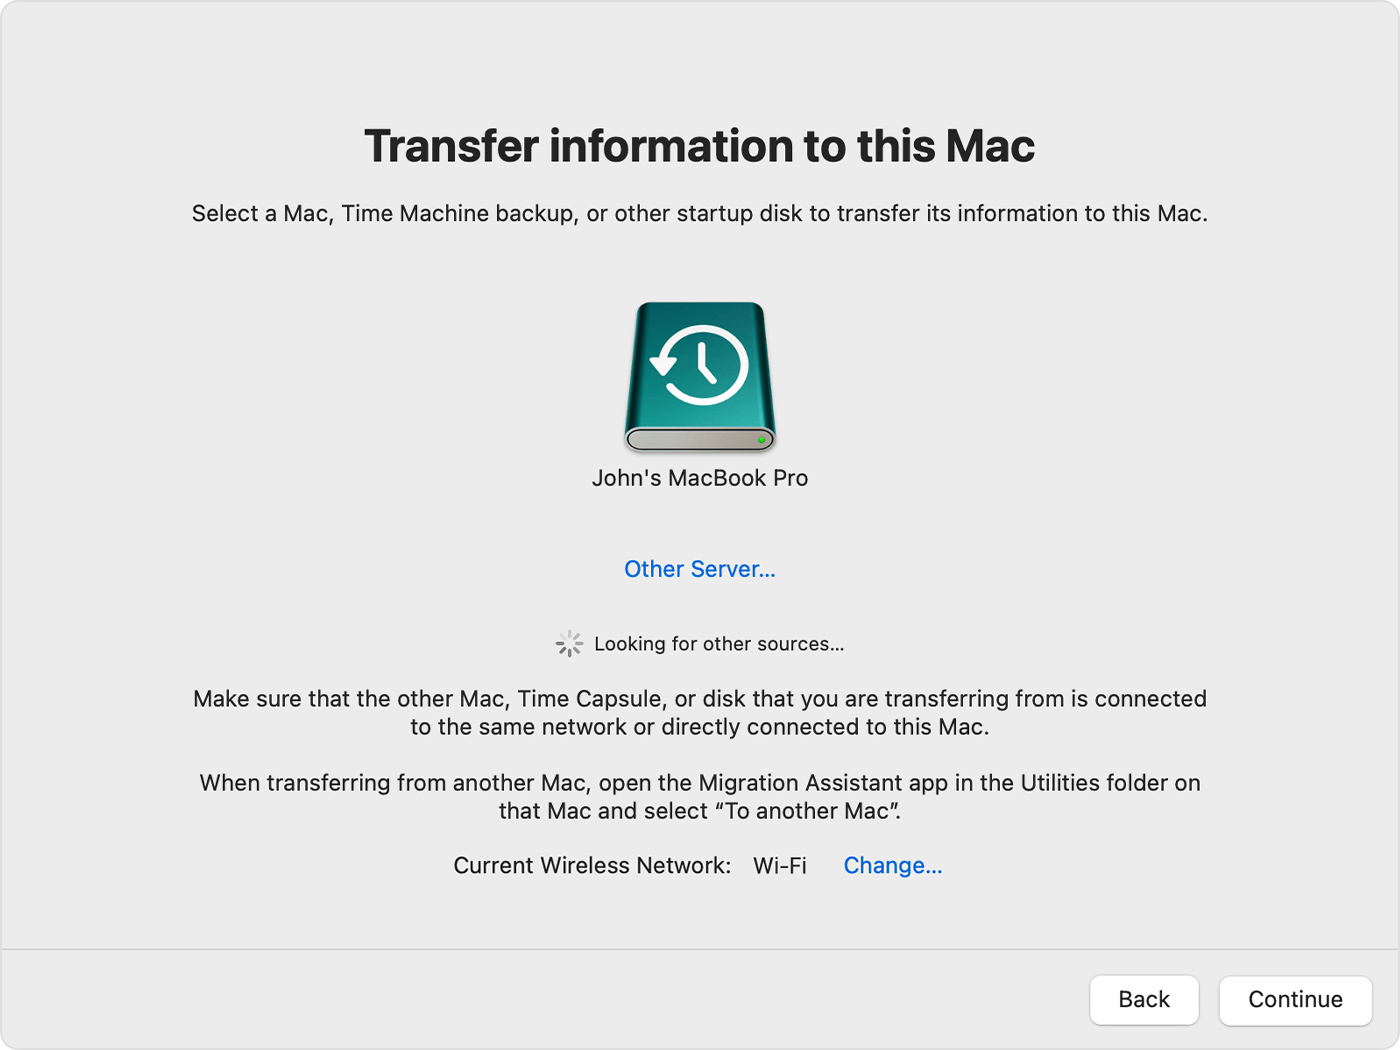
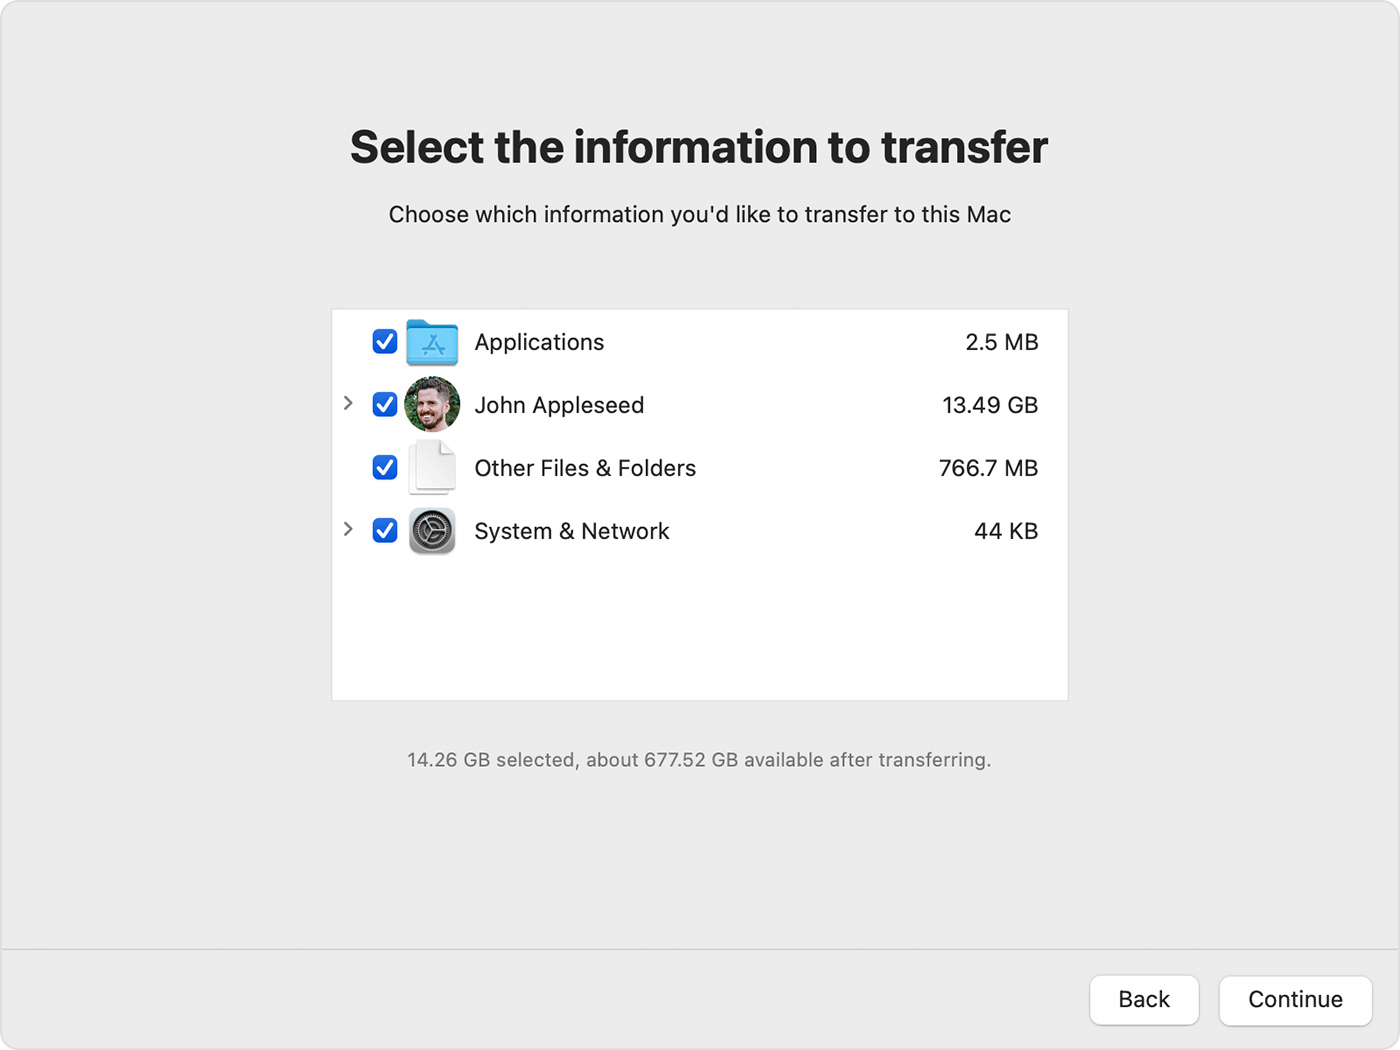
Step 4. Just select the latest backup of your old Mac, and then click on Continue button to restore the backup to your new Mac.
How to Restore Mac OS Using Time Machine Backup?
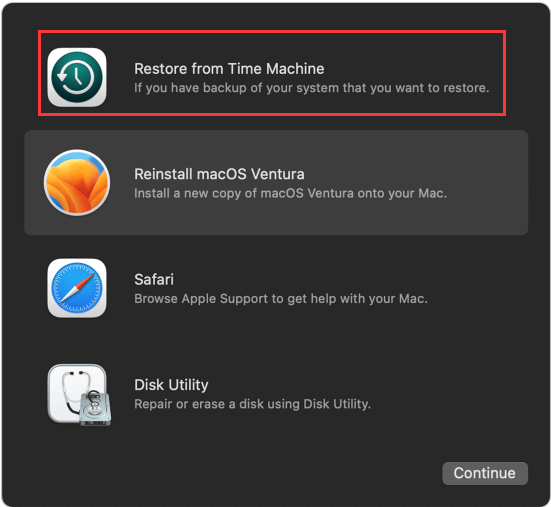
If your macOS gets crashed or you want to install the macOS from a Time Machine backup on your new Mac, just follow the steps below:
Step 1. Press and hold on the Power button when you turn on the Mac. Then the Mac will boot into macOS Recovery mode.
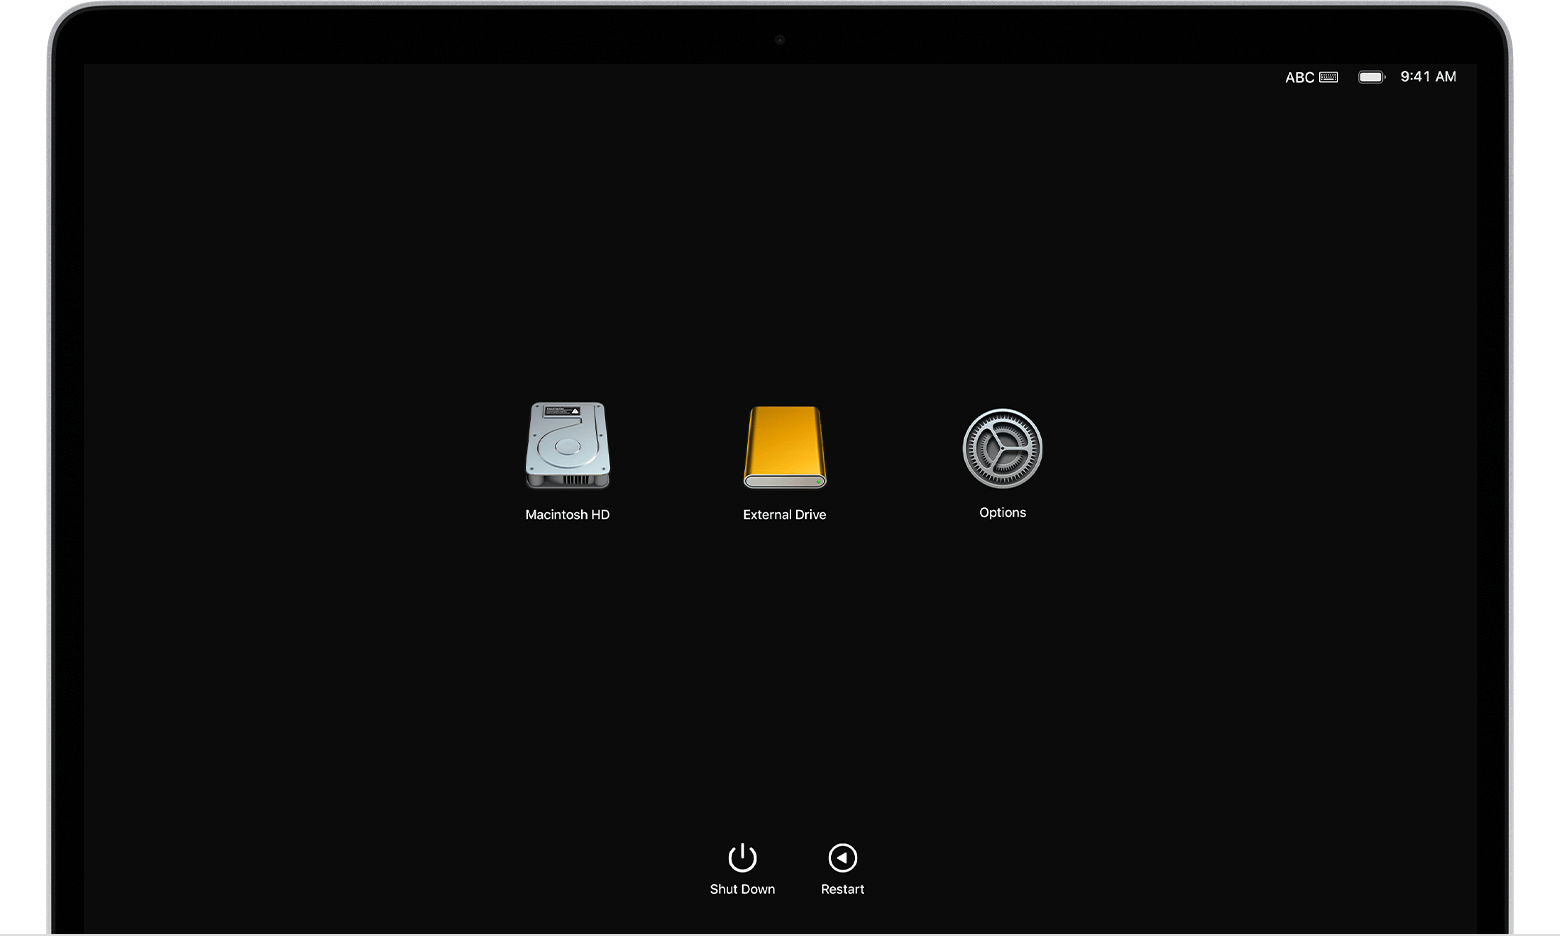
Step 2. Select Options and click on Continue button.If asked, select a user and enter your user password to continue.
Step 3. Select “Restore from Time Machine”, follow the wizard to restore macOS from the Time Machine backup.
Time Machine Alternative: Disk Cloning Software
Disk cloning software can help you create a full backup of your Mac and you can move the clone backup to a new Mac. Unlike Time Machine, disk clone is one-time backup. If you want to make a full backup of your Mac or create a bootable clone, just follow the steps below:
Step 1. Download and install the easy-to-use disk cloning application - Donemax Disk Clone for Mac. It is fully compatible with macOS 10.9 to the latest macOS version.
Step 2. Connect an external hard drive to your Mac and then open Donemax Disk Clone for Mac and select disk cloning mode - OS Clone. This mode will clone all data including macOS, user files, settings, apps and other data from the Mac hard drive to the external hard drive.

Step 3. Select the external hard drive as the destination drive, then click on Clone Now button to securely clone the Mac to the external hard drive.

FAQs About Data Migration on Mac
- The Migration Assistant provides this service during the initial setup of a new Mac. You can use this application in one of two ways on a Mac.
- Please have both Macs handy. If you're transferring files between Macs running macOS Sierra or later, Migration Assistant will set up a peer-to-peer wireless network so you may do it wirelessly. Ensure both Macs are on the same wireless network if they run Mac OS X El Capitan or earlier.
- The new Mac must be connected to a drive with Time Machine backups.
- Use "target disk mode" to link your Macs together. It is exclusive to Macs equipped with Intel processors.
- You can copy data from one Mac or hard drive to another by selecting the source device and then choosing to copy user accounts, apps, files, folders, and preferences.
- Getting started with Migration Assistant is a breeze. You may select which user accounts on the old Mac to transfer to the new one, and the program will copy all of their files.
Using the Migration Assistant, however, results in a complete copy of your files. When upgrading Macs over time, moving data from old Macs to new ones makes it possible to end up with hundreds, if not thousands, of unused files. Because of this, a fresh installation might be the best option.
Go to Apple Menu > System Settings > General > Time Machine. Make sure you’ve connected an external hard drive to your Mac. Then set the external hard drive as the backup drive, then Time Machine will back up the Mac data to the external hard drive.
Just connect the Time Machine backup drive to your new Mac. Then open Migration Assistant on your new Mac, and select transfer data to the new Mac with Time Machine backup. You also can enter into macOS Recovery mode on the new Mac, and click Options, select Restore from Time Machine backup.
Conclusion:
It's recommended to perform regular backups of your Mac. It's important to back up your data in case of a computer crash, a program malfunction, or a malicious program. With Apple's Time Machine utility, users can easily back up their entire system, restore certain files, or even an entire hard disk.
You have the option of scheduling automatic backups or initiating them manually. You can use a USB or Thunderbolt external drive, another Mac as a Time Machine destination, or a NAS device with Time Machine over Server Message Block to store your backups.
Related Articles
- Jul 18, 2025How to Change Startup Disk on Mac?
- Jan 01, 1970How to Clone Hard Drive on macOS High Sierra?
- Jun 19, 2024How to Clone Hard Drive On macOS Sequoia?
- Oct 24, 2025How to Clone Disk on M5 Chip Mac: Step-by-Step Guide
- Sep 28, 2025Migrate Data from macOS Sequoia to macOS Tahoe
- Jul 15, 2025How to Clone Mac Hard Drive to External Hard Drive?

Christina
Christina is the senior editor of Donemax software who has worked in the company for 4+ years. She mainly writes the guides and solutions about data erasure, data transferring, data recovery and disk cloning to help users get the most out of their Windows and Mac. She likes to travel, enjoy country music and play games in her spare time.

Gerhard Chou
In order to effectively solve the problems for our customers, every article and troubleshooting solution published on our website has been strictly tested and practiced. Our editors love researching and using computers and testing software, and are willing to help computer users with their problems
