Written byStevenUpdated on Apr 01, 2025
How to Use Seagate Ultra Compact SSD on Mac?
Approved byGerhard Chou
Tip: If the Seagate Ultra Compact SSD is an NTFS drive, you can reformat it to APFS, ExFAT or HFS+. If you don't want to reformat it, you can use third-party NTFS driver - such as Donemax NTFS for Mac to enable writable for NTFS drives. Then you can use an NTFS Seagate Ultra Compact SSD on your Mac without any limitation.
PAGE CONTENT:
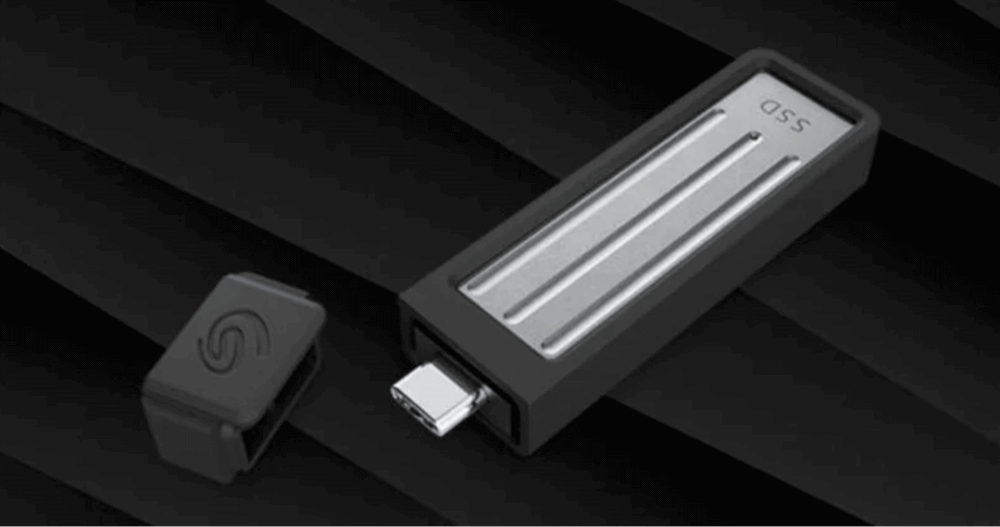
External solid-state drives (SSDs) have become an essential tool for Mac users who need fast, reliable, and portable storage solutions. Among the many options available, the Seagate Ultra Compact SSD stands out due to its sleek design, high-speed performance, and ease of use. Whether you want to expand your Mac's storage, transfer large files quickly, or use the SSD as a backup drive, the Seagate Ultra Compact SSD is a great choice.
In this guide, we will walk you through how to set up, format, and use the Seagate Ultra Compact SSD on your Mac while also covering performance optimization, troubleshooting, and best practices.
Checking Compatibility: Before using the Seagate Ultra Compact SSD with your Mac, it's important to ensure compatibility with your system.
1. macOS Requirements
Most Seagate SSDs, including the Ultra Compact model, are compatible with modern versions of macOS, but you should check your macOS version to avoid any issues. To do this:
- Click the Apple menu in the top-left corner.
- Select About This Mac.
- Note the macOS version displayed.
![Use Seagate Ultra Compact SSD on Mac]()

Seagate SSDs generally support macOS 10.13 High Sierra and later, but if you have an older version, you may need to update your macOS.
2. Connectivity Ports
The Seagate Ultra Compact SSD typically comes with USB-C or USB 3.0 connections. Macs released after 2016 primarily feature USB-C/Thunderbolt 3 ports, meaning you can connect the SSD directly. However, if your Mac has only USB-A ports (older MacBooks and iMacs), you will need a USB-A to USB-C adapter.
Steps to Use Seagate Ultra Compact SSD on Your Mac
1. Connect the Seagate Ultra Compact SSD to Your Mac
Connecting the SSD is straightforward:
- Use the provided USB-C or USB-A cable to connect the Seagate SSD to your Mac.
- Once plugged in, your Mac should recognize the drive automatically.
- Open Finder and check if the SSD appears in the Devices or Locations section on the left panel.
![Use Seagate Ultra Compact SSD on Mac]()

If the SSD does not appear in Finder, follow the below steps:
- Open Disk Utility from Utilities via Applications to check if the SSD is recognized.
![Use Seagate Ultra Compact SSD on Mac]()
- If the SSD is listed but not mounting, it may need formatting (covered in the next section).
![Use Seagate Ultra Compact SSD on Mac]()


2. Format the Seagate Ultra Compact SSD for macOS (If Needed)
1. Why Formatting May Be Necessary
Most Seagate external SSDs come pre-formatted as exFAT or NTFS:
- exFAT is compatible with both macOS and Windows but lacks some macOS-specific features.
- NTFS is read-only on Mac, meaning you cannot write or edit files.
To achieve full compatibility and best performance, reformatting to APFS or Mac OS Extended (Journaled) is recommended.
2. Format the Seagate Ultra Compact SSD Using Disk Utility
Step 1: Open Disk Utility
- Open Disk Utility from Utilities via Applications
- Select your Seagate Ultra Compact SSD from the left panel.
Step 2: Erase and Choose a Format
- Click the Erase button at the top.
![Use Seagate Ultra Compact SSD on Mac]()
- Choose a format based on your needs:
- APFS (Apple File System) – Best for macOS 10.13 or later; optimized for SSDs.
- Mac OS Extended (Journaled) – Works with older macOS versions, good for Time Machine backups.
- ExFAT – If you want cross-platform compatibility between macOS and Windows.
- Name your drive (e.g., "Seagate SSD").
![Use Seagate Ultra Compact SSD on Mac]()
- Press Erase and watch for the procedure to finish.


After formatting, your Mac will recognize the SSD and allow full read/write access.
3. Transfer Files and Use the Seagate Ultra Compact SSD
Now that the Seagate Ultra Compact SSD is formatted, you can start using it for various purposes.
1. Copy and Move Files
To transfer files to and from the SSD:
- Drag and drop files from your Mac to the SSD in Finder.
- Use Command (⌘) + C to copy and Command (⌘) + V to paste files.
- Hold Option (⌥) and drag to create file copies instead of moving them.
2. Use the SSD for Time Machine Backups
Seagate SSDs can be used for automatic backups with Time Machine, macOS's built-in backup feature.
Setting Up Time Machine with the Seagate Ultra Compact SSD:
- Go to Time Machine from System Settings > General.
![Use Seagate Ultra Compact SSD on Mac]()
- Click Add Backup Disk and select the Seagate Ultra Compact SSD.
![Use Seagate Ultra Compact SSD on Mac]()
- Choose "Back Up Automatically" (optional).
- macOS will format the SSD for Time Machine and start backing up.


3.Use the SSD for a macOS Bootable Drive
If you want to create a bootable macOS drive:
Step 1. Download and install Donemax Disk Clone for Mac - a reliable Mac disk cloning software which can create bootable clones for Mac.
Step 2. Open Donemax Disk Clone for Mac, choose OS Clone mode. Then select the Seagate Ultra Compact SSD as the destination drive.
Step 3. Click on Clone Now button to clone all data including macOS, apps, settings, user data from the Mac's internal disk to the external Seagate Ultra Compact SSD.

After creating the bootable clone on the Seagate Ultra Compact SSD, go to System Settings > General > Startup Disk. Set the Seagate Ultra Compact SSD as the startup disk.
Optimize Seagate Ultra Compact SSD and Fix Issues on Mac
Once your Seagate Ultra Compact SSD is set up and running on your Mac, it's crucial to ensure optimal performance and reliability. SSDs are much faster than traditional hard drives, but improper use or configuration can lead to slow speeds, corruption, or unexpected failures. This section covers best practices for SSD maintenance, ways to boost speed, and how to troubleshoot common issues.
Maintain Seagate Ultra Compact SSD Performance
To keep your Seagate Ultra Compact SSD running at peak performance, follow these best practices:
1. Keep Sufficient Free Space
Unlike traditional hard drives, SSDs rely on flash memory cells to store data. If an SSD is nearly full, the system struggles to find empty memory cells for writing new data, causing slower speeds and increased wear.
Recommendation:
- Always keep at least 10-20% of the SSD's total capacity free.
- If you notice performance slowdowns, delete unnecessary files or move them to another storage device.
2. Enable TRIM for SSD Longevity
TRIM is a macOS feature that helps maintain SSD performance by optimizing how data is erased and written. Modern macOS versions (10.13 High Sierra and later) automatically enable TRIM for APFS-formatted SSDs, but if you formatted the SSD manually, you should check if TRIM is enabled.
How to Check and Enable TRIM in macOS:
- Open Terminal from Utilities via Applications
- Type the following command and press Enter:
sudo trimforce enable
![Use Seagate Ultra Compact SSD on Mac]()
- Enter your Mac's administrator password when prompted.
- Restart your Mac to apply changes.

Why is TRIM important?
Without TRIM, an SSD may experience slower write speeds over time because it must erase data blocks before writing new data. TRIM ensures that erased blocks are available immediately, improving performance and extending the SSD's lifespan.
3. Eject the Seagate Ultra Compact SSD Properly Before Disconnecting
Unlike USB flash drives, SSDs use high-speed data caching to optimize read/write speeds. If you disconnect the SSD without ejecting it first, you risk corrupting files or damaging the SSD's file system.
Proper Way to Eject the SSD:
- Method 1: Finder – Right-click the SSD in Finder > Devices, then select Eject.
- Method 2: Desktop – Drag the SSD's icon to the Trash (it changes to an eject symbol).
- Method 3: Disk Utility – Open Disk Utility, select the SSD, and click Unmount.
If your SSD is in use (e.g., transferring files) when you try to eject it, macOS will show an error message. Wait for the transfer to complete, then try again.
4. Update macOS and Seagate Firmware
Keeping your Mac and SSD firmware up to date ensures compatibility, stability, and improved performance.
Checking for macOS Updates:
- Go to Apple menu > System Settings > General > Software Update.
- If an update is available, click Update Now.
Updating Seagate SSD Firmware:
- Visit Seagate's official support website.
- Search for your Ultra Compact SSD model.
- Download and install the latest firmware update, if available.
Seagate Ultra Compact SSD on Mac Common Issues & Fixes
Even though the Seagate Ultra Compact SSD is designed for smooth operation, you may occasionally encounter errors, slow speeds, or unrecognized drives. Below are common problems and their solutions.
Problem 1: SSD Not Recognized in Finder
If your SSD doesn't appear in Finder after plugging it in, try the following:
Solution:
- Open Finder > Click Settings.
- Under the General tab, check "External disks".
- Under the Sidebar tab, ensure "External disks" is selected.
![Use Seagate Ultra Compact SSD on Mac]()

If the SSD still doesn't show up, check Disk Utility:
- Open Disk Utility from Utilities via Applications
- Select the SSD and click Mount if it shows up but isn't mounted.
![Use Seagate Ultra Compact SSD on Mac]()

Problem 2: SSD is Read-Only (Cannot Write Files)
If you can read files but cannot move or delete them, the SSD may be formatted as NTFS, which is read-only on macOS.
Solution:
- Option 1 (Recommended): Reformat the SSD to APFS, Mac OS Extended (Journaled), or ExFAT using Disk Utility.
- Option 2: Install Donemax NTFS for Mac to enable full NTFS write support.
It is highly recommended to use NTFS for Mac tool to enable writable for NTFS drives:
Step 1. Download and install the reliable NTFS driver - Donemax NTFS for Mac.
Step 2. Open Donemax NTFS for Mac, select the Seagate Ultra Compact SSD, then click on Enable Writable button. Then you can write data to the NTFS Seagate Ultra Compact SSD without any limitation.

Problem 3: Slow Transfer Speeds
If you experience sluggish performance when transferring files, consider the following:
Solution:
- Use USB-C or Thunderbolt Ports – If you're using a USB-A to USB-C adapter, it might be limiting speed. Try a direct USB-C connection if available.
- Check Cable Quality – Some cheap cables do not support high-speed transfers. Use the official Seagate cable for best performance.
- Format with APFS – If you're using Mac OS Extended (Journaled) or exFAT, reformatting to APFS may boost speeds.
- Avoid Heavy Background Processes – Large file transfers slow down if your Mac is running multiple apps. Close unnecessary programs before transferring data.
Problem 4: macOS Asks to "Initialize" the SSD
If macOS prompts you to "Initialize" the SSD when plugging it in, this means the drive’s file system is either corrupt or unreadable.
Solution:
- Open Disk Utility and select the SSD.
- Click First Aid to attempt a repair.
- If repair fails, click Erase, select APFS or Mac OS Extended (Journaled), and reformat the SSD.
![Use Seagate Ultra Compact SSD on Mac]()

⚠️ Warning: Reformatting will delete all data on the SSD. If possible, back up your files before proceeding.
Problem 5: SSD Disconnects Randomly
If your SSD disconnects unexpectedly, it may be due to:
- Faulty cables or ports
- macOS sleep settings
- Power-saving issues
Solution:
- Try a Different USB Port or Cable – Plug the SSD into another port or use a different cable.
- Prevent Mac from Sleeping While Transferring Files:
- Go to System Settings > Display > Advanced.
- Enable Prevent automatic sleeping when the display is off.
- Disable Power Nap (for MacBooks):
- Go to System Settings > Battery > Options.
- Turn off Enable Power Nap.
💡Note: If you lose data due to fixing Seagate Ultra Compact SSD, you can use data recovery software - such as Donemax Data Recovery for Mac to help recover lost data from the Seagate Ultra Compact SSD.
Conclusion
The Seagate Ultra Compact SSD is a fantastic storage solution for Mac users, offering high-speed performance, portability, and reliability. Whether you're using it for everyday file storage, backups with Time Machine, or even as a bootable drive, setting it up properly ensures smooth operation and maximum efficiency.
By following the steps outlined in this guide, you can ensure full compatibility, optimal performance, and long-term durability of your SSD. If you encounter any issues, refer to the troubleshooting section or check Seagate's support page for further assistance.
Donemax NTFS for Mac
An easy-to-use NTFS for Mac tool to help you enable writable for NTFS drives on Mac so that you can read-write NTFS drives on Mac without any limitation. It also can help you mount, format, repair, rename, open drive on your Mac.
Related Articles
- Oct 16, 2024How to Add or Remove Icons from Dock on Mac?
- Jan 02, 2025Download and Create macOS Sequoia ISO File for VMware/VirtualBox and Other Virtual Machines
- Feb 06, 2025[7 Fixes] Fix Volume Hash Mismatch Error on Mac Without Losing Data
- Nov 07, 2024Downgrade from macOS Sequoia to macOS Sonoma or Earlier Versions
- Dec 12, 2024How to Mount External Hard Drive or USB Drive Using Terminal on Mac?
- Dec 06, 2024Why Can't I Select an External Hard Drive for Time Machine Backup Disk?

Contributing Writer
Steven
Steven has been a senior writer & editor of Donemax software since 2020. He's a super nerd and can't imagine the life without a computer. Over 6 years of experience of writing technical solutions and software tesing, he is passionate about providing solutions and tips for Windows and Mac users.

Editor in chief
Gerhard Chou
In order to effectively solve the problems for our customers, every article and troubleshooting solution published on our website has been strictly tested and practiced. Our editors love researching and using computers and testing software, and are willing to help computer users with their problems