Written byMariaUpdated on Feb 06, 2025
[7 Fixes] Fix Volume Hash Mismatch Error on Mac Without Losing Data
Approved byGerhard Chou
PAGE CONTENT:
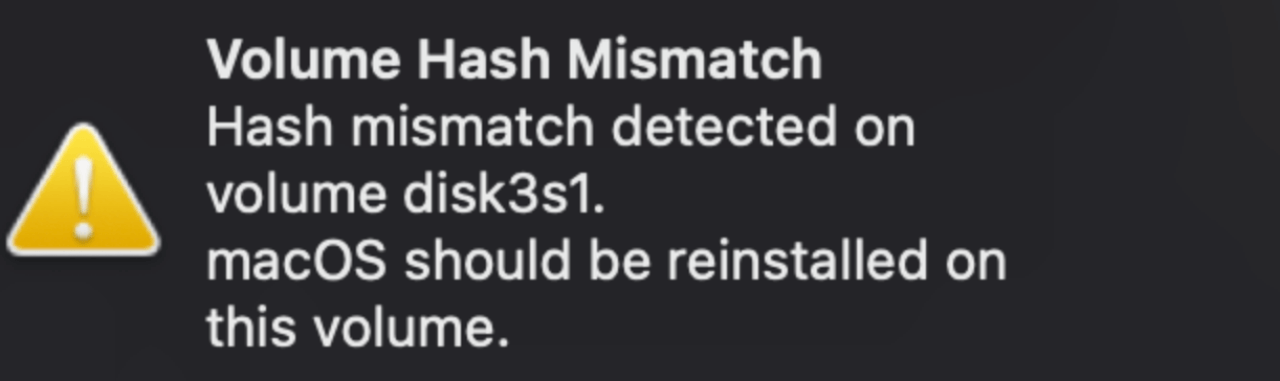
Mac users sometimes encounter cryptic system errors that disrupt their workflow, and one such frustrating issue is the "Volume Hash Mismatch" error. This error typically appears during boot-up and indicates a problem with macOS's integrity verification system. It can lead to performance issues, system instability, or even prevent the Mac from booting properly.

The error is mainly associated with macOS Big Sur and later versions, as Apple implemented new security measures that involve cryptographic verification of system files. While these measures improve security, they can sometimes misfire, especially after a system update, leading to the "Volume Hash Mismatch" error.
In this guide, we will explore why this error occurs and provide step-by-step solutions to fix it. Whether you're dealing with occasional pop-ups or your Mac refuses to start, following these troubleshooting methods should help you restore stability to your system.
Understand the "Volume Hash Mismatch" Error
To fully grasp the "Volume Hash Mismatch" error, it's essential to understand how macOS ensures system security and integrity. Apple's Signed System Volume (SSV) technology, introduced in macOS Big Sur, plays a crucial role in preventing unauthorized modifications to system files. This feature helps ensure that no malicious software or accidental corruption alters the macOS core components, protecting both security and performance.
How Signed System Volume (SSV) Works?
The SSV is essentially a cryptographically signed snapshot of the system volume. Every time your Mac boots up, macOS verifies that the system files have not been modified by comparing the stored cryptographic hash of the system volume against the expected hash value from Apple. If these values don't match, macOS flags the error and may prevent the system from booting normally.
This means that even slight modifications - whether due to software updates, disk corruption, or unintended changes - can trigger the "Volume Hash Mismatch" error. The system is designed this way to prevent malware, unauthorized changes, or accidental corruption from compromising the stability and security of macOS.
What Triggers the "Volume Hash Mismatch" Error?
While this error is a security feature, it can sometimes be triggered by non-malicious factors, including:
- Failed macOS Updates:
- If an update is interrupted (e.g., due to a sudden shutdown, power failure, or insufficient space), macOS might fail to complete the verification process, resulting in a mismatched volume hash.
- In some cases, a bug within the update itself can cause a mismatch, especially in early releases of new macOS versions.
- Disk Errors or Corruption:
- Over time, hard drives and SSDs develop bad sectors or other errors, which can prevent macOS from properly reading system files.
- If the system volume becomes partially corrupted, macOS may fail to generate a correct hash, leading to the mismatch error.
- Third-Party System Modifications:
- Some advanced users modify macOS system files to enable custom themes, bypass security restrictions, or install third-party software not officially supported by Apple.
- Tools like OpenCore, Hackintosh modifications, or system tweaking utilities can inadvertently alter system files, causing the hash to mismatch.
- File System Issues (APFS Problems):
- macOS uses Apple File System (APFS) for storage management. If APFS encounters issues (e.g., corruption or improper shutdowns), it might interfere with volume hashing and integrity verification.
- Hardware Problems (Failing SSD or RAM Issues):
- Faulty SSDs or bad RAM modules can corrupt system files during read/write operations. This may lead to inconsistencies in the system volume, triggering the mismatch error.
- Running Apple Diagnostics (as explained later) can help identify hardware-related issues.
- Cloning or Restoring a System Image Improperly:
- If you clone your macOS system from an old disk to a new one using third-party tools, the SSV may not be properly signed.
- Similarly, restoring macOS from a backup that lacks proper system integrity verification can lead to a hash mismatch.
How This Error Affects Your Mac?
Depending on the severity, a "Volume Hash Mismatch" error can cause:
- Slow performance: System verification failures can lead to slow boots, laggy performance, or unresponsive applications.
- Frequent crashes or kernel panics: If macOS detects serious integrity issues, it might restart unexpectedly or refuse to load the operating system.
- Boot failures: In extreme cases, the Mac may refuse to boot altogether, requiring macOS reinstallation or a clean install.
Understanding these underlying causes is crucial before moving on to troubleshooting. By pinpointing the root of the problem, you can choose the most effective fix, whether it's a simple restart, disk repair, or a complete system reinstall.
How to Fix Volume Hash Mismatch on Mac?
If you encounter this error, follow these troubleshooting methods to fix it.
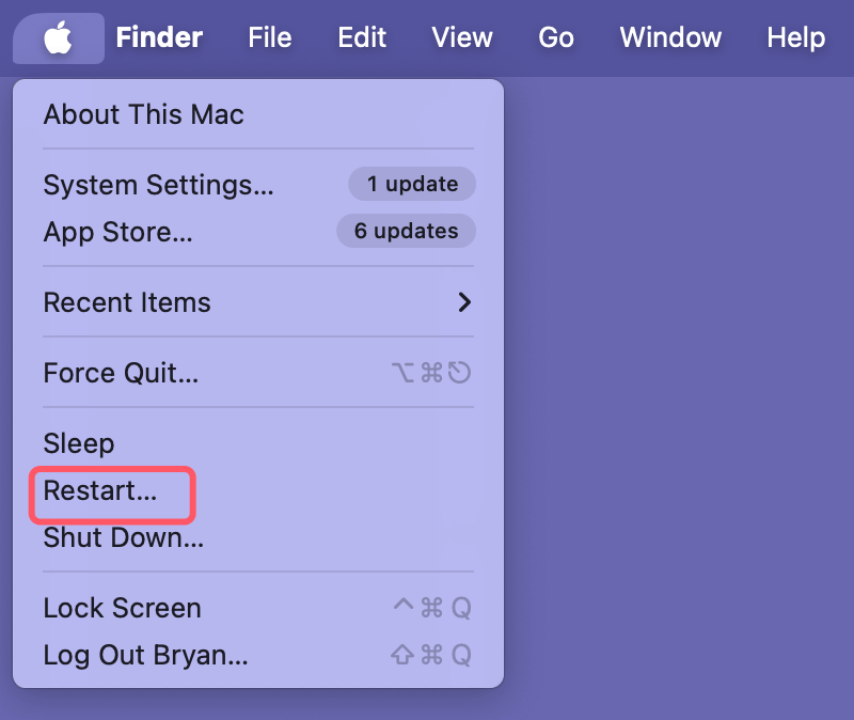
Fix 1. Restart Your Mac to Fix Volume Hash Mismatch Error
Before attempting complex solutions, start with a simple reboot. You can fix short-term issues and clear up system caches that might be the source of the error by restarting your Mac.
- Select Restart after clicking on the Apple menu.
![Fix Volume Hash Mismatch Error on Mac Without Losing Data]()
- If your Mac is not responding, force a shutdown by holding down the power button for ten or so seconds, then restart it.
If the error persists, proceed to the next steps.
Fix 2. Run First Aid in Disk Utility to Repair Startup Disk
Since disk corruption can cause the "Volume Hash Mismatch" error, using Disk Utility to check and repair your disk is a logical next step.
- Boot into macOS Recovery Mode:
- Restart your Intel Mac and press and hold Command (⌘) + R until the Apple logo appears.
- Turn off your Apple Silicon Mac (M-chip), then hold down the power button as long as it says "Loading startup options." From the Options menu, choose Continue.
- In macOS Utilities, select Disk Utility and click Continue.
- Choose Macintosh HD (or your primary system disk) in the sidebar.
- Click First Aid and then Run to check for errors.
![Fix Volume Hash Mismatch Error on Mac Without Losing Data]()
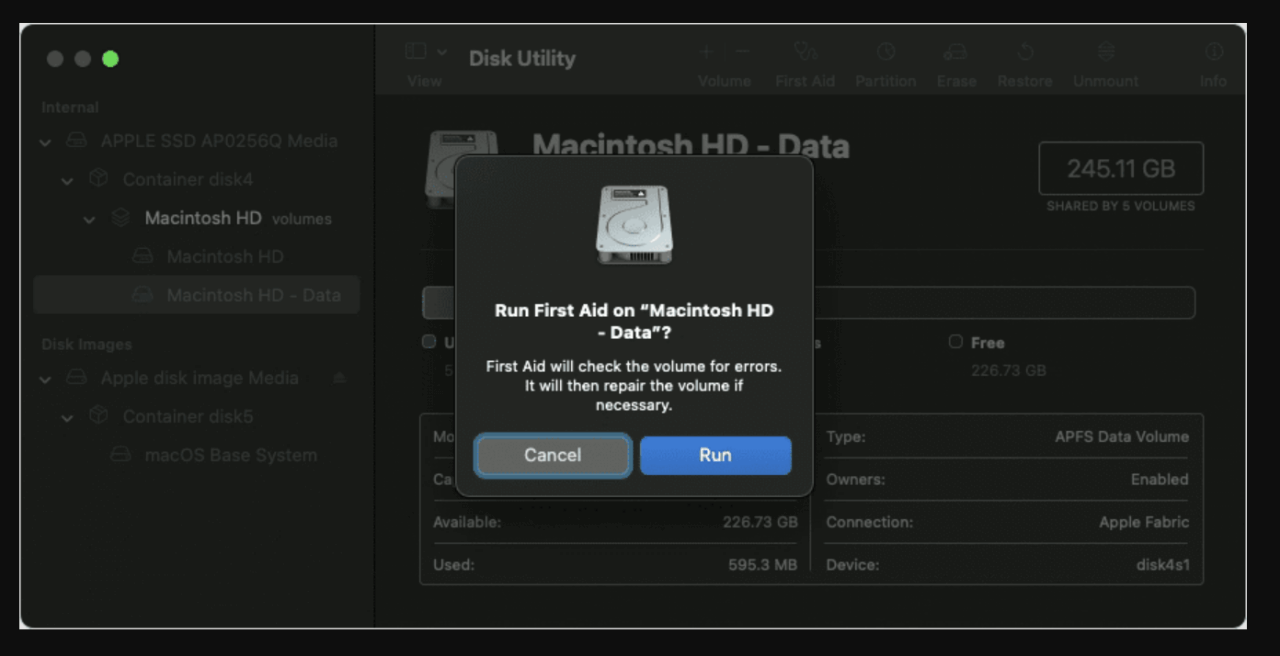
If First Aid detects and fixes issues, restart your Mac and check if the error is resolved.
Fix 3. Reset NVRAM and SMC
Resetting NVRAM and SMC can clear hardware-related glitches that might contribute to system errors.
Reset NVRAM (Intel Macs Only):
- Turn off your Mac.
- Switch it back on and hold Option (⌥) + Command (⌘) + P + R for roughly 20 seconds instantly.
- When the Apple logo appears and vanishes twice or you hear the startup chime (if applicable), release the keys.
For M-chip Macs, NVRAM resets automatically upon reboot, so this step is unnecessary.
Reset SMC (Intel Macs Only):
If you're using an Intel Mac, resetting the SMC can help resolve power-related issues.
For Macs with a T2 chip:
- Turn off your Mac.
- For seven seconds, press and hold Control + Option + Shift.
- Press and hold the power button for an additional seven seconds while holding these keys.
- Turn the Mac back on after releasing all the keys.
For Macs without a T2 chip:
- Shut down your Mac.
- Disconnect the power cable and wait for 15 seconds.
- Reconnect the cable and turn your Mac back on.
If the issue persists, proceed to Safe Mode.
Fix 4. Boot in Safe Mode
Safe Mode loads macOS with only essential components, bypassing third-party drivers and extensions that could be causing the issue.
Booting into Safe Mode
For Intel Macs:
- Hold down the Shift key after restarting your Mac until the login screen appears.
- Log in and check if the issue persists.
For Apple Silicon Macs:
- Shut down your Mac.
- Press and hold the power button until you see the startup options.
- Select your boot disk while holding the Shift key and click Continue in Safe Mode.
![Fix Volume Hash Mismatch Error on Mac Without Losing Data]()
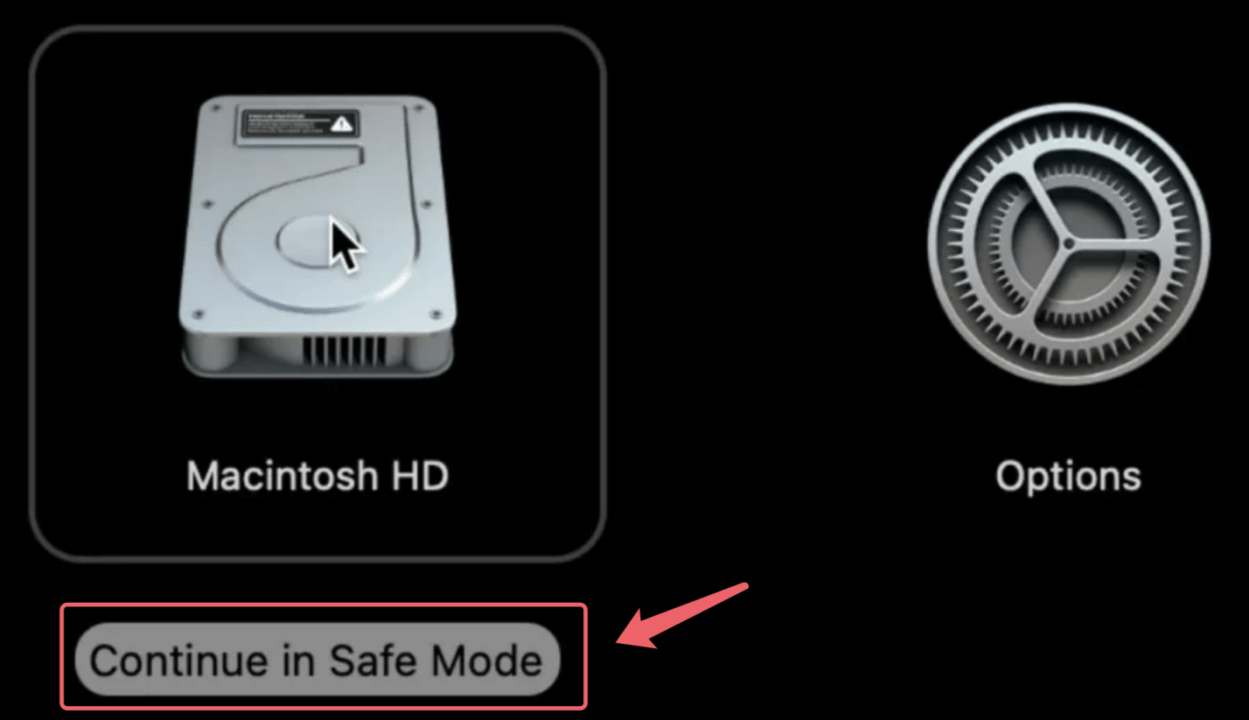
If the error doesn’t appear in Safe Mode, a third-party app or extension might be the culprit. Try removing recently installed software and restart normally.
Fix 5. Reinstall macOS Without Losing Data
If system files are corrupted, reinstalling macOS can replace them without erasing your data.
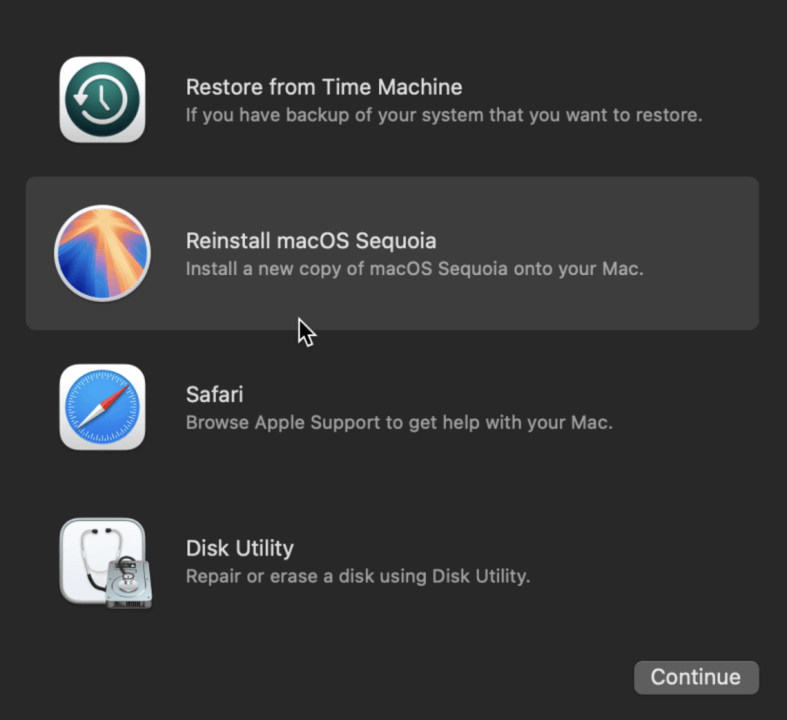
- Boot into macOS Recovery Mode (as described earlier).
- Choose Reinstall macOS and adhere to the prompts displayed on the screen.
![Fix Volume Hash Mismatch Error on Mac Without Losing Data]()
- Once the installation is complete, check if the error persists.
This process keeps your files intact while refreshing system components.
Fix 6. Perform a Clean macOS Installation
If all else fails, performing a clean install is the most thorough fix. This erases your disk and reinstalls macOS from scratch.
Steps for a Clean Install
- Backup your data using Time Machine or an external drive.
- Boot into macOS Recovery Mode.
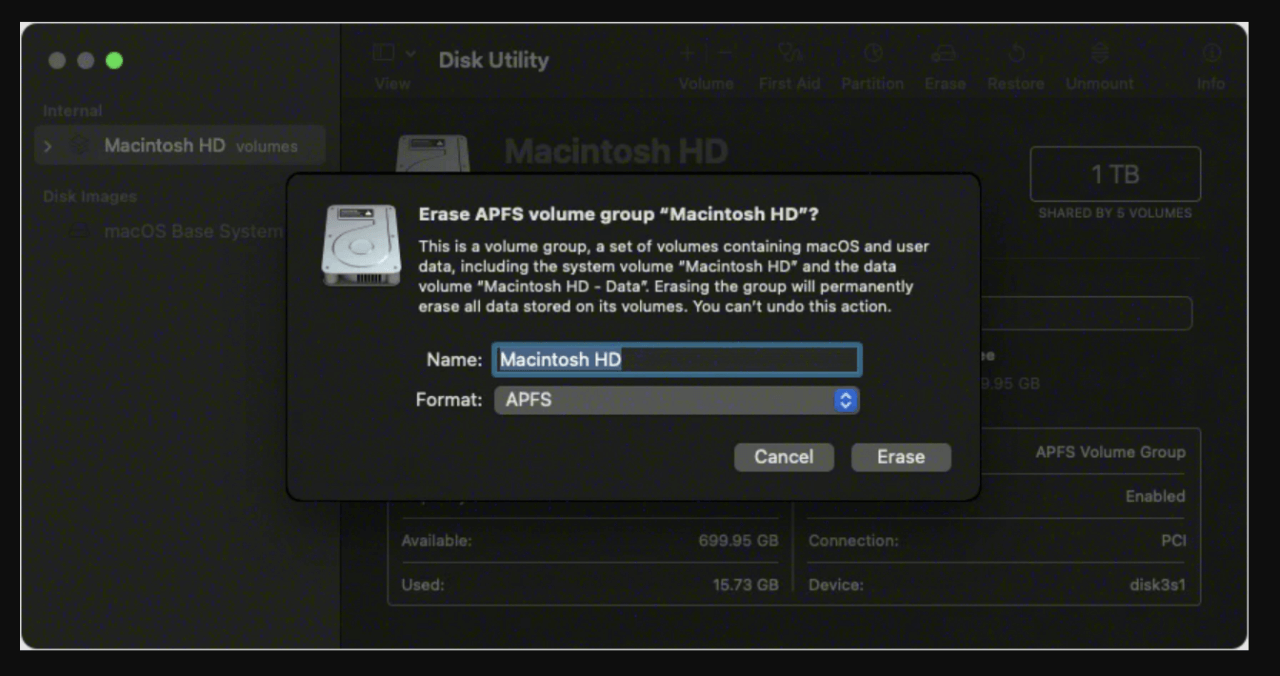
- Open Disk Utility, select Macintosh HD, and click Erase. Choose APFS or Mac OS Extended (Journaled) format.
![Fix Volume Hash Mismatch Error on Mac Without Losing Data]()
- Exit Disk Utility and select Reinstall macOS.
![Fix Volume Hash Mismatch Error on Mac Without Losing Data]()
- Follow the installation steps and set up your Mac as new.

After reinstalling macOS, restore only necessary files to prevent reintroducing corrupt data.
Fix 7. Check for Hardware Issues
If a clean install doesn’t fix the problem, the issue could be hardware-related.
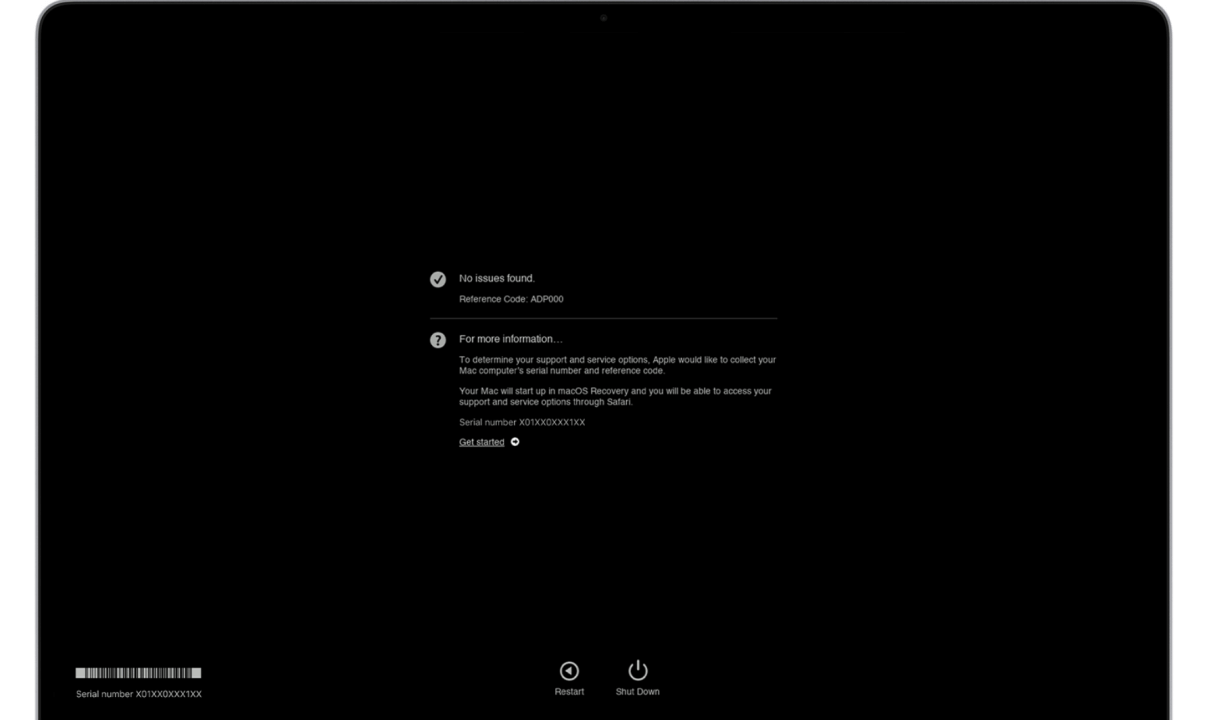
- Run Apple Diagnostics
- Turn Off your Mac.
- Restart while holding D until the diagnostics screen appears.
- Follow on-screen instructions to check for hardware issues.
![Fix Volume Hash Mismatch Error on Mac Without Losing Data]()
- Visit an Apple Store
If diagnostics detect hardware problems, visit an Apple Authorized Service Provider for further assistance.
Recover Lost Data After Fixing Volume Hash Mismatch on Mac
If you have lost data during fixing Volume Hash Mismatch errors on Mac, you can use Mac data recovery software - such as Donemax Data Recovery for Mac to help you get the lost data back.
Step 1. Download and install Donemax Data Recovery for Mac, run it from Launchpad.
Step 2. Open Donemax Data Recovery for Mac, select the startup disk, such as Macintosh HD, to start data recovery.

Step 3. Click on Scan button. Donemax Data Recovery for Mac will scan the startup disk and find all recoverable files.

Step 4. Once the scan is completed, you can preview all recoverable files. Then select the wanted files, click on Recover button to save them.

Prevent Future "Volume Hash Mismatch" Errors
To avoid encountering this error again, consider the following precautions:
- Keep macOS updated – Always install official updates from Apple to maintain system stability.
- Avoid modifying system files – Refrain from using third-party tools that alter macOS's core system components.
- Perform regular disk maintenance – Use Disk Utility > First Aid periodically to check for disk issues.
- Backup your data frequently – Use Time Machine or cloud storage to prevent data loss in case of a system failure.
Conclusion
The "Volume Hash Mismatch" error on Mac can be alarming, but it's usually fixable with the right approach. Start with basic troubleshooting like restarting your Mac and running Disk Utility, then move on to resetting NVRAM/SMC and booting in Safe Mode. If needed, reinstall macOS or perform a clean install.
If none of these solutions work, hardware failure could be the culprit, and seeking professional help may be necessary. By following preventive measures, you can keep your Mac running smoothly and avoid future system integrity issues. If you have lost data due to fixing Volume Hash Mismatch on your Mac, just use Mac data recovery app - such as Donemax Data Recovery for Mac to help you get the lost data back.
Donemax Data Recovery for Mac
Donemax Data Recovery for Mac is one of the best Mac data recovery software. It is easy-to-use and can help in recovering deleted, formatted, inaccessible or lost data from Mac HDD/SSD, external disk, USB drive, SD card, camera or other storage devices.
Related Articles
- Jan 22, 2025How to Merge Partitions on Mac: A Detailed Guide
- Oct 05, 2024Mac Won't Shut Down: Fix It Now
- Oct 18, 2024How to Empty or Force Empty Trash on Mac?
- Apr 15, 2025Accidentally Deleted Macintosh HD? Fix It Now
- Jun 18, 2025How to Remove/Hide Macintosh HD Icon on Mac Desktop?
- Jul 01, 2025How to Restart and Force Restart Mac?

Contributing Writer
Maria
Maria is one of the senior writers & editors of Donemax who lives and works in Sydney, Australia. She loves PC, Mac and Internet Technology. She has 6 years of writing articles about data recovery on PC/Mac, disk cloning solution, data eraser and computer OS optimization, etc. She is also interested in testing various software and digital products.

Editor in chief
Gerhard Chou
In order to effectively solve the problems for our customers, every article and troubleshooting solution published on our website has been strictly tested and practiced. Our editors love researching and using computers and testing software, and are willing to help computer users with their problems