Written byChristinaUpdated on Jul 02, 2024
How to Securely Wipe SSD Without Shortening the Service Life of the SSD?
Approved byGerhard Chou
PAGE CONTENT:
We store our most private data on devices like Solid State Drives (SSDs) because our lives are closely connected to technology. But as we get new hardware or give away old ones, ensuring all personal info is gone is more important than ever. Welcome to the world of SSD data erasure, an important part of digital security that is often forgotten.
It's important to know how to safely wipe SSDs, whether you're a tech enthusiast who wants to improve performance or a careful user who wants to protect your privacy. There are many ways to clean up your data completely.
Let's look at the different types of SSD data erasing so that you can protect your privacy and make sure that your digital assets get to their new home safely.

Best 4 Methods to Wipe SSD Safely!
Wiping your SSD will delete everything stored on the SSD. You’d better make a backup before wiping your SSD.
Method 1: Safely Erase Your SSD Through Your Motherboard
A hardware-level way to delete data is to erase your SSD safely through your motherboard's BIOS. This way, BIOS's features are used to secure erase, completely removing all the data. To use this method, follow these steps:
1. Go to BIOS Settings.
Restart PC. Go to the BIOS settings. pressing the right key (Del, F2, or F10) during startup.
2. Find the Secure Erase Option.
The secure erase choice is in the BIOS menu. It might also be in the SATA configuration settings or the disk management settings.
3. Select SSD.
When you find the safe erase choice, pick out the SSD you want to erase from the list of connected drives.
4. Start Secure Erase.
Follow the on-screen directions to confirm your choice and start the secure erase process. This process will permanently erase all the information on the chosen SSD.

5. Verify Erasure.
Once the safe erase process is done, restart your computer and make sure the SSD was properly erased.
Please note that the erased data is not lost for good and can be recovered by data recovery software. Check how to recover lost data from formatted SSD >>
Method 2: Use Manufacturer's Utility to Wipe Your SSD Safely
Many companies that make SSDs offer utility software with safe erase features. These tools are made to work especially with their SSD models, ensuring they are compatible and reliable. To safely erase your SSD, follow these steps to use a manufacturer's tool:
1. Download and Install Utility.
Go to the company's website that made your SSD and download the utility program for that model. Then, follow the software's directions to install it on your computer.
2. Launch Utility.
Open the utility software to access the secure erase or disk management area.
3. Choose SSD.
Pick the SSD you want to erase from the list of drives found by the tool.
4. Start Secure Erase.
To start the secure erase process for the chosen SSD, follow the on-screen directions that the utility gives you. Make sure you made the right choice, then erase it.
5. Verify Erasure.
Close the utility and check that the SSD has been safely erased after the secure erase process.
Method 3: Use Windows Diskpart to Wipe Your SSD Safely
Windows Diskpart is a command-line tool for managing disks that can also be used to delete SSDs safely. Using the tools that come with Windows, this way makes it easy to delete data. Here's how to use Diskpart to erase your SSD safely:

1. Start The Command Prompt
If you press Win + X and choose "Command Prompt (Admin)," the Command Prompt will start with administrative rights.
2. Launch Diskpart
Type "diskpart". Press "Enter" to open the Diskpart tool.
3. List Disks
If you type list disk and press Enter, a list of all linked disks will appear. Find the disk number that goes with your SSD.
4. Select the SSD
When you type pick disk X, you should see the number of the SSD disk you want to wipe. Press Enter to choose that disk.
5. Initiate Secure Erase
Start the safe erase process for the chosen SSD by typing "clean all" and pressing "Enter." That's it, and this program will delete everything on the SSD.
6. Verify
After the safe wipe process, close Diskpart and ensure the SSD has been erased.
Method 4: Erase Your SSD Safely With Third-Party Software
To safely erase your SSD, third-party software options provide a flexible and adaptable method. These apps have many features and functions that give users more control over deleting data. Here's a closer look at how to use third-party tools to delete your SSD safely:
Step 1: Choose the Right SSD Wipe Software.
The first step is to find a trusted third-party SSD wipe software program that is made to erase SSDs safely. Do extensive research to ensure the software works with your SSD model and has all the necessary features.
Donemax Data Eraser is one of the best SSD wipe programs. It can help you securely and easily wipe SSD on Windows and macOS, permanently erasing all data from the SSD.
Donemax Data Eraser
- Securely and permanently wipe SSD on Windows PC and Mac.
- Certified data erasure method including Peter Gutmann, U.S. Army AR380-19, DoD 5220.22-M ECE, etc.
- 100% safe, no physical damage.
This SSD wipe program is 100% safe, it will not affect the service life of your SSD. And it supports to wipe all types of SSDs including external SSDs, SATA SSDs, NVMe M.2 SSDs, etc.
Step 2: Download and Install the Software.
After choosing the software, get it from the official website or a source you know you can trust. The software can be put on your computer by following the installation directions that come with it.
Just download and install Donemax Data Eraser on your computer and connect the SSD to your computer.
Step 3: Launch the Software and Choose Erase Hard Drive Mode.
Open Donemax Data Eraser on your computer, then choose Erase Hard Drive mode. This mode will securely wipe the SSD and permanently erase all data from it. Before you sell, donate or dispose of your SSD, just choose this mode to wipe the SSD and destroy all sensitive data , no trace left.
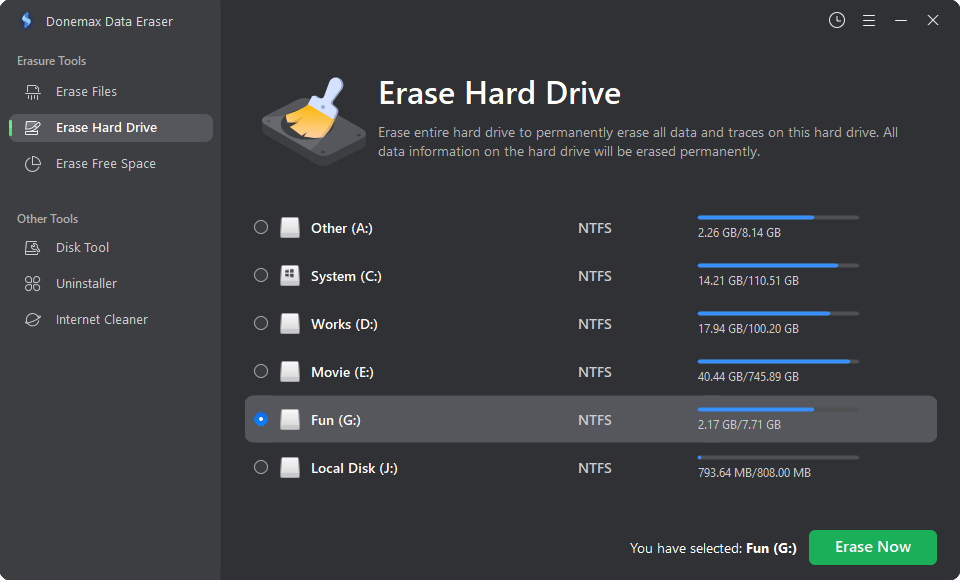
Step 4: Select the SSD.
You can select the SSD you want to erase from the list of drives shown in the software's interface. Ensure you pick the right SSD so you don't accidentally erase the wrong drive. Then click on Erase Now button.
Step 5: Configuring Settings and Wipe the SSD.
Pick the overwrite method, then click on Continue button to format and wipe the SSD.
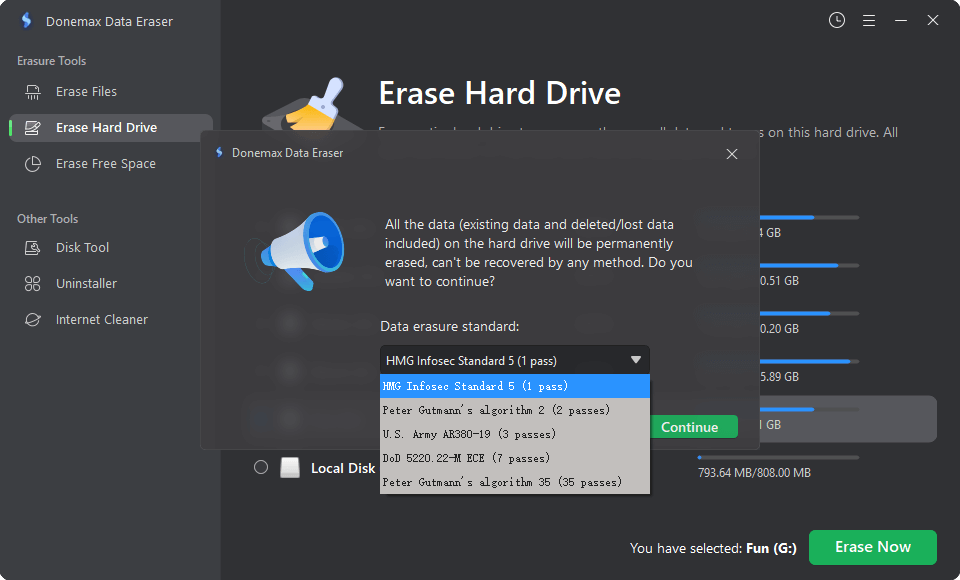
The program will show you what to do on the screen to start the secure erase process for the chosen SSD. Make sure you made the right choice, then erase it.
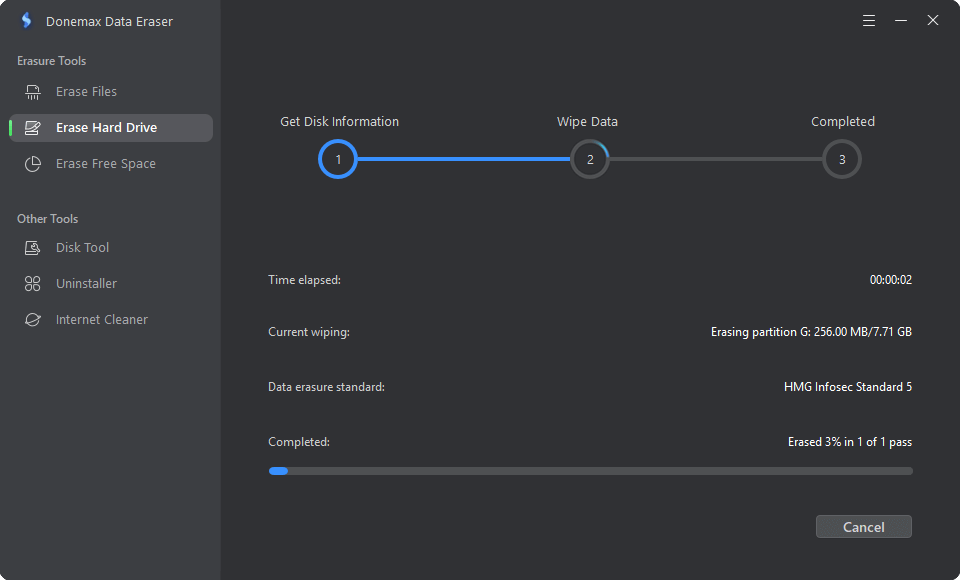
Step 6: Verify the Erasure.
Close the software and ensure the SSD has been safely erased after the secure erase process. Some software programs may have built-in tools to ensure the erasing mechanism works.

Donemax Data Eraser also can help you wipe HDD, digital camera, USB flash drive, external disk, RAID, Server, memory card, etc. Once the data is erased by Donemax Data Eraser, the data is lost permanently, no way to recover it.
Conclusion:
In conclusion, ensuring that private data on SSDs is deleted safely is important for protecting digital privacy. It doesn't matter what method is used - motherboard BIOS features, maker utility software, Windows Diskpart, or third-party programs - the main goal is always the same: permanently deleting all data.
By following the steps listed and putting data security first, users can confidently move their digital assets while keeping personal data safe from people who shouldn't have access to it. It is important to completely delete all SSD data when updating hardware or giving away devices. It is the only way to protect your privacy and peace in the digital world.
FAQs About Safely Wiping SSD
1. What is the best SSD safe wipe software?
Here is the list of top 5 SSD wipe software:
- Donemax Data Eraser
- BitRaser
- AweEraser
- BitWiper
- DBAN
2. How to securely wipe SSD on Windows or macOS?
Before you sell, donate or dispose of your SSD, you can use Donemax Data Eraser to securely wipe the SSD:
- Connect the SSD to your computer.
- Download, install and open Donemax Data Eraser on your computer.
- Choose Erase Hard Drive mode.
- Select the SSD and click on Erase Now button.
- Securely wipe the SSD and permanently erase all data from the SSD.
3. Can I recover lost data from the wipe SSD?
No, if the SSD has been wiped by Donemax Data Eraser, all data stored on the SSD is lost for good, no trace left, cannot be recovered by any method.
Related Articles
- Jan 27, 2024How to Execute Unrecoverable Delete on Windows/macOS/External Storage Device?
- Mar 12, 2024Quick Format vs Full Format, What Are the Differences?
- Feb 20, 2024Can Format Erase Everything Permanently from The Hard Drive?
- Jun 12, 2023How to Permanently Erase Formatted Data in Windows 11/10/8/7/Vista?
- Jun 12, 2023Permanently Erase Data Before Selling A Windows 8/8.1 PC
- Jun 28, 2024How to Factory Reset Razer Computer?

Contributing Writer
Christina
Christina is the senior editor of Donemax software who has worked in the company for 4+ years. She mainly writes the guides and solutions about data erasure, data transferring, data recovery and disk cloning to help users get the most out of their Windows and Mac. She likes to travel, enjoy country music and play games in her spare time.

Editor in chief
Gerhard Chou
In order to effectively solve the problems for our customers, every article and troubleshooting solution published on our website has been strictly tested and practiced. Our editors love researching and using computers and testing software, and are willing to help computer users with their problems