Written byMariaUpdated on Mar 21, 2025
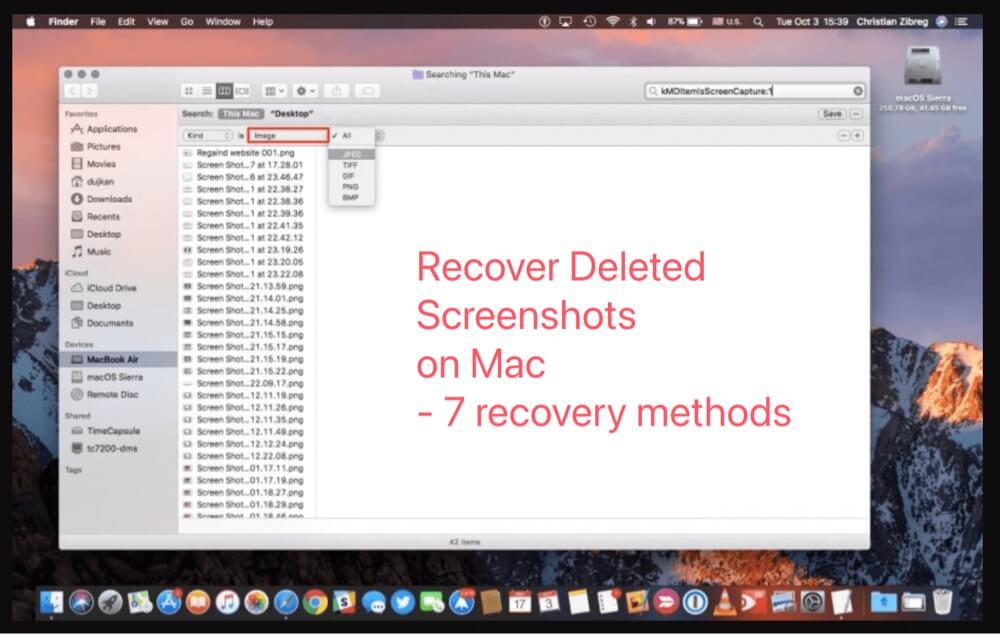
[7 Methods] Recover Deleted Screenshots on Mac: A Comprehensive Guide
Approved byGerhard Chou
Tip: If you can't restore deleted screenshots from trash bin or backups, you can use Donemax Data Recovery for Mac to help you recover permanently deleted screenshots on Mac, recover lost screenshots from a corrupted/erased hard drive on Mac.
PAGE CONTENT:
Screenshots play a crucial role in daily computer use, whether for work, study, or personal documentation. They help capture important information quickly, making it easy to save and share. However, losing screenshots due to accidental deletion, system crashes, or emptying the Trash can be frustrating.
Fortunately, macOS provides multiple ways to recover deleted screenshots, including built-in recovery options like Trash, Time Machine, and iCloud, as well as third-party data recovery tools. In this guide, we will explore step-by-step methods to recover deleted screenshots on a Mac.
How to Recover Deleted or Lost Screenshots on Mac? [7 Methods]
It is easy to recover deleted screenshots on Mac. Check every method and find the best one for you.
Method 1: Recover deleted screenshots from trash bin
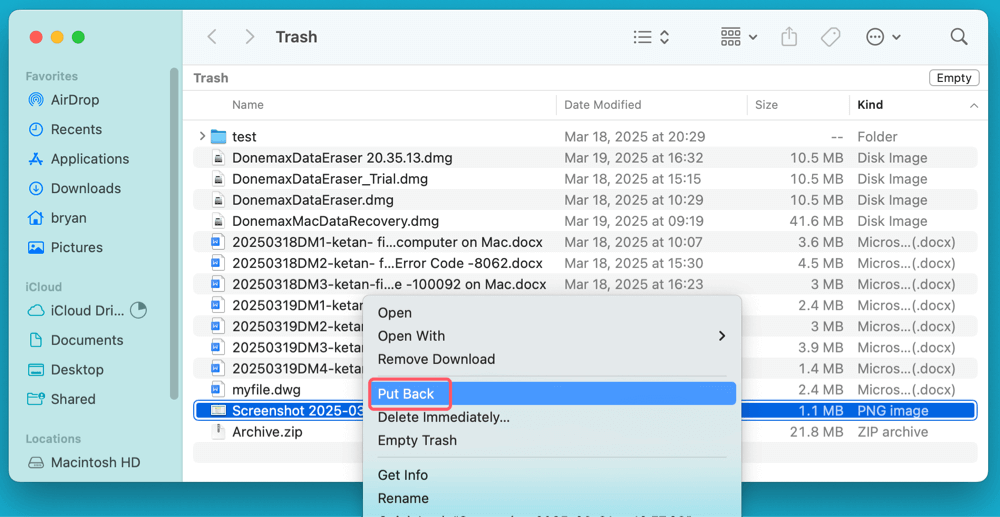
When you delete a screenshot, it is moved to the Trash folder, where it remains until you manually empty the Trash or macOS automatically removes it after 30 days. If you recently deleted a screenshot, restoring it from the Trash is the easiest solution.
Steps to Recover Screenshots from Trash:
- Open Trash: In the Dock, click the Trash icon.
- Search for the screenshot: Use the search bar and type "Screenshot" or "png" to quickly locate the file.
- Right-click and restore: Locate the erased screenshot, then choose Put Back with a right-click. It will return to its former position as a result.
![recover deleted screenshots on a Mac]()
Limitations:
- If the Trash has been emptied, this method will not work.
- If macOS automatically removed the file after 30 days, it is no longer recoverable through this method.
Method 2: Restore deleted screenshots and images from Time Machine Backup
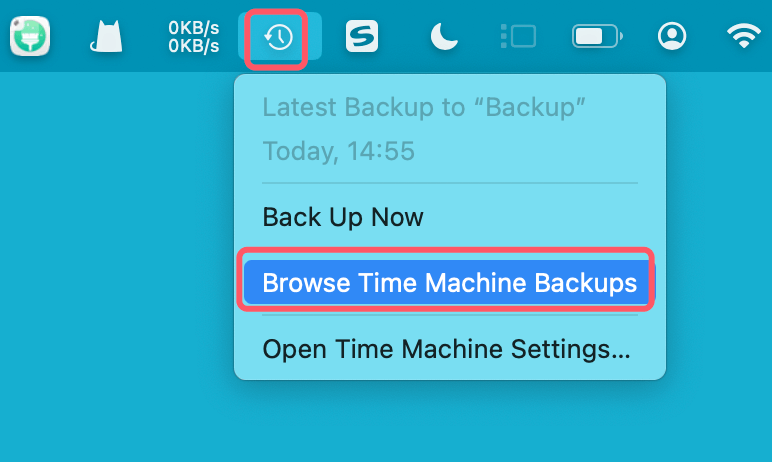
If you regularly back up your Mac using Time Machine, you can retrieve deleted screenshots even if they have been permanently removed from the Trash.
Steps to Recover Screenshots Using Time Machine:
- Connect the backup drive that contains your Time Machine backups.
- Navigate to the original folder where the screenshot was saved (e.g., Desktop or Pictures folder).
- Click the Time Machine symbol in the menu bar, then choose Browse Time Machine Backups to launch Time Machine.
![recover deleted screenshots on a Mac]()
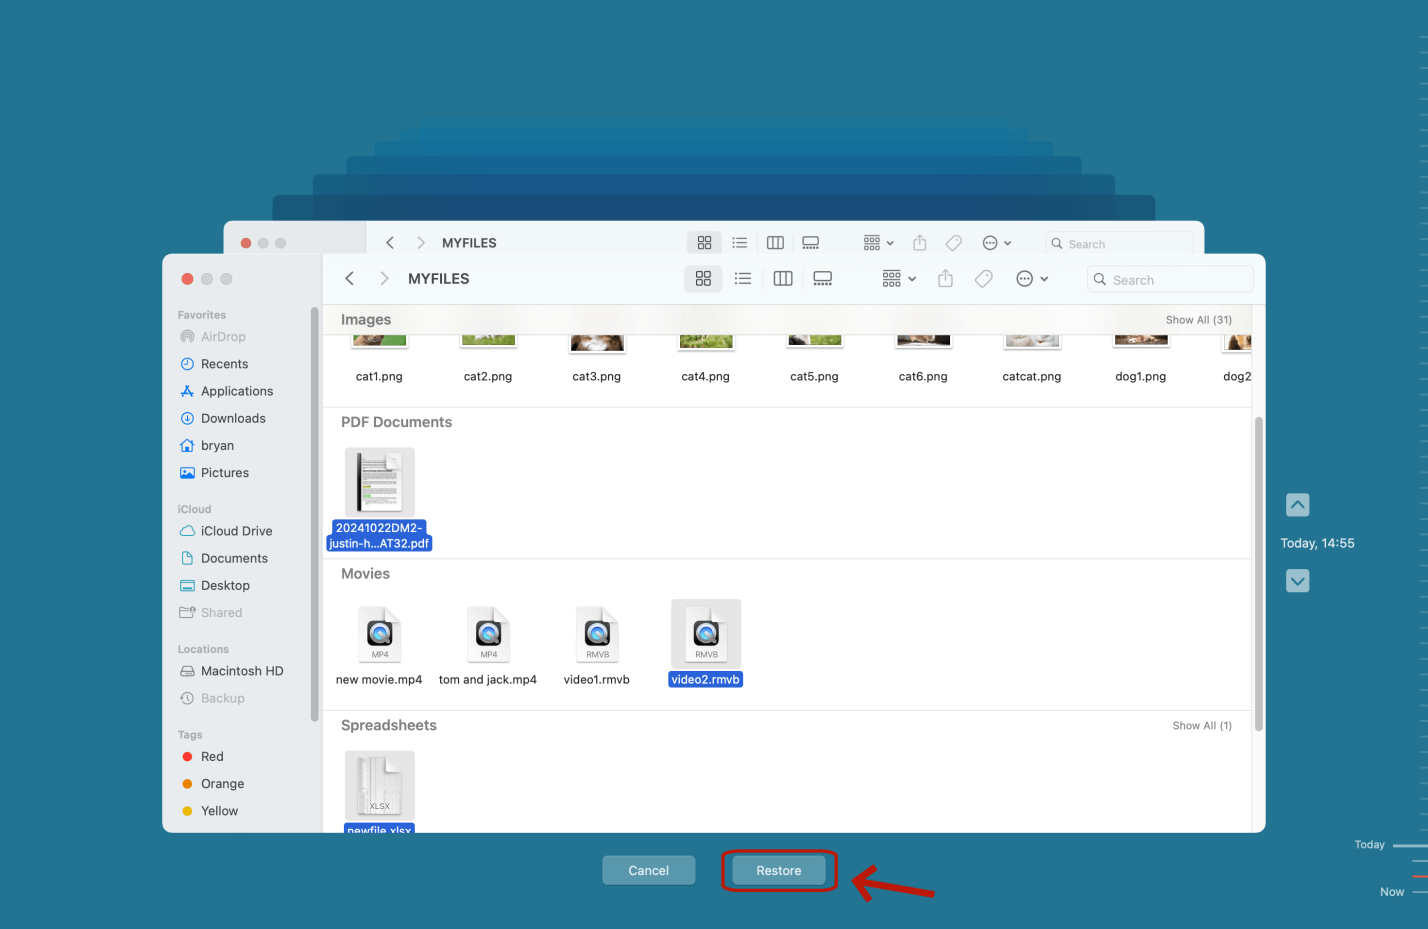
- Browse previous versions by scrolling through the timeline on the right.
- Locate the deleted screenshot, then click Restore.
![recover deleted screenshots on a Mac]()
Limitations:
- Time Machine must have been enabled before the screenshot was deleted.
- If no backup exists, this method will not be useful.
Method 3: Check iCloud Drive or Photos App
If iCloud Drive or Photos App is enabled, screenshots may be recoverable from these services.
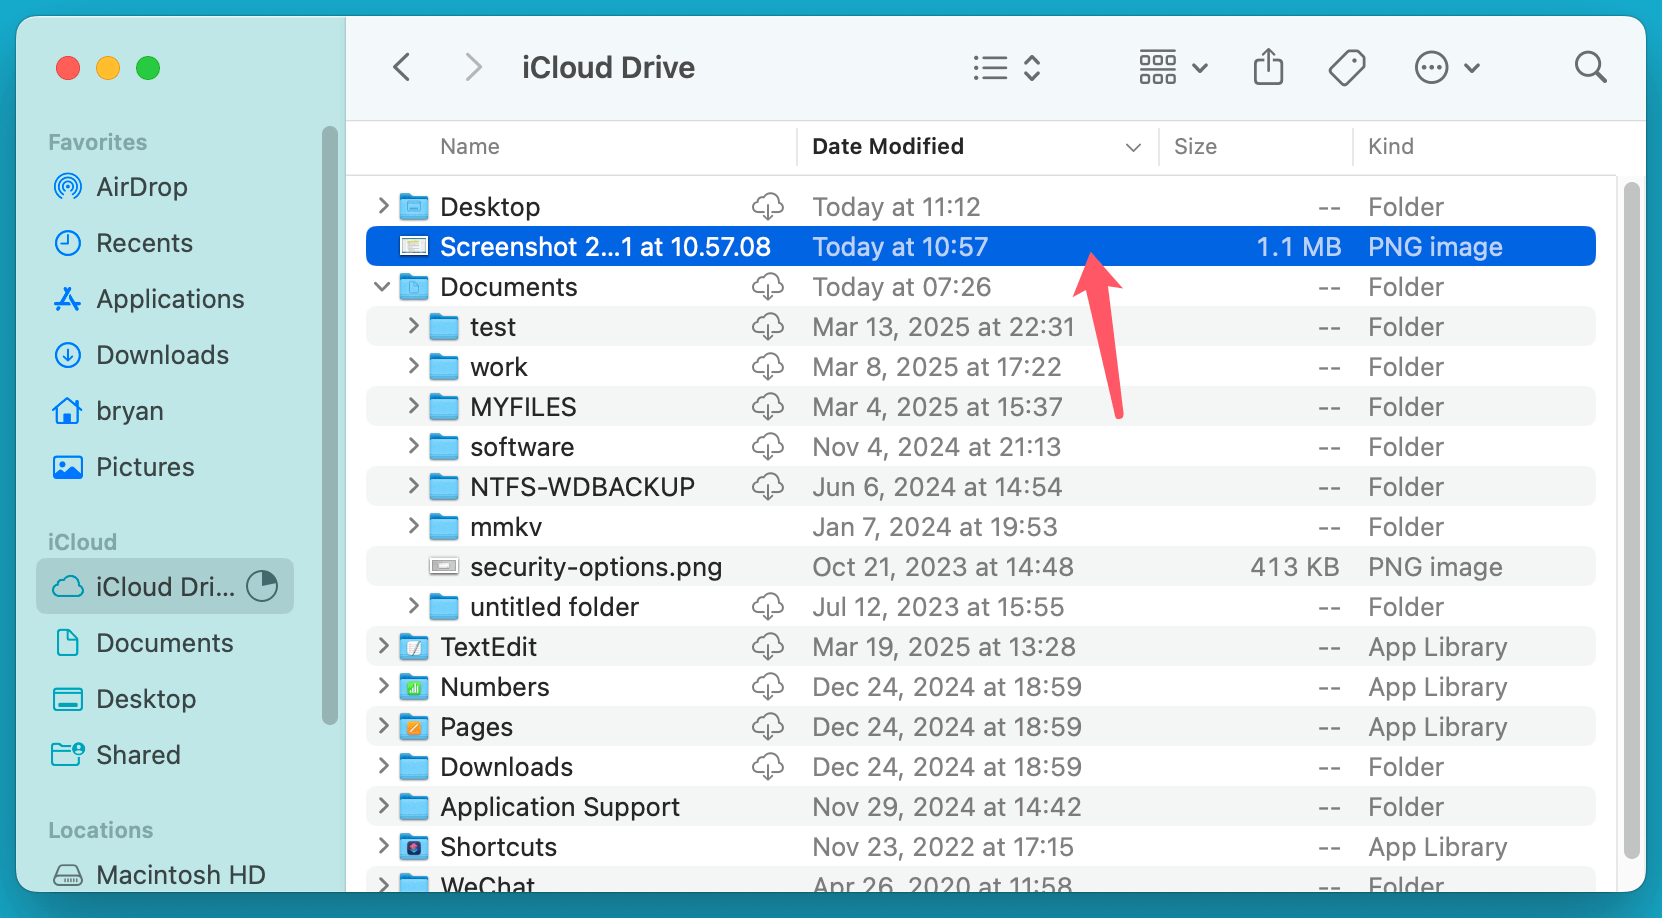
Steps to Check iCloud Drive for Screenshots:
- Open Finder and select iCloud Drive from the sidebar.
- Navigate to Desktop or Documents, as these are common locations for saved screenshots.
- Search for "Screenshot" in the search bar.
- If found, drag the screenshot back to your Mac.
![recover deleted screenshots on a Mac]()
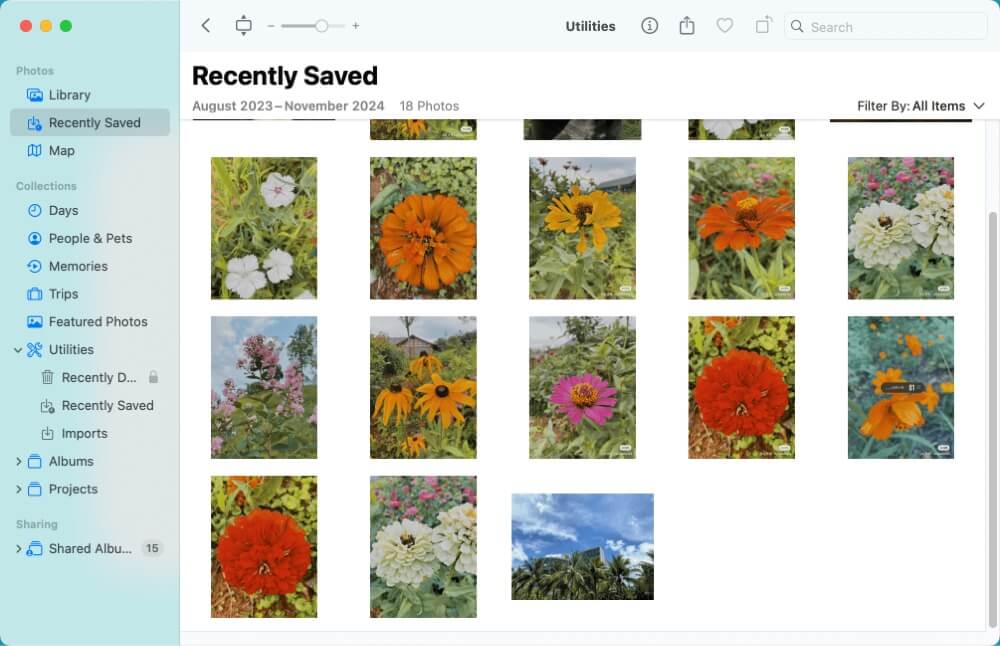
Recovering Screenshots from Photos App:
- Open Photos App from Launchpad or Applications.
- Check the "Recently Saved" and "Library" sections for the screenshot.
- If found, export or drag it to a local folder.
![recover deleted screenshots on a Mac]()
Limitations:
- Requires iCloud sync to be enabled before deletion.
- If screenshots were not backed up, they may not be recoverable through iCloud.
Method 4: Restore Screenshots from Recently Deleted Folder
The Photos app stores deleted images, including screenshots, in the Recently Deleted folder for 30 days before permanently removing them.
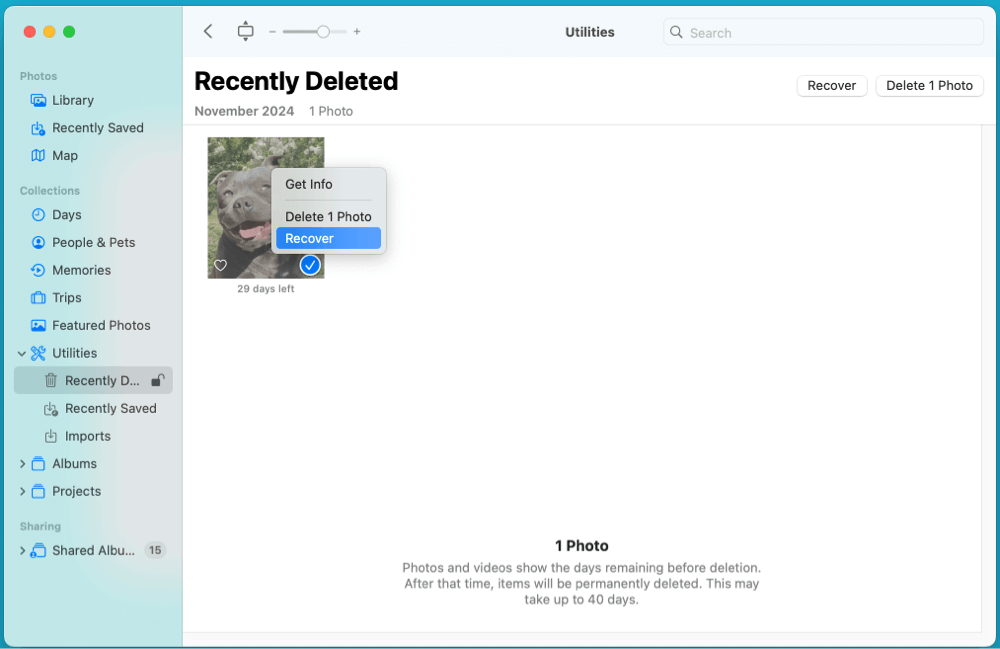
Steps to Restore from Recently Deleted Folder:
- Open the Photos App on your Mac.
- Click "Recently Deleted" in the sidebar.
- Locate the deleted screenshot and select it.
- Click Recover to restore it to your Photos Library.
![recover deleted screenshots on a Mac]()
Limitations:
- Only works if the screenshot was saved in Photos before deletion.
- If the 30-day retention period has passed, the screenshot will be permanently deleted.
Method 5: Use macOS Terminal to Find Lost Screenshots
If you suspect that your screenshot is misplaced rather than deleted, macOS Terminal can help locate it.
Steps to Find Screenshots Using Terminal:
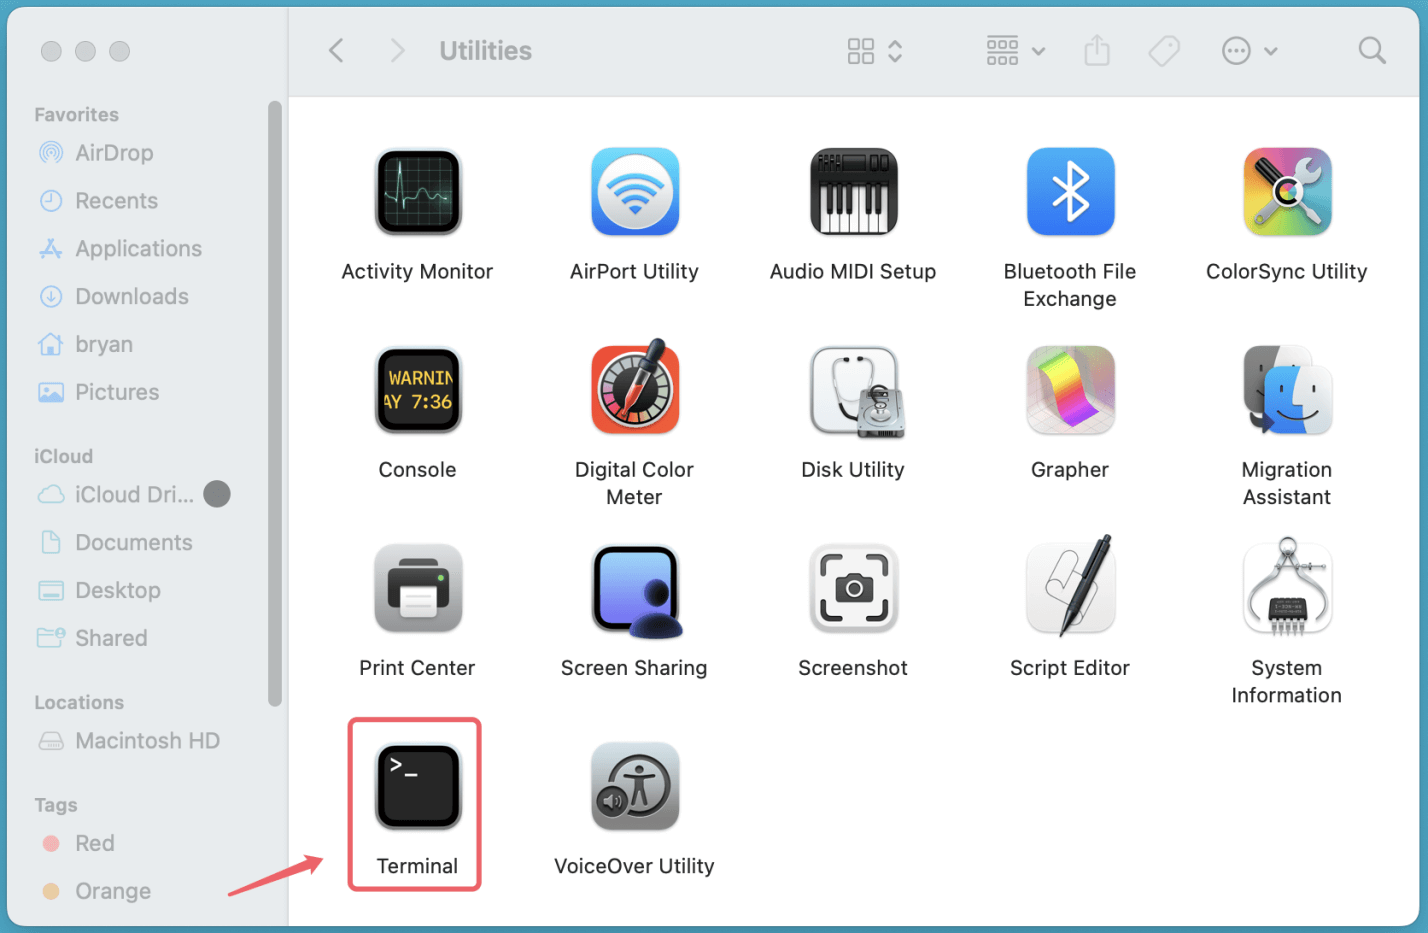
- Open Terminal from Launchpad or Applications > Utilities.
![recover deleted screenshots on a Mac]()
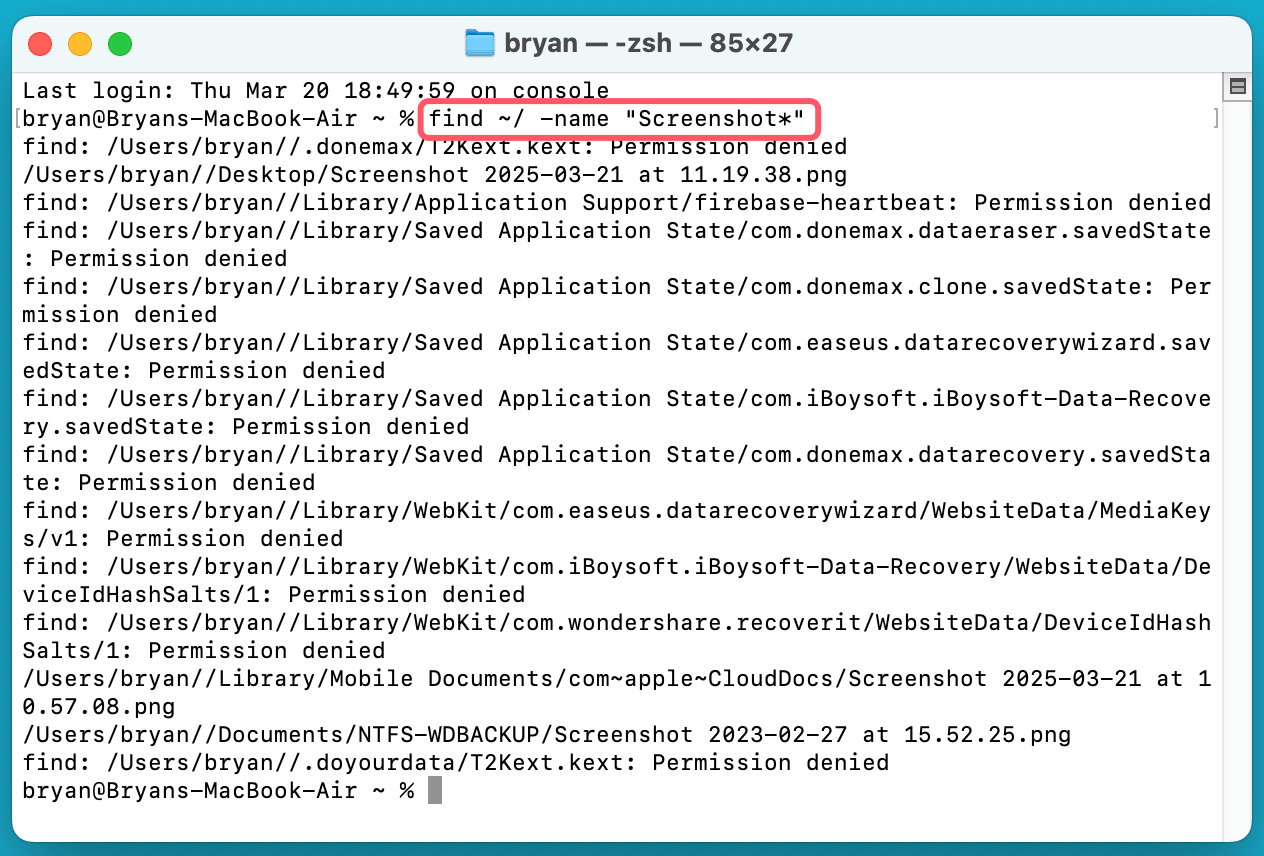
- Type the following command and press Enter:
find ~/ -name "Screenshot*"
![recover deleted screenshots on a Mac]()
- This will search for all files starting with "Screenshot" in your user directory.
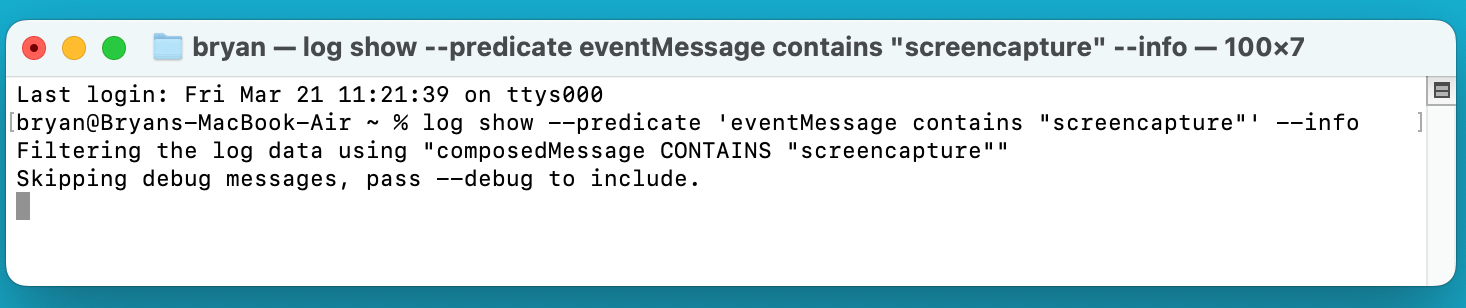
Checking System Logs for Screenshot Activity:
- Open Terminal and enter:
log show --predicate 'eventMessage contains "screencapture"' --info
![recover deleted screenshots on a Mac]()
- This will display recent screenshot activity, including file names and locations.
Limitations:
- If the file was permanently deleted, this method will not recover it.
- Only useful if the screenshot was misplaced rather than deleted.
Method 6: Recover Screenshots Using Third-Party Data Recovery Software
If built-in recovery methods like Time Machine, iCloud, and the Trash folder do not work, using third-party data recovery software is your best alternative. These tools are designed to scan your Mac's storage, locate deleted files, and recover them before they get overwritten by new data.
Data recovery tools use deep scanning algorithms to search for file fragments that still exist on the disk, reconstructing the deleted file whenever possible. However, the success of recovery depends on several factors, including:
- How long ago the screenshot was deleted (older files are more likely to be overwritten).
- Whether new data has been written to the same storage location (downloading files, installing apps, or even using Safari can overwrite lost files).
- The type of storage drive (HDDs have a better chance of recovery than SSDs with TRIM enabled).
Donemax Data Recovery for Mac is one of the most popular data recovery tools for Mac, known for its deep scanning capabilities and ability to recover various file types, including screenshots (.png and .jpg).
Key Features:
- Deep scanning to find lost screenshots.
- Supports all macOS file systems (APFS, HFS+, NTFS, FAT32, NTFS, etc.).
- Allows previewing recoverable files before restoration.
Let's see how to use Donemax Data Recovery for Mac to recover deleted or lost screenshots on Mac:
Step 1. Download and install Donemax Data Recovery for Mac on your Mac.
Step 2. Open Donemax Data Recovery for Mac, choose the drive - such as Macintosh HD to start scanning.

Step 3. Click on Scan button to deeply scan the Mac's internal disk and find all recoverable files including lost screenshots and images.

Step 4. Once the scan is completed, you can preview the screenshots. Then select the wanted ones, click on Recover button to save them.

Factors That Affect Screenshot Recovery Success
While data recovery software can be very effective, several factors determine whether your deleted screenshots can be restored:
Higher Recovery Chances If:
- You act quickly before the deleted file gets overwritten.
- You use an HDD instead of an SSD (SSDs with TRIM enabled permanently erase deleted files).
- You have not downloaded large files or installed new applications since deletion.
- You used deep scanning mode, which takes longer but is more thorough.
Lower Recovery Chances If:
- The screenshot was deleted a long time ago.
- You emptied the Trash and continued using your Mac extensively.
- You are using an SSD with TRIM enabled, which instantly erases deleted files.
When Should You Use Third-Party Recovery Software?
Using recovery software is recommended if:
- The Trash has been emptied and screenshots are no longer accessible.
- No Time Machine or iCloud backup is available.
- The file was deleted recently and has not been overwritten.
However, if your Mac is equipped with an SSD that has TRIM enabled, the chances of recovering deleted files are very low because macOS permanently erases them to optimize storage.
Precautions When Using Recovery Software
To maximize your chances of recovering lost screenshots, follow these best practices:
- Do not save new files after deletion to avoid overwriting lost screenshots.
- Install recovery software on an external drive instead of your Mac’s internal storage.
- Use "Preview" mode before recovering files to ensure they are not corrupted.
- Avoid recovering files to the same location where they were deleted from.
Alternative to Recovery Software: Professional Data Recovery Services
If recovery software does not work, you can seek help from professional data recovery services. Companies like DriveSavers and Ontrack specialize in advanced data retrieval. However, this service can be expensive (starting at $300+), so it is usually recommended for critical data loss situations.
Method 7: Check Temporary and Cache Files
Sometimes, macOS stores temporary copies of screenshots before they are saved permanently. Checking these locations may help recover lost files.
Steps to Check Temporary Files:
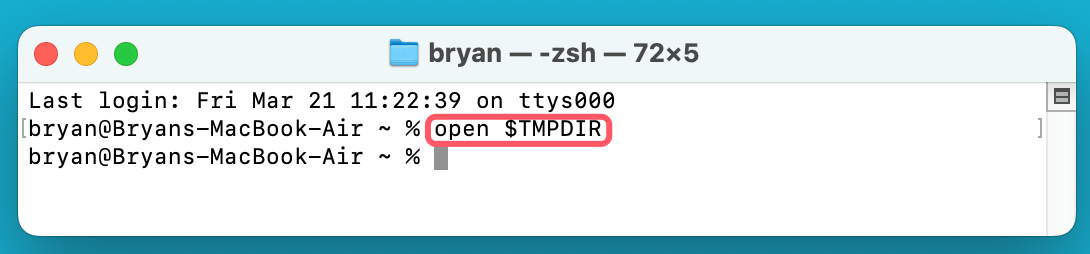
- Open Terminal and enter:
open $TMPDIR
![recover deleted screenshots on a Mac]()
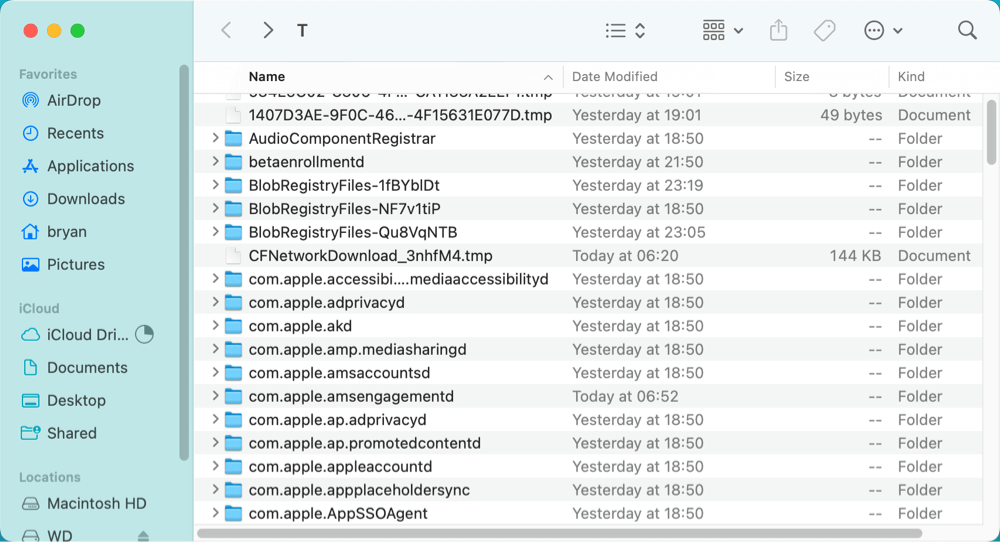
- This will open the temporary files directory in Finder.
![recover deleted screenshots on a Mac]()
- Search for screenshots by typing "Screenshot" in the search bar.
- If found, move them to a permanent folder.
Limitations:
- Temporary files may be deleted automatically by macOS.
- If the system has been restarted, temporary files may no longer exist.
Preventative Measures to Avoid Future Data Loss
To prevent losing important screenshots in the future, consider these best practices:
- Enable Time Machine Backups – Regular backups ensure easy recovery.
- Use iCloud Drive Sync – Store important screenshots in iCloud for safekeeping.
- Organize Screenshots – Save them in dedicated folders instead of the Desktop.
- Avoid Emptying Trash Immediately – Always check before permanently deleting files.
- Use File Recovery Software Proactively – Install and set up recovery tools before data loss occurs.
Conclusion
Losing important screenshots on a Mac can be frustrating, but with the right methods, recovery is possible. If the screenshot was recently deleted, checking Trash, iCloud, or Time Machine can be the fastest solution. For permanent deletions, using Terminal commands or third-party recovery software may help.
To avoid future data loss, setting up automatic backups with Time Machine or iCloud is highly recommended. By following these steps, you can significantly improve your chances of recovering deleted screenshots on your Mac.
Donemax Data Recovery for Mac
Donemax Data Recovery for Mac is one of the best Mac data recovery software. It is easy-to-use and can help in recovering deleted, formatted, inaccessible or lost data from Mac HDD/SSD, external disk, USB drive, SD card, camera or other storage devices.
Related Articles
- Nov 29, 2024Mac Trash Recovery: A Comprehensive Guide to Recovering Deleted Files on Mac
- Feb 12, 2025[2025 Updated] Top 4 Seagate File Recovery Solutions for Mac
- Jun 16, 2023How to Recover Lost Data from SSD on Mac? 2 Solutions to Try
- Mar 06, 2025[5 Methods] Recover Lost Data from WD External Hard Drive on Mac
- May 17, 2024Best 8 SD Card Recovery Software for Mac
- Dec 31, 2024No Files on USB Drive on Mac, How to Get the Lost Files Back?

Contributing Writer
Maria
Maria is one of the senior writers & editors of Donemax who lives and works in Sydney, Australia. She loves PC, Mac and Internet Technology. She has 6 years of writing articles about data recovery on PC/Mac, disk cloning solution, data eraser and computer OS optimization, etc. She is also interested in testing various software and digital products.

Editor in chief
Gerhard Chou
In order to effectively solve the problems for our customers, every article and troubleshooting solution published on our website has been strictly tested and practiced. Our editors love researching and using computers and testing software, and are willing to help computer users with their problems