Before we start: When the USB drive shows no files on your Mac, you can use Mac data recovery software - such as Donemax Data Recovery for Mac to scan the drive and find all recoverable files including deleted/lost files and hidden files, etc. Then select the wanted files, click on Recover button to save them to your Mac.
PAGE CONTENT:
If you've ever plugged a USB drive into your Mac and found that it shows up but doesn't display any files, you're not alone. This frustrating issue can be caused by a number of factors, from simple glitches to more serious problems with the USB drive's format, the Mac's system, or hidden files. While it might seem daunting at first, there are several troubleshooting steps you can take to resolve the issue and regain access to your files. In this article, we'll explore the possible causes and solutions in detail, guiding you through the steps to fix the problem.
Introduction: Understanding the Issue
It's not uncommon for a USB drive to show up on a Mac but appear empty, even though you know it contains important files. The drive might be visible in Finder or Disk Utility, but when you try to open it, it shows as empty or the files are not visible. There are several reasons why this could happen, and the good news is that many of them can be resolved relatively easily with a bit of troubleshooting.
Whether the issue stems from hidden files, USB drive formatting problems, a temporary system glitch, or something else, we'll walk you through the possible causes and how to fix them.
Methods to Solve "USB Drive Not Showing Files on Mac" Problem
1. Check Basic Connections and Settings
The first step in troubleshooting any issue with a USB drive is to check the basic physical connection. While it might seem simple, ensuring the USB drive is properly inserted into your Mac can save you a lot of time. If the connection is loose or not fully plugged in, the Mac might fail to recognize the device, or the drive could appear empty.
● Try a Different USB Port
Sometimes, USB ports can malfunction. If you're using a single USB port on your Mac, try plugging the USB drive into a different port. MacBooks and other Macs often have more than one USB port, so switching ports can quickly resolve the issue. Also, check to see if your Mac has both USB-C and USB-A ports; using the wrong cable or adapter may cause the drive not to be detected.
● Test on Another Mac or Device
If changing ports doesn't work, try plugging the USB drive into another Mac or even a Windows PC. This will help you rule out the possibility that the USB drive itself is damaged. If the drive works on another device, the issue likely lies with your Mac rather than the USB drive.
● Restart Your Mac
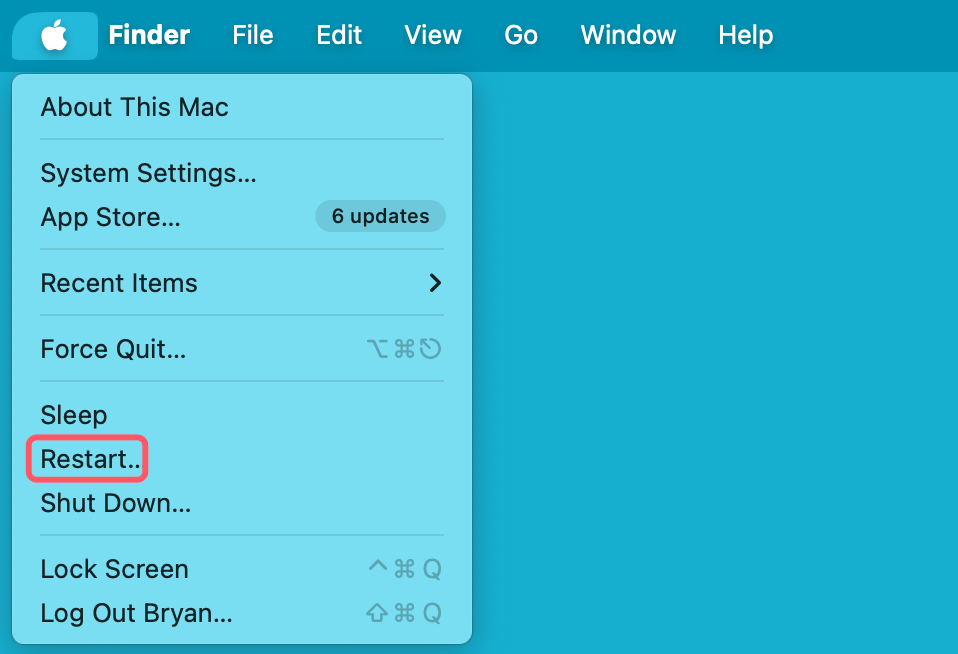
A simple restart can sometimes resolve issues with USB drives not showing files. Rebooting your Mac can clear out temporary system glitches that might prevent the USB drive from displaying its contents. After restarting, try reconnecting the USB drive to see if the files appear.
2. Examine Finder Settings
If the USB drive is properly connected but still not displaying its files, there could be an issue with how Finder is displaying content. By default, macOS Finder hides certain system files and folders, and it's possible the files on your USB drive are hidden in this way.
Show Hidden Files in Finder
On macOS, hidden files and folders are typically not visible in Finder. However, there's an easy way to reveal them. To toggle the visibility of hidden files, press Command + Shift + Period while in Finder. This keyboard shortcut will show or hide files that begin with a period (e.g., .hiddenfile) - including hidden system files that might be present on your USB drive.
If the files reappear after using this shortcut, then the issue was likely due to the fact that the files were hidden. To keep these files visible, you can leave the hidden files setting on.
Check for Hidden Files and Folders
Even if you've toggled the visibility of hidden files in Finder, there could still be files or folders that remain hidden for various reasons. For example, some files may be marked as hidden because they are system files or because of their naming conventions.
3. Use Terminal to Reveal Files
If you suspect that there are hidden files on your USB drive, you can use the Terminal application on your Mac to explore further. Open Terminal (located in Applications > Utilities) and type the following command to view hidden files on your USB drive:
ls -a /Volumes/YourUSBDrive
Replace "YourUSBDrive" with the actual name of your USB drive. This command lists all files, including hidden ones. If you see your files listed here but still can't access them through Finder, the issue is likely with Finder's settings.

4. Check for Formatting and Partition Issues
One of the most common reasons why files might not appear on a USB drive is that the drive is formatted in a way that's incompatible with macOS. If the drive is using a file system that macOS doesn't support (such as NTFS), your Mac might not be able to read or display the files correctly.
Check the USB Drive Format
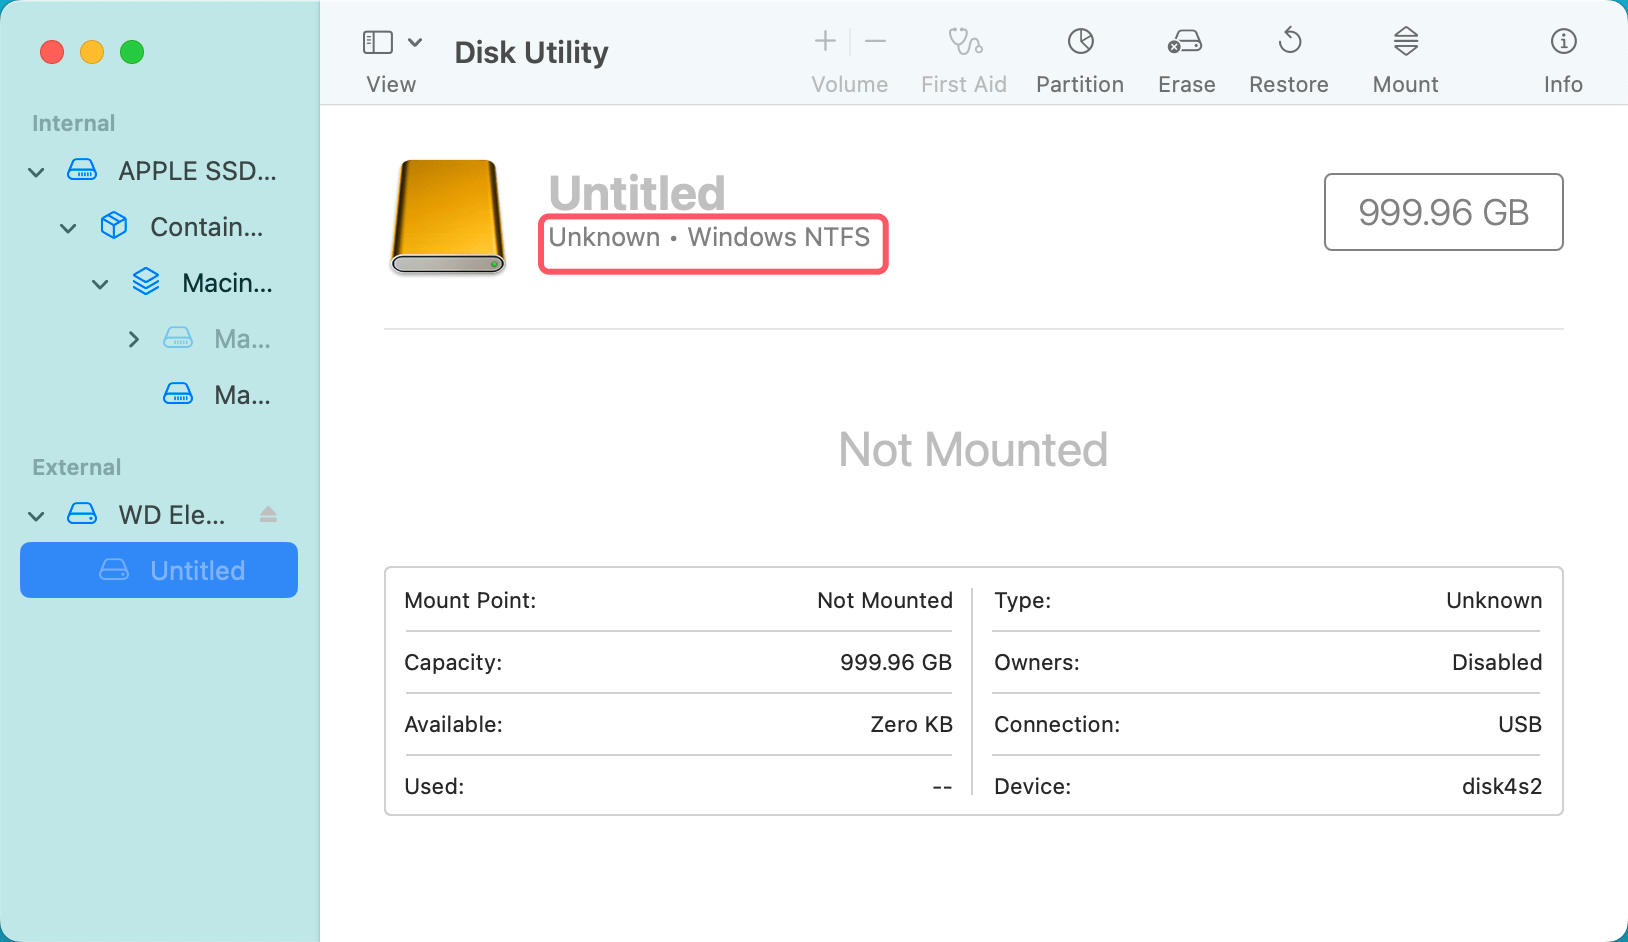
To determine the file system format of your USB drive, you can use Disk Utility, a built-in tool on macOS that provides detailed information about storage devices connected to your computer.
- Open Disk Utility (Applications > Utilities).
- In the left-hand sidebar, find your USB drive and click on it.
- Look for the Format field in the information panel. If the format says something like NTFS, FAT32, or ExFAT, the drive might be compatible with macOS, but it could cause issues with certain file types or behaviors.
![USB Drive Shows No Files When Being Opened on Mac]()
Reformat the USB Drive
If the format is not compatible, you might need to reformat the USB drive to a Mac-friendly format. The most commonly used file systems for Mac are HFS+ (Mac OS Extended) and APFS, although ExFAT is also a good choice for cross-platform compatibility between macOS and Windows.
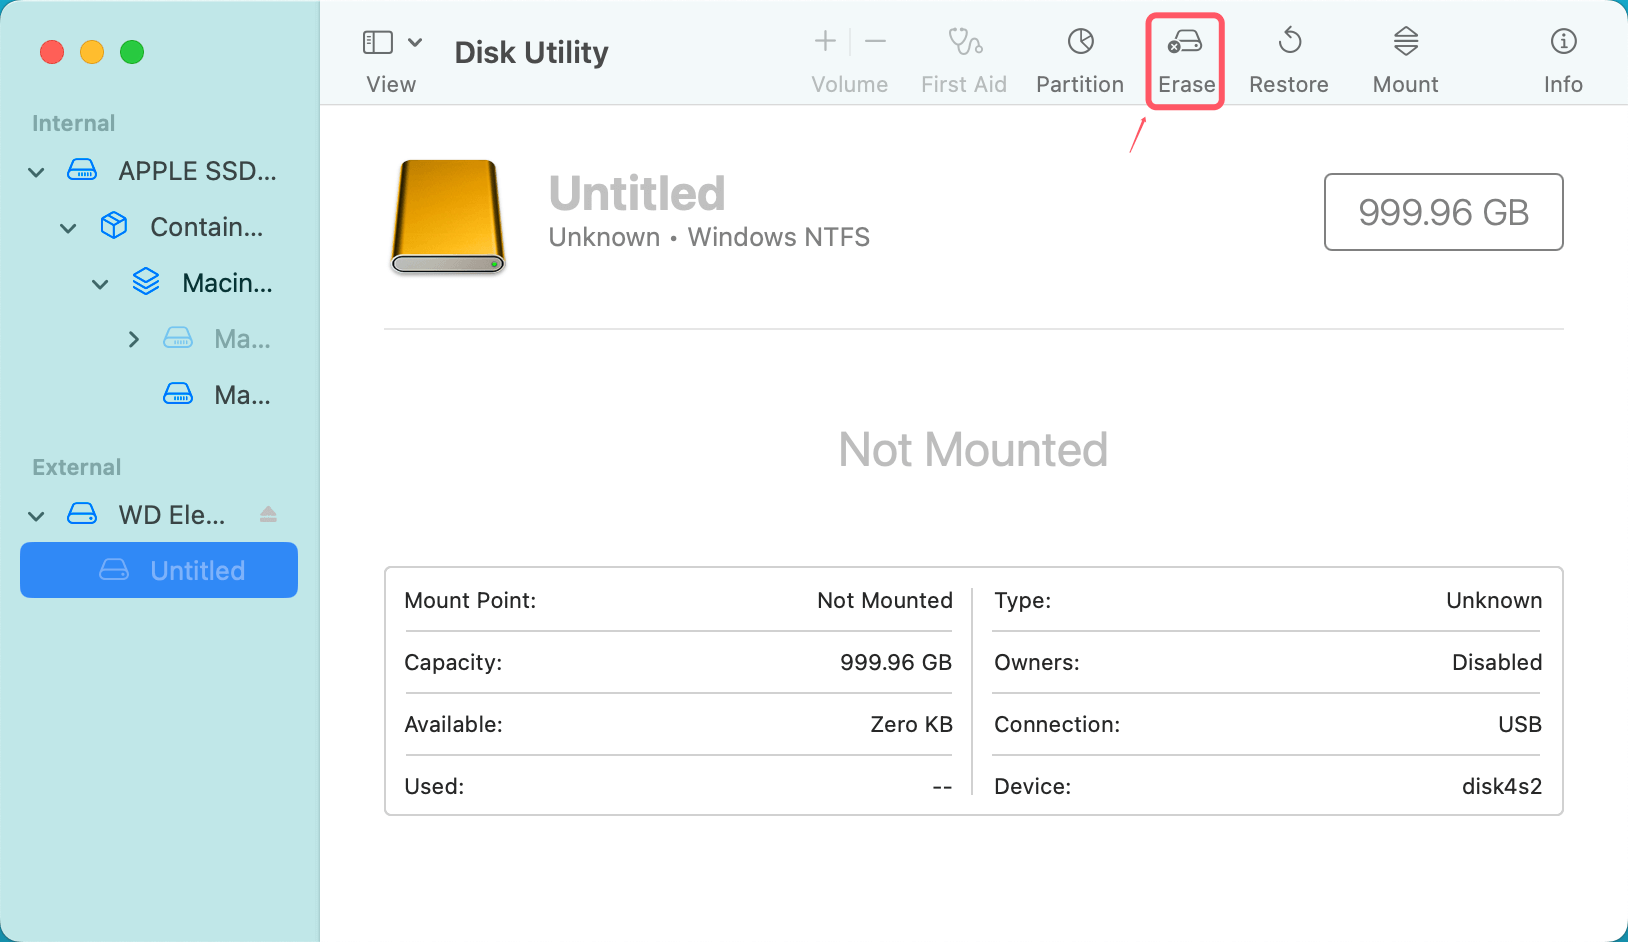
- Open Disk Utility and select your USB drive.
- Click on Erase at the top.
![USB Drive Shows No Files When Being Opened on Mac]()
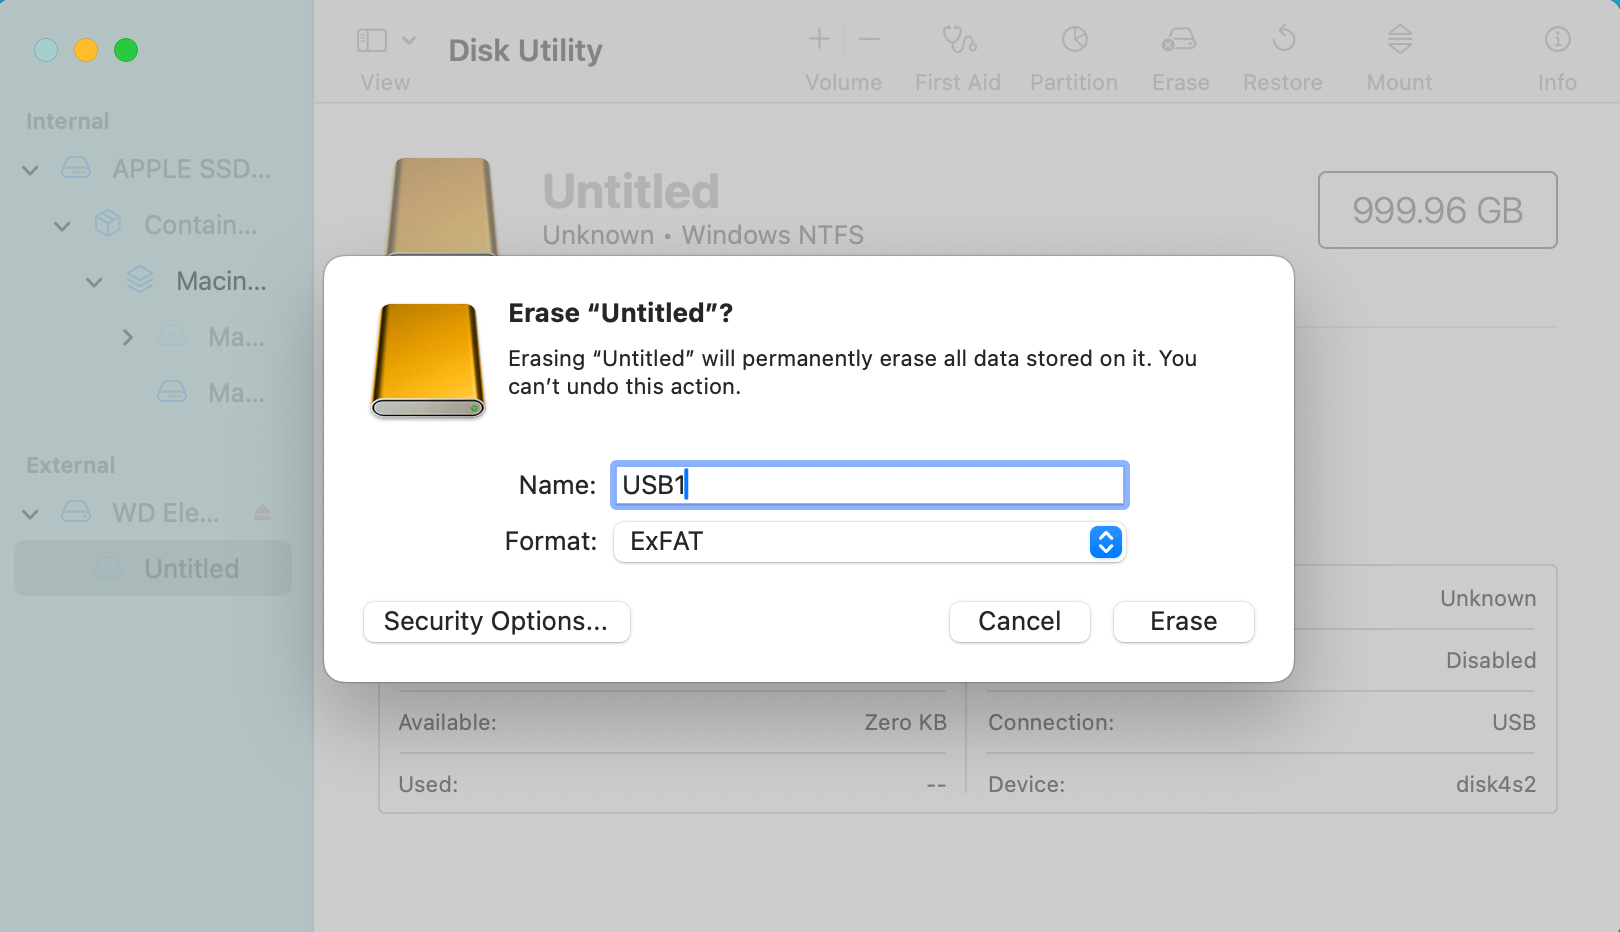
- Choose the appropriate format (APFS or ExFAT, depending on your needs).
![USB Drive Shows No Files When Being Opened on Mac]()
- Click Erase to reformat the drive.
Remember, reformatting will erase all the data on the USB drive, so make sure to back up any important files beforehand.
Use Disk Utility's First Aid Tool
If the USB drive is formatted correctly and the files are still not showing, it’s possible that the drive has errors that are preventing the files from being displayed. macOS includes a tool called First Aid, available in Disk Utility, that can help identify and fix disk errors.
- Open Disk Utility (Applications > Utilities).
- Select your USB drive from the list of drives on the left.
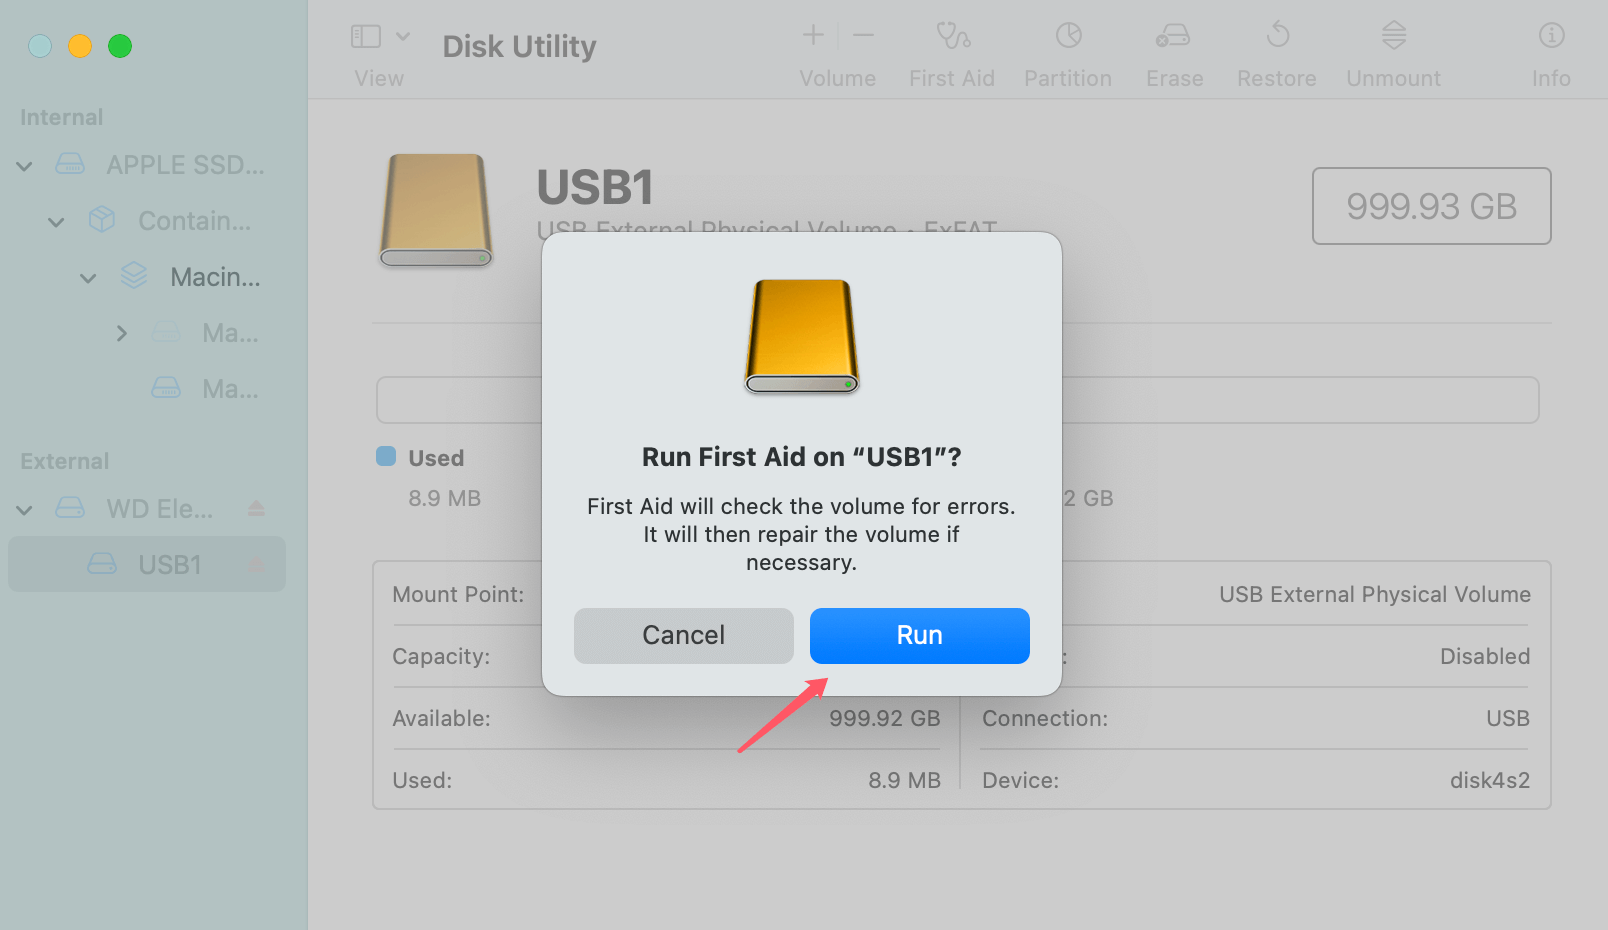
- Click First Aid in the toolbar.
- Click Run to start the repair process.
![USB Drive Shows No Files When Being Opened on Mac]()
Disk Utility will check the drive for errors, attempt to repair any issues, and then prompt you with a summary of the results. If errors were found and fixed, check your USB drive again to see if the files have appeared.
5. Use Terminal for File System Errors
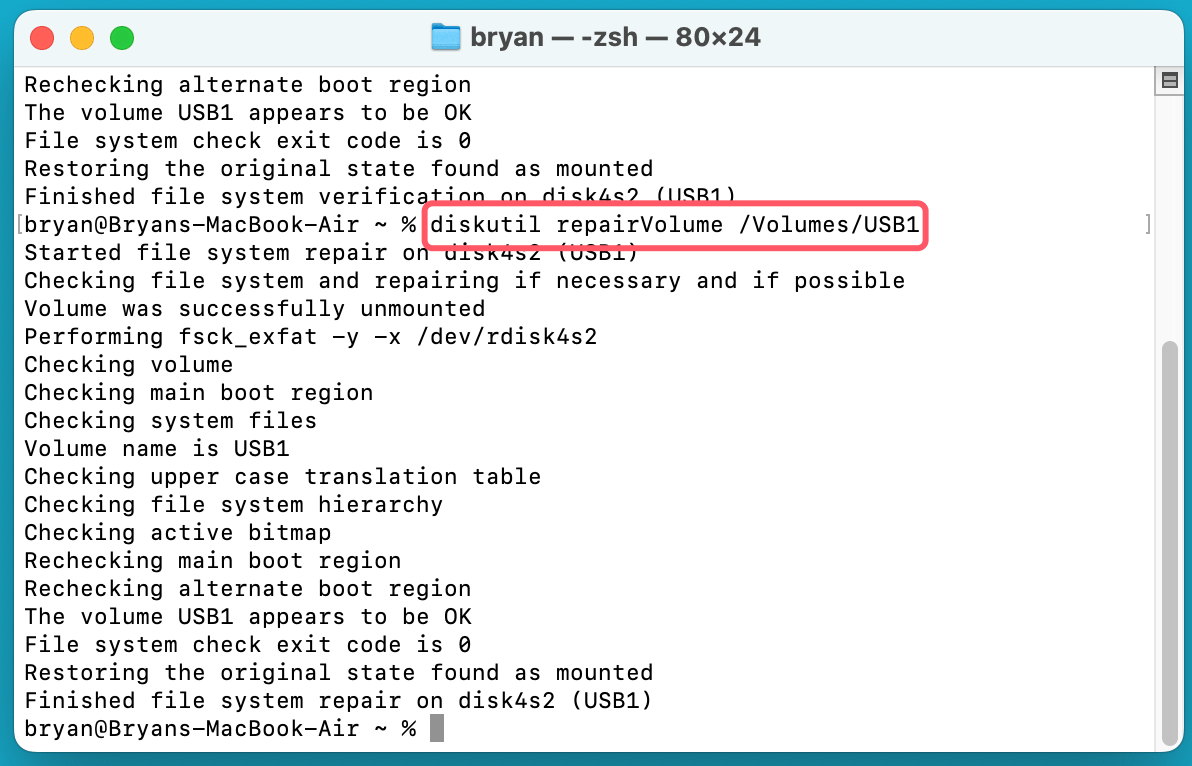
For users comfortable with Terminal, you can also check and repair file system errors directly using the diskutil command. Open Terminal and enter the following command:
diskutil verifyVolume /Volumes/YourUSBDrive

This command will check the file system on your USB drive for errors. If it finds any issues, you can use the following command to repair the disk:
diskutil repairVolume /Volumes/YourUSBDrive
6. Update macOS and USB Drivers
If none of the above steps resolve the issue, it's a good idea to ensure that both your macOS operating system and any USB drivers are up to date. Software updates often include important bug fixes that could solve issues related to external drives.
To check for macOS updates:
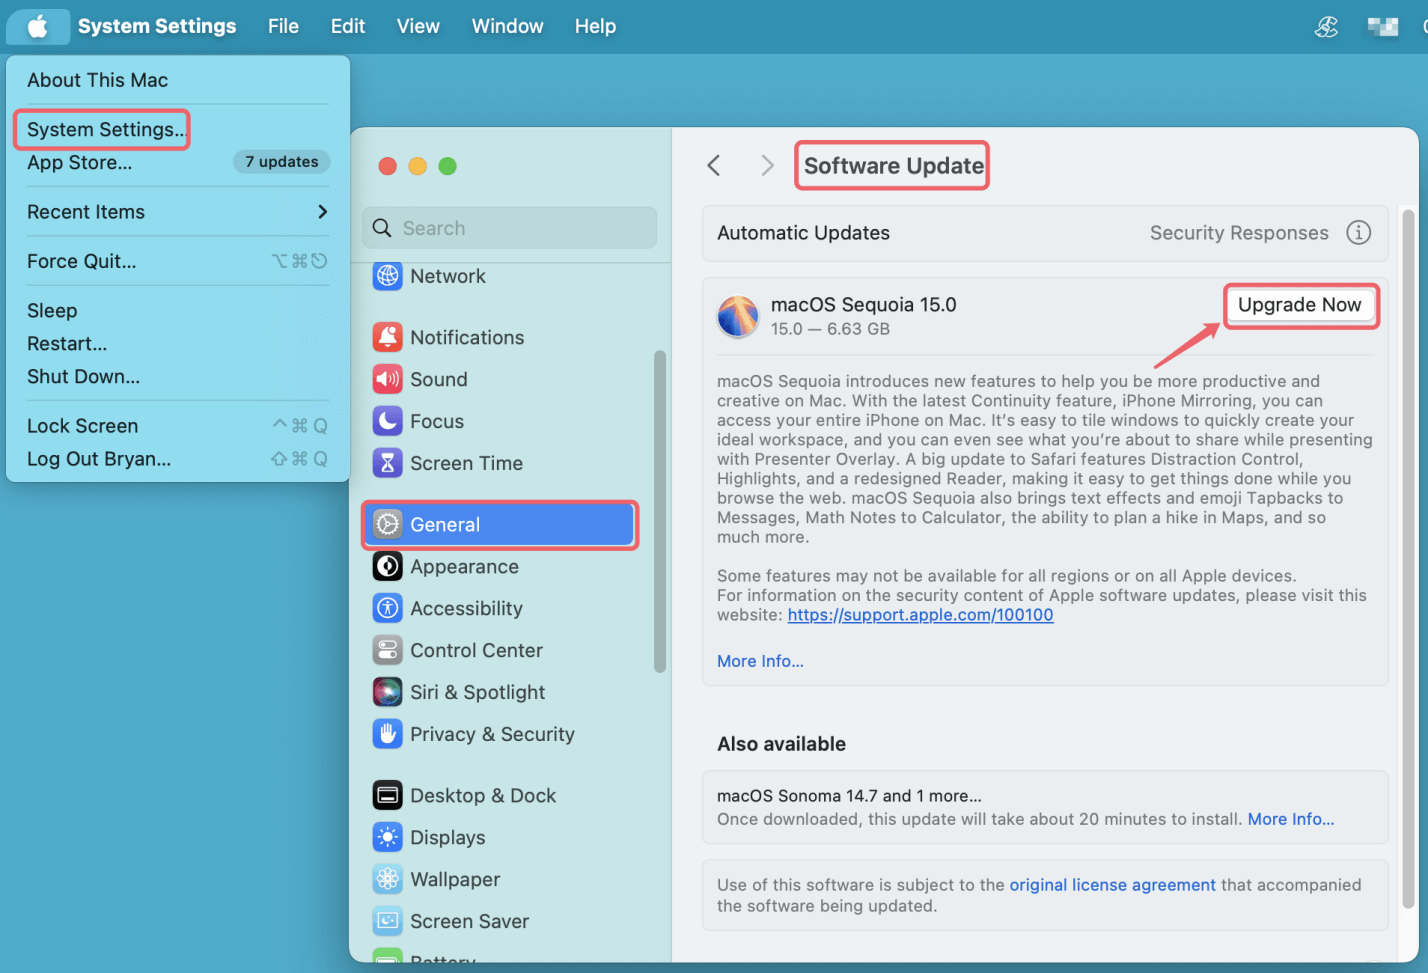
- Go to the Apple menu in the top-left corner of your screen.
- Click System Settings > General and then Software Update.
- If an update is available, click Update Now to install it.
![USB Drive Shows No Files When Being Opened on Mac]()
Additionally, if you're using third-party USB hubs or devices, ensure that their drivers are also up to date.
7. Data Recovery Options
If your USB drive still appears empty or inaccessible after trying all these steps, it's possible that the files are lost or corrupted. Before panicking, consider using a data recovery tool.
Donemax Data Recovery for Mac is a powerful Mac data recovery program. It can help you deeply scan the USB drive and find all recoverable files.
Step 1. Click on Download button below to download Donemax Data Recovery for Mac, then install it on your Mac.
Step 2. Open Donemax Data Recovery for Mac, then select the USB drive to start data recovery.

Step 3. Click on Scan button to deeply scan the USB drive and find all recoverable files including deleted/erased files and hidden files, etc.

Step 4. Once the scan is completed, you can preview all recoverable files. Then select the wanted files, click on Recover button to save them.

Conclusion
A USB drive that shows up on your Mac but appears empty can be frustrating, but it's a problem that can usually be fixed with some simple troubleshooting. From checking connections and settings to using built-in tools like Disk Utility and Terminal, there are several steps you can take to restore access to your files. If the problem is related to the drive's format, reformatting the drive or using third-party recovery software can often help recover lost data.
Remember to always back up important files to avoid data loss, and keep your system and drivers updated to prevent future issues. If the problem persists after all troubleshooting efforts, it may be time to seek professional help.


Donemax Data Recovery for Mac
Donemax Data Recovery for Mac is one of the best Mac data recovery software. It is easy-to-use and can help in recovering deleted, formatted, inaccessible or lost data from Mac HDD/SSD, external disk, USB drive, SD card, camera or other storage devices.
Related Articles
- Jun 16, 2023How to Recover Lost Data from An Formatted APFS Hard Drive?
- Nov 04, 2024How to Recover Lost Data After Factory Reset a Mac?
- Sep 23, 2025How to Recover Lost Files After macOS Update? [macOS Tahoe Supported]
- Feb 22, 2024How to Recover Lost Data from External Hard Drive, USB Drive, SD Card on macOS Sonoma?
- Sep 04, 2025Recover Deleted or Unsaved PowerPoint Files on Mac
- Feb 21, 2025Where Deleted Photos Go on Mac?

Charles
Charles, who lives in Sydney, Australia, is an editor & writer of Donemax Team. He is good at writing articles related with Apple Mac computers, Windows operating systems, data recovery, data erasure, disk clone and data backup, etc. He loves reading and playing tennis in his spare time and is interested in testing new digital devices such as mobile phones, Macs, HDDs, SSDs, digital cameras, etc.

Gerhard Chou
In order to effectively solve the problems for our customers, every article and troubleshooting solution published on our website has been strictly tested and practiced. Our editors love researching and using computers and testing software, and are willing to help computer users with their problems

