Before we start: Donemax Data Recovery for Mac is a powerful Mac data recovery program. It can deeply scan the hard drive and find all recoverable files. So, it can help you completely recover all lost files after macOS update.
PAGE CONTENT:
It's not uncommon for Mac users to face the dilemma of missing files after a macOS update. While macOS updates generally improve system stability and introduce new features, sometimes, files seem to vanish or become inaccessible. Fortunately, in most cases, lost files can be recovered with a little effort. In this article, we'll explore why files might go missing after an update and provide detailed steps to recover them, ensuring you don't panic if this happens to you.
Why Do Files Disappear After a macOS Update?
There are several reasons why files may disappear after updating macOS. Let's take a closer look at some of the most common causes:
1. System Glitches During the Update
Occasionally, updates can introduce software bugs or glitches, especially when the update modifies core components like the file system or settings. Sometimes, these bugs can cause files to become inaccessible or appear missing temporarily.
2. iCloud Sync Issues
If your files are stored in iCloud, there may be synchronization issues that occur during the update process. Files may be temporarily stored in the cloud or may fail to sync properly, causing them to appear lost even though they still exist in iCloud.
3. File System Changes
macOS updates can sometimes alter the file system or reorganize files. If the update includes changes to how macOS handles file storage or permissions, files could be moved or hidden in different locations, making them hard to find.
4. Permissions and Ownership Issues
Updates may modify file permissions or ownership, especially if they involve changes to system preferences or user accounts. Files may no longer be accessible if the system doesn't recognize the correct permissions or user access.
5. External Drive or Cloud Service Disconnections
If you use external hard drives or cloud-based services like Dropbox, Google Drive, or OneDrive, there’s a chance that these services didn't sync correctly during the update. Files stored on these services might not be visible until you reconnect or sync your account.
Basic Troubleshooting Steps:
If you find that your files have disappeared after updating macOS, don't panic just yet. You can try a few basic troubleshooting steps to locate your missing files.
1. Check for System and App Updates
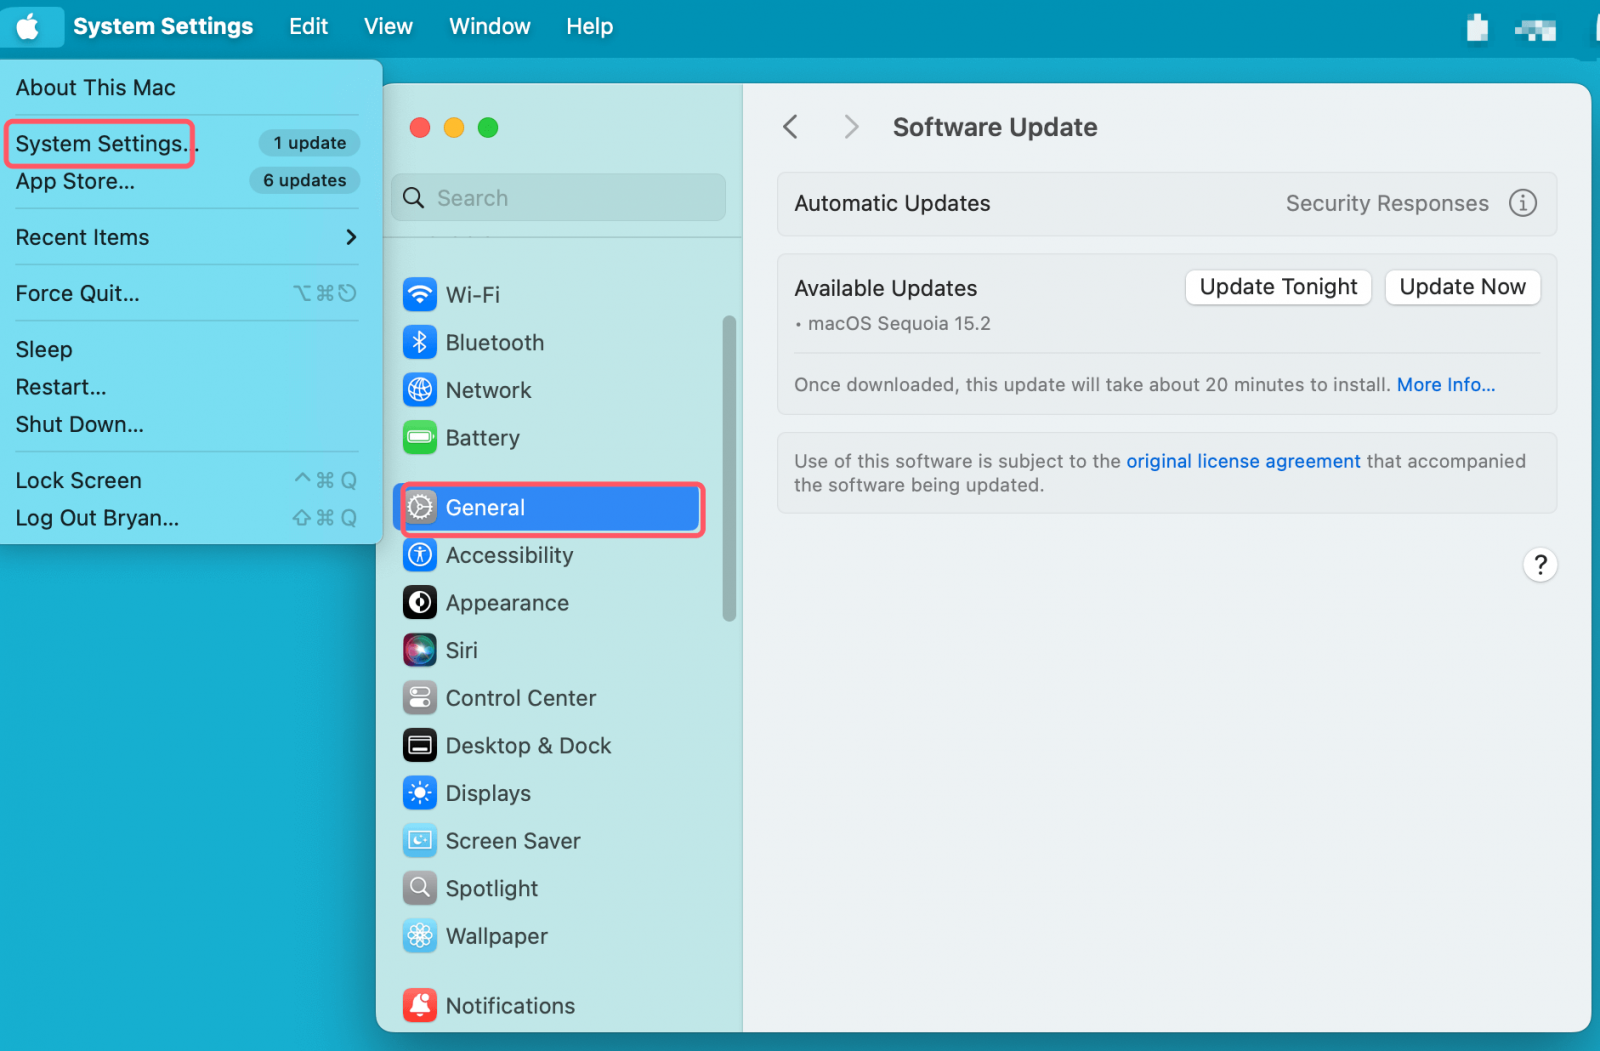
Before doing anything drastic, ensure that the macOS update has fully completed. Sometimes, a system update can be partial or require additional patches. Go to System Settings > General > Software Update to check if any new updates or patches are available. Installing them may resolve the issue.
2. Search for Missing Files
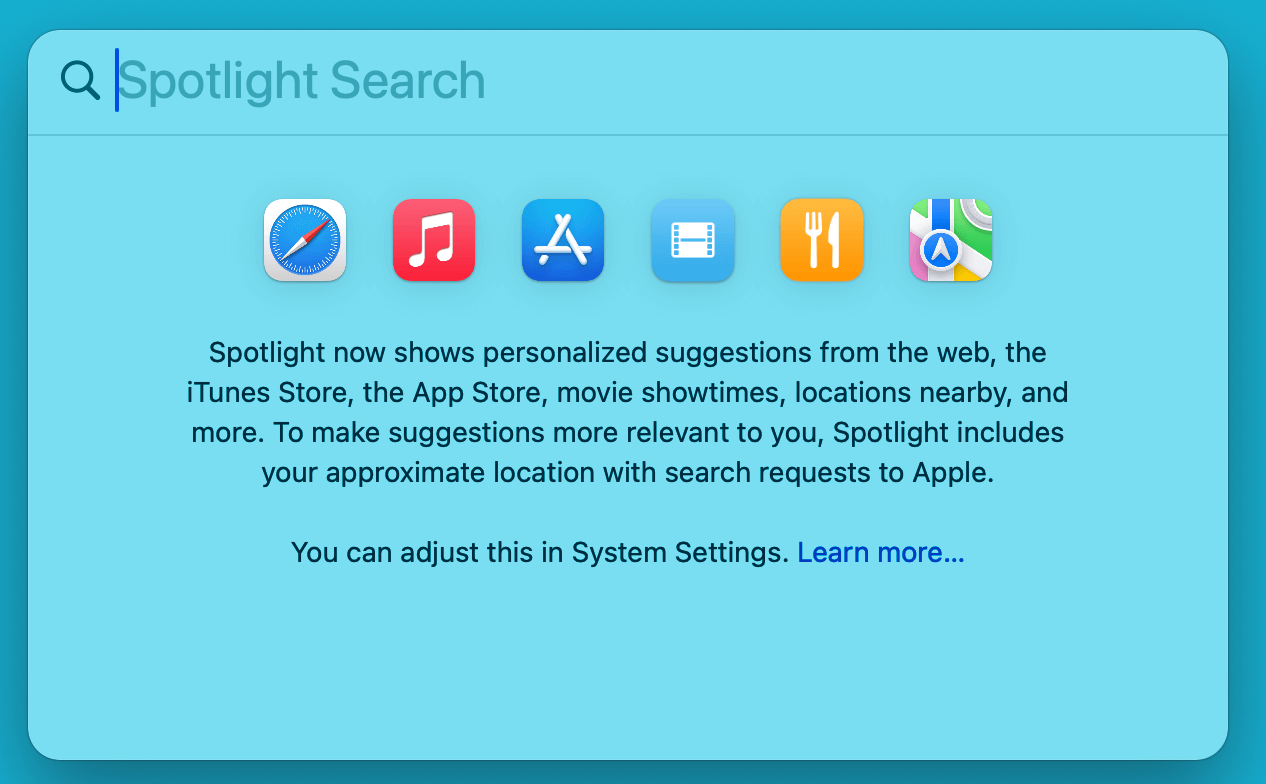
A missing file could simply be misplaced or stored in a different location due to changes during the update. Use Finder to search for your lost files:
- Open Finder and type the file name or a part of the name into the search bar.
- If the file is stored in iCloud or an external drive, ensure that these locations are included in the search results.
Additionally, check the Downloads, Documents, and Desktop folders, as they are common places where files might be moved during updates.
How to Search a File on Mac
Check how to search a file on Mac by using Finder and Spotlight or recover missing files with data recovery tools.
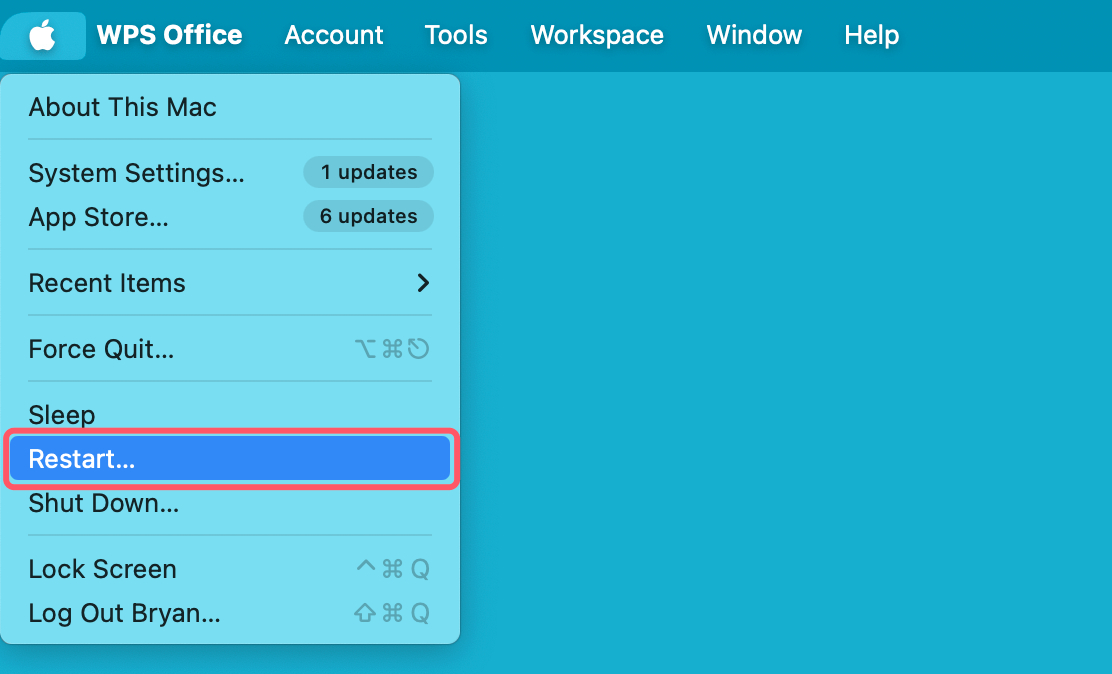
3. Restart Your Mac
Sometimes, files can seem to disappear because of a temporary glitch or the update process not finishing correctly. Restarting your Mac may clear out any temporary errors, allowing your files to reappear or become accessible again.
Top 3 Solutions for Recovering Lost Files After macOS Update
If you still cannot find your files after quick checks, you can use these methods to get the lost files back.
Solution 1. Use Time Machine to Recover Lost Files
One of the best ways to recover lost files on your Mac is by using Time Machine, Apple's built-in backup solution. If you've set up Time Machine before the update, you can easily restore files that were lost.
Step-by-Step Guide to Restore Files Using Time Machine:
Step 1. Connect Your Backup Drive: Make sure your Mac is linked to your external backup disk, sometimes known as a Time Capsule.
Step 2. Open Time Machine
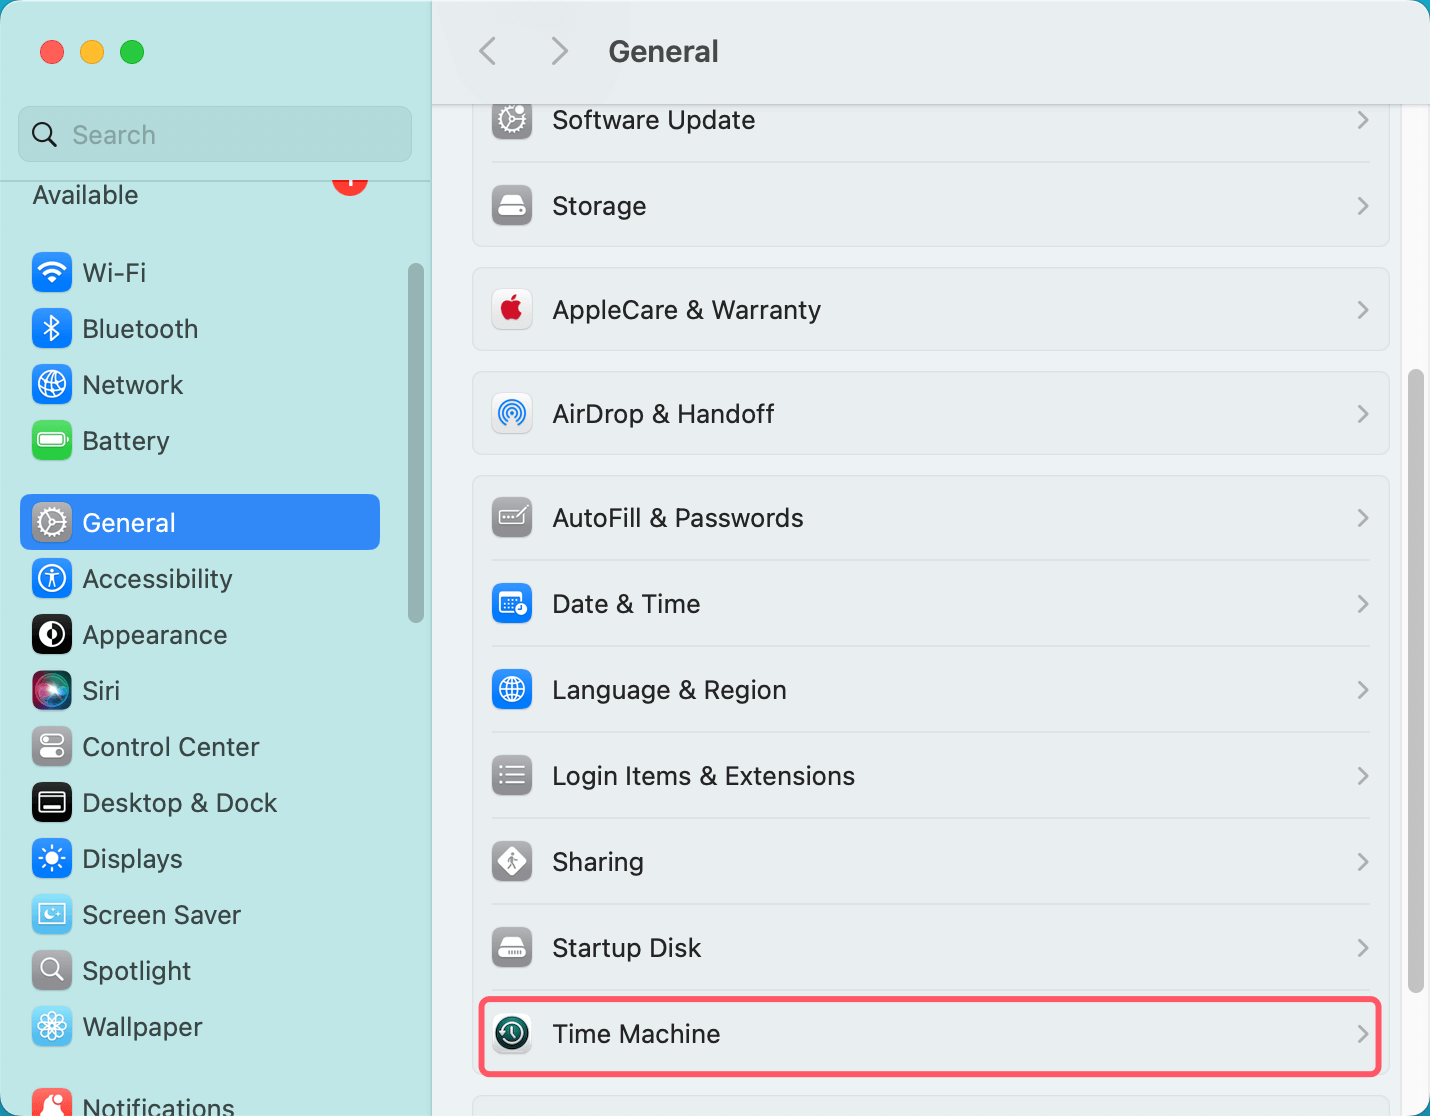
- If Time Machine isn't already active, enable it by going to System Settings > General > Time Machine.
![Recover Lost Files After macOS Update]()
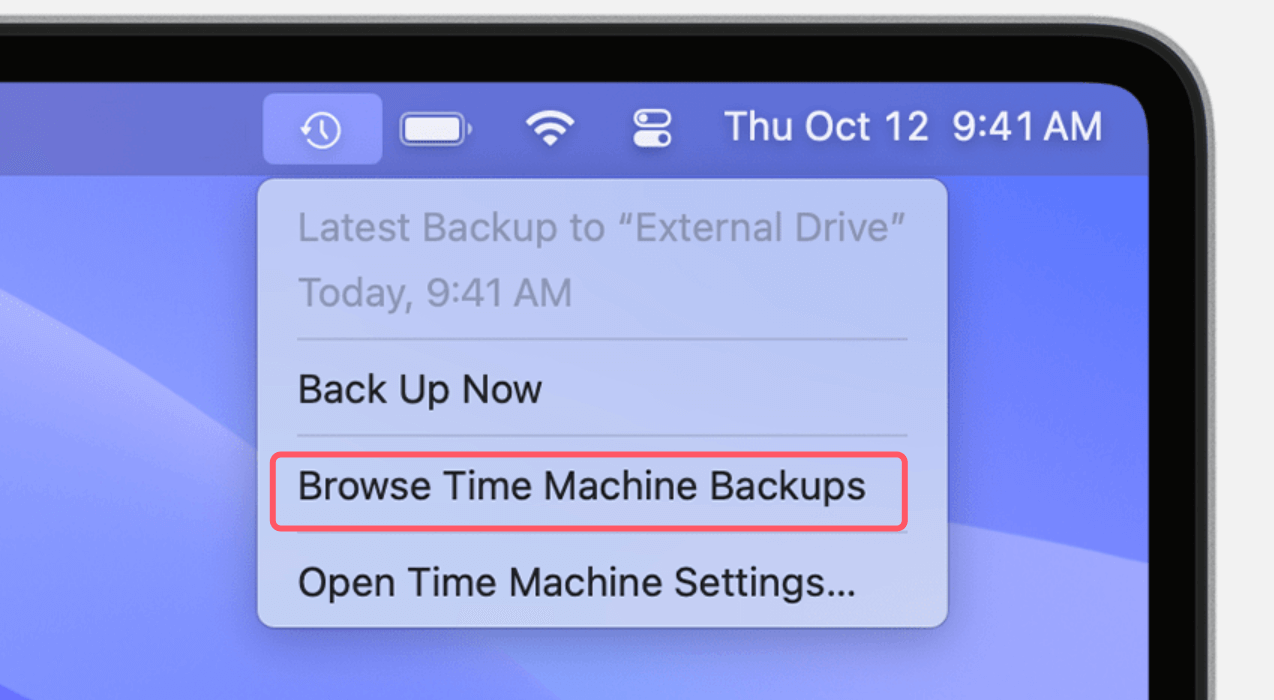
- Choose Enter Time Machine or Browser Time Machine Backups after clicking the Time Machine icon in the menu bar.
![Recover Lost Files After macOS Update]()
Step 3. Navigate to the Date Before the Update
- To return to a time before the update happened, use the timeline on the right side of the screen.
- You'll be able to see a list of files as they appeared at that time.
Step 4. Find and Restore Your Files: Once you've located the lost files, click on them and then select Restore to return them to their original location.
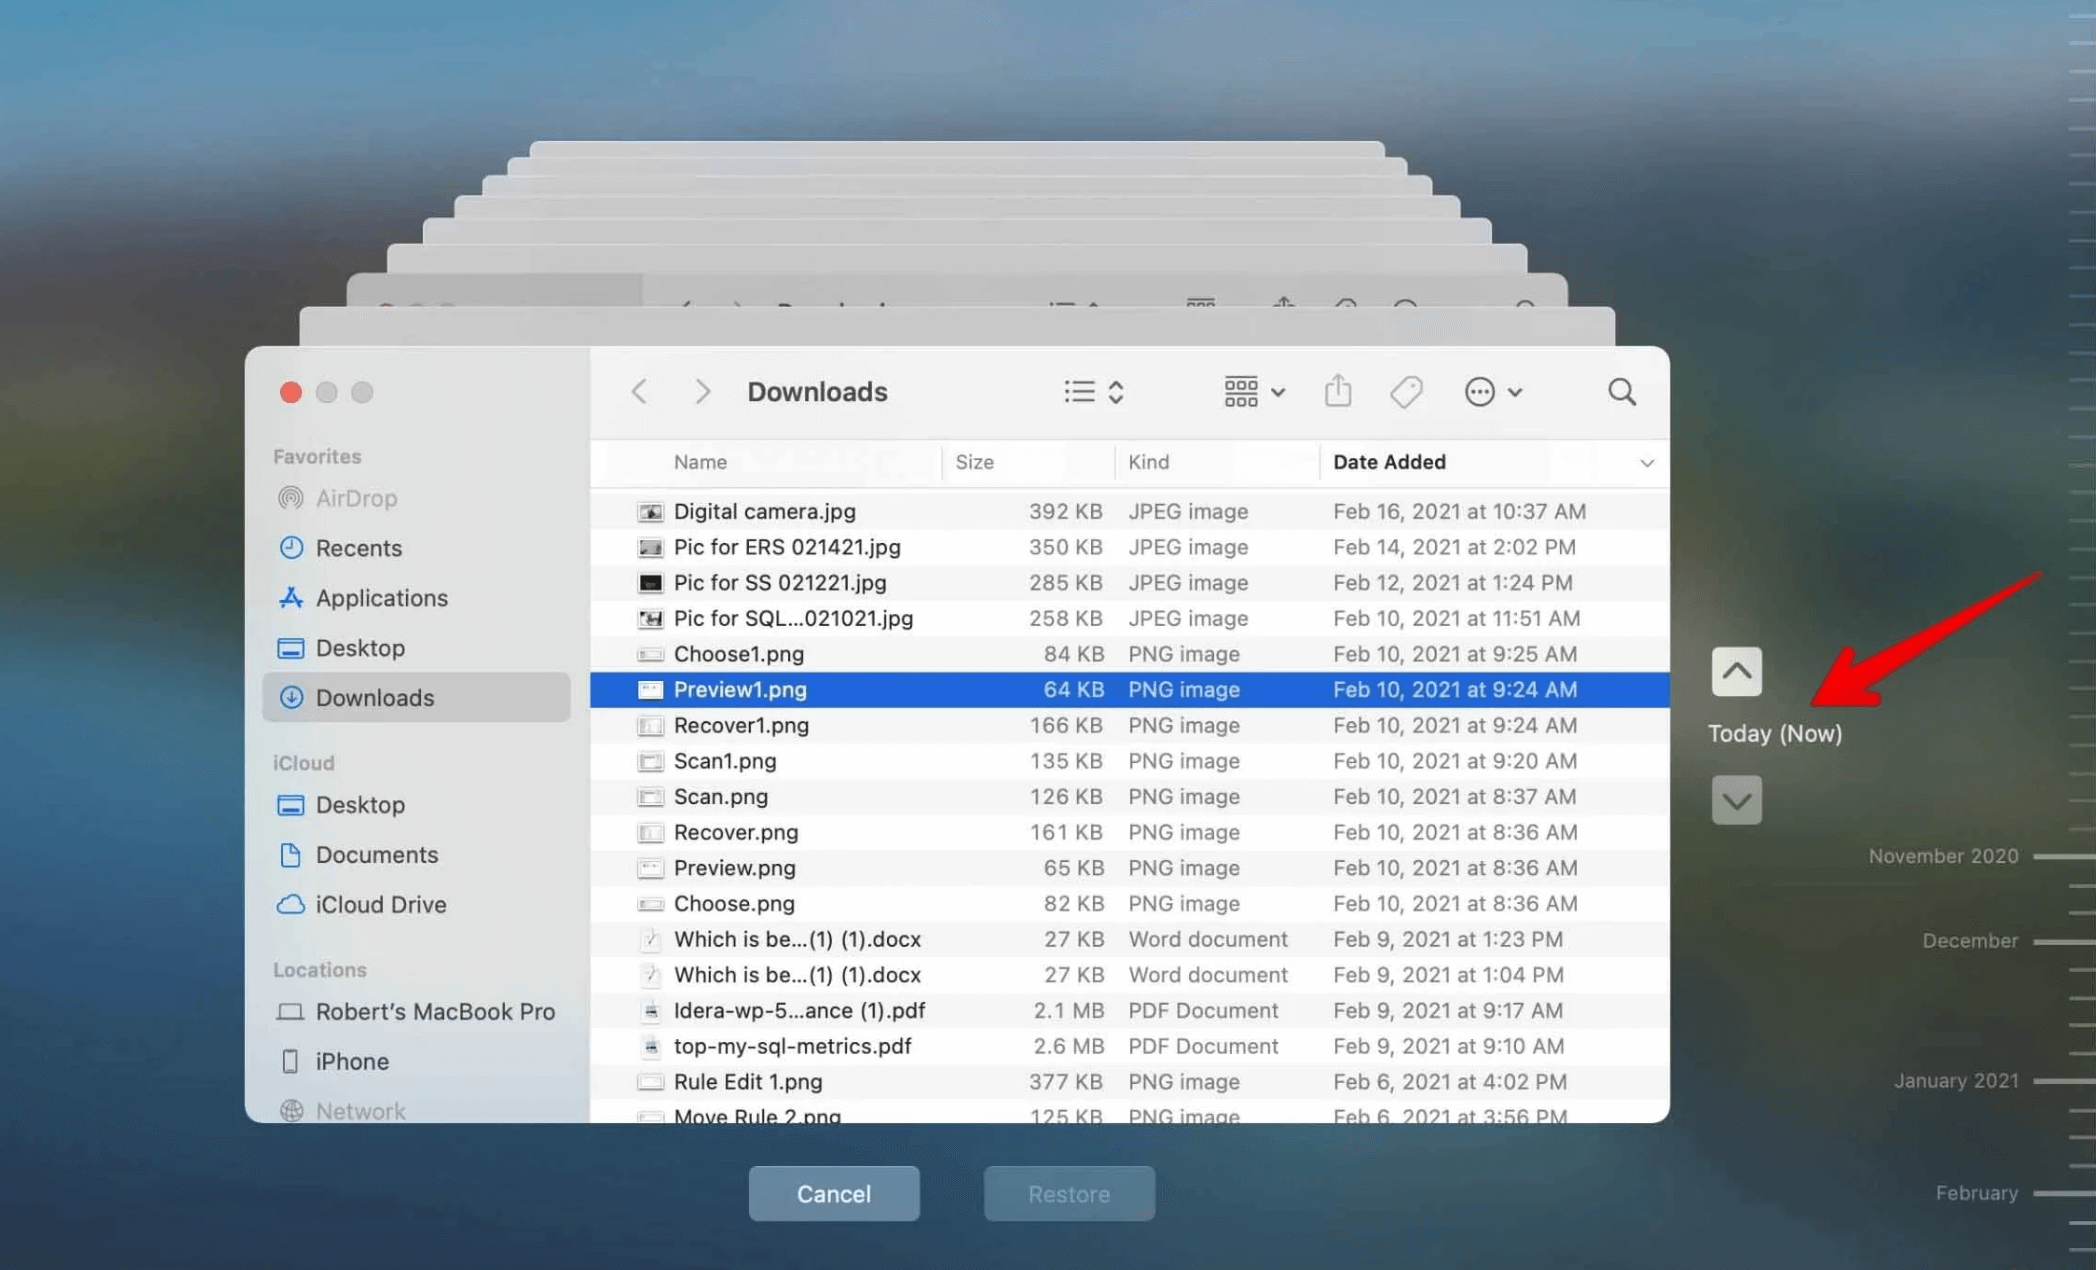
Using Time Machine is the most effective and reliable way to recover files if you have set up regular backups. Remember, Time Machine must be configured before the update for this method to work.
Solution 2. Recover Files Using Third-Party Data Recovery Tools
If you don't have a Time Machine backup, don't lose hope. Several third-party data recovery tools can help you recover lost files. These tools scan your Mac's storage for traces of deleted files, even if the files are not in the trash or the file system has changed.
🔗 Also read: best Mac data recovery software.
Donemax Data Recovery for Mac is one of the best Mac data recovery programs. It can securely and completely recover lost data after macOS update. It offers deep scan technology to deeply scan the HDD or SSD and find every recoverable file.
Step 1. Download and install Donemax Data Recovery for Mac on your Mac. It is fully compatible with M-chips and the latest macOS versions.
Step 2. Open Donemax Data Recovery for Mac, then select the internal drive (usually named Macintosh HD) to start data recovery.

Step 3. Click on Scan button to deeply scan the drive and find all recoverable files including deleted files, erased files, etc.

Step 4. Once the scan is completed, you can preview all recoverable files. Then select the wanted files, click on Recover button to save them.

Solution 3. Recover Files from iCloud or External Backups
If you regularly use iCloud, Dropbox, or other cloud services, your files may still be safe there. After an update, it's possible that the files were simply moved to iCloud or another cloud service without syncing to your Mac.
Recover Files from iCloud:
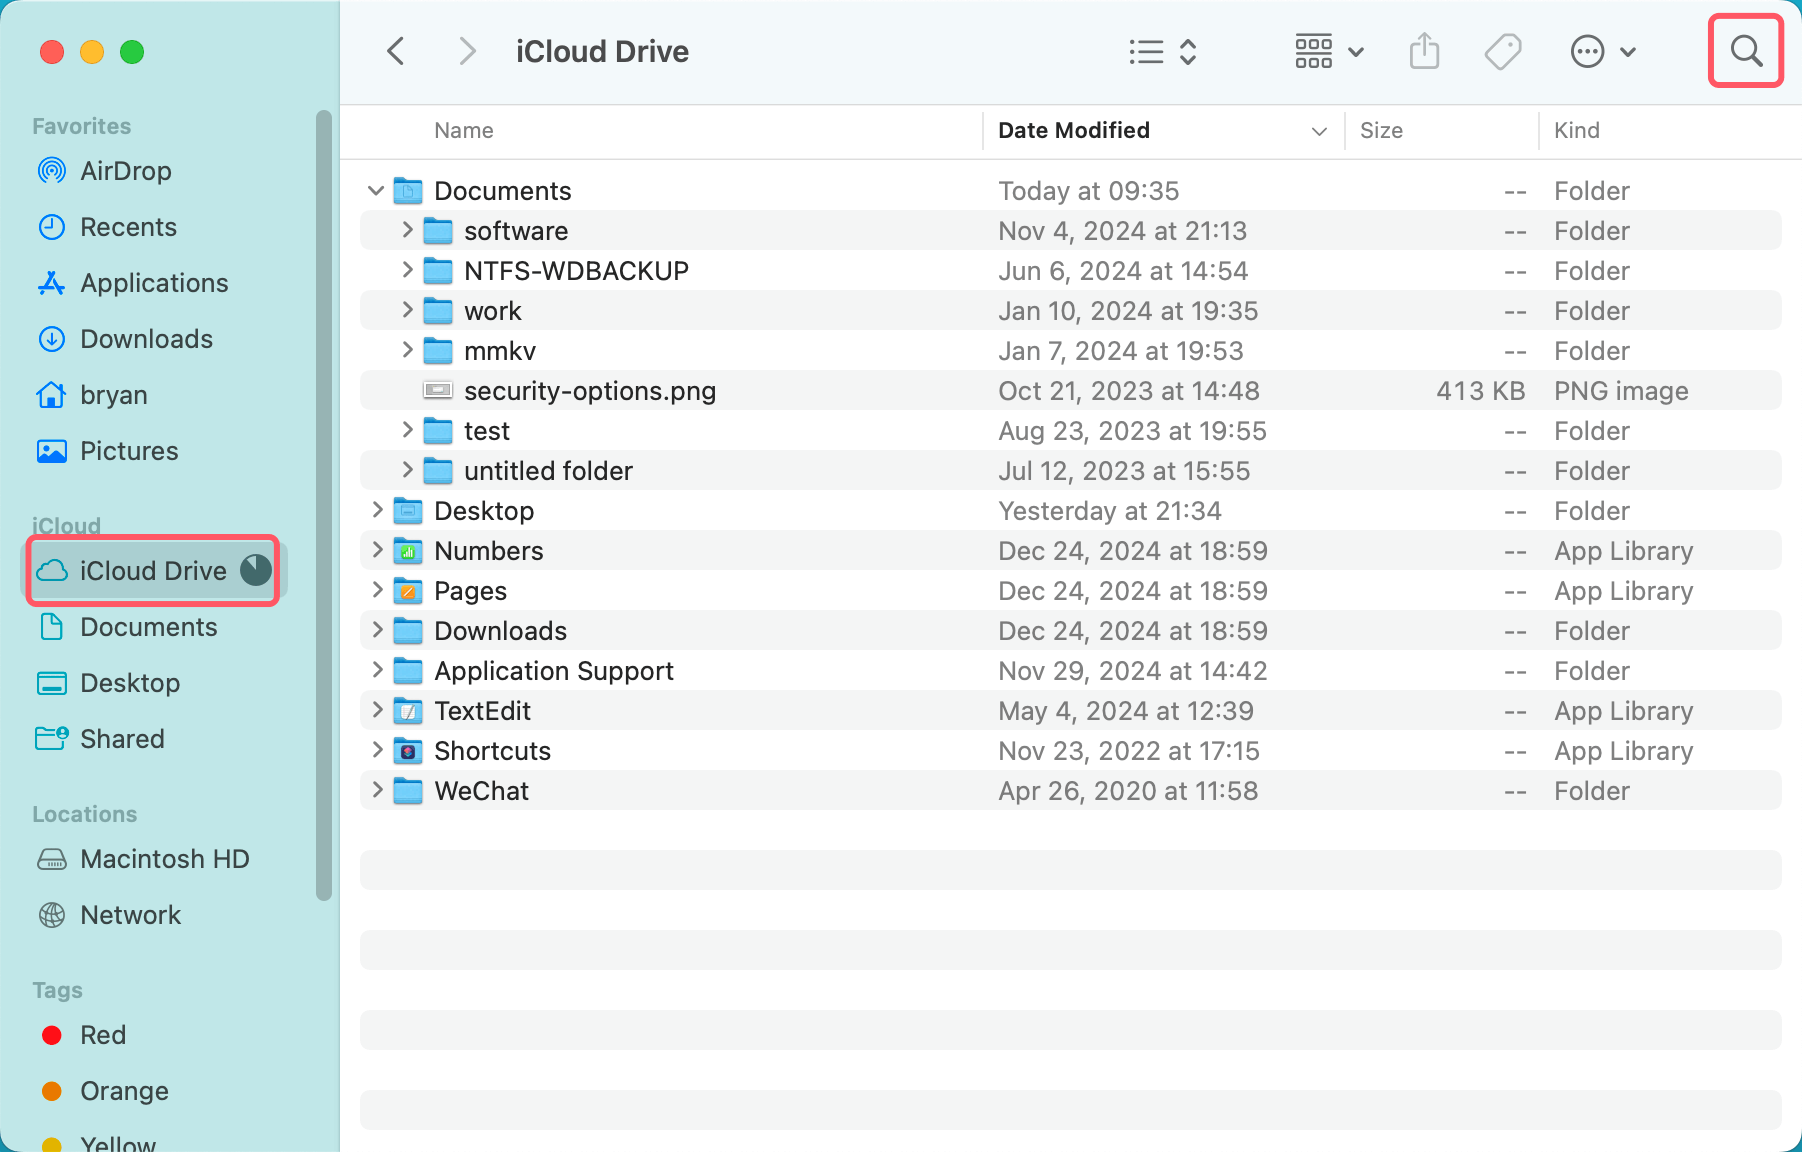
Step 1. Check iCloud Drive: Open Finder and click on iCloud Drive in the sidebar. If you store your documents, photos, or other files in iCloud, they should be available here.
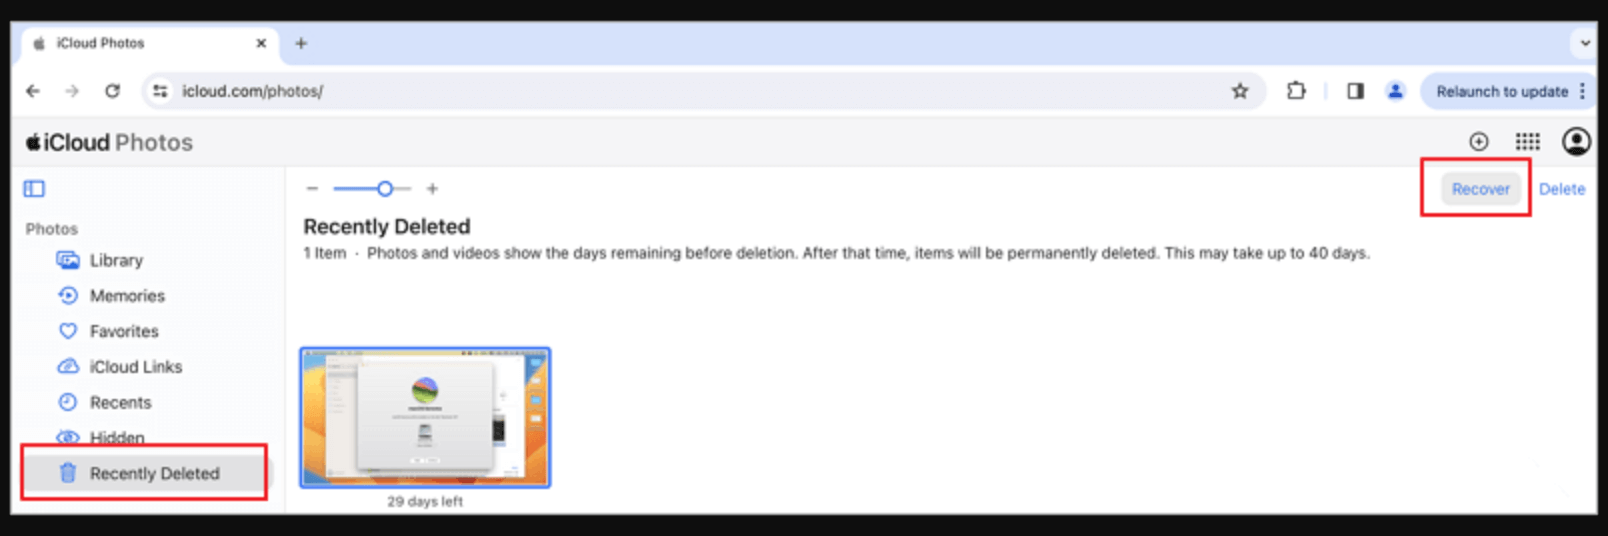
Step 2. Sign in to iCloud.com: If you don't see the files in Finder, try logging in to iCloud.com. Once signed in, you can check iCloud Drive, Photos, or other apps for your lost files.
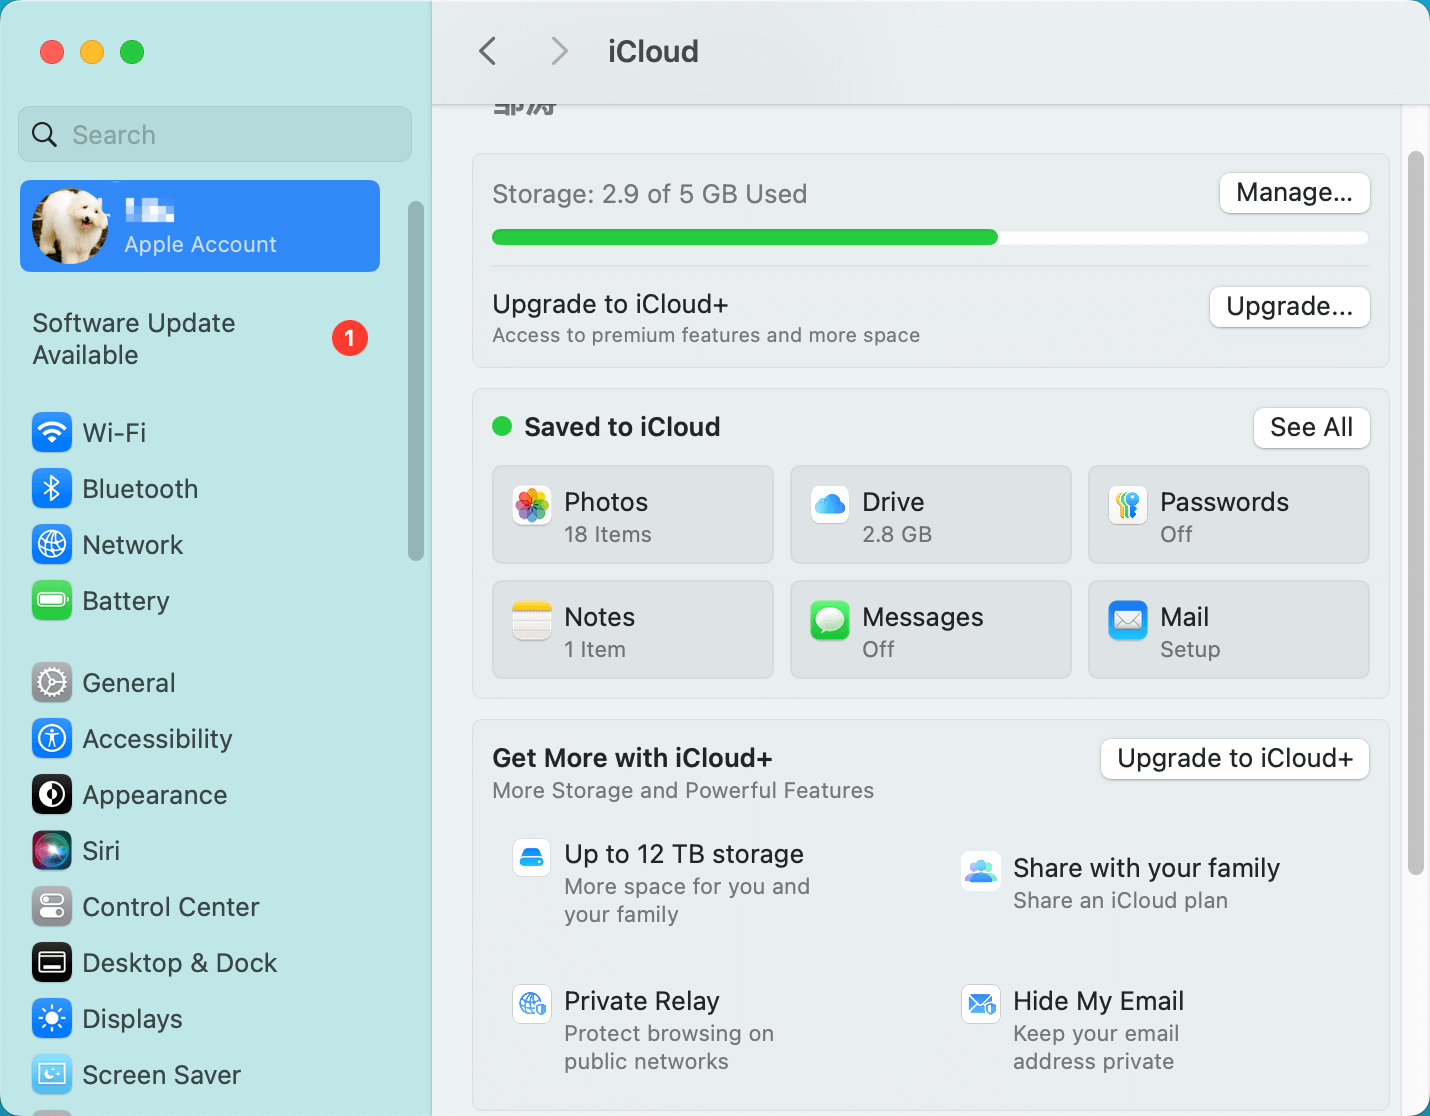
Step 3. Enable iCloud Sync: If syncing was paused during the update, ensure that iCloud Drive is enabled in System Preferences > Apple ID > iCloud or System Settings > Apple Account > iCloud (for macOS Ventura or later).
Recover Files from External Backups:
If you use any external hard drives or cloud storage services, check if the missing files are stored there. These services usually sync your files automatically, and a simple sync can restore the missing files to your Mac.
🔗 Also read: how to clone everything from Mac to an external hard drive.
Checking for Corrupted Files or Permissions Issues
It's possible that files are still on your Mac but are corrupted or have incorrect permissions, which can make them inaccessible.
Repair File Permissions:
macOS updates may modify file permissions, making it difficult to access files. Here's how to fix permissions:
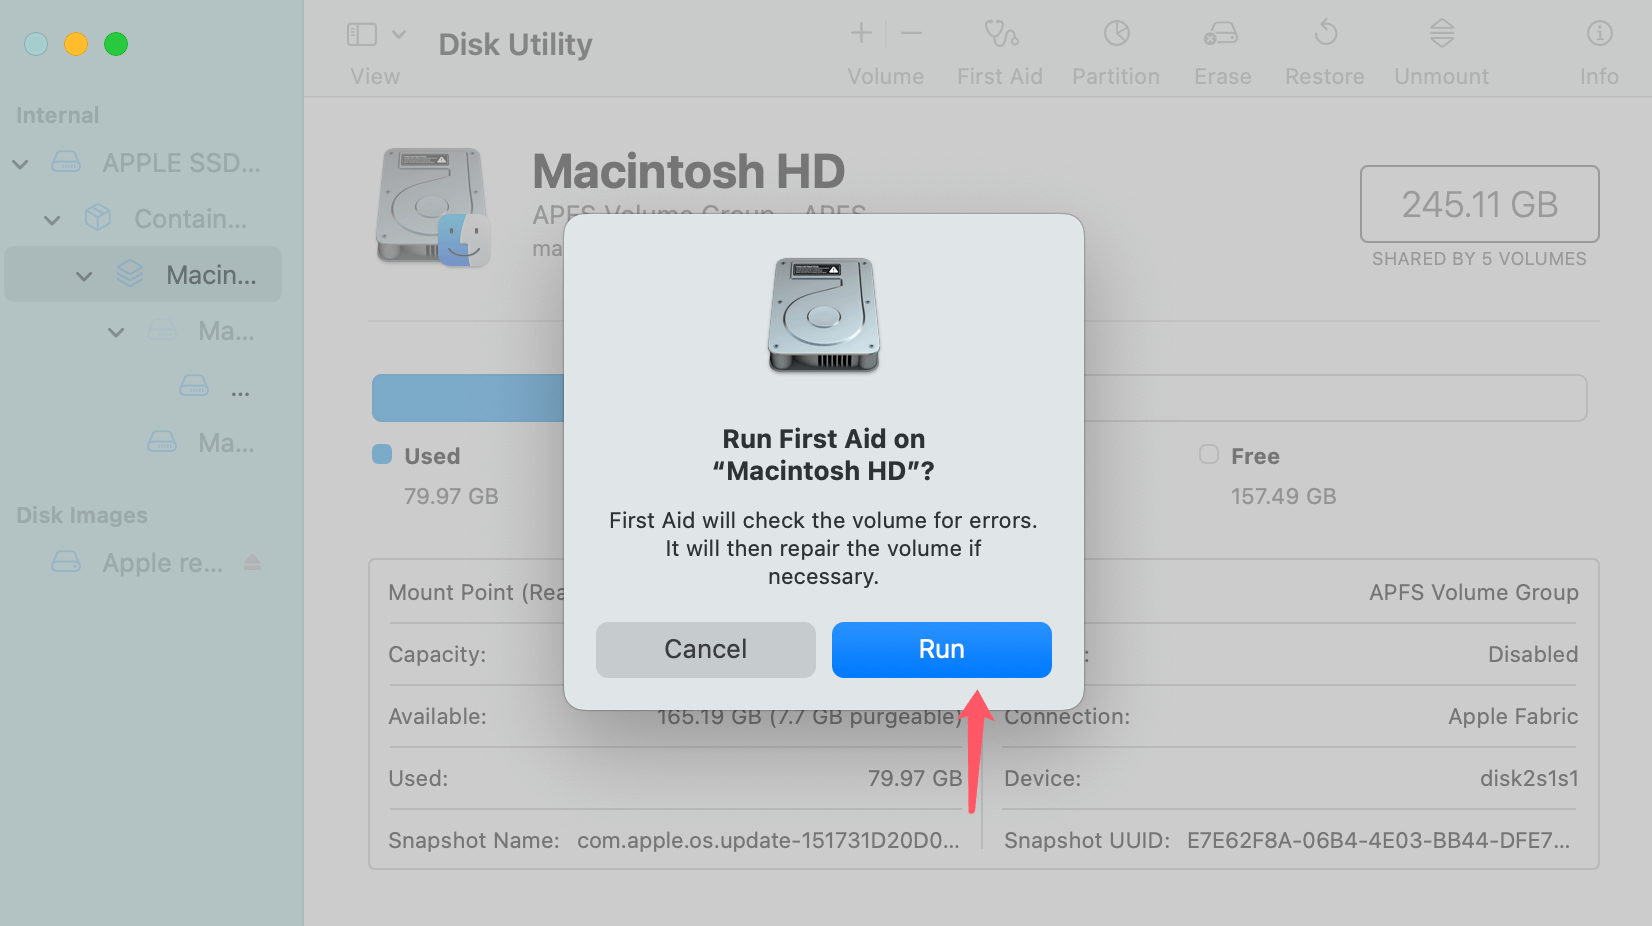
Step 1. Open Disk Utility: Go to Disk Utility from Utilities via Applications.
Step 2. Repair Disk Permissions: Select your startup disk (usually named "Macintosh HD") and click First Aid to repair any disk errors or permission issues.
Check File Integrity:
If files have become corrupted, they might be irrecoverable through normal methods. Third-party tools can sometimes repair minor corruption, but serious corruption may require professional recovery services.
How to Prevent File Loss in Future Updates?
Preventing file loss in future updates is essential. The best way to safeguard your data is by following best practices for backups and system maintenance.
- Regular Backups: Use Time Machine to create automatic backups of your Mac. Ensure you back up your files regularly, especially before performing macOS updates.
- Use iCloud or External Cloud Services: Store important files on iCloud or external cloud services, ensuring that your data is synchronized and accessible from multiple devices.
- Create a System Backup Before Updates: Before updating macOS, consider creating a full backup of your system using Time Machine or a disk cloning tool. This way, if something goes wrong during the update, you can restore your entire system to a previous state.
When to Seek Professional Help
If you've exhausted all the methods mentioned and still can't recover your lost files, it may be time to seek professional assistance. Professionals can help recover data from damaged or corrupted drives, and in some cases, they may be able to retrieve data that software tools cannot.
Contact Apple Support or a reputable data recovery service for assistance. Be prepared for a cost, as professional data recovery can be expensive, depending on the severity of the problem.
Conclusion
Losing files after a macOS update can be a frustrating experience, but with the right steps, recovery is usually possible. Start with basic troubleshooting, like searching for misplaced files or restarting your Mac. If that doesn't work, turn to Time Machine, third-party recovery tools, or your cloud backups. Finally, always ensure that you have a regular backup plan in place to avoid similar issues in the future. By following these steps, you can quickly recover lost files and prevent data loss in the future.
FAQs About Recovering Lost Files After macOS Update
1. Does macOS Update delete everything on Mac?
No, normally, macOS Update won't delete any user file. But, if you choose clean installation, it will wipe all data from the startup disk, then reinstall macOS.
2. How to recover lost files after macOS update?
Mac data recovery software can completely recover lost files after macOS update or clean installation.
- Download and install Donemax Data Recovery for Mac.
- Open Donemax Data Recovery for Mac, choose the internal HDD or SSD.
- Click on Scan button to deeply scan the drive.
- Preview and recover lost files after scanning.
3. What is the best recovery tool for data recovery after macOS update?
Here is the list of top 5 Mac data recovery software:
- Donemax Data Recovery for Mac
- Do Your Data Recovery for Mac
- Magoshare Data Recovery for Mac
- Disk Drill
- PhotoRec


Donemax Data Recovery for Mac
Donemax Data Recovery for Mac is one of the best Mac data recovery software. It is easy-to-use and can help in recovering deleted, formatted, inaccessible or lost data from Mac HDD/SSD, external disk, USB drive, SD card, camera or other storage devices.
Related Articles
- Mar 04, 2025[5 Methods] Recover Deleted or Unsaved TextEdit Files on Mac
- Oct 29, 2024How to Recover Deleted PNG/JPG Images on Mac?
- Jan 14, 2025How to Recover Lost Data from Fusion Drive on Mac?
- Mar 06, 2025Three Methods to Recover Lost Data from WD My Passport on Mac
- Nov 29, 2024Application Support Folder Deleted/Missing on Mac, 5 Methods to Recover It
- Mar 06, 2025Recover Formatted WD External Hard Drive on Mac: A Complete Guide

Charles
Charles, who lives in Sydney, Australia, is an editor & writer of Donemax Team. He is good at writing articles related with Apple Mac computers, Windows operating systems, data recovery, data erasure, disk clone and data backup, etc. He loves reading and playing tennis in his spare time and is interested in testing new digital devices such as mobile phones, Macs, HDDs, SSDs, digital cameras, etc.

Gerhard Chou
In order to effectively solve the problems for our customers, every article and troubleshooting solution published on our website has been strictly tested and practiced. Our editors love researching and using computers and testing software, and are willing to help computer users with their problems
