Written byLucienUpdated on Mar 26, 2025
How to Recover Deleted Audio Files on Mac? Here Are 7 Proven Methods
Approved byGerhard Chou
Before we start: Donemax Data Recovery for Mac is a powerful Mac recovery application. It can securely and completely recover permanently deleted audio files on Mac, recover lost audio files from formatted or inaccessible hard drive, etc. Download it here:
PAGE CONTENT:
Losing audio files on a Mac can be daunting, whether it's due to unintentional deletion, formatting drive, or system errors. These files may include music tracks, voice recordings, podcasts, GarageBand projects, or professional audio edits. If you've mistakenly deleted an important audio file, don't panic - there are multiple ways to recover lost data including audio files on macOS.
In this guide, we will explore several recovery methods, from simple solutions like checking the Trash Bin to advanced techniques such as using Terminal commands or specialized data recovery software. Acting quickly is crucial because macOS may overwrite deleted files, reducing the chances of successful recovery.
7 Methods to Recover Deleted or Lost Audio Files on Mac
There are many ways to recover lost files including audio files on Mac. If you've realized you lose important audio files on your Mac or from an external storage device, don't write new data to your Mac or the device. Just perform data recovery as soon as possible.
Method 1. Recover Deleted Audio Files from Trash Bin
On macOS, when a file is deleted, it typically goes to the Trash Bin and stays there until it is removed completely. Examining the trash is the first step in retrieving deleted audio files.
Steps to Recover Audio Files from the Trash:
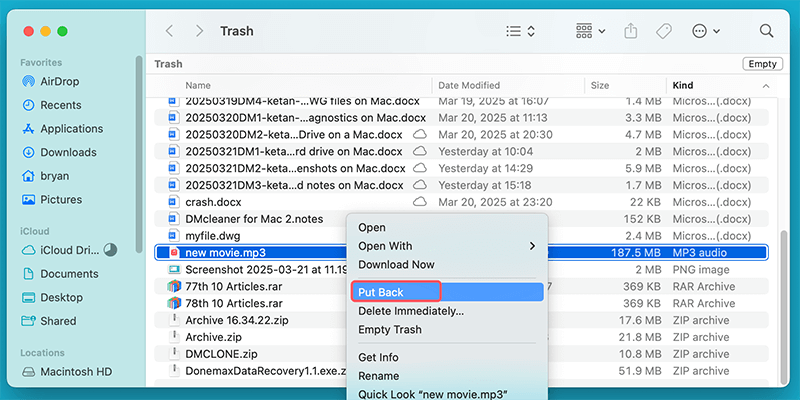
- Open the Trash: In the Dock, click the Trash icon.
- Search for your audio file: Use the search bar or manually browse the files. Common audio file formats include MP3, WAV, AIFF, M4A, AAC, FLAC, and ALAC.
- Restore the file: To restore the file to its original location, right-click on it and choose "Put Back".
What If the File Isn't in the Trash?
- If you have emptied the Trash, macOS permanently deletes the files. However, they may still be recoverable using Time Machine or third-party data recovery tools.
- Files deleted using Shift + Command + Delete bypass the Trash and require other recovery methods.
Method 2. Recover Deleted Audio Files via Time Machine Backup
Deleted audio files can be recovered from a backup if Time Machine is enabled. Your Mac is regularly backed up via Time Machine, which enables you to recover lost data.
How to Recover Audio Files Using Time Machine:
- If necessary, connect your backup drive.
- Open the folder where the file was originally stored (e.g., Music, Downloads, GarageBand Projects).
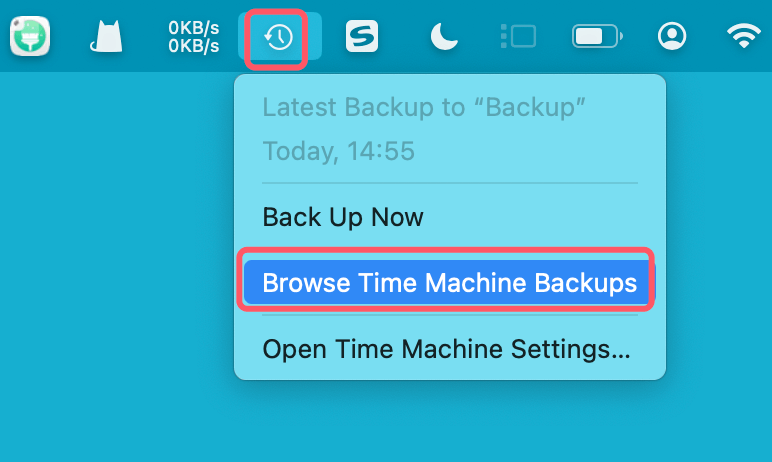
- Launch Time Machine: Choose "Enter Time Machine" or "Browse Time Machine Backups" after clicking the Time Machine icon in the menu bar.
![Launch Time Machine]()
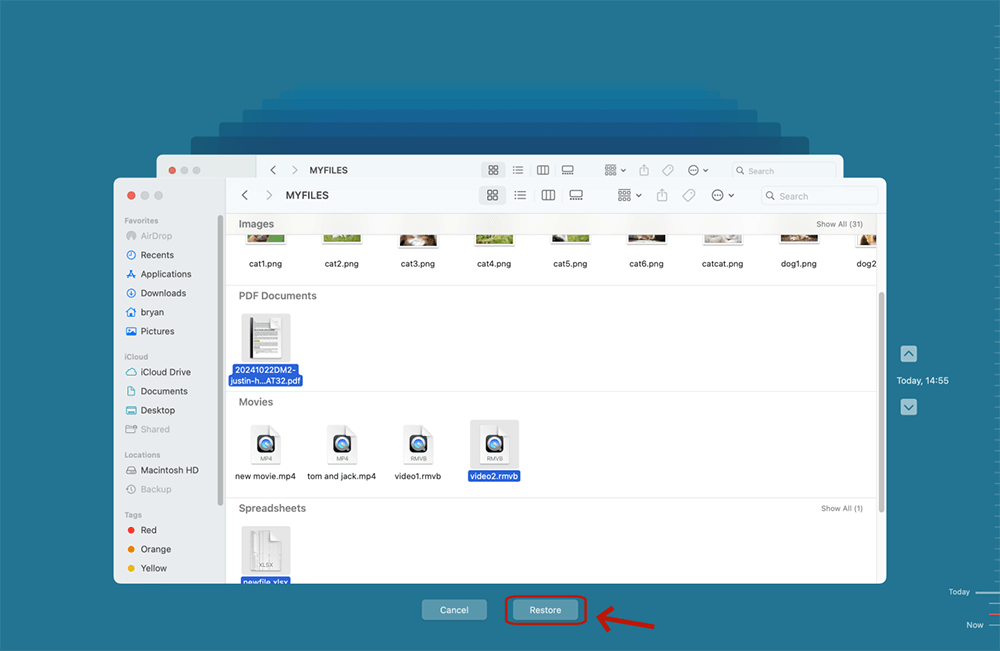
- Browse backup versions: Use the timeline on the right to find a version before the file was deleted.
- Restore the Audio file: Click the audio file and select "Restore" to bring it back.
![Restore the Audio file]()
Alternative Backup Methods:
- iCloud Drive: If you sync files with iCloud, check the iCloud website (iCloud.com) or Finder > iCloud Drive for a backup.
- Google Drive/Dropbox: If you store files in cloud services, check their "Trash" or "Deleted Items" sections.
Method 3. Restore from Recently Deleted (in Apps like GarageBand)
Some Mac applications, such as GarageBand, Logic Pro, and Voice Memos, have a "Recently Deleted" folder where files are temporarily stored before being permanently removed.
Recovering from GarageBand or Logic Pro:
- Open GarageBand or Logic Pro.
- Look for a "Recently Deleted" or "Previous Versions" option.
- If the file is available, restore it to your project folder.
Recovering from Voice Memos:
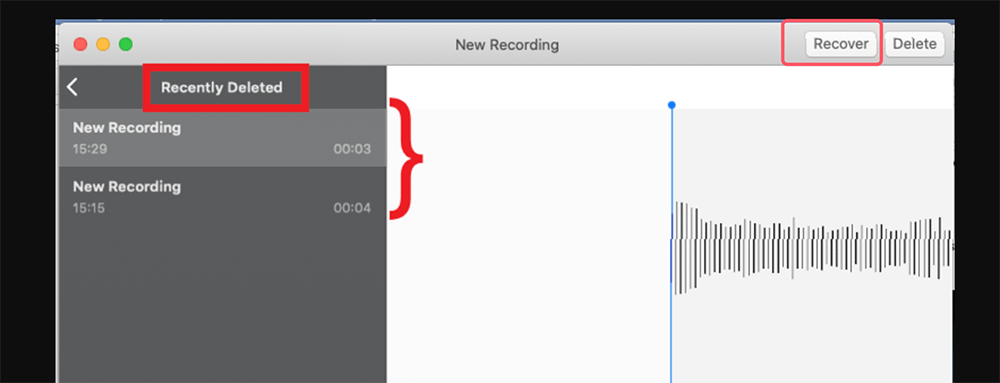
- Open the Voice Memos app.
- Click on "Recently Deleted" on the left panel.
- Find the deleted audio file and click "Recover".
![Recovering from Voice Memos]()
If your file isn't in the Recently Deleted folder, try using data recovery software.
Method 4. Recover Audio Files Using Terminal (For Advanced Users)
If you've recently deleted an audio file but haven't emptied the Trash, you might recover it using Terminal commands.
Recovering Files Using the mv Command
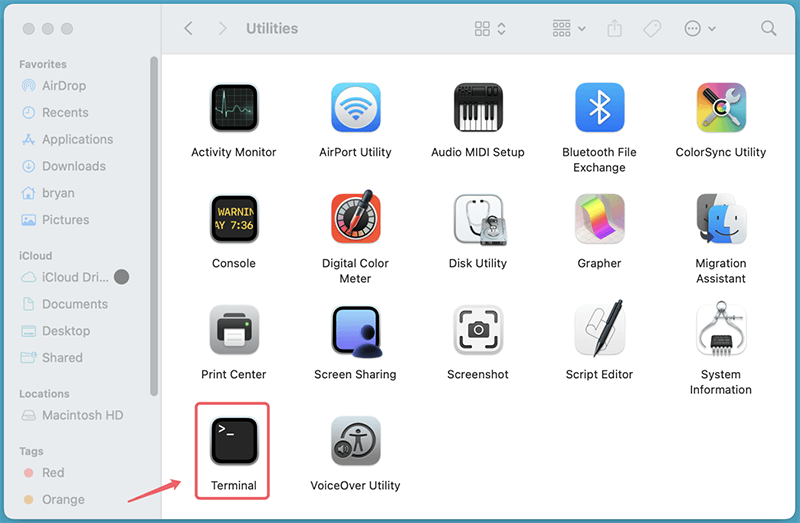
- Open Terminal from Utilities via Applications.
![Recovering Files Using the mv Command]()
- Type the below command:
mv ~/.Trash/filename /Users/YourUsername/Desktop/
Replace filename with the actual name of your deleted file.
- Press Enter to restore the file to your desktop.
Limitations of This Method:
- This method works only if the file is still in the Trash.
- If the file has been permanently deleted, Terminal cannot retrieve it.
Method 5. Recover Lost Audio Files Using Mac Data Recovery Software
If the above methods fail, specialized data recovery software can help retrieve permanently deleted audio files. These tools scan your Mac's storage for recoverable data.
Most Mac recovery software operates in the following way:
- Deep scan & quick scan – The tool scans your hard drive or external device for lost files.
- File filtering & preview – You can search for specific file types (MP3, WAV, AIFF, etc.) and preview them.
- File restoration – Once identified, the software restores lost files to a new location.
Best Data Recovery Software for Mac:
Donemax Data Recovery for Mac is one of the best data recovery software for macOS. It supports to recover all type of lost files including audio files from internal disk or external storage device.
How to Recover Audio Files Using Donemax Data Recovery for Mac:
Donemax Data Recovery for Mac is one of the most widely used Mac recovery tools due to its powerful scanning capabilities and ease of use. Here’s how to recover deleted audio files with Donemax Data Recovery for Mac:
Step 1: Download and Install Donemax Data Recovery for Mac
Click Download button below to download and install Donemax Data Recovery for Mac on your Mac.
- Install the software by dragging it into your Applications folder.
- Launch the app and grant it full disk access (System Settings > Privacy & Security > Full Disk Access).
Step 2: Select the Drive to Scan
- Open Donemax Data Recovery for Mac and select the drive where the deleted audio files were located (e.g., Macintosh HD or an external storage device).
![select the drive where the deleted audio files]()
- Click "Scan" to begin scanning.
![Click Scan to begin scanning]()


Step 3: Filter & Locate Lost Audio Files
- Once the scan completes, click on the "Audio Files" filter to display only lost music or sound files.
![Filter & Locate Lost Audio Files]()
- Use the search bar to find specific files by name or extension (e.g., .mp3, .wav).

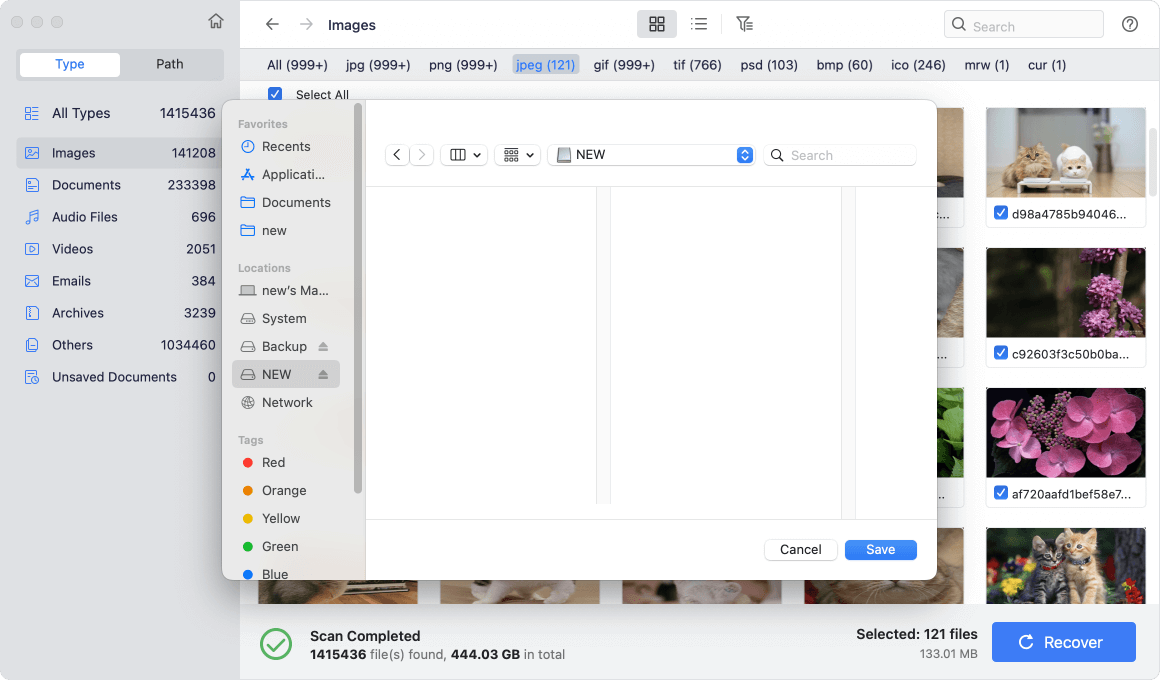
Step 4: Preview and Restore the Files
- Click on a file to preview it and check if it's recoverable.
- Select the files you want and click "Recover".
![Preview and Restore the Files]()
- Save the recovered files to a different drive (not the original location) to avoid overwriting data.
Alternative Data Recovery Techniques:
Recovering Audio Files from External Drives (USB, SD Card, External HDD)
If your lost audio files were on an external storage device, follow these steps:
- Connect the device to your Mac using a USB cable or adapter.
- Launch Donemax Data Recovery for Mac, Magoshare Data Recovery for Mac, or another recovery tool.
- Select the external drive and perform a deep scan.
- Preview and restore lost files as needed.
Recovering Deleted Files from an SSD (Trim Enabled Drives)
If your Mac has an SSD (Solid State Drive) and Trim is enabled, file recovery might be more difficult. Trim automatically erases deleted files to improve performance.
To check if Trim is enabled:
- Open Terminal and type:
system_profiler SPSerialATADataType | grep 'TRIM Support'
- If the output says "Yes", then Trim is enabled, reducing recovery chances.
If Trim is enabled and recovery software fails, Time Machine backups or professional data recovery services are your best options.
Pros of Using Recovery Software:
- Can recover permanently deleted files.
- Works even after emptying the Trash.
- Supports multiple file formats.
Cons
- Some tools require a paid version for full recovery.
- Recovery success depends on whether the file has been overwritten.
Method 6. Check Temporary and Cache Folders
Sometimes, Mac stores unsaved or lost audio files in temporary or cache folders.
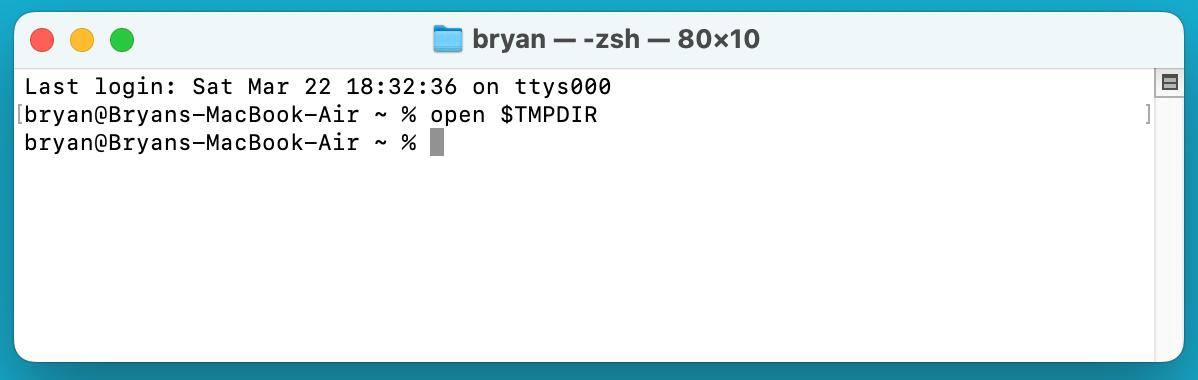
How to Locate Temporary Files:
- Open Terminal and type:
open $TMPDIR
![Check Temporary and Cache Folders]()
This opens the temporary files directory.
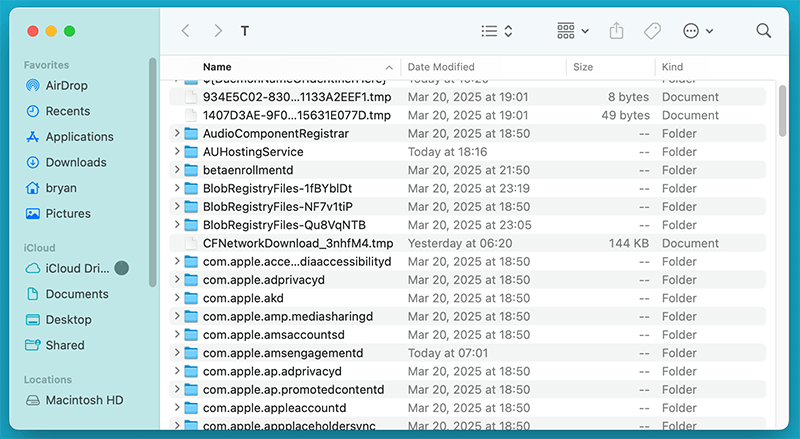
- Look for folders named com.apple.logic, GarageBandTemp, or AudioTemp.
![Check Temporary and Cache Folders]()
- If you find your file, move it to a safe location.
Recovering from Application Cache:
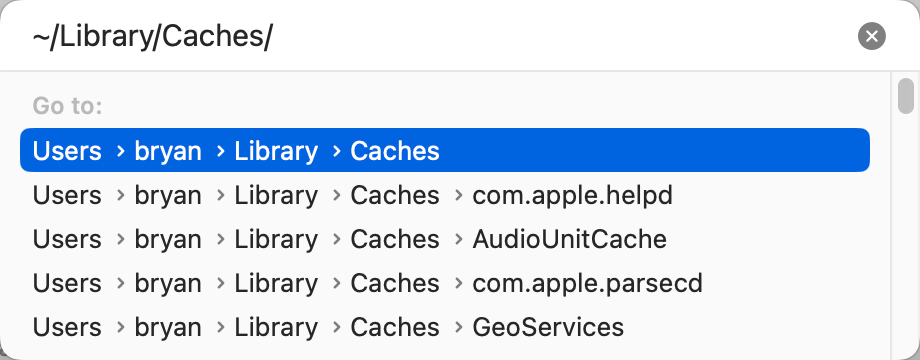
- Open Finder and go to:
~/Library/Caches/
![Recovering from Application Cache]()
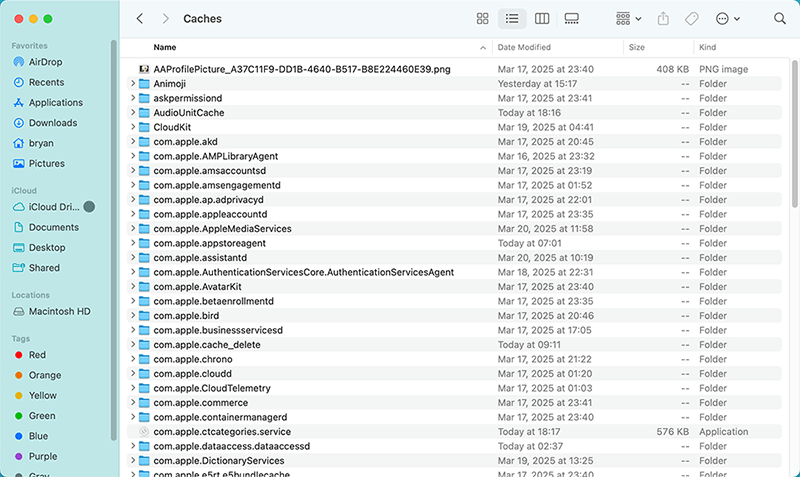
- Look for app-specific folders (e.g., GarageBand, Logic Pro, or Audacity).
![Recovering from Application Cache]()
- Check for lost files and copy them back.
Method 7. Seek Professional Data Recovery Services (Last Resort)
If your audio files are critically important and software recovery fails, consider a professional data recovery service.
When to Seek Professional Help:
- The Mac's hard drive is physically damaged.
- You formatted your storage device.
- Software-based recovery attempts have failed.
Best Data Recovery Services for Mac:
- DriveSavers – Specializes in professional data recovery.
- Ontrack – Offers high success rates for Mac file recovery.
- Secure Data Recovery – Provides expert services for SSD and HDD recovery.
Conclusion
Recovering deleted audio files on a Mac is possible using multiple methods, from simple Trash recovery to advanced data recovery software. Acting quickly increases the chances of a successful recovery before the data is overwritten.
Key Takeaways:
- Check the Trash Bin first before using advanced methods.
- Time Machine backups can restore deleted files effortlessly.
- Data recovery software can retrieve permanently deleted audio files.
- Terminal and temporary file recovery work in some cases.
- Professional recovery services should be the last option.
Preventive Tips to Avoid Future Data Loss:
- Regularly back up your files using Time Machine or cloud storage.
- Use external hard drives or SSDs for important audio projects.
- Enable auto-save in GarageBand, Logic Pro, and other music apps.
- Be cautious when emptying the Trash or using Shift + Delete.
By following this guide, you can recover your lost audio files and prevent future data loss. If one method doesn’t work, try another - persistence often pays off in data recovery!
Donemax Data Recovery for Mac
Donemax Data Recovery for Mac is one of the best Mac data recovery software. It is easy-to-use and can help in recovering deleted, formatted, inaccessible or lost data from Mac HDD/SSD, external disk, USB drive, SD card, camera or other storage devices.
Related Articles
- Nov 27, 2024Top 8 Methods to Recover Deleted Files on Mac
- Oct 29, 2024How to Recover Deleted PNG/JPG Images on Mac?
- Jul 05, 2024How to Recover Lost Data on macOS Sequoia? [5 Methods]
- Nov 29, 2024Mac Trash Recovery: A Comprehensive Guide to Recovering Deleted Files on Mac
- Mar 21, 2025[8 Methods] Recover Missing or Disappeared Files from an External Hard Drive on Mac
- Mar 19, 2025How to Recover Lost Data on MacBook Pro: 5 Proven Methods (2025 Guide)

Contributing Writer
Lucien
Lucien is a writer and a chief programmer of Donemax software who has worked in the company for 5+ years. He has written much of the content on the site and devotes to providing troubleshooting and solution for Windows and Mac users including disk cloning, data recovery, migration, eraser, error fixes.

Editor in chief
Gerhard Chou
In order to effectively solve the problems for our customers, every article and troubleshooting solution published on our website has been strictly tested and practiced. Our editors love researching and using computers and testing software, and are willing to help computer users with their problems