PAGE CONTENT:
The macOS Trash is a useful feature designed to provide a safety net for users when deleting files. It acts as a temporary storage location where deleted files remain until they are permanently removed. However, there are situations where you might want to bypass the Trash entirely. Whether it's to free up space immediately, securely delete sensitive data, or streamline your workflow, bypassing the Trash can be an efficient solution.
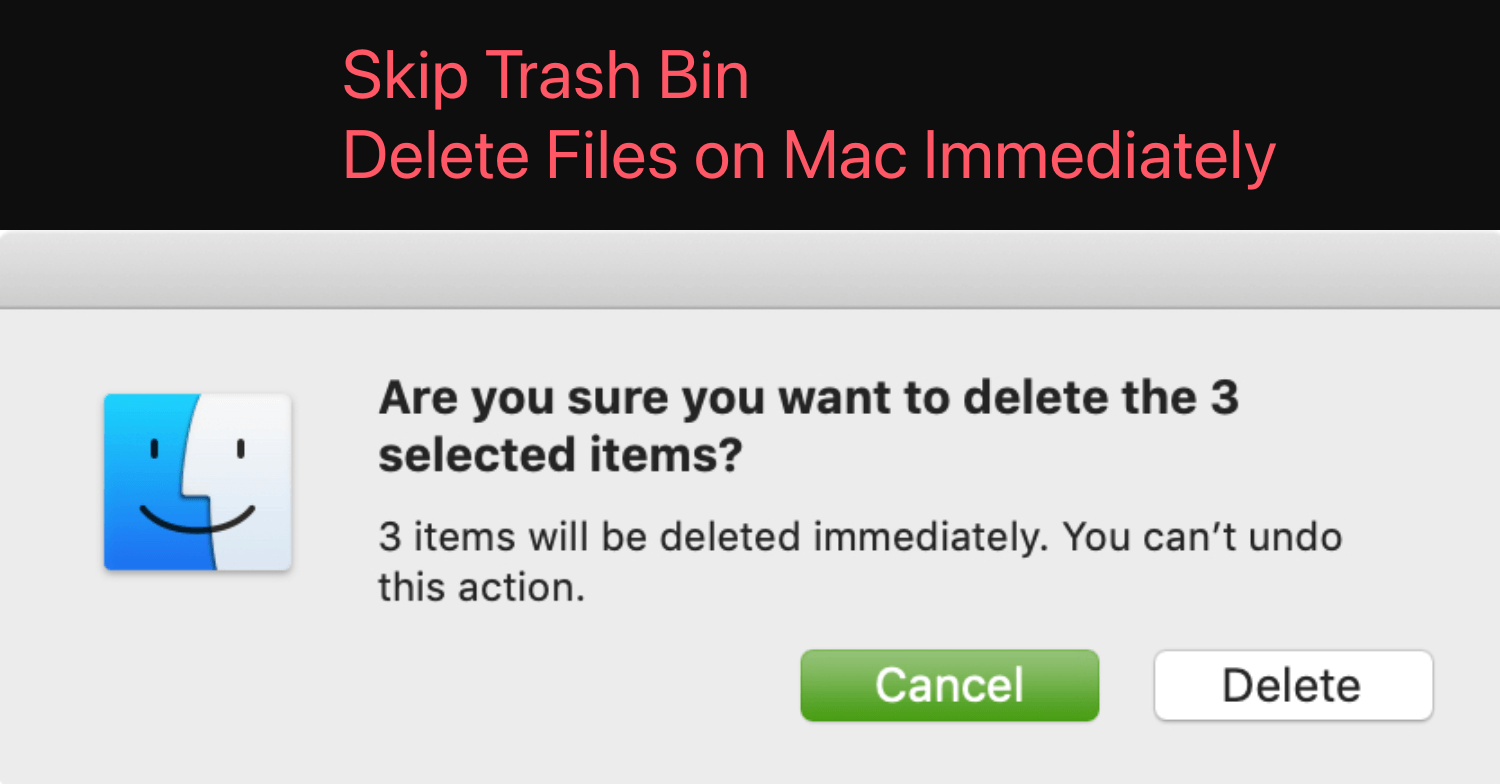
In this comprehensive guide, we’ll explore various methods to bypass the Trash when deleting files on a Mac. From simple shortcuts to advanced techniques using the Terminal, we'll cover everything you need to know. Additionally, we'll discuss the risks involved and provide practical tips to ensure a smooth experience.
Why Bypass the Trash?
The Trash can be a convenient safeguard, but it may not always suit your needs. Here are some common reasons for bypassing it:
- Immediate Space Savings: Files in the Trash still occupy disk space. By bypassing the Trash, you instantly free up space on your drive.
- Secure Deletion: For sensitive files, bypassing the Trash ensures they don’t linger in a recoverable state.
- Workflow Efficiency: If you're confident about the files you're deleting, skipping the Trash can save time.
Precautions Before Bypassing the Trash
Before diving into the methods, it's important to understand the implications of bypassing the Trash. When you delete files permanently, recovery becomes significantly more difficult. To minimize risks:
- Double-check files before deletion: Ensure you no longer need the files you're deleting.
- Back up important data: Use Time Machine or another backup solution to safeguard critical files.
- Be cautious with system files: Deleting system files can cause instability or prevent macOS from functioning correctly.
Methods to Bypass the Trash on Mac When Deleting Files
1. Using Keyboard Shortcuts
Keyboard shortcuts provide a quick and easy way to bypass the Trash. macOS includes a built-in combination for permanent deletion:
- Select the file(s) or folder(s) you want to delete.
- Press Command + Option + Delete.
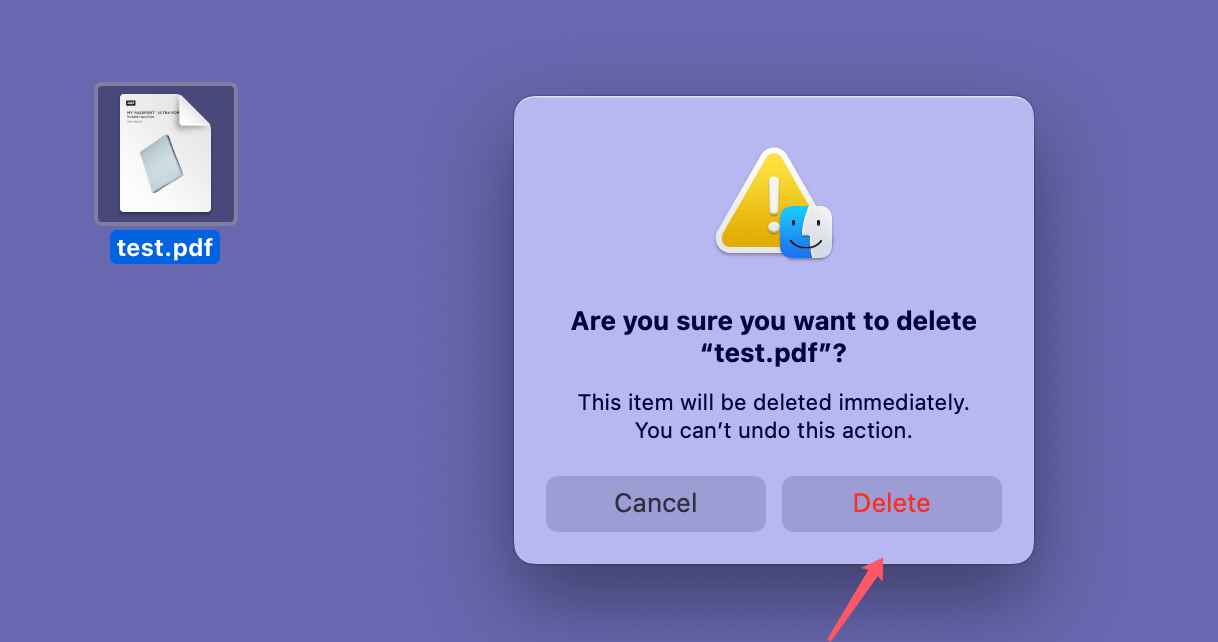
- A confirmation dialog will appear asking if you’re sure about permanently deleting the files. Click Delete to proceed.
![bypass the Trash when deleting files on a Mac]()
Advantages:
- Quick and easy to use.
- No need for additional tools or apps.
Disadvantages:
- A confirmation dialog may interrupt the workflow.
- Risk of accidental permanent deletion if confirmation is disabled.
💡 Note: If you delete files by mistake, you can use Mac data recovery software to scan the drive where you delete the files, then get the deleted files back.
2. Using Terminal for Advanced Users
Why Use Terminal?
- Efficiency: Terminal commands can quickly delete multiple files or folders without the need to interact with menus or confirmation dialogs.
- Precision: You have direct control over which files or directories are deleted.
- Advanced Features: Terminal allows for options like recursive deletion, secure overwriting, and the ability to bypass macOS restrictions on certain files.
Step 1: Open Terminal
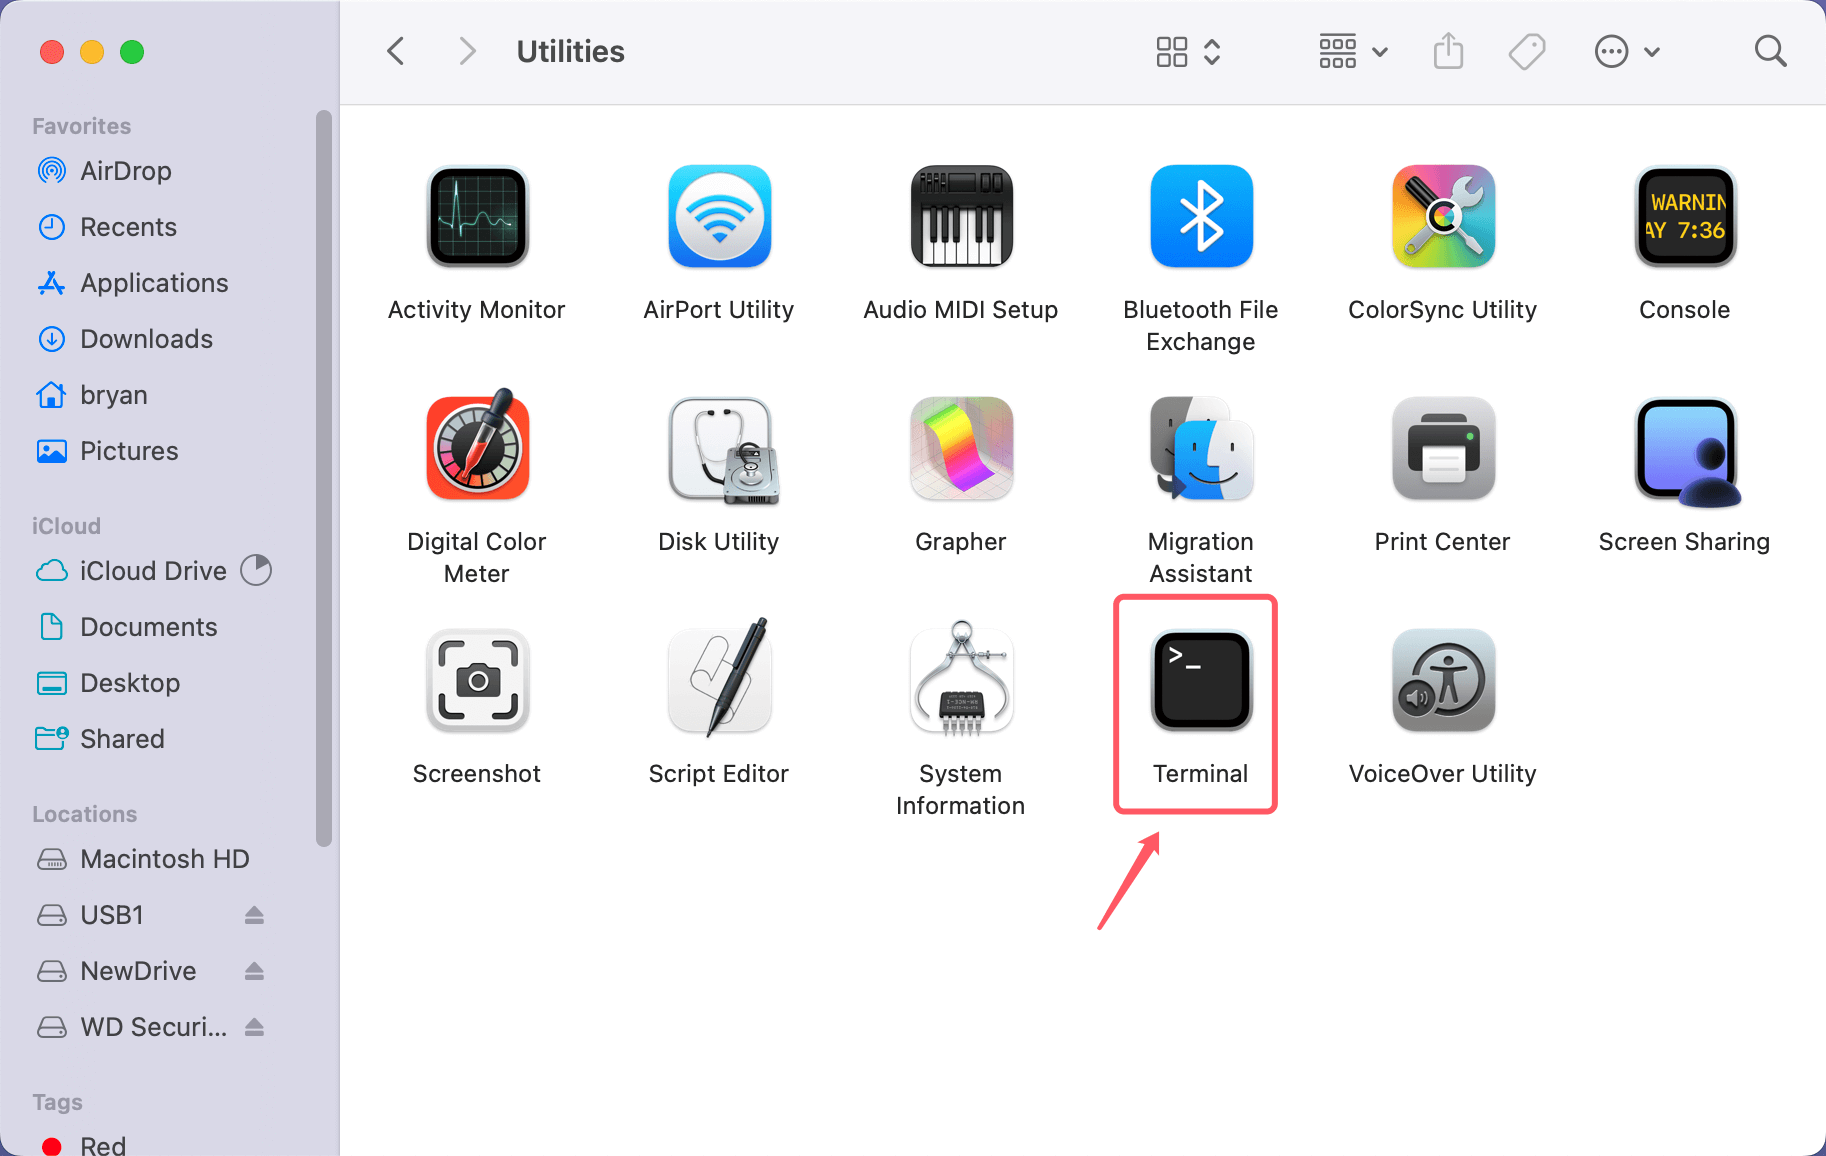
Launch the Terminal app from Applications > Utilities or by using Spotlight Search (Command + Space, then type "Terminal").
Step 2: Navigate to the File's Directory
- Use the cd (change directory) command to navigate to the folder containing the file you want to delete. For example:
cd /Users/YourUsername/Documents
- If you're unsure of the file's location, drag and drop the file into the Terminal window after typing cd. This will automatically populate the correct path.
![bypass the Trash when deleting files on a Mac]()
Step 3: Use the rm Command to Delete Files
- Once in the correct directory, type the rm command followed by the filename to delete it. For example:
rm myfile.txt
![bypass the Trash when deleting files on a Mac]()
- For filenames with spaces, enclose the name in quotes or escape the spaces with a backslash (\):
rm "my file.txt"
or
rm my\ file.txt
Step 4: Delete Folders (Directories)
- To delete a folder and all its contents, use the -rf flag:
rm -rf foldername
![bypass the Trash when deleting files on a Mac]()
- -r stands for recursive, meaning it will delete all files and subdirectories within the specified folder.
- -f stands for force, which overrides any prompts or restrictions.
Step 5: Confirm Deletion
Unlike using the Trash, files deleted via Terminal do not go to the Trash - they are immediately removed from the filesystem. Double-check the command before pressing Enter.
Advanced Options with the rm Command:
- Interactive Mode (-i): If you want to be prompted for confirmation before each file is deleted, add the -i flag:
rm -i filename.ext
This is useful for cautious users who want to avoid mistakes.
- Dry Run Simulation (echo): To simulate what would be deleted without actually performing the action, use the echo command before rm:
echo rm -rf foldername
This lets you verify your command.
- Secure Deletion: While rm doesn't overwrite the file data, third-party tools like srm (secure remove) or macOS's Disk Utility can securely delete files by overwriting them multiple times.
Advantages of Using Terminal
- No GUI Limitation: Delete files or folders even if macOS Finder encounters issues.
- Batch Deletion: Quickly delete multiple files using wildcards:
rm *.txt
This deletes all .txt files in the directory.
Risks and Warnings
- No Undo Option: Files deleted using Terminal do not go to the Trash, and recovery requires advanced tools, which may not always succeed.
- Accidental Deletion: A small typo in the command, such as pointing to the wrong directory, can lead to catastrophic data loss. For example:
- rm -rf / will delete the root directory, rendering your macOS unbootable.
- Permission Issues: Some system-protected files or directories may require administrative privileges. Use sudo cautiously:
sudo rm filename.ext
Be aware that sudo grants full system-level privileges, so always double-check your command.
When to Use Terminal for File Deletion
- Handling Stubborn Files: Some files may resist deletion in Finder due to permissions issues or system locks. Terminal can bypass these restrictions.
- Automating File Cleanup: For users comfortable with scripting, Terminal commands can be incorporated into shell scripts to automate routine deletions.
- Secure Environments: Terminal offers greater control in environments where precise file management is required, such as servers or development machines.
💡 Tip: Be extremely cautious when using the rm -rf command, as it doesn’t provide any warning or confirmation before deleting files.
3. Deleting Files from External Drives
Files deleted from external drives, such as USB flash drives or external hard disks, often bypass the Trash automatically. This behavior depends on the macOS settings and file system of the drive.
- When you delete a file from an external drive, macOS may not move it to the Trash but instead delete it permanently.
- If files are still being moved to the Trash, you can configure Finder Settings or format the drive for direct deletion.
Advantages:
- No additional steps required.
- Useful for managing space on external drives.
Disadvantages:
- Not customizable for all drives.
- Risk of losing files accidentally.
4. Disabling Trash for Specific Drives
For greater control, you can disable the Trash for specific drives:
- Open Finder.
- Right-click the external drive and select Get Info.
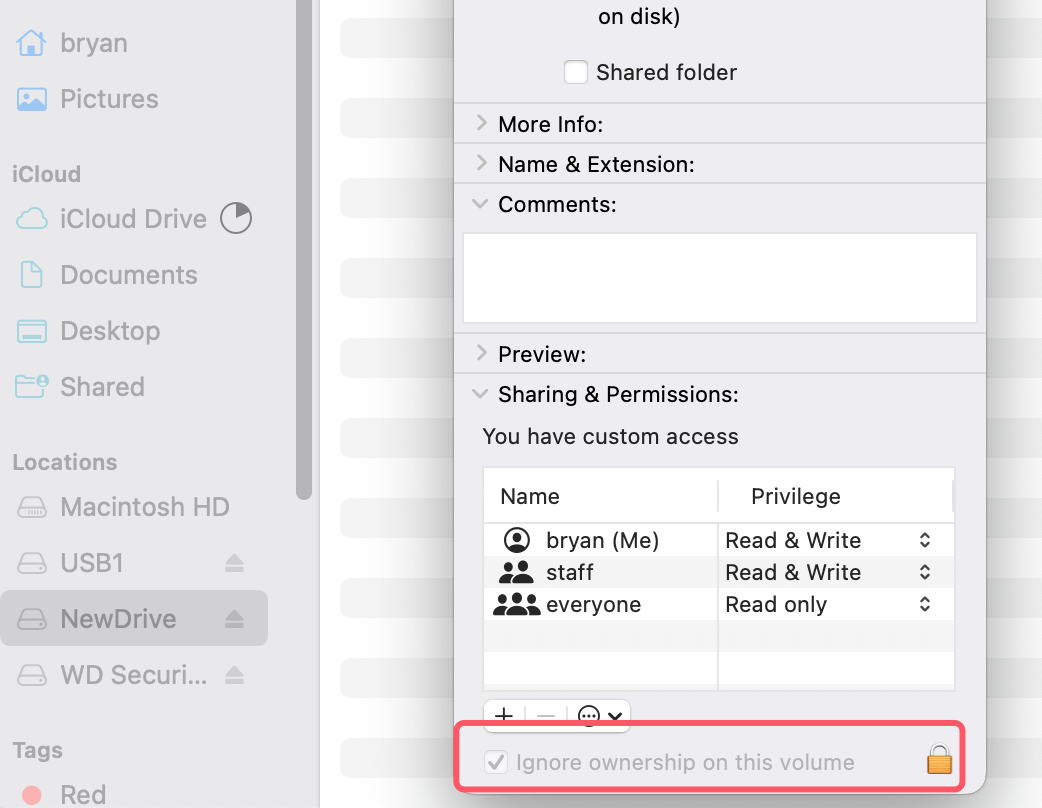
- Check the box for Ignore ownership on this volume.
![bypass the Trash when deleting files on a Mac]()
By doing this, files deleted from the drive will bypass the Trash and be permanently removed.
Advantages:
- Effective for drives where file recovery isn’t needed.
- Simplifies the deletion process for external storage.
Disadvantages:
- Requires manual configuration for each drive.
5. Using Third-Party Tools
Several third-party apps can help you bypass the Trash while offering additional features, such as secure deletion. Popular options include:
- Donemax Data Eraser for Mac: Offers an intuitive interface for cleaning and securely deleting files.
- FileShredder: Specializes in permanently erasing sensitive data.
- TrashMe: Designed to handle app uninstallation and file deletion.
Advantages:
- User-friendly and feature-rich.
- Secure deletion methods reduce the risk of file recovery.
Disadvantages:
- Some tools require payment.
- Additional software installation may be needed.
Check how to use Donemax Data Eraser for Mac to securely and permanently delete files on Mac:
Step 1. Download and install Donemax Data Eraser for Mac on your Mac, then open it.
Step 2. Open Donemax Data Eraser for Mac, choose Erase Files mode. Then click Add button to add files and folders to the erasure list.

Step 3. Click on Erase Now button to securely and permanently erase the selected files/folders. Once the process gets finished, the files/folders are lost for good, cannot be recovered by any method.

6. Secure File Deletion
For sensitive files, it's important to ensure they can't be recovered after deletion. Secure file deletion overwrites the file's data to prevent recovery. Here's how to do it:
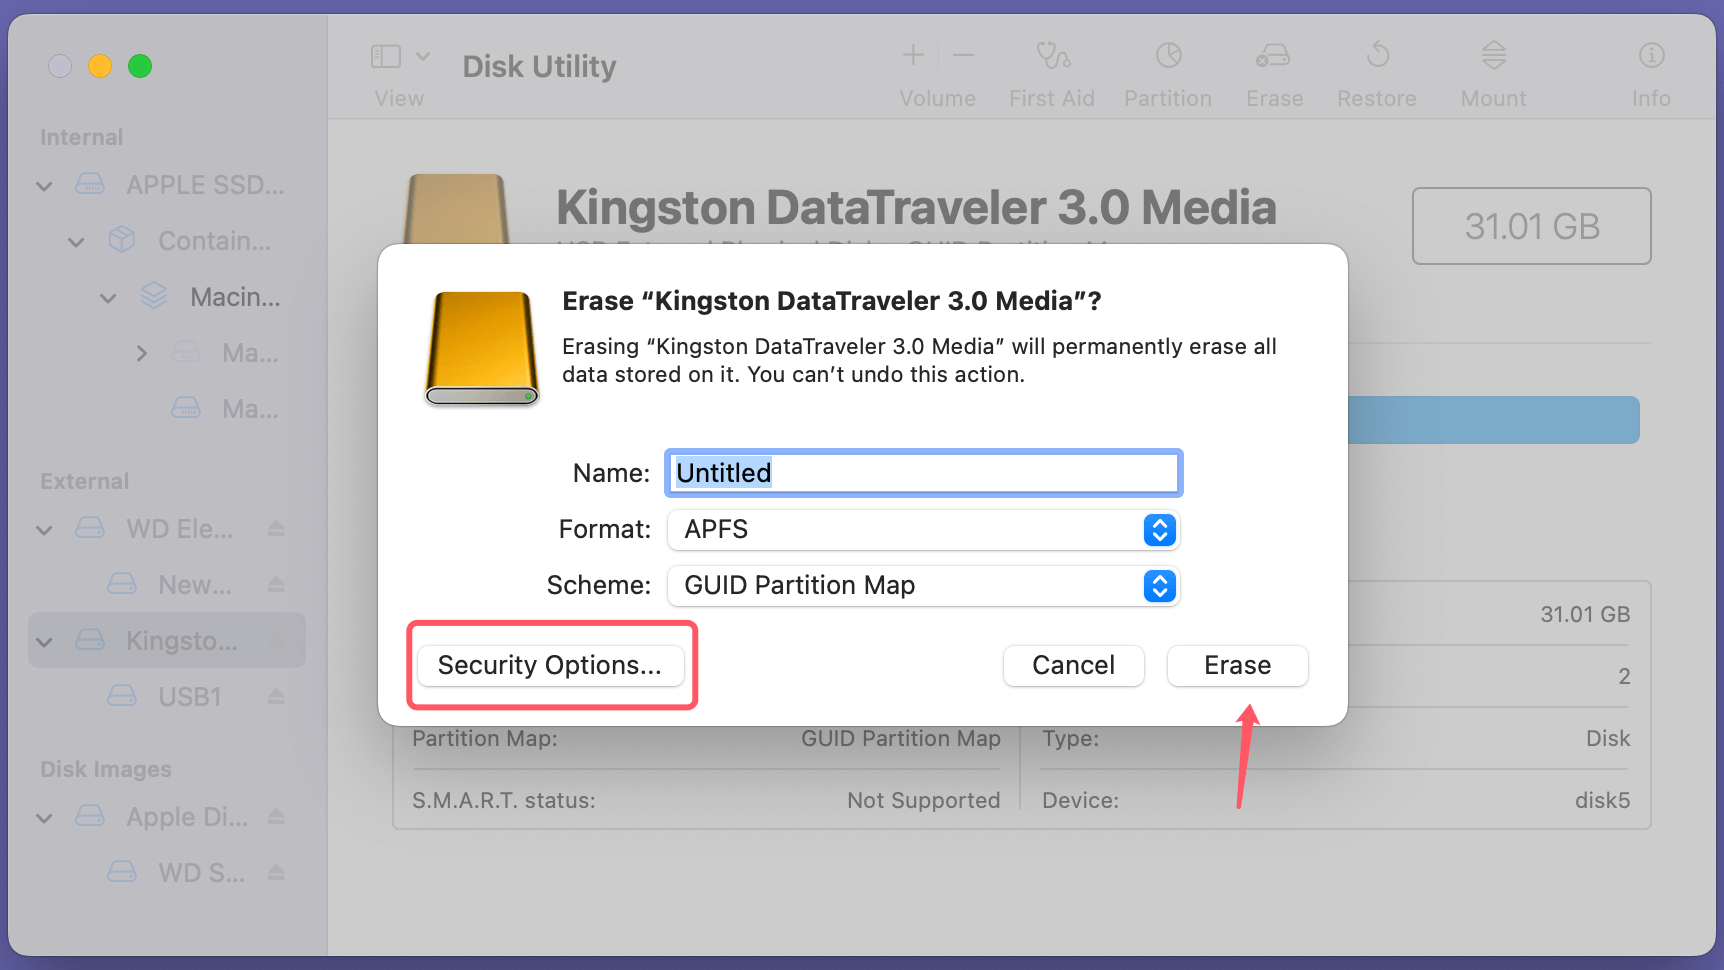
- Open Disk Utility.
- Go to the Erase tab and choose the file or drive you want to securely erase.
- Select the Security Options and configure the level of overwriting.
![bypass the Trash when deleting files on a Mac]()
Alternatively, you can use third-party tools like Donemax Data Eraser for Mac to securely delete individual files.
Advantages:
- Ensures sensitive files are unrecoverable.
- Adds a layer of security for confidential data.
Disadvantages:
- Slower than standard deletion.
- Requires additional steps or software.
Troubleshooting Common Issues
1. Keyboard Shortcut Doesn't Work
If the shortcut for bypassing the Trash doesn't work:
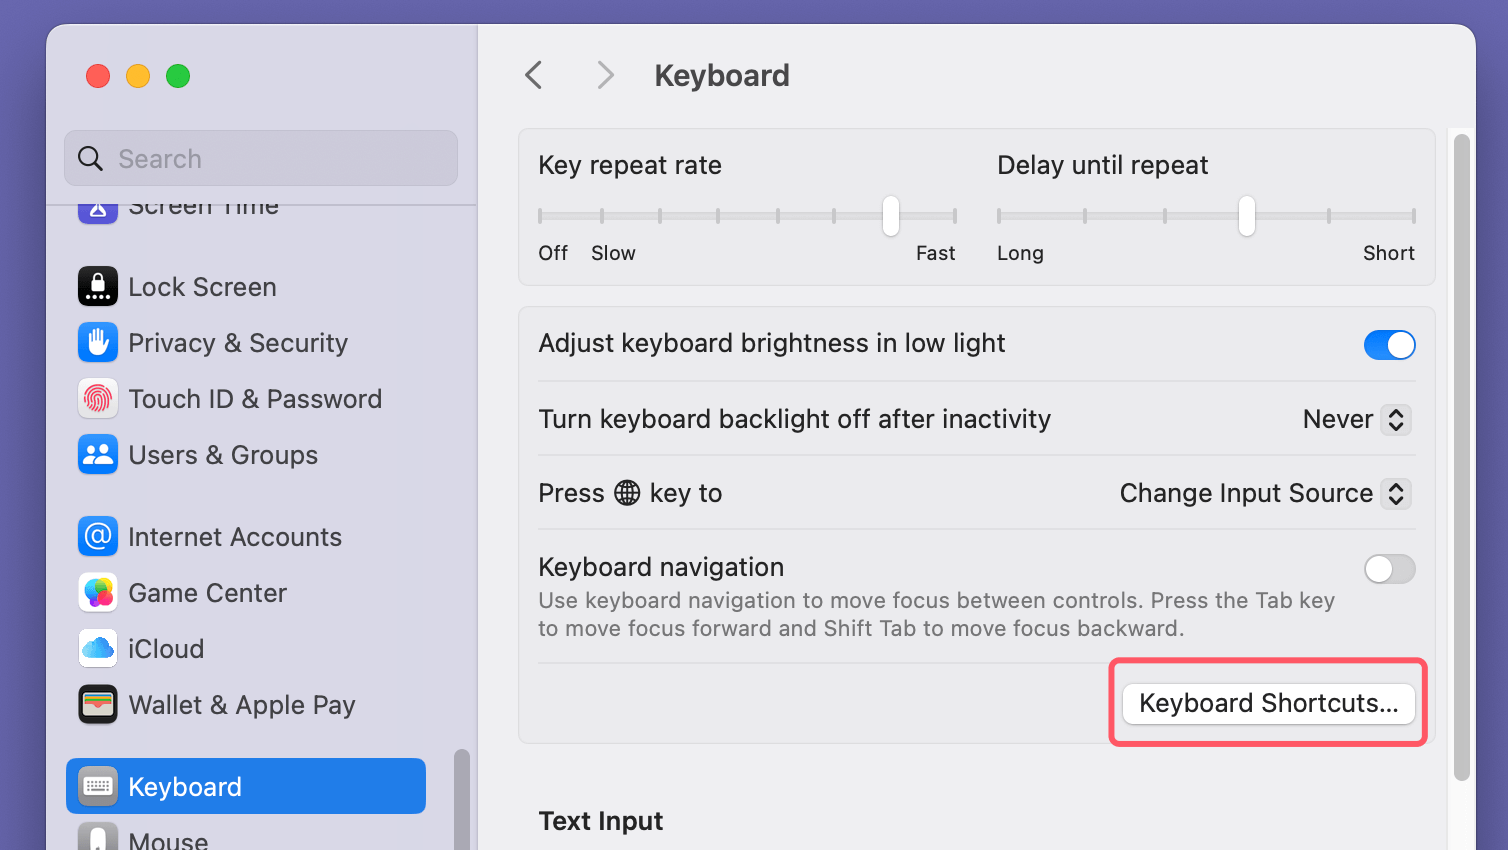
- Check System Settings > Keyboard > Keyboard Shortcuts to ensure the command is enabled.
![bypass the Trash when deleting files on a Mac]()
- Restart your Mac to resolve any temporary glitches.
2. Terminal Commands Fail
If Terminal commands don't work:
- Ensure you have the correct permissions for the file or directory.
- Use sudo for administrative privileges:
sudo rm filename.ext
- Double-check the file path to avoid errors.
3. Files Are Still Recoverable
If bypassing the Trash doesn't prevent recovery:
- Use a secure deletion method to overwrite the data.
- Tools like Secure Empty Trash (on older macOS versions) can help.
Best Practices for File Deletion on Mac
To avoid accidental deletions or mishandling files, follow these best practices:
- Regular File Management: Organize files into folders and periodically delete unnecessary items.
- Enable File Previews: Use Finder's preview pane to confirm the file contents before deletion.
- Use Time Machine Backups: Regular backups ensure that important files can be restored if deleted by mistake.
- Leverage iCloud: Store critical files in iCloud to keep them safe and accessible.
Conclusion
Bypassing the Trash on macOS is a powerful way to streamline file deletion, manage disk space, and securely erase sensitive data. Whether you use keyboard shortcuts, Terminal commands, or third-party tools, each method offers unique advantages tailored to different needs. However, it's crucial to exercise caution and back up important files to prevent accidental data loss.
Deleting files permanently is a double-edged sword: it offers efficiency and security but comes with the risk of irretrievable mistakes. By understanding and implementing the techniques discussed in this guide, you can confidently manage file deletion on your Mac without relying on the Trash.


Donemax Data Eraser for Mac
100% safe and powerful Mac data erasure program. It offers certified data erasure standards including U.S. Army AR380-19, DoD 5220.22-M ECE to help in securely and permanently erase data from Mac HDD/SSD and external storage device, making data recovery be impossible.
Related Articles
- Apr 06, 2025Best 7 Solutions to Fix WD My Passport Not Mounting on Mac Without Losing Data
- May 20, 2025What is ZIP File, How to Open It on Mac?
- Jun 09, 2025How to Open a BitLocker Encrypted USB Drive/External Disk/SD Card on Mac?
- Oct 16, 2024How to Add or Remove Icons from Dock on Mac?
- Jun 12, 2025Factory Reset macOS Catalina: Step-by-Step Guide
- Sep 02, 2025MacBook Pro Not Charging? Fix It with Easy Solutions

Charles
Charles, who lives in Sydney, Australia, is an editor & writer of Donemax Team. He is good at writing articles related with Apple Mac computers, Windows operating systems, data recovery, data erasure, disk clone and data backup, etc. He loves reading and playing tennis in his spare time and is interested in testing new digital devices such as mobile phones, Macs, HDDs, SSDs, digital cameras, etc.

Gerhard Chou
In order to effectively solve the problems for our customers, every article and troubleshooting solution published on our website has been strictly tested and practiced. Our editors love researching and using computers and testing software, and are willing to help computer users with their problems

