Written byCharlesUpdated on Apr 15, 2025
Accidentally Deleted Macintosh HD? Fix It Now
Approved byGerhard Chou
Before we start: Donemax Data Recovery is a powerful data recovery program. It can easily and completely recover lost data from a deleted or formatted Macintosh HD. If you have lost data due to fixing missing Macintosh HD or reinstalling macOS, just use this data recovery program to help recover the deleted/erased and lost data.
PAGE CONTENT:
Accidentally deleting the Macintosh HD, your Mac's primary storage volume, can feel like a nightmare - especially if it contains essential files, your operating system, or critical system partitions. Whether this mishap occurred due to an error in Disk Utility, formatting the wrong volume, or trying to clean up your storage, don't panic. With the right approach, your data and system can be recovered or restored.
In this guide, we'll walk you through everything you need to know about fixing a deleted Macintosh HD, including explanations, step-by-step recovery methods, and tips to prevent it from happening again.
What Is Macintosh HD?
"Macintosh HD" is the default name given to the main hard drive or SSD in macOS systems. It typically contains the macOS operating system, your applications, system files, and personal data like photos, documents, and videos.
Since macOS Catalina, Apple has split the system volume into two parts:
- Macintosh HD – Read-only system files
- Macintosh HD - Data – User data and apps
Deleting or formatting the Macintosh HD volume can cause your Mac to become unbootable, leading to data loss and system errors. But the good news is - it's not always gone forever.
Can You Really Delete Macintosh HD?
Technically, macOS prevents you from deleting the Macintosh HD while you're actively using it. However, it can still be erased or overwritten in situations like:
- Using Disk Utility improperly in Recovery Mode
- Accidentally deleting the volume or reformatting the drive
- Installing macOS on the wrong partition
- Running terminal commands that alter disk partitions
- Corruption or hardware failure that causes the volume to disappear
In many cases, the drive isn't "deleted" in the traditional sense but has become unmounted, erased, or inaccessible due to errors. This distinction is crucial because it means recovery is often possible.
What to Do Immediately After Deleting Macintosh HD?
1. Stop Using the Mac
The very first thing you should do is stop writing any new data to the drive. Continuing to use the Mac can overwrite your deleted data, making recovery more difficult or even impossible.
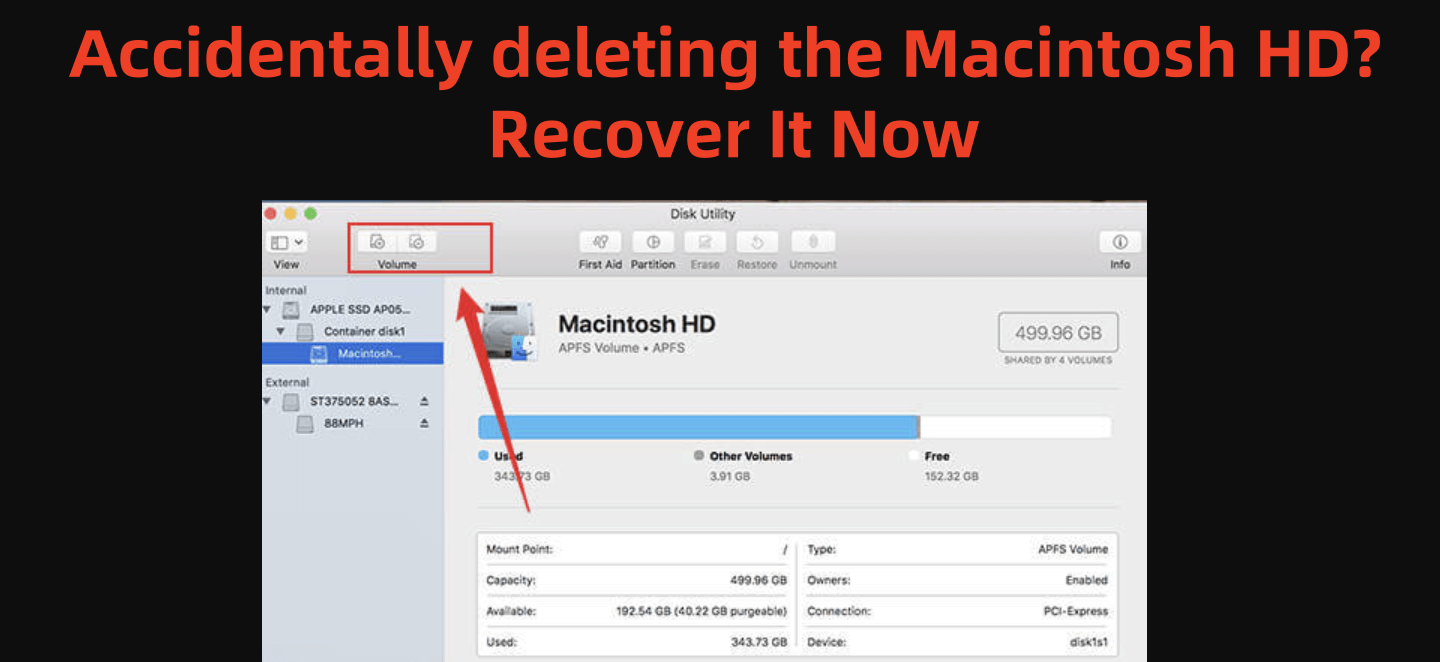
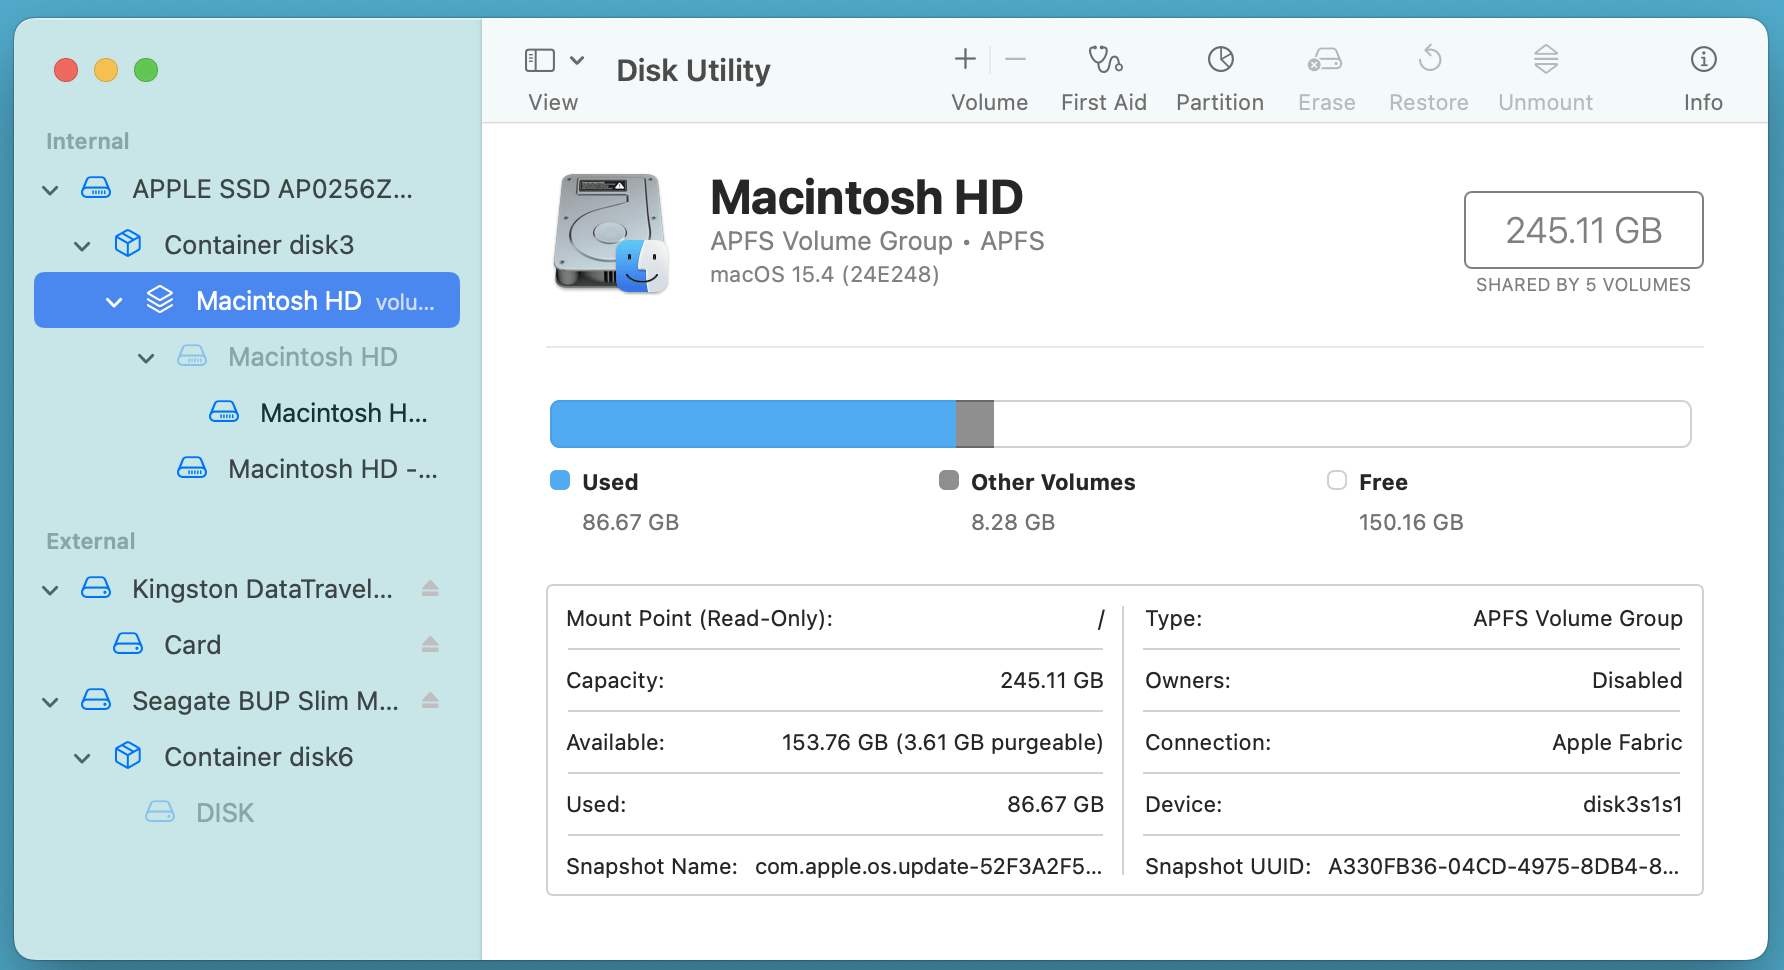
2. Check Disk Utility
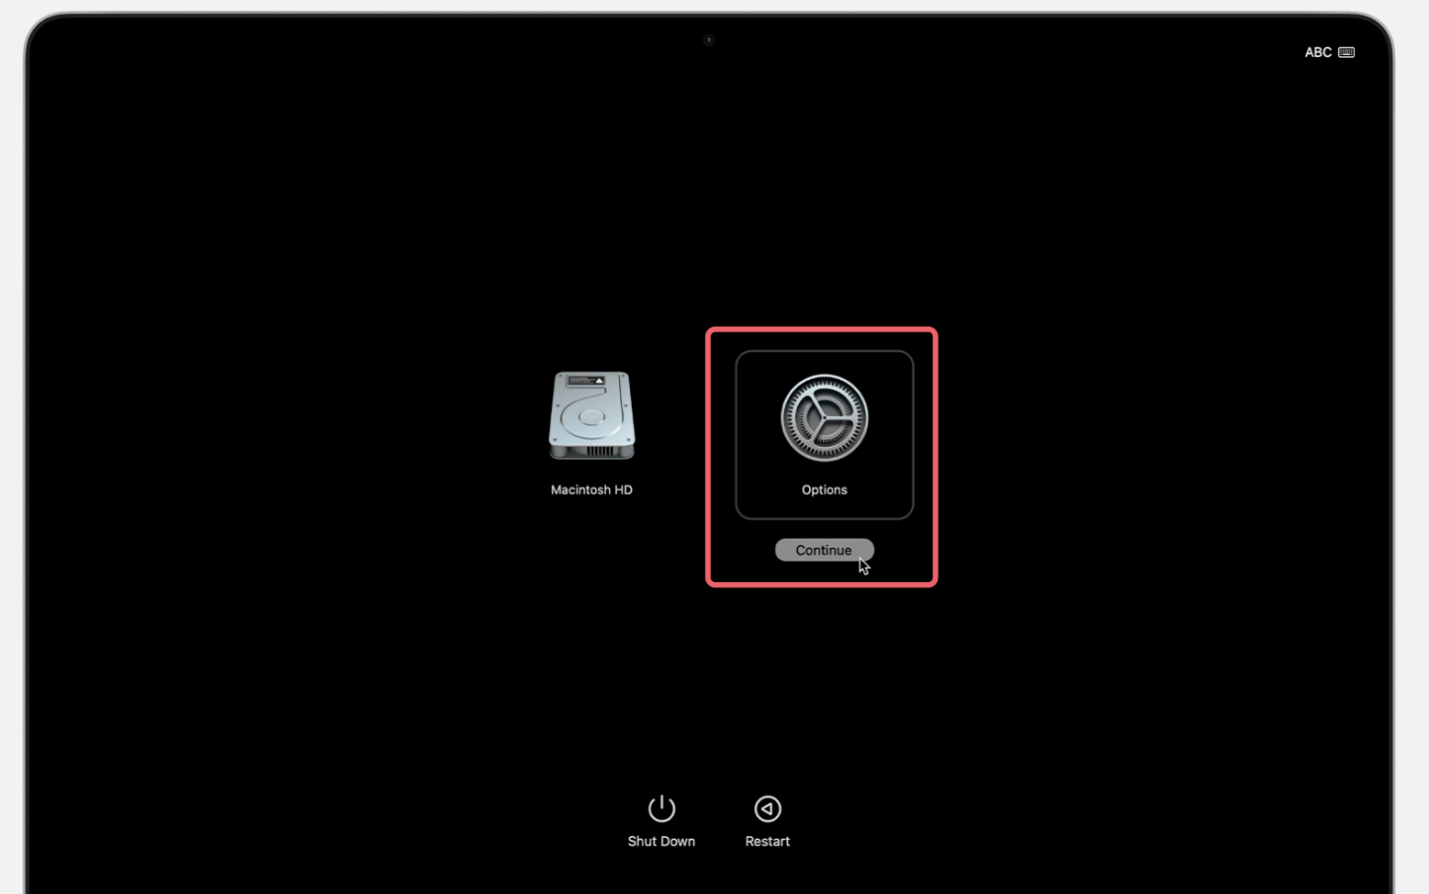
- Boot your Mac into macOS Recovery Mode:
- For Intel-based Mac: Turn off your Mac, then press Command (⌘) + R as it powers on.
- For Apple silicon Mac: Shut down the Mac, then press and hold Power button until it boots into macOS Recovery mode. Choose Options and click Continue.
![Accidentally deleting the Macintosh HD]()
- Choose Disk Utility from the macOS Utilities window.
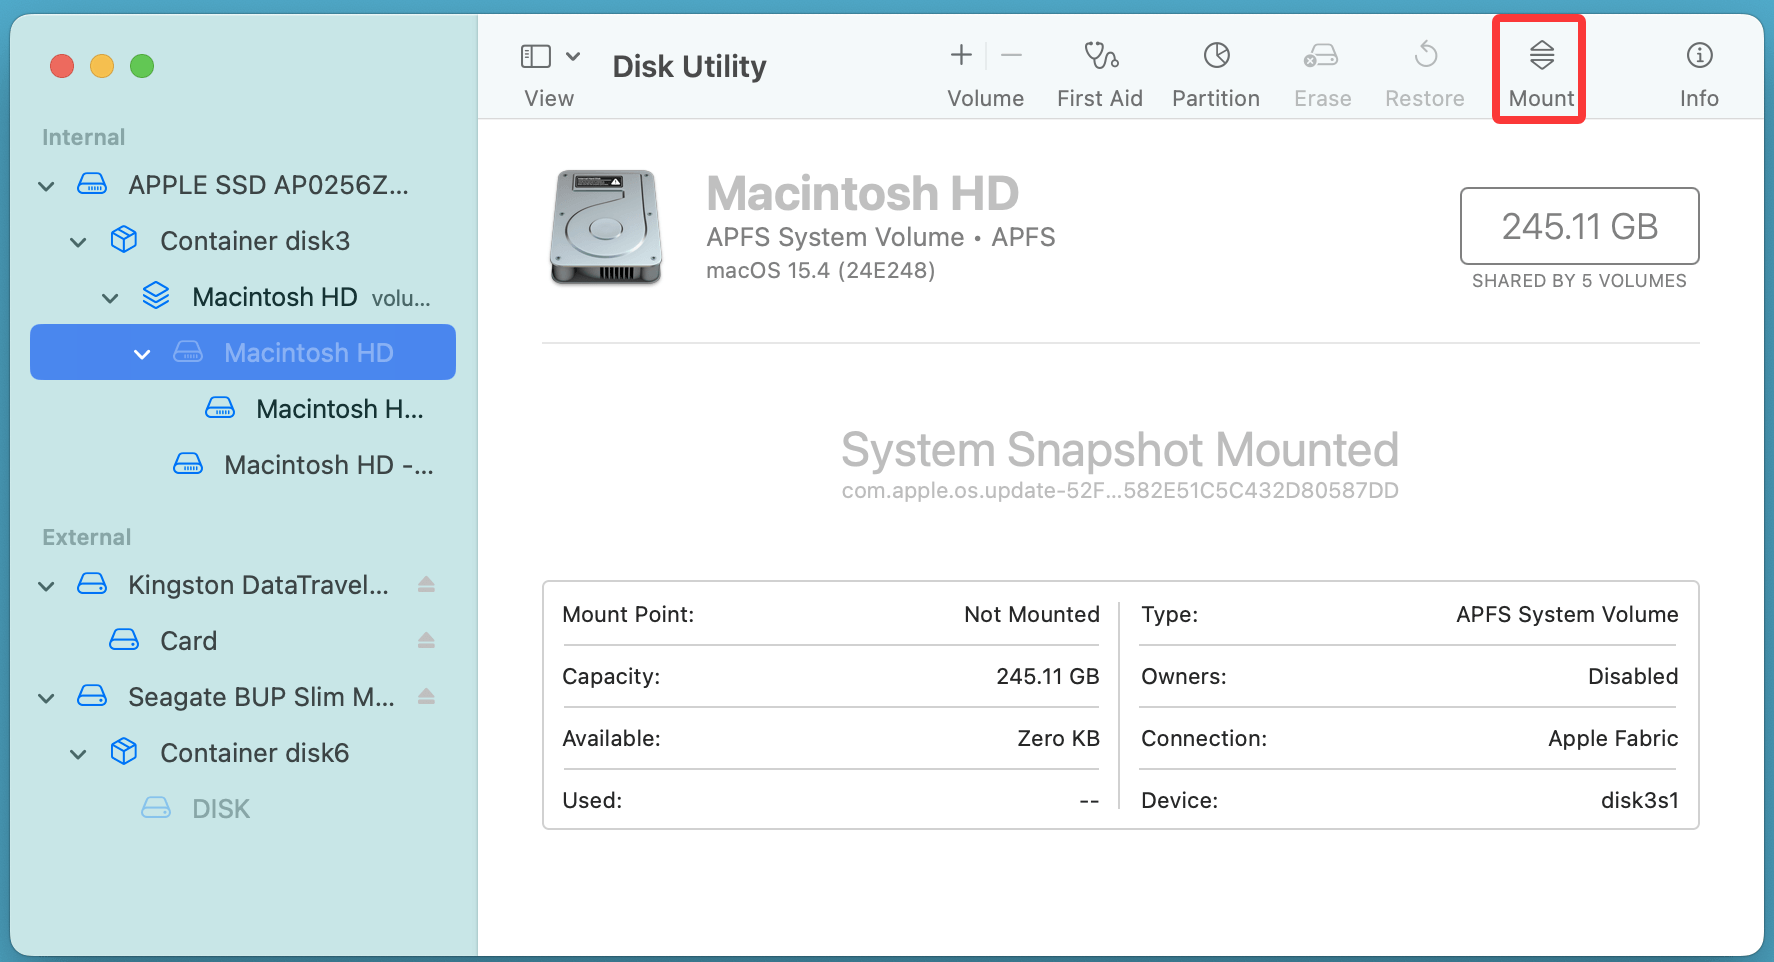
- Look for Macintosh HD or Macintosh HD - Data.
- If it appears greyed out, it's unmounted - not deleted.
- Select the drive and click Mount.
![Accidentally deleting the Macintosh HD]()
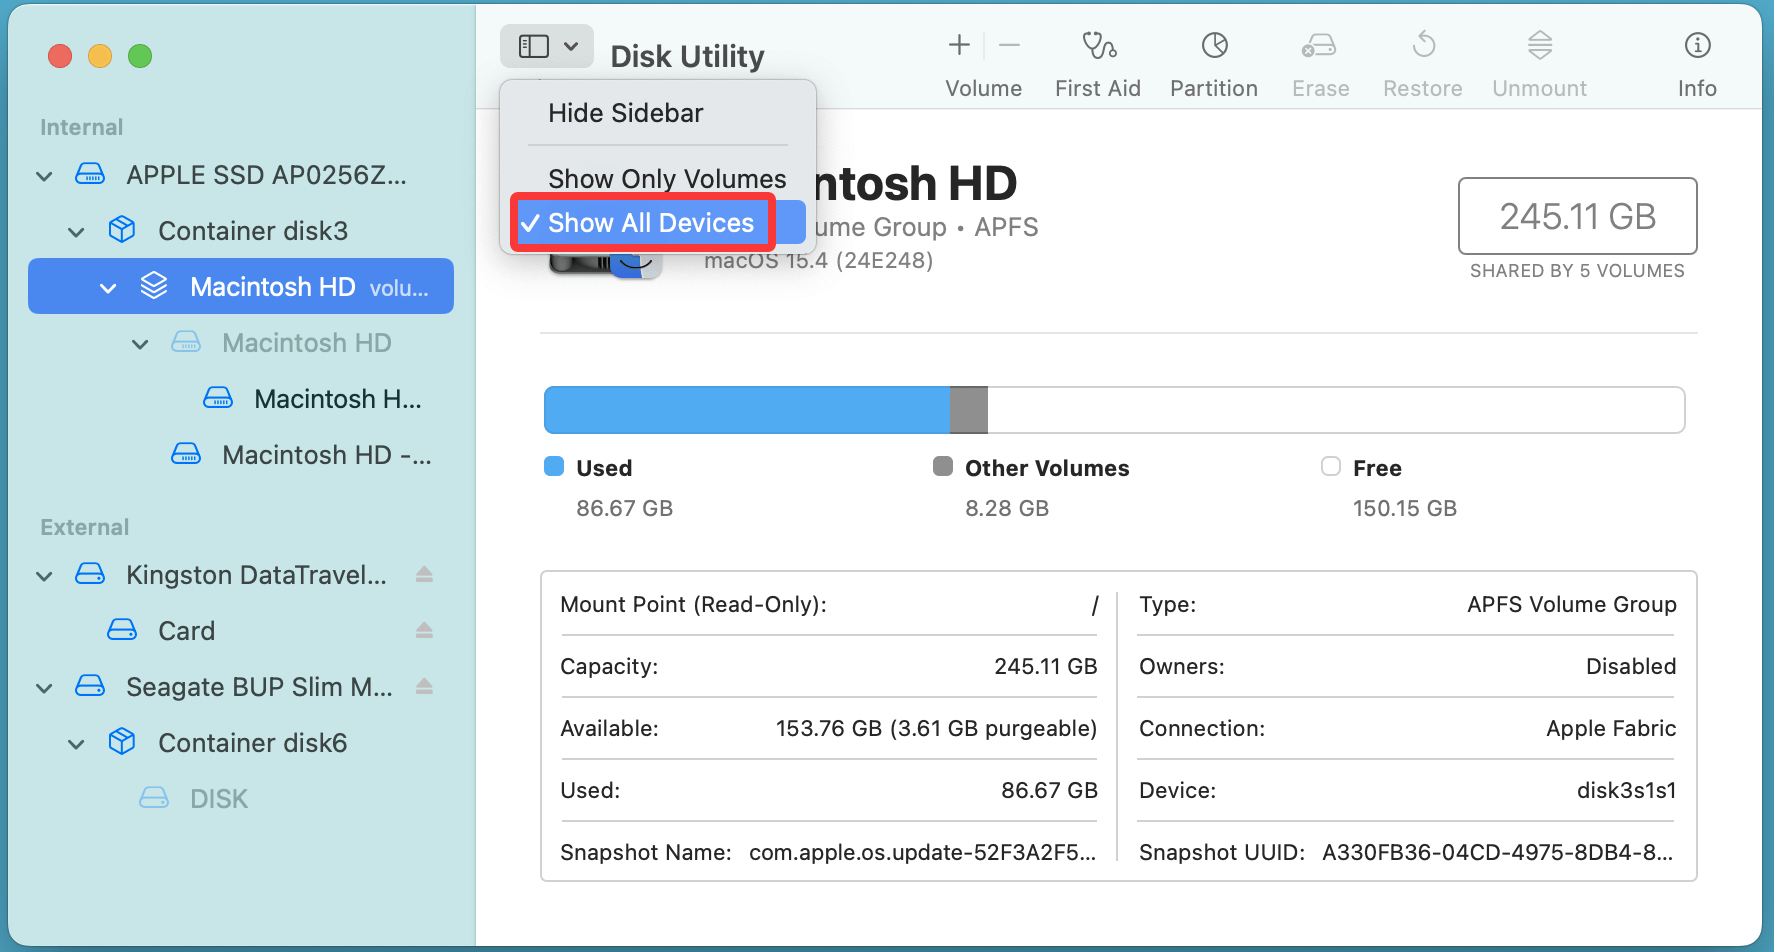
- If it doesn't appear at all, try selecting "Show All Devices" from the View dropdown.
![Accidentally deleting the Macintosh HD]()
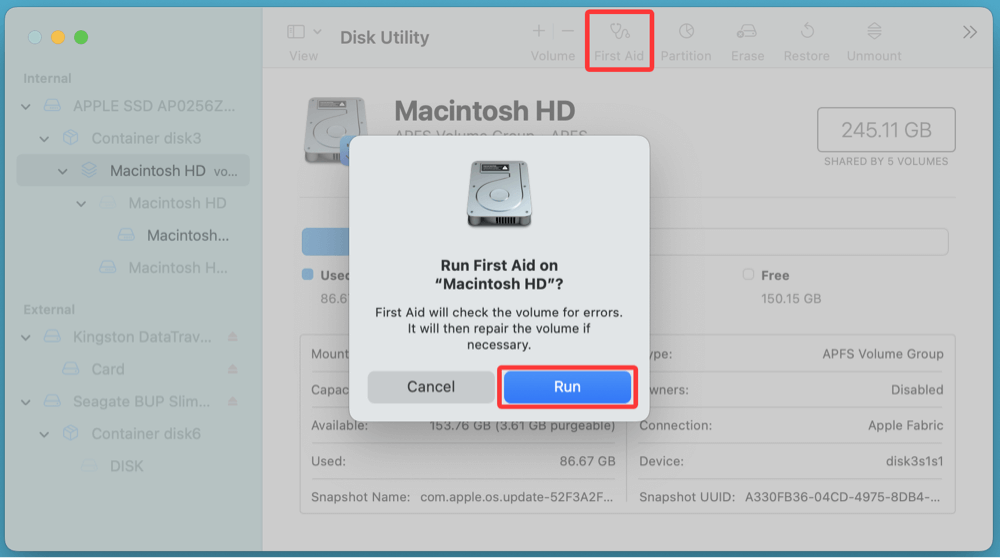
3. Run First Aid in Disk Utility
If the Macintosh HD is visible but acting strange:
- In Disk Utility, select the volume or container.
- Click First Aid and run the diagnostic and repair process.
![Accidentally deleting the Macintosh HD]()
- If errors are found and repaired, your drive may become accessible again.
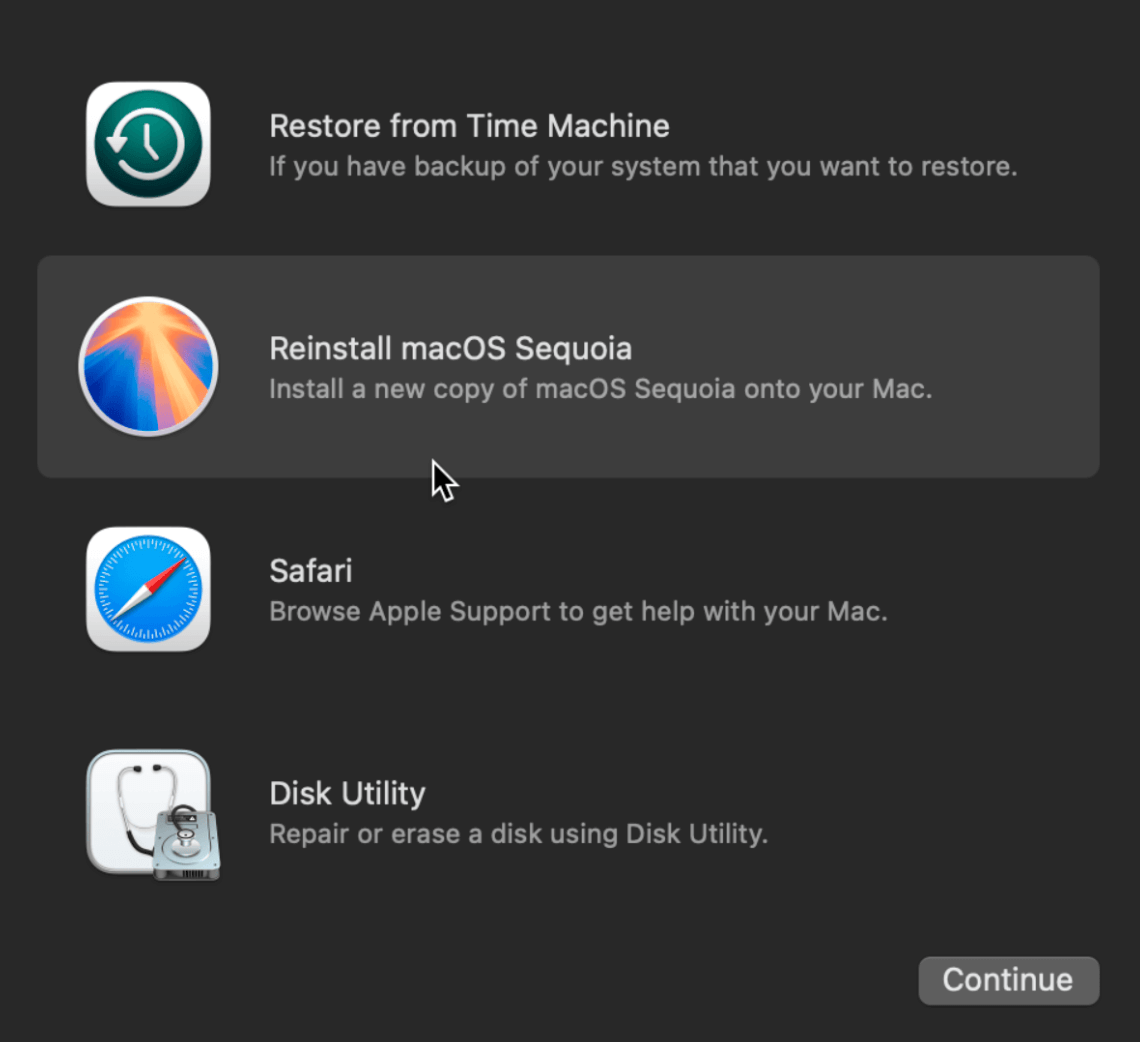
4. Reinstall macOS (Without Formatting)
You can reinstall macOS over the existing drive without erasing data.
- Boot into Recovery Mode (Command + R or Power button).
- Select Reinstall macOS from the Utilities screen.
![Accidentally deleting the Macintosh HD]()
- Follow the prompts and choose your existing disk (if available).
- This refreshes the system files without deleting personal files.
💡 Note: This only works if the data partition is still intact and the disk is not completely reformatted.
Restore Macintosh HD Using Time Machine
If you had Time Machine enabled before the deletion, recovery is straightforward.
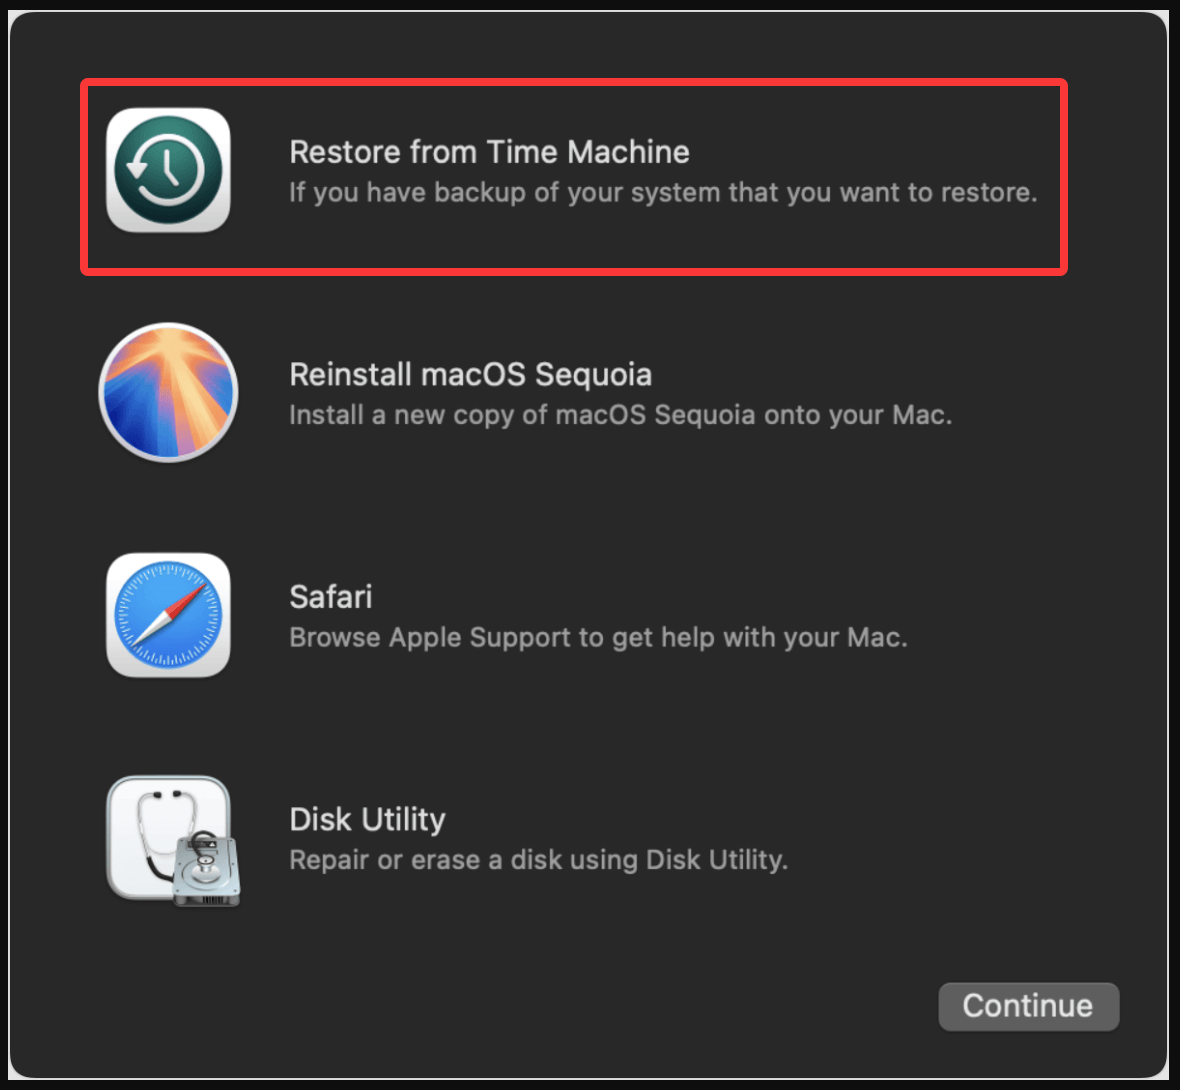
5. Use Time Machine Backup or Software to Recover Data
- Boot into macOS Recovery Mode (Command + R or Power button).
- Select Restore from Time Machine.
![Accidentally deleting the Macintosh HD]()
- Choose the backup source (Time Machine drive).
- Select the latest backup made before the volume was deleted.
- Restore the entire system to that point.
Time Machine backs up both the system and data volumes, making it one of the most reliable ways to recover from such accidents.
Recover Data from Macintosh HD Using Third-Party Software
If Time Machine isn't available and the volume doesn't mount, your best bet is third-party data recovery tools.
If the Macintosh HD doesn't appear in Disk Utility or mounting fails, and you don't have a Time Machine backup, professional Mac data recovery software is your best next step. These tools are specifically designed to scan formatted, deleted, or lost volumes - even if the partition structure is missing - and recover everything from system files to personal data like photos, videos, and documents.
Why Use Third-Party Recovery Tools?
- Deep Scanning Capabilities: These tools can bypass the operating system and scan the drive sector by sector to locate lost data.
- Partition Recovery: Some applications allow you to recover entire lost partitions, including Macintosh HD.
- File Preview Before Recovery: You can preview recoverable files before restoring them, helping you selectively recover what you need.
- File Type Support: They support thousands of file types - DOCX, XLSX, PSD, RAW, ZIP, MOV, MP4, and more.
⚠️ Warning: Do not install recovery software on the same drive you're trying to recover from. Doing so may overwrite the very data you're trying to restore. Always use a second Mac or an external USB drive to perform the recovery.
Donemax Data Recovery for Mac is a powerful data recovery program which is able to recover lost data from deleted or erased Macintosh HD.
Step 1. Download and install Donemax Data Recovery for Mac on your Mac.
Step 2. Open Donemax Data Recovery for Mac, select Macintosh HD or entire Mac's SSD to start data recovery.

Step 3. Click on Scan button to deeply scan the drive and find all recoverable files.

Step 4. Once the scan is completed, you can preview all recoverable files, then select the wanted files, click on Recover button to save them.

Limitations and Considerations
- TRIM on SSDs: If you deleted Macintosh HD on an SSD, macOS might have already triggered TRIM, which can make recovery impossible. Some tools try to work around this, but success rates vary.
- Encrypted Drives: If your drive was encrypted with FileVault, you’ll need the password to decrypt and scan it.
- Free vs Paid Versions: Most tools offer free scans and previews, but actual recovery requires a paid license.
Best Practices for Using Recovery Software
- Always Scan the Entire Disk, not just visible volumes.
- Label Recovered Files for easier sorting later.
- Run Deep Scans Overnight – they may take hours on large drives.
- Recover in Batches to avoid performance issues.
By using professional-grade Mac recovery tools, even a "deleted" Macintosh HD isn't necessarily gone for good. These tools can be lifesavers, especially when you don't have a backup and need to recover precious files urgently.
Recreate the Macintosh HD Partition on Mac
If the disk structure is missing, you may need to manually create a new partition and reinstall macOS.
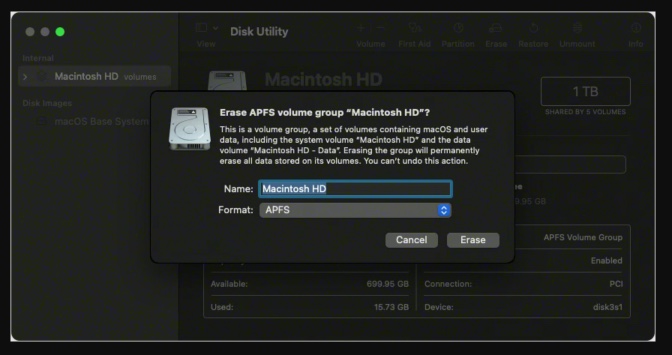
Create New Partition and Install macOS:
- Open Disk Utility in Recovery Mode.
- Select your internal storage (e.g., Apple SSD…).
- Click Erase and format it as APFS or Mac OS Extended (Journaled). Name it Macintosh HD.
![Accidentally deleting the Macintosh HD]()
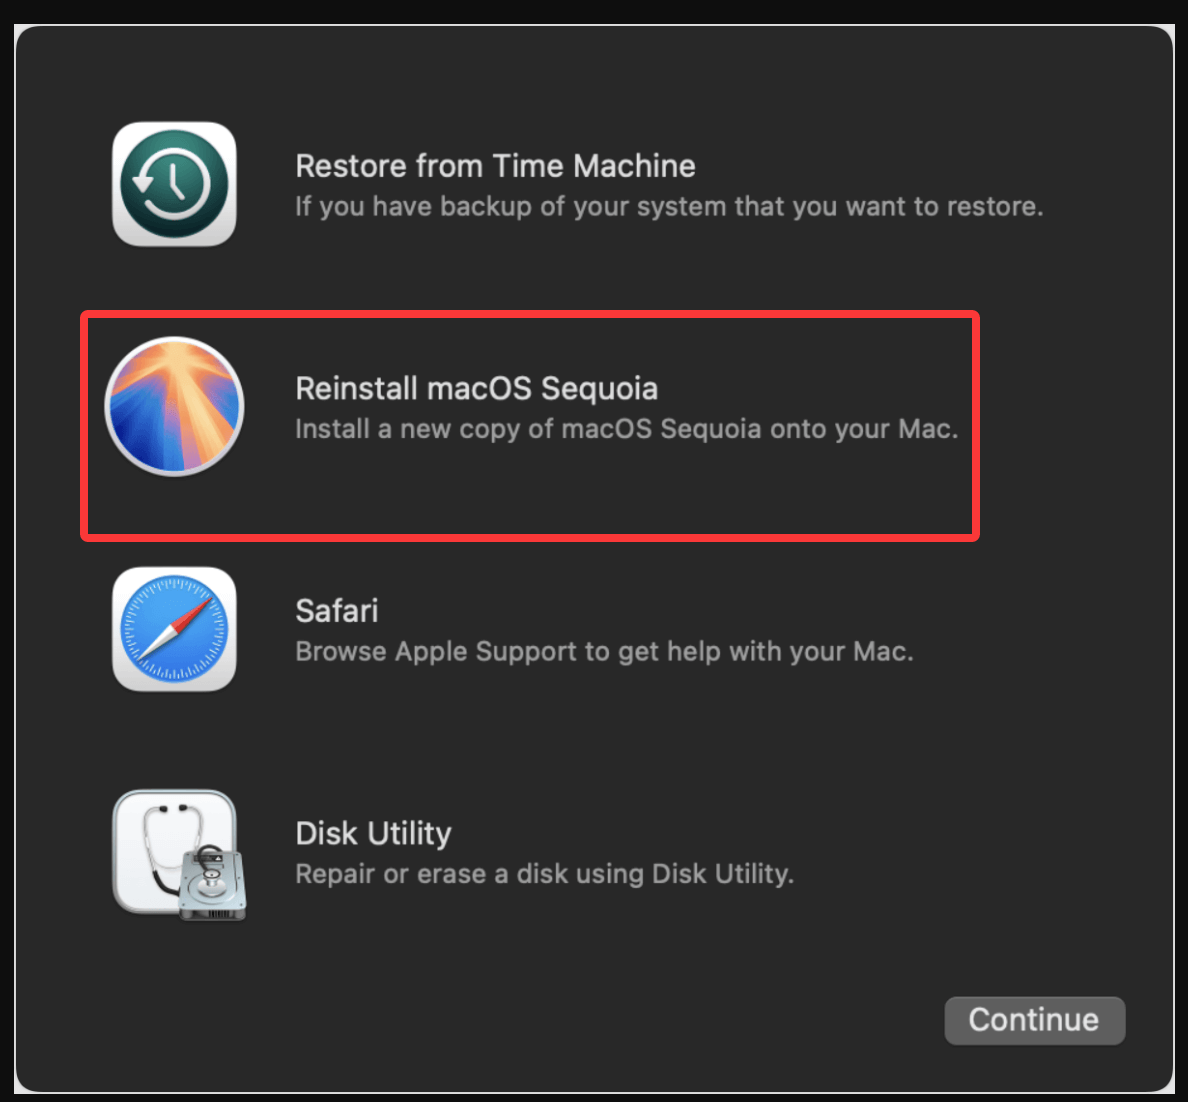
- Quit Disk Utility.
- In the Utilities window, choose Reinstall macOS.
![Accidentally deleting the Macintosh HD]()
- Follow instructions to install macOS from the internet.
This process gives you a clean slate. If you have a backup, restore your files after installation.
When to Contact Apple Support or Professional Help
If:
- The disk is not recognized at all
- Recovery software fails to find your data
- You hear unusual clicking sounds (indicating hardware failure)
- You suspect physical damage or logic board issues
…it's time to reach out to the professionals.
Apple Genius Bar or Authorized Service Provider
- Apple can help you reinstall macOS and reconfigure your storage.
- If you're under warranty or AppleCare+, some repairs may be covered.
Data Recovery Services
There are certified data recovery labs that can:
- Extract data from physically damaged drives.
- Restore deleted partitions using advanced forensic techniques.
Top providers include:
- DriveSavers
- Ontrack Data Recovery
- Secure Data Recovery Services
These services can be expensive but are worth it for mission-critical data.
Prevent Future Macintosh Loss or Data Loss
To avoid a repeat of this stressful situation, implement a few safety practices:
Set Up Time Machine:
- Connect an external drive.
- Go to System Settings > General > Time Machine.
- Turn it on and select the disk.
![Accidentally deleting the Macintosh HD]()
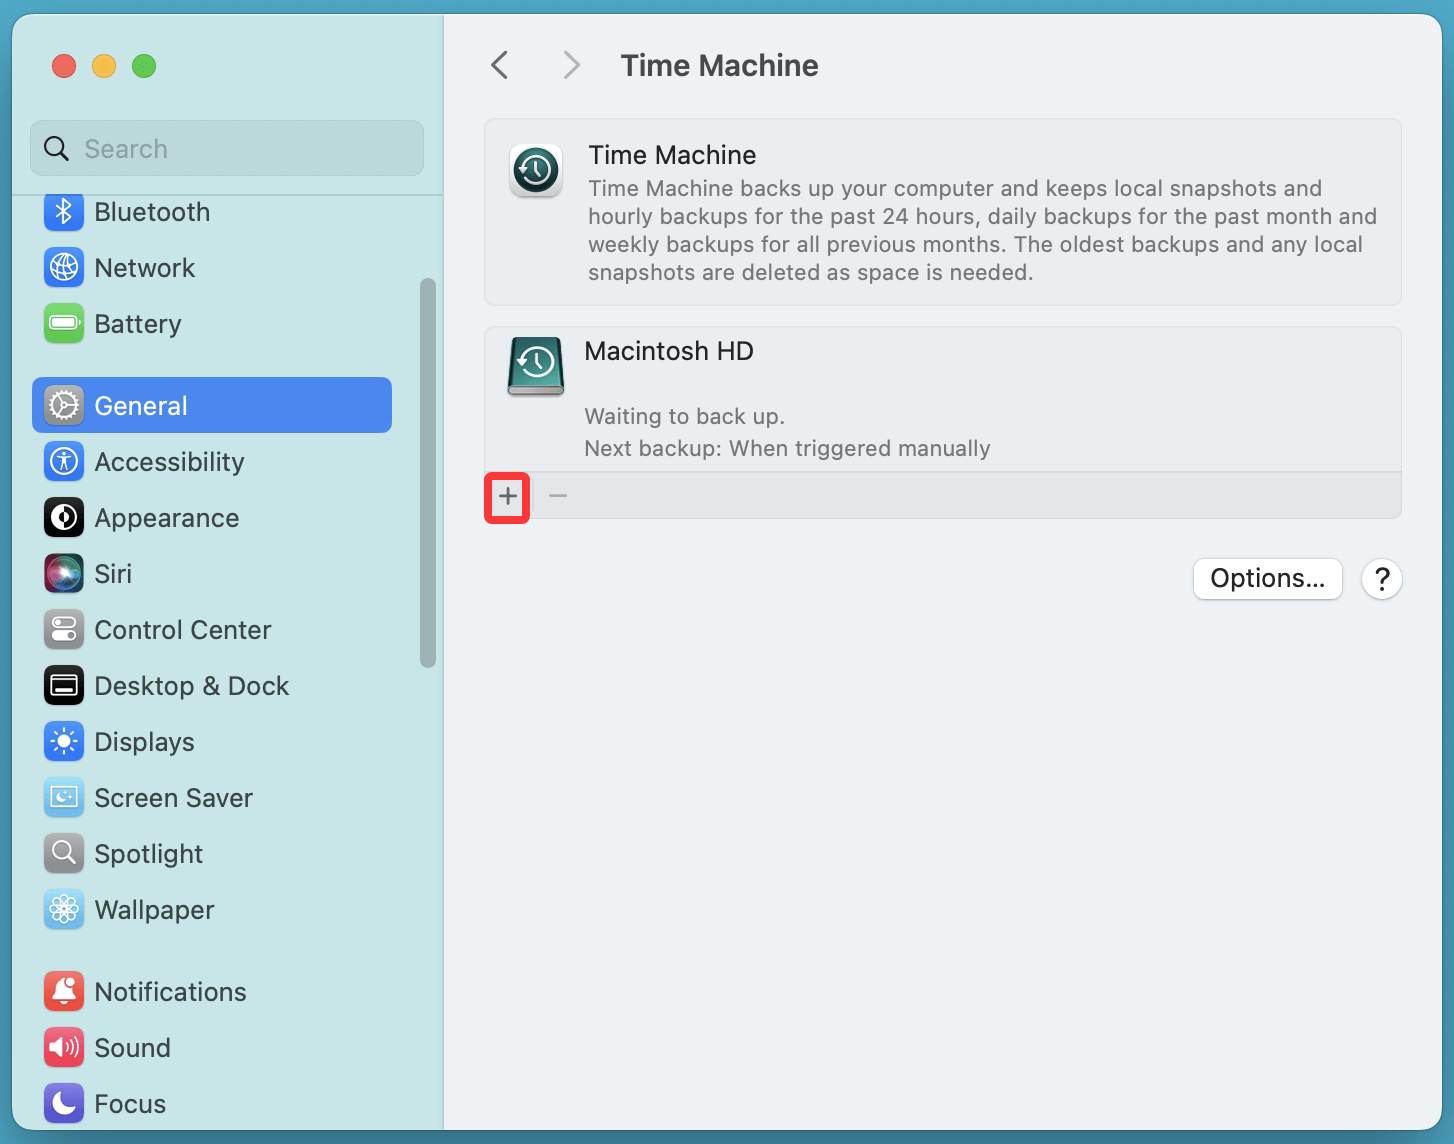
Time Machine creates automatic hourly backups for the past 24 hours, daily backups for the past month, and weekly backups for older data.
Use Disk Cloning Software:
Tools like Donemax Disk Clone for Mac allow you to create a bootable copy of your entire Mac.
Step 1. Download and install Donemax Disk Clone for Mac on your Mac. Connect an external hard drive to your Mac.
Step 2. Open Donemax Disk Clone for Mac, choose OS Clone mode. Select the external hard drive as the destination drive, click on Clone Now button.
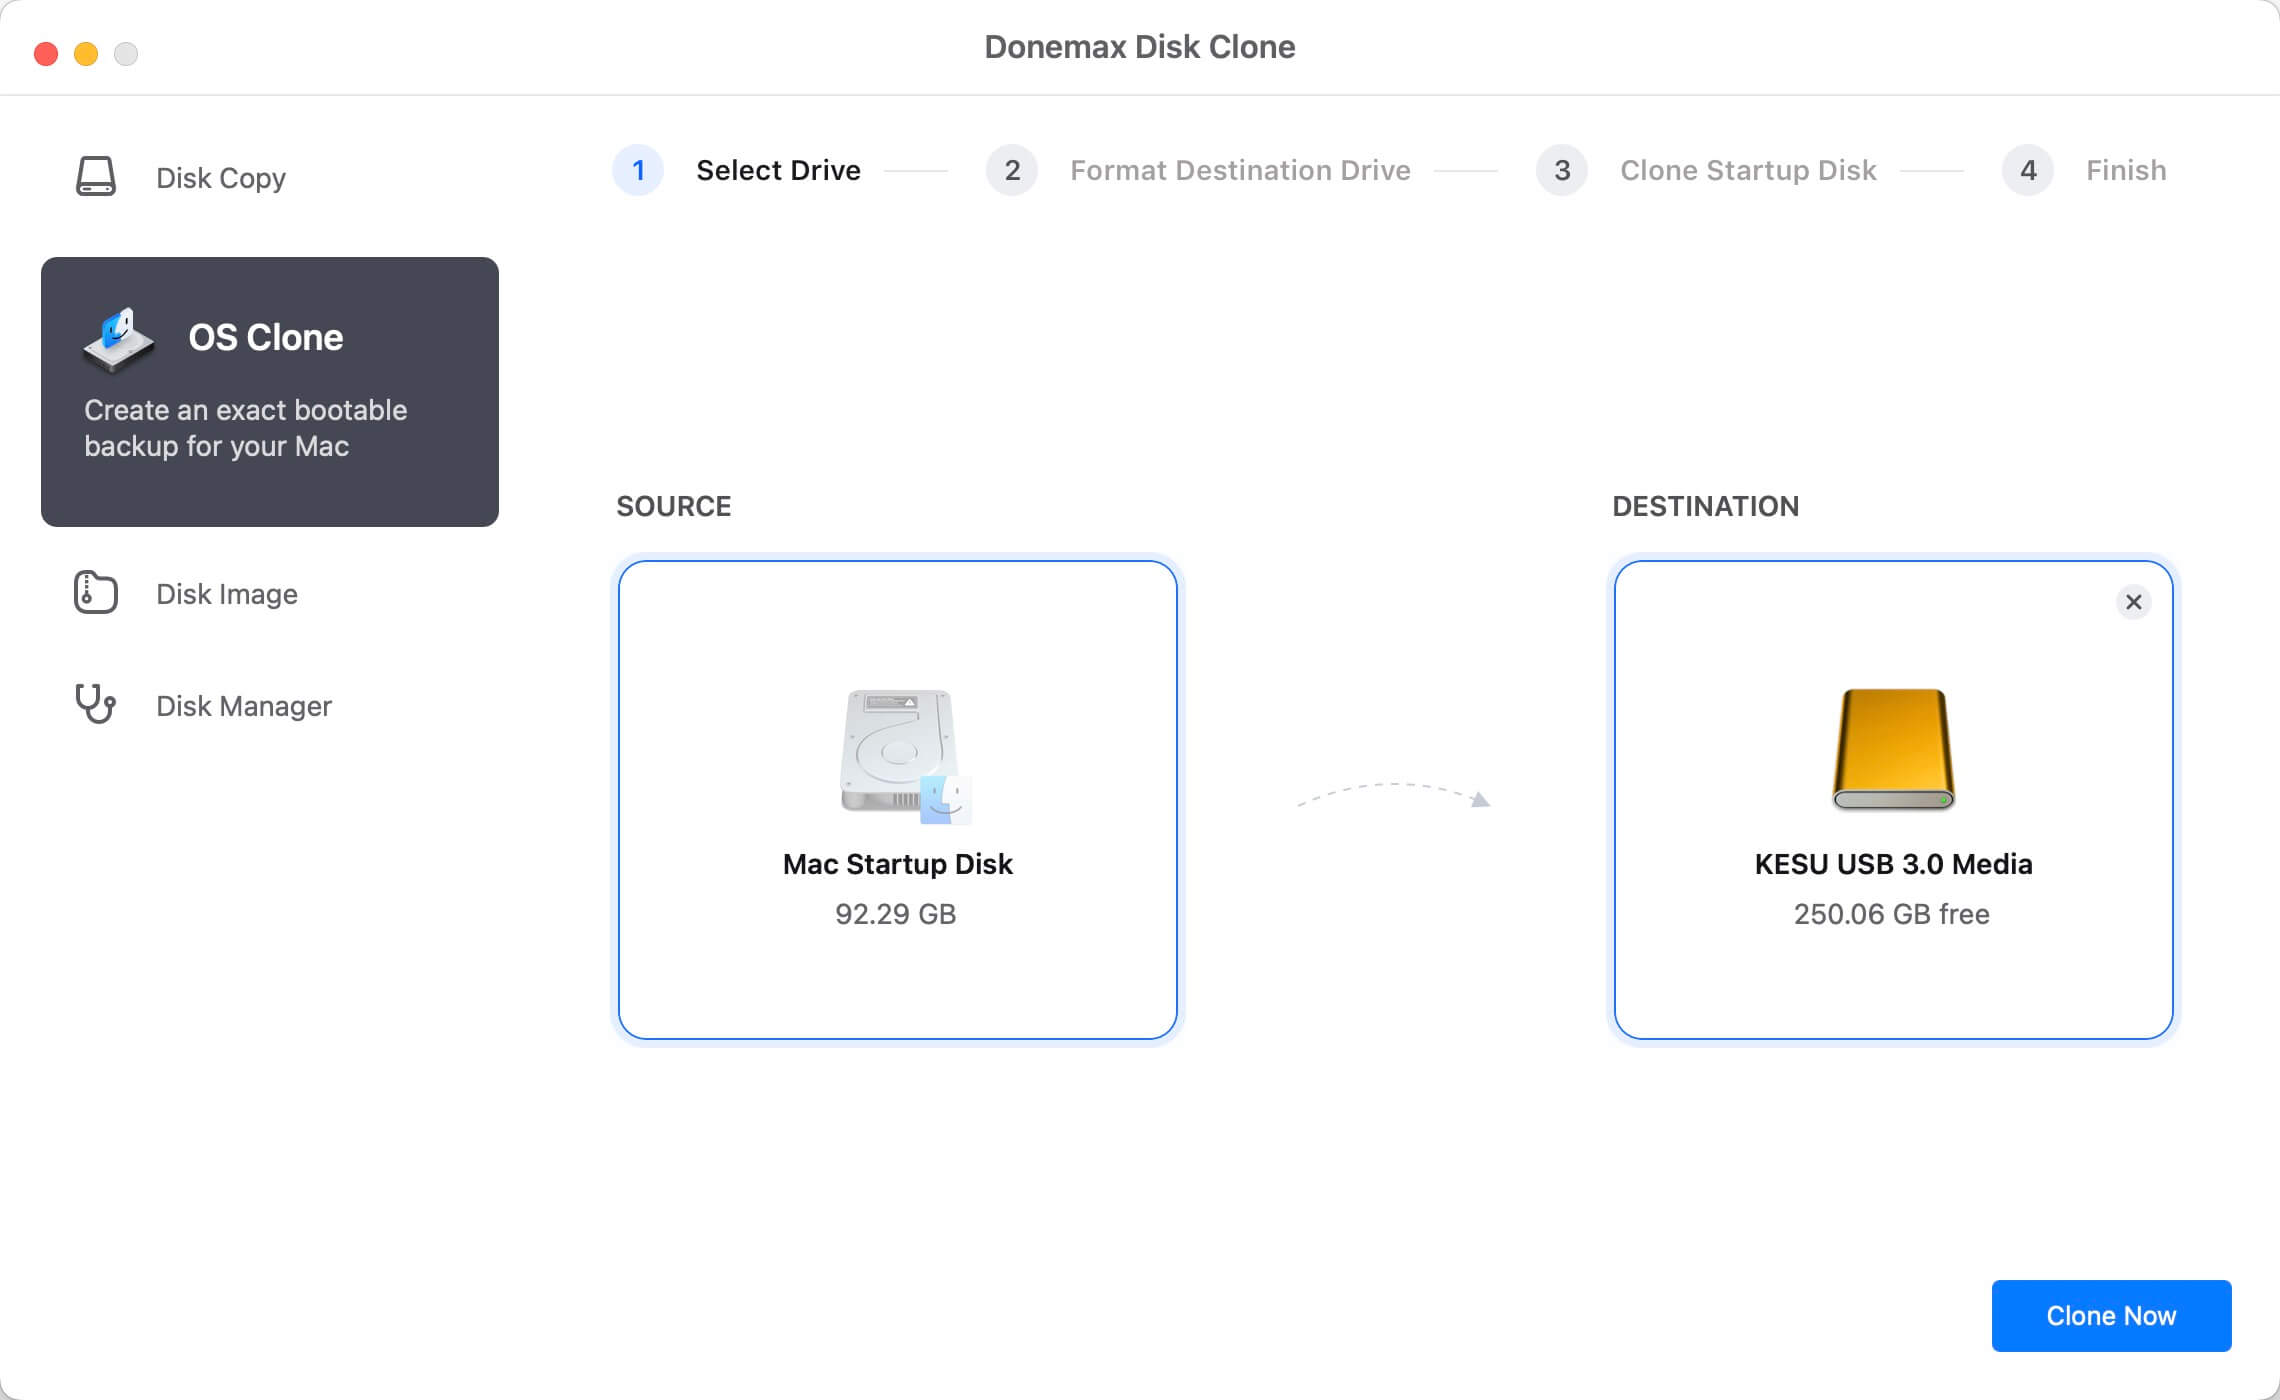
Donemax Disk Clone for Mac will clone everything including macOS, apps, user data, settings from the Mac's internal disk to the external hard drive, making a full bootable clone backup.
Be Cautious in Disk Utility:
Disk Utility is powerful, but mistakes can be catastrophic. Double-check:
- That you're erasing the correct volume.
- Whether you need to format or simply repair a disk.
- That you understand the consequences of deleting APFS containers or partitions.
Create a Bootable macOS Installer:
- Download macOS from the App Store.
- Use Terminal to create a bootable USB installer.
- Use this if your recovery partition fails in the future.
🔗 Related link: how to create a bootable installer for macOS.
Conclusion
Accidentally deleting Macintosh HD is serious, but far from the end of the road. By acting quickly and avoiding further data writing, you greatly increase your chances of a full recovery.
Start by checking Disk Utility and using First Aid. If that doesn't work, try reinstalling macOS or restoring from Time Machine. For deeper issues, reliable data recovery software (such as Donemax Data Recovery for Mac) can help retrieve lost files. And if everything else fails, Apple support or professional recovery labs are available to assist.
The most important takeaway? Always back up your data. With Time Machine, disk cloning, and cloud storage, you can recover from almost any disaster - accidental deletion included.
Donemax Data Recovery for Mac
Donemax Data Recovery for Mac is one of the best Mac data recovery software. It is easy-to-use and can help in recovering deleted, formatted, inaccessible or lost data from Mac HDD/SSD, external disk, USB drive, SD card, camera or other storage devices.
Related Articles
- Aug 05, 2024How to Use 1TB or 2TB SD Card on Mac?
- Dec 06, 2024Why Can't I Select an External Hard Drive for Time Machine Backup Disk?
- Jan 17, 2025Force Delete Files on Mac: A Complete Guide
- Feb 06, 2025[4 Methods] Fix The Volume Macintosh HD Was Found Corrupt and Needs to Be Repaired
- Jan 12, 2025Fix First Aid Found Corruption That Needs to Be Repaired Without Losing Data on Mac
- Oct 16, 2024Can't Open Trash on Mac? Here's How to Fix It

Contributing Writer
Charles
Charles, who lives in Sydney, Australia, is an editor & writer of Donemax Team. He is good at writing articles related with Apple Mac computers, Windows operating systems, data recovery, data erasure, disk clone and data backup, etc. He loves reading and playing tennis in his spare time and is interested in testing new digital devices such as mobile phones, Macs, HDDs, SSDs, digital cameras, etc.

Editor in chief
Gerhard Chou
In order to effectively solve the problems for our customers, every article and troubleshooting solution published on our website has been strictly tested and practiced. Our editors love researching and using computers and testing software, and are willing to help computer users with their problems