Written byCoco LinUpdated on Aug 05, 2024
How to Use 1TB or 2TB SD Card on Mac?
Approved byGerhard Chou
PAGE CONTENT:
As the need for more storage grows, 1TB and 2TB SD cards are now necessary for photographers, filmmakers, and anyone else who needs to store a lot of data. Using these high-capacity SD cards with a Mac can greatly improve your workflow and storage choices.
This guide will show you how to use 1TB or 2TB SD cards on your Mac. It covers everything from making sure the cards are compatible to fixing common problems. We'll give you detailed steps and tips on how to handle and make the most of your high-capacity SD cards so they work perfectly and reliably, whether you want to store a lot of high-resolution photos and videos, make your Mac's storage bigger, or make safe backups.
Understanding SD Card Types and Compatibility
Types of SD Cards:
There are several types of SD cards, mostly based on their capacity and efficiency standards:
- SD (Secure Digital): Up to 2GB most of the time.
- SDHC (Secure Digital High Capacity): Ranges from 4GB to 32 GB.
- SDXC (Secure Digital Extended Capacity): Ranges from 64GB to 2TB.
- SDUC (Secure Digital Ultra Capacity): It is more than 2TB, but not many people use it yet.
For 1TB and 2TB capacities, you'll be dealing with SDXC cards.

Mac Compatibility:
However, it's important to make sure that your specific type of Mac can handle high-capacity cards:
- Built-in SD Card Slots: Check to see if your Mac has a slot for an SD card. Many MacBook Pro and iMac models have slots built in, but later models may need an external card reader.
- External Card Readers: If your Mac doesn't have an SD card slot built-in, you can use a separate card reader. Make sure that the reader can read SDXC cards.
Checking Compatibility:
Look at Apple's official specs for your Mac model to see if it's compatible. You can also try putting the SD card into a slot on your Mac to see if it works.
How to Format 1TB or 2TB SD Card for Mac?
You should format a 1TB or 2TB SD card on your Mac before you can use it. This process ensures that the card works best with Mac OS and can help avoid problems.
Steps to Format an SD Card on a Mac:
Step 1. Put the SD Card in: Either put the SD card on your Mac or connect it to an external card reader.
Step 2. Open Disk Utility: Start by going to Applications > Utilities > Disk Utility.
Step 3. Select the SD Card: In the Disk Utility window, select your SD card from the list of drives.
Step 4. Erase the SD Card:
- Press the "Erase" button.
- Pick a style that works. If you want to use your drive with macOS, you should use ExFAT or APFS, Mac OS Extended (Journaled).
- As soon as you're done, give your SD card a name and click "Erase."
![Erase the SD Card]()

Choosing the Right Format:
- ExFAT is perfect if you want to use the SD card on both a Mac and a PC. It works with all file types and can handle big files.
- APFS: This file system is the native file system for macOS 10.13 or later.
- Mac OS Extended (Journaled): This is best for use only with macOS. It works better with macOS functions and makes the system run faster.
Recover Lost Data from Formatted 1TB or 2TB SD card on Mac:
If you lose important data due to formatting your 1TB or 2TB SD card on Mac, you can use a data recovery app to deeply scan the formatted 1TB or 2TB SD card and find all recoverable files.
Step 1. Download and install the SD card data recovery software - Donemax Data Recovery for Mac, then connect the 1TB or 2TB SD card to your Mac.
Step 2. Open Donemax Data Recovery for Mac, select the SD card, and click on Scan button.

Step 3. This SD card recovery software offers deep scan mode to ensure finding every recoverable file. Once you click on Scan button, it deeply scans the SD card and show you what it has found.

Step 4. When the scan is completed, you can preview all recoverable files including images and videos, documents, etc. Then select the wanted files and save them by clicking on Recover button.

Using the SD Card for Different Applications
Photography and Video Recording:
Large amounts of high-resolution pictures and videos can be stored on SD cards with a lot of space. In order to use your SD card for this:
- Insert the SD Card into Your Camera: Make sure that your camera can handle SDXC cards. If necessary, format the card in your camera.
- Transfer Files to Mac: After taking pictures and movies, put the SD card into your Mac. To add video, use the Photos app or Image Capture.
Backing Up and Storing Data:
For safekeeping important files and papers, it's easy to use a 1TB or 2TB SD card for data storage and backups:
- Manual Backup: In Finder, drag and drop things from your Mac to the SD card.
- Automated Backup: You can set up automatic saves to your SD card with Time Machine, which is built into macOS.
- Disk Clone Backup: Clone all data including macOS, apps, user data and settings from your Mac to the 1TB/2TB SD card, and make a full bootable clone backup.
Expanding Storage:
If the native storage on your Mac is getting low, you can use an SD card as extra storage:
- Mount the SD Card: When you insert the SD card, Finder will see it as an external drive.
- Move Non-Essential Files: Move big files like movies, music, and papers to the SD card to free up space on your computer's hard drive.
Troubleshooting Common Issues
SD Card Not Recognized:
The steps below should help if your Mac doesn't see your SD card:
- Check the Card and Slot: Make sure that the SD card is in the slot properly and that it is free of any dust or other debris.
- Try Another Card Reader: Try a different external card reader to check for hardware problems.
- Restart Your Mac: A simple restart can sometimes fix problems with detection.
- Check Disk Utility: Launch Disk Utility and check to see if the card is shown but not mounted. If so, try to mount it by hand.
- Edit Finder Settings: Click Finder on Apple menu, choose Settings. When Finder Settings window opens, click General, Sidebar, make sure External disks is selected.
Fix SD Card Not Recognized on Mac Without Losing Data
SD card is not showing up or not detected on Mac? Find the right solution to fix this issue and get all lost data back.
Data Transfer Errors:
Data transfer mistakes can happen for many reasons, such as a damaged file system or a problem with the hardware:
- Verify the Card: Check the SD card and fix it with Disk Utility. Click on First Aid on the card you want to use.
- Reformat the Card: If the errors persist, make a copy of your information and format the SD card.
- Check for Physical Damage: Check the SD card for any damage or signs of wear.
Slow Performance:
Sometimes, high-capacity SD cards slowly work because they are fragmented or not formatted correctly:
- Defragment the Card: Use a third-party tool to clean the card on a regular basis.
- Use a High-Speed Reader: Make sure that your card reader can send and receive data quickly.
- Check Read/Write Speeds: Make sure that the read/write speeds of the SD card meet your needs.
Conclusion:
A strong way to increase your storage space on a Mac is to use a 1TB or 2TB SD card. You can get the most out of these high-capacity storage options by making sure they work with each other, loading the card correctly, and using and maintaining them according to best practices.
SD cards make it easy to manage large amounts of data, whether you're a photographer or videographer or need more space. Keep your Mac and its accessories up to date, be careful with your SD cards, and make backups to keep your info safe and your computer running at its best. Take advantage of the space on high-capacity SD cards to make your digital life on a Mac easier.
FAQs About Using 1TB or 2TB SD Card on Mac
1. How to format a 1TB or 2TB SD card for Mac?
First of all, make a backup of your important files stored on the SD card. Then use Disk Utility to format it for Mac:
- Connect the SD card to your Mac.
- Go to Launchpad > Other > Disk Utility, open Disk Utility.
- Select the 1TB or 2TB SD card, click Erase.
- Select a Format such as ExFAT for Windows and macOS, APFS for macOS 10.13 or later, Mac OS Extended for older macOS versions.
- Click Erase again.
- When the process gets finished, click Done and check if the SD card is formatted to the file system you selected.
![check if the SD card is formatted to the file system you selected]()

2. Can I use a NTFS 1TB/2TB SD card on Mac without formatting?
Yes, just install a NTFS driver on your Mac, and use it to enable writable for the NTFS-formatted SD card:
Step 1. Download and install Donemax NTFS for Mac on your Mac.
Step 2. Select the NTFS SD card, click on Enable Writable button. Then you can read-write any NTFS drive including the NTFS SD card on your Mac without any limitation.

3. How to fix my 1TB or 2TB SD card not showing up on Mac?
- Open a Finder, then click Finder on Apple menu.
- Choose Settings.
- In Finder Settings window, click General and Sidebar.
- Make sure External disks is selected.
![Make sure External disks is selected]()

4. How to back up Mac data with a 1TB or 2TB SD card?
1>Go to System Settings > General > Time Machine, then select the 1TB or 2TB SD card as the Backup Disk, then click Back Up Now. It will back up your Mac data to the SD card.

2>Use disk cloning software to clone all data from your Mac to the 1TB or 2TB SD card:
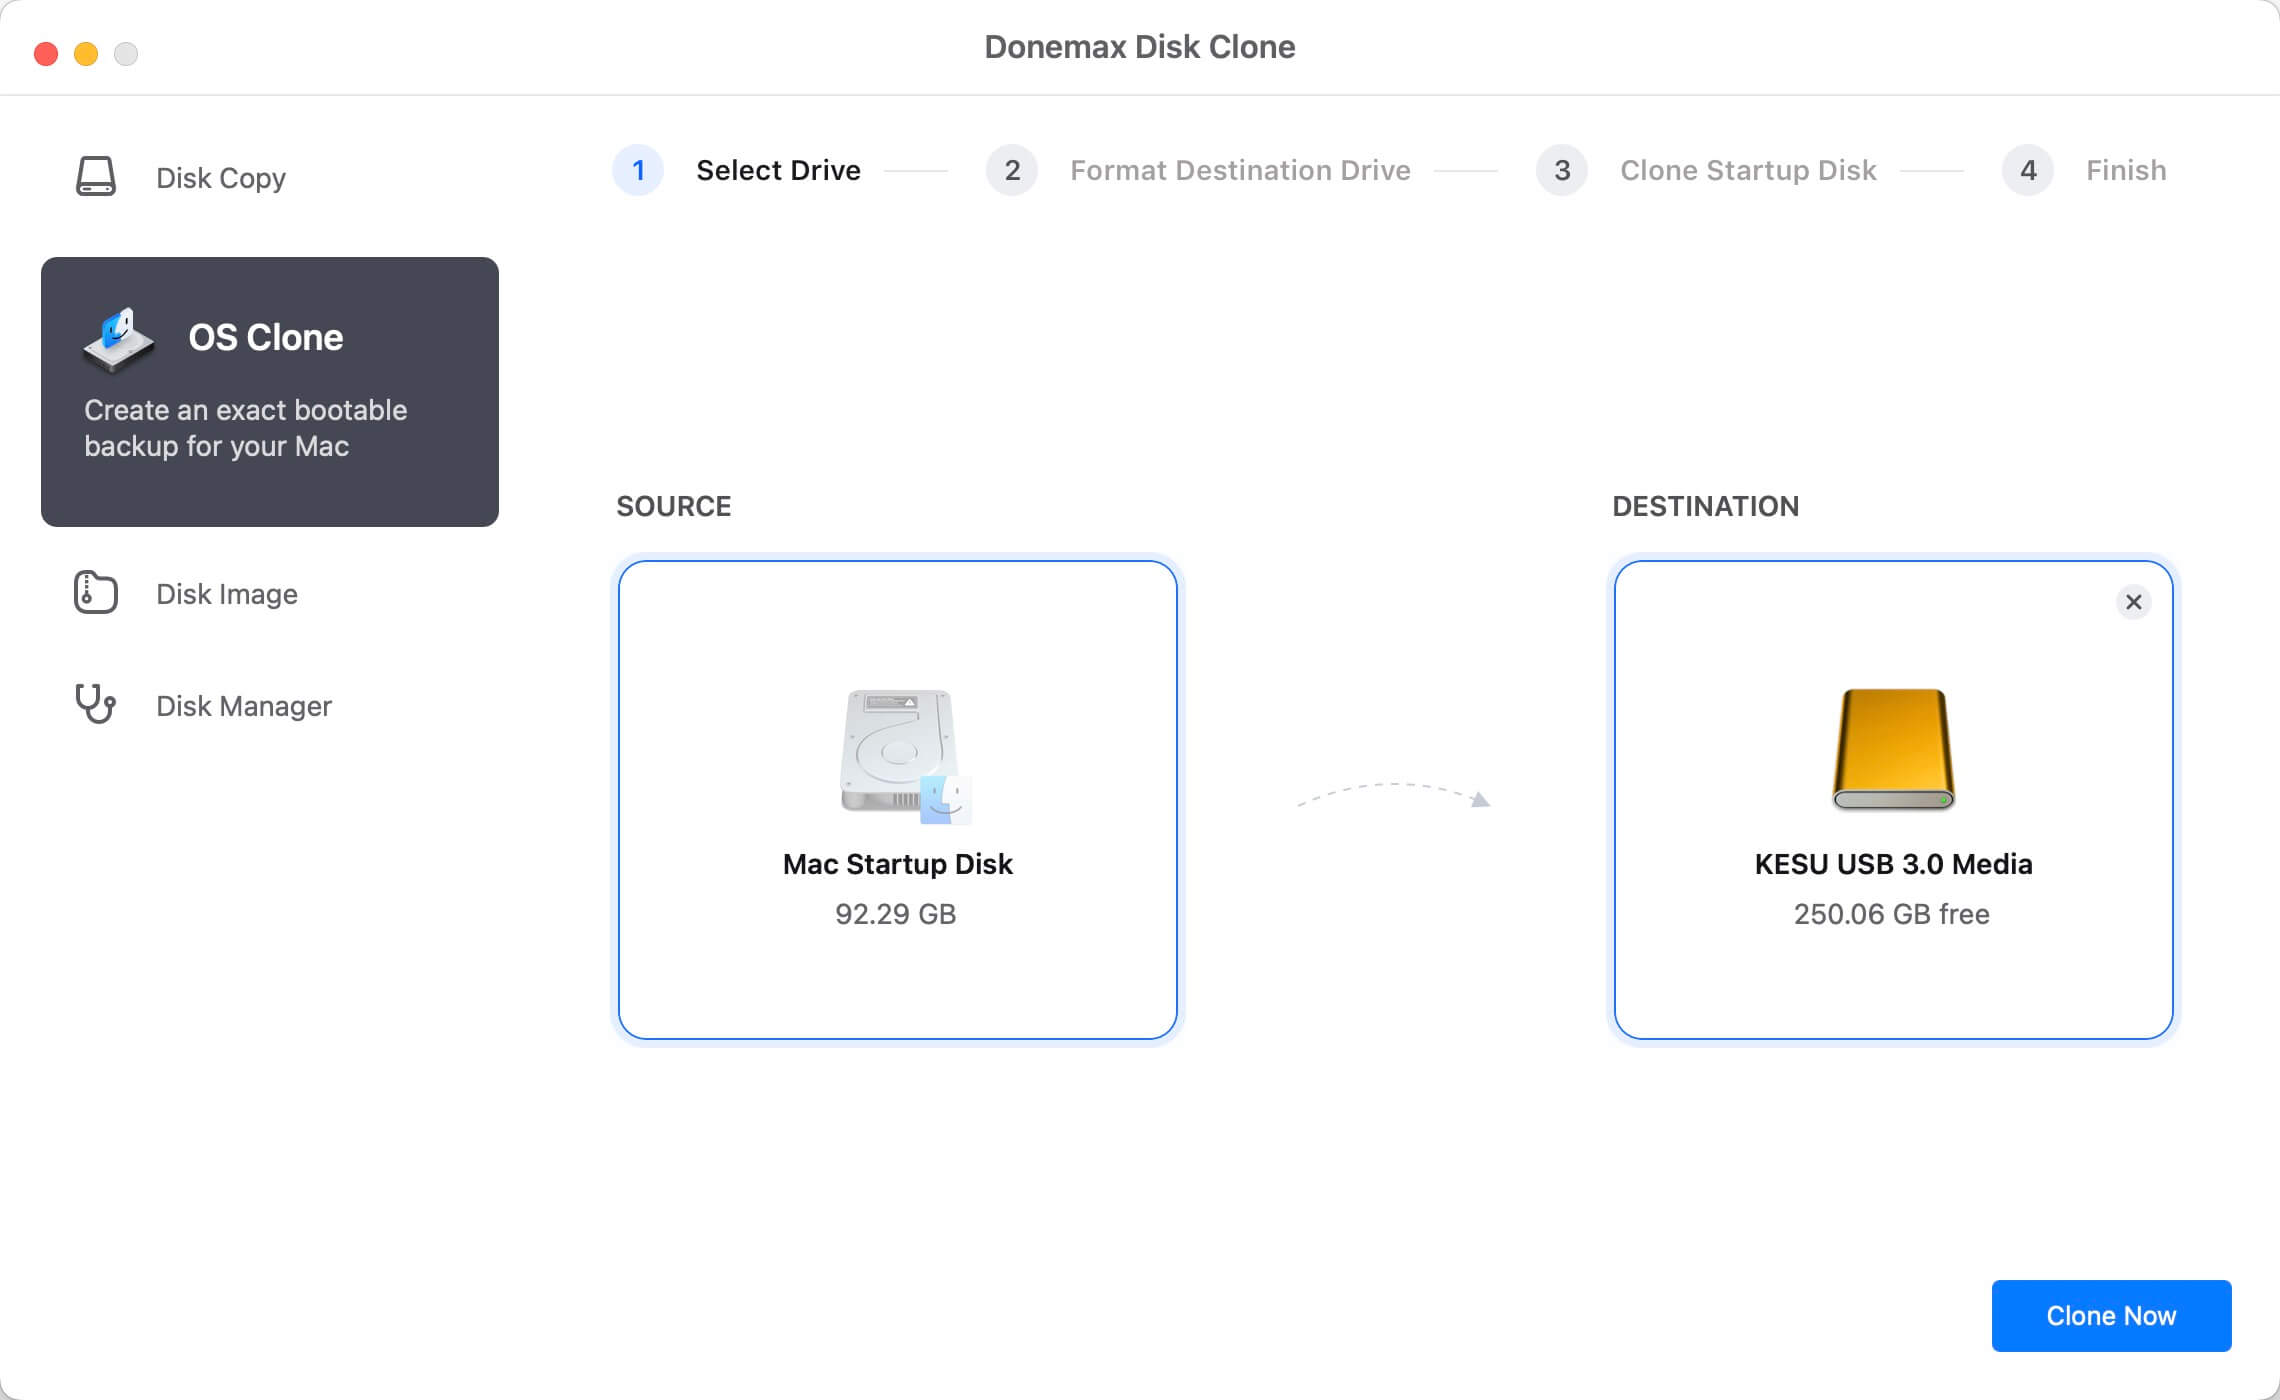
Step 1. Download and install the best Mac disk cloning software - Donemax Disk Clone for Mac.
Step 2. Open Donemax Disk Clone for Mac, choose OS Clone mode. This mode can clone all data including Mac operating system, all applications, user data, settings and others from your Mac internal disk to the 1TB or 2TB SD card, making a full bootable clone backup.
Step 3. Select the 1TB or 2TB SD card as the destination drive, click on Clone Now button.
Once the cloning process gets finished, you can check the cloned data on the SD card. You also can set the 1TB or 2TB SD card as a startup disk.
Related Articles
- Oct 18, 2024Check Free Disk Space on Mac: A Comprehensive Guide
- Oct 21, 2024macOS Sequoia Not Recognizing USB Flash Drives, 9 Methods to Fix It
- Mar 21, 2025[8 Fixes] Fix Seagate Ultra Compact SSD Not Mounting on Mac
- Mar 12, 2025How to Use Seagate Ultra Compact SSD on Mac?
- Nov 07, 2024Fix Error Code 36 on Mac: A Comprehensive Guide
- Jul 12, 2024Can I Use CCleaner to Wipe Data Permanently on Mac?

Contributing Writer
Coco Lin
Coco has been a writer and a chief programmer at Donemax software since 2018. Over 10 years of experience of writing troubleshooting articles in the software industry, she is passionate about programming and loves to providing solutions to Windows and Mac users. Also she enjoys music and palying tennis in her free time.

Editor in chief
Gerhard Chou
In order to effectively solve the problems for our customers, every article and troubleshooting solution published on our website has been strictly tested and practiced. Our editors love researching and using computers and testing software, and are willing to help computer users with their problems