Written byStevenUpdated on Apr 17, 2025
Recover Word Temporary Files on Mac: A Complete Guide
Approved byGerhard Chou
Summary: Word files might be missing or unsaved on Mac. The Word AutoRecovery feature, cloud storage, temporary files, or backups can be used to recover the Word documents. Otherwise, you can still recover the files with recovery software Donemax Data Recovery for Mac.
PAGE CONTENT:
Microsoft Word is one of the most widely used word-processing applications, whether for school assignments, business reports, or creative writing. However, losing an important document due to an application crash, power failure, or accidental closure can be a frustrating experience. Fortunately, Word can help recover lost or unsaved documents by creating temporary files.
In this comprehensive guide, we will explore various methods to recover Word temporary files on a Mac, ensuring you never lose important work again.

Understanding Word Temporary Files on Mac
What Are Word Temporary Files?
Microsoft Word automatically creates temporary files to store real-time progress and backup versions of open documents. These temporary files act as a safeguard, allowing you to recover your work in case of an unexpected issue such as a crash, sudden shutdown, or accidental file closure.
Where Are Word Temporary Files Stored on Mac?
Word temporary files can be found in several locations, including:
- AutoRecovery Folder – Automatically saves a backup version of unsaved Word documents.
- Temporary Folder ($TMPDIR) – Stores temporary files created by Word during use.
- Microsoft OneDrive or iCloud – If cloud saving is enabled, previous versions may be available.
- Trash Folder – If a document was accidentally deleted, it may still be in the Trash.
- Time Machine Backups – If enabled, Time Machine can help restore previous versions.
Methods to Recover Word Temporary Files on Mac
1. Recover from AutoRecovery Folder
Microsoft Word's AutoRecovery feature is designed to save your work at regular intervals. If Word crashes before you manually save the file, you can check for AutoRecovery files.
Steps to Recover from AutoRecovery Folder:
- Launch the Mac's Finder app.
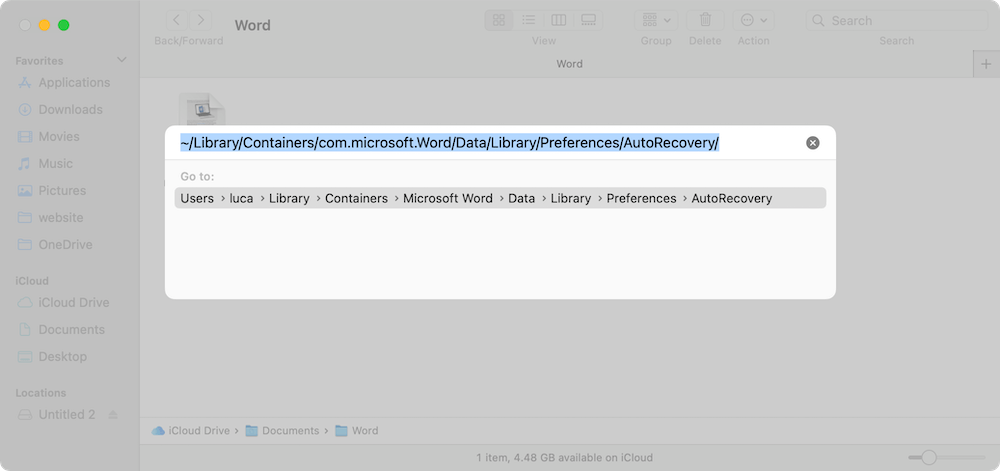
- Choose Go to Folder by clicking on Go in the top menu.
- Type the following path and press Enter:
~/Library/Containers/com.microsoft.Word/Data/Library/Preferences/AutoRecovery/
![recover Word temporary files on Mac]()
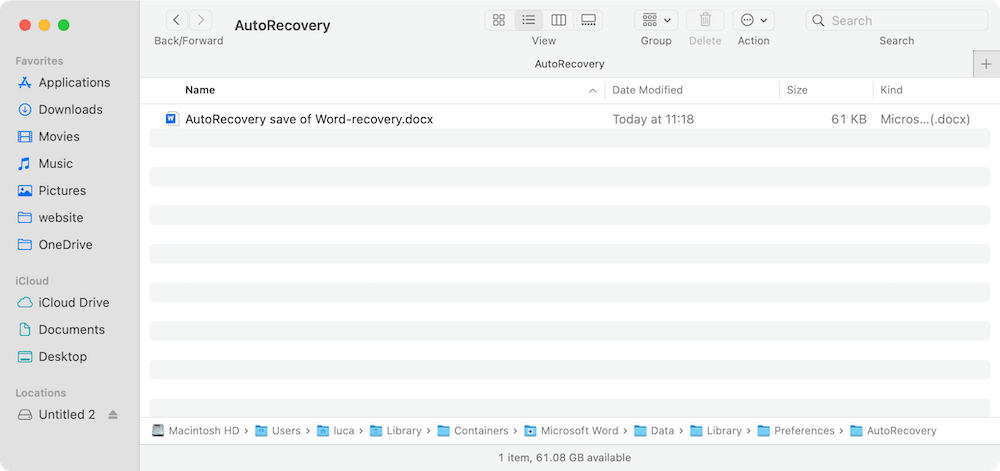
- Look for files with names starting with "AutoRecovery save of" followed by your document name.
![recover Word temporary files on Mac]()
- To open the file in Word, double-click it.
- Save the document manually to a preferred location.
💡Note: AutoRecovery only works if the document was open for a few minutes before the crash.
2. Recover from Mac Temporary Folder ($TMPDIR)
Mac's temporary folder stores unsaved files created by various applications, including Word. You can try recovering your document from this hidden system folder.
Steps to Locate Temporary Files Using Terminal:
- Open Terminal from Utilities via Applications.
- Type the following command and press Enter:
open $TMPDIR
![recover Word temporary files on Mac]()
- This will open the Temporary Directory in Finder.
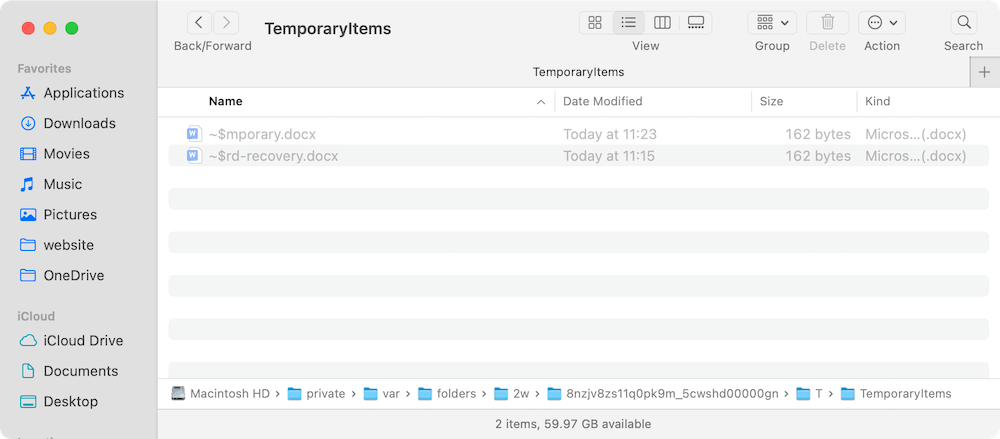
- Navigate to the TemporaryItems folder.
- Look for files with names similar to your lost Word document.
![recover Word temporary files on Mac]()
- Copy the file to your desktop and try opening it in Word.

💡Tip: If the file won't open, rename it and add a .docx extension.
3. Recover from Recently Opened Documents in Word
If Word was recently closed but you didn't save your document, it might still appear in the Recent Documents list.
Steps to Recover from Recent Documents:
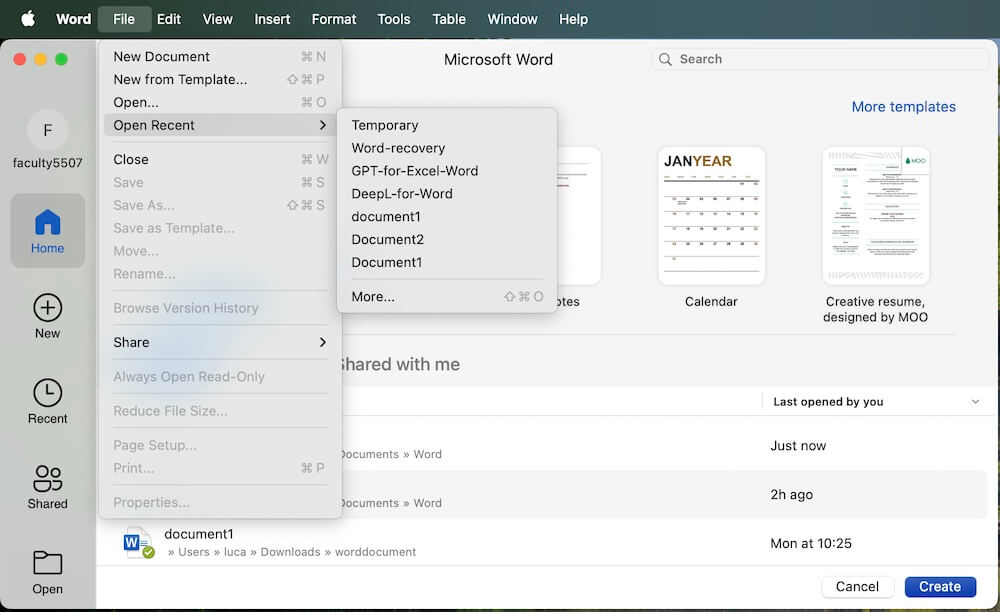
- Open Microsoft Word.
- Click on File in the menu bar.
- Select Open Recent.
![recover Word temporary files on Mac]()
- If your document is listed, click to open it.
- Save the file to prevent further loss.
4. Restore from Time Machine Backups
Time Machine is macOS's built-in backup feature that can restore lost Word files if backups were previously created.
Steps to Recover a Word Document Using Time Machine:
- Locate the folder where the document was saved by using Finder.
- Connect your Time Machine backup drive (if applicable).
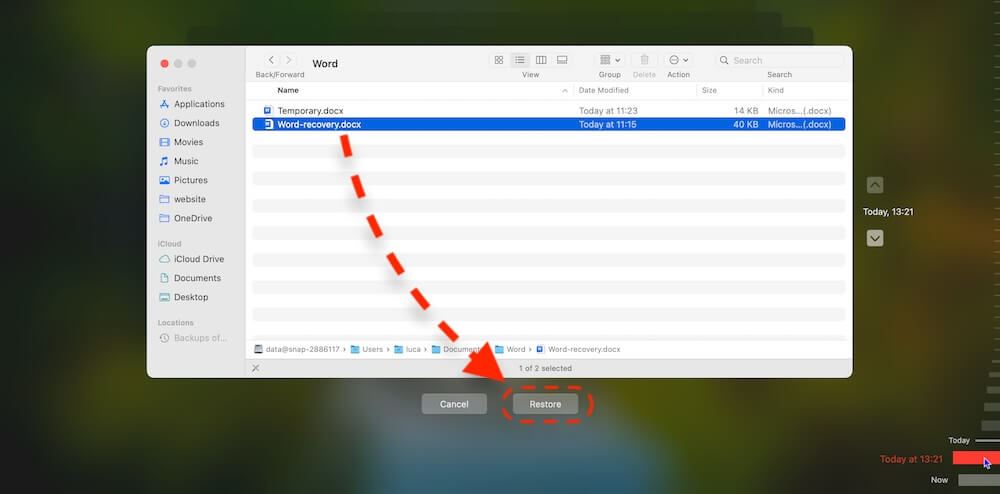
- Choose "Browse Time Machine Backups" after clicking on the Time Machine symbol in the top menu.
- Browse through the backup history to find a previous version of your document.
- Select the file and click Restore.
💡Tip: If your Word document was deleted, go to the Trash and check if it is still recoverable.
5. Check OneDrive or iCloud for Auto-Saved Files
Losing an important Word document due to an application crash or accidental closure can be frustrating, but if you use Microsoft OneDrive or iCloud Drive, your document may have been automatically backed up to the cloud. These services store previous versions of your files and allow you to recover them in case of data loss.
Why Cloud Storage Can Help Recover Word Files
Cloud storage services like OneDrive and iCloud have built-in automatic synchronization that ensures your files are continuously updated and stored securely. If you work on a document saved in OneDrive or iCloud, even if Word crashes, the latest version of your file might still be available online.
Some advantages of using cloud storage include:
- ✅ Automatic Backup – Files are saved in real-time.
- ✅ Access from Any Device – You can retrieve documents from another Mac, PC, or mobile device.
- ✅ File Versioning – Many cloud services keep previous versions, allowing you to restore an earlier copy.
- ✅ Protection Against Hard Drive Failure – Since files are stored online, local disk failures won't erase your data.
How to Recover a Lost Word Document from OneDrive
If your Microsoft Word document was saved to OneDrive before disappearing, follow these steps to recover it:
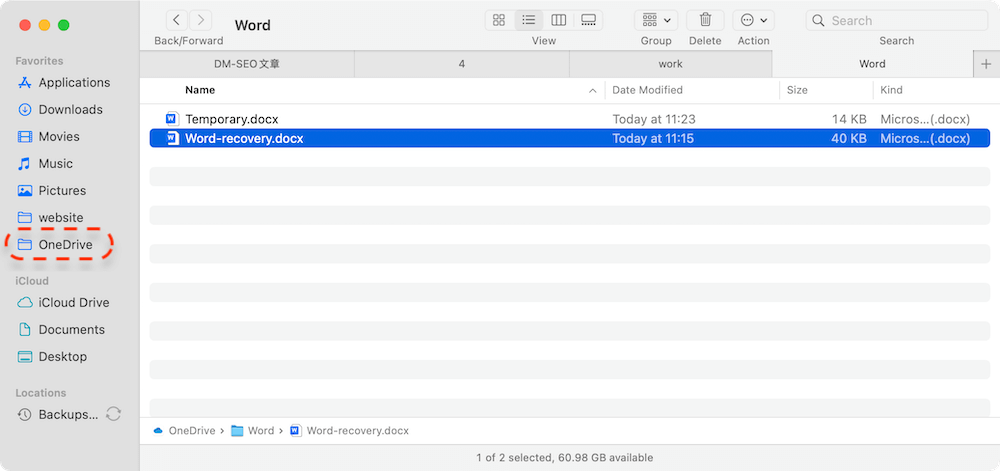
🔹 Method 1: Check the OneDrive Folder on Your Mac
- Open Finder and click on OneDrive.
- Navigate to the Documents folder (or the folder where your file was originally saved).
- Search for your lost Word document.
- If found, double-click the file to open it in Word, then save a copy to ensure it remains accessible.
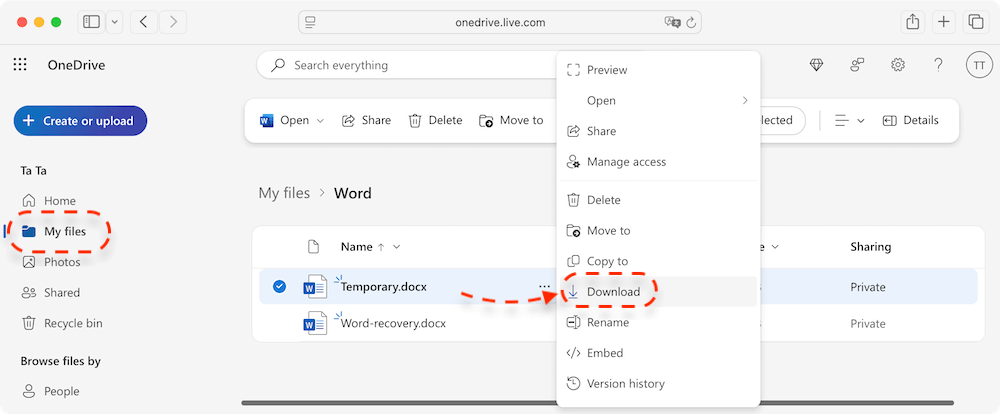
🔹 Method 2: Check OneDrive Online
If your document is missing from your Mac but was previously synced, you can check your OneDrive account online:
- Open your web browser and go to https://onedrive.live.com/.
- Sign in with your Microsoft account.
- Click on My Files and look for your document.
- If found, download and save it to your computer.
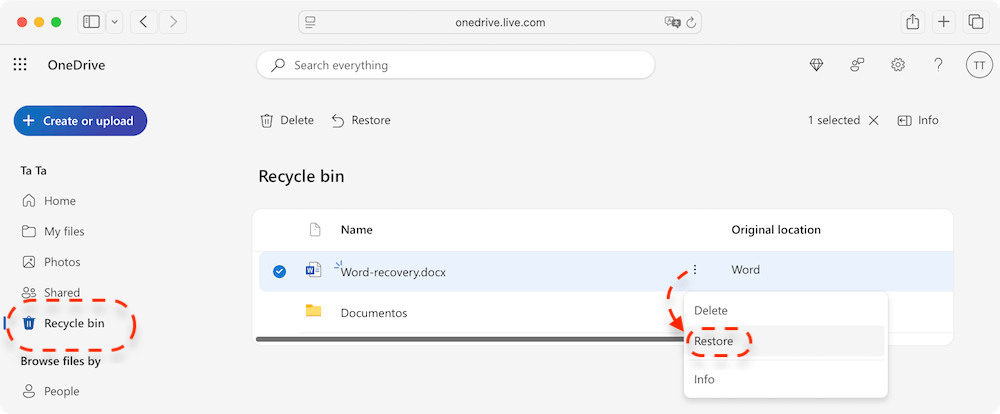
🔹 Method 3: Restore from OneDrive's Recycle Bin
OneDrive has its own Recycle Bin, which keeps deleted files for up to 30 days (or 93 days for business accounts).
To restore a deleted Word file from OneDrive's Recycle Bin:
- Open OneDrive in your web browser.
- Click on Recycle Bin from the left sidebar.
- Look for your lost Word document.
- Click Restore after selecting the file.
- The file will be restored to its initial OneDrive location.
How to Recover a Lost Word Document from iCloud Drive
If you save your Word documents in iCloud Drive, they may still be available even if they disappeared from your Mac.
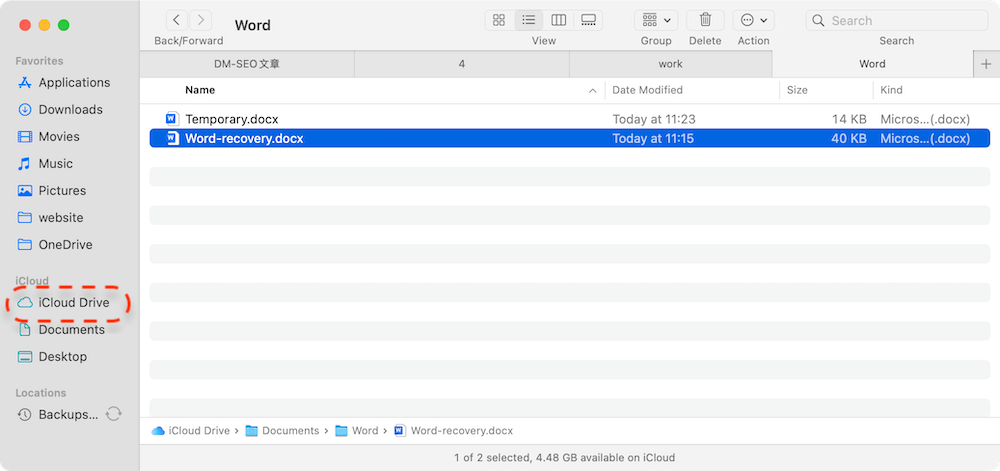
🔹 Method 1: Check the iCloud Drive Folder on Your Mac
- Select iCloud Drive from the sidebar after opening Finder.
- Go to the Documents folder (or the specific folder where your file was saved).
- Look for your missing Word document.
- If found, double-click the file to open it, then save a backup copy to another location.
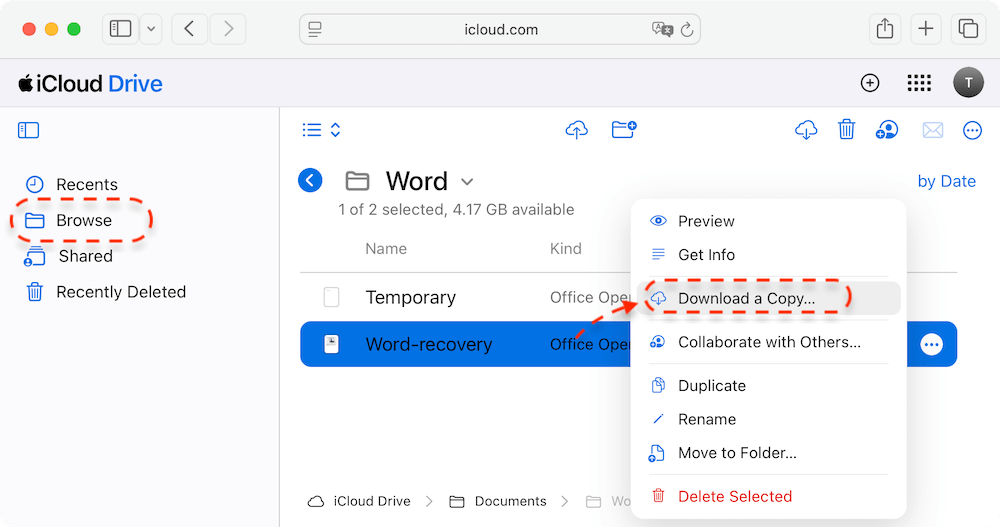
🔹 Method 2: Check iCloud Drive Online
If the file is missing from your Mac, try accessing it from iCloud.com:
- Go to iCloud in your web browser.
- Enter your Apple ID to log in.
- Click on iCloud Drive.
- Navigate to the Documents folder and look for your Word file.
- If found, download the file and save it to your Mac.
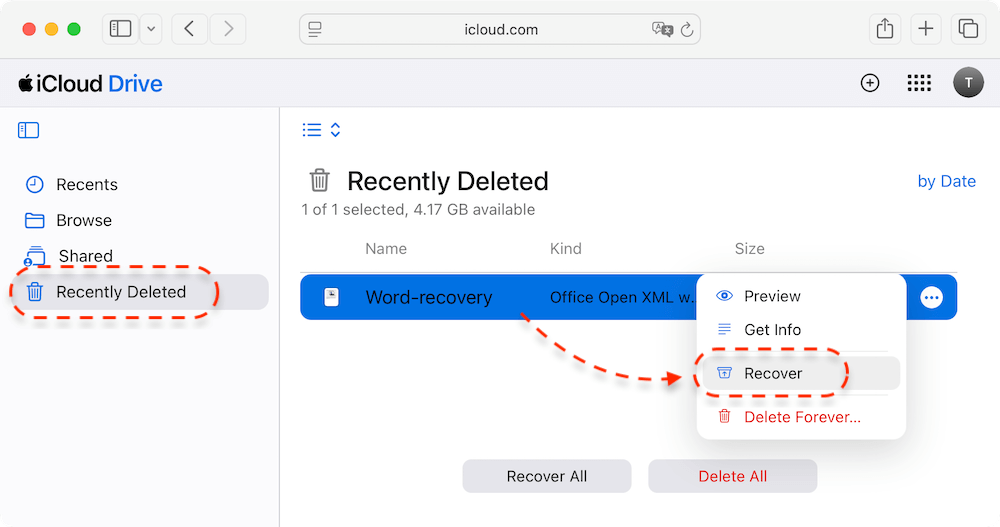
🔹 Method 3: Restore Deleted Word Documents from iCloud's "Recently Deleted" Folder
iCloud stores deleted files in the Recently Deleted folder for up to 30 days before permanently erasing them.
To restore a deleted file:
- Go to iCloud.com and sign in.
- Click on iCloud Drive and then select Recently Deleted from the bottom-right corner.
- Look for your lost Word document.
- Select the file and click Recover.
How to Ensure Future Word Files Are Backed Up in the Cloud
To prevent future file loss, consider enabling auto-backup for Word documents:
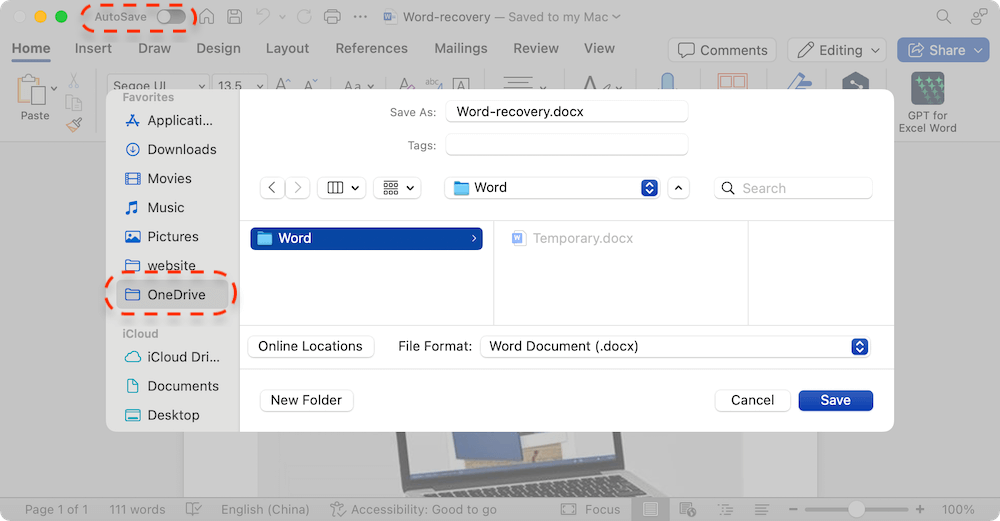
🔹 Enable OneDrive Auto-Sync for Word
- Open Microsoft Word.
- Click Save As from File.
- Choose OneDrive as the save location.
- Ensure AutoSave is turned on (toggle switch in the top-left corner).
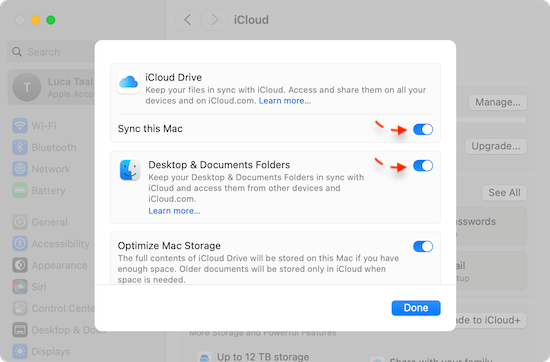
🔹 Enable iCloud Drive Sync for Word
- Click the Apple Menu → System Settings.
- Select Apple ID → iCloud.
- Click iCloud Drive and make sure it is enabled.
- Click Options and check Desktop & Documents Folders to sync Word files automatically.
6. Recover Deleted Word Files from Trash
If you accidentally deleted your Word document, it might still be in the Trash.
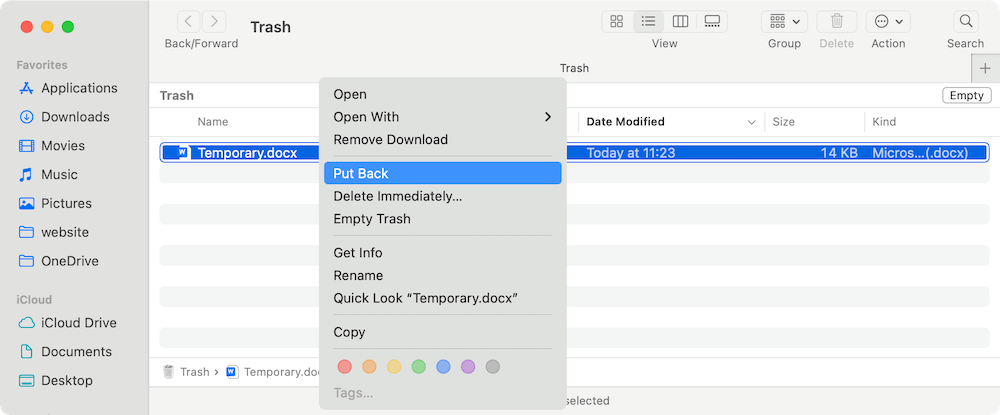
Steps to Restore a Deleted Word File:
- Open Trash from the Dock.
- Look for your lost Word document.
- Choose Put Back from the menu when you right-click on the file.
- The original location of the file will be restored.
7. Use Data Recovery Software (Last Resort)
If none of the above methods work, you can use trustworthy and reliable data recovery software to scan your Mac for lost Word files. For example, you can use the software Donemax Data Recovery for Mac. It's an effective recovery tool that can recover lost data in different data loss scenarios, like accidentally deleted files, formatted drive, partition loss, documents unsaved, etc.
Donemax Data Recovery for Mac
- Recover Word and other documents, pictures, videos, and more.
- Trusted and reliable data recovery software for macOS.
- Support data recovery for hard drives, SSDs, USB flash drives, SD cards, etc.
Steps to Recover Word Documents Using Data Recovery Software:
- Download and install the recovery software. Connect the drive (if it's external device) to the Mac.
- Launch the program from launchpad and select the drive where your Word documents were saved.
![recover Word temporary files on Mac]()
- Run a scan to locate lost Word documents. It may take some time depending on the size of your drive.
![recover Word temporary files on Mac]()
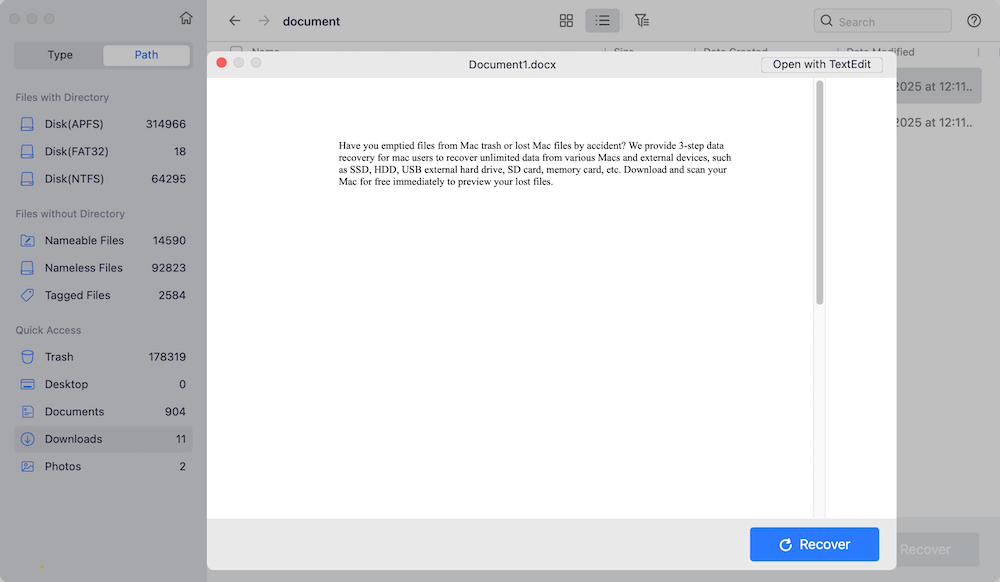
- Preview and restore the wanted files after the scanning process is done. Ensure to save the recovered files to another drive.
![recover Word temporary files on Mac]()


How to Prevent Word File Loss in the Future
While recovery methods exist, it's best to prevent losing Word documents in the first place.
Tips to Avoid Data Loss:
- ✅ Enable AutoSave in Word – Go to Preferences → Save → Enable AutoSave.
- ✅ Manually Save Files Frequently – Use Command + S often.
- ✅ Set Up Time Machine Backups – Ensure regular backups are enabled.
- ✅ Use OneDrive or iCloud Drive – Cloud saving prevents permanent loss.
- ✅ Keep Word and macOS Updated – Bug fixes improve system stability.
Conclusion
Losing a Word document can be stressful, but Mac users have several methods to recover lost or unsaved files. Whether using AutoRecovery, Terminal commands, Time Machine, OneDrive, or Mac data recovery software, there's a good chance of retrieving your data.
To prevent future losses, always enable AutoSave, create backups, and use cloud storage. With these proactive steps, you can minimize disruptions and ensure your important Word documents remain safe.
Donemax Data Recovery for Mac
Donemax Data Recovery for Mac is one of the best Mac data recovery software. It is easy-to-use and can help in recovering deleted, formatted, inaccessible or lost data from Mac HDD/SSD, external disk, USB drive, SD card, camera or other storage devices.
Related Articles
- Feb 22, 2024How to Recover Lost Data from External Hard Drive, USB Drive, SD Card on macOS Sonoma?
- Nov 01, 2024How to Recover Deleted or Lost MP4 Videos on Mac?
- Feb 29, 2024SDHC Card Recovery on Mac: Completely Recover Deleted/Formatted Data
- May 17, 2024Best 8 SD Card Recovery Software for Mac
- Mar 06, 2025[5 Methods] Recover Lost Data from WD External Hard Drive on Mac
- Apr 10, 2025How to Recover Photos from iCloud on Mac?

Contributing Writer
Steven
Steven has been a senior writer & editor of Donemax software since 2020. He's a super nerd and can't imagine the life without a computer. Over 6 years of experience of writing technical solutions and software tesing, he is passionate about providing solutions and tips for Windows and Mac users.

Editor in chief
Gerhard Chou
In order to effectively solve the problems for our customers, every article and troubleshooting solution published on our website has been strictly tested and practiced. Our editors love researching and using computers and testing software, and are willing to help computer users with their problems