PAGE CONTENT:
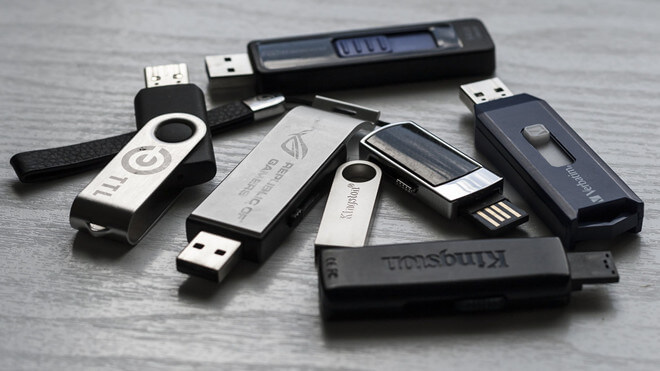
Why do you need to format an USB flash drive?
There are a lot of reasons for wanting to format an USB flash drive. For example:
- Format an USB flash drive before selling, donating it or giving it away: You’d better permanently wipe all data from the USB flash drive by formatting it before you give it to other person or throw it into trash.
- Format an USB flash drive to quickly delete all contents: Formatting the USB flash drive will quickly remove all data you will no longer need and regain the full disk space.
- Remove all virus-infected files or malware: Quickly format the USB flash drive to completely remove all virus-infected files or any malware from the USB flash drive so that it could be reused without any security issue.
- Fix logical errors: Formatting the USB flash drive may help you fix minor errors on it, such as fixing raw file system, fixing not showing up issue, etc.
- Format an incompatible USB flash drive: Format the USB flash drive so that it could be used on Windows or Mac.
No matter why you want to format the USB flash drive, you’d better make a backup. Just copy the useful documents from the USB flash drive to another hard drive before formatting it.
![format USB flash drive]()
Best 5 methods to quickly format an USB flash drive
Whether you are a Windows user or a Mac user, you can easily format an USB flash drive with or without third-party software. Generally, there are two format level:
Quick format: It is also called low level format method which deletes the file system table and the root folder. This option is frequently used for quickly format the USB flash drive and free up disk space. The files which are deleted due to formatting are still stored on the USB flash drive, and can be recovered by data recovery software.
Full format: It is also called high-level format method or “erase”, it will erase the hard drive sector by sector, it means the files are stored on the hard drive will be erased and overwritten by zeros. In most cases, it is hard to recover the files which deleted by Full Format method.
Check the methods below, and you can select a method to format an USB flash drive on Windows or Mac depending on your needs.
Method 1. Quick format USB flash drive on Windows PC
If you can find the connected USB flash drive under My Computer or This PC. You can format it with Windows quick format feature.
Connect the USB flash drive to your Windows PC, and open This PC or My Computer.
Right-click the USB flash drive icon, then choose Format.
![format USB flash drive]()
Then you can choose a file system for the USB flash drive. exFAT and FAT32 are the most frequently used file systems for USB flash drives. And you also can format it to a Windows NTFS drive (This file system is not compatible with macOS). Under volume label, enter the USB flash drive name you want, and click Start button to quickly format the USB flash drive.
![format USB flash drive]()
Note: FAT32 is the best file system option for compatibility, but it only allows file sizes up to 4GB. exFAT & NTFS don't limit the size of a single file, but may not be compatible with older Windows OS or macOS. For example, if you format it to a NTFS drive, the USB flash drive will not be writable or even can not mount on Mac computers.
Method 2: Format an USB flash drive using Disk Management
Disk Management is a built-in tool which can help you quickly format hard drives including local partitions, external drives, raw drives, Mac hard drives, etc. It also can help you initialize unrecognized/damaged USB flash drive or add drive letter to an USB flash drive which has no drive letter so that it can be recognized by your Windows PC.
Right-click My Computer or This PC > Choose Manage > Open Computer Management > Click Disk Management.
![format USB flash drive]()
Find and right-click the USB flash drive, and choose Format. Then follow the wizard to quickly format the USB flash drive.
![format USB flash drive]()
Method 3: Format USB flash drive using Disk Utility on Mac
Disk Utility allows you to format an USB flash drive with quick format method or full format method. The security options allows you to choose the erasure rounds while formatting the USB flash drive. The first aid option even can help you fix a damaged USB flash drive on Mac. Follow the guide below to format an USB flash drive on Mac using Disk Utility.
Go to Launchpad > Enter Disk Utility and find this app > Open Disk Utility.
Plug the USB flash drive into your Mac or connect it to your Mac via USB hub.
On the left side, you will see all drives and devices. Click and select the USB flash drive. On the right side, you can see five options: Volume, First Aid, Partition, Erase, Restore, Mount. Just click Erase.
Then edit the disk name, select a file system (ExFAT is recommended). You can click Security Options to raise the standard of erasure.
Click on Erase button, then it will erase and format the USB flash drive. When it completes, click on Done button.
![format USB flash drive]()
Method 4. Format an USB flash drive use a Mac start menu
Most of third-party apps which provide disk management function can help in formatting hard drives including USB flash drives on Mac. For example, DMmenu for Mac, a start menu app for Mac can help you quickly format an external USB flash drive or memory card on Mac.
After installing DMmenu for Mac, open it. Choose Disk Manager, it will list all hard drives and connected devices on your Mac. Select the USB flash drive, then click on Format button.
![Disk Manager - format USB drive]()
Method 5. Format and wipe USB flash drive on Windows/Mac
The methods listed above can help you format the USB flash drive, but can not wipe the USB flash drive. It means the formatted data on the USB flash drive still can be recovered by data recovery software or manual data recovery method.
Before you sell or dispose of an old USB flash drive, you’d better wipe all sensitive data off. In this case, you need a third-party data erasure tool - such as Donemax Data Eraser. This data erasure software offers certified data erasure standards including U.S. Army AR380-19, DoD 5220.22-M ECE to help in permanently erasing data from HDD, SSD, memory card, USB drive, pen drive, memory card, digital camera, etc.
Donemax Data Eraser
- Permanently erase data on any device.
- Once the data is erased, the data is gone forever, can’t be recovered by any method.
- Securely format and wipe USB flash drive.
Follow the steps below to securely format and wipe USB flash drive on Windows or Mac:
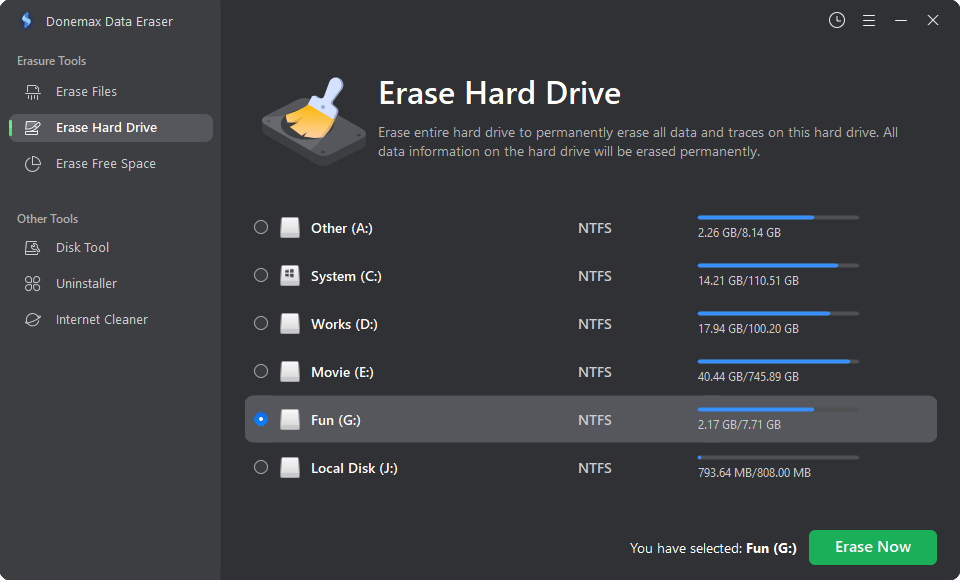
Step 1. Download and install Donemax Data Eraser on your computer, and connect the USB flash drive. Open Donemax Data Eraser, you will see three data erasure modes. To format and wipe USB flash drive, choose mode - Erase Hard Drive. Select the USB flash drive.
![wipe USB flash drive]()
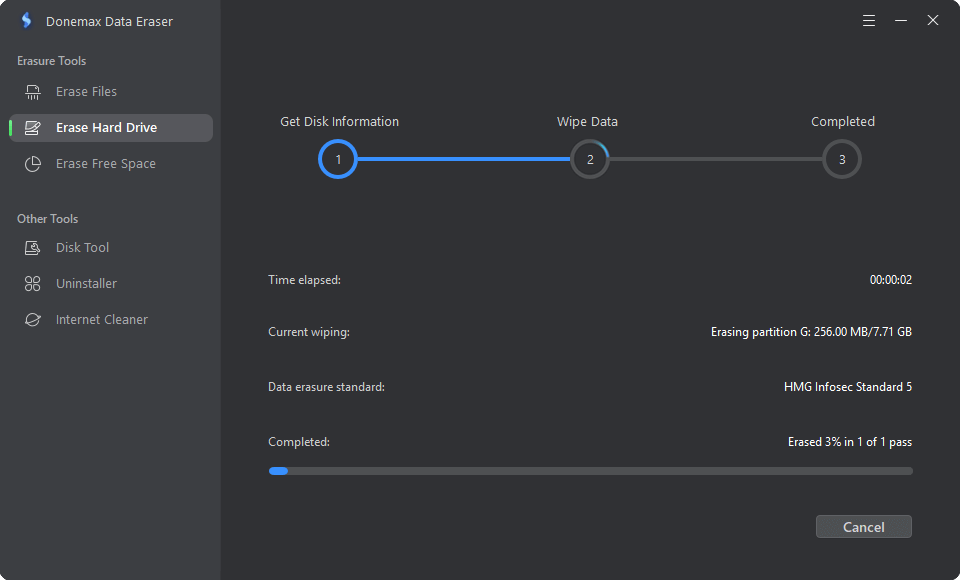
Step 2. Click on Erase Now button to format the USB flash drive and permanently wipe all data including deleted/lost data and existing data on the hard drive.
![wipe USB flash drive]()
Once the process gets finished, the data on the USB flash drive is lost forever, can’t be recovered by any data recovery software.
Formatting USB flash drive FAQs:
The best way to recover an formatted USB flash drive is to use a data recovery program. Follow the steps below:
- Download and install a data recovery program - Donemax Data Recovery.
- Connect the USB flash drive to your computer, open Donemax Data Recovery.
- Select the USB flash drive and click on Scan button.
- Once the scanning gets finished, you can preview and recover all lost files.
There are lots of tools can help you format an USB flash drive on Windows or Mac. Such as:
- Disk Utility for Mac
- Disk Management for Windows
- DMmenu for Mac
- Donemax Data Eraser
- MacClean360
- AweCleaner for Mac
- EaseUS Partition Master
Search the product name on Google, then you can download these tools listed above.
Yes, when you format it, select a right file system such as ExFAT, FAT32 which is fully compatible with both Windows and Mac OS.
In conclusion:
Formatting an USB flash drive will remove all data from the USB flash drive, rebuild the file system. With the methods listed above, you can securely and quickly format an USB flash drive on a Windows PC or on a Mac. If you want to wipe all data from it, just try a data erasure program - such as Donemax Data Eraser.


