Normally, when you connect a USB flash drive to your Mac computer, the USB drive will be seen on the desktop or in Finder. However, if there are issues happen, the USB drive will not be recognized normally on Mac. If you find the USB flash drive is not showing up on Mac, please don't worry, if the USB flash drive is not physically damaged, you can still try to fix the issue.
![USB flash drive is not showing up on Mac]()
Part 1: Symptoms unrecognized USB flash drive
There are some symptoms if the USB flash drive cannot be recognized normally on Mac. Here we will show the most common scenarios.
- USB flash drive is not showing up in Disk Utility.
- USB flash drive cannot be recognized on the desktop of Mac.
- Cannot see the connected USB flash drive in Finder.
- USB flash drive is not accessible in Finder.
Part 2: Fix not showing up USB flash drive on Mac
First, if the USB flash drive is not physically damaged, there are some solutions to help you fix the issue and make the not showing up UBS drive work again.
Method 1. Check and change the USB port, USB hub.
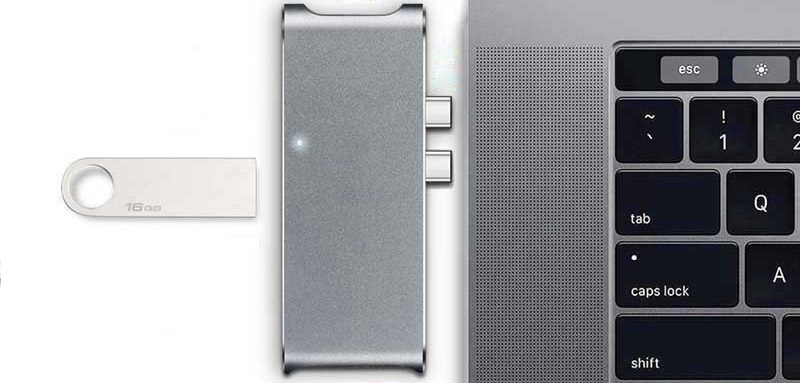
If the connected USB flash drive cannot even be recognized in Disk Utility, there should be issues with the disk or the USB port. We suggest you unplug and reconnect the USB flash drive. You can change a USB port to have a try.
![USB flash drive is not showing up on Mac]()
Also, if you use a USB adaptor or USB hub, please first change a USB port to have a try. If it doesn't work, you can change a USB hub/adaptor and see if it works. What's more, you can connect the USB flash drive directly to the port on the computer.
![USB flash drive is not showing up on Mac]()
Also, you can try to reboot your Mac and check if the USB flash drive could be recognized normally. If there are some occasional issues with the system, a reboot may fix the issue and make the USB flash drive showing up.
If the drive can be seen in Disk Utility but just cannot be recognized in Finder, there should be some other issues with the USB flash drive or system preferences. You can try the following solutions to fix the issue.
Method 2. Change system preferences to show USB flash drive.
If the system preferences are changed or not configured correctly, you will not see the connected USB flash drive on the desktop or in Finder.
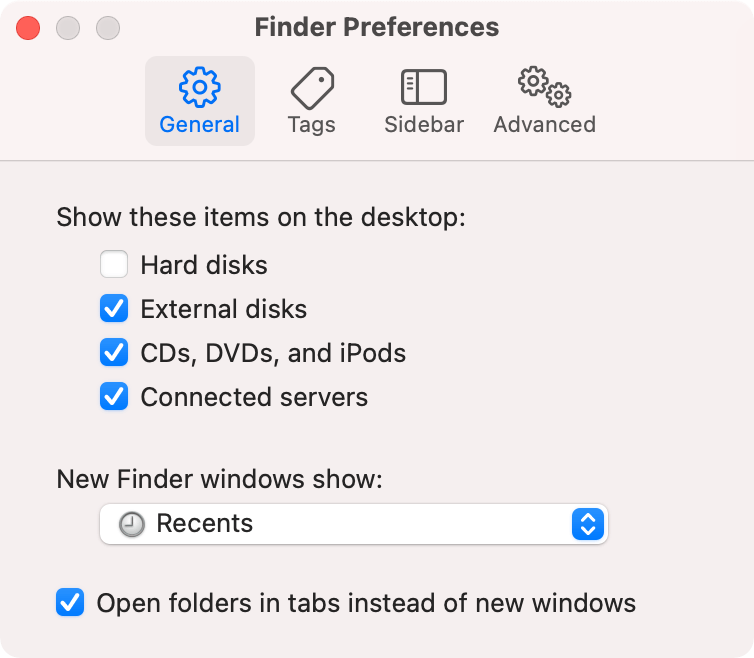
First, check and change the settings to show the USB flash drive on the desktop. Please open Finder and choose the Preferences... from the Finder menu. It will open the Finder Preferences windows. You will see the option External disks under the General tab, and please enable it. Then you can see the external devices, including a USB flash drive on the desktop.
![USB flash drive is not showing up on Mac]()
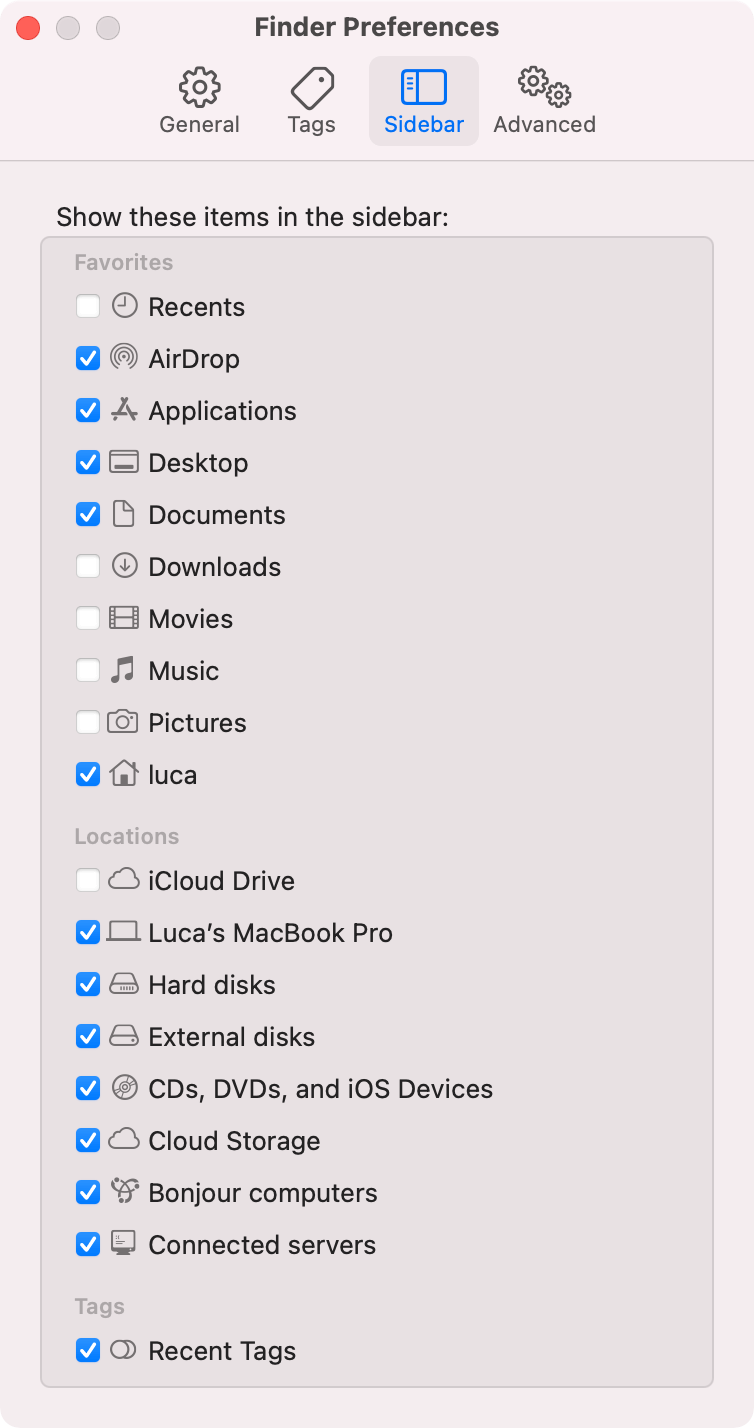
Also, please change to Sidebar under the same Finder Preferences window, then check and enable the option External disks. Then you will also see the connected USB flash drive in the sidebar of Finder.
![USB flash drive is not showing up on Mac]()
Method 3. Run first Aid in Disk Utility to fix the USB flash drive.
If the USB flash drive is inaccessible, cannot be mounted, or show other errors, you can try to fix it in Disk Utility. There is an option First Aid that can try to fix some drive issues.
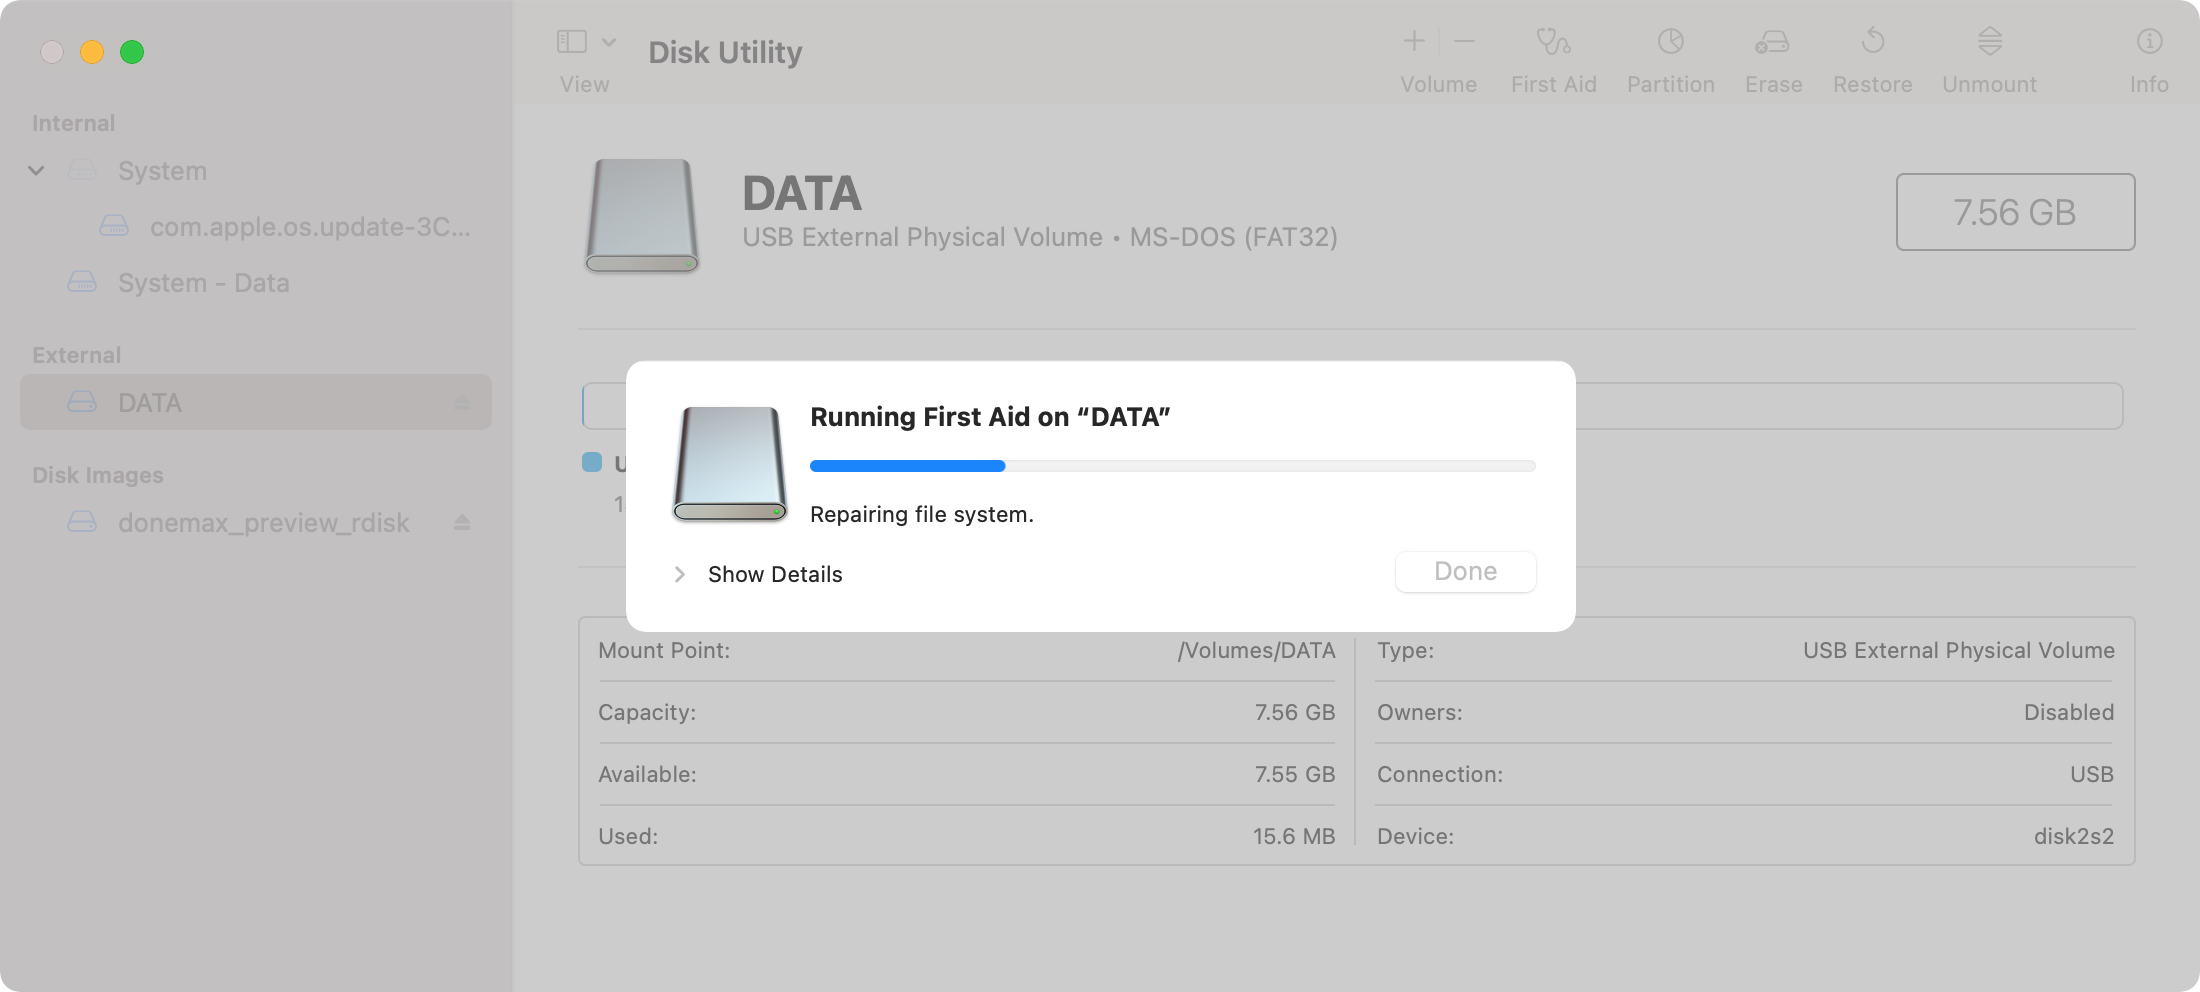
Open Disk Utility under Applications > Utility. Please choose the USB flash drive in the left sidebar. Then you will see the First Aid option at the top right corner of the Disk Utility window. Please just click it and it will try to fix the drive issues automatically.
![USB flash drive is not showing up on Mac]()
It will take some time, please wait patiently. If the process is finished, you can click the Done button to close it. Then please check if the USB flash drive could be recognized normally in Finder.
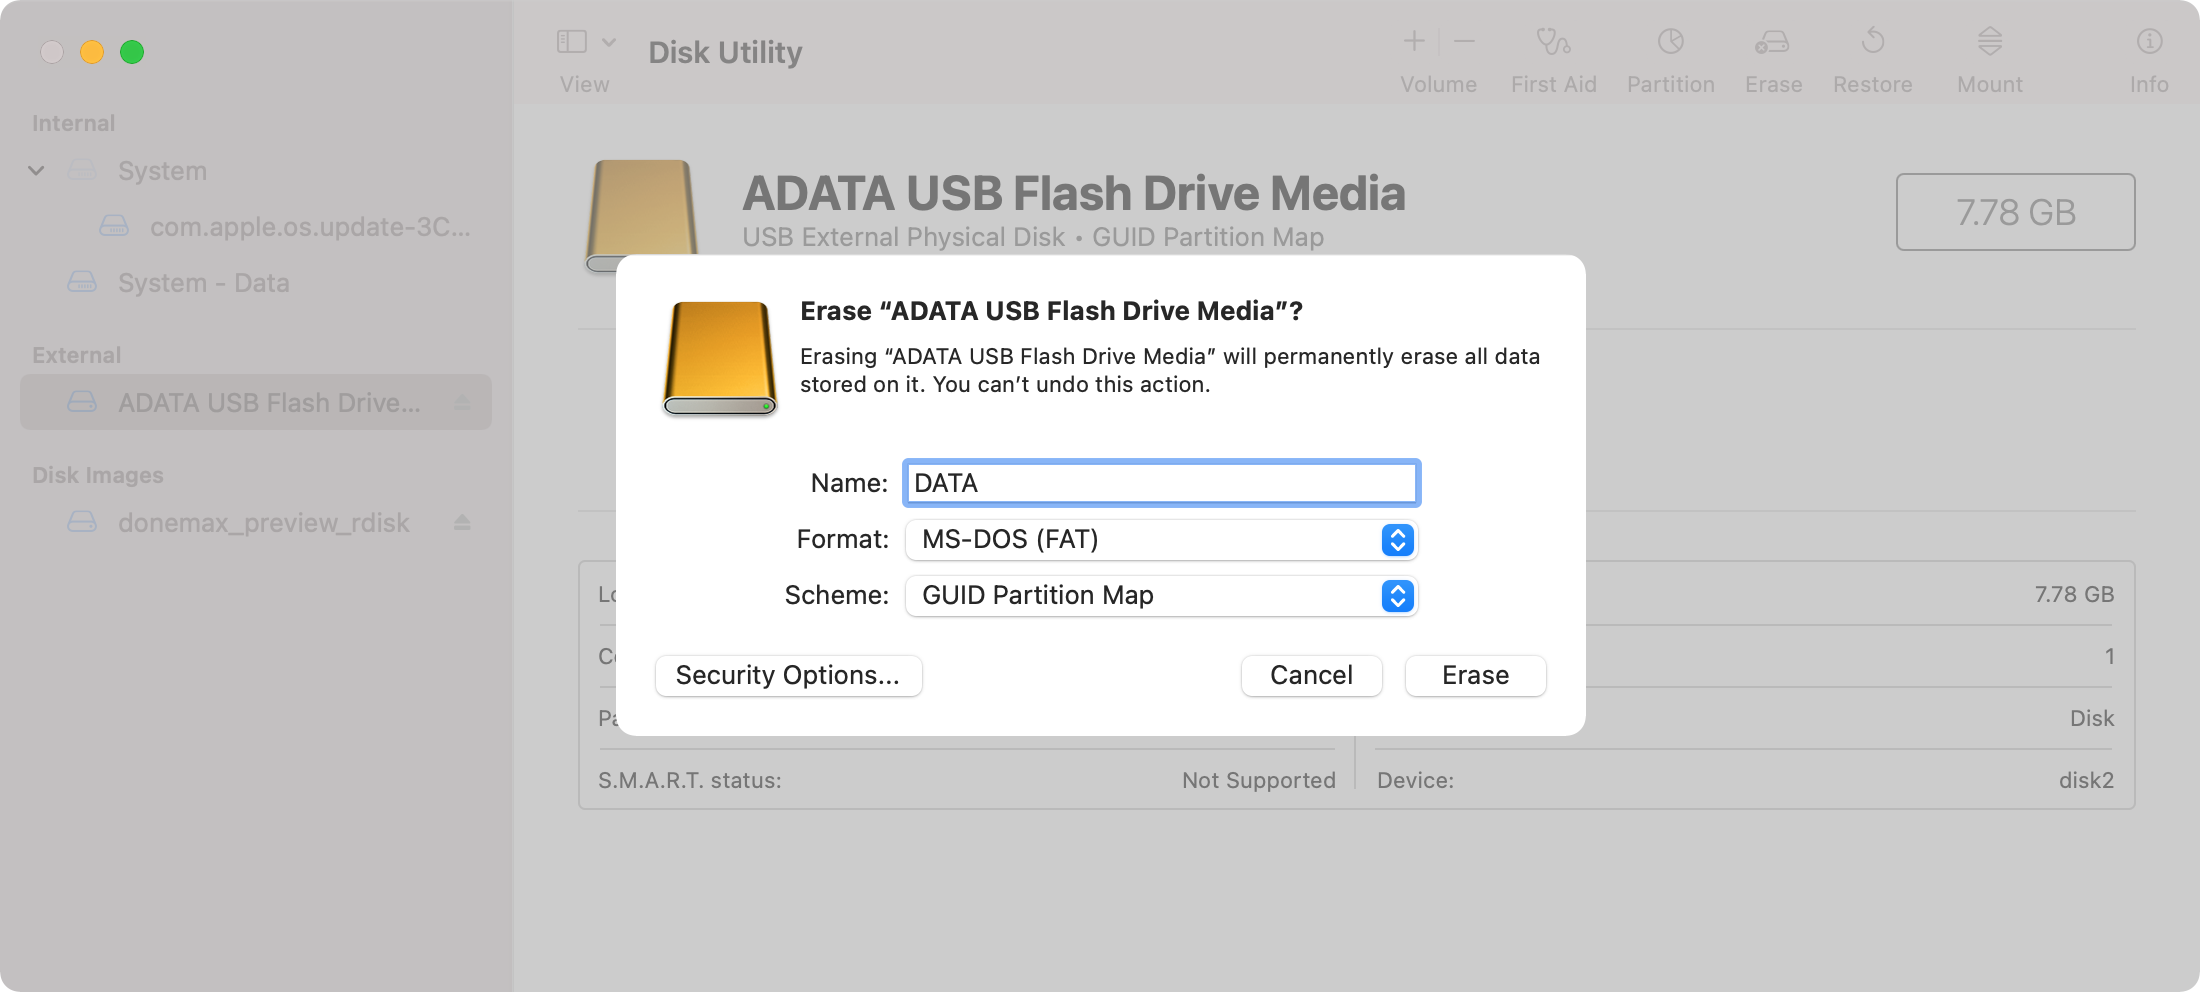
Method 4. Erase or format the USB flash drive.
If you cannot fix the USB flash drive issues with First Aid, or the drive is just empty without a volume on it, you can try to erase and format it directly in Disk Utility.
1. Open Disk Utility and choose the USB flash drive, then just click the Erase option to continue.
2. Set a name for the USB flash drive, choose the format of the drive.
3. Click the Erase button to continue, it will then format the USB flash drive directly.
![USB flash drive is not showing up on Mac]()
Part 3: Data recovery for not showing up USB flash drive
If you have important data on the not showing up USB flash drive, you can try to recover the lost files first. To recover the lost data from the unrecognized USB flash drive, we suggest you choose reliable data recovery software. Only with a professional application, you can safely and effectively recover data from the USB flash drive.
We recommend Donemax Data Recovery for Mac in such a case. The software can recover any data from different types of devices, like a USB flash drive. If you want to recover precious photos, videos, audio, documents, emails, or other files from the unrecognized USB flash drive, please download and have a try with the software.
The software is easy-to-use and users can recover data from a USB flash drive within only 3 steps. Here is a quick guide for you to use the software and recover lost data from dead USB flash drive.
Step 1. Connect the USB flash drive to the Mac machine and run the data recovery software. Choose the USB flash drive in the software to continue.
![USB flash drive is not showing up on Mac]()
Step 2. Click the Scan button, the software will start to scan the USB flash drive. Then it will analyze and try to find the lost files from the USB flash drive.
![USB flash drive is not showing up on Mac]()
Step 3. Once the scan process is completed, all the found files will be listed in the software. Please check and choose the wanted files to recover and save to another drive.
![USB flash drive is not showing up on Mac]()
Part 4: Wipe data permanently on a USB flash drive
Data loss on USB flash drive can be easily recovered. Also, if you deleted or lost files on USB flash drive in other cases, you can recover the files successfully with Donemax Data Recovery for Mac or other data recovery software.
If you don't want the data on the USB flash drive to be recovered in any way, you need to wipe the data permanently from the USB flash drive. Here we suggest you the best data wiping tool to avoid a data breach – Donemax Data Eraser for Mac.
This tool provides 3 modes to help you wipe data permanently from USB flash drive or other drives. Also, it's able to erase data and no software can recover the wiped data. Before you wiping data with the tool, please check and ensure to back up your data first. Then you can try to erase the data on USB flash drive.
Mode 1. Shred specified files on USB flash drive.
With the first mode, you can selectively shred the files on the USB flash drive. You can choose specified folders or files to shred directly.
![USB flash drive is not showing up on Mac]()
Mode 2. Wipe the entire USB flash drive.
If you want to wipe all the data on the USB flash drive, please choose the second mode and select the USB flash drive to wipe. It will wipe all the data on the drive.
![USB flash drive is not showing up on Mac]()
Mode 3. Erase deleted data on USB flash drive.
After deleting files on the USB flash drive, you can use the last mode to wipe the deleted data. Then the deleted data will not be recovered with any software or methods.
![USB flash drive is not showing up on Mac]()


