When you connect an external hard drive but find it's not showing up on Mac, it would be the issue with connection, interface, hardware, or logical issues on the drive. You can try to troubleshoot and fix the issue with some methods. Also, we suggest you use Donemax Data Recovery for Mac to recover the lost data if necessary.
When your external drive not showing up on Mac, please don't worry. If the external hard drive is not physically damaged, you can try to fix it or recover data from it. We will show you some clues and solutions to troubleshoot and fix the issue. Please read on and try the following methods to fix the not showing up external hard drive on Mac.
Part 1. Main causes for the problem.
If the drive is not dead, are there any other reasons that the external hard drive not showing up on Mac? Actually, there are some other causes for the issue.
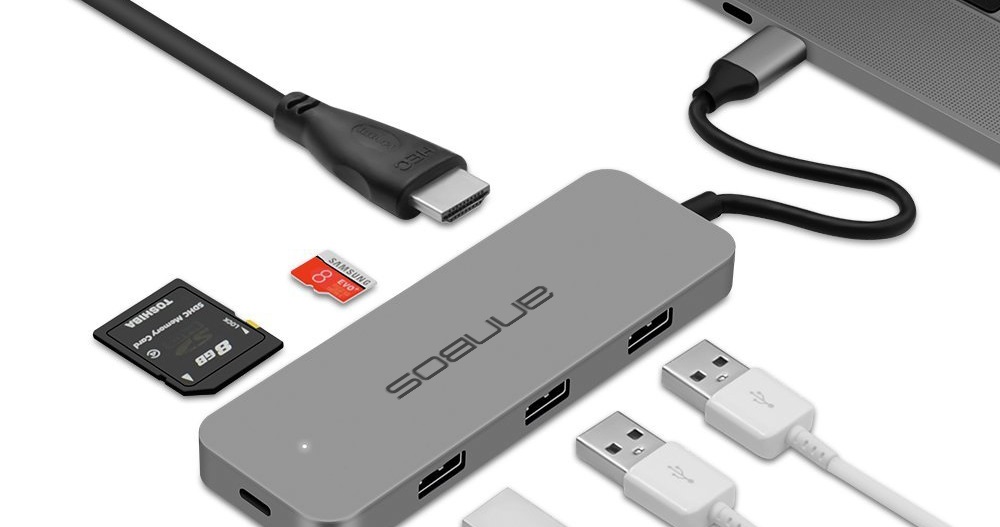
- Connection issues. If the connection is not stable, the connected external hard drive would not be detected normally on Mac. For example, if the connection cable, adapter, USB hub/dock, USB port is corrupted or malfunctioned, the issue will happen.
- No partition/volume available. Only if there is volume on the drive, you are able to see and access the external drive. If the volume/partition was deleted or lost for some reasons, then it will not show up on Mac.
- File system damaged. File system for an external drive cannot be damaged, otherwise, the Mac cannot recognize it and you are not able to see the drive on Mac.
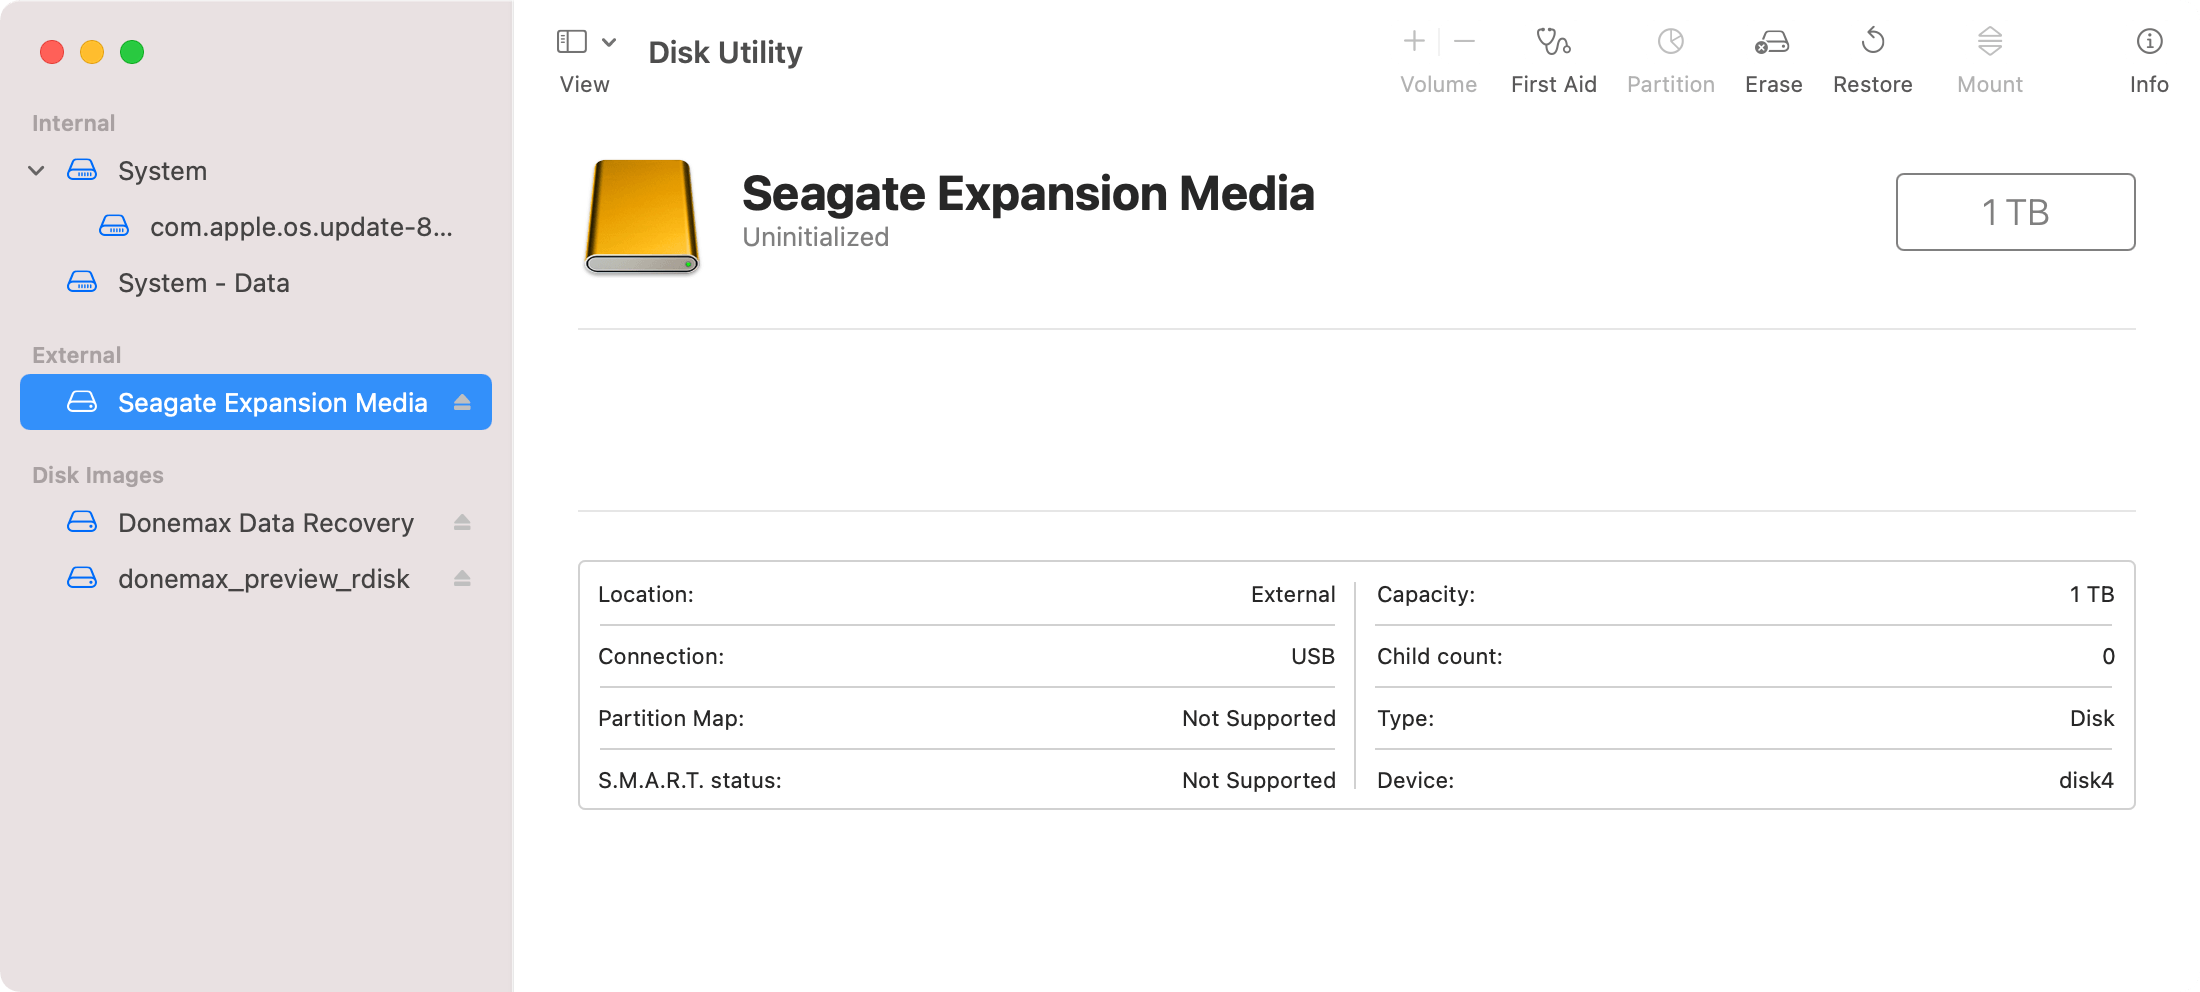
- Drive becomes uninitialized. When you open Disk Utility and see the external drive is “uninitialized”, the drive also cannot be seen on your desktop or Finder. Sometimes, a brand new drive would be uninitialized. Or some issues will also make the drive become uninitialized.
![external hard drive not showing up on Mac]()
- Drive is not mounted. External drive should also be mounted successfully before you can see and access it in Finder. However, the drive would become “Not Mounted” or unmounted if there are some issues happen to the drive.
![external hard drive not showing up on Mac]()
- File system not compatible. Mac cannot support some file systems that are used on other operating system. For example, EXT, ReFS, or others. If you connect an external drive with these unsupported file systems, the drive will not show up on Mac.
Part 2. Check the connections of the external hard drive.
![external hard drive not showing up on Mac]()
Before you try some other solutions, we suggest you first check the connections. You can do it easily. First, you can change a cable, adapter/hub, or USB port to see if it works.
If you use a Mac laptop, please also check if there is enough power. In low power mode, the external hard drive would not work normally without enough power supply. You can plug the power cable in such a case.
By the way, you can also restart the Mac computer directly to check if the external drive will show up. Sometimes, some issues could disappear directly after a Mac reboot.
Part 3. Change preferences to show external drives.
Sometimes you may be confusing if the external drive is not showing up on your Mac, however, it could be loaded and recognized on another Mac. You can go and check the preferences of Finder.
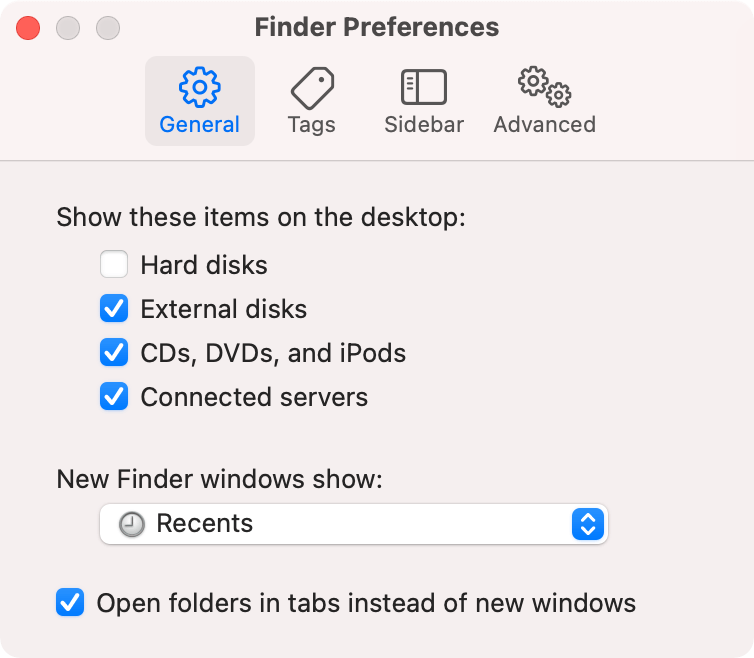
Open Finder, click Finder > Preferences... from the top menu bar.
First, please check and ensure to enable the option “External disks” under General tab. It will make sure the connected external hard drives showing up on desktop of your Mac.
![external hard drive not showing up on Mac]()
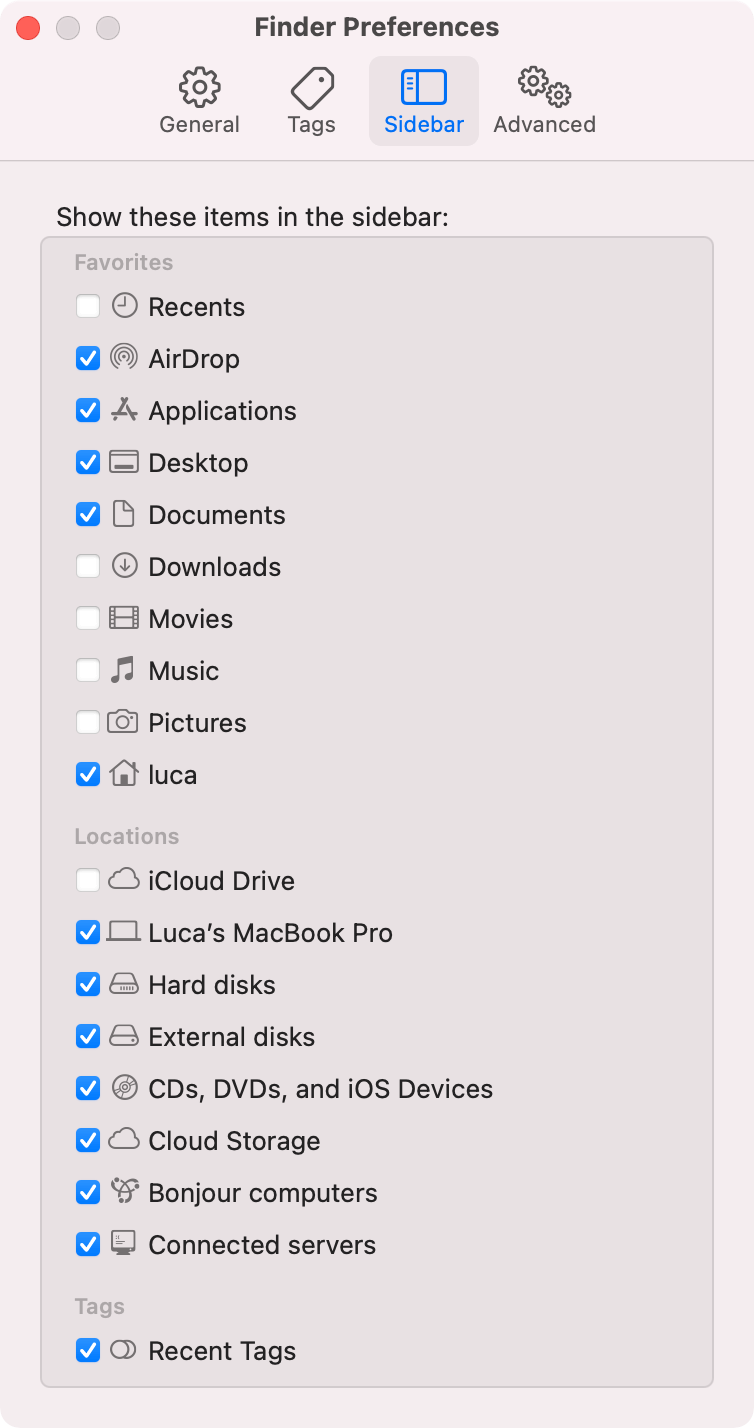
Second, please change to “Sidebar” to choose “External disks”. Then you will see connected external hard drives in the sidebar of Finder.
![external hard drive not showing up on Mac]()
Part 4. Recover data from not showing up external drive.
If it's not the issues with the connection or system settings, then there would be some other issues with the external hard drive. There are some other methods to try. If necessary, we suggest you recover the data from the not showing up external drive to make your data safe first.
To recover data from not showing up external drive on Mac, you need to get a reliable and easy data recovery software. It can help you get the data securely and fast before you do further changes to your not showing up external hard drive.
We recommend Donemax Data Recovery for Mac for you. Please first download the software.
After installing the software, please run it from Launchpad. Then do as follows to recover data from the unrecognized external hard drive step by step.
Step 1. Please ensure to connect the drive to the Mac, run the software and choose the drive.
![external hard drive not showing up on Mac]()
Step 2. Click the Scan button to continue.The software will scan the drive deeply.
![external hard drive not showing up on Mac]()
Step 3. After the scan process is finished, please check and recover the files to another drive.
![external hard drive not showing up on Mac]()
What's more, the software is able to recover data from your Mac drive, external drive, thumb drive, SD card in some other data loss scenarios. So you can also have a try with the software no matter how you lose your data.
Part 5. Fix the logical issues of the external drive.
Now, we can continue to troubleshoot the issue. Normally, if the drive is not toasted, you can see it in Disk Utility. You can check the status of the external drive and then try to fix it in different ways.
Mount the Not Mounted drive.
If the external hard drive is showing up as “Not Mounted”, the system may fail to mount it. In such a case, you can try to mount it manually. In the left sidebar, please with click the external drive, choose “Mount” option to mount the drive manually.
![external hard drive not showing up on Mac]()
Partition the empty external hard drive.
The drive would be empty if there is no any volume or partition on it. Then you can try to partition the external drive and use it. You can select the external drive first in the left sidebar. You will find the Partition option on the top of the window. Click it to add partition(s) to the external drive.
If you create a partition on the drive, then it would be formatted and mounted automatically. The drive will then be visible on desktop or in Finder.
![external hard drive not showing up on Mac]()
Fix file system issues with First Aid:
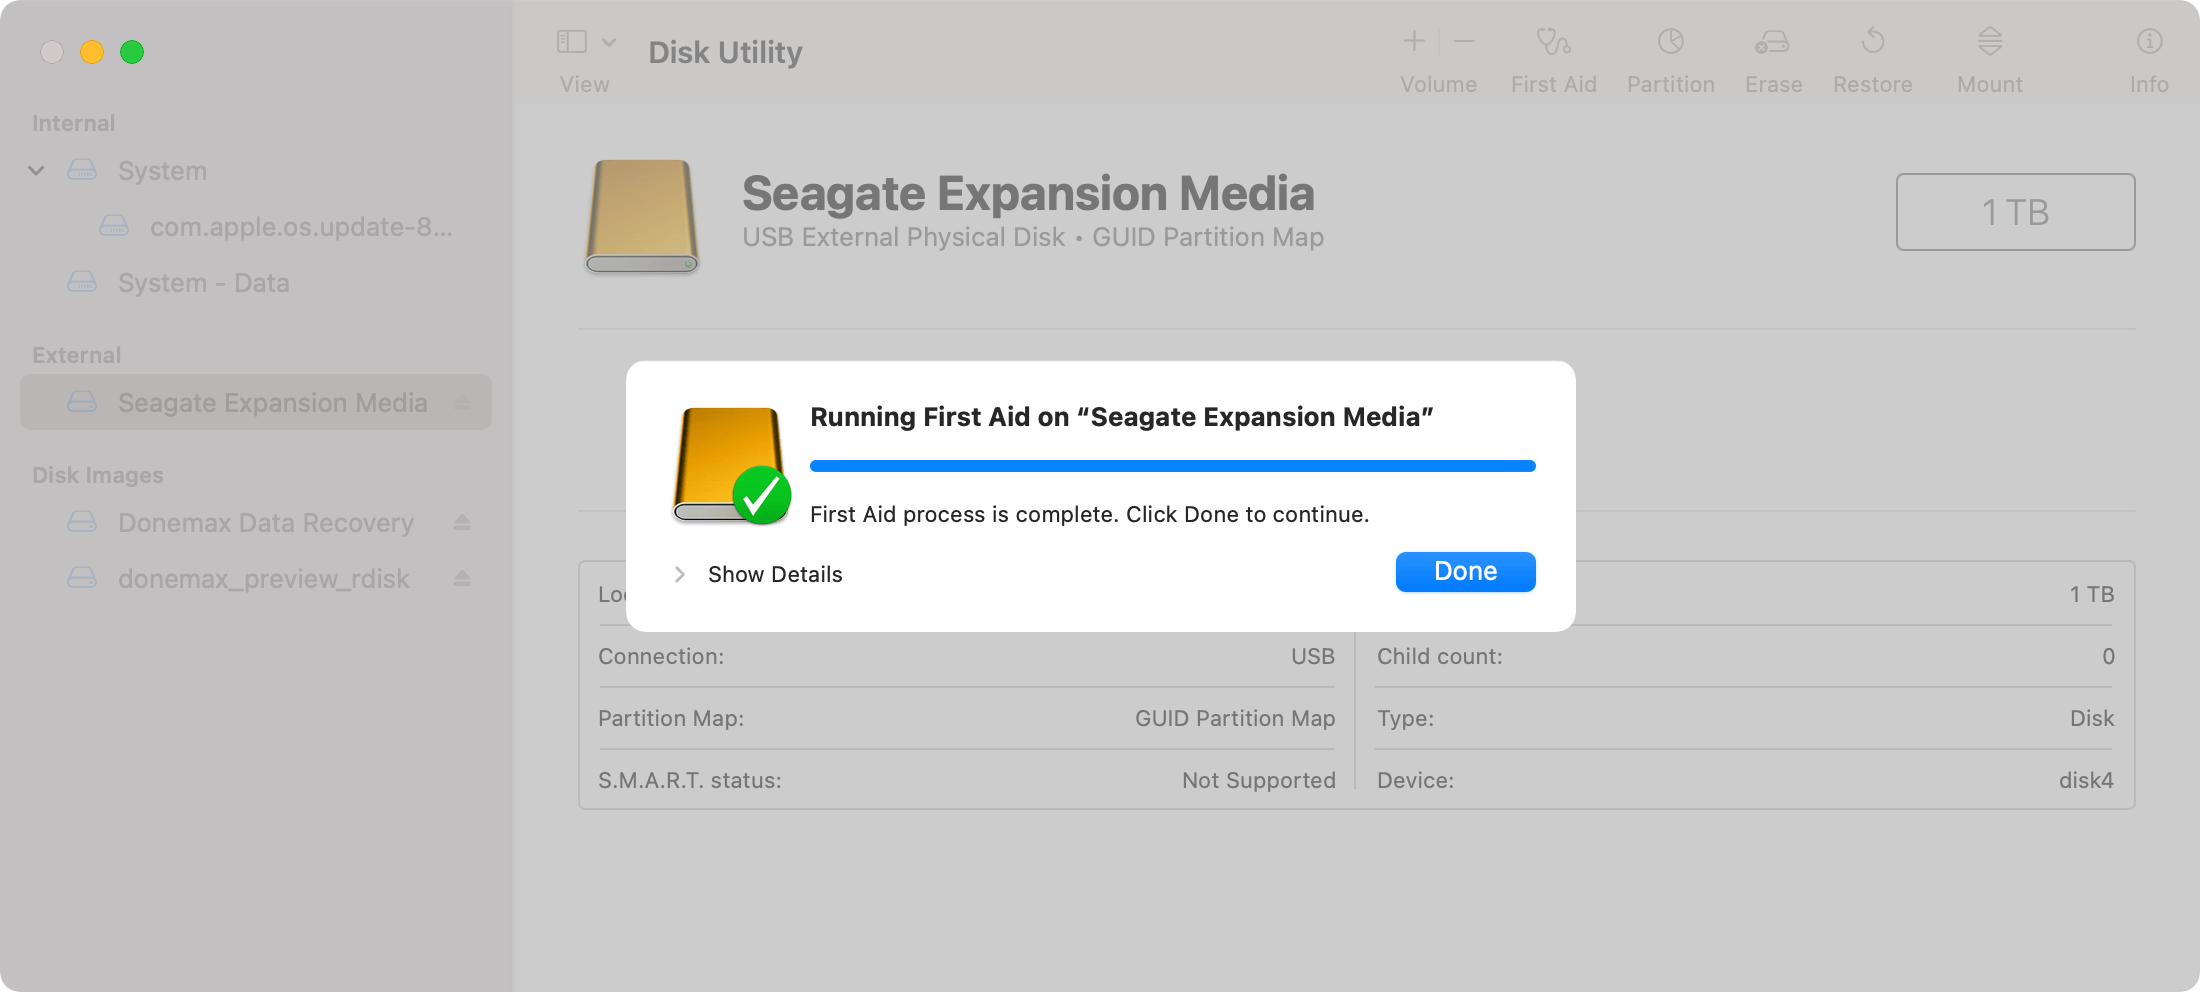
Sometimes, you cannot mount a drive directly. The file system on the drive is corrupted and you cannot mount it on Mac. In Disk Utility, you will find an option “First Aid”. With this option, you can try to fix some file system issues of external drive.
Please choose the external drive and click “First Aid” to continue. It will automatically analyze and try to fix the issues. You can just wait until the process is done. If the issues could be fixed, then you can mount and access the drive again on your Mac.
![external hard drive not showing up on Mac]()
Erase and format the drive.
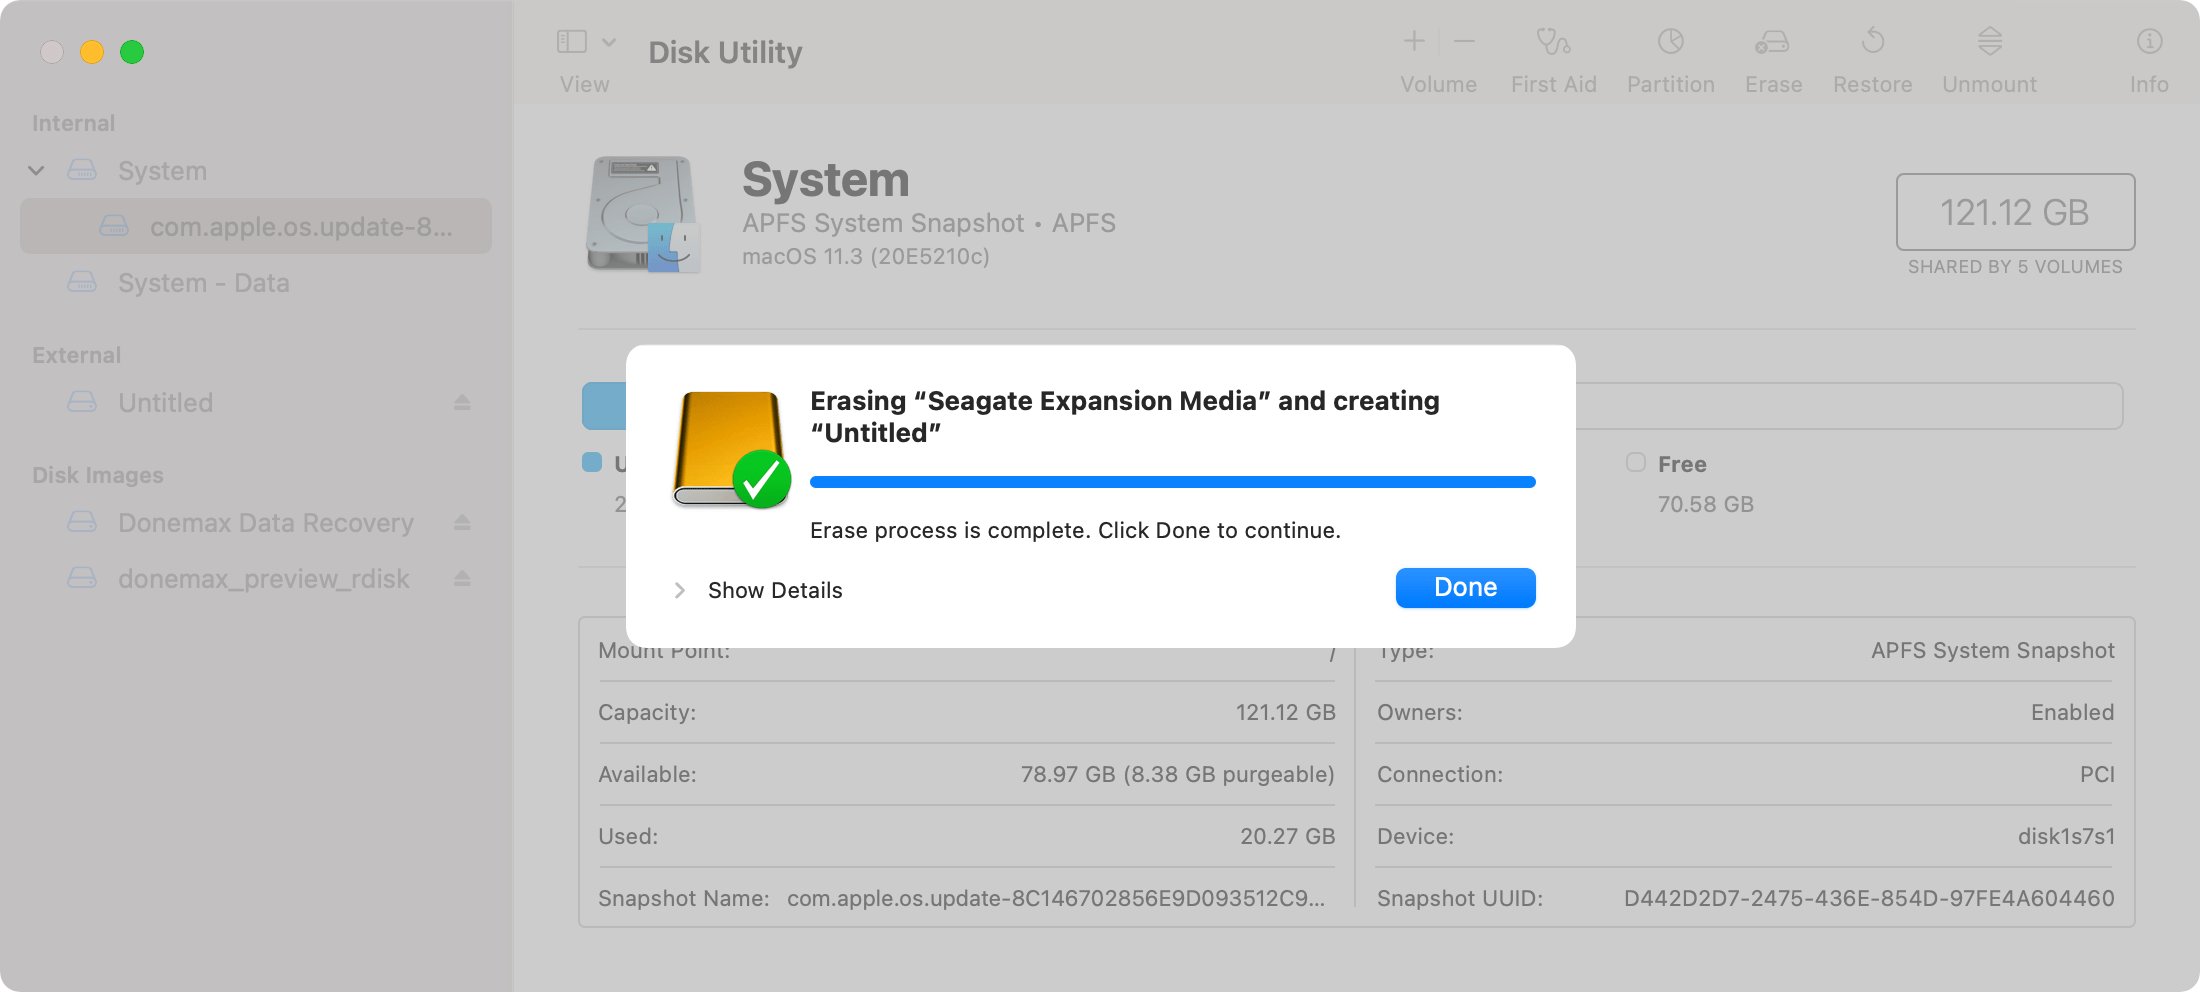
If there are issues with file system and cannot be fixed with “First Aid”, what to do? We suggest you try the “Erase” feature to format the drive directly.
Also, you can erase and format the drive if the file system of the drive is not supported on Mac. During the process, you can apply a Mac compatible file system for the external drive directly.
Choose the external drive and click Erase. Follow the wizard to choose the format and other options for the drive, and erase/format it directly. If the drive could be formatted successfully, then you will find the external hard drive is showing up again.
![external hard drive not showing up on Mac]()
Actually, you can also try to erase and format the corrupted drive with third-party software, like Donemax Data Eraser for Mac. It can not only format the drive, it can also erase all the data permanently.
Part 6. Reset NVRAM and SMC to fix the issue.
Besides the above methods, your troubleshoot repertoire should also include additional procedures. Sometimes, these methods can occasionally eliminate otherwise inscrutable problems—zapping the NVRAM and resetting the SMC. You can also have a try to fix external hard drive not showing up issue.
Reset NVRAM
To reset your NVRAM, just do as the following procedure.
1) Shut down your Mac.
2) Press the power button, and as soon as you power up the laptop, hold down Command-Option-P-R.
3) Keep holding down those keys for about 20 seconds. Then let go and allow your Mac to continue starting normally.
Reset the SMC
Before you reset SMC on your Mac, you need to shut down your Mac first. After that, you can try the following different procedures depending on the type of Mac you have. (It's not available in M1 Mac machines).
Desktop Macs: Disconnect the power cord and wait 15 seconds, then you can plug it back in. Then turn on your Mac after 5 seconds.
Laptops (T2 chip): Press and hold Control-Option-Shift. Hold these keys for 7 seconds, then press and hold the power button. If your Mac is on, it will turn off while you hold down the keys for another 7 seconds. Then release the keys, wait a few seconds and turn on the laptop.
![external hard drive not showing up on Mac]()
Laptops (no T2 chip) with non-removable batteries: press and hold Control-Option-Shift., and press the power button and hold all of these down for 10 seconds, then release the keys. Connect the power adapter and then turn the Mac on normally.
Laptops (no T2 chip) with removable batteries: Disconnect the power cord and remove the battery. Press the power button, hold it for 5 seconds, and then let go. Put the battery back in, reconnect the power cord, and turn the Mac on normally.
Part 7. Conclusion.
It's not able to avoid any issues that happen on your external hard drive, USB flash drive, memory card or other storage devices. But you can do the best to keep your data safe. You can back up your data regularly and save on different disks. If any issues happen on a drive, you can still have other backups. Also, you can try to fix the external device not showing up issues with the methods in this article. Normally, if the drive is not dead, you are able to fix the issue and make the disk work again. At least, you can recover the data with Donemax Data Recovery for Mac in such a case.
