PAGE CONTENT:
With every macOS release, Apple introduces exciting new features, security improvements, and performance upgrades. The latest version, macOS Sequoia, is no different. However, many users report their Mac running slower after installing the macOS Sequoia update, even on relatively new models. This can be frustrating, especially when you're expecting improved performance, not slowdowns.
In this article, we will explore the reasons why your Mac might be sluggish after upgrading to macOS Sequoia and provide actionable solutions to fix these performance issues. Whether you're dealing with slower boot times, laggy apps, or poor system responsiveness, we've got you covered.
Reasons Why macOS Sequoia Might Slow Down Your Mac
Before diving into solutions, it's important to understand why your Mac might slow down after installing macOS Sequoia. Here are some common reasons behind the problem:
1. Background Tasks After Installation
After upgrading to a new operating system, your Mac often runs several background tasks, such as Spotlight indexing, iCloud syncing, and system optimization processes. These tasks can take up significant system resources, causing the Mac to slow down temporarily. While these tasks usually complete within a few hours to a day, the initial performance dip can be noticeable.
2. System Requirements Mismatch
macOS Sequoia may introduce new features that are more demanding on your Mac's hardware. If you're running Sequoia on an older model, your Mac might struggle to keep up with the demands of the new system, especially if it's nearing the end of its lifecycle. Insufficient RAM, older CPUs, or outdated storage can all contribute to slower performance.
3. Bugs in Early Versions
Like any major software release, macOS Sequoia may have bugs, especially in the early versions. These bugs can cause various performance issues, including system slowdowns, app crashes, and unresponsive behavior. While Apple regularly releases updates to fix these issues, it's not uncommon for early adopters to face slowdowns due to software glitches.
4. Too Many Startup Programs
If you have several applications configured to open automatically when your Mac starts, this can significantly increase your Mac's boot time and slow down performance. These startup programs consume resources as soon as you log in, which can create an overall sluggish experience until they are fully loaded.
5. Low Disk Space
A lack of free disk space can severely hamper your Mac's performance, particularly after an upgrade. macOS requires a significant amount of free space to operate efficiently. If your disk is nearly full after the installation of Sequoia, your system may have difficulty allocating enough space for virtual memory, resulting in slowdowns.
6. Outdated Apps
Some of your apps might not be fully optimized for macOS Sequoia. If developers haven't released updates to ensure compatibility, these apps could cause system instability or slow performance. Outdated software can conflict with the new OS, leading to crashes, freezes, or sluggish behavior.
7. Corrupted Cache and System Files
When you upgrade to a new macOS version, some of the cache and system files may become corrupted, which can slow down your system. These files may also become bloated over time, especially if they haven't been cleared in a while. Clearing them out can help your Mac run more efficiently.
👍Fixes for Slow Mac After Installing macOS Sequoia
Now that we've covered the reasons why your Mac might be running slowly, let's move on to the solutions. Follow these steps to restore your Mac's performance and make it run as smoothly as it did before the upgrade.
Fix1. Restart Your Mac
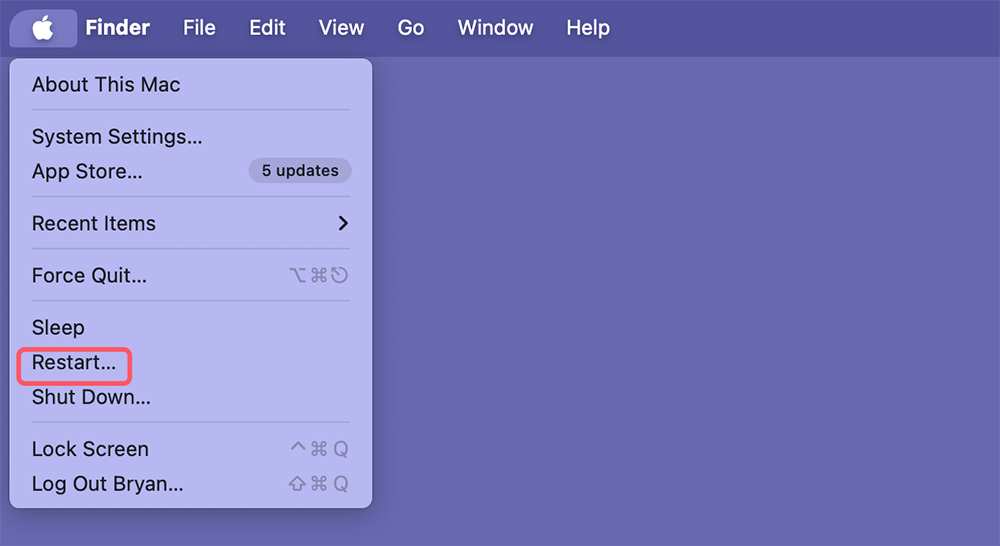
The first solution is often the simplest. If you haven't already done so, restart your Mac. A fresh reboot can clear out temporary files, stop unnecessary background tasks, and resolve minor issues that could be slowing your system down. While this might seem basic, it's a quick and effective fix for many performance problems.
Fix2. Check Activity Monitor for Resource Hogs
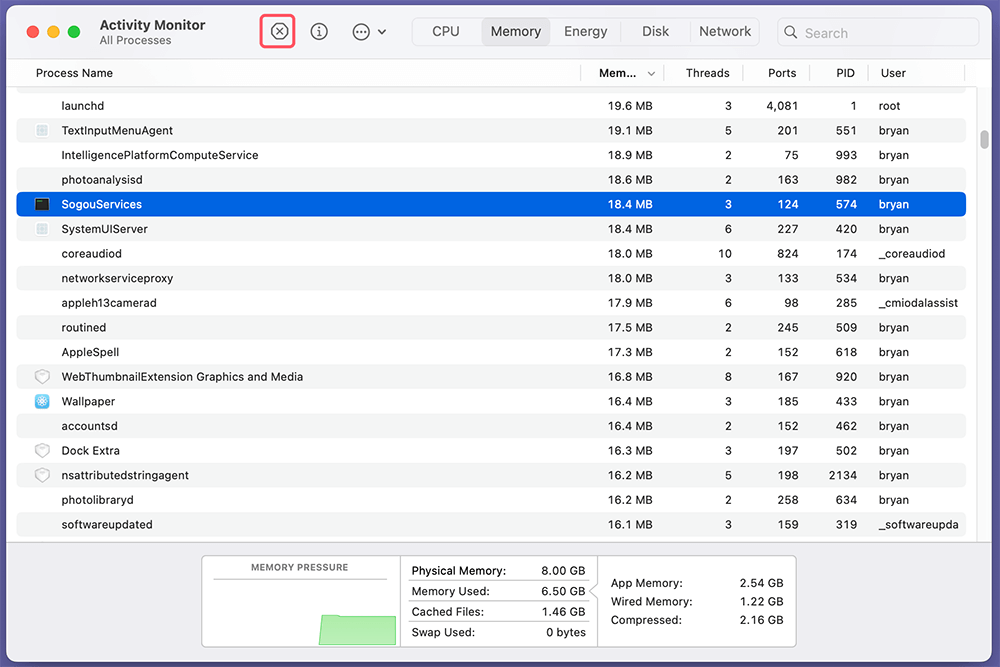
Activity Monitor is your best friend when diagnosing slowdowns. It allows you to view all running processes and see which ones are consuming the most CPU, memory, and energy.
Steps to check Activity Monitor:
- Open Activity Monitor by going to Utilities via Applications.
- Click on the CPU tab to see which processes are using the most processing power.
- Identify resource-hogging apps and force quit them if they're not essential.
![Check Activity Monitor for Resource Hogs]()
Sometimes, you may find that a particular app is using a disproportionately high amount of CPU or memory. By quitting these apps, you can instantly improve your system's performance.
Fix3. Disable Startup Programs
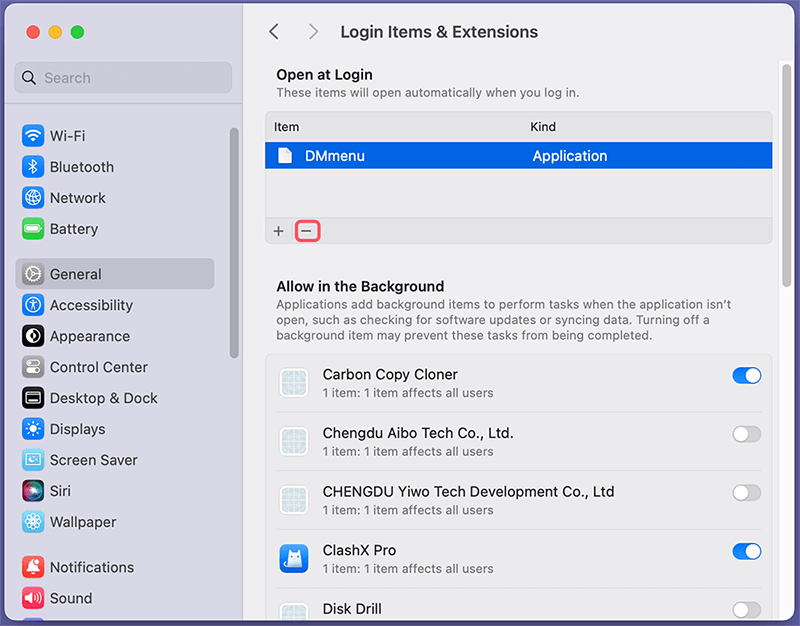
Having too many startup programs can slow down your Mac right from the start. Disabling non-essential programs from starting at login will reduce the load on your Mac and help it boot faster.
How to disable startup programs:
- Go to System Settings > General > Login Items & Extensions.
- Review the list of apps under Login Items.
- Select the apps you don’t need at startup and click the “-” button to remove them.
![Disable Startup Programs]()
This will prevent those apps from launching automatically, freeing up system resources for more important tasks.
Fix4. Free Up Disk Space
As mentioned earlier, insufficient free disk space can significantly impact your Mac's performance. The operating system needs extra space for virtual memory and system files. If your disk is close to full, it's time to free up some space.
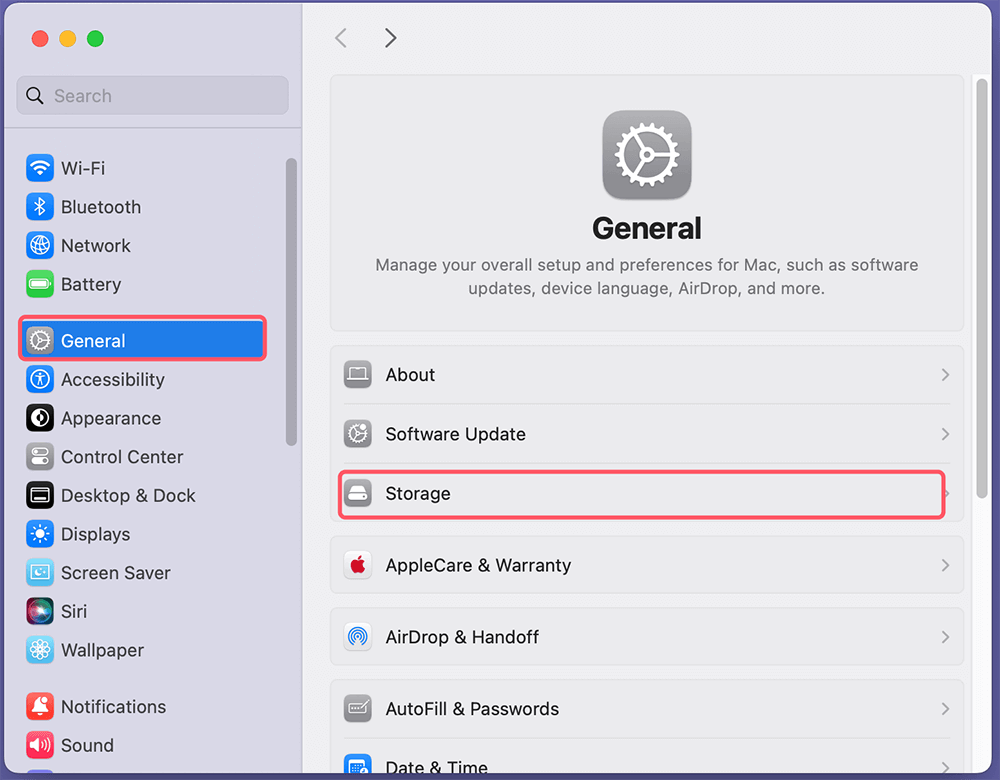
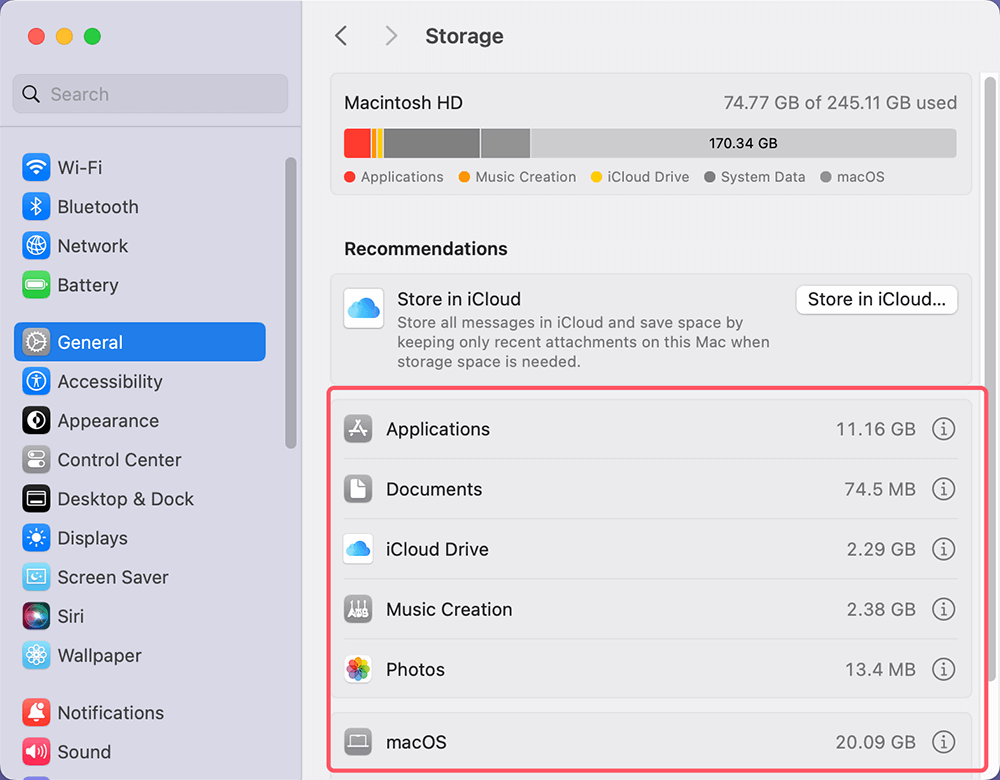
How to check and free up disk space:
- Go to Apple Menu > System Settings > General > Storage.
![Go to Apple Menu > System Settings > General > Storage]()
- Look at the available storage. If it’s less than 10~15% of the total storage, you need to clear some space.
![Look at the available storage]()
- Delete old files, unused apps, and large downloads.
- Empty the Trash.
You can also use macOS's built-in recommendations to optimize storage by enabling Store in iCloud or Optimize Storage to automatically manage files and reduce clutter.
Fix5. Reset NVRAM/PRAM
Resetting your Mac's NVRAM or PRAM can resolve a variety of performance issues, especially after a major macOS update. This is where macOS stores settings related to display resolution, sound volume, and more.
Steps to reset NVRAM/PRAM:
- Turn off your Mac.
- After turning it back on, press and hold Option, Command, P, and R for roughly 20 seconds.
- When the Apple logo shows and vanishes, or when you hear the starting sound, release the keys.
After the reset, your system may take a little longer to restart, but it could solve performance problems that stem from corrupted settings.
Fix6. Clear Cache Files
Caches are temporary files created by apps and the system to speed up tasks, but over time, they can become corrupted or simply take up too much space. Clearing them can free up resources and improve performance.
Steps to clear cache files:
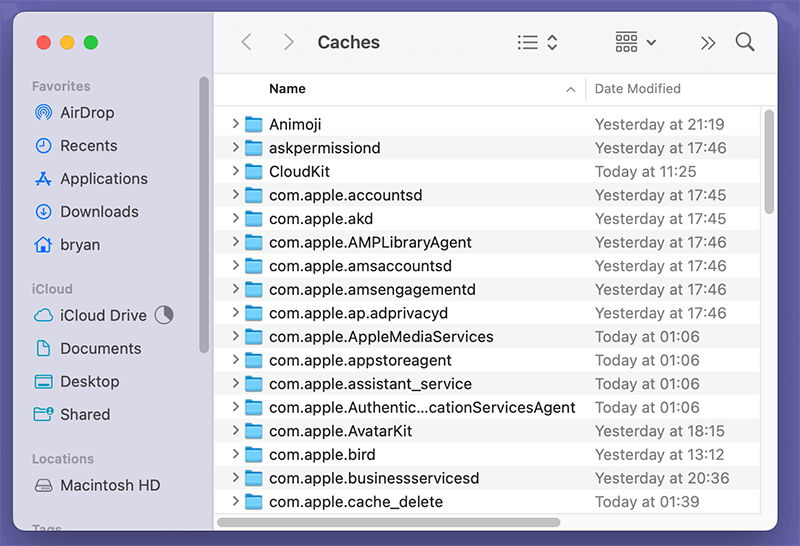
- Launch Finder and choose the Go to Folder window by pressing Command + Shift + G.
- Type ~/Library/Caches and click Go.
- Delete the contents of each folder inside the Caches folder.
![Clear Cache Files]()
You can also use a third-party app like AweCleaner for Mac or CCleaner for Mac to clear cache files more easily, as well as remove other unnecessary files that may be slowing down your Mac.
Fix7. Update All Apps
Outdated apps can cause performance issues, especially if they aren't optimized for the latest macOS. Check the App Store or individual app websites for updates and make sure all of your software is up-to-date.
Steps to update apps:
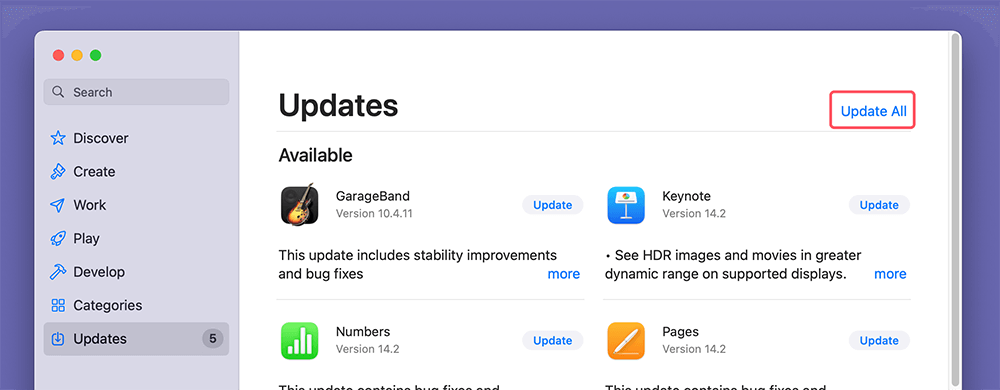
- Open the App Store.
- Click on Update All or Update in the sidebar.
- Install any available updates.
![Update All Apps]()
Fix8. Reduce Visual Effects
macOS comes with a variety of visual effects that can make the system feel more polished but may also slow down older Macs. Disabling these effects can improve performance without significantly altering your experience.
How to reduce visual effects:
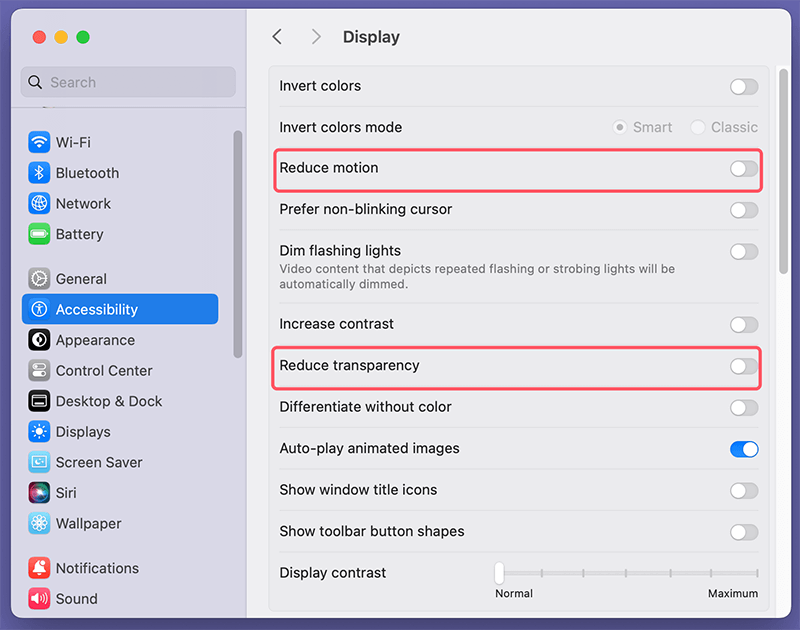
- Go to System Settings > Accessibility > Display.
- Enable Reduce Motion and Reduce Transparency.
These changes will make animations less demanding on your hardware, leading to a snappier experience overall.
Fix9. Reset SMC
The System Management Controller (SMC) controls many hardware functions on your Mac, and resetting it can fix performance issues like slowdowns, unresponsive fans, and more.
Steps to reset SMC (for Macs with non-removable batteries):
- Turn off your Mac.
- For ten seconds, press and hold the power button as well as the Shift, Control, and Option buttons on the left.
- Let go of all keys and restart your Mac normally.
Fix10. Run Disk Utility
If your Mac's disk has errors, it could lead to performance slowdowns. Running Disk Utility can help identify and repair issues with your hard drive.
Steps to use Disk Utility:
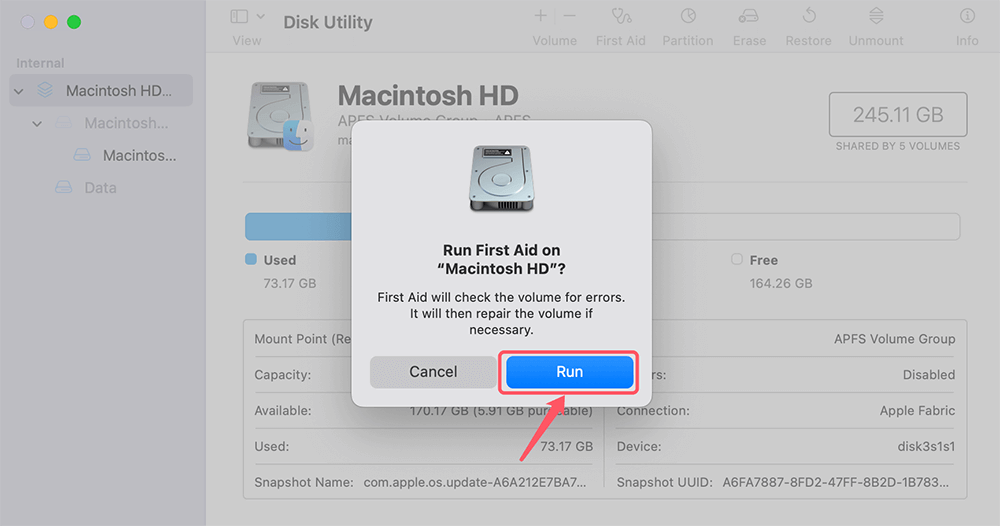
- Open Disk Utility from Utilities via Applications.
- Select your main disk (usually called Macintosh HD).
- Click First Aid and follow the on-screen instructions to repair the disk.
![Run Disk Utility]()
This process will fix minor disk issues, improving overall system performance.
Advanced Solutions to Fix Slow Mac After Installing macOS Sequoia
If the basic fixes don't work, you might need to take more advanced steps to restore your Mac's performance.
Solution 1. Reinstall macOS Sequoia
If none of the previous solutions have worked, it might be necessary to reinstall macOS Sequoia. A clean install will wipe any corrupted system files and give your Mac a fresh start, often solving persistent performance issues.
Steps to reinstall macOS Sequoia:
- Backup your important data using Time Machine or an external drive.
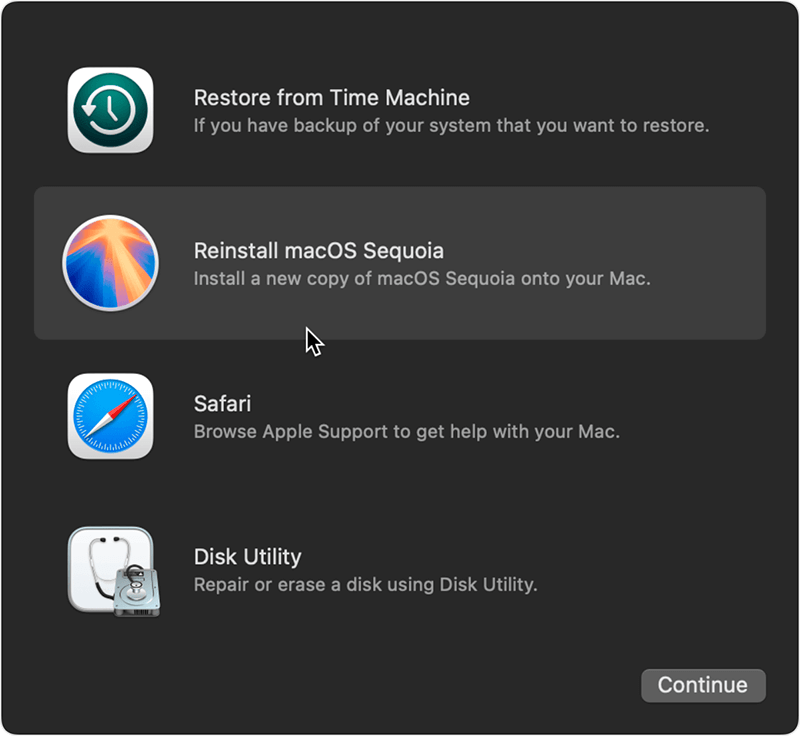
- To access Recovery Mode, restart your Mac and press & hold Power button. Choose Options and click on Continue button.
- Choose Reinstall macOS Sequoia and follow the prompts.
![Reinstall macOS Sequoia]()
This will install a fresh version of macOS without affecting your data, but you should always back up before proceeding.
Solution 2. Upgrade Your Mac's Hardware
If you're running an older Mac, it may simply not be able to handle the demands of macOS Sequoia. In this case, upgrading your hardware may be the best solution.
Consider upgrading:
- RAM: More memory can significantly improve performance, especially when running multiple apps simultaneously.
- SSD: If your Mac still has a hard drive, upgrading to an SSD will provide a substantial boost in speed.
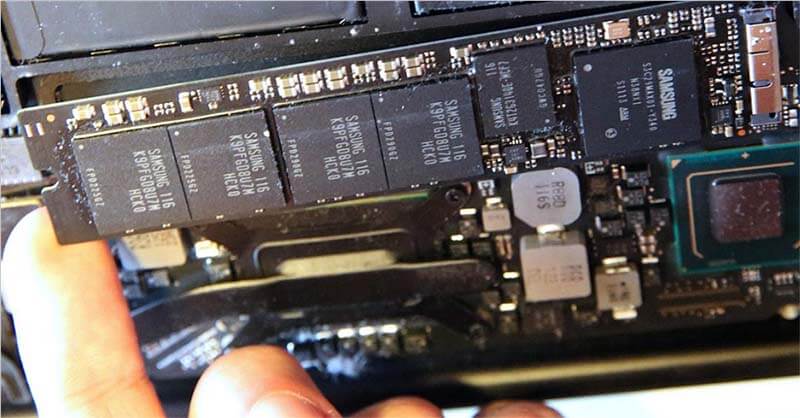
Upgrade Old SSD to New SSD on Mac
Clone all data from old SSD to new SSD and replace old startup disk with the new SSD to speed up your Mac.
Hardware upgrades can breathe new life into an older Mac, making it better equipped to handle newer macOS versions.
Preventive Tips to Avoid Slowdowns in the Future
Once you've resolved your Macs performance issues, it's important to maintain your system to prevent future slowdowns.
1. Regular Maintenance
- Regularly clear cache files and manage startup programs.
- Run Disk Utility periodically to check for disk errors.
2. Keep Apps and macOS Up-to-Date
- Install updates as soon as they’re available to ensure compatibility and security.
- Avoid using outdated apps that could cause performance issues.
3. Avoid Installing Unnecessary Apps
- Only install apps you genuinely need.
- Uninstall apps you no longer use to save disk space and reduce system load.
Conclusion
macOS Sequoia brings exciting new features and improvements, but for some users, it also brings performance issues. If your Mac is running slow after upgrading to macOS Sequoia, the fixes outlined in this article should help you resolve the problem. Whether it's clearing cache files, disabling startup programs, or upgrading your hardware, you can restore your Mac to its full potential and enjoy a smooth and efficient experience.
Remember, it's essential to keep your Mac regularly maintained to prevent slowdowns in the future. By following these tips, you can ensure that your Mac stays fast and responsive, even with the latest software updates. Before or after upgrading macOS, make a full bootable clone backup with Mac disk cloning software.

Donemax Disk Clone for Mac
Powerful, easy-to-use & 100% safe Mac disk cloning software to clone HDD/SSD/external device on Mac, create disk image backup and create bootable clone backup for Mac computers. 100% support Intel-based Macs, Apple T2 Security Macs and all Apple silicon M-chip Macs.
Related Articles
- Dec 05, 20248 Solutions to Fix Disk Utility Can't Mount an External Hard Drive on Mac
- Dec 24, 2024Seagate External Hard Drive Shows Wrong Capacity: How to Fix It
- Jan 05, 2025Error! Could Not Find APFS System Volume Handle, How to Fix It?
- Feb 12, 2025Fix The Semaphore Timeout Period Has Expired Error Without Losing Data
- Jan 21, 2025Fix SD Card Won't Read or Open
- Nov 13, 2024Deleted App Still Shows Up on Top Menu Bar of Mac: How to Fix It

Maria
Maria is one of the senior writers & editors of Donemax who lives and works in Sydney, Australia. She loves PC, Mac and Internet Technology. She has 6 years of writing articles about data recovery on PC/Mac, disk cloning solution, data eraser and computer OS optimization, etc. She is also interested in testing various software and digital products.

Gerhard Chou
In order to effectively solve the problems for our customers, every article and troubleshooting solution published on our website has been strictly tested and practiced. Our editors love researching and using computers and testing software, and are willing to help computer users with their problems
Hot Donemax Products

Clone hard drive with advanced clone technology or create bootable clone for Windows/Mac OS.

Completely and easily recover deleted, formatted, hidden or lost files from hard drive and external storage device.

Certified data erasure software - permanently erase data before selling or donating your disk or any digital device.
