Before we start: Terminal commands can help you securely fix split Fusion Drive on Mac. It also erases everything from the Fusion Drive. Mac data recovery software - such as Donemax Data Recovery for Mac can help you get everything back.
PAGE CONTENT:
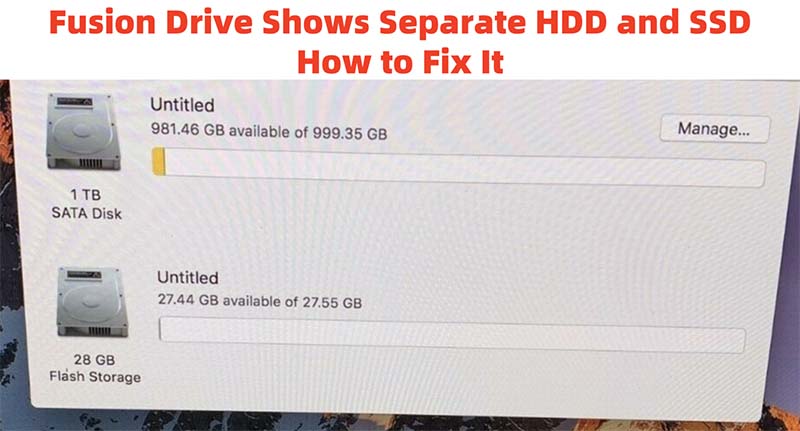
Fusion Drive, an innovative storage technology from Apple, combines the speed of SSDs (solid-state drives) with the capacity of HDDs (hard disk drives). It provides users with the best of both worlds: fast performance and ample storage space. However, when the Fusion Drive setup malfunctions and appears as two separate drives in Finder, it can lead to significant frustration, as it disrupts the seamless integration that defines the technology. This article provides a comprehensive guide to diagnosing and fixing this issue to restore your Mac's storage performance.
Everything About Mac's Fusion Drive and Why It Becomes Two Drives
How the Fusion Drive Works?
Fusion Drive integrates an SSD and an HDD, allowing macOS to intelligently manage the distribution of files. Frequently accessed files are stored on the SSD for faster read and write speeds, while less frequently used data resides on the HDD. Users experience a single logical drive in Finder, which operates efficiently without requiring manual intervention.

Why the Fusion Drive Might Appear as Two Drives?
When a Fusion Drive appears as two separate drives in Finder, it indicates a breakdown in this seamless integration. Common causes include:
- macOS Corruption: A bug in macOS can sometimes prevent it from recognizing the Fusion Drive as a single entity.
- Hardware Failures: Issues such as cable disconnections, damaged drives, or other hardware problems can disrupt the Fusion Drive configuration.
- User Interference: Accidental manipulation of disk configurations or third-party software tinkering can break the logical link between the SSD and HDD.
Preliminary Checks:
Before diving into complex fixes, it's essential to conduct some basic diagnostics:
1. Verifying the Drives
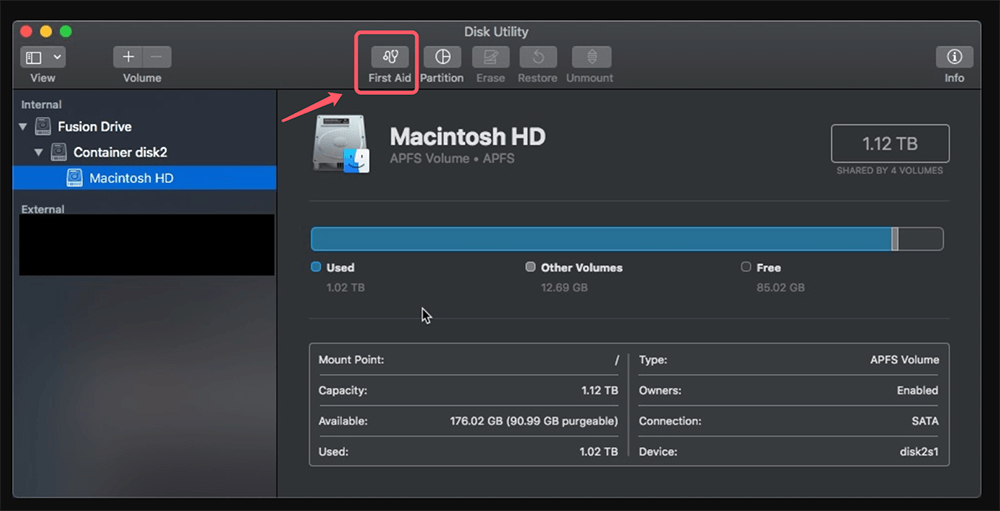
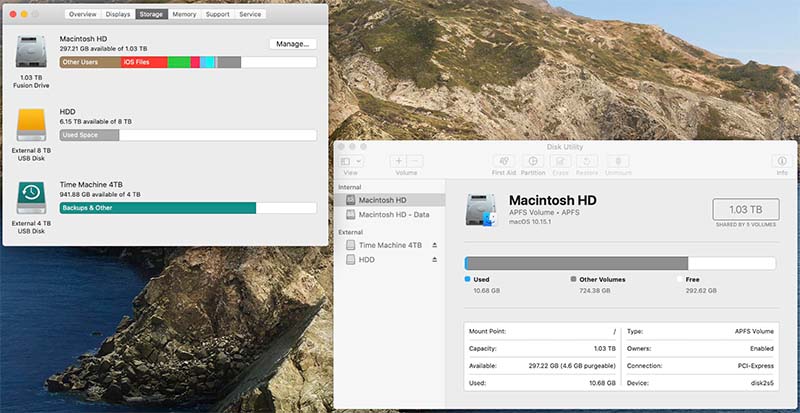
Open Disk Utility by going to Finder and then utilities via Applications and examine the list of drives. If you see two separate drives instead of one, note their names and sizes to confirm that they belong to the Fusion Drive setup.
2. Checking macOS Version
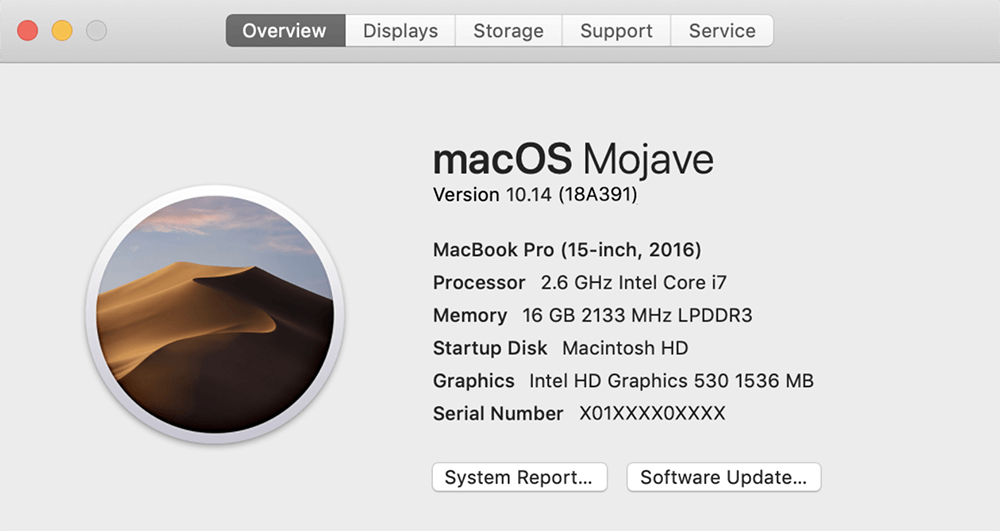
Ensure your macOS version supports Fusion Drive. Older macOS versions may not fully support newer Fusion Drive configurations. Navigate to System Preferences > About This Mac to check your macOS version and update it if needed.
3. Backup Data
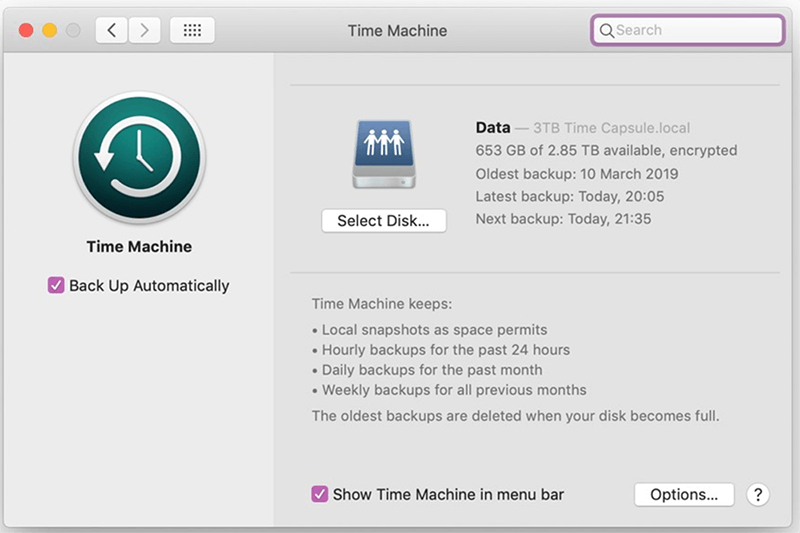
Before proceeding with any fixes, backup your data. Use Time Machine or an external drive to create a complete backup to prevent data loss during the troubleshooting process.
How to Fix Split Fusion Drive on Mac
The Terminal provides a powerful way to diagnose and fix disk-related issues. Ensure you have backed up your important data, then recreate the Fusion Drive by using Terminal Commands.
For macOS Mojave or later
- Shut down your Mac, then restart it, press and hold Command+R until it boots into macOS Recovery mode.
- From the Utilities window, choose Utilities > Terminal from the menu bar.
- When Terminal opens, type in diskutil resetFusion and press Enter.
- Type Yes and press Enter.
- When it is successful, quit Terminal.
- Get back to Utilities window, choose Reinstall macOS. Follow the onscreen instructions to install macOS.
For macOS High Sierra or earlier
- Turn on your Mac, press and hold Command+R to enter into macOS Recovery mode.
- From the menu bar, choose Terminal.
- Type diskutil list and pres Enter (return). Find the disk identifier of the HDD and SSD (which combine the Fusion Drive).
- Enter diskutil cs create Macintosh\ HD identifier1 identifier2, replace 1 or 2 with the identifier of your HDD/SSD. Then hit Return. (If you get a disk unmounting error, just type in diskutil unmountDisk identifier)
- Type diskutil cs list and press Return. Terminal displays additional data about your drives (volumes). Find the string of numbers that appears after "Logical Volume Group" for the volume named Macintosh HD. It's a number like 8354AFC3-BF97-4589-A407-25453FD2815A.
Example:
+-- Logical Volume Group 8354AFC3-BF97-4589-A407-25453FD2815A
|
=========================================================
| Name: Macintosh HD
- Type in: diskutil cs createVolume logicalvolumegroup jhfs+ Macintosh\ HD 100%
Replace logicalvolumegroup with the number you found in the previous step. Then press Return.
Example: diskutil cs createVolume 8354AFC3-BF97-4589-A407-25453FD2815A jhfs+ Macintosh\ HD 100%
- When it is successful, quit Terminal and get back to Utilities window, choose Reinstall macOS or OS X to reinstall Mac operating system.
If the HDD or SSD of the Fusion Drive gets damaged, repair it with Disk Utility.
- Open Disk Utility.
- Select each drive and click First Aid to repair them.
![Select each drive and click First Aid to repair them]()
Follow the on-screen instructions to resolve any detected errors.
If errors persist, reset your Mac's PRAM (Parameter RAM) and SMC (System Management Controller):
- PRAM Reset: Hold down Command + Option + P + R until the startup sound plays twice after restarting your Mac.
- SMC Reset: Follow Apple’s instructions based on your Mac model.
Verification After Recreating the Fusion Drive:
Once you've completed all these steps, it's essential to verify that the Fusion Drive is working correctly.
- Open Disk Utility again and check if the Fusion Drive now appears as a single volume.
- You can also open Terminal and run the command diskutil list to confirm that the drives are now showing as part of the same logical volume group.
- Check Finder and ensure that the Fusion Drive is now appearing as a single drive, not two separate ones.
By following these steps, you've successfully recreated your Fusion Drive, resolved the issue of it appearing as two separate drives in Finder, and restored your Mac's performance and functionality.
Also read: how to fix Fusion Drive not mounting or not showing up on Mac.
Recover Lost Data After Fixing Separate Drives in Fusion Drive
Fixing Fusion Drive issues may erase everything from your Mac's internal disk, you can restore the files easily if you have a backup. But, if you don't have a backup, you still can restore the lost files by using Mac data recovery software.
Step 1. Donemax Data Recovery for Mac is a powerful, 100% safe and easy-to-use Mac data recovery program. You can download and install it on your iMac, Mac mini or other Mac computers.
Step 2. Open Donemax Data Recovery for Mac, choose the internal drive (usually named Macintosh HD) to start data recovery.

Step 3. Click on Scan button to deeply scan the Fusion Drive and find all deleted/erased files.

Step 4. Once the scan is completed, it lists all recoverable files. Find and select the wanted files, click on Recover button to save them.

Preventative Measures for the Future
Once the Fusion Drive is restored, follow these tips to prevent similar issues:
1. Keep macOS Updated
Ensure your system is running the latest macOS version to minimize compatibility issues. Apple frequently releases updates to improve Fusion Drive stability.
2. Regular Backups
Set up automated backups using Time Machine. This ensures your data remains safe, even if the Fusion Drive malfunctions again. You also can use disk cloning software to create a bootable clone backup for your Mac.
3. Avoid Manual Tampering
Do not manually alter the disk setup unless absolutely necessary. Using third-party tools or modifying settings without proper knowledge can cause configuration issues.
4. Monitor Drive Health
Use apps like SMART Utility or DriveDx to monitor the health of your drives. Early detection of hardware problems can save you from potential data loss.
When to Seek Professional Help
◾Signs of Hardware Damage
If you notice signs such as unusual noises, frequent crashes, or unresponsive drives, it may indicate hardware failure.
◾Contacting Apple Support
Visit an Apple Authorized Service Provider or contact Apple Support if you suspect hardware issues. They can diagnose the problem and replace faulty components if necessary.
◾Data Recovery Services
For critical data recovery, consult professional services specializing in retrieving data from malfunctioning drives.
Note: Before fixing separate HDD/SSD of Fusion drive, it is highly recommended to back up all your data to an external hard drive. With a disk cloning program, you can make a full bootable clone backup for your Mac.
Conclusion
A Fusion Drive appearing as two separate drives in Finder is an issue that can disrupt the performance and functionality of your Mac. By adhering the processes described in this article, you can diagnose and resolve the problem effectively.
Always make a backup of your data before trying any solutions, and when in doubt, get professional assistance. With proper care and maintenance, your Fusion Drive will continue to deliver optimal performance and reliability.
If you have lost data due to fixing Fusion Drive issues on Mac, just use Mac data recovery software to get the lost data back.


Donemax Data Recovery for Mac
Donemax Data Recovery for Mac is one of the best Mac data recovery software. It is easy-to-use and can help in recovering deleted, formatted, inaccessible or lost data from Mac HDD/SSD, external disk, USB drive, SD card, camera or other storage devices.
Related Articles
- Jul 15, 2024How to Fix SD Card Not Mounting on Mac?
- Feb 20, 2024How to Fix External SSD Not Mounting on Mac?
- Jan 22, 2025[8 Methods] Fix CF Card Not Reading/Recognized/Detected: A Complete Troubleshooting Guide
- Jan 02, 20255 Methods to Fix APFS Snapshot Invalid or APFS Snapshot Metadata Tree Is Invalid on Mac
- Jan 21, 2025Fix SD Card Won't Read or Open
- Dec 25, 2024Unable to Delete Files from External Hard Drive on Mac? 6 Solutions

Lucien
Lucien is a writer and a chief programmer of Donemax software who has worked in the company for 5+ years. He has written much of the content on the site and devotes to providing troubleshooting and solution for Windows and Mac users including disk cloning, data recovery, migration, eraser, error fixes.

Gerhard Chou
In order to effectively solve the problems for our customers, every article and troubleshooting solution published on our website has been strictly tested and practiced. Our editors love researching and using computers and testing software, and are willing to help computer users with their problems
Hot Donemax Products

Clone hard drive with advanced clone technology or create bootable clone for Windows/Mac OS.

Completely and easily recover deleted, formatted, hidden or lost files from hard drive and external storage device.

Certified data erasure software - permanently erase data before selling or donating your disk or any digital device.
