PAGE CONTENT:
Apple's macOS is known for its smooth performance, user-friendly design, and strong security features. With each new release, Apple aims to improve on these foundations. macOS Sequoia is the latest iteration in this lineage, bringing with it a host of new features, security upgrades, and enhanced system performance. For those eager to experience these advancements, knowing how to upgrade to macOS Sequoia is important.
In this article, we will explore the process of upgrading to macOS Sequoia, from preparing your Mac, downloading and installing the update, to troubleshooting common issues. Whether you're upgrading for new features or to ensure continued security, this guide will help make the upgradation smooth.
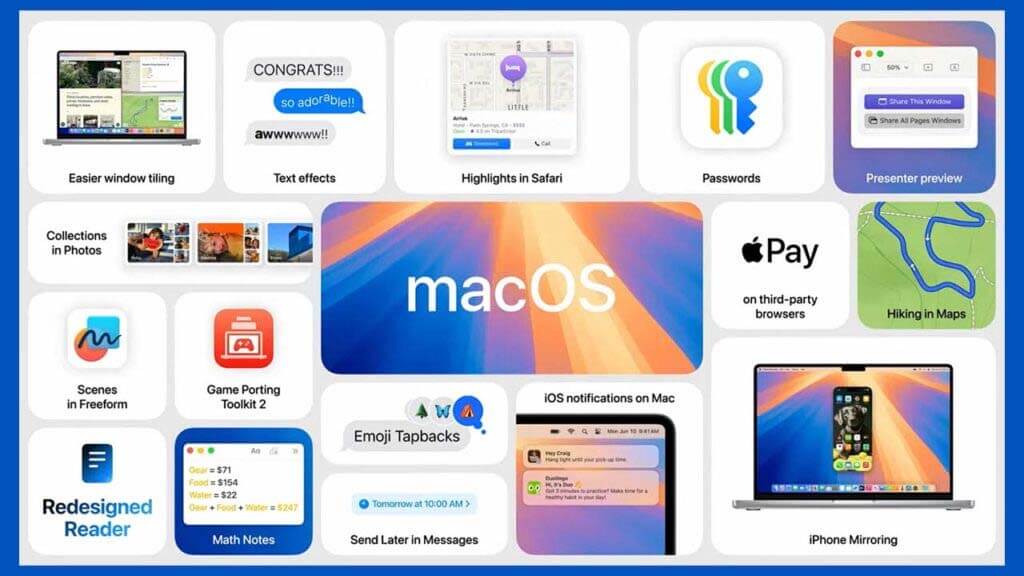
About macOS Sequoia
macOS Sequoia is designed to elevate the Mac experience with a focus on performance improvements, user interface refinements, and new features aimed at making your workflow more productive. If you're curious about what makes macOS Sequoia stand out, here are some key features:
- Refined User Interface: Sequoia brings subtle design enhancements across the OS, including a more intuitive system settings panel and a sleeker, more minimalistic look.
- Improved Performance: The operating system has been optimized for better efficiency on both older and newer devices, allowing for smoother multitasking and app usage.
- Advanced Privacy and Security: With more robust privacy controls and tighter security measures, macOS Sequoia ensures that your personal data stays private.
- Native M1, M2 and M3 Chip Support: Sequoia is optimized to fully leverage Apple's custom silicon chips, offering unprecedented speed and efficiency for M1/M2 and M3-powered Macs.
While these features are exciting, upgrading is not as simple as clicking a button. Proper preparation and execution are necessary for a smooth transition. Let's break down the steps.
Preparing for the Upgrade
Before you start the upgrade process, it's critical to ensure that your Mac is ready to handle the transition smoothly. Failing to prepare may lead to data loss, software incompatibility, or installation issues.
🔖Check System Requirements:
Not all Macs will support macOS Sequoia. Check your model's compatibility by visiting Apple’s official website.
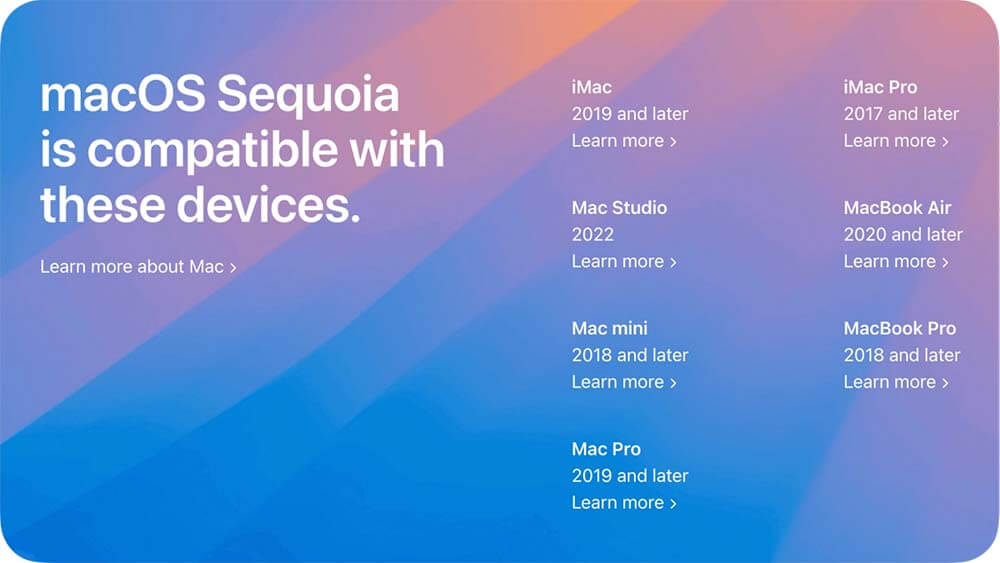
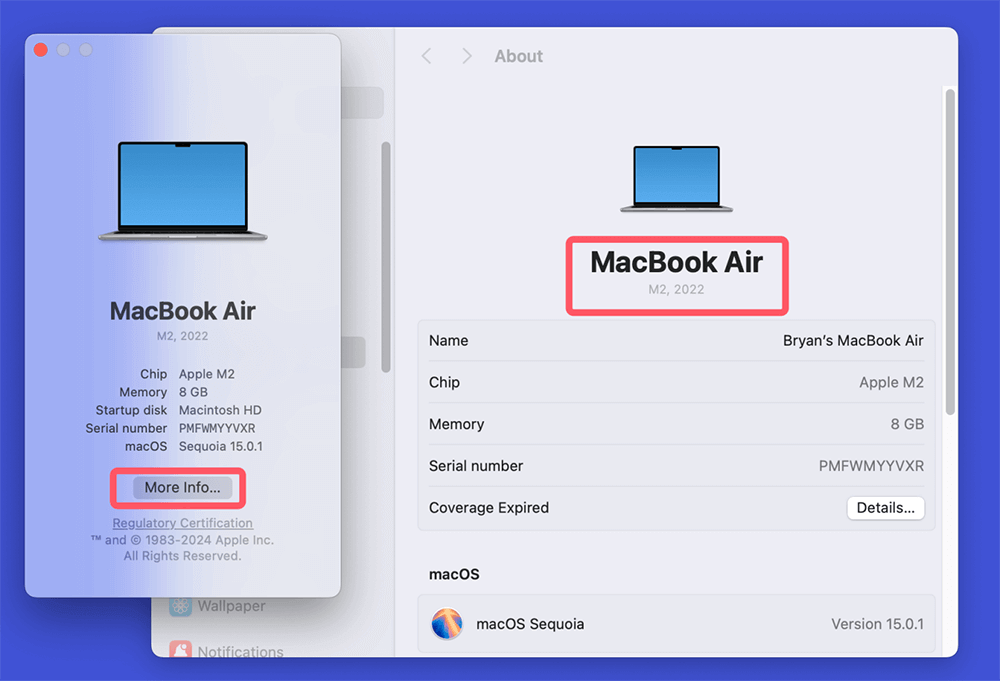
Here's how you can check your Mac model:
- Click the Apple icon in the top left of your screen.
- Select About This Mac then check Overview or check More Info...
![how you can check your Mac model]()
If your Mac meets the system requirements, you're good to proceed. If not, you may need to stick to your current version or consider purchasing a new Mac.
🔖Backup Your Data:
Backing up your files is one of the most critical steps before upgrading. Even though macOS Sequoia upgrades are generally safe, things can go wrong, such as file corruption or data loss.
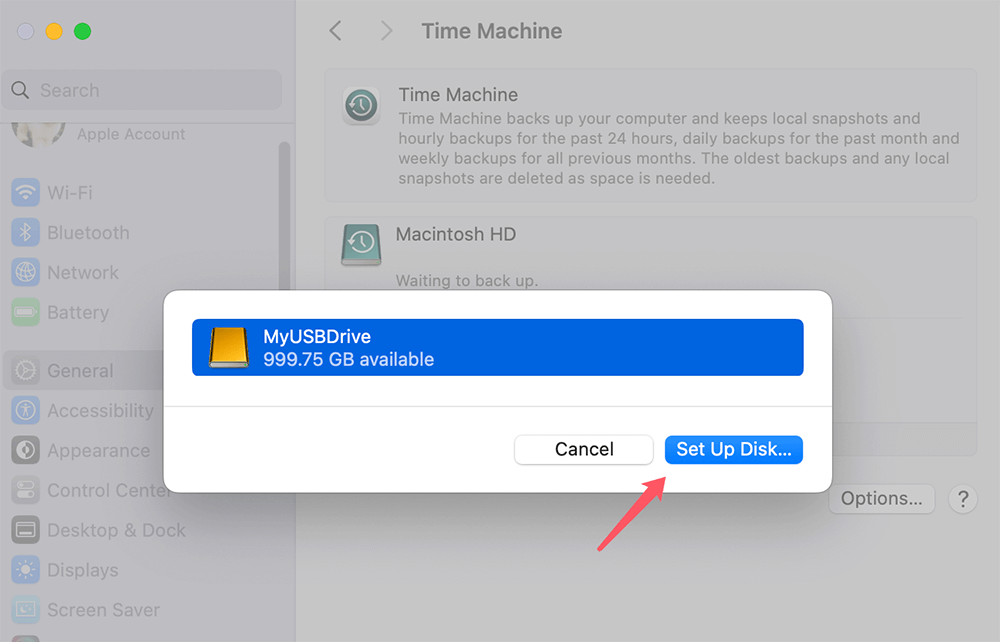
Time Machine, Apple's integrated backup system, is the simplest method to create a copy of your Mac. Here's how to do it:
- Link your Mac to an external hard disk.
- Select Time Machine under System Settings > General.
- Select the external hard drive by clicking on it, then click Set Up Disk.
![Backup Your Data]()
- To start the backup procedure, click Back Up Now.
Ensure that the backup is completed before proceeding with the upgrade.
You also can use disk cloning software - such as Donemax Disk Clone for Mac to clone all data from your Mac to an external hard drive, then make a full bootable clone backup for your Mac.
🔖Free Up Storage:
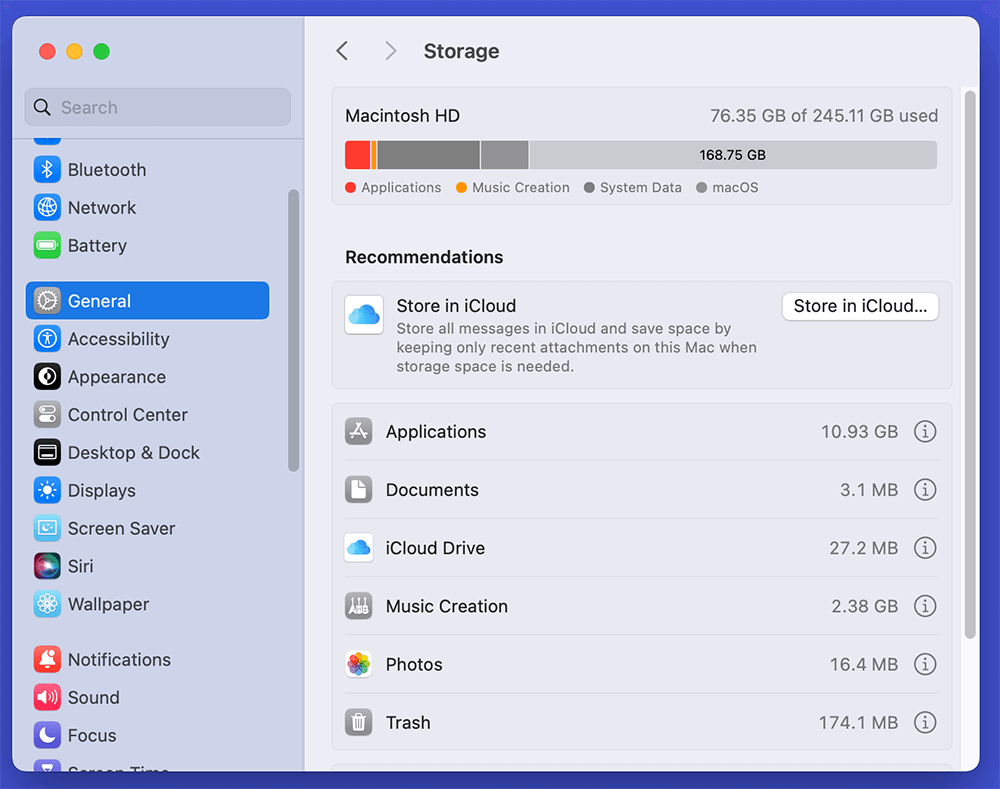
macOS upgrades require a significant amount of free space to install successfully. Sequoia demands around 20 GB of free storage, so if you're running low, now's the time to declutter.
To check your storage:
- Click the Apple icon and select System Settings.
- Click General > Storage.
![Free Up Storage]()
Tips for freeing up storage:
- Delete Unnecessary Files: Clean out your downloads folder and trash.
- Uninstall Unused Applications: Remove apps you no longer use.
- Transfer Files to External Storage: Transfer huge files to cloud storage or an external hard disk.
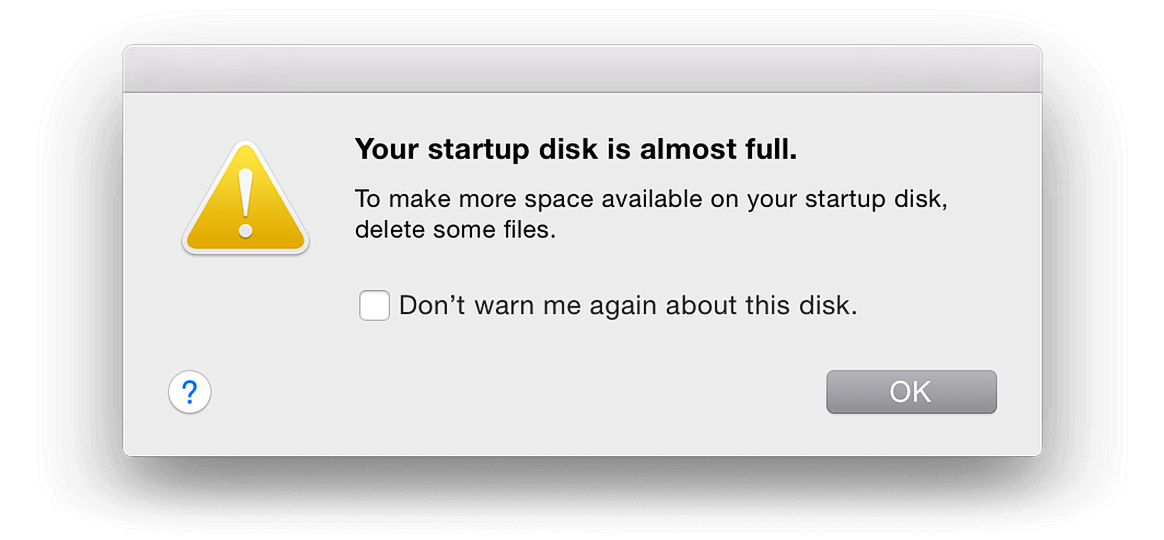
How to Increase Storage Space on Mac
Quickly delete caches, junk data from Mac and back up data from Mac to external hard drive to free up disk space on Mac.
🔖Update Apps and Software:
Some apps may not be compatible with macOS Sequoia right away. Ensure all your critical apps are updated to their latest versions to avoid incompatibility issues post-upgrade.
To update your apps:
- Open the App Store.
- Click on the Updates tab.
- Update any apps listed there.
How to Upgrade to macOS Sequoia? Here Are Two Methods
Method 1. Upgrade to macOS Sequoia via System Settings' Software Update
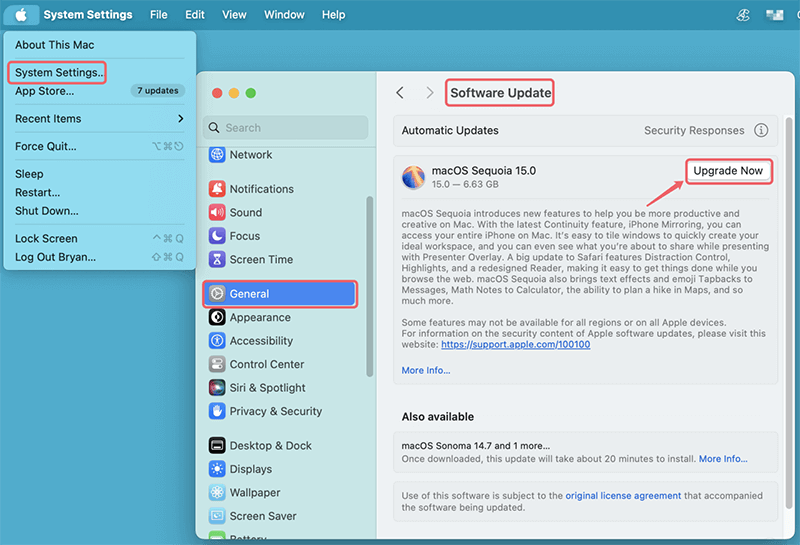
After completing the necessary preparations, it’s time to download macOS Sequoia. Apple makes this easy through the Software Update feature if your Mac is compatible with this operating system.
Steps to Download macOS Sequoia:
- Click the Apple logo in the upper-left corner.
- Select System Settings and click General, choose Software Update.
- If macOS Sequoia is available, click on Upgrade Now button.
![click on Upgrade Now button]()
- Then it will start downloading macOS Sequoia.
The download process can take some time depending on your internet connection speed. If you're using Wi-Fi, ensure that your connection is stable and that your Mac is plugged into a power source.
Installing macOS Sequoia: A Step-by-Step Guide
Once the download is complete, you can start the installation process. The macOS installation is relatively straightforward, but you should still follow each step carefully to avoid any issues.
Installation Process
- After the download is complete, a window will automatically open prompting you to start the installation.
- Click Continue to proceed.
- Review the terms and conditions, then click Agree.
- Select the drive where you want to install macOS Sequoia (usually Macintosh HD).
- Click Install.
Your Mac will now restart, and the installation process will begin. Depending on your Mac's speed, the complete procedure might take thirty to sixty minutes. During this time, your computer may restart multiple times. It's essential not to interrupt the process.
Method 2. Install macOS Sequoia on a Supported/Unsupported Mac via USB Installer
If the first method does not apply for your Mac, you can create a bootable USB installer of macOS Sequoia and then use the USB installer to install macOS Sequoia on your Mac.
Create a bootable USB Installer for macOS Sequoia:
Step 1. Connect an USB flash drive (32GB or bigger than 32GB) to your Mac.
Step 2. Download macOS Sequoia installer from Apple store (or click this link macappstores).
Step 3. Go to Applications and find the installer named Install macOS Sequoia.
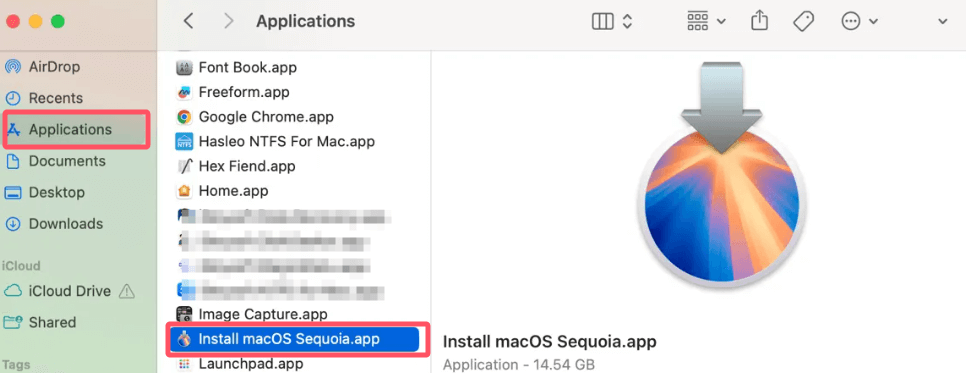
Step 4. Open Terminal on your Mac, type:
sudo /Applications/Install\ macOS\ Sequoia.app/Contents/Resources/createinstallmedia --volume /Volumes/MyVolume
MyVolume is the name of the USB flash drive, press Enter. Follow the wizard to create a bootable USB installer for macOS Sequoia.
Install macOS Sequoia via USB Installer:
Step 1. Shut down the Mac, then connect the bootable USB installer to the Mac.
Step 2. Then turn on the Mac, press and hold Power button until you see Loading Startup Options. Then select the bootable USB installer, click Continue. When macOS Sequoia installer opens, follow the onscreen instructions to complete the installation.
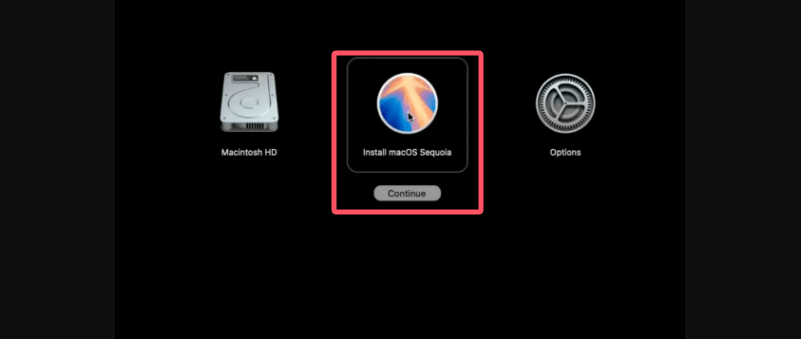
If your Mac is not an Apple silicon Mac, just press and hold Options key when turning on the Mac. When you see the bootable installer, release Options key. Then click the onscreen arrow or press Return. Follow the onscreen instructions to complete the installation.
Note: If you want to clean install macOS Sequoia on your Mac, you should wipe the startup disk in macOS Recovery mode first. Then use bootable USB installer to install macOS Sequoia.
🔖Post-Installation Setup: Getting Started with macOS Sequoia
Once macOS Sequoia is installed, you'll need to perform some initial setup steps. This ensures that all your settings, preferences, and apps are configured correctly.
Initial Setup:
- After installation, your Mac will prompt you to sign in with your Apple ID. This syncs your iCloud services and apps.
- Review and confirm your privacy and location settings.
- Check for any final app updates now that Sequoia is installed. Some developers may have released patches specifically for macOS Sequoia.
Customizing Settings:
macOS Sequoia introduces new features that allow for deeper customization:
- Focus Mode: Enhance productivity by customizing notifications and workflows.
- Widgets and Home Screen: Adjust widgets and personalize your home screen experience.
- Privacy Controls: New security features in Sequoia allow you to manage app permissions more granularly.
Explore the updated System Settings menu to personalize your experience.
🔖Common Issues and Troubleshooting:
Most macOS upgrades go smoothly, but occasionally users may run into issues. Here's how to troubleshoot some common problems that arise when upgrading to macOS Sequoia.
Installation Errors:
If the installation fails, try these steps:
- Restart your Mac: A simple restart often resolves minor glitches.
- Reinstall from Recovery Mode: Hold down Power button (for Apple silicon) or Command + R (for Intel-based) during startup to enter recovery mode and reinstall the OS.
App Incompatibility:
If certain apps are crashing or not launching, check the developer's website for compatibility updates. You can also try resetting the app by uninstalling and reinstalling it.
Performance Issues:
If your Mac seems slow after the update:
- Reset the PRAM/NVRAM: Shut down your Mac, and upon restarting, hold down Option + Command + P + R for 20 seconds.
- Clear Cache Files: Use tools like AweCleaner for Mac or manually clear cache files through Finder.
Tips for Optimizing Performance:
To get the most out of macOS Sequoia, follow these optimization tips:
- Manage Background Processes: Use the Activity Monitor to close unnecessary background processes that consume memory and CPU.
- Regular Updates: Keep macOS and your apps up to date to benefit from performance fixes and security patches.
- Security Measures: Use built-in tools like the macOS Firewall, FileVault, and Gatekeeper to secure your system from threats.
Recover Lost Data after Installing macOS Sequoia
If you have lost data due to upgrading to macOS Sequoia, you can use Mac data recovery software to get the lost data back.
Step 1. Download and install Donemax Data Recovery for Mac on your Mac. It is fully compatible with macOS Sequoia.
Step 2. Open Donemax Data Recovery for Mac, select the internal disk (Macintosh HD) to start scan.

Step 3. Click on Scan button to deeply scan the internal disk and find all deleted/erased or lost files.

Step 4. Once the scan is completed, you can preview all recoverable files. Then select the wanted files, click on Recover button to save these files.

Conclusion
Upgrading to macOS Sequoia offers many benefits, from enhanced security features to improved system performance and exciting new tools like Universal Control and Focus Mode. The upgrade process, though relatively simple, requires careful preparation to ensure that your data is safe and that you avoid common pitfalls. By following this guide - checking your Mac's compatibility, backing up your data, ensuring sufficient storage, and updating apps - you can experience a smooth transition to the latest version of macOS. After installation, take time to explore the new features and enjoy a more streamlined, powerful computing experience.
Related Articles
- Dec 16, 20242025 Best 5 Disk Mounter for Mac
- Sep 30, 2024How to Turn on A Mac?
- Sep 21, 2024How to Format External Hard Drive or SSD on Mac?
- Nov 25, 2024How to Create a Bootable USB Installer for macOS Monterey?
- Dec 02, 2024How to Fix XprotectService High CPU Usage on Mac – 7 Methods
- Nov 21, 2024Create Bootable USB Installer for macOS Sierra

Steven
Steven has been a senior writer & editor of Donemax software since 2020. He's a super nerd and can't imagine the life without a computer. Over 6 years of experience of writing technical solutions and software tesing, he is passionate about providing solutions and tips for Windows and Mac users.

Gerhard Chou
In order to effectively solve the problems for our customers, every article and troubleshooting solution published on our website has been strictly tested and practiced. Our editors love researching and using computers and testing software, and are willing to help computer users with their problems
