PAGE CONTENT:
Upgrading your macOS is a common way to boost your Mac's performance and security, but sometimes an upgrade alone doesn't solve every issue. In situations where your Mac is sluggish, showing repeated errors, or you simply want a fresh start, a clean install might be the best approach. This guide will walk you through every step of a clean installation for macOS High Sierra, ensuring that you're set up for a smooth and optimized user experience.
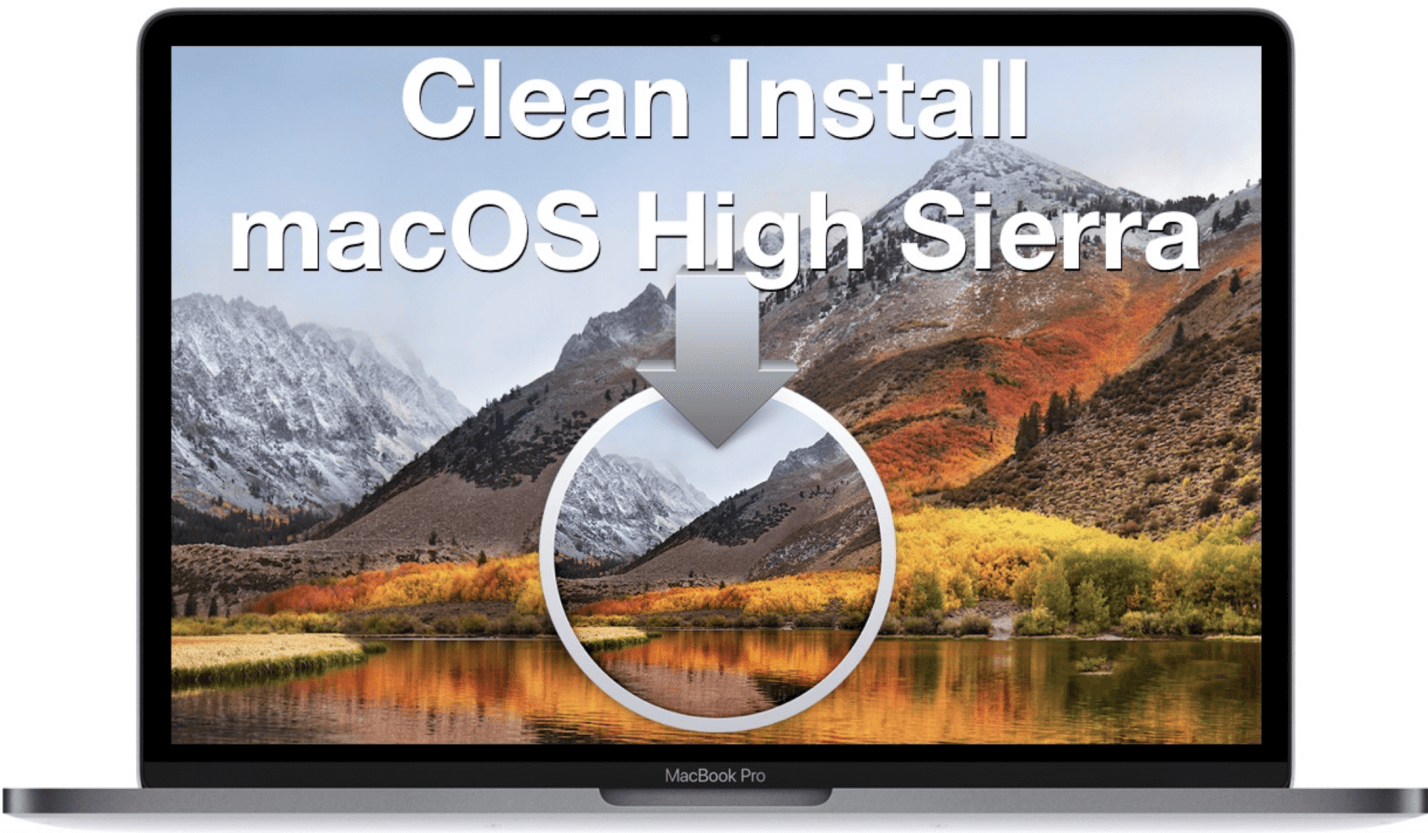
Overview: A clean install of macOS High Sierra involves erasing your hard drive and reinstalling the OS from scratch. This method is recommended for users who face persistent issues like frequent crashes, performance lags, or have simply accumulated too many unnecessary files over the years. With a clean install, your Mac will feel as fresh as it did when you first unboxed it, free from clutter and any lingering software bugs. This article will guide you through the preparation steps, the installation process, and post-installation tips for macOS High Sierra.
Things Need to Do Before Clean Install of macOS High Sierra
Before diving into the installation, proper preparation is crucial to avoid data loss and ensure a seamless setup. Follow these steps to get ready:
Back Up Your Data:
Since a clean install will erase all data on your drive, backing up your files is essential. Here are a few popular methods:
- Time Machine Backup: Use Apple's built-in Time Machine tool to back up your entire system. Connect an external drive, open Time Machine, and start the backup. This method allows you to restore individual files or your entire system later.
- External Storage: Manually copy important files to an external hard drive, such as documents, photos, and essential app data.
- Cloud Backup Services: Use iCloud or a third-party service like Dropbox or Google Drive to save files you may want quick access to after the installation.
- Make Bootable Clone: You can create a full bootable clone backup for macOS High Sierra with third-party disk cloning software - such as Donemax Disk Clone for Mac.
Create a Bootable USB Installer for macOS High Sierra:
A bootable USB installer allows you to install macOS High Sierra from an external drive, making the clean install process easier.
Download macOS High Sierra:
Before anything else, you'll need to download the macOS High Sierra installer from the Mac App Store.
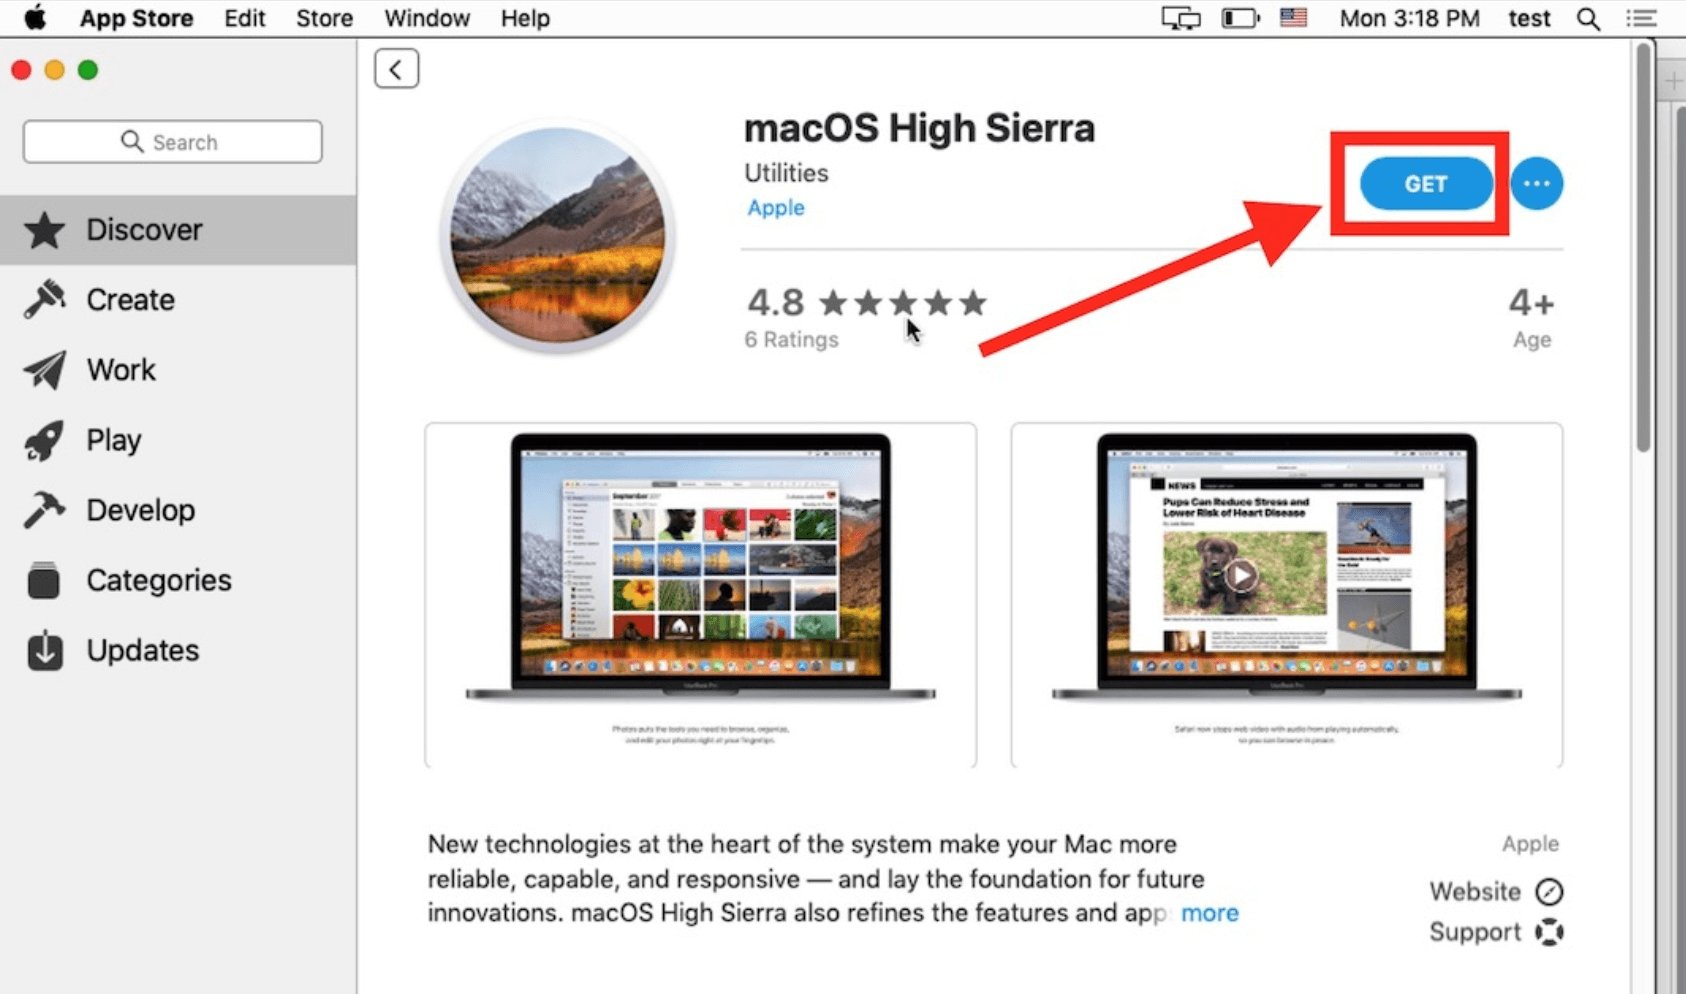
- Open the Mac App Store: On your Mac, open the Mac App Store, which is accessible from the Applications folder or via the Dock.
- Search for macOS High Sierra: In the search bar, type in macOS High Sierra to locate the installer. If you have difficulty finding it, you can use this direct link to macOS High Sierra on the App Store.
- Download the Installer: Click the "Get" button to begin the download. The installer will begin downloading and will automatically open when the download is complete. Don't worry if the installer automatically opens - we won't begin the installation yet. Instead, we'll use it to create the bootable installer.
![clean installation for macOS High Sierra]()
Note: macOS High Sierra is a large file, usually around 5GB, and can take a while to download depending on your internet speed. Make sure you have sufficient space on your hard drive for the download. If your internet connection is slow, it might be wise to download the installer during off-peak hours to avoid interruptions.
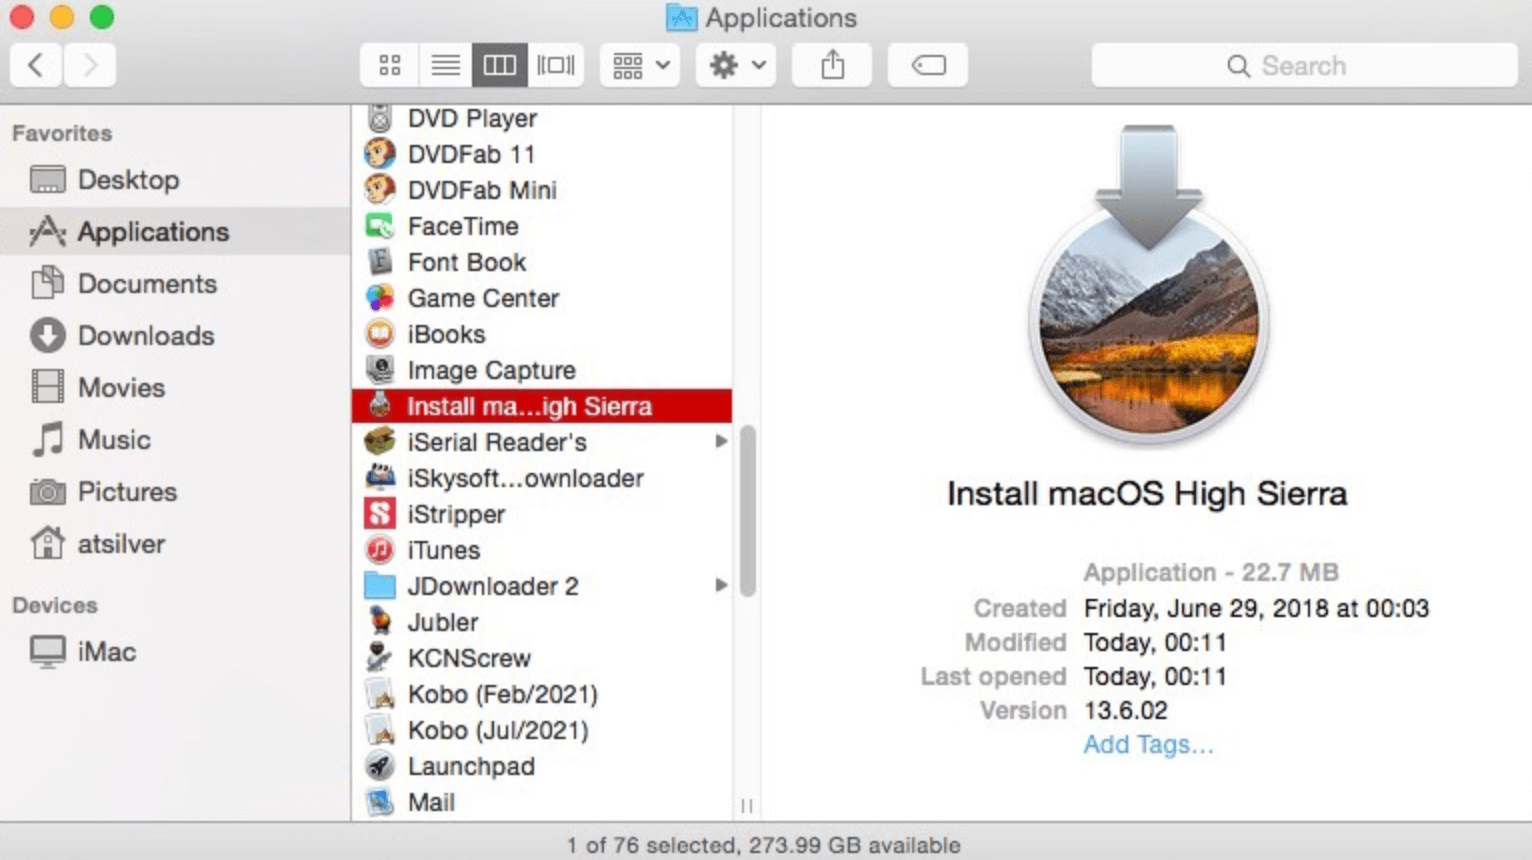
- Close the Installer: After the installer opens, close it to ensure that it doesn't start installing macOS right away. You'll find the installer file, titled "Install macOS High Sierra.app" in your Applications folder.
![clean installation for macOS High Sierra]()
Prepare the USB Drive:
- Connect a USB drive (minimum 16GB storage).
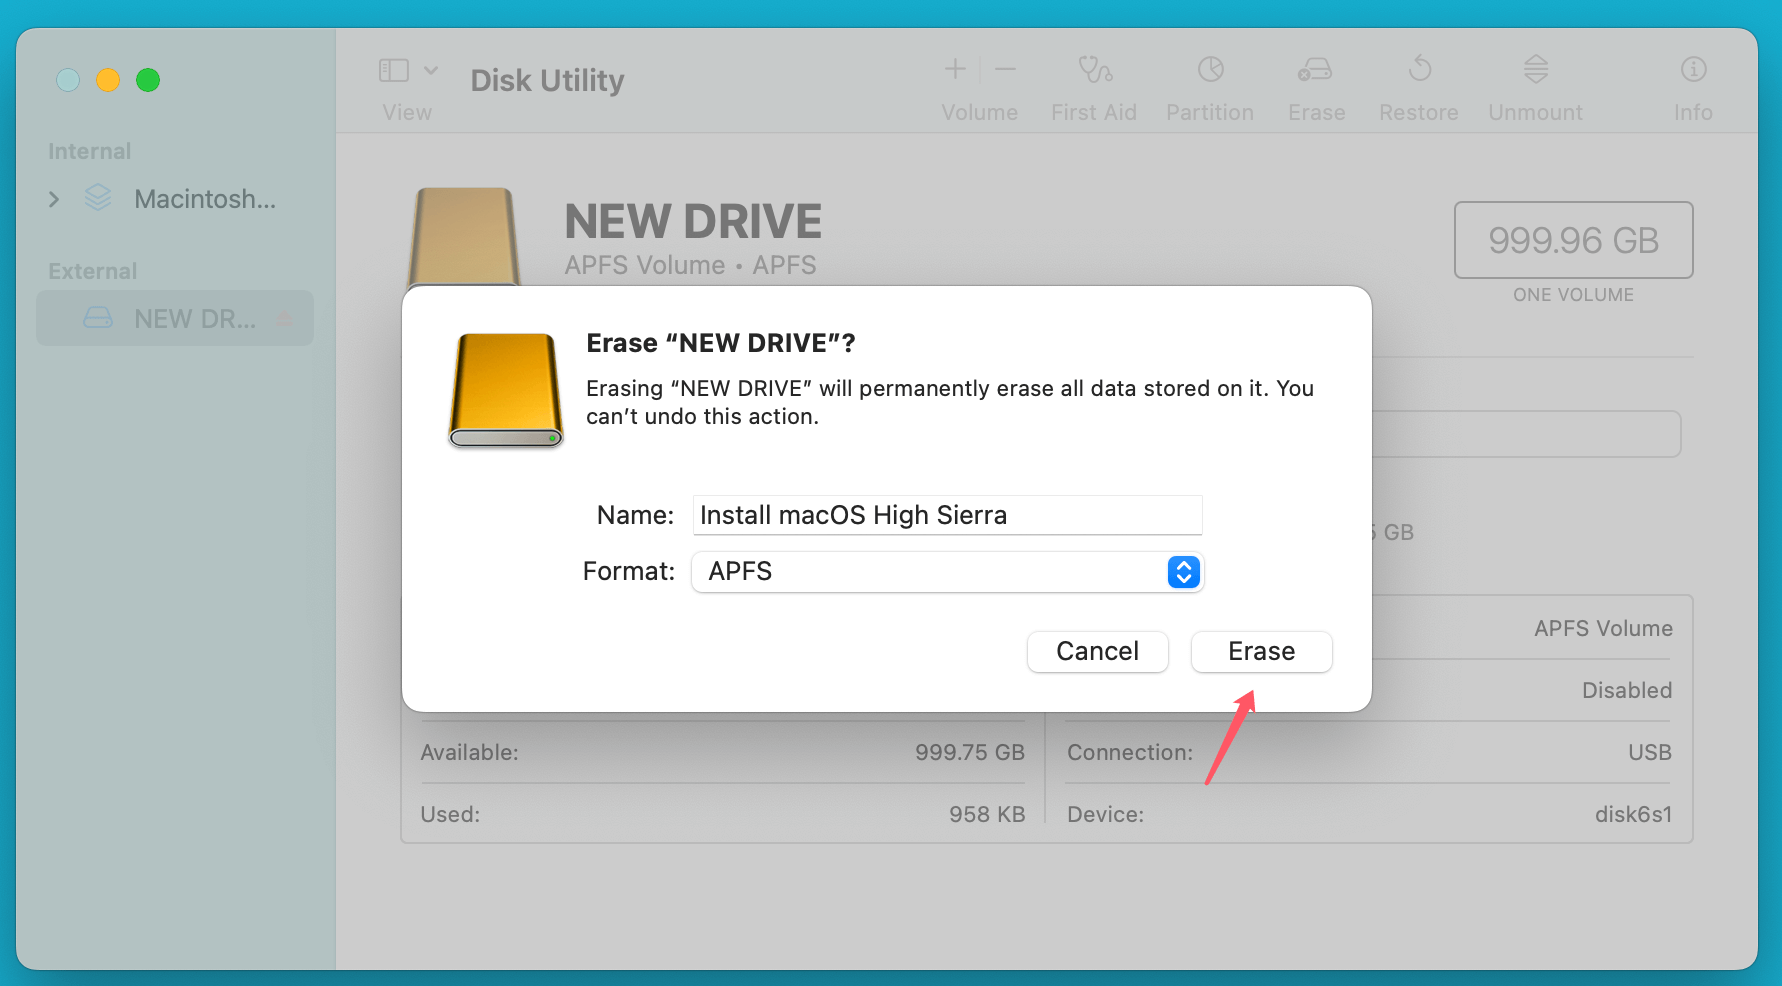
- Open Disk Utility from Utilities via Applications.
- Choose the USB drive from the sidebar, tap "Erase," and choose:
- Format: macOS Extended (Journaled) or APFS.
- Scheme: GUID Partition Map
- Click Erase and wait for formatting to complete.
![clean installation for macOS High Sierra]()
Create the Bootable Installer:
- Open Terminal (Applications > Utilities).
- Enter the Createinstallmedia Command: In Terminal, type the following command, which tells macOS to copy the installer to the USB drive:
sudo /Applications/Install\ macOS\ High\ Sierra.app/Contents/Resources/createinstallmedia --volume /Volumes/MyVolume
![clean installation for macOS High Sierra]()
Replace "MyVolume" with the name you gave your USB drive during the formatting step. If you named your USB drive "Untitled," the command would look like this:
sudo /Applications/Install\ macOS\ High\ Sierra.app/Contents/Resources/createinstallmedia --volume /Volumes/Untitled
- Execute the Command: After entering the command, press Enter to execute it. Your administrator password will need to be entered. This step is necessary because the sudo command gives you elevated privileges to modify system files.
- Confirm the Action: Terminal will ask you if you're sure you want to erase the contents of the USB drive. Type Y and press Enter to confirm. The system will now begin creating the bootable installer, which could take anywhere from 10 to 20 minutes depending on the speed of your USB drive and your Mac.
Note: The process might seem slow at times, but don't interrupt it. It's important that the command completes fully. You will see Terminal output showing the progress, and it will indicate when the process is finished.
- Complete the Process: Once the process is done, Terminal will display a message saying that the bootable installer has been successfully created.
Perform the Clean Install of macOS High Sierra
With the bootable installer ready, you can begin the installation.
Boot from the USB Installer:
- Connect the USB installer to your Mac.
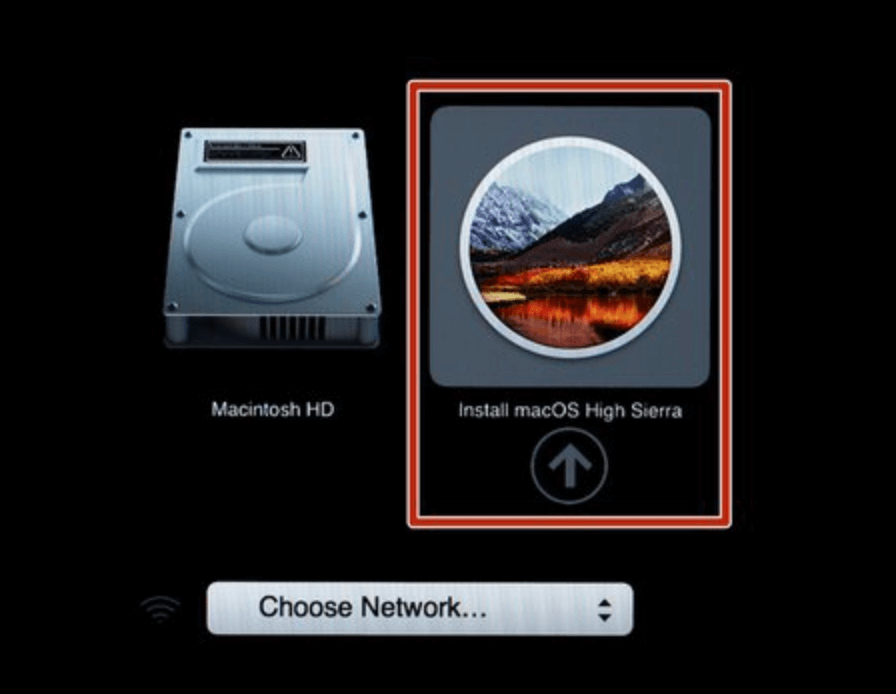
- Hold down the Option (⌥) key while your Mac starts up after restarting.
- When the Startup Manager screen appears, let go of the key.
- Select the USB drive labeled "Install macOS High Sierra" and press Enter.
![clean installation for macOS High Sierra]()
Erase the Hard Drive:
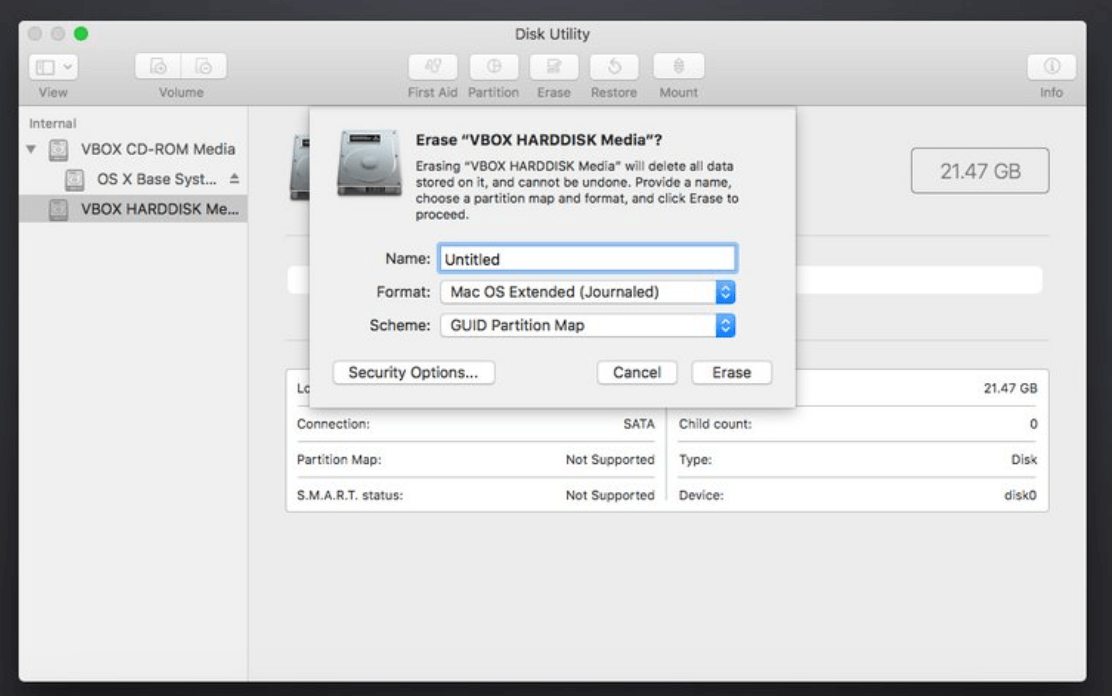
- Once the installer loads, open Disk Utility (from the Utilities menu).
![clean installation for macOS High Sierra]()
- In the sidebar, select your Mac's main drive (often labeled as "Macintosh HD").
- Click "Erase" and choose:
- Name: Macintosh HD (or any name you prefer)
- Format: APFS (for SSDs) or macOS Extended (Journaled) (for HDDs)
![clean installation for macOS High Sierra]()
- Confirm the action and wait for the drive to be erased.
Install macOS High Sierra:
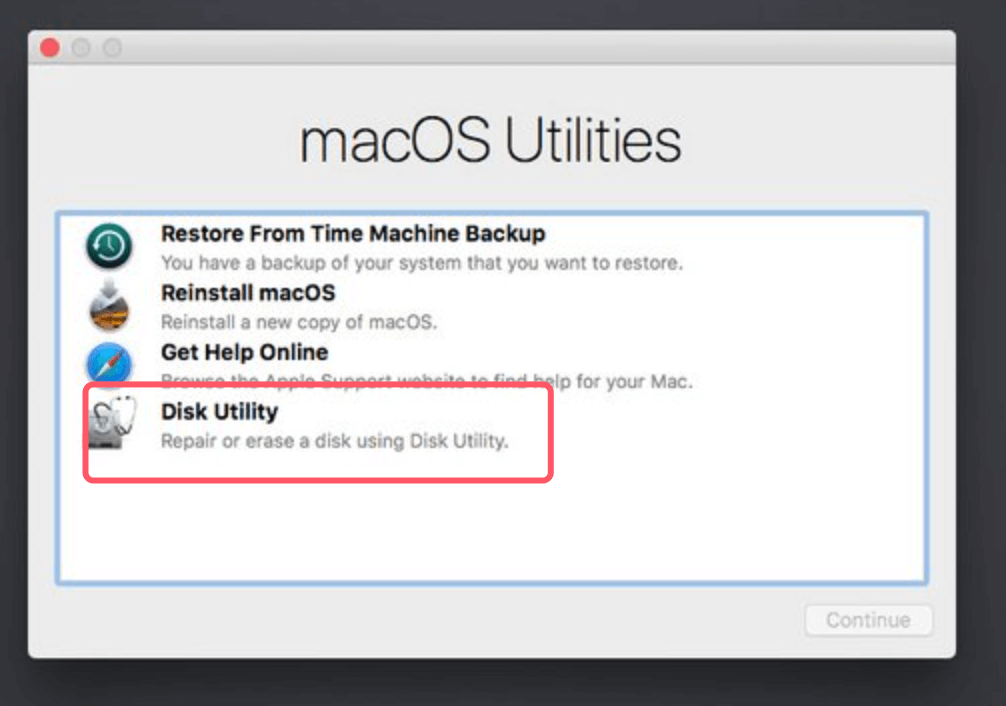
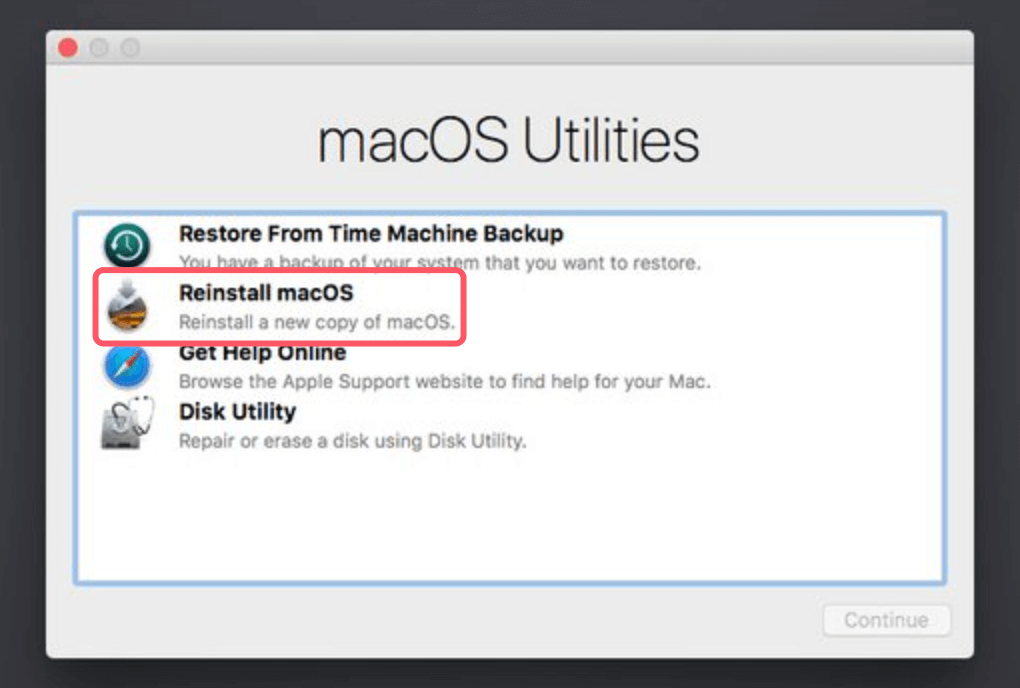
- Close Disk Utility, which will bring you back to the macOS Utilities screen.
- Select "Install macOS" and follow the on-screen instructions.
![clean installation for macOS High Sierra]()
- Choose the drive you just erased as the destination for macOS High Sierra.
- The installation will begin. Expect it to take 20-40 minutes, and your Mac may restart several times.
Set Up macOS High Sierra After Installation
Once installation is complete, you'll be prompted to set up macOS High Sierra. Follow these steps:
Initial Setup Configuration:
- Language and Region: Select your preferred language, keyboard layout, and region.
- Wi-Fi: Connect to your Wi-Fi network.
- Apple ID: Sign in with your Apple ID to enable iCloud, App Store, and other Apple services.
- Data & Privacy: Set your preferences for data sharing with Apple.
- FileVault and iCloud: You’ll have the option to enable FileVault (disk encryption) and set up iCloud. Both are recommended for security and convenience.
Reinstall Apps and Restoring Data:
- 1Restore from Backup: If you used Time Machine, you can restore your files from the backup by going to Time Machine.
- Download Apps: Visit the App Store to re-download essential apps, or manually reinstall from any backups or downloads.
- Reconfigure Settings: Open System Preferences to customize settings like Notifications, Desktop, and Dock.
Post-Installation Tips for Optimal Performance
After a clean install, you can take additional steps to optimize performance and enjoy a smooth macOS High Sierra experience.
Update macOS and Software:
- Go to System Preferences > Software Update and install any updates for macOS High Sierra.
- Check the App Store for app updates to ensure compatibility and performance improvements.
Adjust System Preferences:
Customize your macOS settings for efficiency:
- Energy Saver: Configure sleep settings to maximize battery life.
- Notifications: Set up notifications for only essential apps.
- Security & Privacy: Enable the Firewall and adjust permissions as needed.
Optimize Storage and Disk Management:
High Sierra includes tools for managing storage:
- Apple Menu > About This Mac > Storage > Manage: Access storage optimization settings, such as storing files in iCloud, emptying trash automatically, and reducing clutter.
- Disk Utility: Use Disk Utility periodically to check for errors and maintain disk health.
Troubleshoot Common Installation Issues
Sometimes, issues can arise during or after installation. Here are common problems and solutions:
Installation Failed:
- Restart your Mac and try booting into Safe Mode (hold Shift at startup) to retry the installation.
- Disk Utility First Aid: Use First Aid in Disk Utility to check for and repair disk errors before reinstalling.
Startup Issues Post-Installation:
- PRAM Reset: Restart your Mac while holding Command + Option + P + R to reset PRAM.
- Recovery Mode: Boot into Recovery Mode (hold Command + R) and use Disk Utility to repair the drive if your Mac isn’t starting up.
Note: If you have lost data due to clean install of macOS High Sierra, you can use Mac data recovery software - such as Donemax Data Recovery for Mac to scan the internal drive and get all lost data back.
Step 1. Download and install the reliable Mac data recovery software - such as Donemax Data Recovery for Mac.
Step 2. Open Donemax Data Recovery for Mac, select the internal drive such as Macintosh HD to start data recovery.

Step 3. Click on Scan button to deeply scan the drive and find all deleted/erased files.

Step 4. Once the scan is completed, you can preview all recoverable files. Then select the wanted files, click on Recover button to save them.

Conclusion
Performing a clean install of macOS High Sierra can breathe new life into your Mac, especially if it's been running slowly or facing recurring issues. With careful preparation and following these steps, you can ensure a smooth, fresh start with your Mac, free from clutter and ready for productivity. Remember to keep your software up-to-date, optimize storage settings, and maintain regular backups to keep your system running smoothly. Enjoy your refreshed Mac experience with macOS High Sierra!

Donemax Disk Clone for Mac
An award-winning disk cloning program to help Mac users clone HDD/SSD/external device. It also can create full bootable clone backup for Macs.
Related Articles
- Dec 09, 2024How to Add an External Hard Drive to Dock on Mac?
- Sep 21, 2024How to Format External Hard Drive or SSD on Mac?
- Mar 06, 2025[7 Fixes] Fix "Your Computer Was Restarted Because of a Problem" on Mac
- Nov 27, 2024How to Add or Delete Photos on Mac?
- Feb 17, 2025Fix XQD Card Not Showing Up or Not Mounting on Mac [10 Fixes]
- Oct 18, 2024How to Upgrade to macOS Sequoia (for Intel-based/T2/Apple silicon Macs)?

Maria
Maria is one of the senior writers & editors of Donemax who lives and works in Sydney, Australia. She loves PC, Mac and Internet Technology. She has 6 years of writing articles about data recovery on PC/Mac, disk cloning solution, data eraser and computer OS optimization, etc. She is also interested in testing various software and digital products.

Gerhard Chou
In order to effectively solve the problems for our customers, every article and troubleshooting solution published on our website has been strictly tested and practiced. Our editors love researching and using computers and testing software, and are willing to help computer users with their problems
