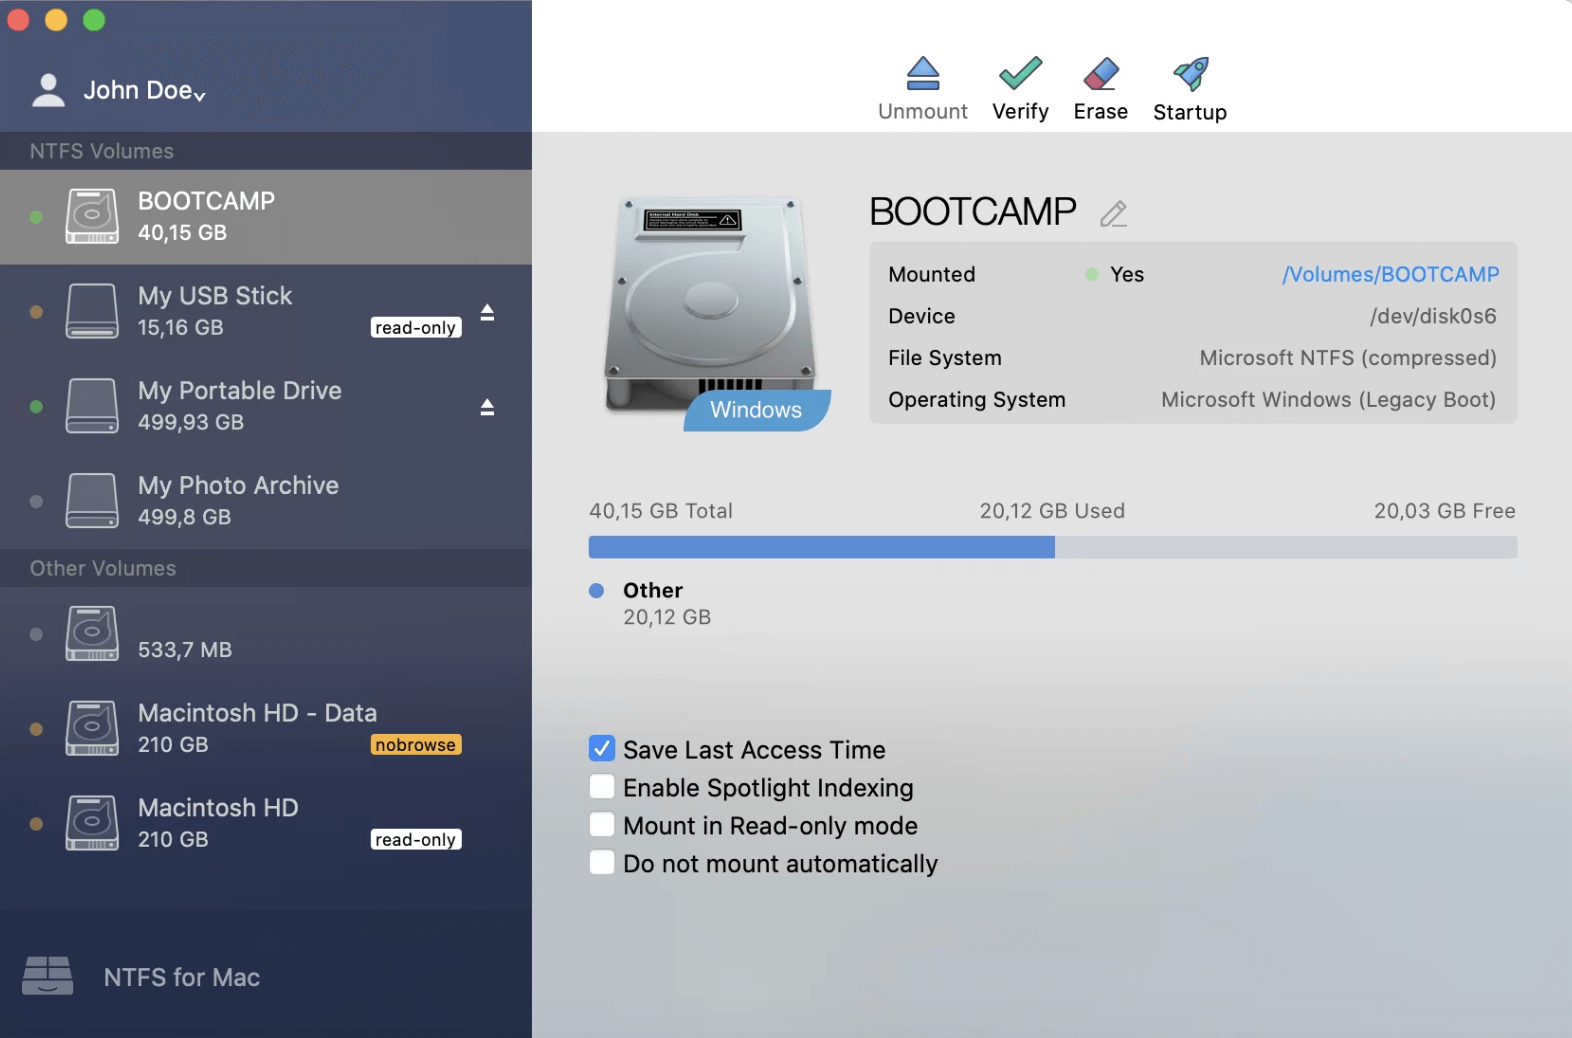
Tip: If your Mac can't mount the NTFS drive, you can try third-party tool - such as Donemax NTFS for Mac. This tool allows your Mac to write data to NTFS drives and can force mount any NTFS drive on your Mac.
PAGE CONTENT:
NTFS (New Technology File System) is a proprietary file system developed by Microsoft, primarily used for formatting hard drives in Windows. While it offers robust features, such as support for large file sizes and strong file permissions, NTFS is not natively supported by macOS for write operations. macOS can only read NTFS drives, making it inconvenient for Mac users who need to access or modify data on NTFS-formatted drives, especially external drives or hard drives from Windows machines.
This article explores the various methods for forcing an NTFS drive to mount on a Mac with full access, including read and write permissions. By the end of this guide, you'll know how to make your Mac work with NTFS drives seamlessly and how to troubleshoot common issues.
Understanding NTFS Compatibility on macOS
Out of the box, macOS can only read NTFS-formatted drives, meaning you can view the contents of an NTFS drive but cannot modify, delete, or create new files on it. This is due to macOS's default behavior, which provides built-in support for file systems such as HFS+, APFS, FAT32, and ExFAT, but not NTFS. The lack of native write support for NTFS is a significant limitation for Mac users, particularly when transferring data between a Mac and a Windows PC, as NTFS is the standard file system on Windows devices.
There are workarounds, however, that allow you to force mount an NTFS drive on macOS, either through third-party applications or command-line tricks. While macOS doesn’t natively support write operations on NTFS, the solutions below can overcome this limitation and offer a smoother experience.
Methods to Force Mount NTFS Drive on Mac
1. Using Third-Party NTFS for Mac Software
The most reliable and user-friendly way to enable full read-write access for NTFS drives on macOS is by using third-party software. Several well-known applications are designed specifically for enabling NTFS write support on Mac, with one of the most popular options being Donemax NTFS for Mac. These tools are often used by professionals and casual users alike for their ease of use, reliability, and features.
Donemax NTFS for Mac offers 100% safe NTFS for Mac solution. It can help you quickly enable writable for NTFS drives and force mount NTFS drives on your Mac.
Step 1. Download and install Donemax NTFS for Mac on your Mac, and connect the NTFS drive to your Mac.
Step 2. To read-write the NTFS drive on your Mac, click on Enable Writable button.

Step 3. To force mount the NTFS drive on your Mac, click on Mount button.

Donemax NTFS for Mac also can help you fix damaged NTFS drives on Mac, reformat external hard drive/USB drive/SD card on the Mac.
More tools for force mounting NTFS drives on Mac:
Paragon NTFS for Mac
Paragon NTFS for Mac is one of the most widely used third-party solutions for NTFS file system support. It provides seamless integration with macOS, allowing users to read from and write to NTFS drives without having to manually mount the drive every time. Here's how you can install and use it:
Step-by-Step Installation and Use:
- Download Paragon NTFS for Mac: Visit the official Paragon website and download the software. It offers a trial version for users to test before purchasing.
- Install the Software: Open the downloaded installer package and follow the on-screen instructions. It may require you to enter your Mac's administrator password.
- Restart Your Mac: After installation, restart your computer to complete the setup.
- Connect the NTFS Drive: Once your Mac restarts, connect the NTFS-formatted external drive to your computer. Paragon NTFS for Mac will automatically recognize the drive and mount it with full read/write access.
![forcing an NTFS drive to mount on a Mac]()
- Access and Modify Files: You can now freely copy, delete, or modify files on the NTFS drive, just as you would on a native Mac drive.
Pros of Paragon NTFS for Mac:
- Continuous integration with macOS.
- Reliable and stable performance.
- Easy to install and configure.
- Regular updates and customer support.
Cons of Paragon NTFS for Mac:
- Paid software with a trial period.
- Not suitable for users who want a free solution.
Tuxera NTFS for Mac
Tuxera NTFS for Mac is another excellent third-party solution that provides full read and write support for NTFS drives. It's similar to Paragon NTFS in terms of functionality and ease of use. Here's how you can set it up:
Step-by-Step Installation and Use:
- Download Tuxera NTFS for Mac: Visit the Tuxera website and download the installer. It also offers a trial version.
- Install the Software: Open the installer file and follow the instructions. The installation process is straightforward and requires administrator privileges.
- Restart Your Mac: After installation, restart your Mac for the software to become fully active.
- Plug in the NTFS Drive: Once your Mac restarts, connect your NTFS drive. Tuxera will automatically mount the drive with read and write access.
![forcing an NTFS drive to mount on a Mac]()
- Start Working on Files: You can now access the drive, copy, modify, and delete files without limitations.
Pros of Tuxera NTFS for Mac:
- High-speed data transfer for both reading and writing.
- Fully compatible with macOS.
- Supports NTFS-formatted drives on all macOS versions.
Cons of Tuxera NTFS for Mac:
- Paid software (though it offers a trial period).
- Some users report occasional slowdowns or issues with newer macOS versions.
2. Using macOS Terminal (Command-Line Method)
For users who are comfortable with the Terminal, macOS provides an advanced option to manually mount NTFS drives with read-write access. This method is more technical and requires a bit of expertise with command-line operations.
Steps for Mounting an NTFS Drive Using Terminal:
- Connect the NTFS Drive: Plug your NTFS-formatted drive into your Mac.
- Open Terminal: Open the Terminal application (you can find it in Applications > Utilities).
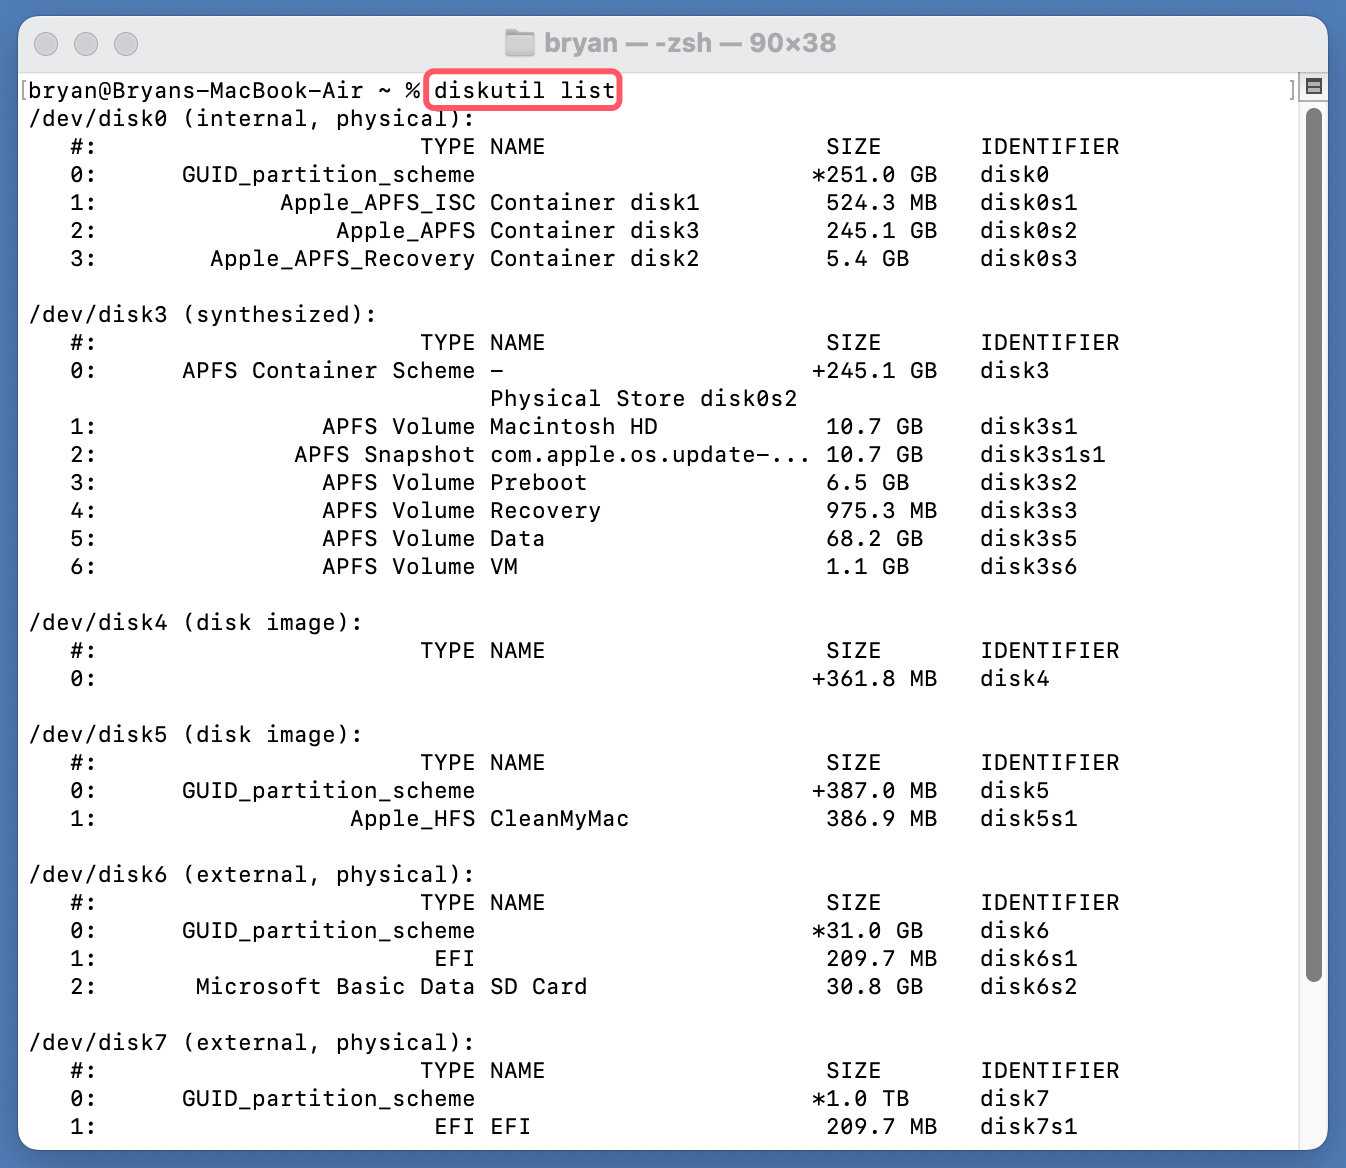
- Identify the NTFS Drive: In Terminal, type the following command to list all attached drives:
diskutil list
This will show all drives connected to your Mac. Identify the NTFS drive by its name and disk number (e.g., /dev/disk2).
![forcing an NTFS drive to mount on a Mac]()
- Mount the NTFS Drive with Write Access: Use the following command to mount the NTFS drive with read-write access:
sudo mount -t ntfs -o rw,auto,nobrowse /dev/disk2s1 /Volumes/NTFS
Replace /dev/disk2s1 with the correct disk identifier for your drive and /Volumes/NTFS with the mount point of your choice.
- Access the Drive: After the command is executed, your drive will be mounted with write permissions. You can access it from Finder (though it will not show up in the sidebar, it can be accessed directly through the /Volumes directory).
Pros of Using Terminal:
- Free (no third-party software required).
- Provides more control over the mounting process.
Cons of Using Terminal:
- Can be complicated for non-technical users.
- May cause system instability or file corruption if not used correctly.
- Needs to be done manually every time you restart your Mac.
3. Using macOS Disk Utility (Read-Only Option)
If you only need to access the contents of the NTFS drive and do not require write permissions, macOS's built-in Disk Utility can help. This method will allow you to mount the NTFS drive in read-only mode, which can be useful when you just need to copy files off the drive without modifying its contents.
Steps for Using Disk Utility:
- Connect the NTFS Drive: Plug the NTFS-formatted drive into your Mac.
- Open Disk Utility: Open the Disk Utility application from Applications > Utilities.
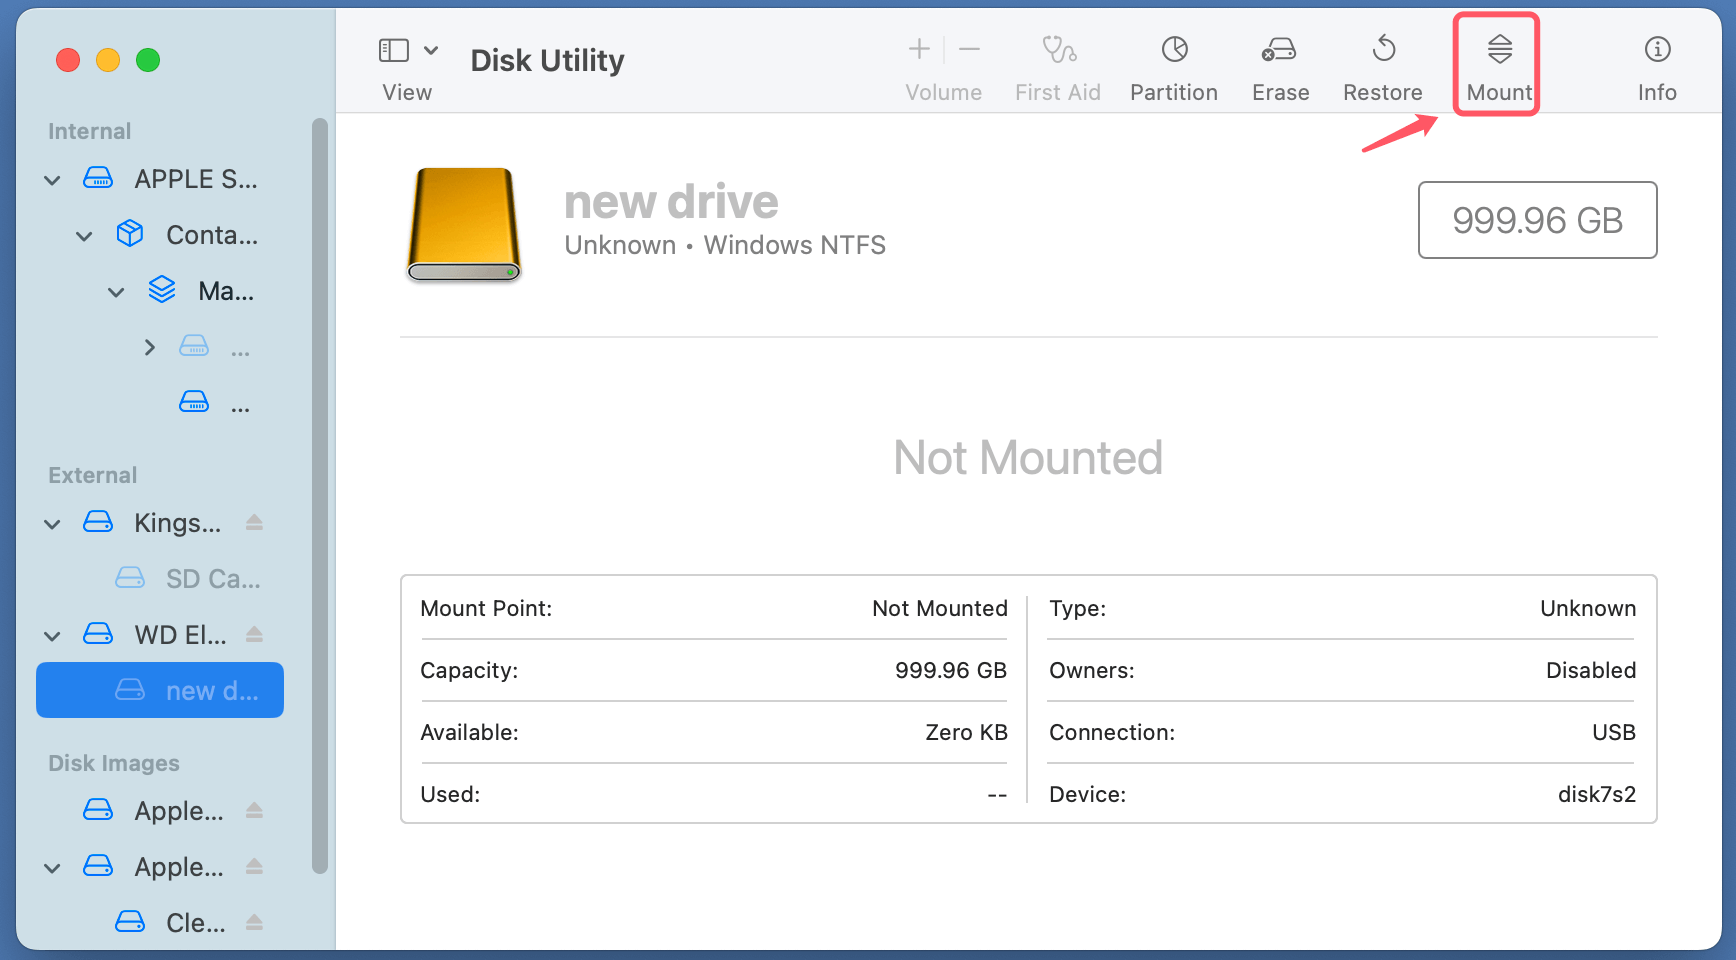
- Select the NTFS Drive: In Disk Utility, select the NTFS drive from the sidebar.
- Mount the Drive: If the drive is not automatically mounted, click the "Mount" button. Your drive will be mounted in read-only mode.
![forcing an NTFS drive to mount on a Mac]()
- Access the Files: You can now access the files on the drive, but you will be unable to modify, add, or delete any files.
Pros of Disk Utility:
- Built into macOS, so no additional software is needed.
- Safe and easy to use.
- Ideal for users who only need to read files from the NTFS drive.
Cons of Disk Utility:
- No write access, limiting its functionality for transferring files back to the NTFS drive.
If you still cannot mount the NTFS drive on your Mac, you can use Mac data recovery software to recover/export all files from the unmounted NTFS drive to your Mac or another drive, then use Disk Utility to reformat the NTFS drive to APFS, Mac OS Extended or ExFAT.
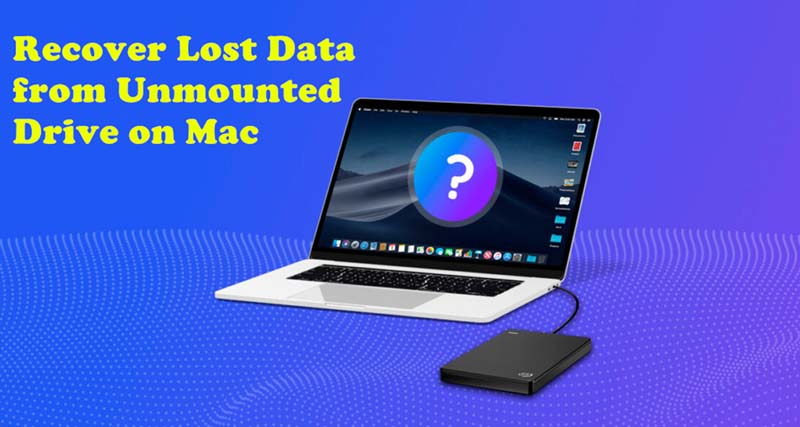
How to Recover Lost Data from Unmounted NTFS Drive on Mac
Mac data recovery software - Donemax Data Recovery for Mac can help you quickly recover all files from the unmounted NTFS drive.
Potential Issues and Troubleshooting
When trying to force mount an NTFS drive on macOS, users may encounter various issues. Here are some common problems and their solutions:
- Drive Not Showing Up: If the NTFS drive is not appearing on your desktop or in Finder, try the following:
- Ensure that the drive is properly connected and powered.
- Restart your Mac and reconnect the drive.
- Check if the drive appears in Disk Utility; if not, try using a different cable or port.
- Drive Not Mounting in Read-Write Mode: If the drive mounts but you cannot modify files, ensure that you're using third-party software like Donemax NTFS for Mac, Paragon or Tuxera, or try the Terminal method to force the mount.
- Corrupted NTFS Drive: In some cases, the NTFS drive may become corrupted if not properly ejected from a Windows machine. Running a disk check utility on a Windows computer before connecting the drive to your Mac can help resolve this.
Alternative Solutions for Cross-Platform Compatibility
Instead of forcing NTFS to work on your Mac, you might consider using a file system that is compatible with both Windows and macOS. ExFAT is an ideal alternative for external drives, as it is supported by both operating systems and allows full read/write access. If you need to reformat the drive, you can do so using Disk Utility or the Windows Disk Management tool.
🔗 Also read: how to format a drive to ExFAT on Windows or macOS.
Conclusion
While macOS does not natively support writing to NTFS-formatted drives, there are several reliable ways to force mount an NTFS drive on a Mac. Using third-party software like Paragon NTFS or Tuxera NTFS is the most straightforward and reliable solution for enabling full access. For users comfortable with the Terminal, macOS also offers a method to mount NTFS drives with write access. However, for those who only need read access, macOS's built-in Disk Utility can be used as a simpler solution.
By understanding these options, you can easily manage NTFS drives on your Mac, transferring files between Windows and macOS systems without any significant hurdles.

Donemax NTFS for Mac
An easy-to-use NTFS for Mac tool to help you enable writable for NTFS drives on Mac so that you can read-write NTFS drives on Mac without any limitation. It also can help you mount, format, repair, rename, open drive on your Mac.
Related Articles
- Jun 12, 2025How to Format and Unformat An NTFS Hard Drive on Mac?
- Jun 20, 2025How to Format an SD Card to NTFS on Mac?
- Jul 06, 2023External Hard Drive Not Mounting on Mac, How to Fix It?
- Feb 08, 2024Lexar Portable SSD Is Read-Only on Mac, Fix It Now
- Dec 05, 2024Kingshiper NTFS for Mac Review, How to Use It, Best Alternative
- Jul 02, 2025How to Fix NTFS Drive Not Mounting on Mac?

Christina
Christina is the senior editor of Donemax software who has worked in the company for 4+ years. She mainly writes the guides and solutions about data erasure, data transferring, data recovery and disk cloning to help users get the most out of their Windows and Mac. She likes to travel, enjoy country music and play games in her spare time.

Gerhard Chou
In order to effectively solve the problems for our customers, every article and troubleshooting solution published on our website has been strictly tested and practiced. Our editors love researching and using computers and testing software, and are willing to help computer users with their problems

