Written byCharlesUpdated on Apr 11, 2025
Fix com.apple.DiskManagement.disenter error 49180 on Mac
Approved byGerhard Chou
Before we start: Donemax Data Recovery for Mac can help you securely and completely recover files from an unmounted or erased drive on Mac. It also can help mount an external storage device on Mac, reformat a drive on Mac, repair a corrupted device on Mac, etc.
PAGE CONTENT:
If you've encountered the error message "com.apple.DiskManagement.disenter error 49180" on your Mac, you're not alone. This cryptic error typically appears when macOS fails to mount an external drive such as a USB flash drive, external SSD, or hard disk. It can cause panic, especially if you have important data stored on the affected disk. Fortunately, there are multiple ways to resolve this issue. In this article, we will explore what causes this error, how to fix it step-by-step, and how to prevent it from recurring in the future.
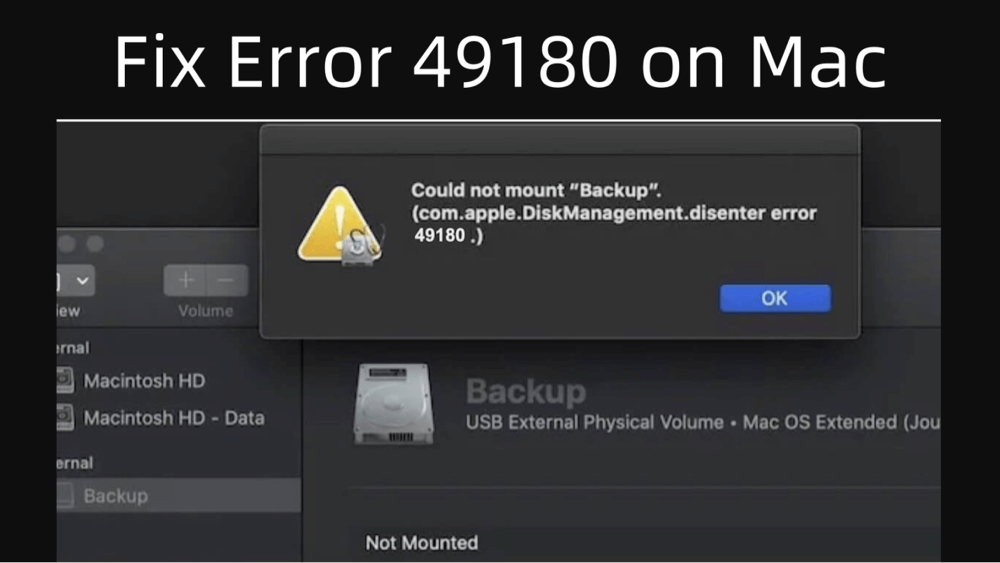
What is com.apple.DiskManagement.disenter error 49180?
The error com.apple.DiskManagement.disenter error 49180 is generated by macOS when it is unable to successfully mount a volume using Disk Management. This error code often appears when:
- You connect an external drive to your Mac.
- You try to manually mount a disk using Disk Utility.
- macOS attempts to boot from a non-startup volume.
Though the error code itself might seem technical and vague, it often points to an underlying problem with the drive, its file system, or the connection between the device and your Mac.
Common Causes of the Error 49180:
Before diving into solutions, it's helpful to understand what might be triggering this issue:
- File System Incompatibility: The external drive is formatted in a file system not supported or partially supported by macOS, such as NTFS.
- Corrupted File System: A damaged partition or corrupted disk structure prevents macOS from recognizing and mounting the disk.
- Improper Ejection: Disconnecting the drive without properly ejecting it can damage file system metadata.
- macOS Permissions Issues: macOS might lack the necessary permissions to mount the volume.
- Outdated macOS or Disk Firmware: Compatibility issues due to outdated software or firmware.
- Hardware Issues: Faulty USB cables, ports, or the drive itself.
Preliminary Checks for Error 49180:
Before diving into advanced troubleshooting, try these basic steps:
- Restart your Mac: A reboot can reset system processes related to disk mounting.
- Switch USB Ports: Try connecting the drive to another port on your Mac.
- Try a Different Cable: Damaged or low-quality cables can cause read errors.
- Test the Drive on Another Computer: Check if the drive works on a Windows PC or another Mac.
- Update macOS: By selecting System Settings > General > Software Update, you can make sure you are using the most recent version of macOS.
How to Fix com.apple.DiskManagement.disenter error 49180 on Mac?
Fix 1: Use Disk Utility to Mount the Drive
Disk Utility is macOS's built-in tool for managing disks and volumes. If your disk appears in Disk Utility but is greyed out or unmounted, you can try manually mounting it.
Steps:
Step 1. Open Disk Utility from Utilities via Applications.

Step 2. In the left sidebar, locate the external drive.
Step 3. If it's unmounted, click on it and choose Mount from the top menu.

Step 4. If mounting fails, click First Aid to check and repair the disk.

💡 Tip: If First Aid finds errors and repairs them, try mounting the disk again.
If this doesn't work, proceed to use Terminal commands.
Fix 2: Use Terminal to Mount the Disk
If Disk Utility fails to mount the disk, Terminal gives you more flexibility and control. You can use command-line tools to manually detect, diagnose, and attempt to mount or repair the drive. Here's a more detailed breakdown of how to use Terminal to deal with com.apple.DiskManagement.disenter error 49180.
Why Use Terminal?
macOS's Disk Utility provides a user-friendly interface, but it sometimes fails to provide specific error details or fails silently. The Terminal allows:
- Precise control over disk mounting
- Access to verbose system messages
- Options for forced mounts
- Useful tools for diagnosis (diskutil, mount, fsck, etc.)
Step-by-Step Guide:
Step 1: Open Terminal
Navigate to Terminal from Utilities via Applications, or press Command + Space and search for "Terminal".

Step 2: List All Disks
To find your external drive's disk identifier:
diskutil list
Step 3: Try Mounting the Drive
To mount the entire disk (not just a single volume):
diskutil mountDisk /dev/disk4

To mount a specific volume (like disk2s1):
diskutil mount /dev/disk4s2
If you receive the error message:
Volume could not be mounted: com.apple.DiskManagement.disenter error 49180
...it indicates that macOS tried and failed to mount the volume.
Step 4: Use sudo for a Forced Mount
Sometimes you’ll need elevated privileges to override system restrictions. You can use sudo to attempt a mount with administrative access:
sudo diskutil mountDisk /dev/disk4
or
sudo diskutil mount /dev/disk4s2
You will be prompted to enter your Mac’s administrator password.
Step 5: Check Disk Info for More Clues
Run the following command to inspect disk details:
diskutil info /dev/disk4s2
Look at fields like:
- File System Type
- Mount Status
- Volume Name
- Media Type
This info helps determine if the issue is due to a corrupted file system, unsupported format, or mounting permissions.
Step 6: Use mount to Try Manual Mounting
If diskutil fails, the UNIX mount command can be another option. For example:
sudo mkdir /Volumes/ManualMount
sudo mount -t msdos /dev/disk2s1 /Volumes/ManualMount
In this command:
- -t msdos specifies the file system type (replace with exfat, hfs, or apfs as appropriate).
- You create a directory for the mount point manually.
- You then mount the volume directly to that folder.
⭐ Important: Misusing mount can damage disks. Use this only if you know the correct file system and are comfortable with the command line.
💡 Troubleshooting Tips:
If the file system is unknown or unrecognized, Terminal might output an error like:
unknown special file or file system
In this case, file system corruption is likely, and recovery/formatting might be necessary.
- Use dmesg | tail or log show to review recent system logs for errors related to the disk.
- If macOS can't recognize the file system at all, consider mounting it on a Windows PC or using third-party tools like Donemax NTFS for Mac (if it's NTFS formatted).
When Terminal Works Best?
Using Terminal is ideal when:
- Disk Utility doesn't show the mount button.
- You need to access specific partitions.
- You're troubleshooting headless Macs or remote machines via SSH.
- You want detailed system responses to mounting operations.
Fix 3: Repair the File System Using fsck
The fsck (File System Consistency Check) command can fix deeper file system issues.
Steps:
Step 1. Reboot into macOS Recovery Mode:
- Intel Macs: Hold Command + R on startup.
- Apple Silicon Macs: Holding down the Power button will bring up alternatives.
Step 2. Select Terminal from Utilities from the top menu.

Step 3. In Terminal, type:
diskutil list
- Identify the affected volume (e.g., /dev/disk4s2).
Step 4. Run fsck:
/sbin/fsck_hfs -fy /dev/disk4s2
Replace the path with your actual volume.
Step 5. If fsck reports that the disk was modified, run the command again until it reports no issues.
Step 6. Restart your Mac and check if the issue is resolved.
Fix 4: Reset NVRAM/PRAM and SMC
NVRAM/PRAM and SMC store certain hardware settings. Resetting them can help with mounting and recognition issues.
Reset NVRAM/PRAM (Intel Macs Only):
- Turn Off your Mac.
- Switch it on, then push and hold right away:
Option + Command + P + R
- Hold the keys for about 20 seconds.
- Release and allow the Mac to boot normally.
Reset SMC:
The method differs depending on your Mac model. For Intel Macs:
- Turn Off the Mac.
- Press and hold:
Shift + Control + Option + Power
- Release all keys after 10 seconds and restart.
For Apple Silicon Macs, restarting resets both automatically.
Fix 5: Use NTFS for Mac Tool to Mount NTFS Disk on Mac
If you want to force mount an NTFS drive on your Mac without reformatting it, just try NTFS for Mac Tool.
Steps:
Step 1. Download and install the reliable NTFS for Mac tool - Donemax NTFS for Mac.
Step 2. Open Donemax NTFS for Mac, select the NTFS drive, click on Mount button.

Step 3. To write data to the NTFS drive on Mac, click on Enable Writable button.

Fix 6: Reformat the Drive (Last Resort)
If the data on the drive is not critical, or if you have a backup, reformatting can fix persistent file system problems.
Steps:
Step 1. Open Disk Utility.
Step 2. Select the affected drive from the sidebar.
Step 3. Click Erase at the top.

Step 4. Choose a new name, and for Format, select:
- APFS (for SSDs)
- Mac OS Extended (Journaled) (for HDDs)
- ExFAT (for cross-platform use)
Step 6. Click Erase to confirm.

⚠️ Warning: This will erase all data on the drive.
Recover Lost Data from Unmounted or Erased Drive on Mac
If you have lost data due to fixing com.apple.DiskManagement.disenter error 49180, you can use data recovery software to help get the lost or inaccessible data back.
Step 1. Download and install the reliable Mac data recovery software - such as Donemax Data Recovery for Mac.
Step 2. Open Donemax Data Recovery for Mac and select the unmounted drive or erased drive to start data recovery.

Step 3. Click on Scan button to deeply scan the selected drive. It will find all recoverable files including existing files, hidden/inaccessible files, deleted/erased/lost files.

Step 4. Once the scan is completed, you can preview all recoverable files. Then select the wanted files, click on Recover button to save them.

Prevent the com.apple.DiskManagement.disenter error 49180 in the Future
Once resolved, it's important to take preventive measures to avoid encountering this error again.
Tips:
- Always Eject Drives Properly: Use the eject icon in Finder before unplugging.
- Update macOS Regularly: Stay up-to-date with system and security patches.
- Avoid NTFS on Mac: NTFS is not natively writable on macOS. Use ExFAT or APFS instead.
- Avoid Low-Quality USB Hubs: Unstable power or signal can corrupt drive connections.
- Backup Important Data: Regular backups ensure you're never at risk of losing critical information.
When to Contact Apple Support
If none of the above methods work and your drive cannot be recognized or mounted on any Mac, it may be a sign of:
- A failing internal SSD or external HDD.
- USB port or controller failure.
- System-level corruption in macOS.
In such cases, contacting Apple Support or visiting an Apple Authorized Service Provider is recommended, especially if your device is under warranty or AppleCare.
Conclusion
The com.apple.DiskManagement.disenter error 49180 on a Mac can be a frustrating experience, particularly when it prevents access to important external storage devices. Fortunately, most cases are fixable using native tools like Disk Utility and Terminal or third-party data recovery software.
Start with basic troubleshooting and progress to more advanced fixes if necessary. Always prioritize data recovery before formatting, and adopt good practices like safely ejecting drives and using supported file systems to avoid this error in the future.
Donemax Data Recovery for Mac
Donemax Data Recovery for Mac is one of the best Mac data recovery software. It is easy-to-use and can help in recovering deleted, formatted, inaccessible or lost data from Mac HDD/SSD, external disk, USB drive, SD card, camera or other storage devices.
Related Articles
- Dec 19, 2024Mac Wi-Fi Not Working? Fix It Now [9 Solutions]
- Aug 05, 2025Fix Error Code 36 on Mac: A Comprehensive Guide
- Jul 19, 2025How to Disable Startup Items/Programs on Mac? [4 Methods]
- Apr 07, 2025[6 Fixes] Fix Macintosh HD Greyed Out in Disk Utility: Step-by-Step Guide
- Jun 23, 2025How to Turn on A Mac?
- Jan 16, 202510 Solutions to Fix Fusion Drive Not Mounting or Not Showing Up on Mac

Contributing Writer
Charles
Charles, who lives in Sydney, Australia, is an editor & writer of Donemax Team. He is good at writing articles related with Apple Mac computers, Windows operating systems, data recovery, data erasure, disk clone and data backup, etc. He loves reading and playing tennis in his spare time and is interested in testing new digital devices such as mobile phones, Macs, HDDs, SSDs, digital cameras, etc.

Editor in chief
Gerhard Chou
In order to effectively solve the problems for our customers, every article and troubleshooting solution published on our website has been strictly tested and practiced. Our editors love researching and using computers and testing software, and are willing to help computer users with their problems