Written byCoco LinUpdated on Aug 01, 2024
Erase Button Greyed Out in Mac Disk Utility | How to Fix
Approved byGerhard Chou
PAGE CONTENT:
Disk Utility is a powerful macOS tool designed for managing disks and storage devices. It allows users to perform a variety of functions, such as formatting, partitioning, and repairing disks. One of the key features of Disk Utility is the "Erase" button, which enables users to wipe a disk clean and reformat it for new use. This function is essential when setting up a new drive, preparing a disk for sale, or troubleshooting issues with a disk.
However, users may sometimes encounter a frustrating problem: the "Erase" button in Disk Utility appears greyed out and unresponsive. This issue prevents users from accessing the erase functionality, which can be particularly troublesome if the goal is to reformat a disk or resolve disk-related issues. Understanding why this might happen and how to address it is crucial for effective disk management and troubleshooting. In this article, we'll explore common reasons behind the greyed-out "Erase" button and provide practical solutions to resolve the issue.
Overview of the "Erase" Function in Disk Utility
The "Erase" function in Disk Utility is used to completely wipe a disk and reformat it to a new file system. This is often necessary for various tasks, such as setting up a new drive, clearing out old data, or preparing a disk for use with different operating systems. When you select a disk and choose "Erase," Disk Utility removes all data on the disk and formats it according to the selected file system (e.g., APFS, Mac OS Extended). This process is crucial for ensuring the disk is clean and ready for new data or applications.
Reasons Why the "Erase" Button Might Be Greyed Out
1. Disk Not Selected
- Issue: The "Erase" button will only become active when a disk or volume is properly selected in Disk Utility. If no disk or the wrong disk is selected, the button remains greyed out.
- Solution: Ensure that you have clicked on the correct disk or volume in the left sidebar of Disk Utility. Make sure the disk is highlighted before attempting to use the "Erase" function.
2. Disk Is in Use or Mounted
- Issue: If the disk you are trying to erase is currently in use or mounted, Disk Utility may prevent the erase operation to avoid data corruption or system instability.
- Solution: Try unmounting the disk by selecting it and clicking the "Unmount" button. If the disk cannot be unmounted because it is in use, you may need to close any applications or processes using the disk before proceeding.
3. Disk Has a Format or Partition Type That Disk Utility Cannot Handle
- Issue: Some disks may have formats or partition schemes that are not compatible with Disk Utility’s "Erase" function. For example, certain external drives or disks formatted with non-standard file systems may not be recognized properly.
- Solution: Verify the disk’s current format and partition type. Check if Disk Utility supports the disk’s format or consider using Terminal commands to perform the erase operation if Disk Utility cannot handle it.
4. User Permissions or System Issues
- Issue: User permissions or underlying system issues may also cause the "Erase" button to be greyed out. This can occur if your user account does not have sufficient privileges or if there are system-level restrictions affecting Disk Utility.
- Solution: Ensure you are logged in as an administrator with sufficient permissions to perform disk operations. If system issues are suspected, try restarting your Mac or booting into Safe Mode to resolve temporary glitches.
How to Fix Disk Utility Erase Button Greyed Out Issue?
Ensure the Disk is Selected
To select the correct disk in Disk Utility, open the application from the Applications > Utilities folder or via Spotlight search. In the sidebar on the left, you will see a list of disks and volumes. Click on the disk you wish to manage to highlight it. The selected disk will be ready for operations such as erasing or partitioning. It’s crucial to select the right disk or volume to avoid accidental data loss. Ensuring you are working with the correct disk is vital for data safety and achieving the desired outcome with Disk Utility.
Note: You cannot erase startup disk in normal mode. If you want to erase your Mac’s startup disk, boot it into macOS Recovery mode. Then find Disk Utility and use it to erase the startup disk.
How to Erase and Format Startup Disk on Mac
Restart your Mac, press and hold Power button until you see macOS Recovery mode, then choose Disk Utility to erase the startup disk.
Unmount the Disk
To unmount a disk, select it in Disk Utility from the left sidebar, and then click the "Unmount" button in the toolbar, which looks like a drive with a downward arrow. Unmounting is necessary because it ensures that no files are actively being used, preventing data corruption during the erase process. If the disk cannot be unmounted, check if any applications are using the disk and close them. You might also need to eject the disk if it is an external drive or restart your Mac to resolve any underlying issues that are preventing the unmount.
Check Disk Utility for Updates
To check for updates to Disk Utility or macOS, open the Apple menu and choose "System Settings > General," then click on "Software Update." This will allow you to see if there are any available updates for macOS, which can include updates for Disk Utility. Keeping your software up-to-date is important as updates can fix bugs, improve functionality, and ensure compatibility with the latest hardware and software. Regular updates help maintain system stability and prevent issues like the "Erase" button being greyed out due to software glitches.
Verify Disk Health
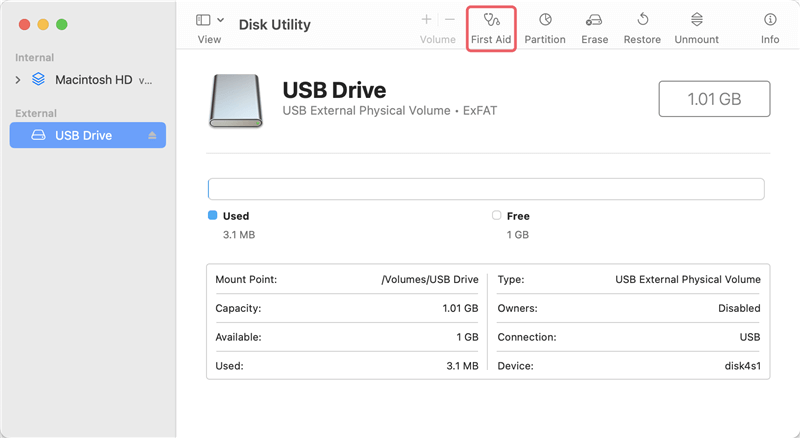
Running First Aid in Disk Utility involves selecting the disk or volume from the sidebar and clicking the "First Aid" button. This tool will check for and attempt to repair any errors on the disk. Follow the on-screen instructions to complete the process. If First Aid reports that the disk is fine, it means there are no detectable errors preventing the erase operation. If errors are found, First Aid will attempt to fix them, which may resolve issues related to the greyed-out "Erase" button.
Restart Your Mac
Restarting your Mac can resolve temporary system issues by refreshing system processes and clearing temporary glitches. To restart safely, click the Apple menu in the top-left corner of the screen and select "Restart." Confirm any prompts and allow your Mac to reboot. This simple step can often resolve problems with Disk Utility and other applications by resetting system states and clearing temporary conflicts that may be causing the "Erase" button to be greyed out.
Boot into Safe Mode
To boot your Mac into Safe Mode, restart your Mac and hold down the Shift key immediately after you hear the startup chime. Release the key when you see the login window. Safe Mode performs a system check and disables non-essential services and extensions, which can help in troubleshooting issues. Safe Mode is beneficial for identifying whether the problem is related to system software or third-party applications that might interfere with Disk Utility operations.
Use Terminal Commands
Using Terminal for disk management involves entering specific commands to address disk issues. Open Terminal from Applications > Utilities, and use commands like diskutil list to view available disks or diskutil eraseDisk to format a disk. Terminal commands can offer more detailed control over disk operations than Disk Utility. Familiarizing yourself with common commands can help resolve issues where Disk Utility’s graphical interface fails, such as when the "Erase" button is unresponsive.
Check for System Integrity Protection (SIP) (For Intel-based Mac)
System Integrity Protection (SIP) is a security feature that protects system files and directories from modification. It can sometimes affect disk operations, including erasing disks. To check SIP status, restart your Mac and hold Command (⌘) + R (for Intel-based Mac) to enter Recovery Mode, then open Terminal and type csrutil status. If SIP is enabled and you need to disable it temporarily, type csrutil disable in Recovery Mode. Remember to re-enable SIP by running csrutil enable after completing your disk operations to ensure your system remains protected.
Advanced Solutions
Reformat the Disk Using Terminal
To reformat a disk using Terminal, follow these detailed steps:
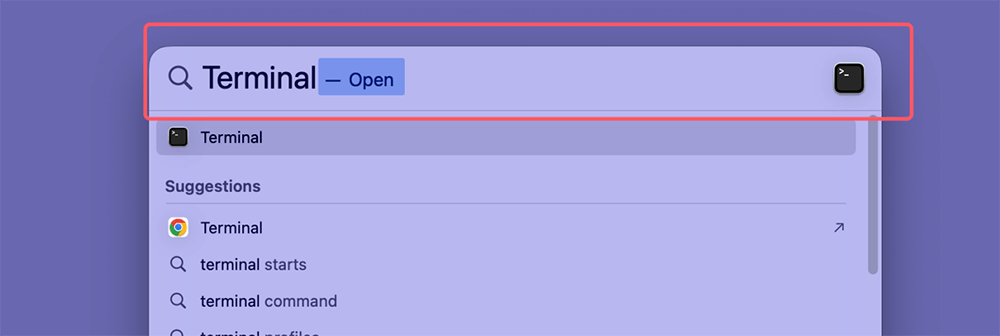
Step 1. Open Terminal: Navigate to Applications > Utilities > Terminal or use Spotlight to search for Terminal.
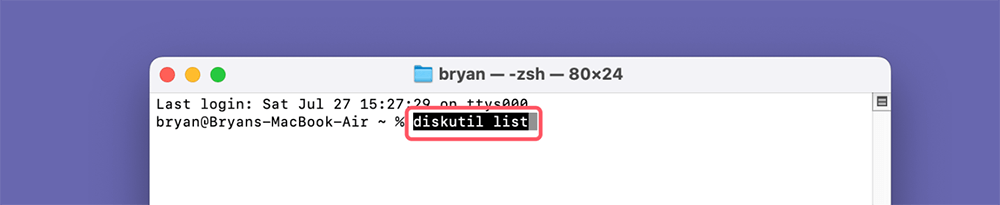
Step 2. List Available Disks: Type diskutil list and press Enter. This command displays a list of all connected disks and their identifiers (e.g., disk0, disk1, disk2, disk3, disk4, disk5).
Step 3. Identify the Disk: Locate the disk you wish to reformat by its identifier and name from the list. Ensure you choose the correct disk to avoid data loss.
- Unmount the Disk: Before reformatting, the disk needs to be unmounted. Type diskutil unmountDisk /dev/diskX (replace diskX with your disk identifier) and press Enter.
- Reformat the Disk: Use the command diskutil eraseDisk FILE_SYSTEM DISK_NAME /dev/diskX. Replace FILE_SYSTEM with the desired format (e.g., APFS, JHFS+), DISK_NAME with the name you want for the disk, and diskX with your disk identifier. For example, diskutil eraseDisk APFS MyDrive /dev/disk4.
- Wait for Completion: Terminal will display progress and completion messages. Ensure the operation finishes before disconnecting or using the disk.

Caution and Backup Advice:
- Backup Data: Ensure you have backed up any important data from the disk before reformatting, as this process will erase all existing data.
- Verify Disk Identifier: Double-check the disk identifier to avoid reformatting the wrong disk, which can result in data loss.
- Proceed with Care: Terminal commands can make significant changes to your system. Execute commands carefully and confirm each step.
Use Third-Party Disk Management Tools
Several reliable third-party disk management tools offer advanced features and greater flexibility than Disk Utility. Here are some options:
1. Donemax Data Recovery for Mac:
- Overview: Donemax Data Recovery for Mac provides powerful disk management and data recovery capabilities. It supports a variety of file systems and offers additional features like mounting disk and formatting drive.
- Recommendations: Ideal for users needing both disk management and data recovery solutions. Ensure you download the software from a reputable source.
2. Paragon Hard Disk Manager:
- Overview: Paragon Hard Disk Manager offers comprehensive disk management, including partitioning, formatting, and cloning. It supports multiple file systems and provides a user-friendly interface.
- Recommendations: Suitable for advanced users who need extensive disk management features. Verify compatibility with your macOS version.
3. Donemax Disk Clone for Mac:
- Overview: Donemax Disk Clone for Mac is known for its cloning and backup capabilities. It also offers disk formatting and repairing features.
- Recommendations: Useful for creating bootable backups and managing disk partitions. Check for the latest version compatible with your macOS.
Precautions:
- Download from Official Sources: Always obtain software from official or reputable websites to avoid malware or incompatible versions.
- Read Reviews: Look for user reviews and expert opinions to ensure the tool is reliable and meets your needs.
- Backup Data: Before using third-party tools, back up your data to prevent accidental loss during disk operations.
These advanced solutions can help resolve disk issues or perform tasks that Disk Utility may not handle. However, exercise caution and ensure you understand the tools and commands you are using.
Conclusion
Dealing with a greyed-out "Erase" button in Disk Utility can be frustrating, but understanding the potential causes and troubleshooting steps can help you resolve the issue effectively. From ensuring the correct disk is selected to unmounting it, updating your software, and verifying disk health, each step is crucial for troubleshooting this problem. Additionally, if the standard methods don't work, using Terminal commands or exploring third-party disk management tools can provide alternative solutions.
Always remember to back up your important data before making changes to your disks, and proceed with caution to avoid accidental data loss. If the issue persists despite following these steps, seeking professional help or contacting Apple Support may be necessary. By systematically addressing each potential cause, you can restore functionality to Disk Utility and manage your disks with confidence.
Related Articles
- Sep 25, 2024Fix Toshiba External Hard Drive Not Mounting on Mac (7 Solutions)
- Jan 02, 2025Fix AppleAPFSMedia Uninitialized Without Losing Data on Mac
- Feb 09, 2025[7 Solutions] Fix Storage System Verify or Repair Failed 69716 Error on Mac
- Feb 20, 2025Fix Xcode Not Working on macOS Sequoia, Sonoma, Ventura, etc.
- Nov 18, 2024How to Restart and Force Restart Mac?
- Oct 16, 2024How to Add or Remove Icons from Dock on Mac?

Contributing Writer
Coco Lin
Coco has been a writer and a chief programmer at Donemax software since 2018. Over 10 years of experience of writing troubleshooting articles in the software industry, she is passionate about programming and loves to providing solutions to Windows and Mac users. Also she enjoys music and palying tennis in her free time.

Editor in chief
Gerhard Chou
In order to effectively solve the problems for our customers, every article and troubleshooting solution published on our website has been strictly tested and practiced. Our editors love researching and using computers and testing software, and are willing to help computer users with their problems