Written byChristinaUpdated on Feb 09, 2025
[7 Solutions] Fix Storage System Verify or Repair Failed 69716 Error on Mac
Approved byGerhard Chou
PAGE CONTENT:
Encountering errors on a Mac can be frustrating, especially when it involves issues with system stability or data loss. One such error that users often report is the "Storage System Verify or Repair Failed -69716" error. This error can cause users to worry about the safety of their files and the integrity of their operating system. If you're experiencing this issue, don't panic - this article will guide you through the process of understanding the problem and resolving it effectively. We'll cover the potential causes of the error and walk you through step-by-step solutions to fix it.
What is Storage system verify or repair failed -69716 error?
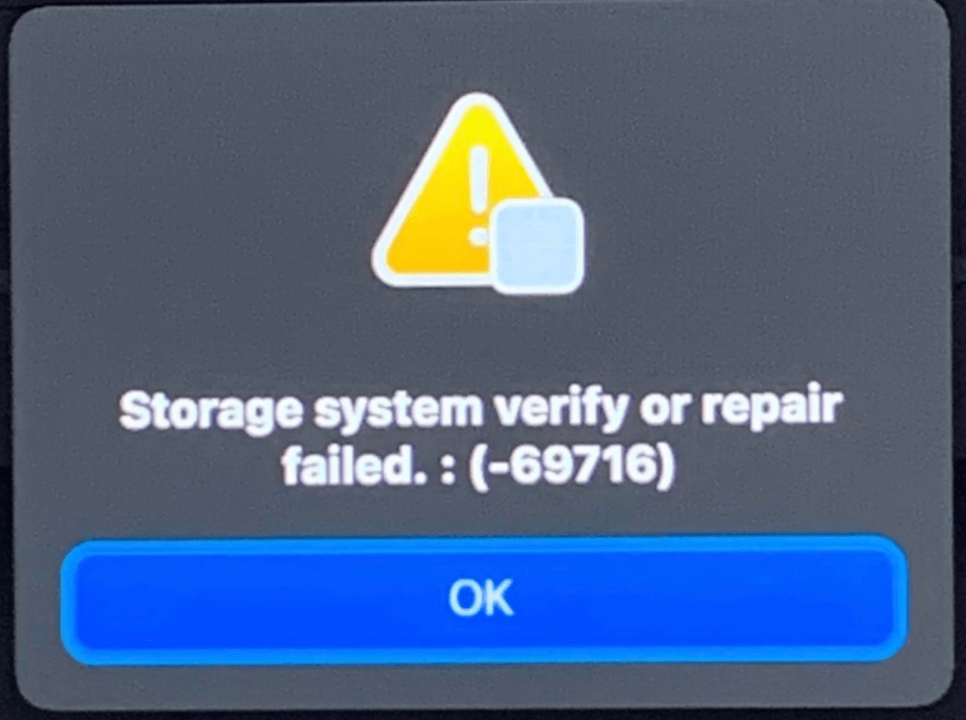
The "Storage System Verify or Repair Failed 69716" or "File System Verify or Repair Failed"error appears when your Mac's built-in disk utility tool (Disk Utility) fails to repair the file system. Essentially, this means that the macOS system is unable to fix an issue on the storage device (usually the internal hard drive or SSD) that is preventing it from functioning normally. While the error can be alarming, understanding the root causes of the problem can help you troubleshoot and resolve it efficiently.
At its core, the error indicates a corruption or issue within the file system - either the logical structure of files or the storage media itself. This issue can prevent you from accessing your files, installing new software, or performing updates. The error could also indicate underlying hardware problems, but don't jump to conclusions just yet. There are several steps you can take to troubleshoot and fix this error before assuming the worst.
Common Causes of the Mac 69716 Error:
There are several factors that can contribute to the "Storage System Verify or Repair Failed 69716" error on Mac. Here are some of the most common causes:
- Disk Corruption or Damage: File systems are sensitive to corruption. If your disk experiences power outages, improper shutdowns, or other interruptions, it can result in corrupted data that makes it difficult for macOS to perform repairs.
- System Permissions Issues: macOS relies on file permissions to control access to files and folders. If there are incorrect permissions on the file system, it can prevent macOS from repairing or verifying the disk.
- Outdated or Incompatible macOS Version: Running an outdated version of macOS can lead to compatibility issues with your storage devices or disk utilities. It is important to regularly update macOS to ensure the system works with the latest bug fixes and patches.
- Hardware Problems: In some cases, the error may be indicative of a hardware failure, such as a dying hard drive or a malfunctioning SSD. Hardware issues can prevent macOS from accessing and repairing the file system correctly.
Recover Data on Mac When Seeing Storage System Verify or Repair Failed 69716 Error
If you have lost data due to "Storage system verify or repair failed -69716" error, you can use Donemax Data Recovery for Mac to help you get the lost data back.
Step 1. Click Download button below to download Donemax Data Recovery for Mac, then open it.
Step 2. Open Donemax Data Recovery for Mac, choose the internal drive (usually named Macintosh HD) to start data recovery.

Step 3. Click on Scan button to deeply scan the Macintosh HD and find all existing files and lost files.

Step 4. After deep scan, you can preview all recoverable files. Then select the wanted files, click on Recover button to save them.

Donemax Data Recovery for Mac also can help you recover lost data after erasing Mac hard drive or reinstalling macOS.
Step-by-Step Solutions to Fix the Error -69716 on Mac
Now that we have an understanding of what could be causing the "Storage System Verify or Repair Failed 69716" or "File system verify or repair failed" error, let's dive into the steps you can take to fix it.
Fix 1. Run First Aid in Disk Utility to Fix 69716 Error
The first step in resolving this error is to use macOS's built-in Disk Utility tool to run First Aid. First Aid is designed to detect and repair errors in the file system, so it's often the first line of defense against disk-related issues.
Here's how to run First Aid in Disk Utility:
- Open Disk Utility by navigating to Utilities via Applications
- In the left-hand sidebar, select the disk or partition that's giving you the error.
- At the top of the window, click the First Aid button.
- Confirm that you want to run First Aid by clicking Run when prompted.
![Storage System Verify or Repair Failed -69716]()
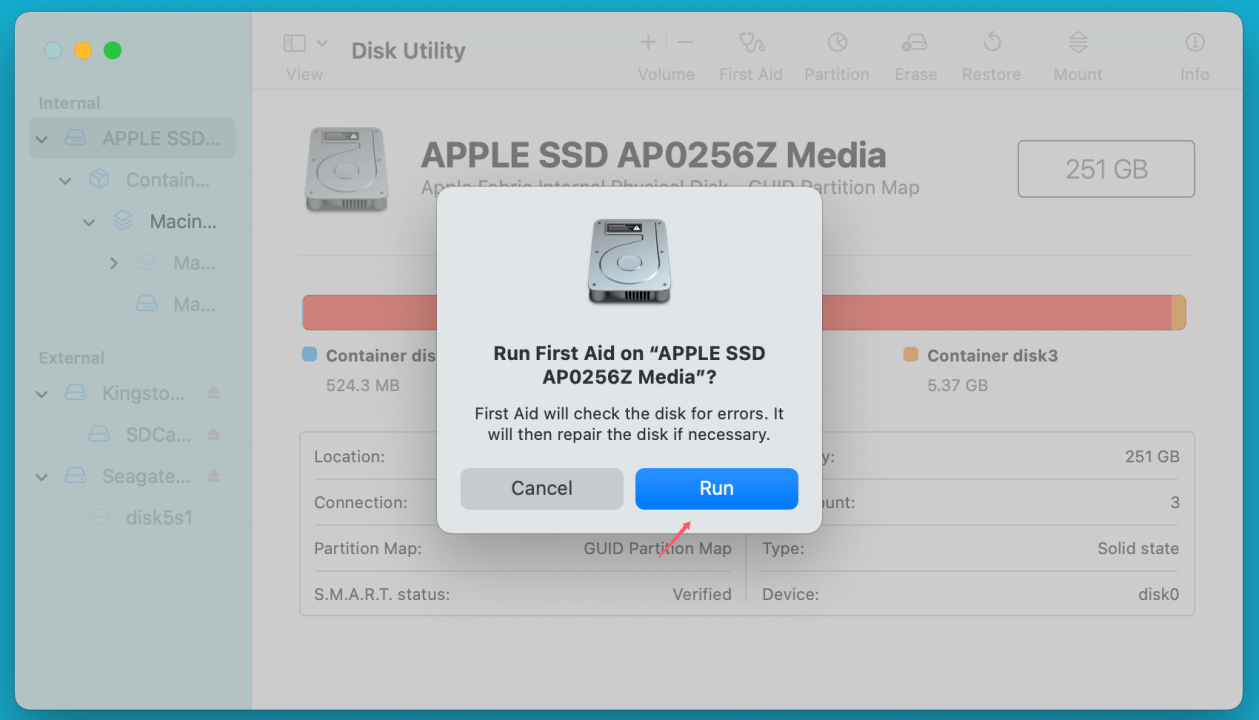
Disk Utility will scan the disk for errors and attempt to fix any issues it finds. If Disk Utility successfully repairs the disk, the error should be resolved. If it reports that the repair process has failed or the disk is unrepairable, proceed to the next step.
Fix 2. Check Disk Permissions to Fix 69716 Error
Sometimes, file system errors occur due to incorrect disk permissions. macOS uses permissions to control which files and applications can access certain parts of the system. If permissions are misconfigured, it can prevent Disk Utility from repairing the file system.
Here's how to check and repair disk permissions:
- Open Disk Utility again.
- Select the problematic disk or partition from the sidebar.
- Click on First Aid again and let it attempt to repair any issues, including permissions.
In more recent versions of macOS (macOS El Capitan and later), the operating system automatically manages disk permissions, so this step might not be necessary. If the problem persists after running First Aid, move on to the next step.
Fix 3. Use Terminal to Repair the File System
You can attempt to manually fix the file system using Terminal if Disk Utility has not been able to fix the problem. One useful tool for identifying and fixing file system problems is the fsck (file system consistency check) command.
Here's how to use the fsck command:
- Open Terminal by going to Utilities via Applications.
- Type the following command:
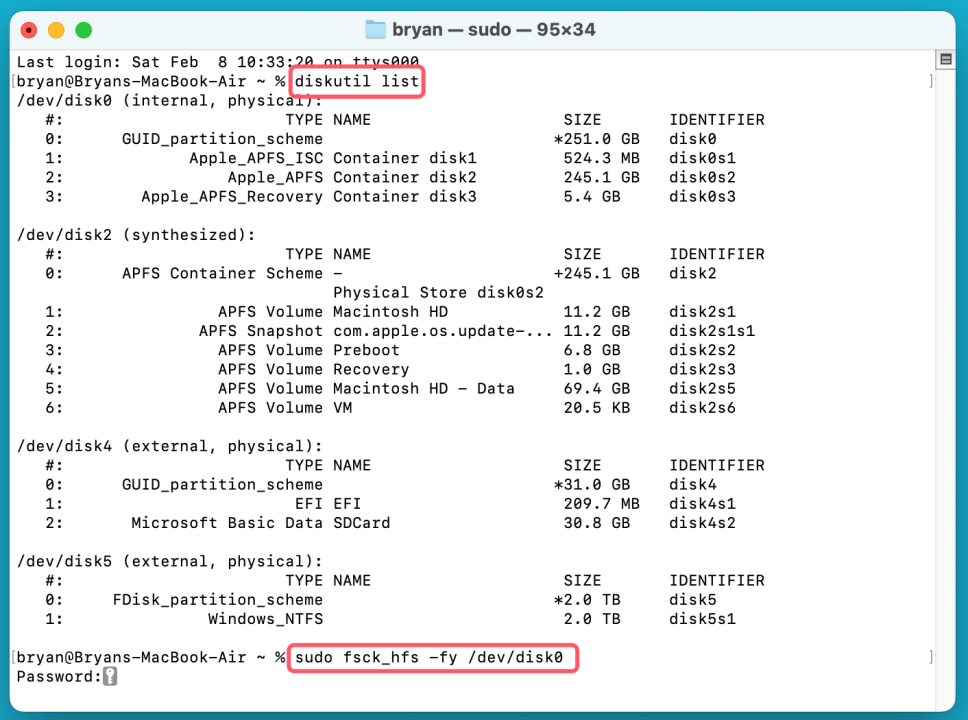
sudo fsck_hfs -fy /dev/disk0
💡 Note: You may need to adjust the disk identifier (e.g., /dev/disk0) based on your specific system configuration. You can find your disk identifier by typing diskutil list in Terminal.
![Storage System Verify or Repair Failed -69716]()
- Press Enter and then enter your administrator password when prompted.
- The fsck command will run and attempt to fix any file system errors it finds. If it reports that repairs were successful, reboot your Mac and check if the error has been fixed.
Fix 4. Reboot in Safe Mode to Fix Disk Errors
Sometimes, rebooting your Mac in Safe Mode can help resolve errors caused by third-party software or system corruption. Safe Mode loads a minimal set of system files, which can help you troubleshoot and isolate the issue.
Here's how to boot your Mac in Safe Mode:
- Turn off your Mac.
- Press and hold the Shift key as soon as you turn it on.
- When the progress bar and Apple logo appear, let go of the Shift key.
💡 Note: If you are using a Mac with Apple silicon, shut down your Mac, then press and hold power button. Then select Macintosh, press Shift key, click Continue in Safe Mode.
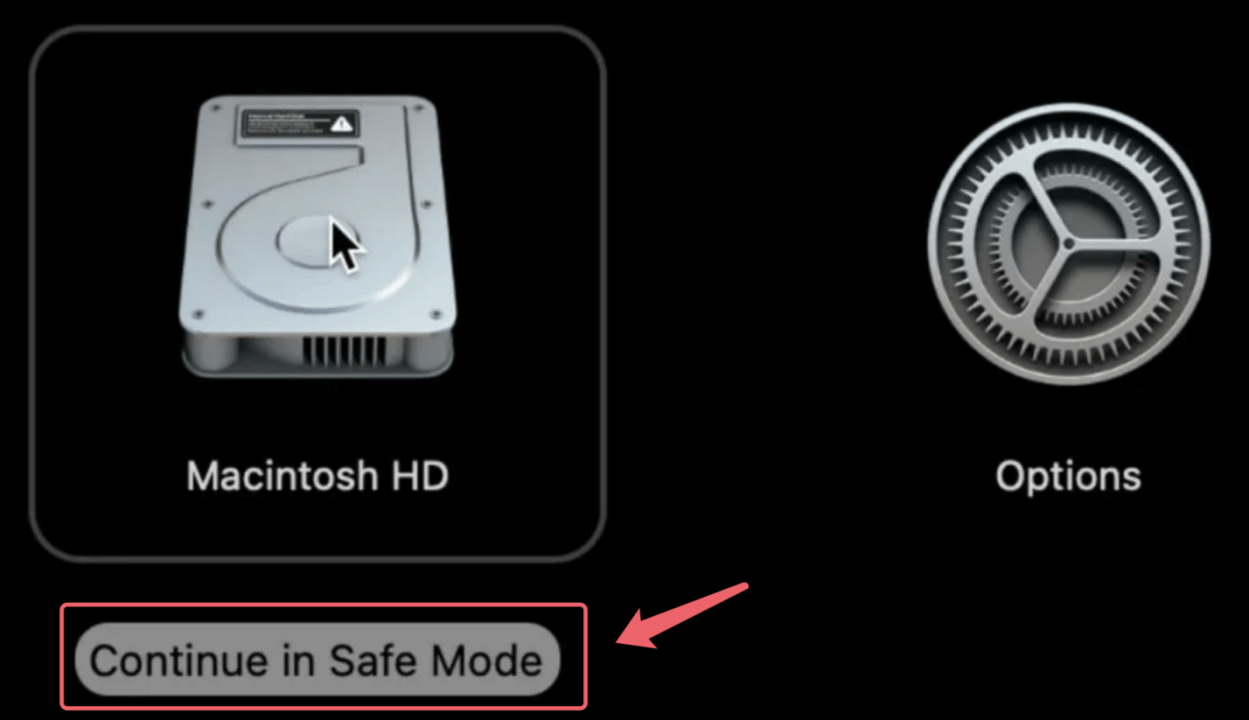
While in Safe Mode, macOS will run a check on the disk and attempt to repair any issues it detects. After logging in, try running Disk Utility again to see if the error has been resolved.
Fix 5. Update macOS and Disk Drivers
If you're running an outdated version of macOS, it could be contributing to the error. Bug fixes and enhancements that may resolve disk-related problems are frequently included in updates. It’s important to keep your macOS up to date to avoid compatibility issues with storage devices and other system components.
To check for updates:
- Choose System Settings from the Apple Menu.
- Click General > Software Update.
- Click Update Now if there is an update available.
![Storage System Verify or Repair Failed -69716]()
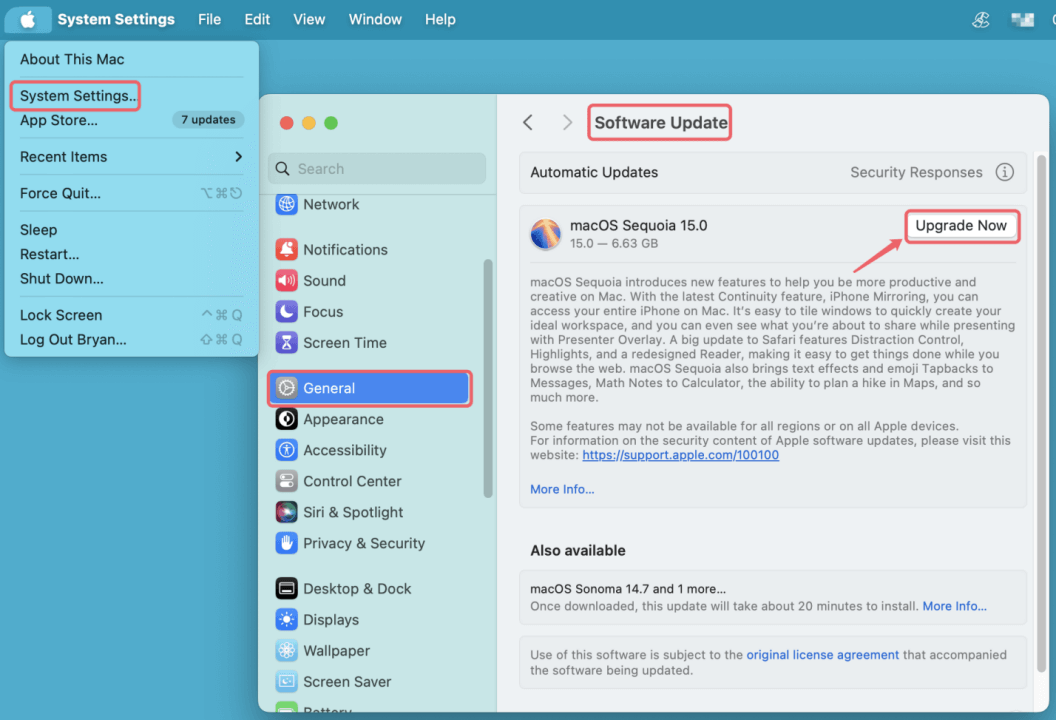
After updating, restart your Mac and check if the error persists.
Fix 6. Check the Hardware (If Applicable)
If the error still persists despite attempting the above solutions, it's time to consider that the issue might be hardware-related. Hard drives and SSDs can fail over time, leading to disk corruption and system errors.
To check the health of your Mac’s storage device:
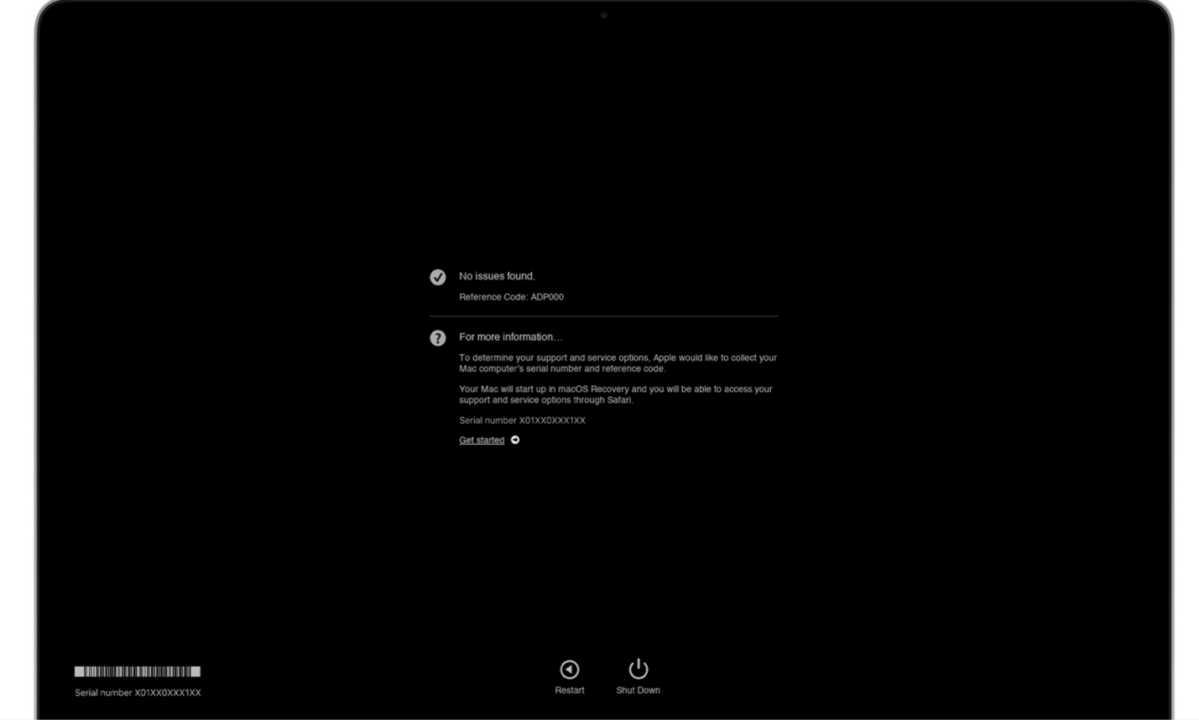
- Restart your Mac and hold down the D key to start Apple Diagnostics.
- Follow the on-screen instructions to run a hardware diagnostic test.
- If the test reports any issues with the storage device, it may need to be repaired or replaced.
![Storage System Verify or Repair Failed -69716]()
Fix 7. Fix Error 69716 in macOS Recovery Mode
If none of the above solutions resolves the issue, you may need to take more drastic measures, such as reinstalling macOS or reformatting the disk. Reinstalling macOS can help resolve system-related issues that may be preventing the repair process.
To reinstall macOS:
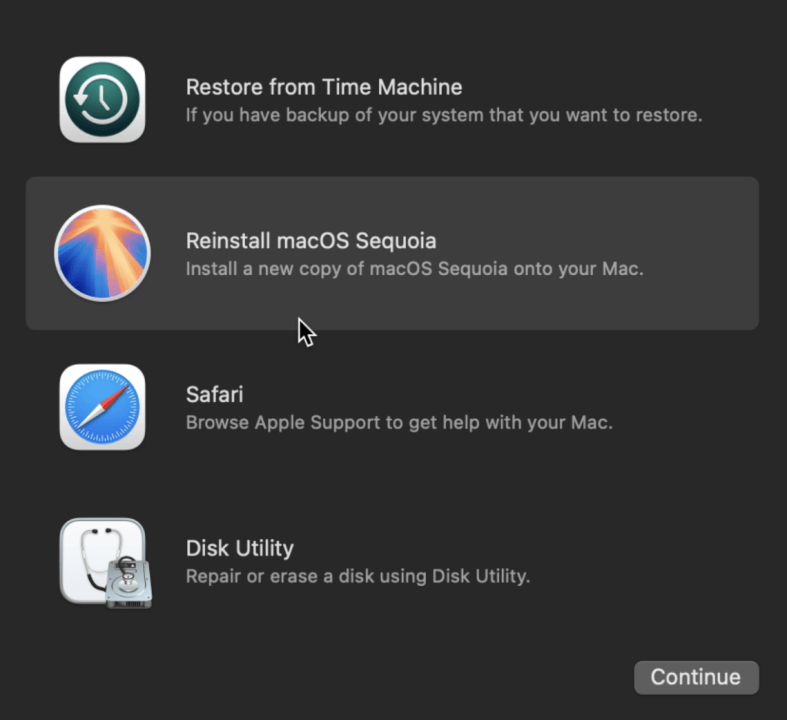
- To enter Recovery Mode, restart your Mac and press and hold Command + R (for Intel-based Mac) or Power button (for Apple silicon Mac).
- From the macOS Utilities window, choose Reinstall macOS.
![Storage System Verify or Repair Failed -69716]()
- To restore the operating system, adhere to the on-screen directions.
If you still cannot fix the error, it may be time to seek professional help from an Apple-certified technician.
Prevent Storage System Verify or Repair Failed 69716 Error on Mac
After resolving the "Storage or File System Verify or Repair Failed 69716" error, it's important to take steps to prevent similar issues in the future. Here are some tips to keep your Mac’s file system in good health:
- Back Up Your Data Regularly: Use Time Machine or another backup solution to ensure your data is safe in case of disk failure.
- Perform Routine Disk Checks: Use Disk Utility's First Aid tool to check your disks periodically for errors.
- Keep macOS Updated: Regularly update macOS to ensure your system remains stable and secure.
- Avoid Forced Shutdowns: Always shut down your Mac properly to prevent file system corruption caused by abrupt power loss.
Conclusion
The "Storage System Verify or Repair Failed 69716" error can be frustrating, but it is often fixable with the right approach. By running Disk Utility, checking permissions, using Terminal commands, and ensuring your hardware is healthy, you can resolve the issue without needing to resort to drastic measures. If the error persists despite your efforts, reinstalling macOS or consulting a professional may be necessary. With proper maintenance and regular checks, you can keep your Mac running smoothly and prevent future errors from occurring.
Donemax Data Recovery for Mac is a powerful Mac recovery app. It can completely recover lost data from your crashed Mac hard drive or erased SSD.
Donemax Data Recovery for Mac
Donemax Data Recovery for Mac is one of the best Mac data recovery software. It is easy-to-use and can help in recovering deleted, formatted, inaccessible or lost data from Mac HDD/SSD, external disk, USB drive, SD card, camera or other storage devices.
Related Articles
- Oct 21, 2024macOS Sequoia Not Recognizing USB Flash Drives, 9 Methods to Fix It
- Jul 13, 2024How to Repair An External Hard Drive on Mac?
- Dec 25, 20242025 Best FAT32 Disk Formatter for Mac
- Feb 22, 2025Memory Card Not Working on Mac? Fix It Without Losing Data
- Mar 19, 2025How to Fix Mac Error Code -8062: A Comprehensive Guide
- Mar 11, 2025How to Use Seagate Expansion Desktop Hard Drive on Mac?

Contributing Writer
Christina
Christina is the senior editor of Donemax software who has worked in the company for 4+ years. She mainly writes the guides and solutions about data erasure, data transferring, data recovery and disk cloning to help users get the most out of their Windows and Mac. She likes to travel, enjoy country music and play games in her spare time.

Editor in chief
Gerhard Chou
In order to effectively solve the problems for our customers, every article and troubleshooting solution published on our website has been strictly tested and practiced. Our editors love researching and using computers and testing software, and are willing to help computer users with their problems