Written byStevenUpdated on Sep 21, 2024
Disk Utility Cannot Repair A Disk, Fix It Now
Approved byGerhard Chou
PAGE CONTENT:
Disk Utility is an important tool for macOS users because it lets them control and fix disks. But if it fails to repair a disk, users may lose a lot of data, have disks that won't work, and have speed problems. This article talks about the most common reasons why Disk Utility doesn't work, such as a severely damaged disk, file systems that aren't supported, permissions problems, and software conflicts.
We'll discuss basic troubleshooting steps, more advanced options, and ways to clone disks and regain lost data. Following this guide, you can fix disk repair problems, keep your data safe, and keep your Mac running smoothly. No matter your experience with computers, this guide will teach you how to fix Disk Utility errors and keep them from happening again.

Understanding Disk Utility and Its Limitations
Disk Utility is a built-in app in macOS that lets you control and fix disk drives. It can format, split, and fix small disk mistakes with "First Aid." Notwithstanding what it can do, Disk Utility has its limits and might not be able to resolve all disk problems for the following reasons:
- Severe Disk Corruption: Disk Utility may be unable to fix extensive file system corruption.
- Physical Disk Damage: Software can't fix problems with hardware, such as bad sectors or disks that won't work.
- Unsupported File System: Disk Utility might not fully handle some file systems, which could mean that repairs don't work.
- Permissions Issues: Disk Utility needs to be given the right access to fix things. Not having enough rights can slow down the process.
- Software Conflicts: Sometimes, third-party software can get in the way of Disk Utility's fixes.
Symptoms of Disk Utility Failure to Repair a Disk on Mac
If Disk Utility fails to fix a disk, you might see several things, such as:
- Error Messages: "Disk Utility cannot repair this disk" or "The disk cannot be repaired."
- Unresponsive Disk: The disk might stop being able to be mounted or accessed.
- Data Loss: Files and folders can disappear or get damaged.
- Slow Performance: The system may slow down or freeze up.
If Disk Utility cannot repair the disk on your Mac, you'd better use a Mac data recovery application to help you recover all data from the disk and save the recovered data to another drive.
Step 1. Download and install Donemax Data Recovery for Mac on your Mac, then run it from Launchpad.
Step 2. Open Donemax Data Recovery for Mac, select the damaged disk to start data recovery.

Step 3. Click on Scan button to deeply scan the damaged disk and find all recoverable files including existing files, deleted/formatted/lost files, etc.
Step 4. Once the scan is completed, you can preview all recoverable files. Then select the wanted files, click on Recover button to save them.

Methods to Fix Disk Utility Cannot Repair a Disk on Mac
💡1.Fix macOS Can't Repair the Disk with First Aid
Apple says you can try to fix the disk again with Disk Utility if you see the message "Disk Utility can't repair this disk." So, you can try this simple fix first, then any of the others in this article. Just keep reading if this fix doesn't work.
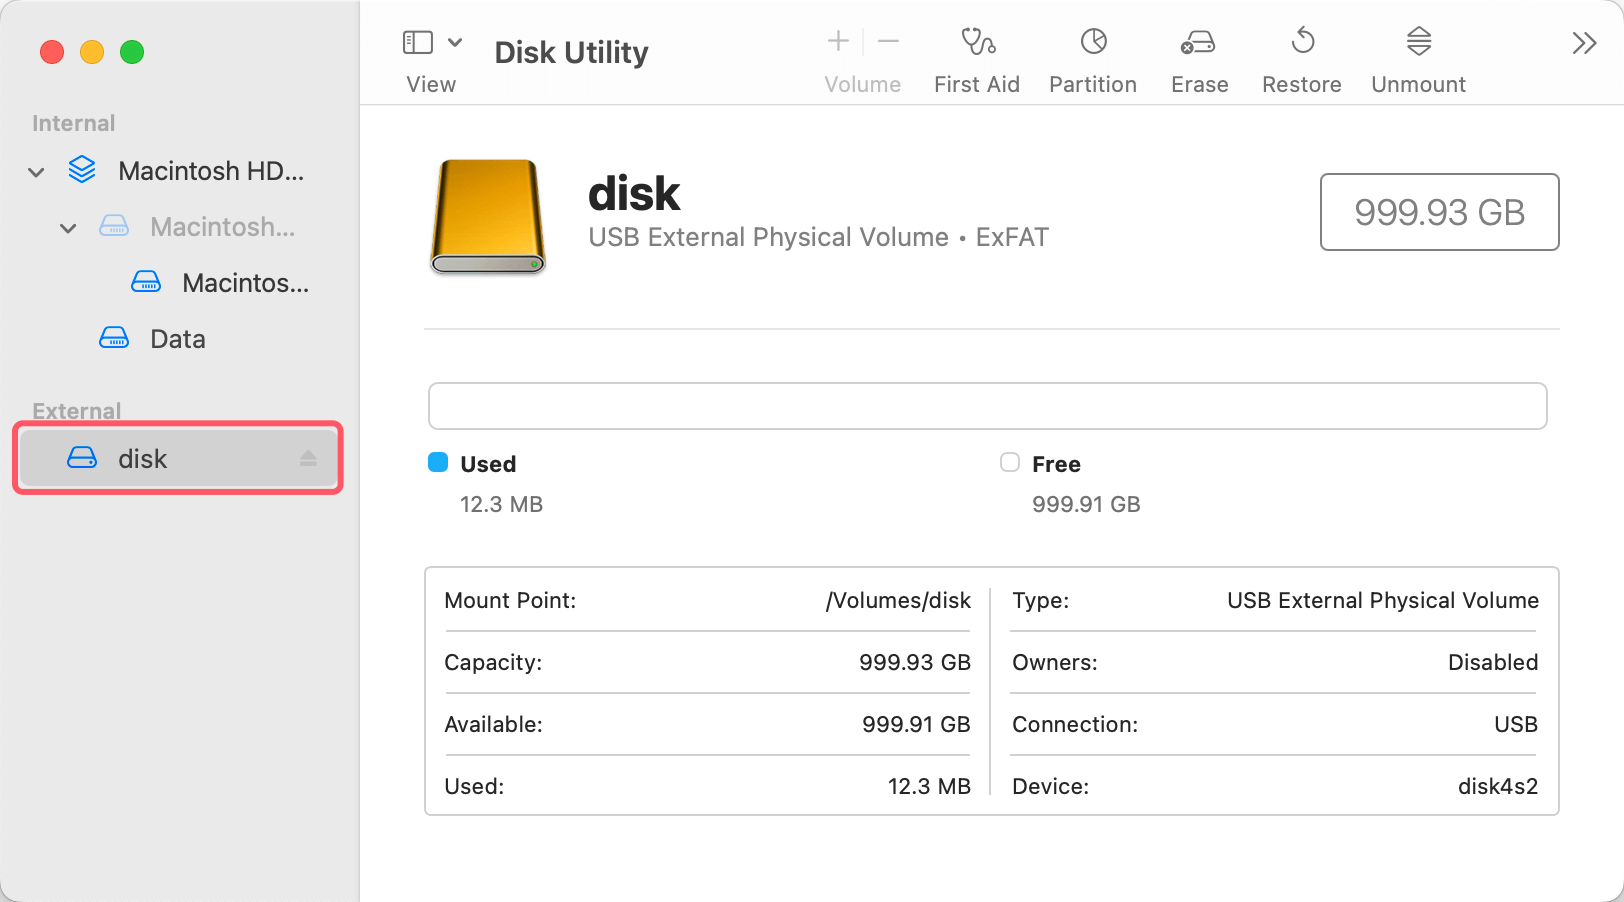
- Go to Launchpad > Other > Disk Utility, open Disk Utility.
- When you run the program, pick the disk you want to use. The disk can be an internal or external hard drive.
![pick the disk you want to use]()
- After that, go to First Aid > Run to start fixing your disk again.
![start fixing your disk again]()
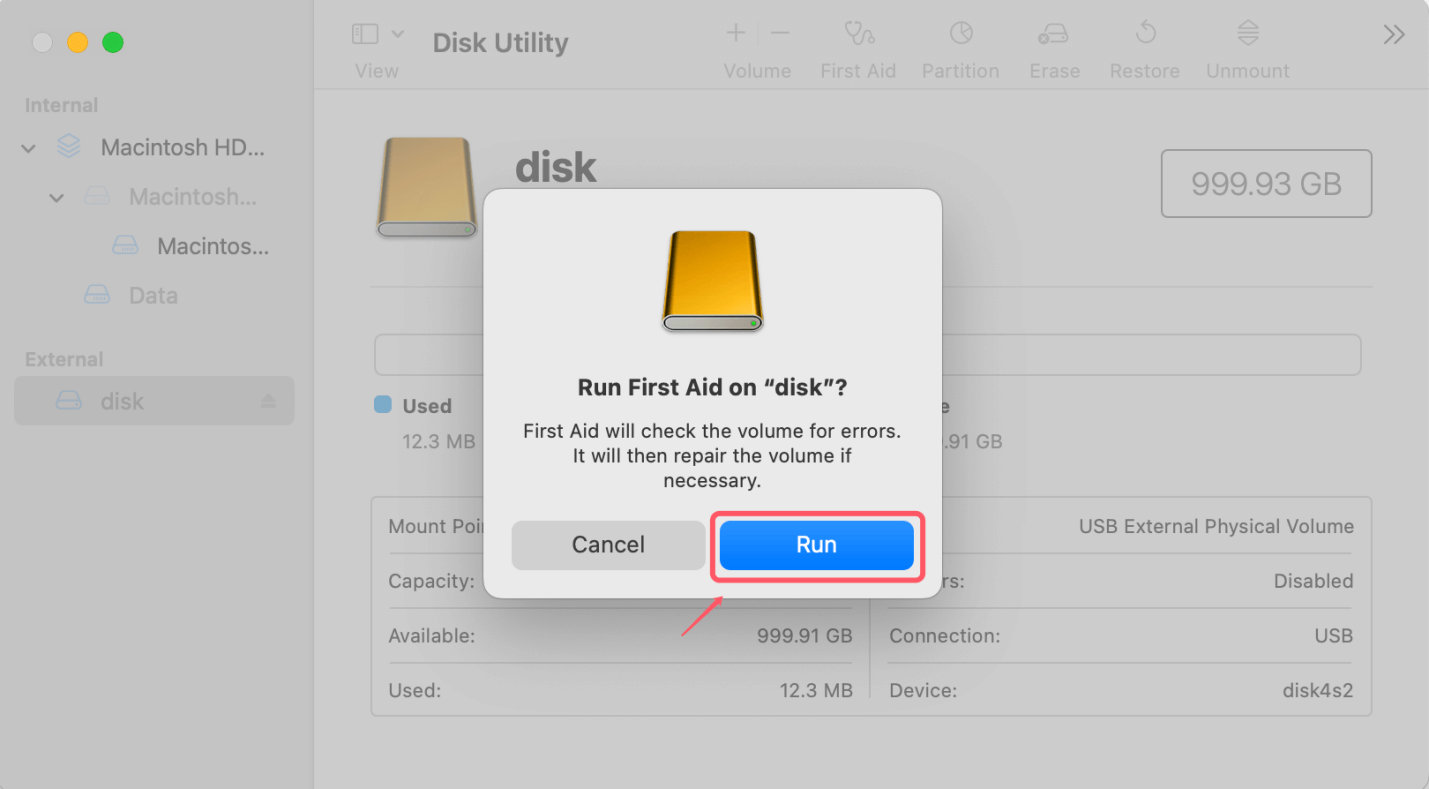
How long Disk Utility first aid takes depends on the size and quality of your hard drive.
💡2.Fix macOS Can't Repair the Disk by Unmounting and Remounting It
Apple support says Mac users can unmount a disk if they need to fix it or do other work. When you mount a disk, macOS can read details about it and give it a mount point so the system can read and write to it. If the disk isn't broken, unmounting and remounting will repeat the process and make the disk available to the operating system again.
- You can open Disk Utility from the Finder > Applicatio
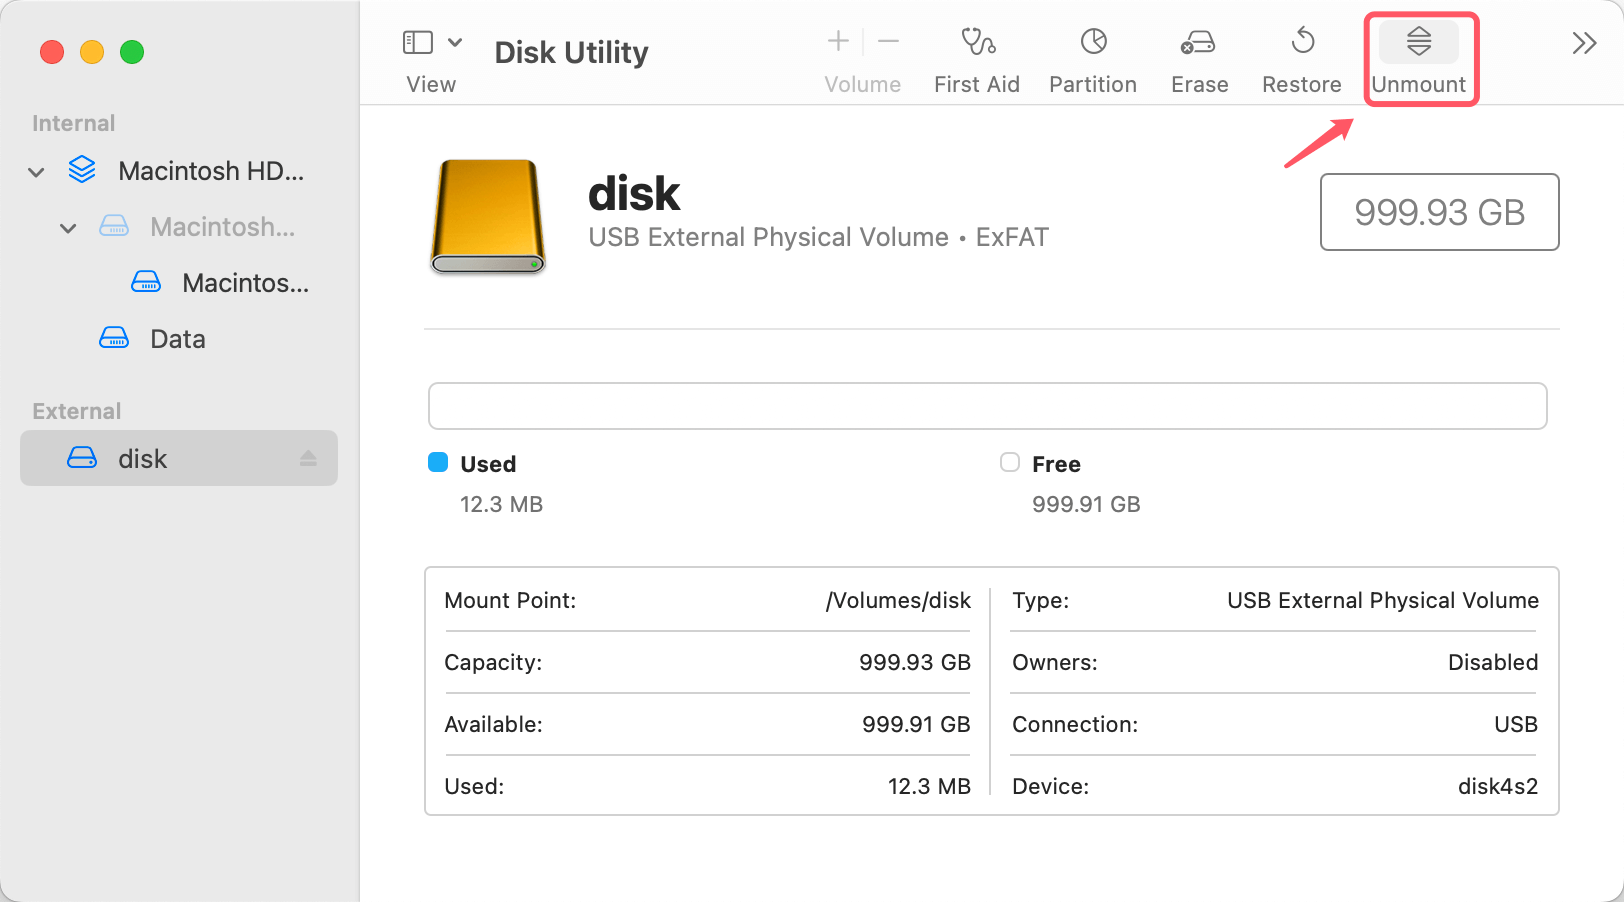
- Pick out the disk, then click "Unmount."
![Pick out the disk and click Unmount]()
- When the Mount box shows up, click it to remount the disk. You can now start fixing the disk again.
💡3.Use FSCK to Fix an External Disk in Single-user Mode
Step 1. Open up Single User mode on your Mac and restart it.
When an older Mac starts up, simultaneously hold down the Command and S keys. That will put the machine into single-user mode. If you have an Apple silicon Mac, restart it and press and hold Power button. Then go to Utilities > Terminal.
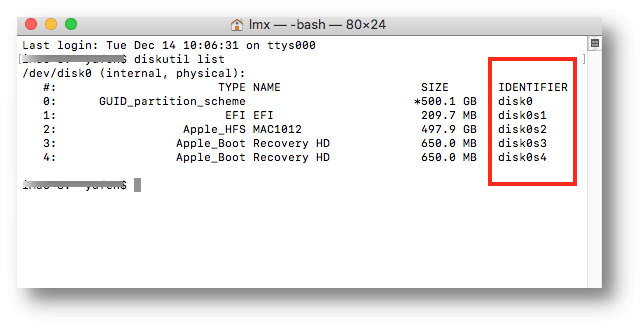
Step 2. To see all the portable hard drives connected to your Mac, type the diskutil list into the command line and press Enter.
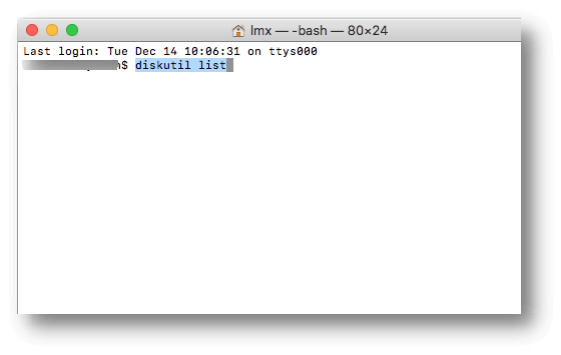
Step 3. Write down the name of the external hard drive you want to fix so you can remember it for the next step.
Step 4. Type the command line: /sbin/fsck_file system –fy /dev/drive number, for example /sbin/fsck_hfs /dev/disk0s2. Then press Enter to begin the scanning and fixing.

Step 5. Type "Reboot" and press "Enter" to turn your Mac back on.
💡4.Upgrade to the Latest System
If you look at your system information again and see if you have updated to the most recent system, you may also be able to get this problem fixed. The most recent system fixes small bugs and glitches and works better.
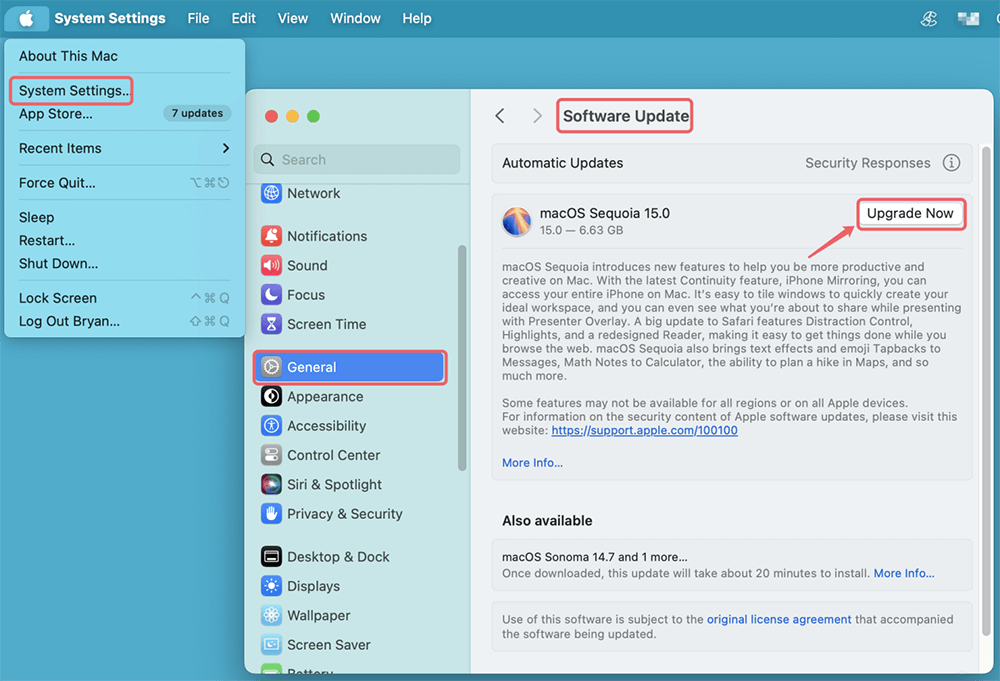
- Open the System Settings app and pick General > Software Update.
- To get the newest version, click Upgrade Now.
![Upgrade to the Latest System]()
If it still does not work, you can make a backup your data, then reinstall macOS in macOS Recovery mode.
How to Install or Reinstall macOS
Enter into macOS Recovery mode, then choose reinstall macOS or clean reinstall macOS on your Mac.
💡5.Use Third-party Software to Repair Your Disk
If Disk Utility cannot repair your disk on the Mac, you can use third-party disk management tool to help you repair or erase the disk.
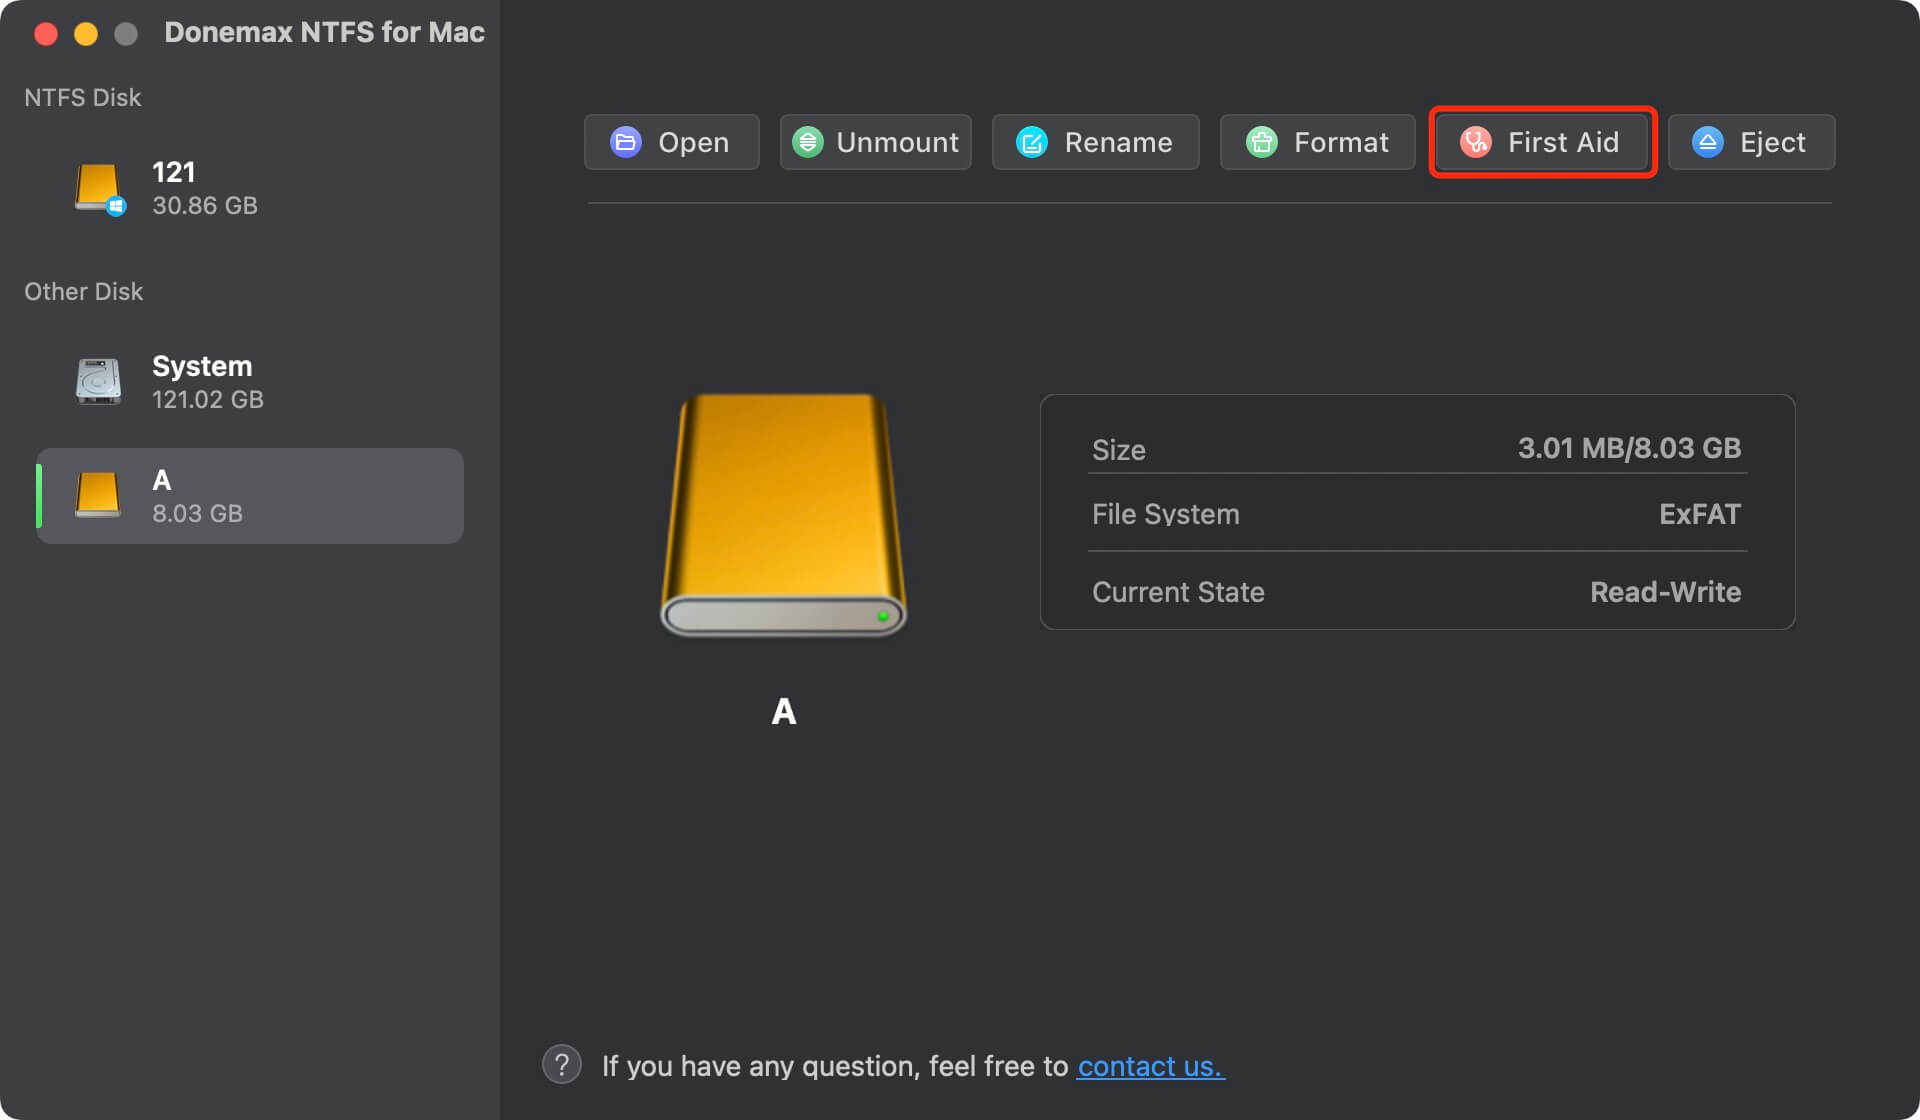
For example, Donemax NTFS for Mac can help you repair NTFS, APFS, ExFAT, FAT32, HFS/HFS+ drives on Mac.
Step 1. Download and install Donemax NTFS for Mac, then run it from Launchpad.
Step 2. Find the damaged disk, then click on First Aid button to repair the disk.
If the disk is an NTFS drive, you can click on Enable Writable button to allow your Mac to read-write the drive without any limitation.

More Mac Disk Management Tools:
- Donemax Data Recovery for Mac: Recover lost data and repair damaged disk on Mac.
- Donemax Data Eraser for Mac: Wipe hard drive, mount or unmount drive, repair damaged drive, etc.
- DMmenu for Mac: Run First Aid on a damaged drive and fix logical errors.
Preventing Future Disk Issues
If you want to avoid future disk repair problems, do these things:
- 1. Regular Backups: A strong backup plan is the best way to keep your info safe. Back up your important files regularly to a portable drive or the cloud. You might want to use Time Machine to back up your Mac automatically.
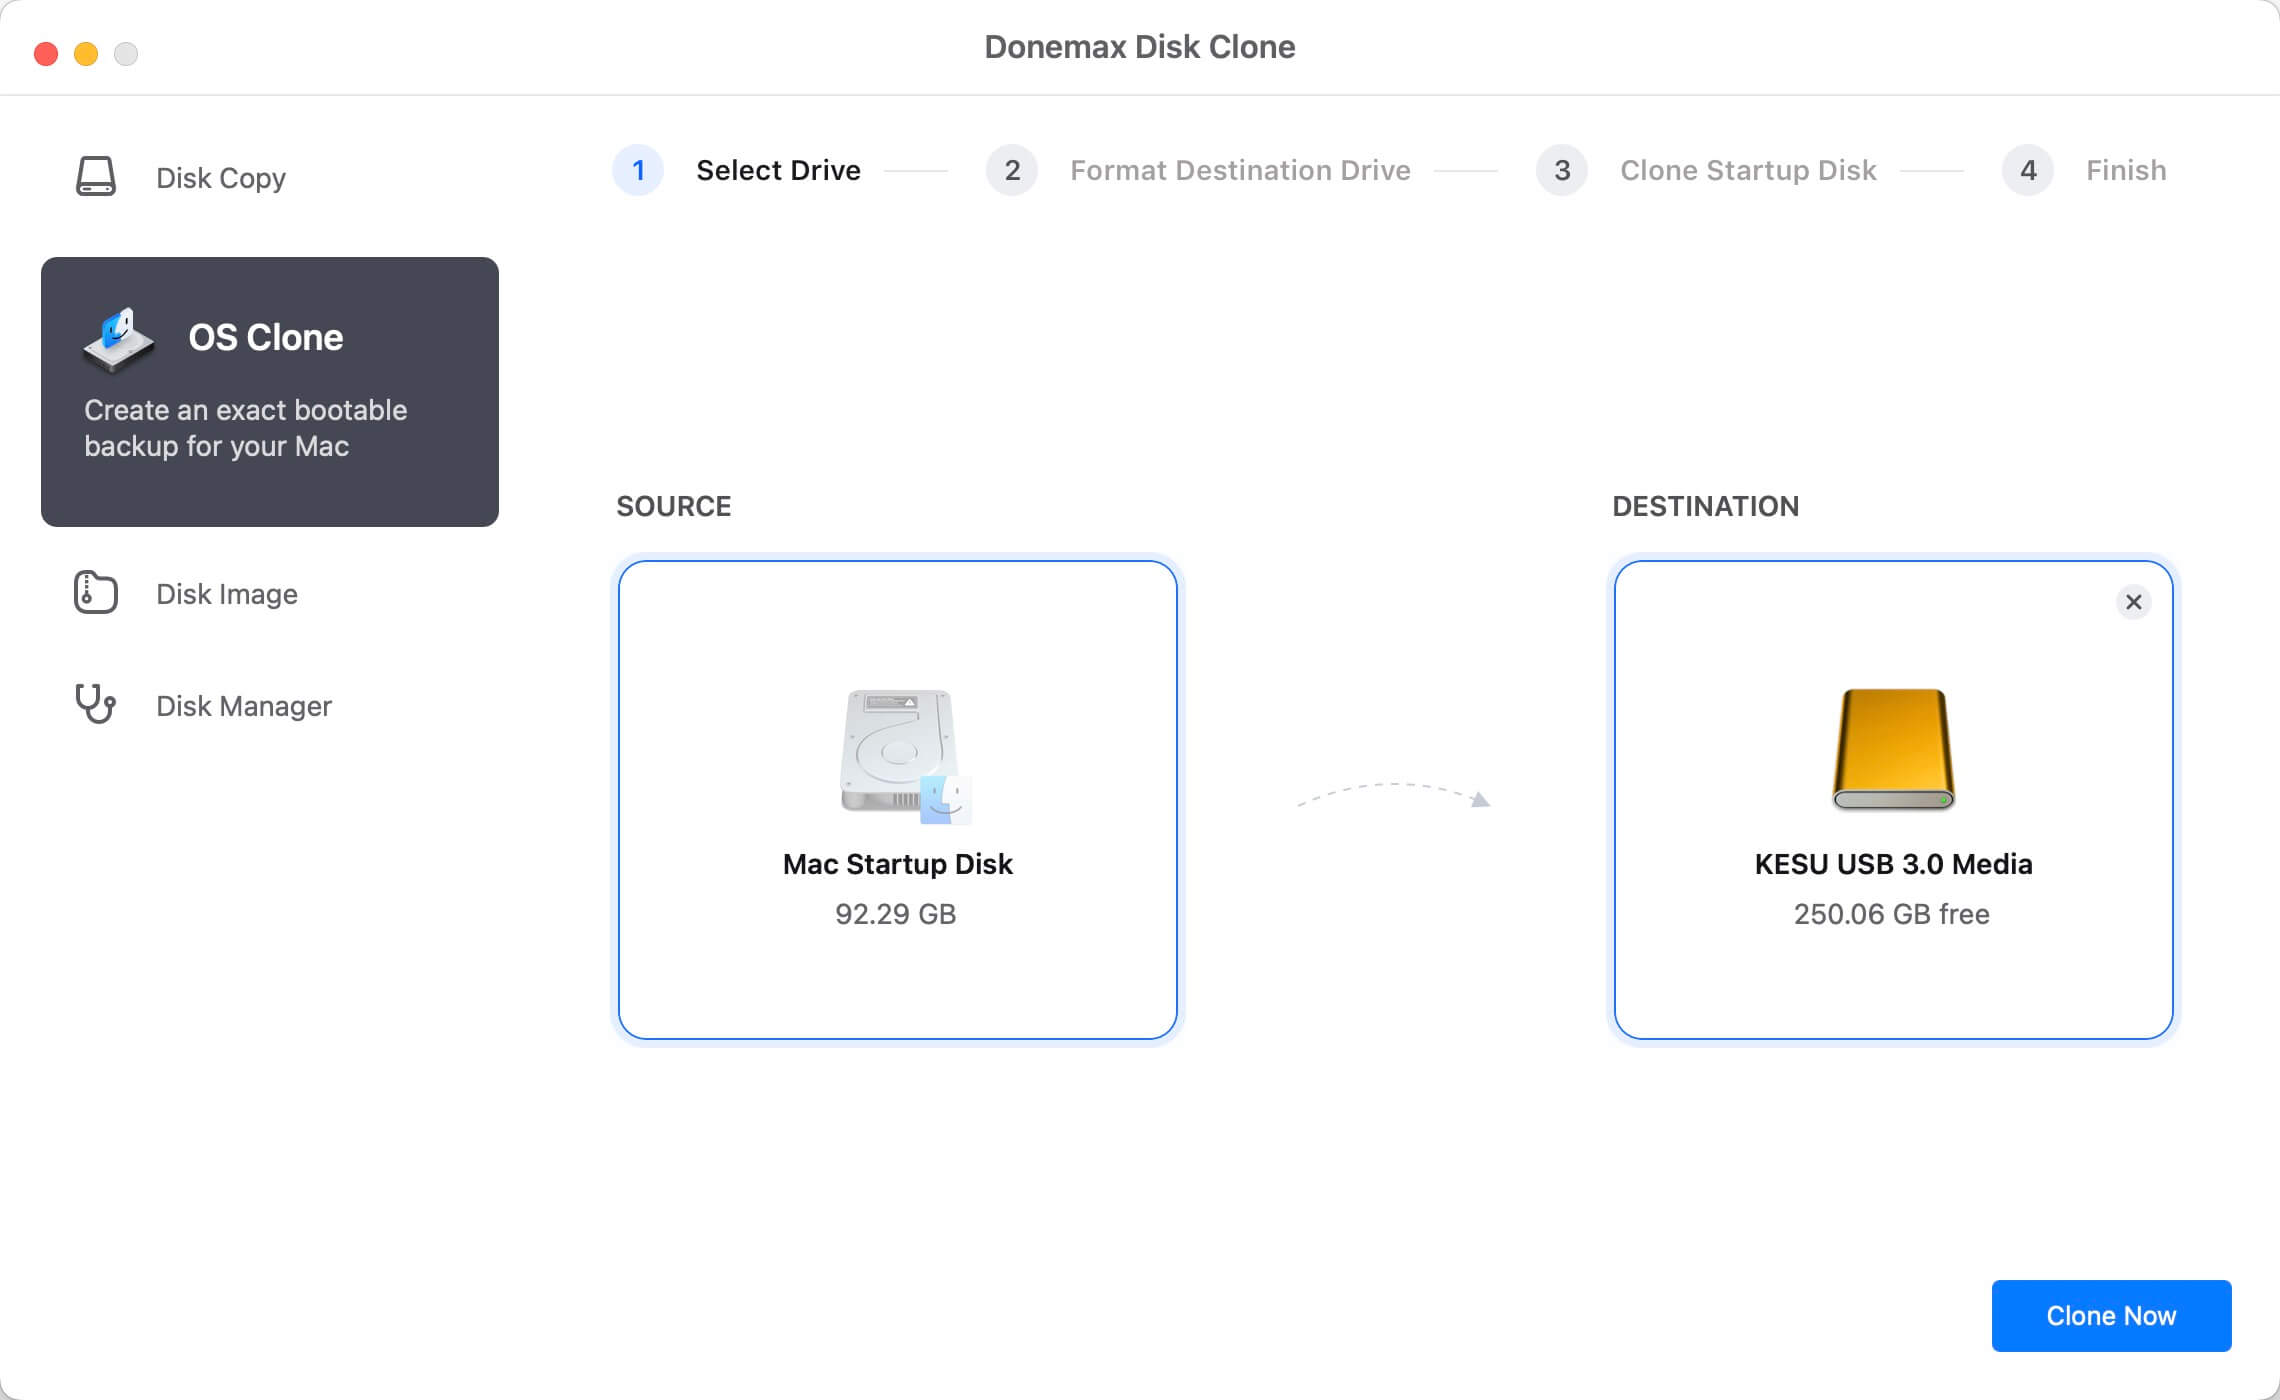
Disk cloning software, such as Donemax Disk Clone for Mac can help you create a bootable clone backup for your Mac.
- 2. Monitor Disk Health: Disk Utility and System Information are tools that can help you determine how healthy your disk is. Check these periodically for any signs that something is wrong.
- 3. Avoid Force Shutdowns: Forcefully shutting down your Mac can damage your files, so always shut it down correctly.
- 4. Keep Software Updated: Don't hold on to old gear forever. Consider getting new ones if you're about to run out of storage space.
- 5. Use Disk Utility Regularly: Use Disk Utility's "First Aid" feature to find and fix small disk problems before they get worse.
- 6. Safe Eject: Always use the "Eject" function to avoid damage before taking out an external drive.
Conclusion:
People get angry when Disk Utility fails to fix a disk, but there are things you can do that will work. This guide covers everything you need to know to correct the problem and keep your data safe, from basic repair to advanced solutions, disk cloning, and data recovery.
Regular maintenance and precautions (making backups and checking the health of your disks) can help prevent problems from happening in the future. To keep your Mac's disks healthy and your data safe, you should know what Disk Utility can't do and how to fix problems during repairs. With these tips, you can easily handle and fix disk problems.
Related Articles
- Jul 13, 2024How to Repair An External Hard Drive on Mac?
- Jan 12, 2025How to Bypass Trash When Deleting Files on Mac?
- Jan 17, 2025Force Delete Files on Mac: A Complete Guide
- Nov 18, 2024How to Restart and Force Restart Mac?
- Feb 22, 2025Memory Card Not Working on Mac? Fix It Without Losing Data
- Mar 21, 2025Run Wireless Diagnostics on Mac: A Complete Guide

Contributing Writer
Steven
Steven has been a senior writer & editor of Donemax software since 2020. He's a super nerd and can't imagine the life without a computer. Over 6 years of experience of writing technical solutions and software tesing, he is passionate about providing solutions and tips for Windows and Mac users.

Editor in chief
Gerhard Chou
In order to effectively solve the problems for our customers, every article and troubleshooting solution published on our website has been strictly tested and practiced. Our editors love researching and using computers and testing software, and are willing to help computer users with their problems