Before we start: Can't find your files on Mac desktop? Can't restore the missing files from trash? You can use Mac data recovery software - such as Donemax Data Recovery for Mac to help you recover the deleted or missing files from Mac desktop.
PAGE CONTENT:
If you've ever stared at your Mac desktop in confusion, wondering where all your files have disappeared to, you're not alone. The sudden disappearance of files can be unsettling, especially if they contain important documents, cherished photos, or critical work materials. Fortunately, this issue is usually solvable with the right approach. In this article, we'll explore why files vanish from Mac desktops, how to recover them, and steps you can take to prevent this situation in the future.
Why Do Files Disappear from the Desktop?
Understanding the root cause of the problem is the first step toward resolving it. Here are the most common reasons files might go missing from your Mac desktop:
- System Glitches
macOS is a robust operating system, but no software is immune to bugs or glitches. Minor issues during an update or system crash can cause files to appear missing, even if they’re still stored on the drive.
- Accidental User Actions
It's surprisingly easy to accidentally move, delete, or hide files without realizing it. A quick drag-and-drop into the wrong folder or an accidental keyboard shortcut could make it seem like your files have vanished.
- View Preferences Changes
macOS allows users to customize how files are displayed in Finder and on the desktop. If the "Show Desktop" option is disabled or view preferences are altered, files may seem to disappear even though they’re still accessible.
- Cloud Syncing Issues
If you use iCloud Drive, your desktop files might have been moved to the cloud. While this feature is designed to save space and enhance accessibility, it can lead to confusion if files are synced but not visible locally.
Preliminary Checks to Find Missing Files on Mac Desktop
Before diving into advanced recovery methods, it's a good idea to try these simple steps. Often, the solution is right under your nose.
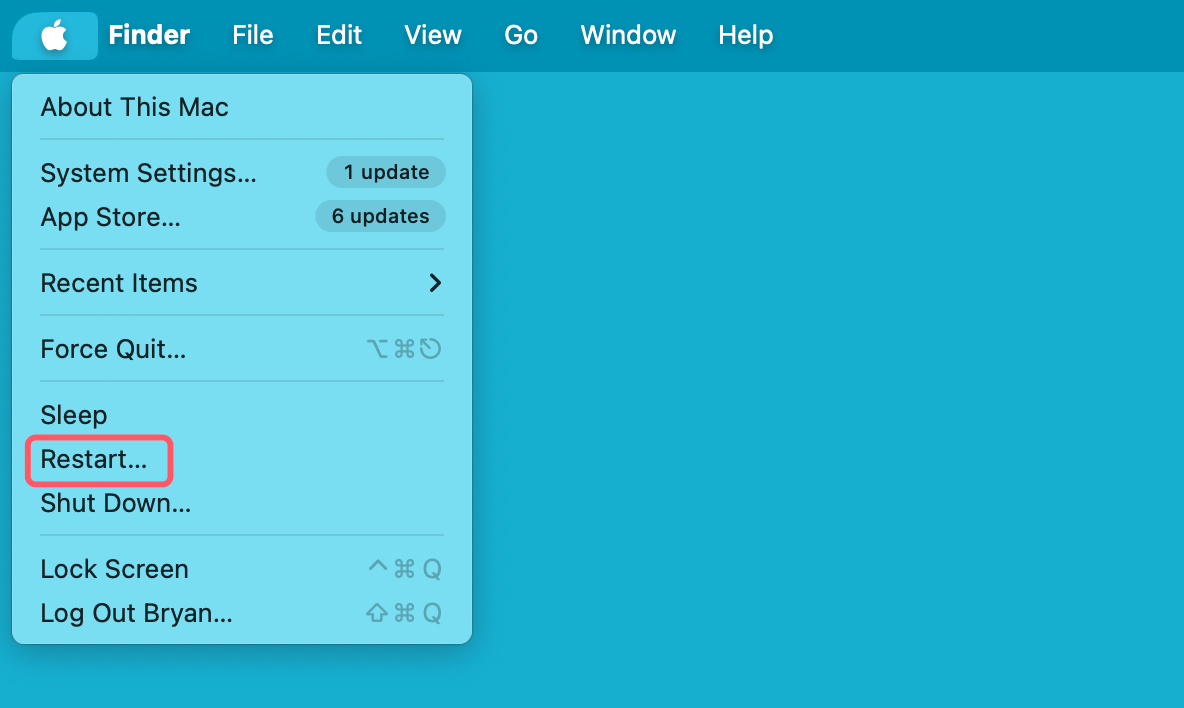
- Restart Your Mac
Restarting your Mac can resolve temporary system glitches. Close all applications, reboot your device, and check if the files reappear on your desktop. This quick step often works wonders.
![Best 4 Methods to Recover Missing Files from Mac Desktop]()
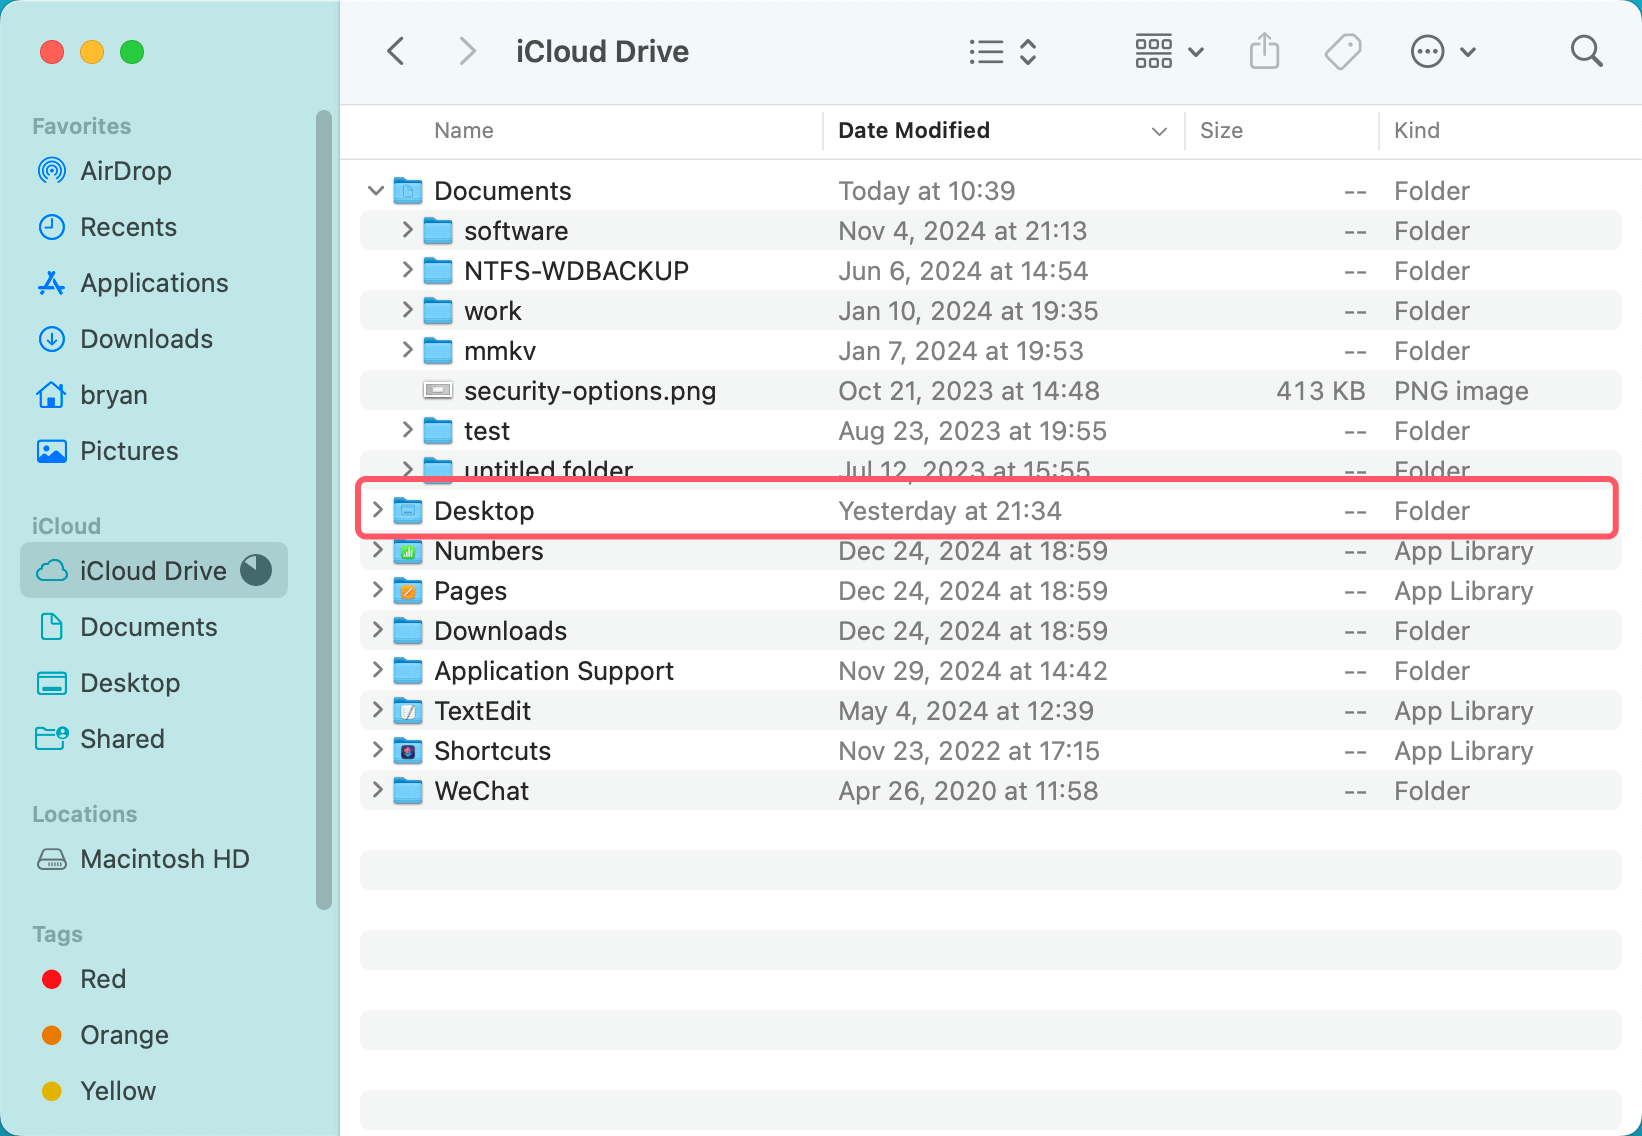
- Check iCloud Drive
If you've enabled iCloud Desktop and Documents syncing, your files might be stored in the cloud.
- Open Finder.
- Navigate to the iCloud Drive section in the sidebar.
- Look for a folder named Desktop and check if your missing files are there.
![Best 4 Methods to Recover Missing Files from Mac Desktop]()
- Search with Spotlight
Spotlight, macOS's powerful search tool, can help you locate missing files:
- Press Command + Spacebar to open Spotlight.
- Type the name of your file or use keywords related to its content.
![Best 4 Methods to Recover Missing Files from Mac Desktop]()
- If the file appears in the search results, right-click it and select Show in Finder to see its location.
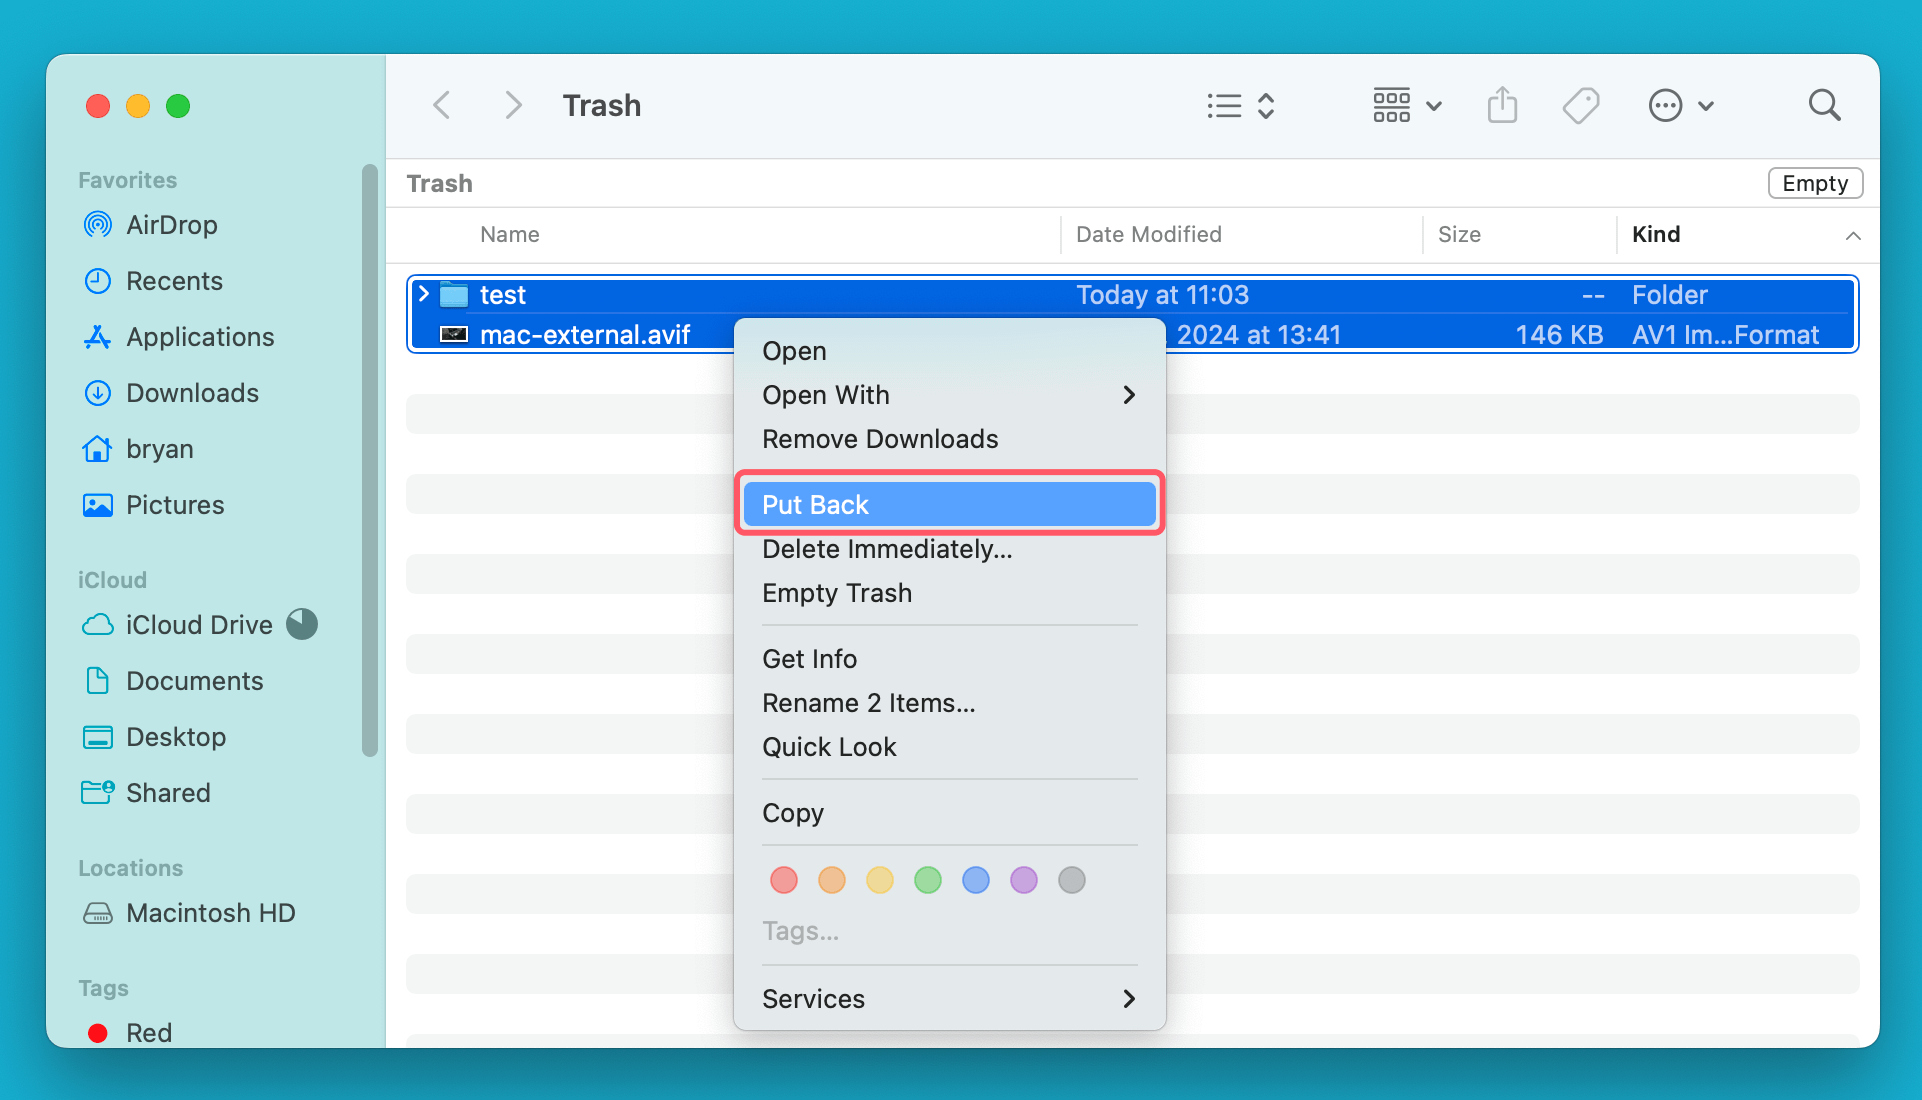
- Inspect the Trash
Accidentally deleted files might be sitting in the Trash folder:
- Click the Trash icon in your dock.
- Browse through the contents for your missing files.
- If you find them, right-click and select Put Back to restore them to their original location.
![Best 4 Methods to Recover Missing Files from Mac Desktop]()
4 Methods to Recover Missing Files on Mac Desktop
If the preliminary checks don't yield results, it’s time to dig deeper into recovery methods.
Method 1. Show Hidden Files
Sometimes, files become hidden due to system settings or accidental changes:
- Open Finder and navigate to your desktop folder.
- Press Command + Shift + Period (.) to toggle the visibility of hidden files.
- If your files appear, drag them back to their original location.
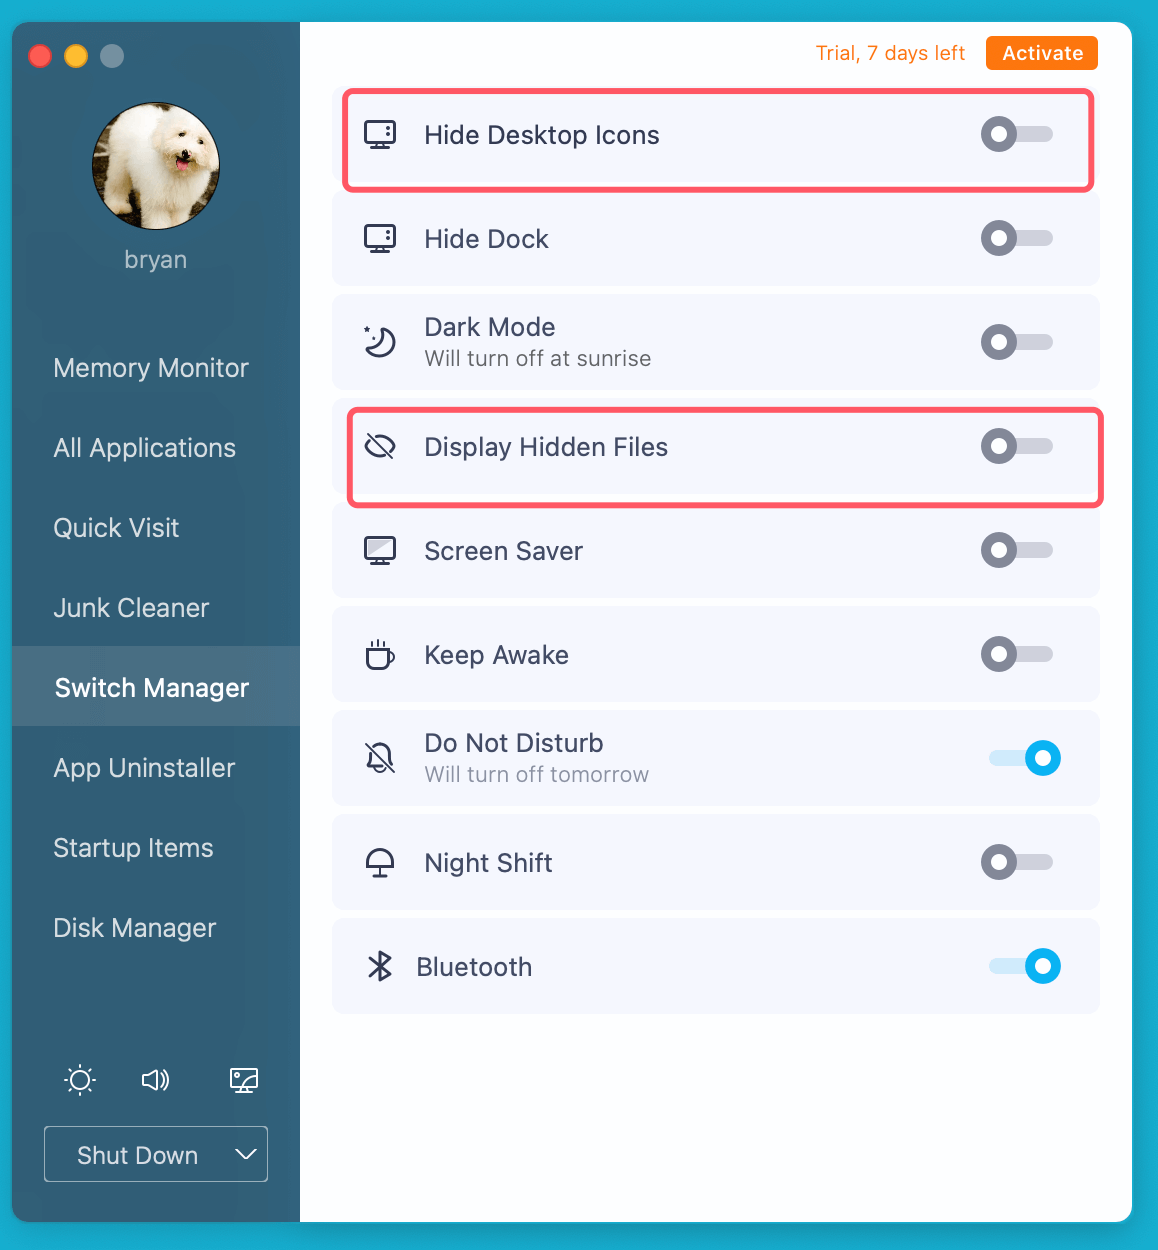
You also can use DMmenu for Mac to show desktop items and hidden files on Mac.
Method 2. Restore from Time Machine
Time Machine is one of macOS's most valuable features, offering an intuitive and reliable way to back up and restore files. If you've set up Time Machine prior to losing your desktop files, this tool can be a lifesaver. Here's a step-by-step guide to recovering your missing files with Time Machine, along with some tips to maximize its utility.
What is Time Machine?
Time Machine is macOS's built-in backup software that automatically saves versions of your files, system settings, and applications to an external drive or Time Capsule. It's designed to allow users to "go back in time" and restore their Mac to a specific point, making it ideal for recovering lost files.
Preparing to Restore Files
Before diving into recovery, ensure you've connected the external drive you use for Time Machine backups to your Mac. If you're using a wireless Time Capsule or networked drive, confirm that your Mac is connected to the same network.
Step-by-Step Restoration Guide
Step 1. Open Finder and Locate the Desktop Folder
- Start by opening Finder and navigating to the Desktop folder.
- This ensures you're focused on the directory where the missing files were last located.
Step 2. Launch Time Machine
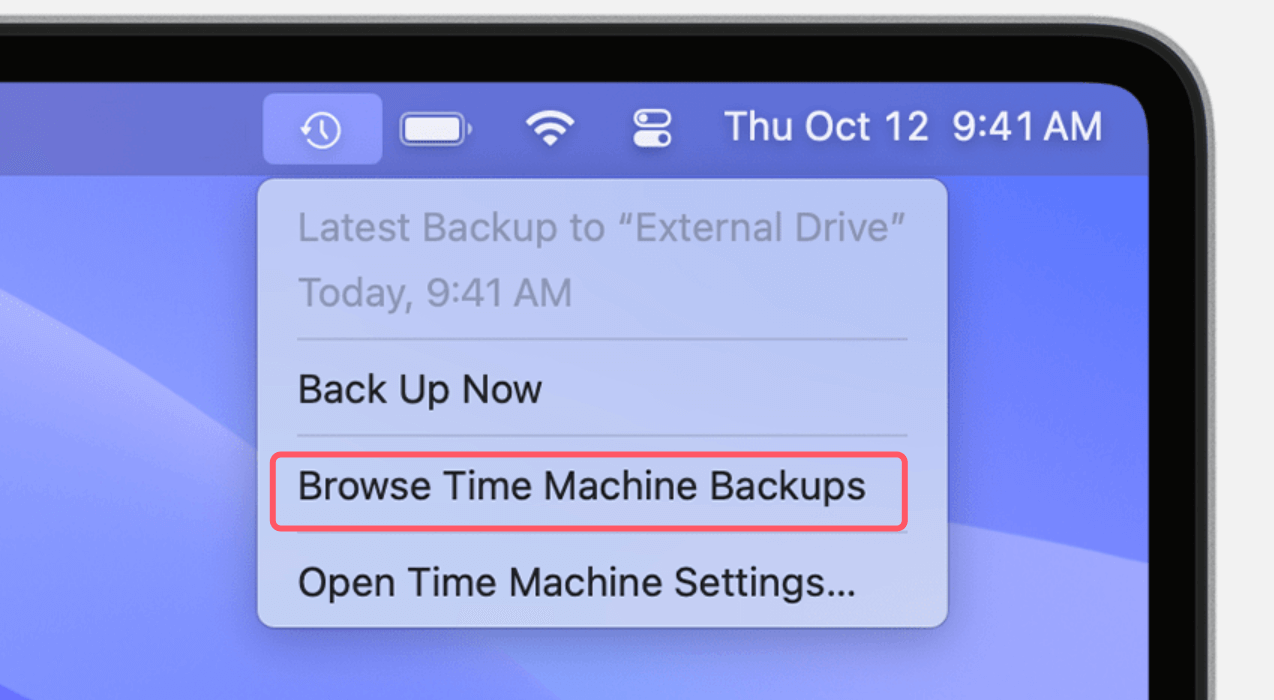
- Click the Time Machine icon in the menu bar (it looks like a clock with a circular arrow).
- If the icon isn't visible, go to System Settings > General > Time Machine.
- Select Browser Time Machine Backups to access the interface.
![Best 4 Methods to Recover Missing Files from Mac Desktop]()
Step 3. Navigate Through Backups
- In the Time Machine window, you'll see a timeline on the right side of the screen. This represents different backup points.
- Use the arrows or the timeline to navigate to a date and time when you know the missing files were still present.
Step 4. Search and Select Missing Files
- Browse through the Desktop folder in the Time Machine interface. You can use the Finder search bar to look for specific files if necessary.
- Once you locate the missing files, select them by clicking on their icons.
Step 5. Restore Files
With the desired files selected, click the Restore button at the bottom of the Time Machine interface.
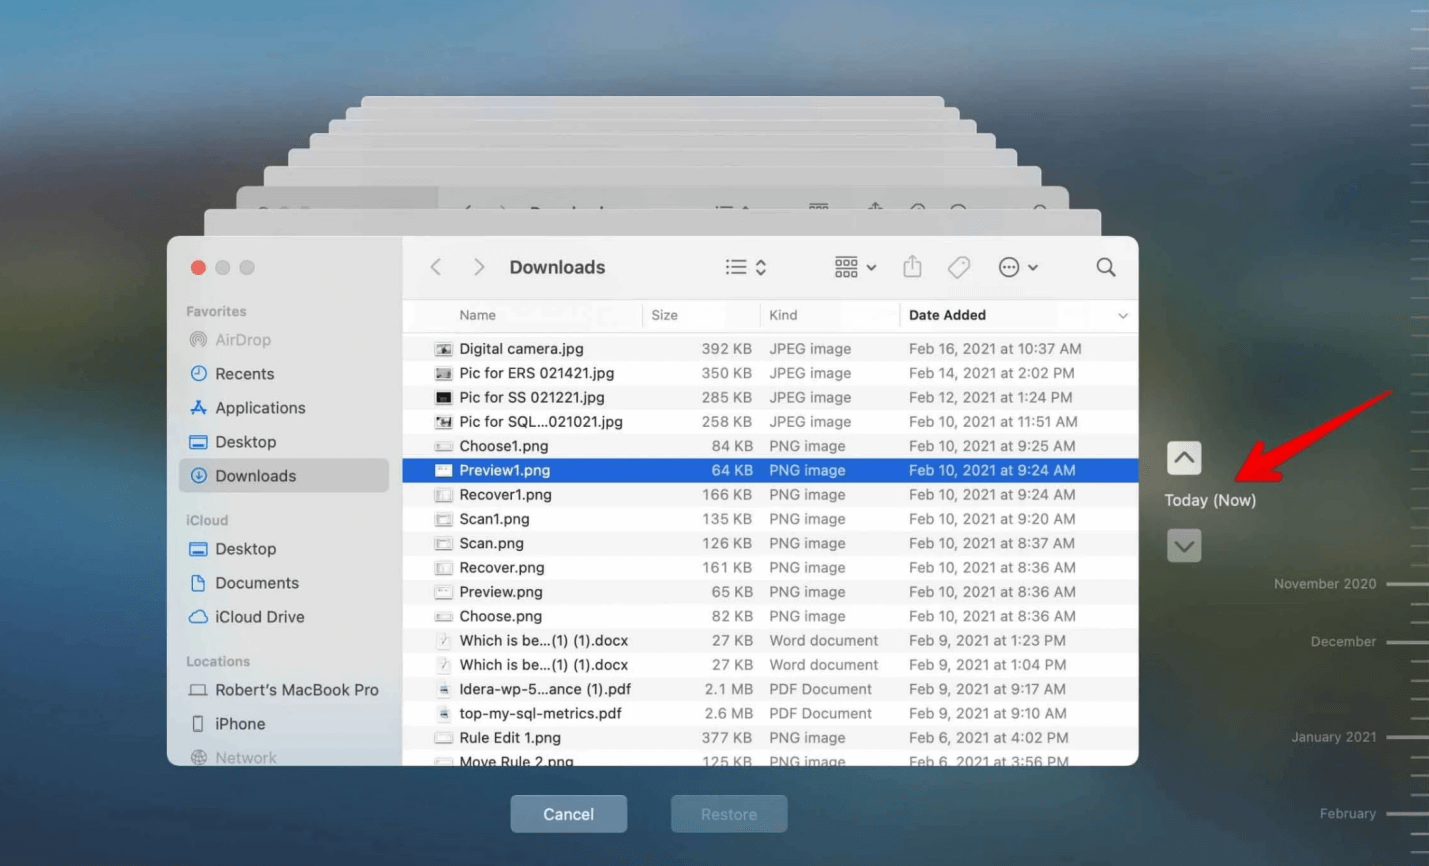
The files will be returned to their original location on your desktop.
Additional Tips for Using Time Machine
- Set Up Regular Backups
If you haven't already enabled Time Machine, now is a good time to start.
- Connect an external drive to your Mac.
- Open System Settings > General > Time Machine and select Add Backup Disk.
- Choose the drive and enable Time Machine. macOS will handle backups automatically moving forward.
- Verify Backup Status
To ensure your files are consistently backed up, periodically check the status of Time Machine:
- Open System Settings > General > Time Machine to view the date and time of the last successful backup.
- If backups are failing, troubleshoot by verifying the connection to your external drive or network.
- Recover Entire Folders or Systems
Time Machine isn't just for individual files - it can restore entire folders or even your entire Mac system. This feature is particularly useful if a major issue, like a system crash, causes widespread file loss.
What If You Don't Have Time Machine Backups?
If you didn't set up Time Machine before losing your files, this method won't help. However, this serves as a reminder of the importance of regular backups. Consider enabling Time Machine now to protect against future data loss.
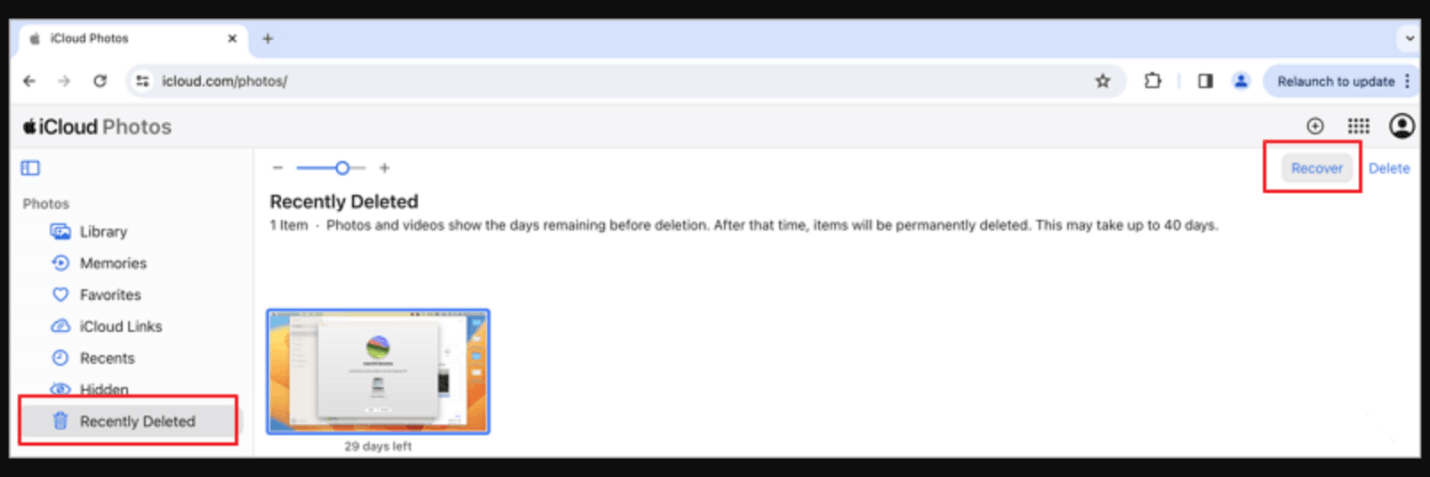
Method 3. Recover Files from iCloud.com
If your files were synced to iCloud but aren't visible on your Mac, you can recover them online:
- Visit iCloud.com and log in with your Apple ID.
- Click on iCloud Drive and open the Desktop folder.
- Download the missing files to your Mac.
![Best 4 Methods to Recover Missing Files from Mac Desktop]()
Method 4. Use Third-Party Recovery Software
When all else fails, third-party tools can help recover lost files:
Step 1. Download and install Donemax Data Recovery for Mac.
Step 2. Open Donemax Data Recovery for Mac, select the Mac disk (Macintosh HD) to start data recovery.

Step 3. Click on Scan button to deeply scan the disk and find all recoverable files including missing desktop files.

Step 4. Once the scan is completed, you can preview all recoverable files. Then select the wanted files, click on Recover button to save them.
When to Seek Professional Help
If your files are still missing after exhausting the above methods, it may be time to consult a professional.
- Persistent File Loss Issues
If the issue recurs frequently or involves critical data, a deeper problem might be at play. This could include hardware failure or corrupted file systems.
- Data Recovery Services
Professional data recovery services specialize in retrieving lost data from damaged drives. While these services can be expensive, they're often the best option for recovering important files. Be sure to choose a reputable provider with positive reviews.
Preventing Future File Loss
While recovering lost files is possible, prevention is always better than cure. Here are some strategies to safeguard your desktop files:
- Regular Backups
Backing up your data ensures you can recover files quickly in the event of loss:
- Use Time Machine to create regular backups of your entire system.
- Consider external drives or cloud-based backup solutions like Backblaze or Dropbox.
- Organize Desktop Files
Keeping your desktop tidy can help prevent accidental deletion or misplacement:
- Create folders to group related files.
- Use descriptive names for files and folders to make them easier to locate.
- Enable iCloud Sync
iCloud Drive can keep your desktop and documents synchronized across devices:
- Go to System Settings > Apple ID > iCloud.
- Check the box for Desktop & Documents Folders.
- Ensure you have enough iCloud storage to accommodate your files.
- System Maintenance
Keeping your macOS updated and maintaining sufficient disk space can prevent glitches:
- Install macOS updates promptly to benefit from bug fixes and new features.
- Regularly clean up unnecessary files to avoid storage issues.
Conclusion
The sudden disappearance of files from your Mac desktop can feel overwhelming, but with the steps outlined in this article, you're well-equipped to recover them. From simple fixes like restarting your Mac to advanced recovery methods like using Time Machine or third-party tools, there's a solution for every scenario.
To avoid future file loss, invest time in organizing your desktop, enabling regular backups, and maintaining your system. Remember, technology can be unpredictable, but a proactive approach can save you from many headaches down the line.
If you've experienced this issue, share your story in the comments below. What worked for you? Let's help each other navigate the sometimes tricky waters of file recovery!


Donemax Data Recovery for Mac
Donemax Data Recovery for Mac is one of the best Mac data recovery software. It is easy-to-use and can help in recovering deleted, formatted, inaccessible or lost data from Mac HDD/SSD, external disk, USB drive, SD card, camera or other storage devices.
Related Articles
- Jun 16, 2023How to Recover Lost Data from An Formatted APFS Hard Drive?
- Feb 11, 20252025 Guide: Top 4 Methods to Recover Lost Data from SD Card on Mac
- Oct 31, 2023Recover Lost Data from A Dead or Crashed Mac
- Mar 26, 2025How to Recover Replaced Files or Folders on Mac?
- Dec 02, 2024Can't Find Deleted Files in Trash on Mac: How to Recover Them
- Mar 21, 2025Recover Deleted/Erased or Lost AutoCAD's DWG Files on Mac

Maria
Maria is one of the senior writers & editors of Donemax who lives and works in Sydney, Australia. She loves PC, Mac and Internet Technology. She has 6 years of writing articles about data recovery on PC/Mac, disk cloning solution, data eraser and computer OS optimization, etc. She is also interested in testing various software and digital products.

Gerhard Chou
In order to effectively solve the problems for our customers, every article and troubleshooting solution published on our website has been strictly tested and practiced. Our editors love researching and using computers and testing software, and are willing to help computer users with their problems
