PAGE CONTENT:
As macOS evolves, so does the technology behind its file systems. The shift from HFS+ (Mac OS Extended) to APFS (Apple File System) represents a significant upgrade in performance, security, and overall efficiency, especially for SSDs. If you're still using HFS+ and wondering whether to make the switch, this guide provides all the information you need, including step-by-step instructions for conversion.

Learn About HFS+ and APFS
What is HFS+?
HFS+ (Hierarchical File System Plus), also known as Mac OS Extended, was introduced in 1998 as an improvement over its predecessor, HFS. Its features include journaling for better data reliability and metadata management to improve file organization. However, HFS+ was designed for older storage systems, and its limitations become apparent with modern SSDs.
What is APFS?
APFS (Apple File System) debuted in 2017 alongside macOS High Sierra. Designed from the ground up for modern storage technologies, particularly SSDs, APFS offers several advancements:
- Faster Performance: Optimized for read/write operations.
- Space Sharing: Allows multiple volumes to share storage dynamically.
- Snapshots: Enables point-in-time backups.
- Encryption: Provides built-in data protection with multiple levels of encryption.
- Improved File Integrity: Prevents data corruption in case of power loss.
Key Differences Between HFS+ and APFS:
| Feature | HFS+ | APFS |
|---|---|---|
| Performance | Slower on SSDs | Optimized for SSDs |
| Encryption | Add-on (FileVault) | Built-in encryption |
| Snapshots | Not supported | Fully supported |
| Compatibility | Older macOS versions | macOS 10.13+ |
Converting to APFS ensures you benefit from these modern advancements, keeping your Mac future-ready.
Before Converting HFS+ to APFS on Mac
Before converting from HFS+ to APFS, take these precautions to avoid data loss or compatibility issues.
1. Check macOS Compatibility
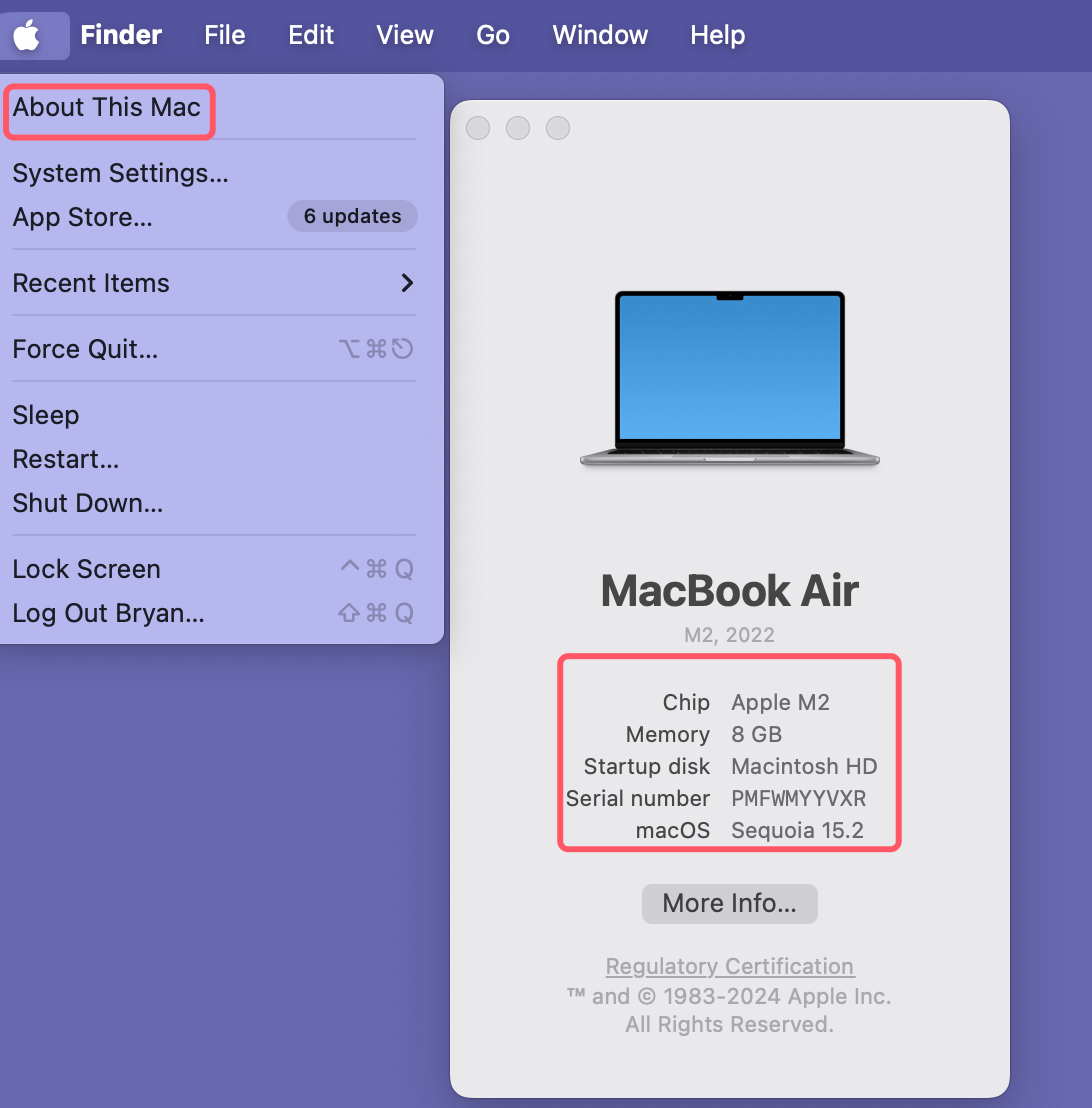
APFS is supported on macOS High Sierra (10.13) and later. Ensure your Mac runs one of these versions by clicking the Apple menu > About This Mac. If your macOS is outdated, update it via System Preferences > Software Update or System Settings > General > Software Update.
2. Backup Your Data
While the conversion process is designed to preserve your data, unexpected errors can occur. Create a complete backup of your system:
● Using Time Machine:
- Connect an external drive.
- Open Time Machine from System Preferences or System Settings > General.
- Select "Back Up Now."
● Cloud Storage or External Drives: Copy important files manually to cloud services or USB drives as an additional precaution.
● Using Disk Clone Software: clone everything from one hard drive to another drive.
3. Verify Drive Health
Ensure your drive is in good condition to avoid errors during the conversion:
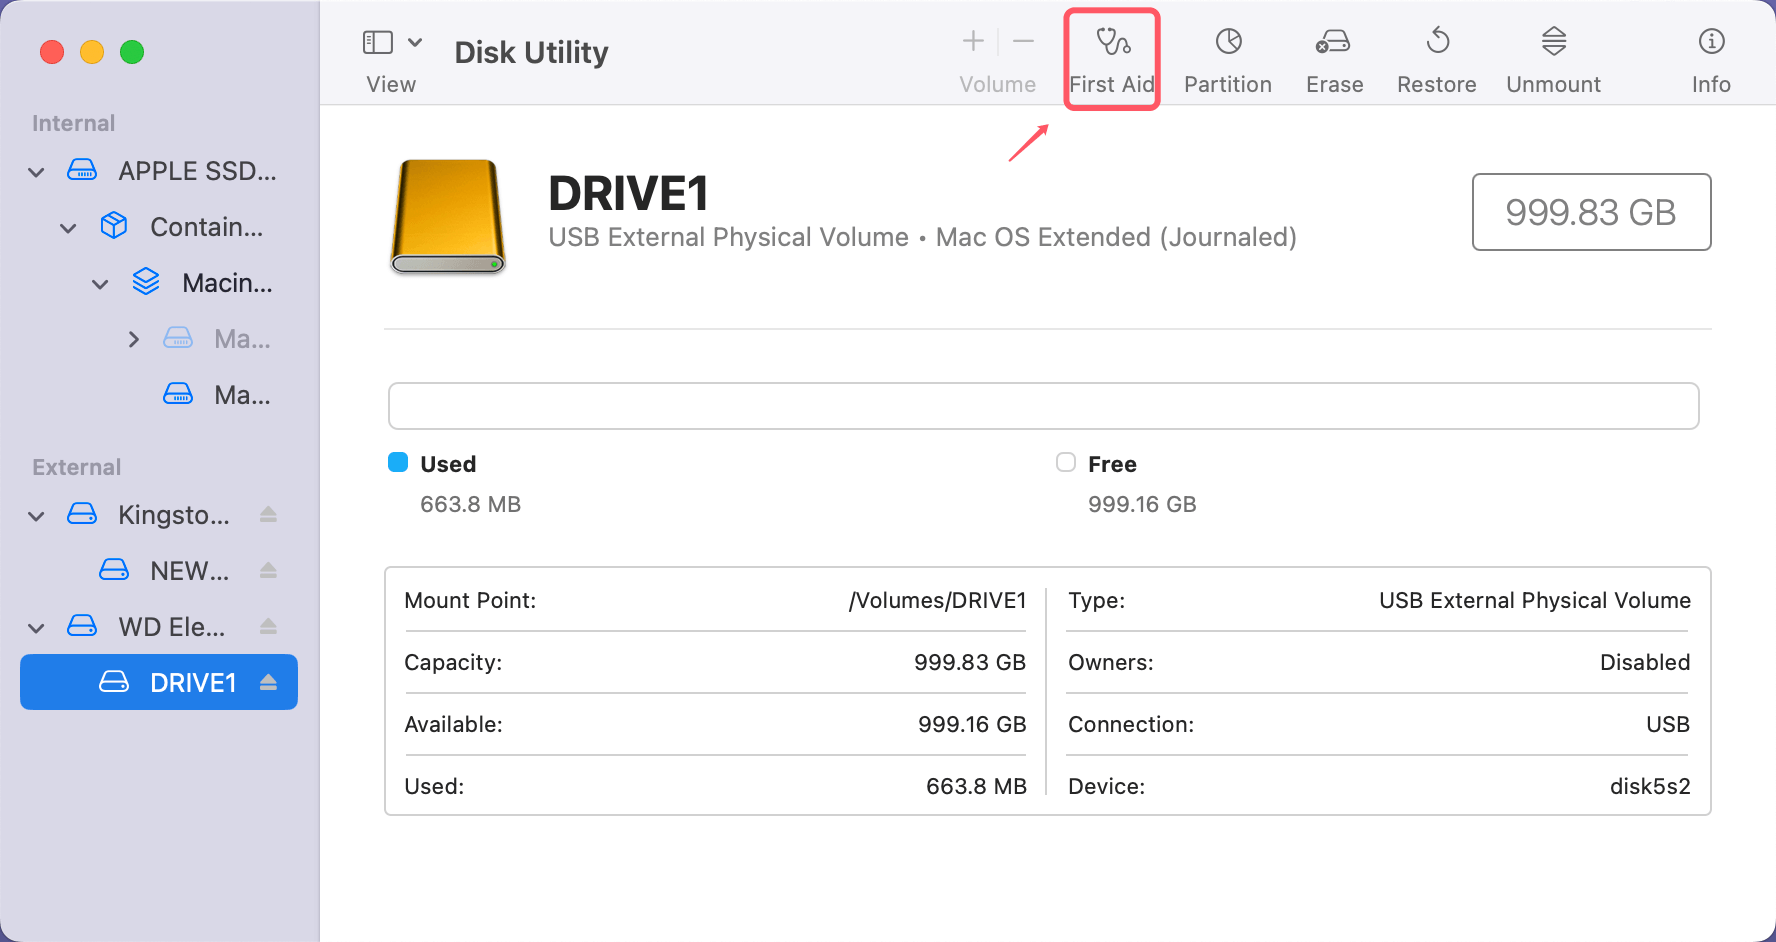
- Open Disk Utility from Utilities via Applications
- Choose the drive and click "First Aid" to check and repair errors.
![Convert HFS+ to APFS on Mac Without Losing Data]()
4. Consider Drive Type
While APFS is optimized for SSDs, it may not offer significant performance improvements on HDDs. For older Macs with traditional hard drives, weigh the benefits before proceeding.
How to Convert HFS+ to APFS on Mac?
Method 1: Using Disk Utility
It is macOS's built-in tool for managing storage drives and volumes. It provides a user-friendly interface to convert HFS+ to APFS without losing your data. Here's a detailed walkthrough:
Step 1. Access Disk Utility
- Open Finder, move to Utilities via Applications, and launch Disk Utility.
- As an alternative, utilize Spotlight by typing "Disk Utility," pressing Enter, and then pressing Command + Space.
![Convert HFS+ to APFS on Mac Without Losing Data]()
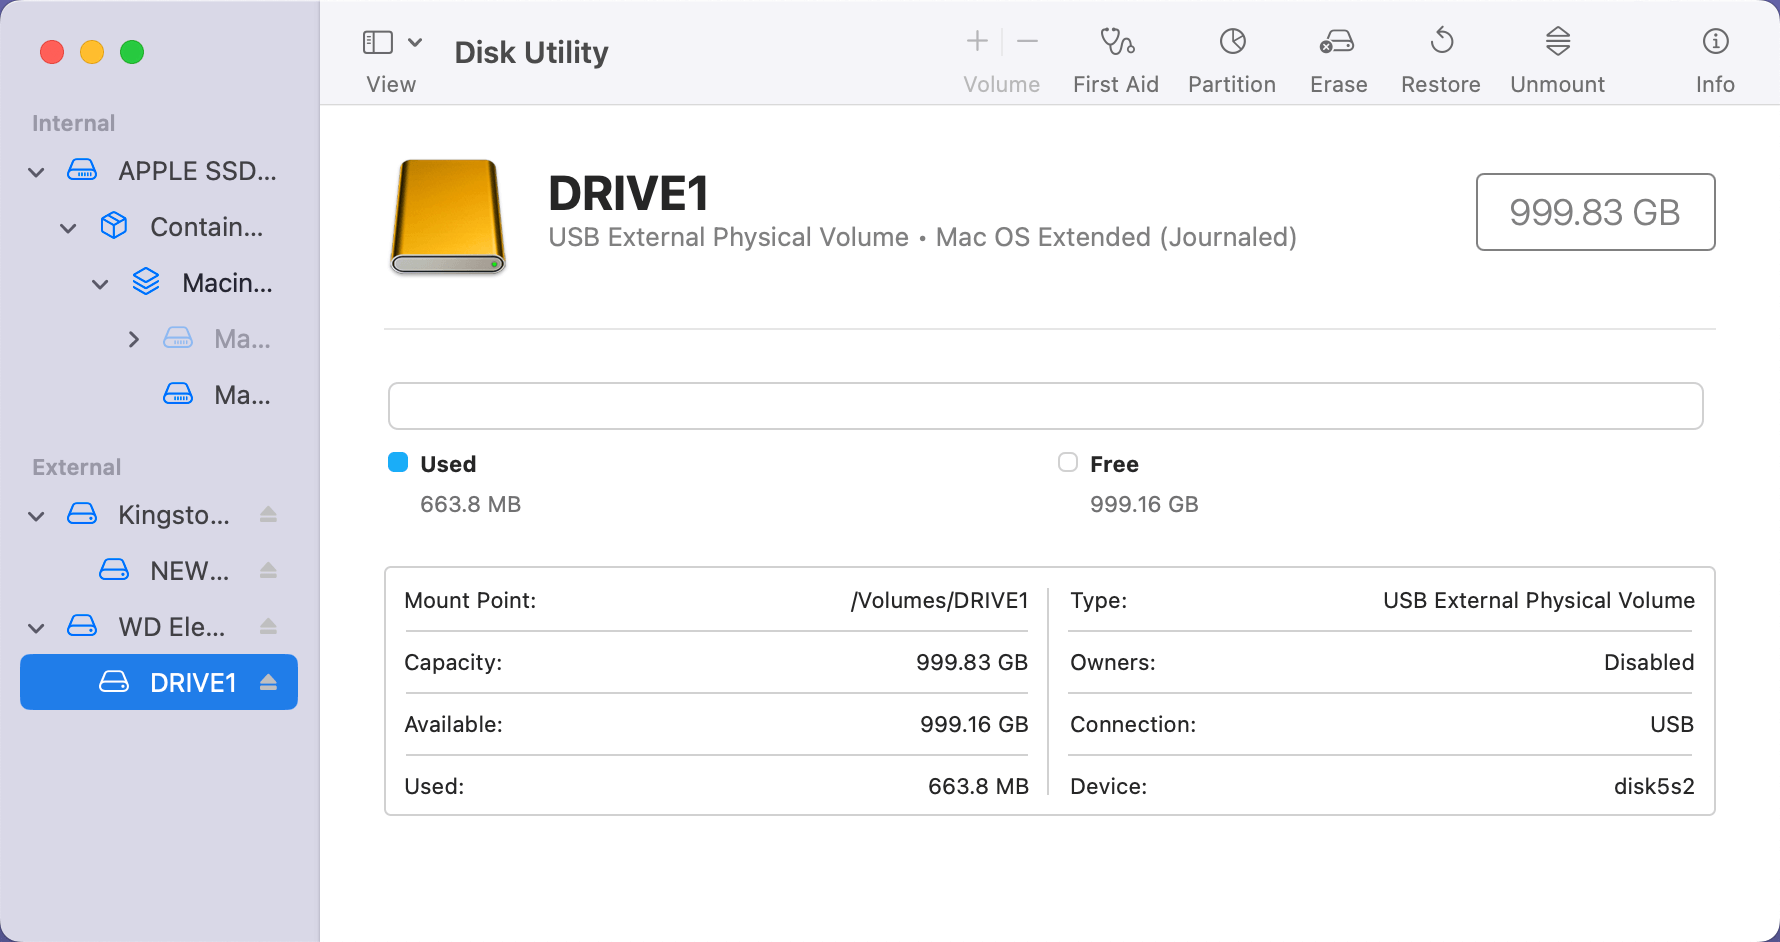
Step 2. Select the Drive or Volume
In the left-hand sidebar, locate the drive or volume formatted as HFS+ (Mac OS Extended) (e.g., Macintosh HD or External Drive). Ensure you select the correct volume to avoid unintended conversions.
Step 3. Initiate the Conversion
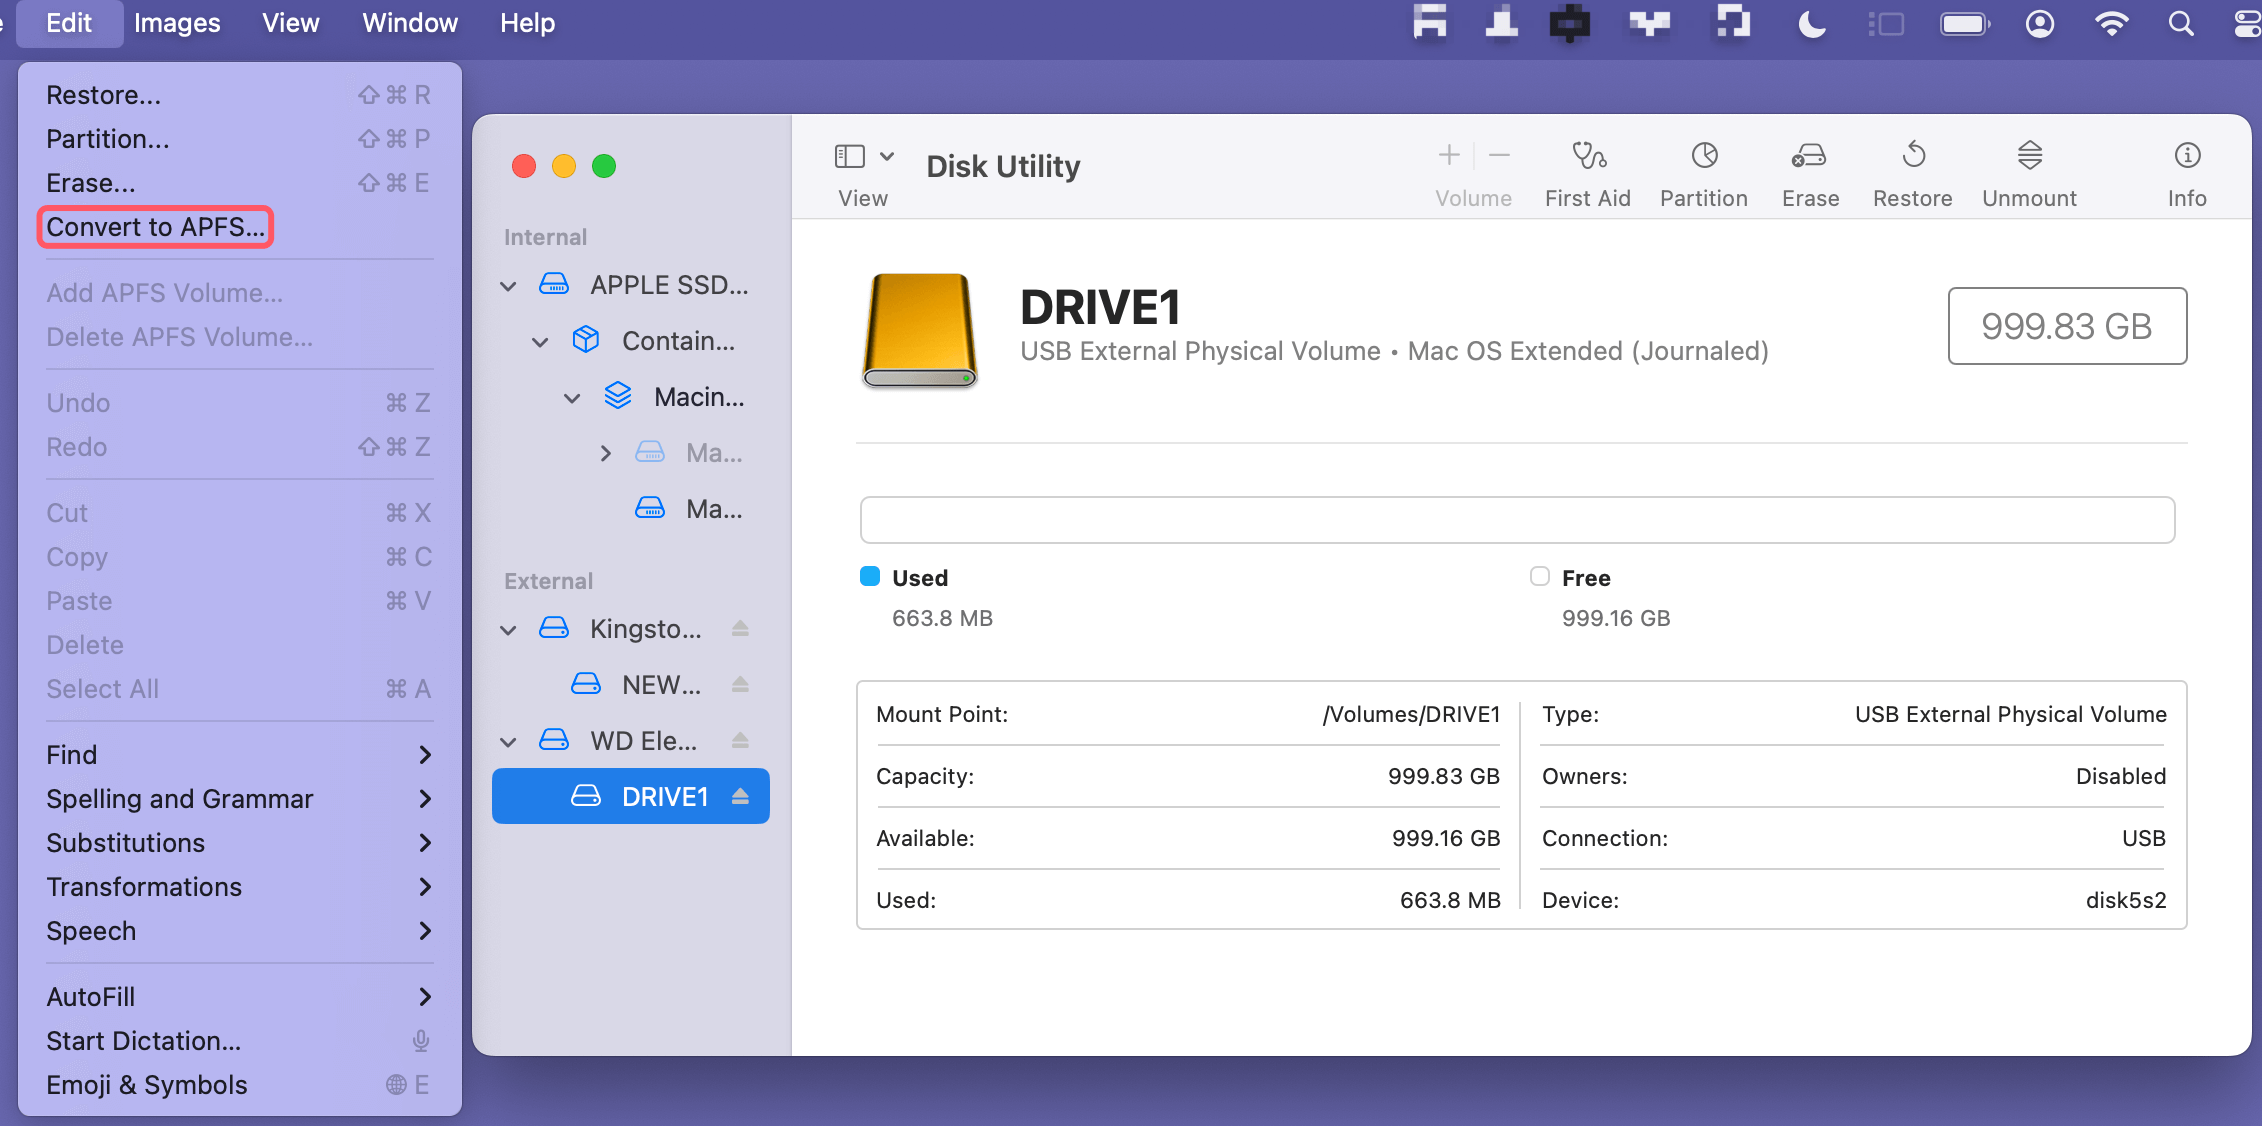
Click on the Edit menu at the top of the screen. From the dropdown, select Convert to APFS.
Step 4. Confirm and Wait
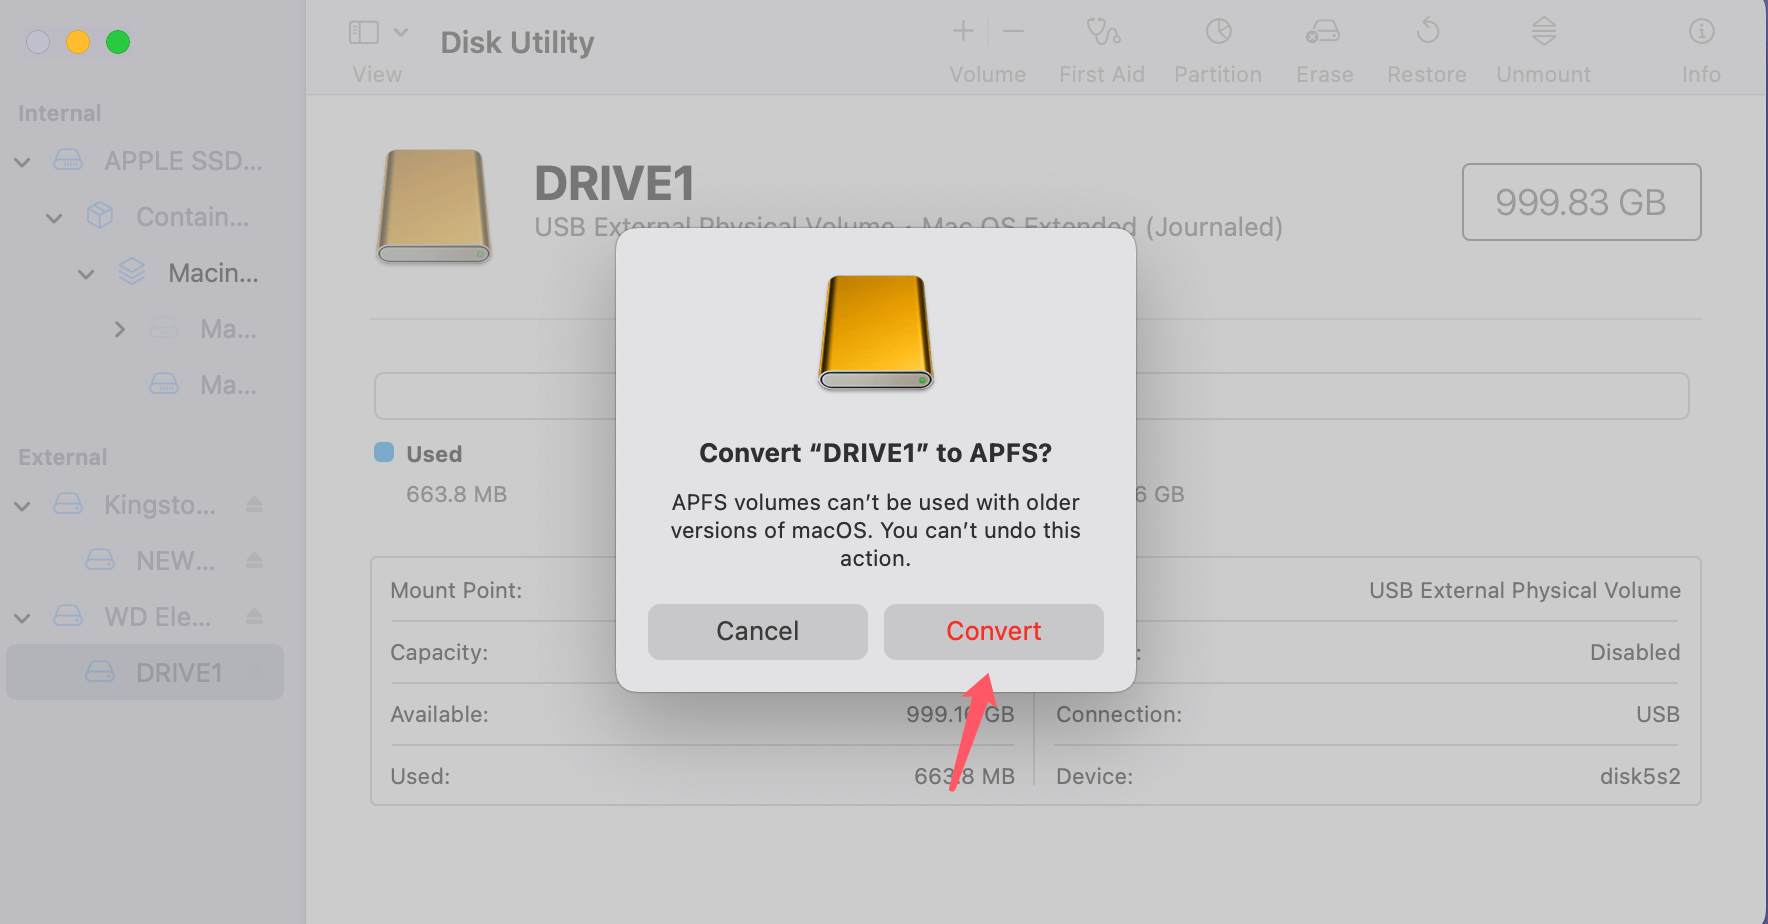
- A dialog box requesting confirmation will show up. Click Convert to proceed. Disk Utility will begin converting the selected volume to APFS.
![Convert HFS+ to APFS on Mac Without Losing Data]()
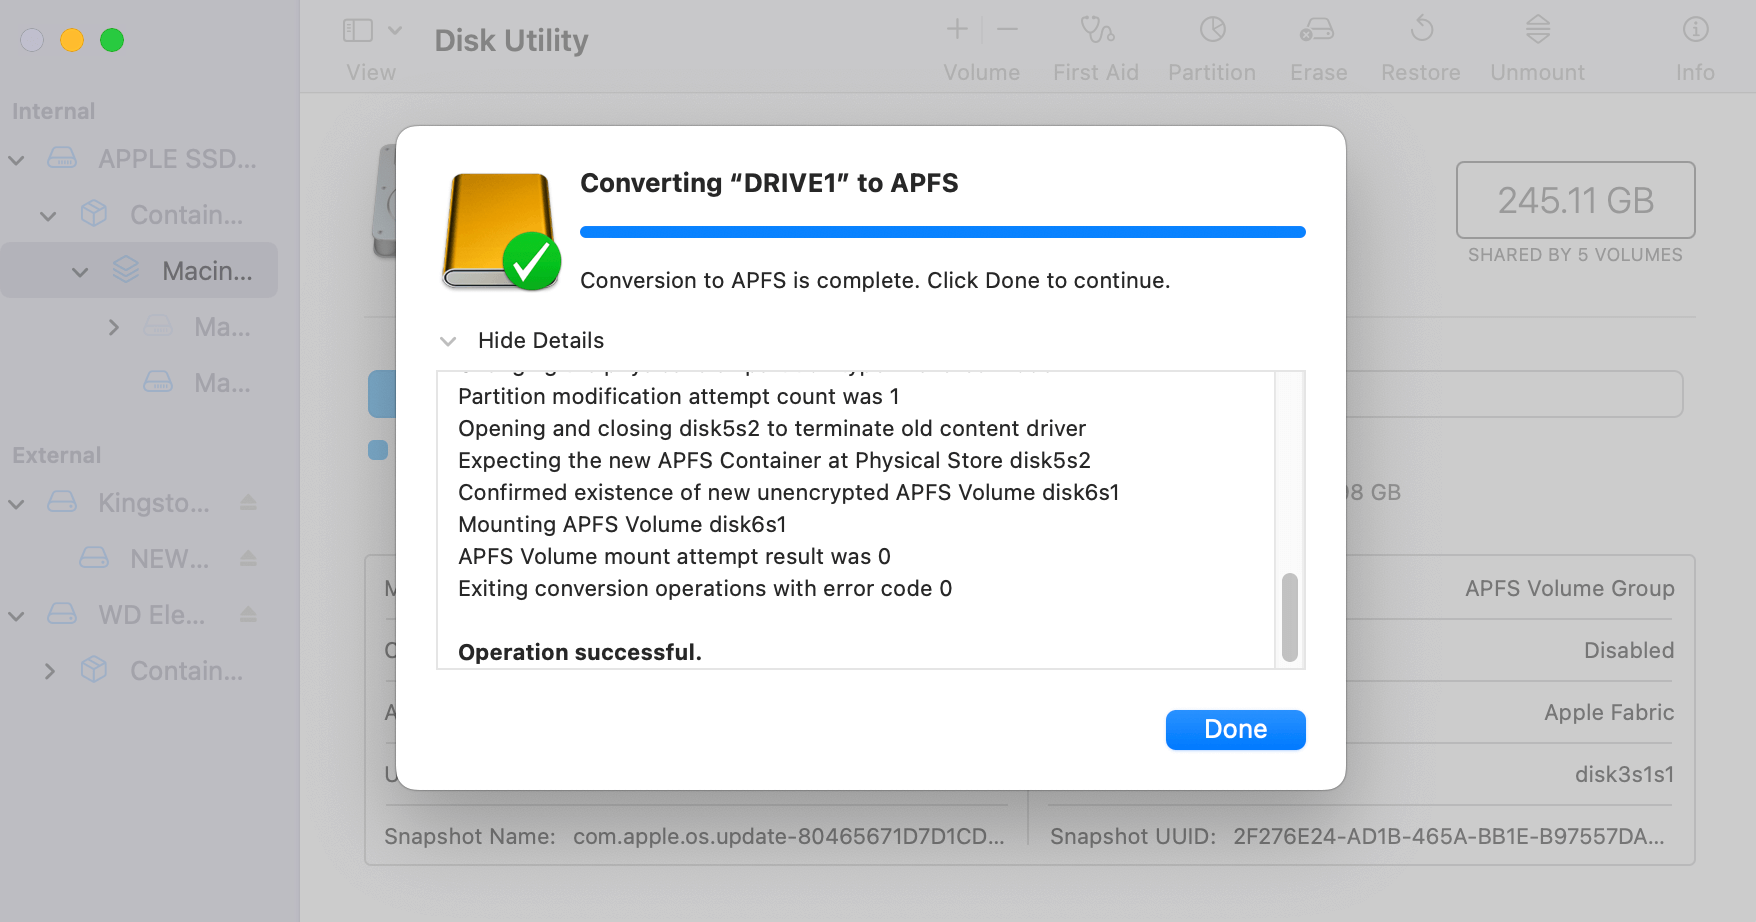
- The process duration varies depending on the size of the volume and the amount of data stored. For example, a 256 GB SSD with moderate data may take about 10-20 minutes, while a larger, nearly full HDD could take significantly longer.
![Convert HFS+ to APFS on Mac Without Losing Data]()
Step 5. Check Conversion Status
Once the conversion completes, Disk Utility will refresh and display the updated file system as APFS in the sidebar.
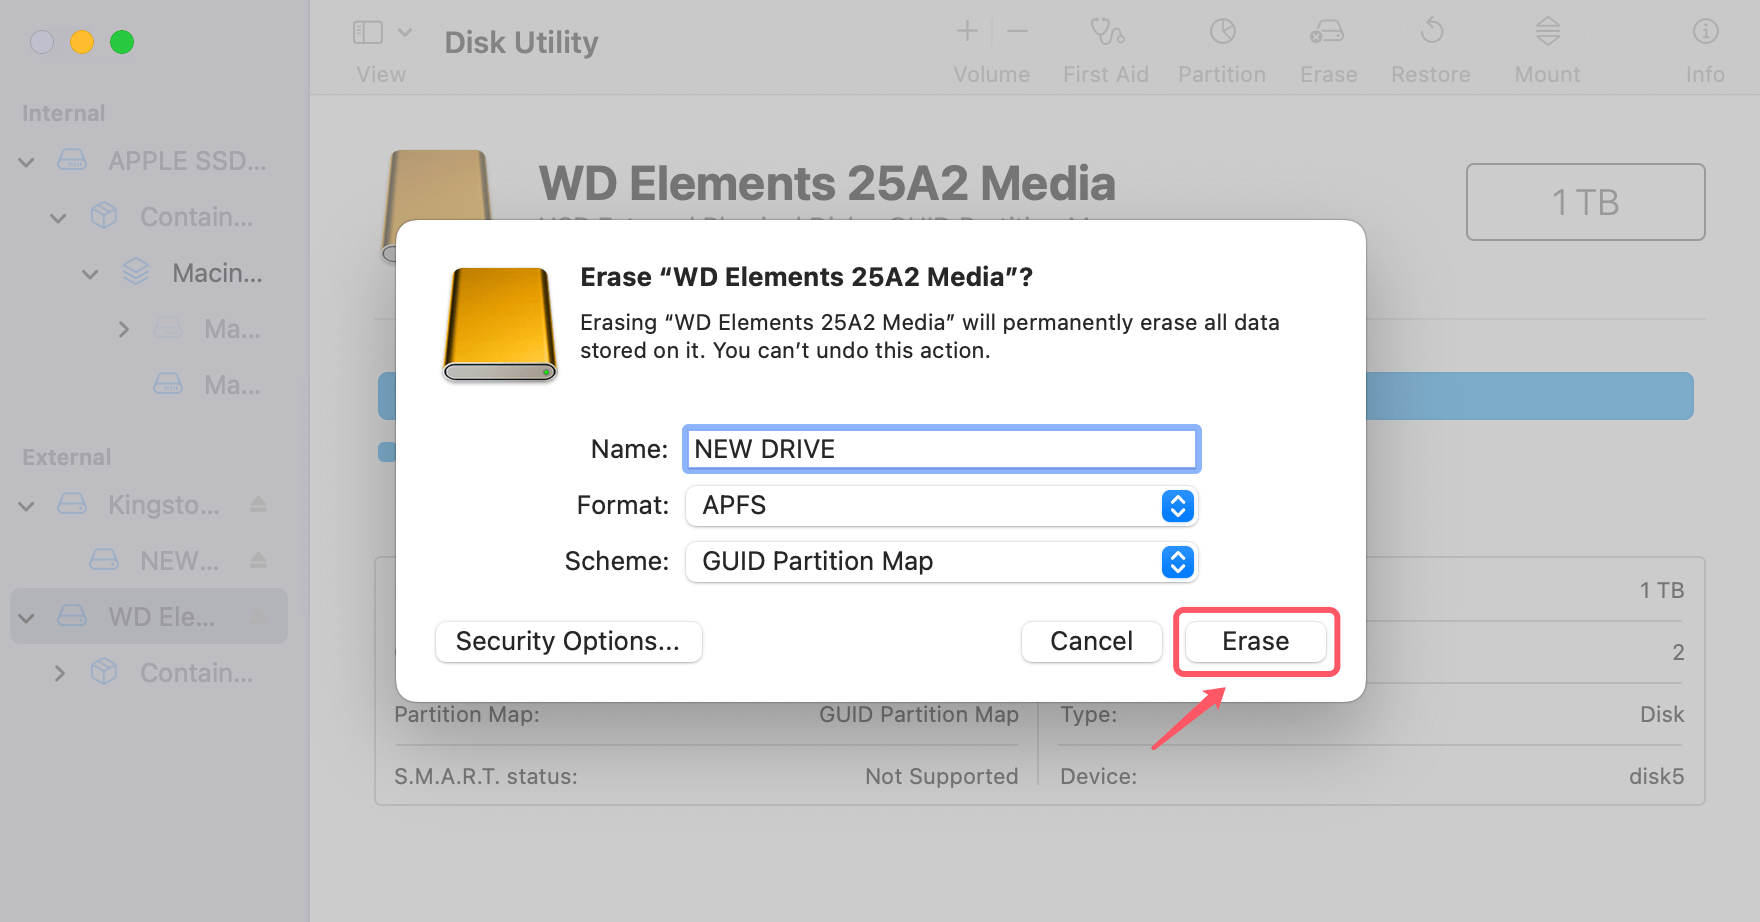
💡 Note: You also can click the Erase button to erase the Mac OS Extended drive to APFS.
Benefits of Using Disk Utility:
- User-friendly: Ideal for non-technical users.
- Non-destructive: Preserves your data during the conversion process.
- Built-in tool: No need for additional software.
Limitations
- Disk Utility doesn't support conversion for some external drives or drives with critical errors.
Method 2: Converting During macOS Installation
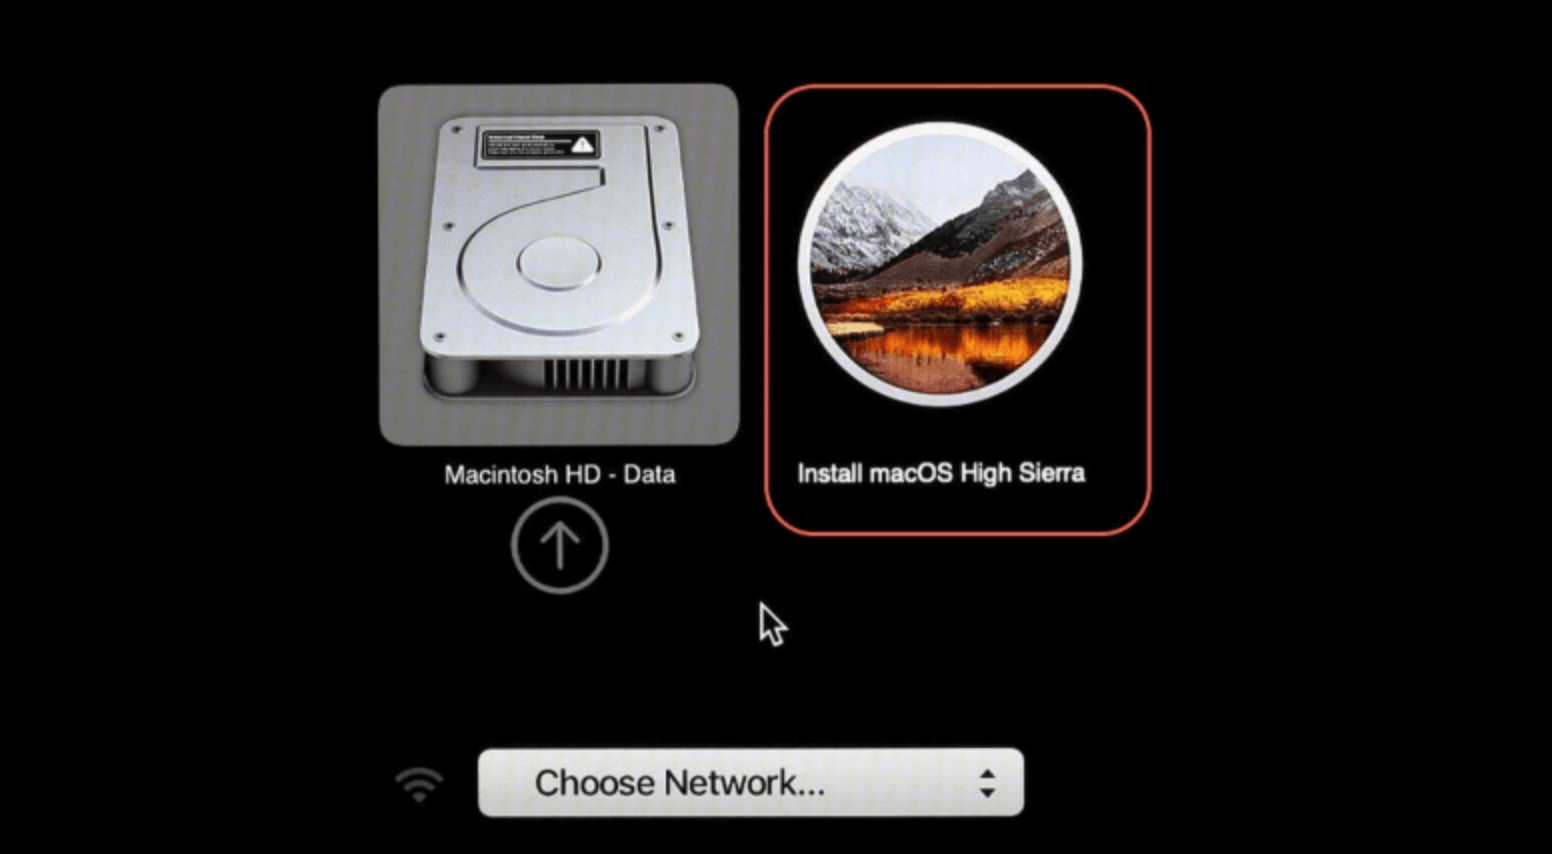
If you're upgrading from an older macOS version (e.g., Sierra) to High Sierra or later, the installer automatically converts your startup drive to APFS under specific conditions:
- SSDs: The conversion is automatic for solid-state drives during the installation.
- HDDs: Hard drives are not automatically converted but can be manually converted post-installation.
Steps for macOS Installation Conversion
Step 1. Backup Your Data: Before upgrading macOS, ensure you have a Time Machine backup or manual backup of important files.
Step 2. Download the macOS Installer: Open the App Store or System Preferences > Software Update (for macOS Monterey or earlier) and download the latest macOS version.
Step 3. Run the Installer: Follow the on-screen prompts to install macOS. If your startup disk is an SSD, the installer will seamlessly convert the file system to APFS.
Step 4. Post-installation Check: After installation, verify the file system by opening Disk Utility or using the Terminal command:
diskutil list
Method 3: Command-Line Conversion (Advanced Users)
For those comfortable with macOS Terminal, the diskutil command provides a more granular approach to converting HFS+ to APFS. This method is particularly useful for advanced users or troubleshooting.
Step-by-Step Guide
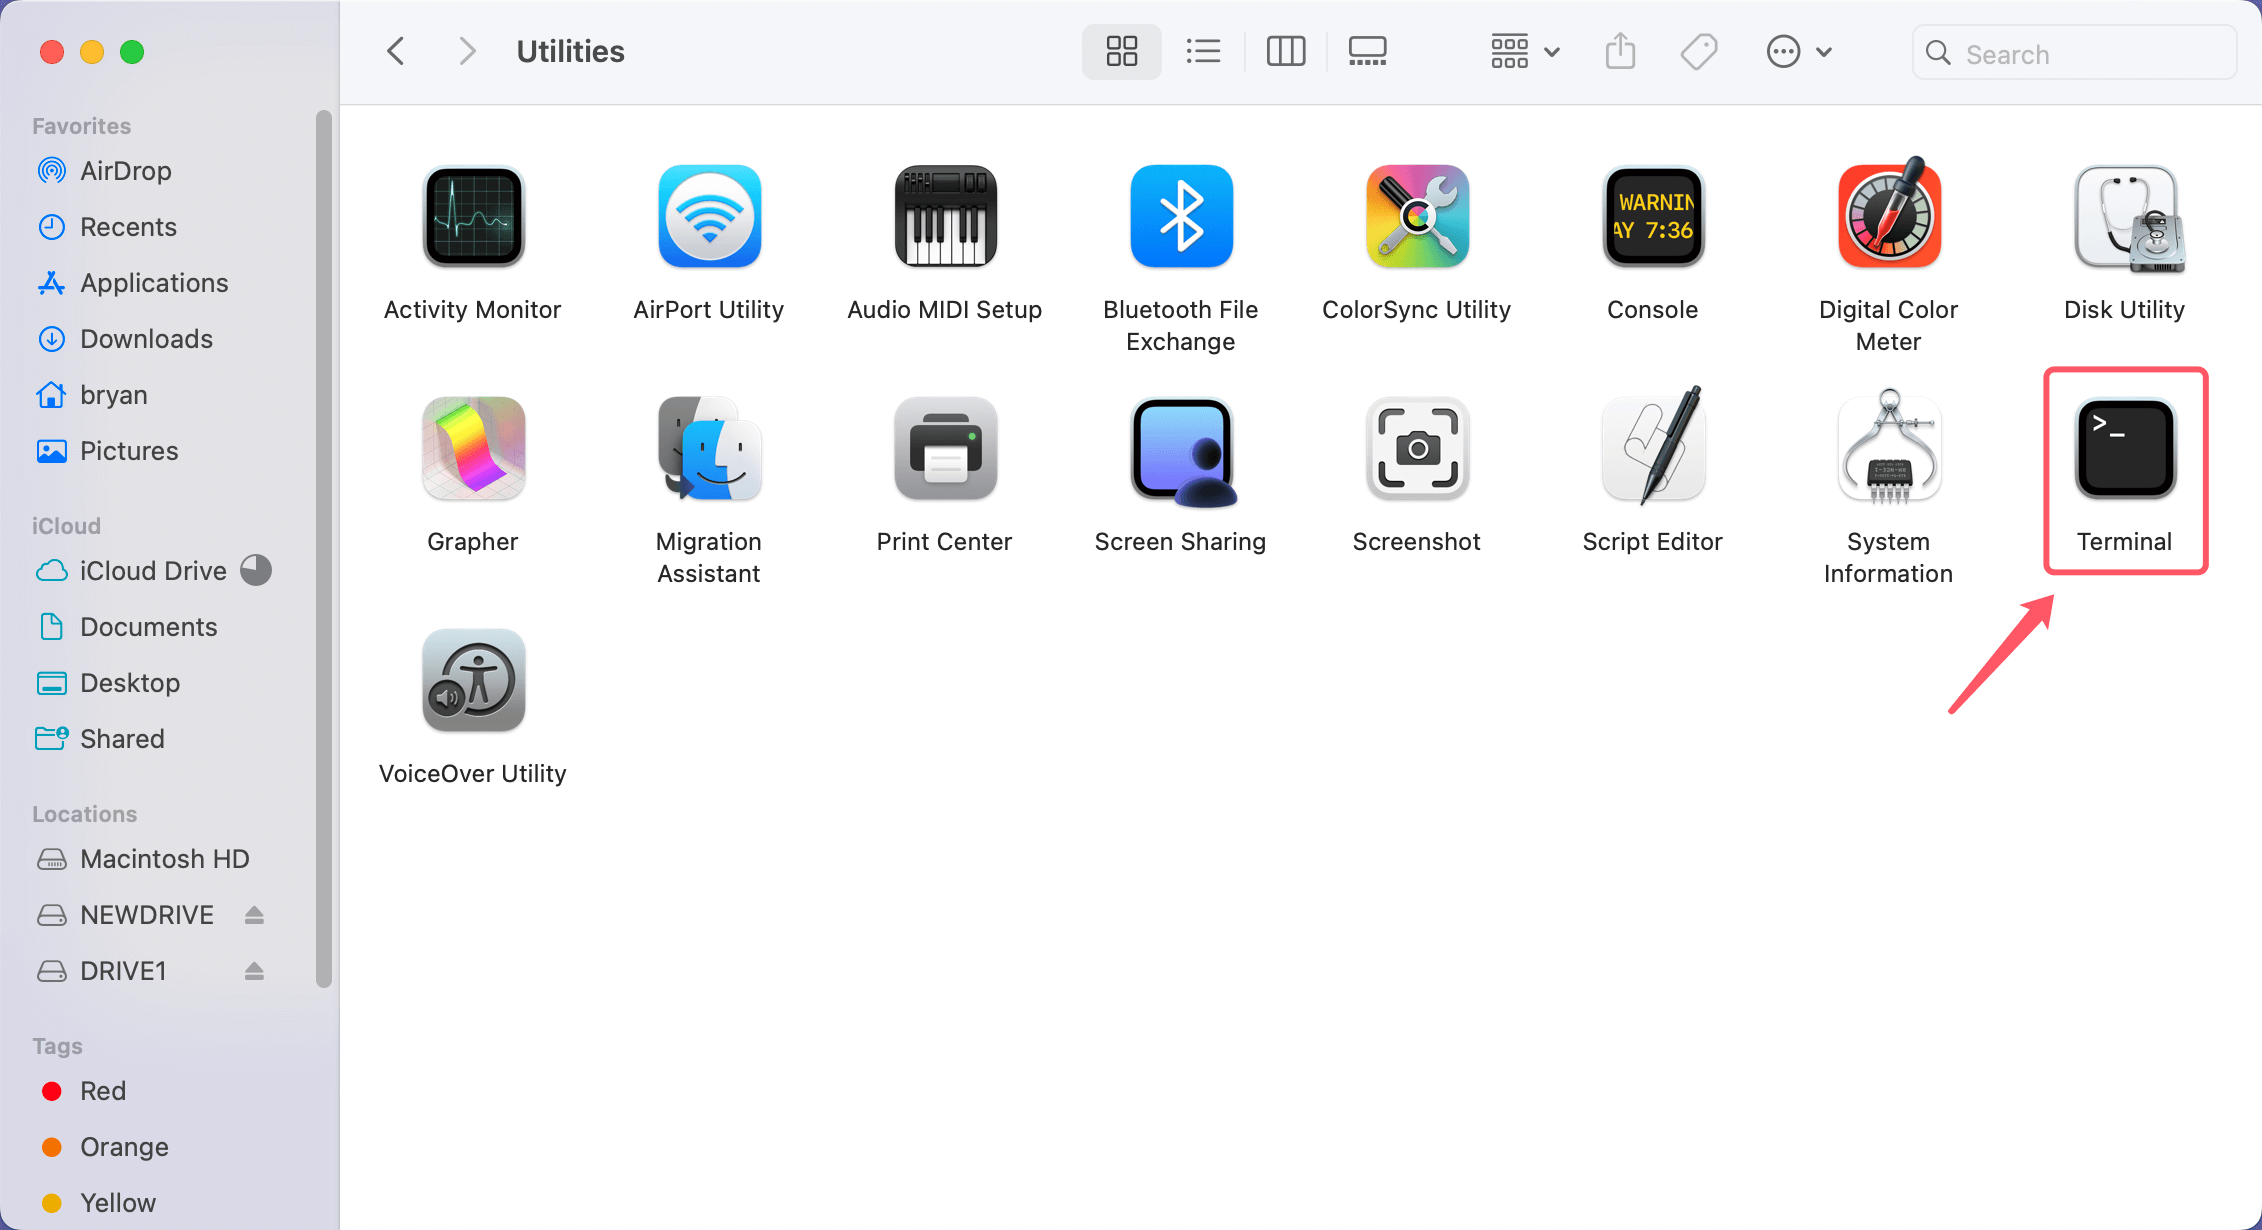
Step 1. Open Terminal: Navigate to Applications > Utilities and open Terminal, or press Command + Space, type "Terminal," and press Enter.
Step 2. List Available Volumes: Use the following command to view all volumes on your system:
diskutil list
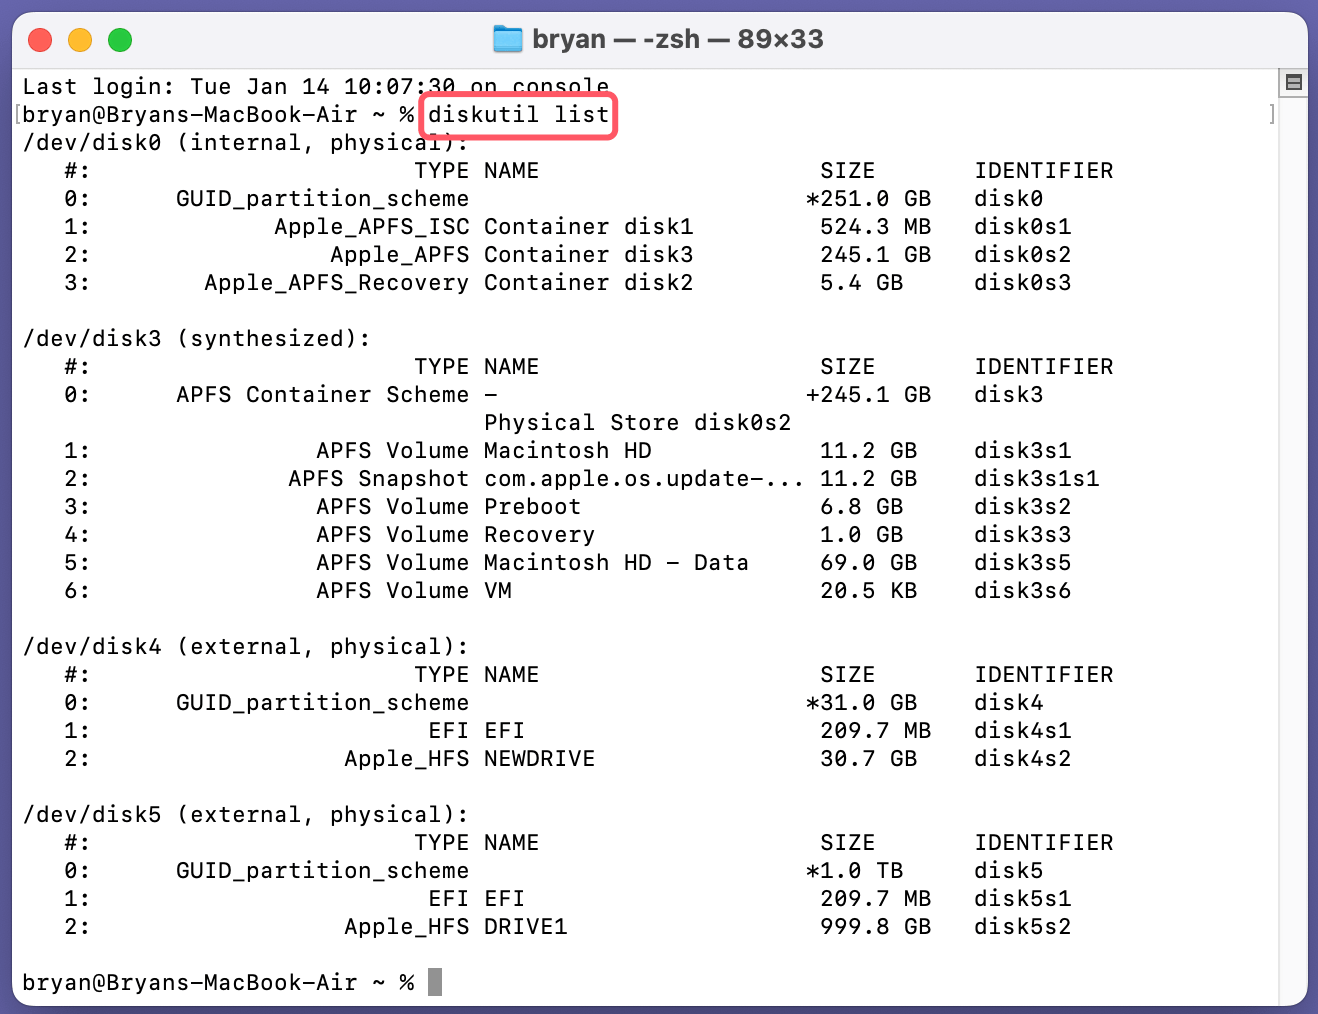
Identify the volume you want to convert.
Step 3. Convert the Volume: Execute the conversion command:
diskutil eraseDisk APFS DRIVE1 /dev/diskX
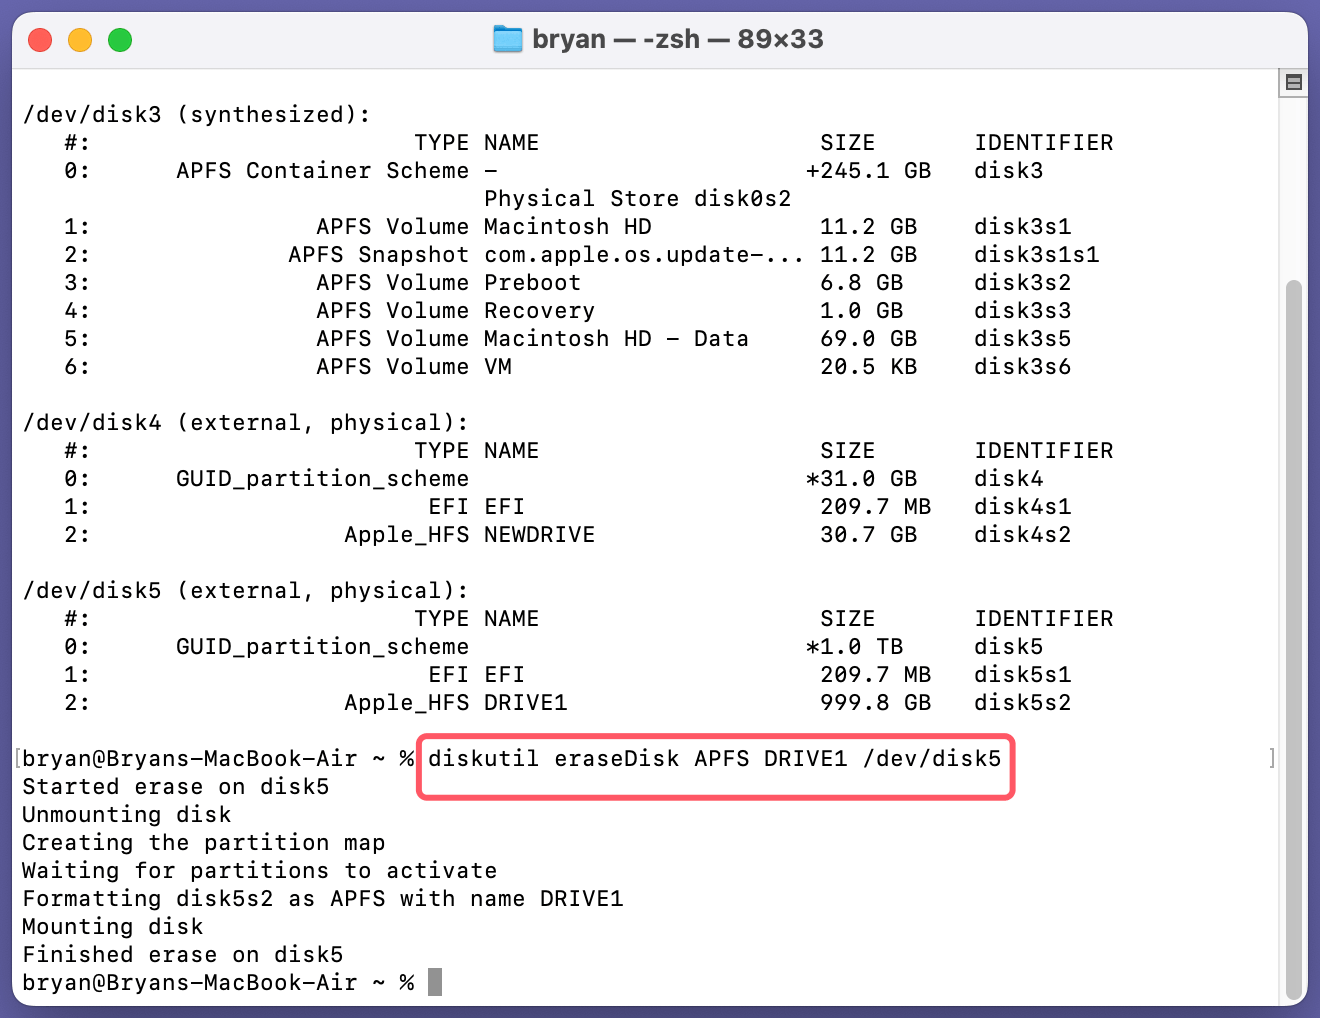
Replace X with the identifier of your drive.
Monitor the Process: Terminal will display progress messages. Do not interrupt the process until it completes.
Advanced Tips
- Verbose Mode: Add -verbose to the command for detailed output:
diskutil apfs convert -verbose /Volumes/YourDriveName
- Force Conversion: If the standard command fails, use -force (use cautiously, as this may lead to data loss).
Precautions
- Ensure your volume has adequate free space (20-30% recommended).
- Avoid closing Terminal or shutting down the system during the process.
Handling Errors During Conversion
Despite Apple's robust tools, errors can occur during the conversion process. Here are some common issues and solutions:
1. Insufficient Space
APFS requires additional temporary space for metadata restructuring. If space is limited, delete unnecessary files or move data to an external drive before retrying.
2. Unsupported macOS Version
Ensure your macOS version is High Sierra (10.13) or later. Older versions do not support APFS conversion.
3. Disk Errors
Use Disk Utility's First Aid to repair the drive:
- Open Disk Utility.
- Select the drive and click First Aid.
- Retry the conversion.
4. Manual Backup and Reformatting
If all else fails:
- Create a full backup of your data.
- Reformat the drive to APFS using Disk Utility.
- Restore your data from the backup.
By carefully following these methods, you can successfully transition to APFS, taking advantage of modern file system capabilities tailored for macOS and SSD performance.
Alternative: Backup, Reformat, and Restore
If direct conversion is unsuccessful, consider the following steps:
- Backup your data using Time Machine or an external drive.
- Reformat the drive to APFS using Disk Utility.
- Restore your data from the backup.
Post-conversion Steps
1. Verify Conversion Success
After conversion, confirm that the volume uses APFS:
Open Disk Utility, select the volume, and check the file system type in the sidebar.
Alternatively, use Terminal:
diskutil list
The output will display your drive's format.
2. Test Drive Performance
Use benchmarking tools like Blackmagic Disk Speed Test to measure read/write speeds. APFS volumes often show significant improvements on SSDs.
3. Update Applications
Ensure your apps are compatible with APFS. Most modern macOS apps support APFS, but older software may require updates.
4. Re-enable Time Machine Backups
If you disabled Time Machine during the process, reconnect your backup drive and enable backups. APFS improves Time Machine’s efficiency by leveraging snapshots.
Recover Lost Data After Converting HFS+ to APFS on Mac
The converting or formatting process will erase everything from the HFS+ drive. If you have lost data and don't have a backup, you can use Mac data recovery software to help you unformat the drive and get all lost data back.
Step 1. Download and install Donemax Data Recovery for Mac, a reliable Ma data recovery app.
Step 2. Open Donemax Data Recovery for Mac, then select the formatted drive to start data recovery.

Step 3. Click on Scan button. Donemax Data Recovery for Mac will deeply scan the drive and find all recoverable files.

Step 4. Once the scan is completed, you can preview all recoverable files. Then select the wanted files, click on Recover button to save them.

Donemax Data Recovery for Mac is also an all-in-one tool which offers disk manager to help you format HFS+ to APFS or format APFS to HFS+ on Mac.
Common Questions About Converting HFS+ to APFS
1. Can APFS Volumes Work on Older macOS Versions?
No. APFS is only supported on macOS High Sierra (10.13) and newer. If you need compatibility with older macOS versions, retain HFS+.
2. What Happens to Encrypted HFS+ Volumes?
Encrypted HFS+ volumes can be converted to APFS with encryption intact. Disk Utility will prompt you to enter the encryption password during the conversion.
3. Can I Revert From APFS to HFS+?
Reverting from APFS to HFS+ requires reformatting the drive. This process erases all data, so you'll need to back up and restore manually.
4. Is APFS Suitable for All Drives?
APFS excels on SSDs but provides limited benefits for traditional HDDs. Additionally, some older external drives or NAS devices may not support APFS-formatted volumes.
Conclusion
Switching from HFS+ to APFS is a step toward modernizing your Mac's file system, ensuring better performance, security, and compatibility with future macOS features. While the conversion process is straightforward, following best practices such as creating backups and verifying drive health is crucial for a seamless transition. Whether you're upgrading your system or optimizing your SSD, APFS is the file system of choice for today’s macOS users.
With these guidelines, you can confidently convert your drive to APFS, taking full advantage of Apple's latest storage innovations.
If you have lost data due to converting a HFS+ drive to APFS, just use a data recovery program to help you get all lost data back.


Donemax Data Recovery for Mac
Donemax Data Recovery for Mac is one of the best Mac data recovery software. It is easy-to-use and can help in recovering deleted, formatted, inaccessible or lost data from Mac HDD/SSD, external disk, USB drive, SD card, camera or other storage devices.
Related Articles
- Dec 28, 2024How to Format a USB Drive to FAT32 on Mac?
- Sep 09, 2025How to Delete A Partition on SSD without Losing Data?
- Nov 20, 2023How to show & hide files/folders on Mac?
- Mar 22, 2024What Is SMC? How to Reset SMC on Mac?
- Jul 10, 2024Factory Reset Dell Laptop and Wipe All Private Data Before Selling/Donating
- Jul 02, 2025Format 32GB/64GB/128GB/256GB SD Card to ExFAT/FAT32

Charles
Charles, who lives in Sydney, Australia, is an editor & writer of Donemax Team. He is good at writing articles related with Apple Mac computers, Windows operating systems, data recovery, data erasure, disk clone and data backup, etc. He loves reading and playing tennis in his spare time and is interested in testing new digital devices such as mobile phones, Macs, HDDs, SSDs, digital cameras, etc.

Gerhard Chou
In order to effectively solve the problems for our customers, every article and troubleshooting solution published on our website has been strictly tested and practiced. Our editors love researching and using computers and testing software, and are willing to help computer users with their problems

