PAGE CONTENT:
Encountering errors during a macOS upgrade can be really awful, especially when you are eager to access new features, enhancements, and security updates. One common error that many Mac users face is the message: "You cannot upgrade this version of macOS because a new version is installed." This issue can prevent you from successfully updating your operating system, leaving you stuck with outdated software. In order to ensure that your Mac operates smoothly and effectively, we'll investigate the causes of this problem and give you with step-by-step solutions in this article.
About the Error That Can't Install macOS
When you attempt to upgrade your macOS, the system checks for the latest compatible version. If it detects that an upgrade process is already in progress or that an incomplete installation exists, it displays the error message. Understanding why this error occurs is crucial for effective troubleshooting. Here are some common scenarios that may lead to this issue:
- Incomplete Updates: Sometimes, an interrupted update can leave files behind, causing the system to think that the upgrade process is still ongoing. This can happen if your Mac loses power during an update or if you manually interrupt the process.
- Software Conflicts: Third-party applications or extensions may interfere with the update process, leading to this error. For example, antivirus software may block certain installation processes, mistaking them for malicious activity.
- Corrupted System Files: Corrupted system files can prevent the upgrade from completing successfully, resulting in error messages. Issues with the file system or problematic applications can contribute to this corruption.
Ignoring this error can have consequences, such as security vulnerabilities, incompatibility with newer applications, and missing out on valuable features. Therefore, it's essential to resolve it promptly.
Preliminary Checks
Before diving into solutions, it's helpful to perform a few preliminary checks to better understand your system's current status:
◾Verify the Current macOS Version
To know what you're working with, it's important to verify your current macOS version. Here's how:
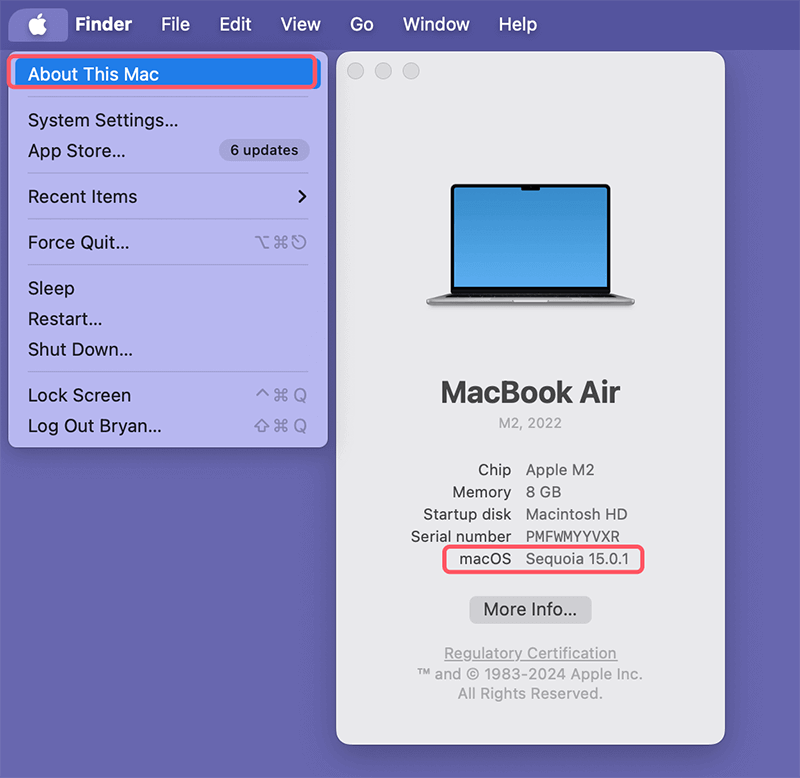
- Click the Apple menu in the top left corner of your screen.
- Choose "About This Mac."
- Take note of the macOS version you are currently using, as this will help determine the compatibility with the new version you wish to install.
◾Check for Pending Updates
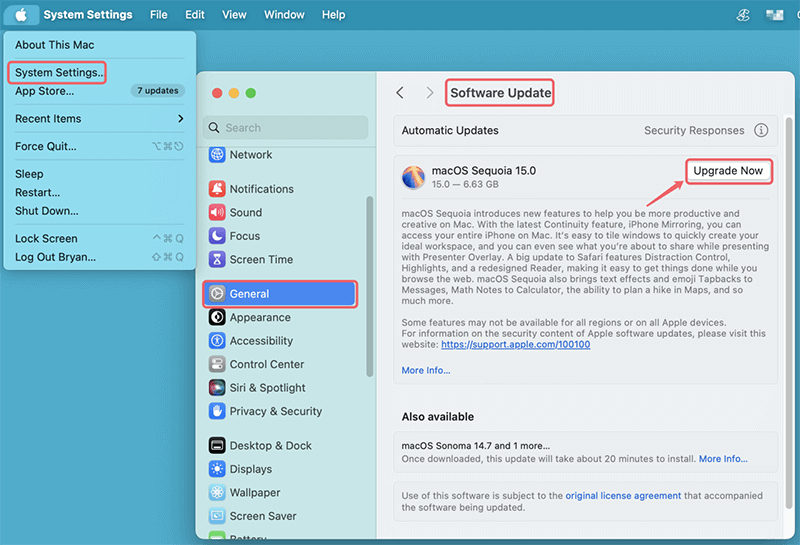
- Open "System Preferences" or "System Settings" (for macOS Ventura or later).
- Tap on "Software Update" or go to "General > Software Update."
- Check if there are any updates available or if an update is in progress. If you see any updates pending, it's best to allow them to complete before attempting a new upgrade.
![Check for Pending Updates]()
◾Review System Requirements
Ensure that your Mac meets the requirements for the new version of macOS you wish to install. These details are available on Apple's official website. If your Mac is too old to support the latest version, you may need to consider upgrading your hardware or staying with an older, supported version.
Step-by-Step Solutions to Fix Cannot Install macOS on Mac
If you've confirmed that your Mac is eligible for an update but you're still encountering the error "You cannot upgrade this version of macOS because a new version is installed", follow these step-by-step solutions:
1. Restart Your Mac
Occasionally, a straightforward restart might fix momentary faults that might be the source of the issue. Here's how to do it:
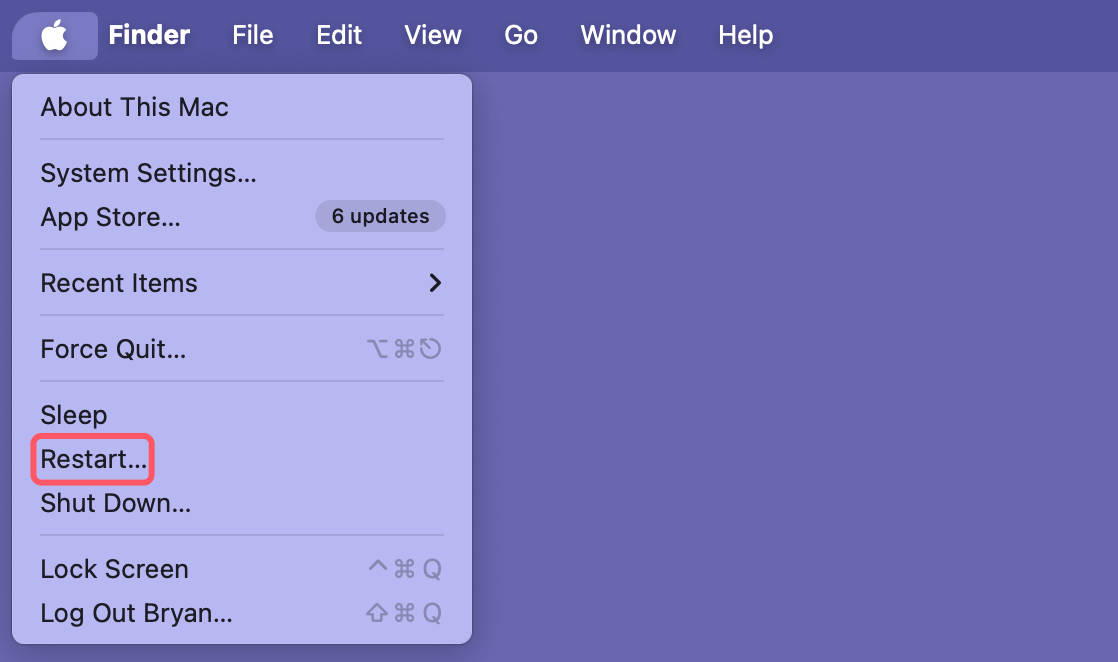
- Press the Apple menu button.
- Select "Restart."
![Restart Your Mac]()
- Try the upgrade procedure once more when your Mac has restarted. A fresh start can clear temporary files and processes that may be stuck.
2. Clear Software Update Cache
Corrupted cache files can often lead to conflicts during the upgrade process. Clearing the software update cache can help resolve these issues.
- Open Finder.
- Click on "Go" in the menu bar, then select "Go to Folder."
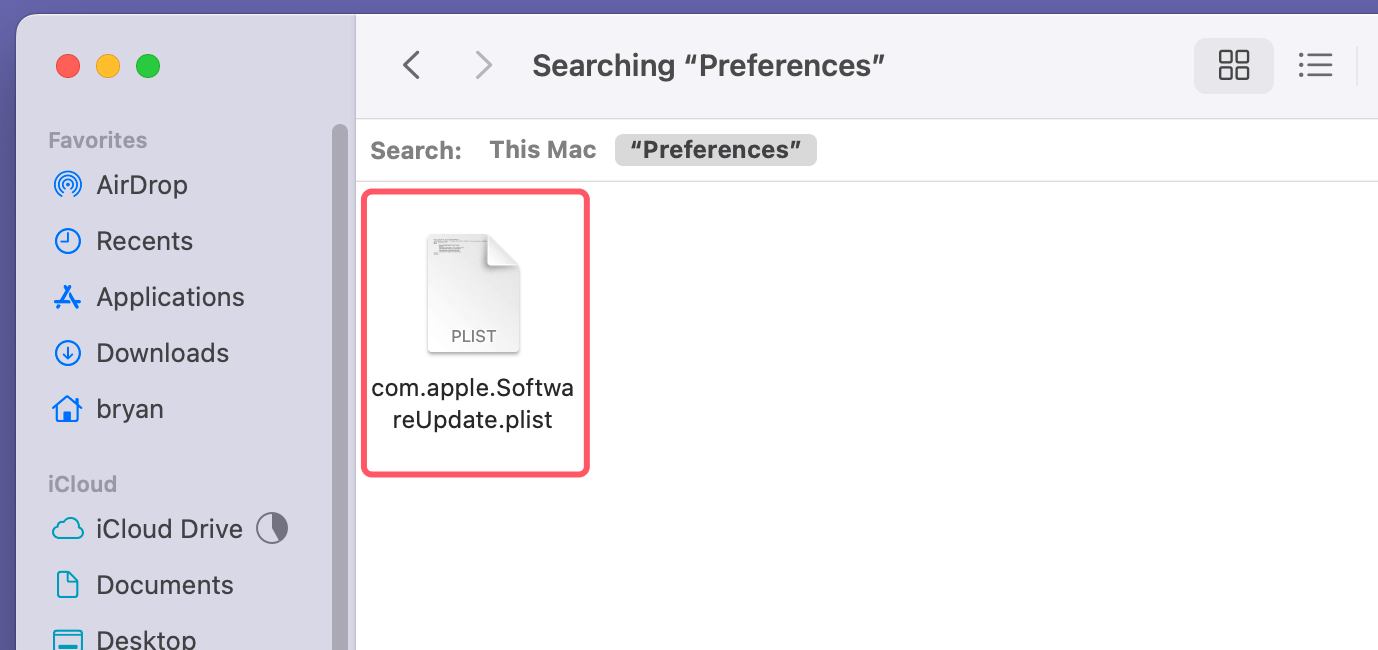
- Type in ~/Library/Preferences/ and click "Go."
- Look for files that start with com.apple.SoftwareUpdate and move them to the Trash.
![Clear Software Update Cache]()
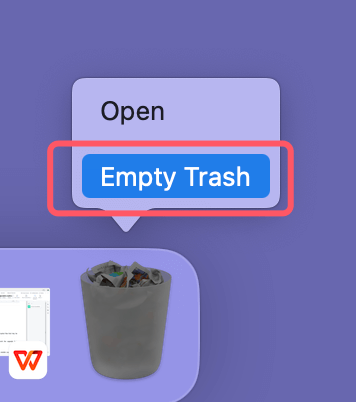
- Empty the Trash.
![Empty the Trash]()
- Restart your Mac and try the upgrade again.
Clearing the cache can free up space and remove any corrupted files that may be causing the update to fail.
3. Remove Incomplete Installations
If there are any incomplete installations, they may prevent the upgrade from proceeding. To identify and remove them:
- Open Finder.
- Go to the Applications folder.
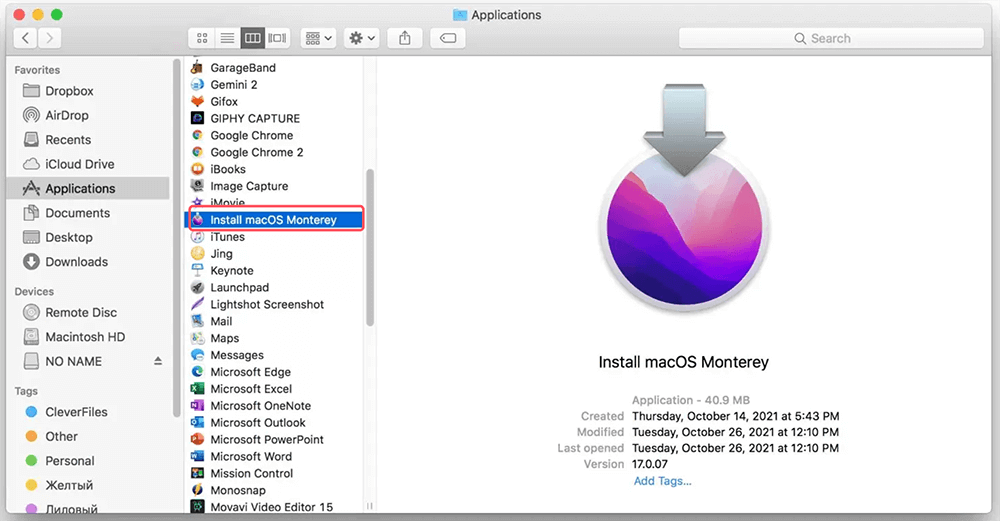
- Look for any files or folders related to the macOS installer (usually named something like "Install macOS [version]").
![Remove Incomplete Installations]()
- Move these to the Trash.
- Empty the Trash and restart your Mac.
It's important to ensure that no remnants of previous installation attempts are left behind, as these can cause confusion for the update process.
4. Use Safe Mode
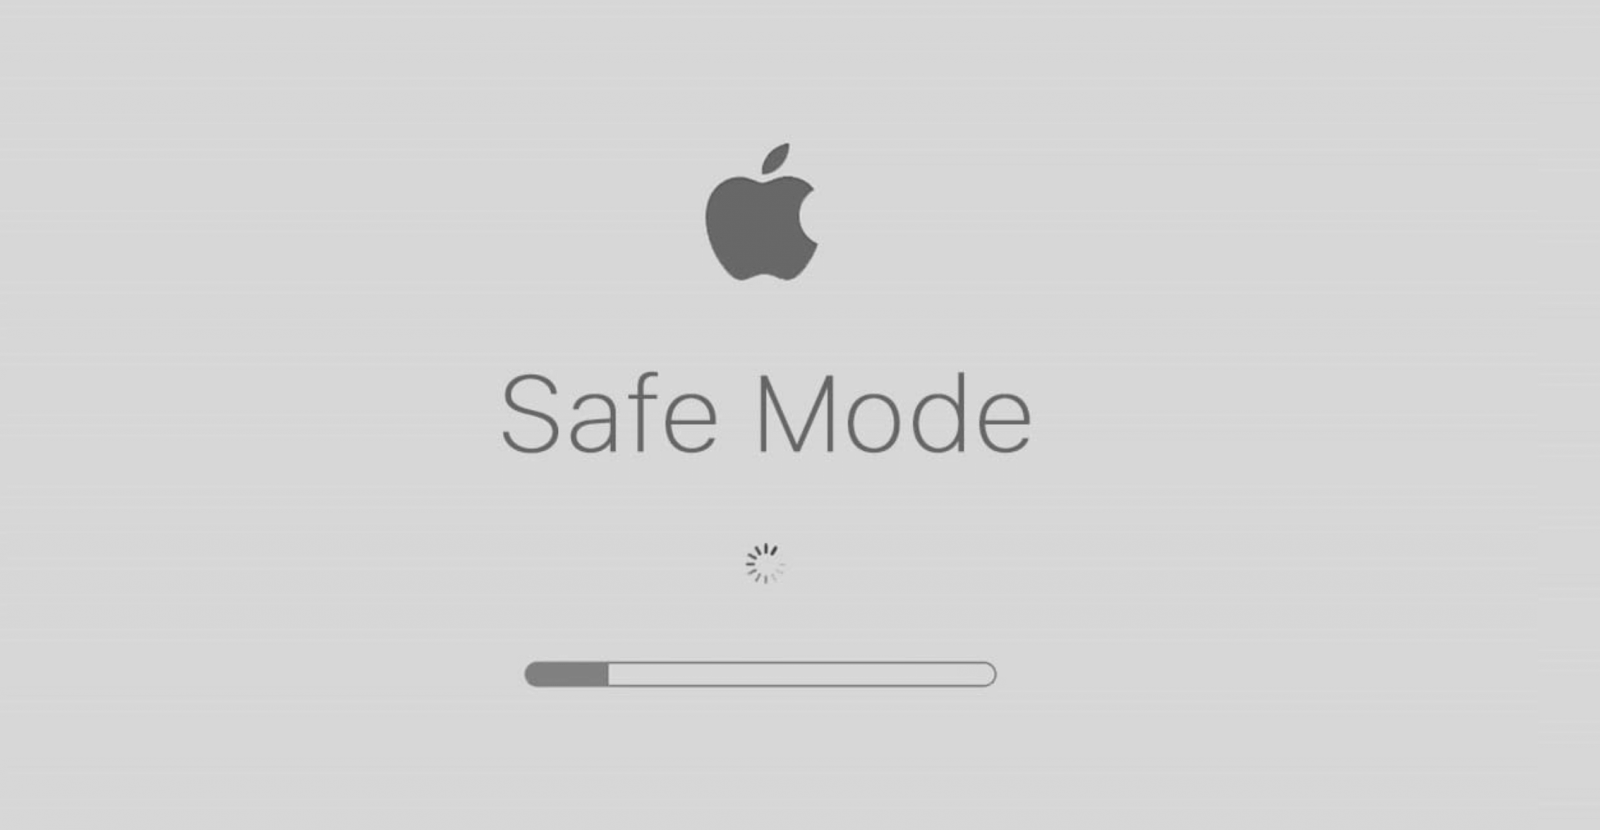
Safe Mode on your Mac can help fix a number of problems, including problems with software updates. Safe Mode loads only the essential macOS files, which can help identify and resolve conflicts.
Here is the procedure:
- Restart your Mac.
- As soon as you hear the starting sound, press and hold the Shift key.
- When you see the login box, let go of the Shift key.
![Use Safe Mode]()
- In Safe Mode, try upgrading your macOS again. If the error does not appear in Safe Mode, it may indicate that a third-party application is causing the conflict.
Note: If you are using a Mac with Apple silicon, shut down the mac, then press and hold the Power button until you see Loading Startup Options. Select Macintosh HD, press and hold Shift key, then click Continue in Safe Mode.
5. Reset NVRAM/PRAM
Certain settings that your Mac utilizes often are stored in NVRAM and PRAM. Sometimes upgrading them fixes the problem.
- Turn off your Mac.
- Turn it on and hit the Option, Command, P, and R keys simultaneously, holding them down.
- Hold onto the keys for a full 20 seconds or so.
- Let go of the keys to let your Mac finish booting.
This reset can help clear any incorrect settings that may interfere with the upgrade process.
6. Reinstall macOS
If none of the above solutions work, you might need to reinstall macOS. This process won't erase your data but will install a fresh copy of the operating system. However, it's always a good idea to back up your important data first.
- Backup your important data using Time Machine or another backup solution. Make sure to save documents, photos, and any important applications.
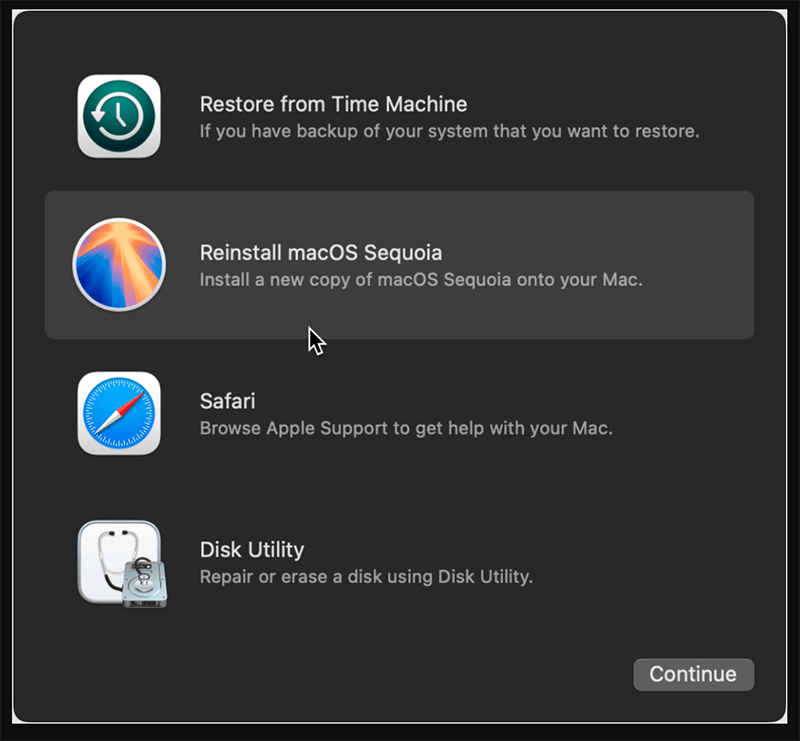
- To access Recovery Mode, restart your Mac and hold down Command + R (for Intel-based Mac) or Power button (for Apple silicon Mac), choose Options and click on Continue button.
- Within the macOS Utilities box, choose "Reinstall macOS XXX."
![Reinstall macOS]()
- To finish the reinstallation, adhere to the on-screen directions.
This option is often effective in resolving deep-seated issues within the operating system, but it should be considered a last resort.
7. Creating a Bootable USB Installer
Making a bootable USB installer for macOS may be a more dependable way to complete the update if all else fails. This approach can bypass potential issues that arise during a standard installation.
Steps to Create a Bootable Installer
- Obtain a USB drive with at least 16GB of space.
- Download the desired macOS installer from the App Store.
- Open Terminal (found in Applications > Utilities).
- Use the following command, replacing "MyVolume" with the name of your USB drive:
sudo /Applications/Install\ macOS\ [Version Name].app/Contents/Resources/createinstallmedia --volume /Volumes/MyVolume
- To finish the procedure, adhere to the Terminal's on-screen directions.
After the creation of the bootable installer, restart your Mac while holding down the Option key(for Intel-based Mac) or Power button (for Apple silicon Mac). Select the USB drive to initiate the installation process.
Related article: how to create bootable USB installer and use it to install Mac operating system.
Additional Tips
◾Keeping Your Mac Organized
Regularly decluttering your Mac can help maintain its performance and minimize issues during upgrades. Here are a few tips:
- Uninstall Unused Applications: Periodically review your Applications folder and uninstall programs you no longer use. This can free up space and reduce clutter.
- Manage Storage: Go to "About This Mac" > "Storage" to see what's taking up space. You can use the "Manage" button to access recommendations for optimizing storage.
- Organize Files: Keep your files organized in folders, and regularly delete any unnecessary documents or downloads. A clean file structure can help improve overall system performance.
◾Regular Maintenance
Performing routine maintenance can help prevent errors in the future:
- Keep Your Software Up to Date: Regularly check for updates for your applications and macOS. Keeping software current ensures you have the latest features and security patches.
- Run Disk Utility: Open Disk Utility and run First Aid on your hard drive to check for and repair any errors in the file system. This can help prevent issues related to corrupted files.
- Use Reputable Antivirus Software: Keeping your Mac safe from malware and viruses can prevent many issues that might interfere with the upgrade process. Regular scans can help maintain system integrity.
◾Backup Your Data Regularly
One of the best practices to avoid losing important files during upgrades is to perform regular backups. Using Time Machine or other backup solutions can protect your data in case of system failures or issues during updates.
- Link your Mac to an external hard disk.
- Click on Time Machine after navigating to System Preferences or System Settings > General.
- Select the external drive and enable Time Machine to start backing up your data automatically.
Regular backups provide peace of mind and ensure you can restore your system if anything goes wrong during an upgrade.
If you want to create a bootable clone backup for your Mac, just try Mac disk cloning software.
Related article: how to create a full bootable clone backup for Mac.
◾Seek Professional Help
It could be time to get expert assistance if you've attempted all of the aforementioned solutions and your problems persist. Support for more complicated issues can be obtained from Apple Support or an approved service provider. They can diagnose underlying issues that may not be immediately apparent and provide solutions tailored to your specific situation.
Conclusion
Encountering the "You cannot upgrade this version of macOS because a new version is installed" error can be a hassle, but with the steps outlined in this article, you should be able to resolve it efficiently. By understanding the root causes of the error and following the recommended solutions, you can get your Mac back on track and ready for the latest updates.
Remember to perform regular maintenance on your Mac, stay updated with the latest macOS versions, and backup your data to avoid similar issues in the future.
Note: If you have lost data due to macOS upgrade error or reinstalling macOS, you can use Mac data recovery software to help get the lost data back.


Donemax Data Recovery for Mac
Donemax Data Recovery for Mac is one of the best Mac data recovery software. It is easy-to-use and can help in recovering deleted, formatted, inaccessible or lost data from Mac HDD/SSD, external disk, USB drive, SD card, camera or other storage devices.
Related Articles
- May 28, 2025[9 Fixes] Fix External Hard Drive Not Accessible on Windows 10
- Jun 25, 2025Deleted App Still Shows Up on Mac? Here's How to Fix It
- Jul 15, 2025[5 Methods] Repair NTFS Drive | Fix NTFS Errors
- Feb 11, 2025How to Fix SD Card Not Showing Up in File Explorer?
- Dec 26, 2024How to Remove SD Card's Write Protection on Mac? [5 Methods]
- Mar 11, 2025How to Repair a Corrupted SD Card with Command Prompt?

Coco Lin
Coco has been a writer and a chief programmer at Donemax software since 2018. Over 10 years of experience of writing troubleshooting articles in the software industry, she is passionate about programming and loves to providing solutions to Windows and Mac users. Also she enjoys music and palying tennis in her free time.

Gerhard Chou
In order to effectively solve the problems for our customers, every article and troubleshooting solution published on our website has been strictly tested and practiced. Our editors love researching and using computers and testing software, and are willing to help computer users with their problems
Hot Donemax Products

Clone hard drive with advanced clone technology or create bootable clone for Windows/Mac OS.

Completely and easily recover deleted, formatted, hidden or lost files from hard drive and external storage device.

Certified data erasure software - permanently erase data before selling or donating your disk or any digital device.
