Before we start: Donemax Data Recovery for Mac can fix AppleAPFSMedia not mounted issue and help you completely recover lost data from a damaged drive or erased drive on Mac.
PAGE CONTENT:
When you encounter the error message "AppleAPFSMedia not mounted," it can be a distressing experience, especially if you rely on your Apple devices for storing important files. This issue often arises when accessing external drives or certain partitions, leaving users anxious about potential data loss. Fortunately, there are steps you can take to resolve this problem without losing any data. This article will guide you through understanding the issue, diagnosing the problem, and implementing effective solutions.
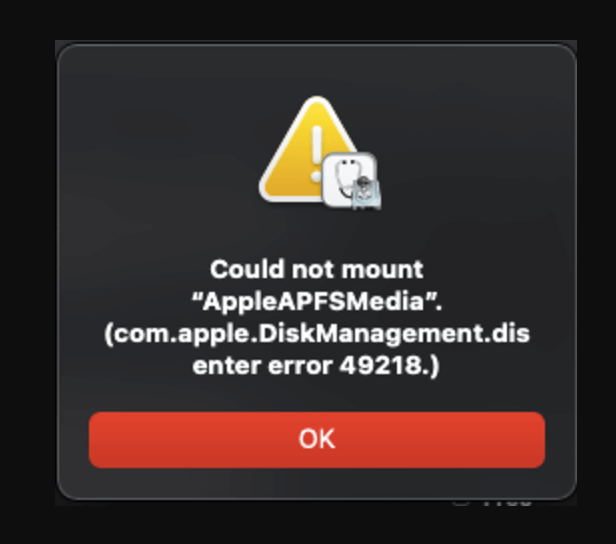
About the AppleAPFSMedia Error
AppleAPFSMedia refers to a specific type of file system used by Apple devices, particularly for managing volumes on hard drives and SSDs. APFS, or Apple File System, is optimized for flash and solid-state storage, supporting features such as snapshots, cloning, and encryption. When you see the message indicating that AppleAPFSMedia is not mounted, it typically means that the operating system is unable to access a specific volume.
🔖The Role of AppleAPFSMedia
AppleAPFSMedia represents APFS volumes on your Mac. When you connect an APFS-formatted drive, your system recognizes it as an AppleAPFSMedia object. If your Mac fails to mount this media, you won't be able to access your files, which can be concerning, particularly if you haven't backed them up recently.
🔖Common Causes of the Error
Several factors can lead to the "not mounted" issue, including:
- Corrupted File System: Data corruption can occur due to unexpected shutdowns, hardware failures, or improper ejection of drives.
- Incompatible macOS Version: Older versions of macOS may not support newer file systems properly, leading to mounting issues.
- Disk Utility Errors: Issues with Disk Utility can prevent volumes from mounting correctly.
- Hardware Problems: Faulty cables, ports, or the drive itself can lead to mounting issues.
🔖Diagnosing the Problem
Before jumping into solutions, it's crucial to diagnose the issue properly. Follow these steps to identify the root cause:
Step 1: Check Disk Connections
Start by ensuring that all physical connections are secure. If you're using an external drive, check the cable and port for any damage or dirt. Try using a different cable or port to rule out hardware issues.
Step 2: Restart Your Device
A simple restart can often resolve temporary glitches that prevent drives from mounting. Restart your Mac and check if the AppleAPFSMedia mounts automatically.
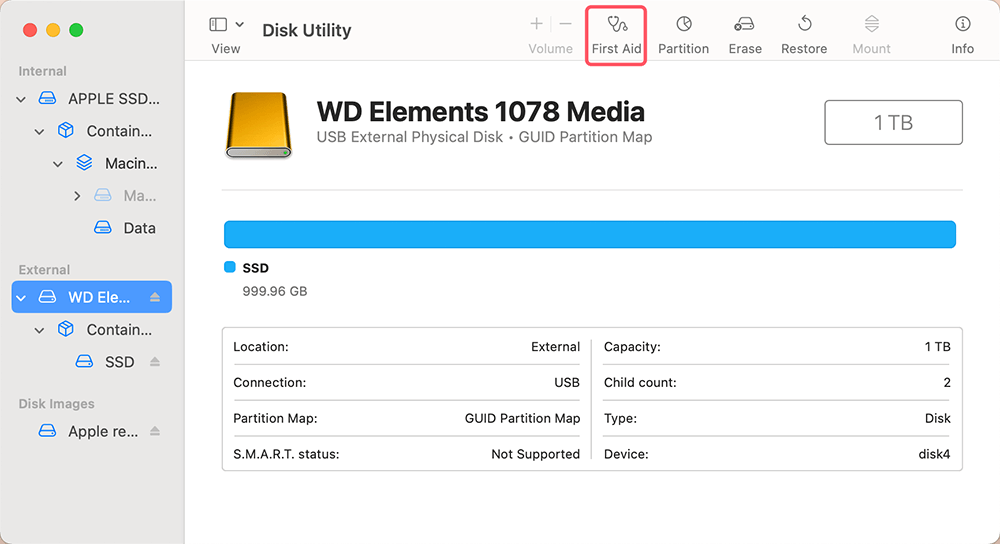
Step 3: Use Disk Utility
The built-in Disk Utility can help diagnose and repair minor issues with your disks:
- Open Disk Utility from the Applications > Utilities folder.
- In the left sidebar, locate the drive or volume that is not mounting.
- Select the volume and click on "First Aid."
![Use Disk Utility]()
- Allow Disk Utility to check and repair the volume.
If Disk Utility identifies and fixes the issue, your volume may now be accessible. However, if the error persists, further action is required.
Solutions to Fix AppleAPFSMedia Not Mounted
Method 1: Mount the Volume Manually
If Disk Utility did not resolve the issue, you can attempt to mount the volume manually:
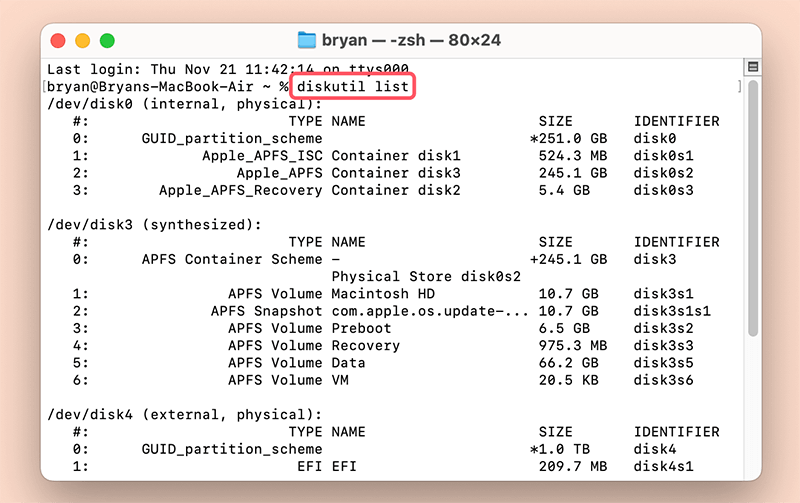
- Open Terminal from Utilities via Applications.
- Type the command below and press Enter:
diskutil list
![Mount the Volume Manually]()
- Identify the volume you want to mount. Look for the identifier (e.g., disk2s1).
- To mount the volume, use the command:
diskutil mount disk2s1
Replace "disk2s1" with your volume's identifier.
If successful, the volume should appear on your desktop or in Finder.
Method 2: Check for File System Errors Using Terminal
If the volume still fails to mount, you can use Terminal to check for file system errors:
- Open Terminal.
- Enter the following command:
diskutil verifyVolume disk2s1
- If errors are reported, use the repair command:
diskutil repairVolume disk2s1
Method 3: Safe Mode Boot
Booting your Mac in Safe Mode can help resolve software-related issues that may prevent the volume from mounting:
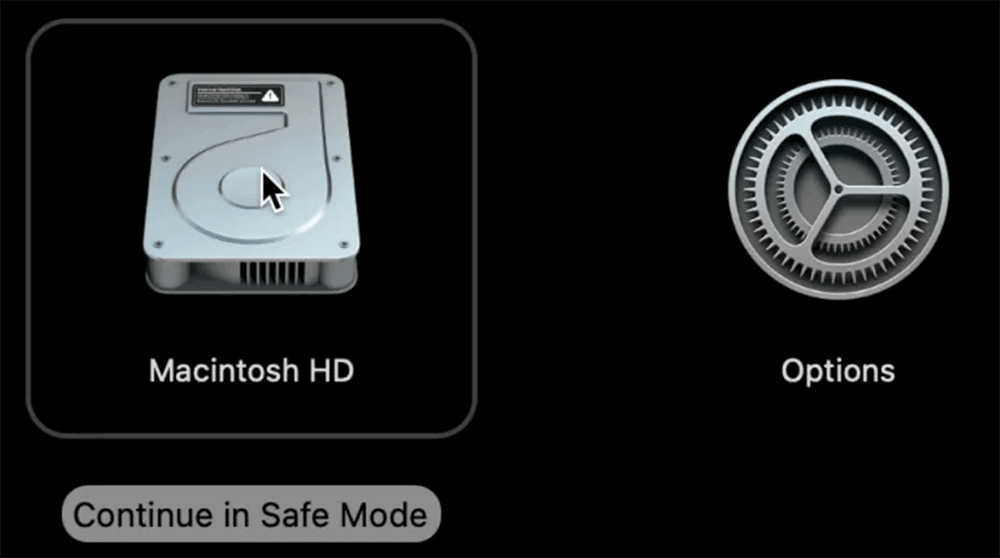
- Shut down your Mac.
- Restart and immediately press and hold the Power button.
- Release the key when you see Loading Startup Options.
- Select the Macintosh HD, press Option key, choose Continue in Safe Mode.
![Safe Mode Boot]()
Once in Safe Mode, check if the volume mounts successfully. If it does, restart normally and check again.
Method 4: Check for macOS Updates
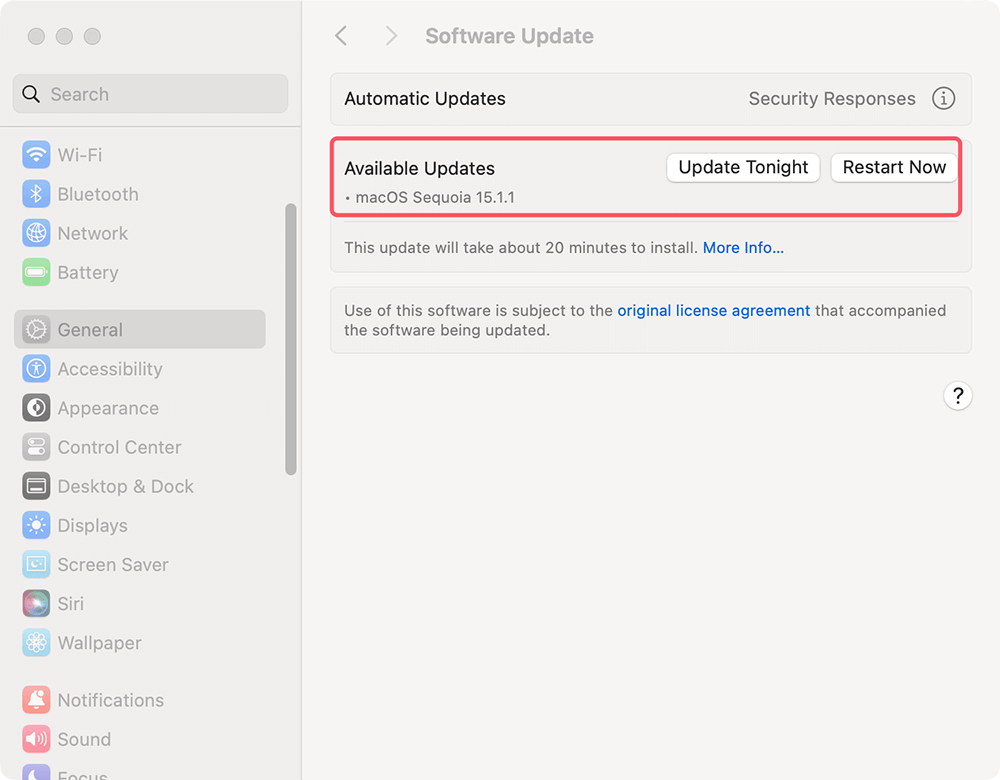
Outdated macOS versions may cause compatibility issues with file systems. Ensure your system is up to date:
- Open System Settings.
- Click on General > Software Update.
- Install any available updates.
![Check for macOS Updates]()
Method 5: Use Data Recovery Software
If all other methods fail and the drive remains unmounted, there's a risk that data stored on the drive could become inaccessible. This is where data recovery software becomes essential, especially if the issue is rooted in disk corruption or file system failure. While recovering data directly from a damaged or unmounted drive may seem daunting, modern data recovery tools are designed to extract files from problematic disks without requiring advanced technical knowledge.
Below is a list of popular and reputable data recovery tools:
- Donemax Data Recovery for Mac: It can help you quickly mount drive, fix damaged drive and completely recover lost data from damaged or erased drive on Mac.
- Disk Drill: It offers features such as disk health monitoring and the ability to create disk images, which can be useful if your drive is showing signs of physical failure.
- EaseUS Data Recovery Wizard: This software is another powerful solution for recovering data from inaccessible volumes. It scans the unmounted drive and retrieves lost data, including images, documents, and videos.
- Stellar Data Recovery: Known for its high success rate, it allows users to preview recoverable files before attempting a full recovery. It can recover data from corrupted or lost APFS partitions.
How to Use Data Recovery Software (such as Donemax Data Recovery for Mac)
Follow these general steps to recover data using data recovery software:
- Stop Using the Drive: If you suspect that your drive is corrupted, refrain from writing any more data to it. This prevents overwriting the files you are trying to recover. Mounting issues often stem from minor corruption in file system records, but writing more data could exacerbate the problem.
- Install the Software: Download and install your chosen data recovery software on a separate drive from the one experiencing issues. This avoids any accidental overwriting of the files you are trying to recover.
Donemax Data Recovery for Mac
- Recover deleted, formatted and lost data on Mac.
- Mount and repair damaged drives on Mac.
- Export inaccessible data from crashed drive to another drive.
- Create a Disk Image (Optional but Recommended): If your drive is showing signs of physical failure, such as strange noises or overheating, create a disk image before attempting recovery. This allows you to work on a copy of the drive, preserving the original.
- Scan the Drive: Use the software to initiate a deep scan of the unmounted drive. This operation may take a few minutes to many hours, depending on the size and state of the drive. The program will find files that can be recovered during the scan and list them.
![Scan the Drive]()
- Preview and Recover Files: Most data recovery programs let you examine the files it has found when the scan is finished. After making your selections, save the data to a new, healthy disk so they may be recovered.
![Preview and Recover Files]()
When to Seek Professional Help
While data recovery software is often effective, there are situations where it may not be enough, and professional data recovery services should be considered. Professional services have the equipment and expertise needed to handle more severe cases of data loss, including hardware-level issues.
- Physical Drive Failure: If your drive is making strange clicking noises, refuses to spin up, or is overheating, it could indicate physical failure. In such cases, attempting to run recovery software could further damage the drive.
- Severe File System Corruption: In cases of severe file system corruption, recovery software might only be able to retrieve fragments of files, or the file structure may be too damaged to reconstruct. Professionals can often repair or extract the file system at a deeper level.
- Critical Data: If the data on the drive is critical and the risk of further damage or loss is unacceptable, it's best to go directly to a professional. These services often involve disassembling the drive in a clean room environment to recover data from the platters or flash memory chips.
🔖Choosing a Professional Data Recovery Service
If you need to seek professional help, look for reputable services that specialize in Mac and APFS recovery. Popular data recovery services include:
- DriveSavers: DriveSavers is one of the most well-known names in professional data recovery, with a long history of retrieving data from damaged and corrupted drives. They specialize in Apple devices and are trusted by many tech professionals.
- Secure Data Recovery: This service offers a "no data, no charge" policy, meaning that if they can't recover your files, you don't pay. They also provide an evaluation report that includes the likelihood of a successful recovery.
- Ontrack: Ontrack offers comprehensive data recovery services and has expertise in handling Apple devices. They provide remote, in-lab, and even onsite data recovery services depending on the urgency and complexity of the case.
Preventing Future Issues
While the above solutions can help resolve the AppleAPFSMedia mounting issue, taking preventive measures can minimize the likelihood of encountering this problem again.
- Regular Backups
Always maintain regular backups of your important data using Time Machine or another backup solution. This ensures that you have a secure copy of your files in case of hardware failure or data corruption.
- Proper Ejection of Drives
When using external drives, always eject them properly before unplugging. This practice helps prevent file system corruption and ensures that all files are safely written to the disk.
- Monitor Drive Health
Keep an eye on the health of your drives. Use Disk Utility to check for errors periodically, and consider using third-party tools that provide detailed reports on drive health.
- Upgrade Hardware When Necessary
If you consistently experience mounting issues with external drives, it might be time to invest in new hardware. Quality cables and drives can reduce the likelihood of data loss and mounting problems.
Conclusion
Encountering the "AppleAPFSMedia not mounted" error can be alarming, especially when facing potential data loss. However, by understanding the issue and following the diagnostic and repair methods outlined in this article, you can often resolve the problem without losing any data. Remember to take preventive measures to safeguard your files in the future. By staying vigilant and proactive, you can ensure a smoother experience with your Apple devices.


Donemax Data Recovery for Mac
Donemax Data Recovery for Mac is one of the best Mac data recovery software. It is easy-to-use and can help in recovering deleted, formatted, inaccessible or lost data from Mac HDD/SSD, external disk, USB drive, SD card, camera or other storage devices.
Related Articles
- Apr 15, 20258 Solutions to Fix com.apple.DiskManagement.disenter error -119930868 on a Mac
- Feb 24, 2025How to Repair a Corrupted Android SD Card: A Complete Guide
- Dec 17, 2024Can't Delete Files from USB Drive or SD Card on Mac? Fix It Now
- Jul 05, 2024Samsung Portable SSD T9 Is Not Mounting on Mac, Fix It Now
- Feb 17, 20255 Methods to Fix a Corrupted USB Flash Drive Without Formatting It
- Jun 27, 2024Fix LaCie External Hard Drive Not Recognized on Windows PC

Steven
Steven has been a senior writer & editor of Donemax software since 2020. He's a super nerd and can't imagine the life without a computer. Over 6 years of experience of writing technical solutions and software tesing, he is passionate about providing solutions and tips for Windows and Mac users.

Gerhard Chou
In order to effectively solve the problems for our customers, every article and troubleshooting solution published on our website has been strictly tested and practiced. Our editors love researching and using computers and testing software, and are willing to help computer users with their problems
Hot Donemax Products

Clone hard drive with advanced clone technology or create bootable clone for Windows/Mac OS.

Completely and easily recover deleted, formatted, hidden or lost files from hard drive and external storage device.

Certified data erasure software - permanently erase data before selling or donating your disk or any digital device.
