Written byStevenUpdated on Feb 19, 2025
Best 5 Methods to Format a Hard Drive on Windows 11 – A Comprehensive Guide
Approved byGerhard Chou
Summary: You can use File Explorer, Disk Management, Command Prompt (CMD), PowerShell, Third-party Tools to format HDD/SSD/USB Drive/SD card on Windows 11. If you will sell or donate your hard drive, you can use Windows 11 disk wipe software - Donemax Data Eraser to securely wipe the drive and permanently erase all data from it.
PAGE CONTENT:
- Preparing for Formatting Hard Drive on Windows 11
- 5 Methods to Format a Hard Drive on Windows 11
- Troubleshooting Common Windows 11 Disk Formatting Issues
- How to Recover Lost Data from Formatted Hard Drive on Windows 11?
- How to Wipe and Format Hard Drive on Windows 11? (Data is lost for good)
- Conclusion
Formatting a hard drive is an essential task for Windows 11 users who want to prepare a new drive, erase data securely, or resolve file system errors. Whether you are setting up a new hard drive, repurposing an old one, or troubleshooting performance issues, formatting ensures that the drive is clean and ready for use.
This guide explores various methods to format a hard drive in Windows 11, ranging from simple graphical user interface (GUI) methods to advanced command-line techniques. We will also discuss different file systems, precautions, and troubleshooting steps to ensure a smooth formatting process.
Preparing for Formatting Hard Drive on Windows 11
▪️ Backing Up Important Data
Formatting a hard drive erases all stored data, so it is important to back up important files before proceeding. Use a dedicated backup software to create a copy of your essential files.
▪️ Checking the Drive Type
Before formatting, determine whether your hard drive is an internal or external drive and whether it is an HDD or an SSD. SSDs benefit from TRIM-enabled formatting for performance optimization.
▪️ Understanding Different Format Types: Quick Format vs. Full Format
When formatting a hard drive in Windows 11, you may notice the option for Quick Format or Full Format. You can select the approach that best suits your needs by being aware of the distinctions between these two approaches.
1. What is a Quick Format?
It is a fast and efficient way to format a drive, but it does not fully erase the data. Instead, it simply removes the file system structure, marking all space as available for new data.
Characteristics:
- Takes only a few seconds to a few minutes, regardless of the drive size.
- Does not check for bad sectors.
- Data can still be recovered using recovery software.
When to Use this method:
- If you are reformatting a drive for reuse on the same system.
- When you need a fast format without checking for disk errors.
- If you plan to overwrite the drive with new data immediately.
How to Perform:
- When formatting through File Explorer, check the "Quick Format" box.
- In Disk Management, select the quick format option when prompted.
- Using Command Prompt, enter:
format X: /fs:ntfs /q
(Replace X: with the correct drive letter.)
2. What is a Full Format?
It is more thorough but also takes longer because it deletes all of the data and checks for corrupt sectors.
Characteristics:
- Can take several minutes to hours, depending on the drive size.
- Scans the entire drive for bad sectors and marks them as unusable.
- Data recovery is much more difficult after a full format.
When to Use this method:
- If you suspect the drive has bad sectors or performance issues.
- When selling or donating a drive and want to securely erase data.
- If you want to ensure a clean installation for a new operating system.
How to Perform:
- In File Explorer, uncheck the "Quick Format" option before formatting.
- In Disk Management, choose full format when prompted.
- Using Command Prompt, enter:
format X: /fs:ntfs
(Replace X: with the correct drive letter.)
5 Methods to Format a Hard Drive on Windows 11
Below are the 5 methods to format HDD, SSD, hard drive partition, USB drive, SD card or other device on Windows 11:
Method 1: Format Hard Drive on Windows 11 via File Explorer
The easiest way to format a hard drive in Windows 11 is through File Explorer. This method is best for quick formatting and is ideal for external drives.
Step-by-Step Guide:
Step 1. Open File Explorer (Win + E).
Step 2. Locate the drive you want to format under "This PC."
Step 3. Right-click on the drive and select "Format."
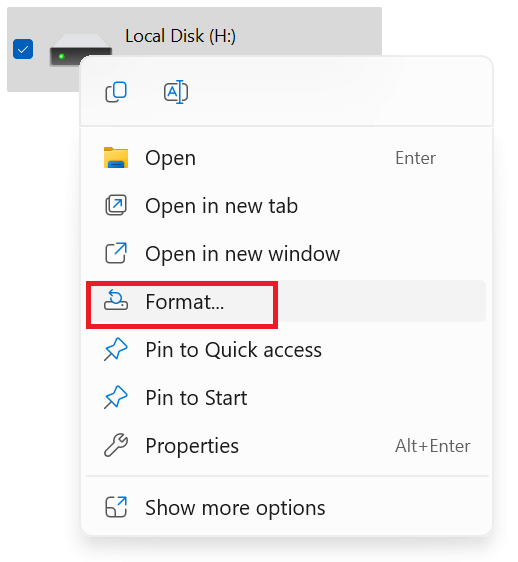
Step 4. Select a file system such as exFAT or NTFS.
Check or uncheck "Quick Format":
- Quick Format: Deletes data quickly but does not scan for bad sectors.
- Full Format: Takes longer but scans for bad sectors.
![format a hard drive in Windows 11]()
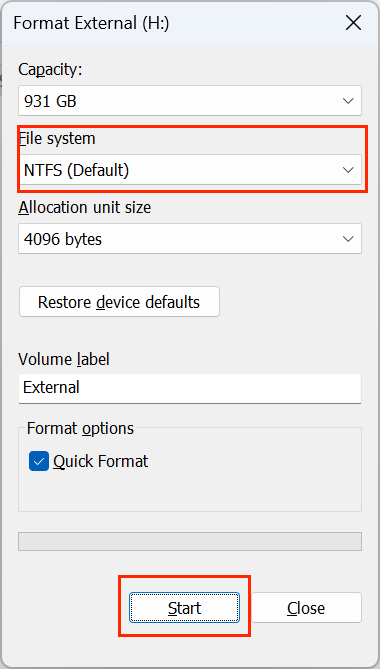
Step 5. Click "Start" and confirm when prompted.
When to Use This Method:
- Best for formatting external drives quickly.
- Ideal for users unfamiliar with advanced formatting tools.
Method 2: Format Hard Drive on Windows 11 Using Disk Management
Disk Management provides more control over formatting, allowing users to create new partitions, change drive letters, and format unallocated space.
Step-by-Step Guide:
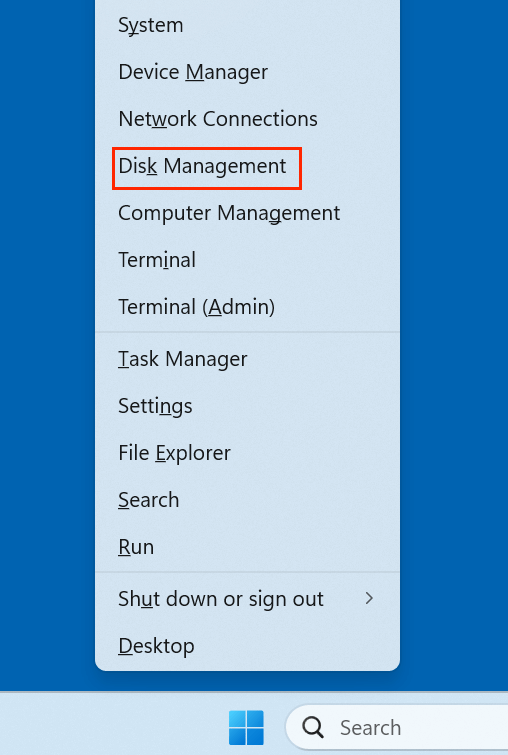
Step 1. Press Win + X and select "Disk Management."
Step 2. Locate the drive you want to format.
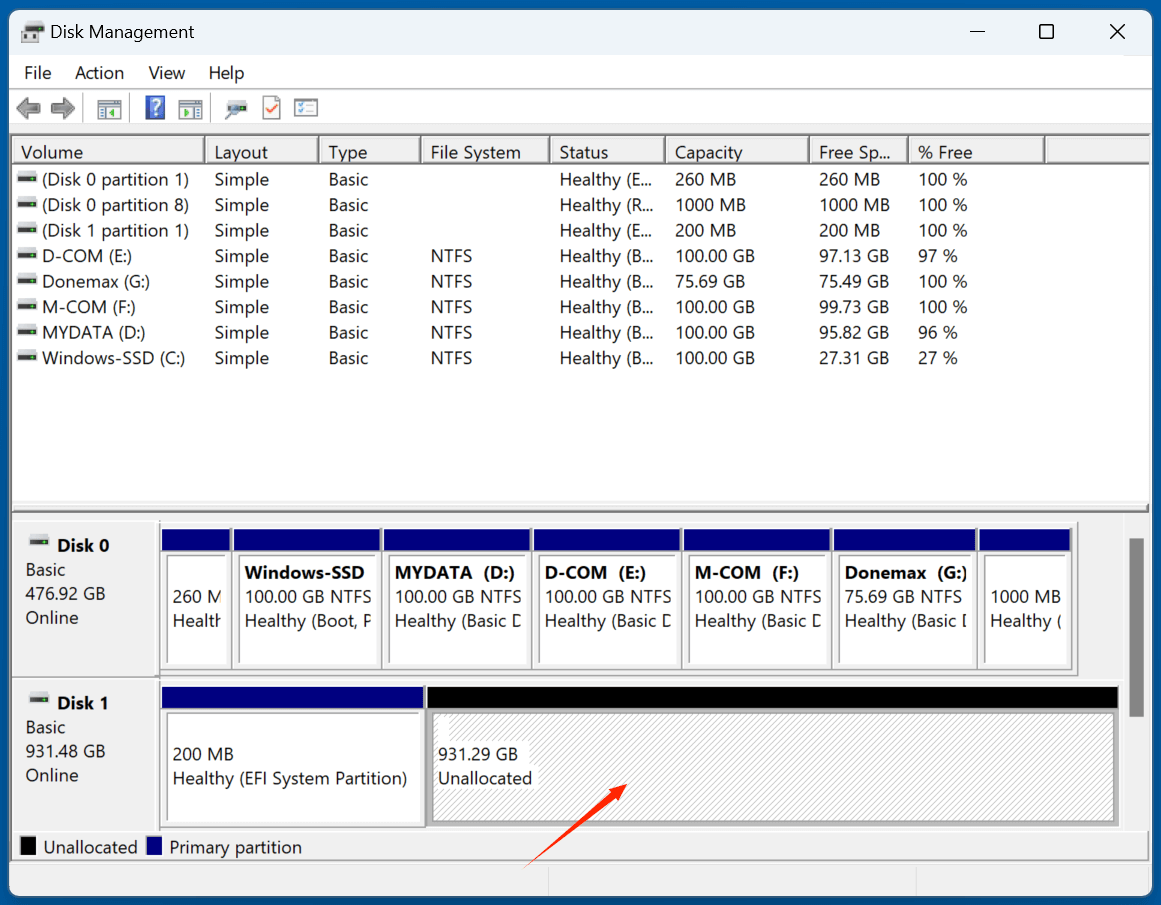
Step 3. If the drive is new and unallocated:
- To access the unallocated space, right-click on it and choose "New Simple Volume."
![format a hard drive in Windows 11]()
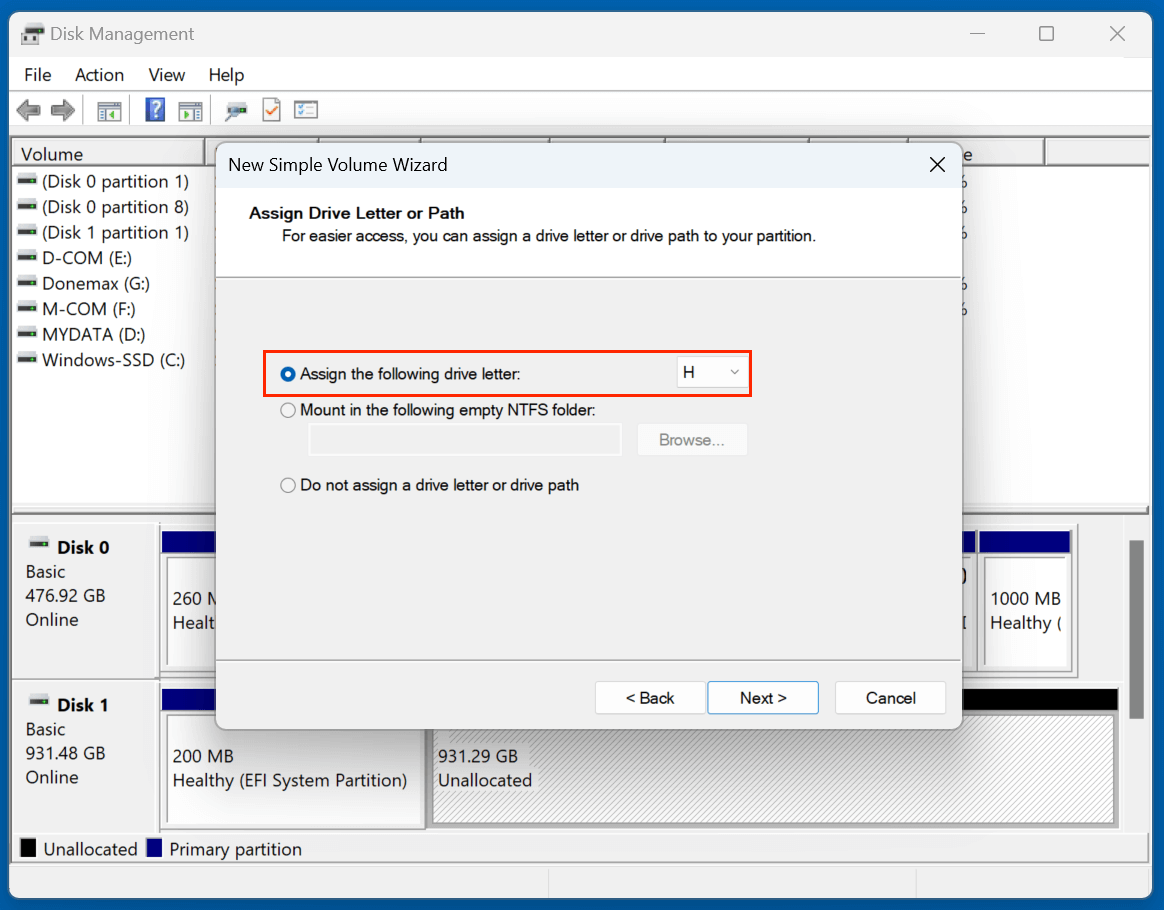
- Format the volume and assign a drive letter by following the wizard.
![format a hard drive in Windows 11]()

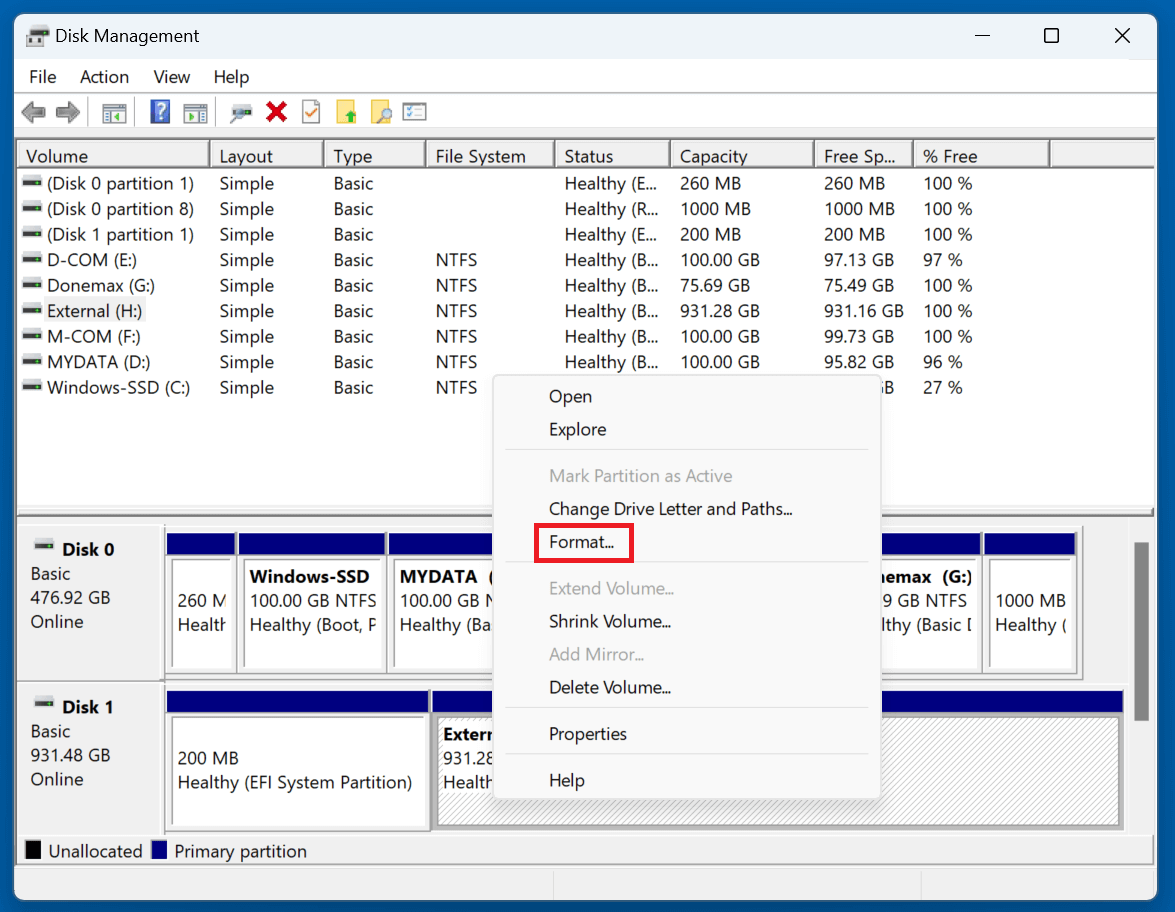
Step 4. If the drive has an existing partition:
- Right-click the partition and select "Format."
![format a hard drive in Windows 11]()
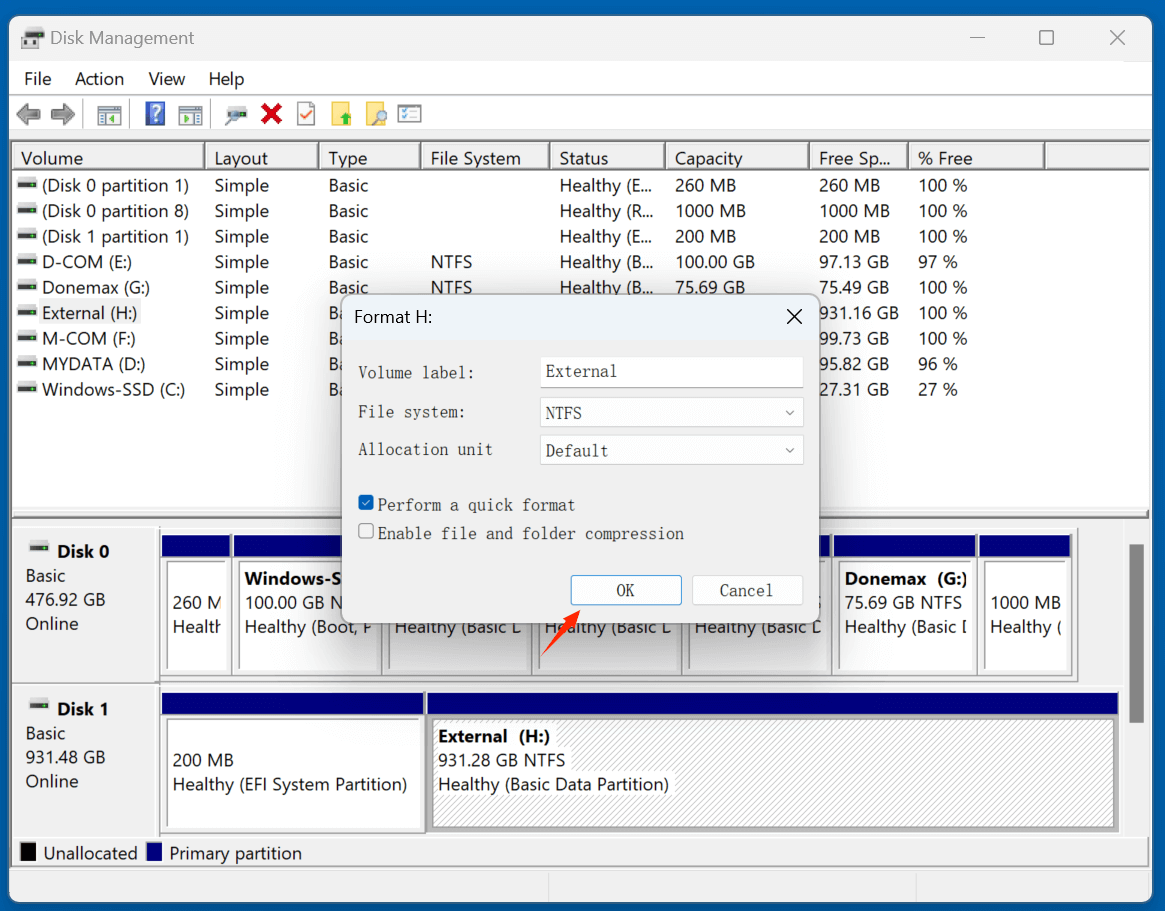
- Select the volume label, allocation unit size, and file system.
![format a hard drive in Windows 11]()
- Click OK and confirm the action.
When to Use This Method:
- Useful for initializing new hard drives.
- Ideal for managing multiple partitions.
Method 3: Format Hard Drive on Windows 11 Using Command Prompt (CMD)
For users comfortable with command-line interfaces, Command Prompt provides a powerful way to format drives.
Procedural Guide:
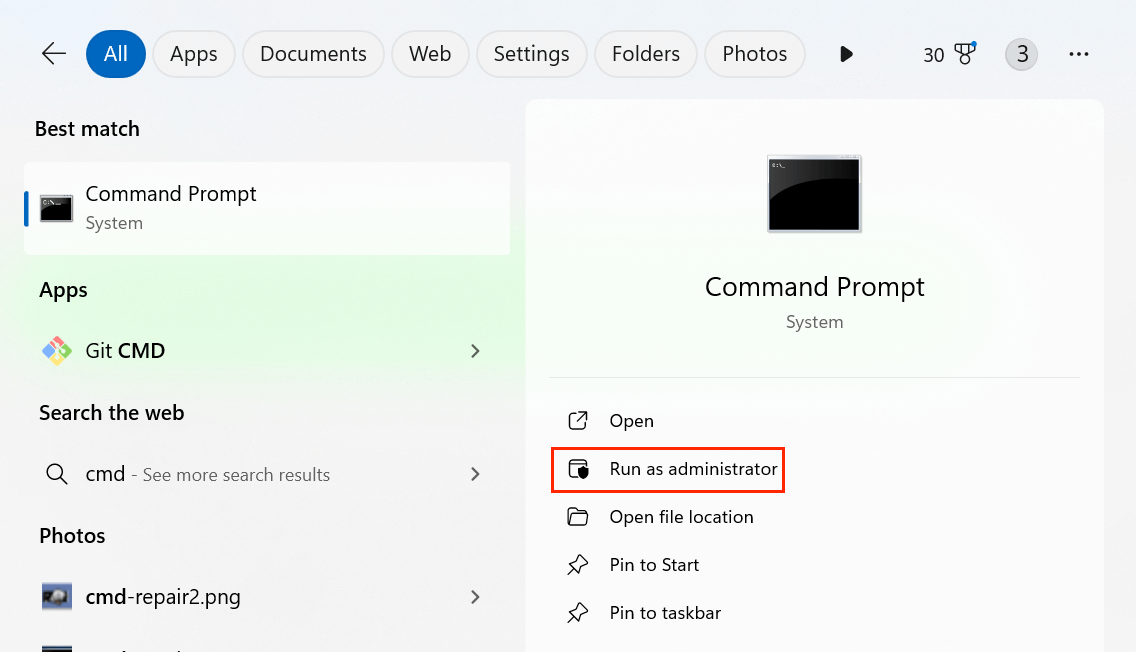
Step 1. Open Command Prompt as Administrator: Press Win + S, type "cmd", right-click "Command Prompt", and select "Run as administrator."
Step 2. Type the following command to list all drives:
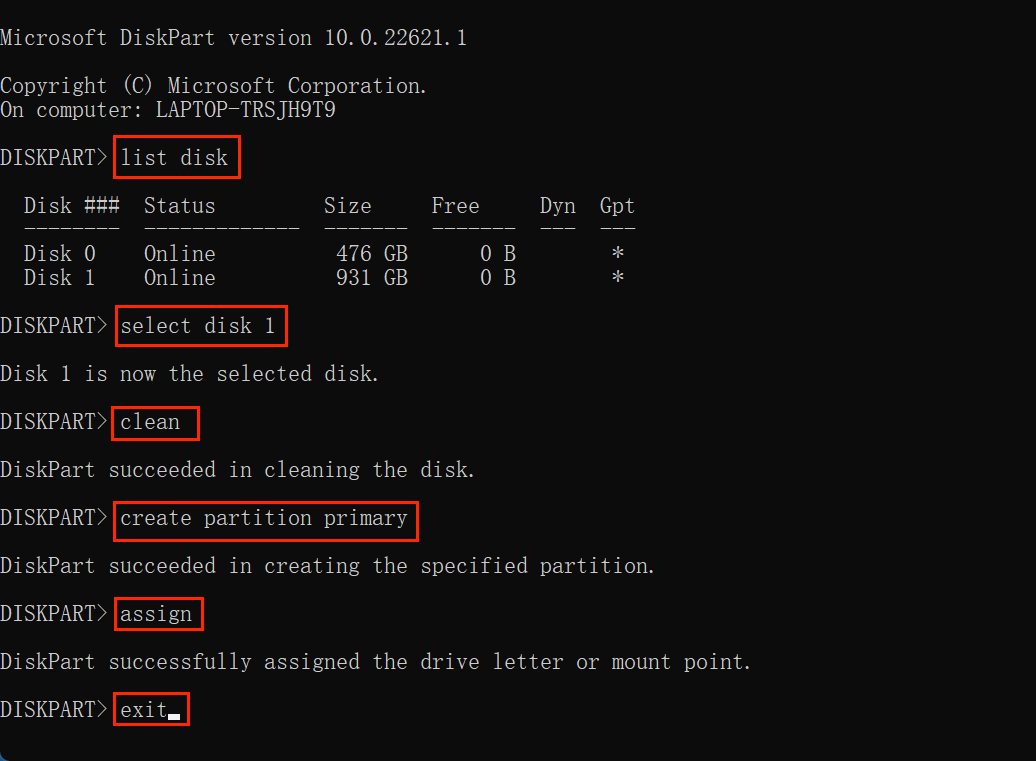
diskpart
Step 3. Then, type:
list disk
Step 4. Determine the drive's disk number to format and type:
select disk X (Replace X with the correct disk number)
Step 5. Clean the disk (optional but recommended for new drives):
clean
Step 6. Create a new partition and format it:
create partition primary
format fs=ntfs quick (Use exfat or fat32 if needed)
Step 7. Assign a drive letter:
assign
Step 8. Exit Diskpart by typing:
Exit
When to Use This Method:
- Best for advanced users needing precise control.
- Useful for formatting corrupted drives that don't appear in File Explorer.
Method 4: Format Hard Drive on Windows 11 Using PowerShell
PowerShell provides another command-line method with additional automation options.
Procedural Guide:
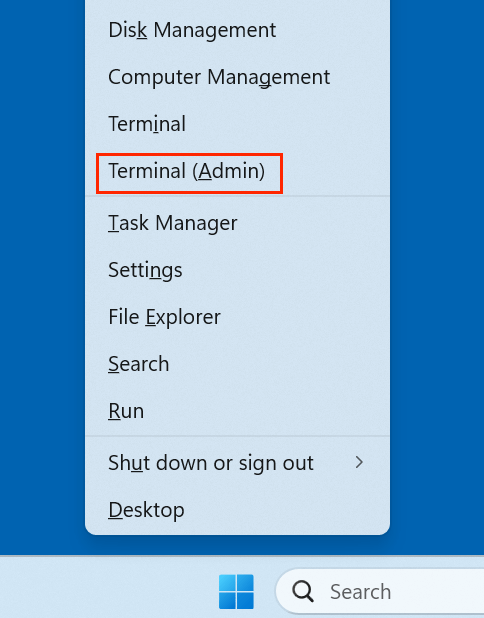
Step 1. Press Win + X to launch PowerShell as Administrator (Terminal (Admin)).
Step 2. List available drives:
Get-Volume
Step 3. Format the selected drive (replace X: with the correct drive letter):
Format-Volume -DriveLetter X -FileSystem NTFS -Full -Force

Step 4. For a quick format, omit the -Full parameter:
Format-Volume -DriveLetter X -FileSystem NTFS -Force
When to Use This Method:
- Useful for scripting and automation.
- Ideal for IT professionals managing multiple systems.
Method 5: Format Hard Drive on Windows 11 Using Third-Party Software
Sometimes, Windows tools might not be enough, especially for repairing damaged partitions or performing secure erasure. Third-party tools provide additional features.
Popular Software Options:
- Donemax Data Recovery (Recover lost data, reformat hard drive, repair drive).
- MiniTool Partition Wizard (User-friendly GUI).
- AOMEI Partition Assistant (Secure data wiping, SSD optimization).
How to Use Third-Party Software:
- Download and install the tool of your choice.
- Open the program and locate the drive.
- Select "Format" and choose file system options.
- Apply changes and wait for the process to complete.
When to Use This Method:
- Best for recovering and formatting corrupted drives.
- Useful for advanced partitioning needs.
Troubleshooting Common Windows 11 Disk Formatting Issues
Below, we explore some of the most common formatting issues and their solutions.
1. Drive Not Detected in Windows
This issue can be caused by several factors, including improper connections, outdated drivers, or a corrupted partition table.
Solutions:
- Check Physical Connections (for External Drives)
- Check Disk Management for Unallocated Space
- Update or Reinstall Drivers
- Use the Hardware and Devices Troubleshooter
- Check BIOS/UEFI Settings (For Internal Drives)
2. Write Protection Errors
If you receive an error message saying, "The disk is write-protected," it means that Windows has prevented modifications to the drive. This can happen due to software restrictions, a locked registry setting, or a damaged drive.
Solutions:
- Remove Write Protection via Command Prompt
- Remove Write Protection via Registry Editor
- Check for Physical Write Protection (For USB/SD Cards)
- Format the Drive Using Third-Party Software
3. Formatting Stuck or Taking Too Long
Formatting a hard drive should typically take a few seconds to a few minutes, depending on the drive size and the selected format type. If the process takes an unusually long time or freezes, there could be underlying issues with the disk.
Solutions:
- Use CHKDSK to Scan and Fix Errors
- Force Format via Command Prompt
- Check for Disk Health Issues
- Format Using a Bootable USB (For System Drives)
4. Drive Shows Incorrect Size After Formatting
Sometimes, after formatting, a drive may show less storage than its actual capacity. This issue is common with large external drives formatted in the wrong file system or affected by hidden partitions.
Solutions:
- Delete and Recreate the Partition
- Use Diskpart to Restore Full Capacity
- Check for Hidden Partitions with Third-Party Software
Formatting a hard drive should be a straightforward task, but technical issues can sometimes interfere. Whether your drive is not detected, write-protected, or formatting is stuck, following these troubleshooting steps should help resolve the problem.
If none of these solutions work, the drive may be physically damaged, and replacement might be the best option. Always back up your data before formatting to prevent data loss.
How to Recover Lost Data from Formatted Hard Drive on Windows 11?
If you have lost data due to formatting a hard drive on Windows 11 and you don't have a backup of the lost data, you can use data recovery program to unformat the drive and get all deleted/formatted/lost data back.
Step 1. Download and install the reliable Windows 11 data recovery program - such as Donemax Data Recovery on your computer.
Step 2. Open Donemax Data Recovery, select the formatted hard drive to start data recovery.

Step 3. Click on Scan button to deeply scan the formatted hard drive and find all recoverable files.
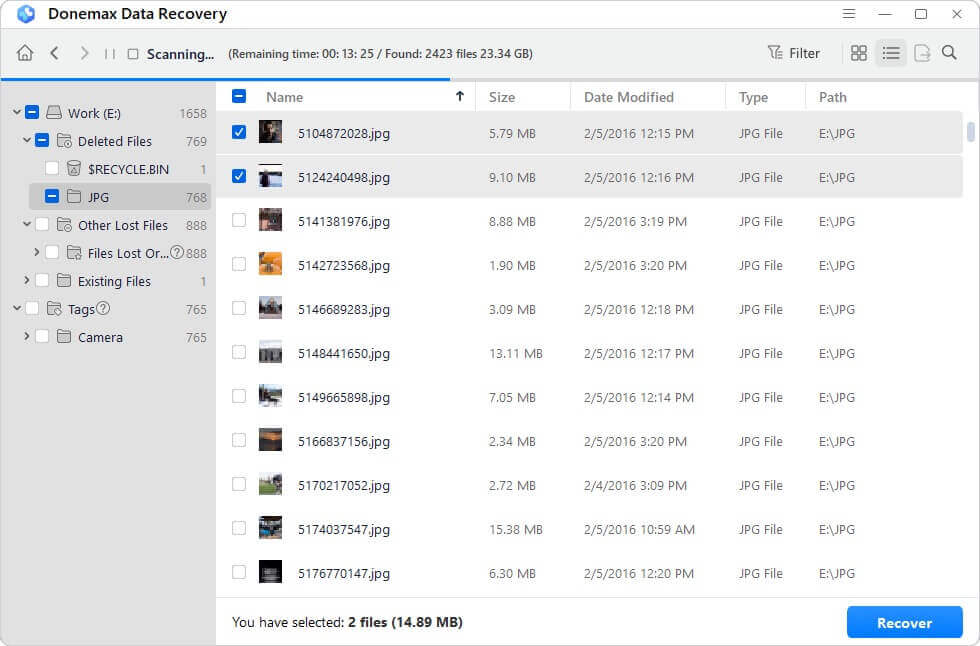
Step 4. Once the scan is completed, you can preview all recoverable files. Then select the wanted files, click on Recover button to save them.

How to Wipe and Format Hard Drive on Windows 11? (Data is lost for good)
If you will sell, donate or dispose of an old hard drive, you can use Windows 11 disk wipe software to securely wipe all sensitive data off the drive, ensure no information is recoverable.
Step 1. Donemax Data Eraser is one of the best disk wipe software for Windows 11. Just download and install it on your computer.
Step 2. Open Donemax Data Eraser, choose Erase Hard Drive mode.Select the drive you want to wipe, click on Erase Now button. It will securely and permanently erase all data from the drive.

Conclusion
Formatting a hard drive on Windows 11 is a smooth process if the correct method is chosen based on the use case. File Explorer and Disk Management provide easy options for casual users, while Command Prompt and PowerShell offer advanced controls. Third-party tools add further flexibility for complex scenarios.
Before formatting, always back up data and select the appropriate file system for your needs. With these methods, you can efficiently format and manage your storage devices, ensuring optimal performance and reliability.
Donemax Data Eraser
One of the best data erasure programs for permanently erase data from PC, Mac, HDD, SSD, USB drive, digital camera and other devices. Once the data is erased, it is lost for good, cannot be recovered by any method.
Related Articles
- Mar 13, 2025[5 Fixes] Fix Seagate One Touch SSD Not Showing Up on My Computer
- Apr 25, 2025What is Disk Cleanup, What to Do if It Is Not Working?
- Nov 29, 2024How to Automatically Empty Recycle Bin on Windows 11/10?
- Feb 26, 2025Fix Memory Stick Not Showing Up on Windows Without Losing Data
- Jul 12, 2024How to Replace A Failed Hard Drive?
- Feb 13, 2025[10 Solutions] Fix USB Flash Drive Not Working on Windows 11/10/8/7

Contributing Writer
Steven
Steven has been a senior writer & editor of Donemax software since 2020. He's a super nerd and can't imagine the life without a computer. Over 6 years of experience of writing technical solutions and software tesing, he is passionate about providing solutions and tips for Windows and Mac users.

Editor in chief
Gerhard Chou
In order to effectively solve the problems for our customers, every article and troubleshooting solution published on our website has been strictly tested and practiced. Our editors love researching and using computers and testing software, and are willing to help computer users with their problems