PAGE CONTENT:
- What Does Initializing a Hard Drive Mean?
- Recover Lost Data or Export Data from Uninitialized Disk
- How to Initialize an External Hard Drive on Windows?
- How to Initialize an External Hard Drive on Mac?
- Choosing the Right File System: NTFS, FAT32, exFAT, or APFS?
- Troubleshooting Common Initialization Issues
- Conclusion
External hard drives are an essential tool for many individuals, whether for backup, transferring large files, or expanding storage capacity. However, when you purchase a new external hard drive, it might not work right away because it hasn't been initialized. Initializing an external hard drive is a crucial first step that prepares it for use by your computer. Without this process, the drive won't show up on your system or allow you to store any data. In this article, we'll walk you through how to initialize an external hard drive on both Windows and Mac, making the process simple and clear for beginners and advanced users alike.

What Does Initializing a Hard Drive Mean?
Before diving into the step-by-step guide, it's important to understand what initializing a hard drive actually means. When you initialize a hard drive, you're preparing it to be used by the operating system. This process involves setting up a partition table, which is a system that the operating system uses to organize and keep track of files on the disk. Initialization essentially gives your hard drive a structure so that files can be saved and accessed.
Common Reasons to Initialize a Hard Drive:
Several scenarios might require you to initialize an external hard drive:
- Brand-new hard drive: New external drives typically need to be initialized and formatted before they can store data.
- Corrupted drive: If your external hard drive is malfunctioning, initializing it might solve the issue.
- Incompatibility: An external hard drive formatted for one system (e.g., Windows) might need re-initialization to be compatible with another (e.g., Mac).
- Switching systems: If you're using a drive that was previously used on another computer or operating system, initializing it ensures it's compatible with your current setup.
It's important to note that initializing a drive will erase all the data on it. This is typically not an issue with new drives, but if you're initializing a drive that has been used before, ensure that you've backed up any important data before proceeding.
Recover Lost Data or Export Data from Uninitialized Disk
Before initializing the external hard drive, you can recover and export all data from the uninitialized external hard drive to your computer or another drive.
Step 1. Download and install the best data recovery software - Donemax Data Recovery.
Step 2. Open Donemax Data Recovery, select the uninitialized external hard drive.

Step 3. Click on Scan button to deeply scan the uninitialized external hard drive to find all recoverable files including deleted/formatted files, existing files, inaccessible files, etc.

Step 4. Once the scan is completed, select the wanted files. Click on Recover button. Then choose a location to save the recovered files.

How to Initialize an External Hard Drive on Windows?
The process for initializing an external hard drive on Windows is relatively straightforward, though it may vary slightly depending on your version of the operating system.
Step 1. Connect the External Hard Drive.
The first step is to physically connect the external hard drive to your computer. Use the USB or Thunderbolt cable that came with the drive, ensuring that it's properly inserted into the correct port on both your computer and the drive itself. Once connected, Windows should automatically recognize the drive.
Step 2. Access Disk Management.
To initialize the drive, you'll need to access the Disk Management tool, which is included in all Windows operating systems. Follow these steps:
- From the list of options that appears, right-click on the Start menu and choose Disk Management. As an alternative, you may choose Disk Management by pressing Windows + X.
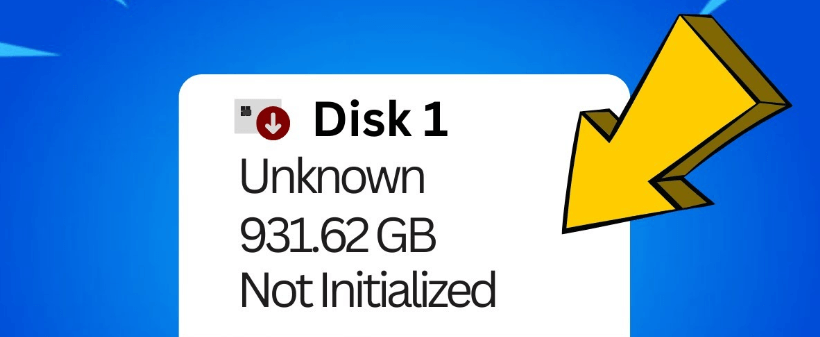
- A list of all the disks that are linked to your computer will be shown when the Disk Management window opens. "Unknown" and "Not Initialized" will be used to indicate if the external hard disk needs to be initialized.
Step 3. Initialize the Drive.
When you see the "Unknown" drive status, follow these steps to initialize it:
- Right-click on the drive that says "Not Initialized."
- Select Initialize Disk from the context menu.
![Initialize the Drive]()
- A dialog box will appear asking you to choose between two partition styles: MBR (Master Boot Record) or GPT (GUID Partition Table).
- MBR is compatible with older systems but has limitations, such as a maximum storage capacity of 2TB.
- GPT is the newer standard and is recommended for most modern systems because it supports larger capacities and more partitions.
- Choose the appropriate partition style (GPT is usually the better choice unless you have an older system).
- Click OK to proceed.
Step 4. Format the Drive.
After initializing the drive, it still won't appear in File Explorer until it's formatted. Here's how to format the newly initialized drive:
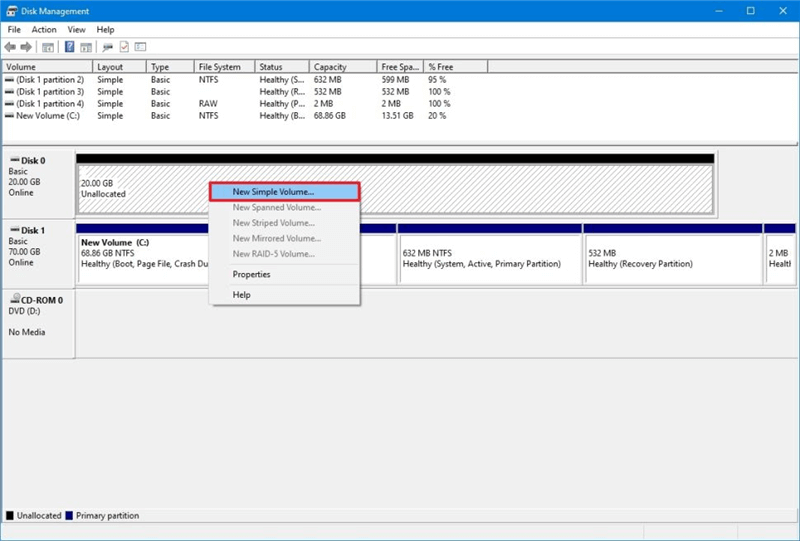
- Right-click on your new drive's Unallocated space in Disk Management.
- From the menu, choose New Simple Volume.
![New Simple Volume]()
- The New Simple Volume Wizard will launch. Follow the prompts to specify the volume size (you can leave it at the default size unless you want to partition the drive), assign a drive letter, and choose a file system.
- Select the file system format. NTFS is recommended for Windows users, while exFAT is a good choice if you plan on using the drive with both Windows and Mac systems.
- Click Finish to complete the formatting process.
Your external hard drive is now initialized, formatted, and ready for use on Windows.
How to Initialize an External Hard Drive on Mac?
The process for initializing an external hard drive on Mac is similar to Windows but uses different tools and terminology. Below, we'll cover the steps for macOS users.
Step 1. Connect the External Hard Drive.
As with Windows, start by connecting the external hard drive to your Mac using the appropriate cable. Once connected, macOS should recognize the drive.
Step 2. Open Disk Utility.
To initialize and format the drive, you'll use the Disk Utility tool. Here's how to open it:
- To launch Spotlight, either click the Spotlight symbol (the magnifying glass) in the upper-right corner of your screen or hit Command + Space.
- In the search field, type "Disk Utility" and hit Enter.
- A list of all the drives that are attached to your Mac may be seen on the left-hand side of the Disk Utility window.
Step 3. Select and Erase the Drive.
If your external drive is new or hasn't been formatted for Mac, it will likely be listed as "Untitled" or show as an unformatted volume. To initialize it:
- Select your external drive from the list on the left (ensure you choose the drive, not the individual volume under it).
- In the Disk Utility window, click the Erase button at the top.
![Select and Erase the Drive]()
- You'll be prompted to enter a name for the drive, choose a format, and choose a partition scheme.
- Format: For Mac-only usage, select APFS (Apple File System) or Mac OS Extended (Journaled). For cross-platform compatibility with Windows, choose exFAT.
- Scheme: Select GUID Partition Map unless you have a very old Mac that requires Master Boot Record (MBR).
- Click Erase to confirm your selections.
Step 4. Mount the Drive.
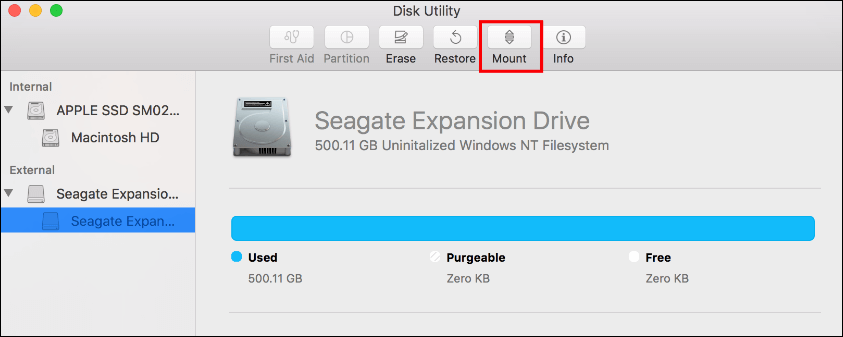
Once the drive has been erased and formatted, it should automatically mount and appear on your desktop. If it doesn't, you can manually mount it by selecting the drive in Disk Utility and clicking Mount.

Your external hard drive is now initialized and formatted for use on your Mac.
Choosing the Right File System: NTFS, FAT32, exFAT, or APFS?
One of the most critical decisions when initializing and formatting a hard drive is selecting the right file system. Each file system has its pros and cons, depending on how you plan to use the drive and which systems you’ll be using it with.
NTFS (New Technology File System)
- 🙂 Pros: NTFS is the default file system for Windows and is great for handling large files and partitions. It supports file permissions and encryption, making it suitable for advanced users.
- 🙁 Cons: NTFS is read-only on macOS without third-party software. This means you can view files on an NTFS drive from a Mac but can’t modify or add files without installing extra drivers.
- 👍 Best for: Windows users who don't need to access their files on a Mac.
FAT32 (File Allocation Table)
- 🙂 Pros: FAT32 is highly compatible across all major operating systems, including Windows, macOS, and Linux. It's also widely supported by external devices like gaming consoles and cameras.
- 🙁 Cons: FAT32 has several limitations, including a maximum file size of 4GB and a maximum partition size of 2TB. It's also an older file system with less security and reliability than newer formats.
- 👍 Best for: Compatibility across multiple platforms, particularly if you’re working with older devices or systems.
exFAT (Extended File Allocation Table)
- 🙂 Pros: exFAT is widely supported by both Windows and Mac, making it ideal for users who switch between the two systems. It doesn't have the file size or partition limitations of FAT32.
- 🙁 Cons: While exFAT is better for cross-platform compatibility than NTFS, it doesn't support some of the advanced features that NTFS offers, such as file permissions.
- 👍 Best for: Users who need to transfer files between Windows and Mac frequently.
APFS (Apple File System)
- 🙂 Pros: APFS is optimized for macOS and offers advanced features like encryption, snapshots, and fast directory sizing. It's also designed to work efficiently with solid-state drives (SSDs).
- 🙁 Cons: APFS is not natively compatible with Windows, so if you need to use the drive with both systems, you'll need third-party software to access it on Windows.
- 👍 Best for: Mac users who primarily use their drive with macOS and want to take advantage of modern file system features.
Troubleshooting Common Initialization Issues
Sometimes, you might encounter issues when trying to initialize an external hard drive. Here are a few common problems and their solutions:
The Drive Doesn't Appear in Disk Management or Disk Utility:
If your external hard drive doesn’t show up in Disk Management (Windows) or Disk Utility (Mac), it could be due to a few factors:
- Check the connections: Ensure that the USB or Thunderbolt cable is securely connected to both the drive and your computer. Try using a different port or cable to rule out hardware issues.
- Power supply: Some external hard drives require more power than others. If your drive isn't showing up, try connecting it to a power source (if it has one) or using a powered USB hub.
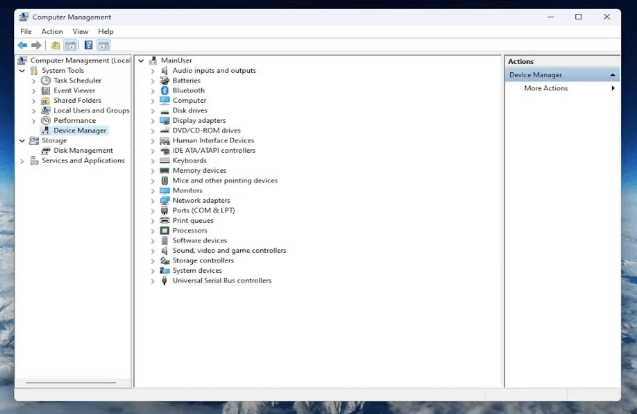
- Update drivers: For Windows users, outdated or missing drivers can prevent the external drive from appearing. Check the Device Manager for any driver issues and update them if necessary.

The Drive Appears but Can't Be Initialized:
If the drive shows up in Disk Management or Disk Utility but you can't initialize it, it could be a sign of a faulty drive. In this case:
- Run diagnostics: Numerous manufacturers of external hard drives provide diagnostic tools that may be used to find drive problems. Check for issues with these tools.
- Contact support: If the drive is new and can't be initialized, contact the manufacturer for a replacement, as it may be defective.
Conclusion
Initializing an external hard drive is a crucial step in setting it up for use with your computer, whether you're on Windows or macOS. By complying the steps described in the above article, you'll be able to get your external hard drive up and running in no time. From choosing the right file system to troubleshooting common issues, this guide covers everything you need to know to ensure your drive works seamlessly across platforms.
If you have lost data due to initializing disk on your computer, you can use data recovery software to recover data from an uninitialized or initialized external hard drive.
Related Articles
- May 09, 2025Can't Find Recycle Bin on Windows Desktop? Here's How to Fix It
- Aug 19, 2025Solutions to Fix the Error Accessing the Registry
- Feb 07, 2025Fix Windows 10 Not Detecting My Seagate External Hard Drive
- Dec 17, 202413 Solutions to Fix WD Elements Not Showing Up on Windows 11/10/8/8.1/7/Vista
- Feb 18, 2025How to Hide and Unhide a File/Folder on Windows 11?
- Apr 29, 2025How to Fix BitLocker Not Working? [6 Solutions]

Christina
Christina is the senior editor of Donemax software who has worked in the company for 4+ years. She mainly writes the guides and solutions about data erasure, data transferring, data recovery and disk cloning to help users get the most out of their Windows and Mac. She likes to travel, enjoy country music and play games in her spare time.

Gerhard Chou
In order to effectively solve the problems for our customers, every article and troubleshooting solution published on our website has been strictly tested and practiced. Our editors love researching and using computers and testing software, and are willing to help computer users with their problems


