Written byMariaUpdated on Feb 18, 2025
How to Hide and Unhide a File/Folder on Windows 11?
Approved byGerhard Chou
PAGE CONTENT:
Windows 11 offers several built-in methods to hide and unhide files and folders, making it easier to maintain privacy, security, and organization. Whether you want to conceal sensitive documents or reduce clutter in your File Explorer, learning how to manage hidden files is a useful skill. In this guide, we will cover multiple ways to hide and unhide files using File Explorer, Command Prompt (CMD), and PowerShell. Additionally, we will provide troubleshooting tips and discuss advanced techniques for added security.

Introduction: Why You Want to Hide or Unhide a File on Windows 11
There are several reasons why you might want to hide a file or folder on Windows 11. Some of the most common include:
- Privacy: Prevent others from easily accessing personal or confidential documents.
- Security: Hide important files from accidental deletion or modification.
- Organization: Keep the File Explorer interface clean by removing unnecessary clutter.
Unlike encryption, which secures files with passwords, hiding a file simply makes it invisible in File Explorer unless you enable hidden file viewing. Fortunately, Windows 11 provides simple ways to hide and unhide files without requiring third-party software.
This guide will walk you through step-by-step instructions on how to:
- Hide files using File Explorer, Command Prompt, and PowerShell.
- Unhide files using the same methods.
- Troubleshoot and explore additional security measures for hidden files.
3 Methods to Hide a File or Folder on Windows 11
There are multiple ways to hide a file or folder in Windows 11. Below, we'll explore the most effective methods.
Method 1. Hide Files and Folders on Windows 11 via File Explorer
File Explorer provides the easiest way to hide a file or folder without using any commands.
Steps to Hide a File/Folder Using File Explorer:
Step 1. Launch File Explorer by pressing Windows + E or by clicking the File Explorer icon in the taskbar.
Step 2. Find the File: Navigate to the folder or file that you wish to conceal.
Step 3. Use the File's Right-Click: From the context menu, choose Properties.
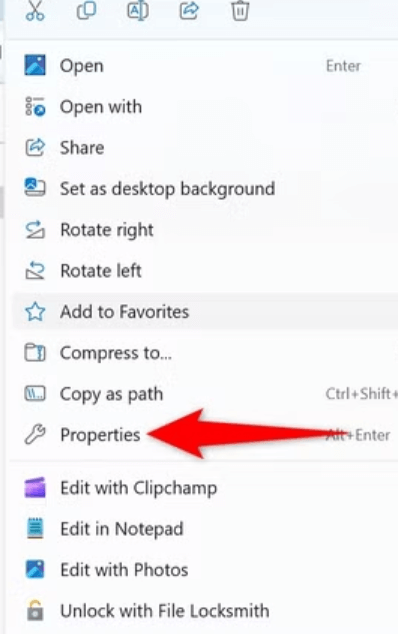
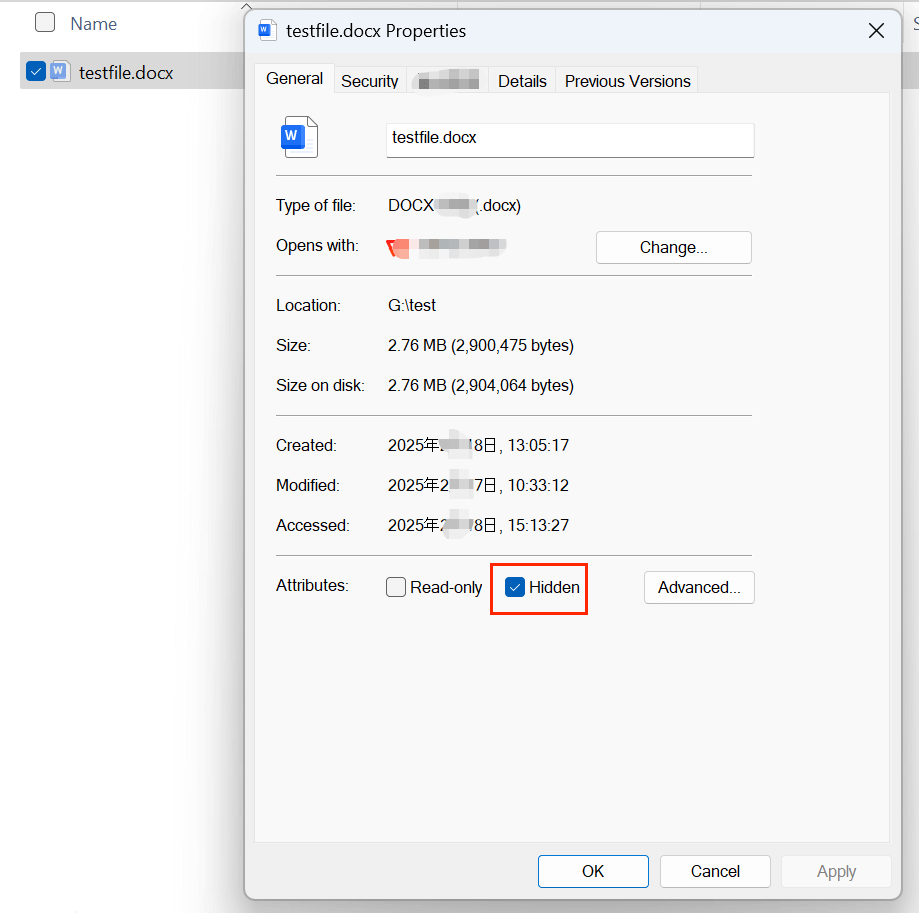
Step 4. Turn on the Hidden Attribute: Select the Hidden box under the General tab.
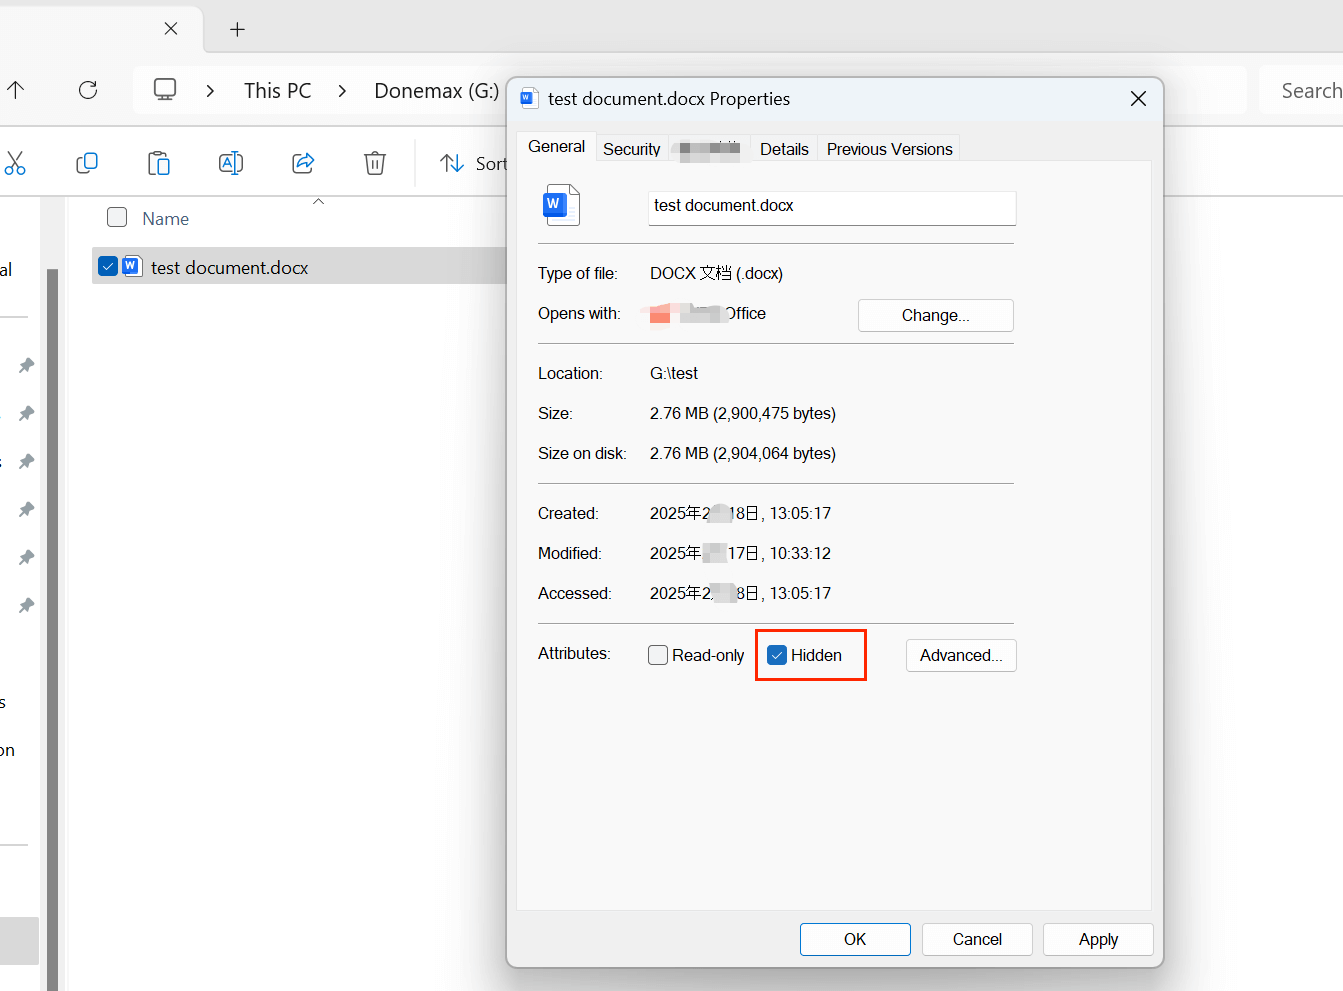
Step 5. Apply Changes: To save the modifications, click Apply and then OK.
Step 6. Confirm Visibility Settings: The file will disappear unless File Explorer is set to show hidden items.
Method 2. Hide Files and Folders on Windows 11 Using Command Prompt (CMD)
For users comfortable with the command line, CMD provides a quick way to hide files.
Steps to Hide a File Using CMD:
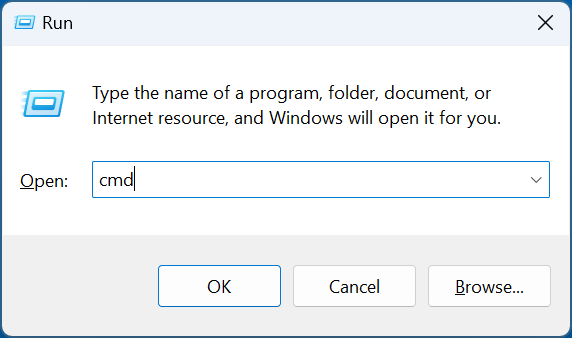
Step 1. Open Command Prompt: Press Windows + R, type CMD and hit Enter.
As an alternative, choose Run as administrator after searching for Command Prompt in the Start menu.
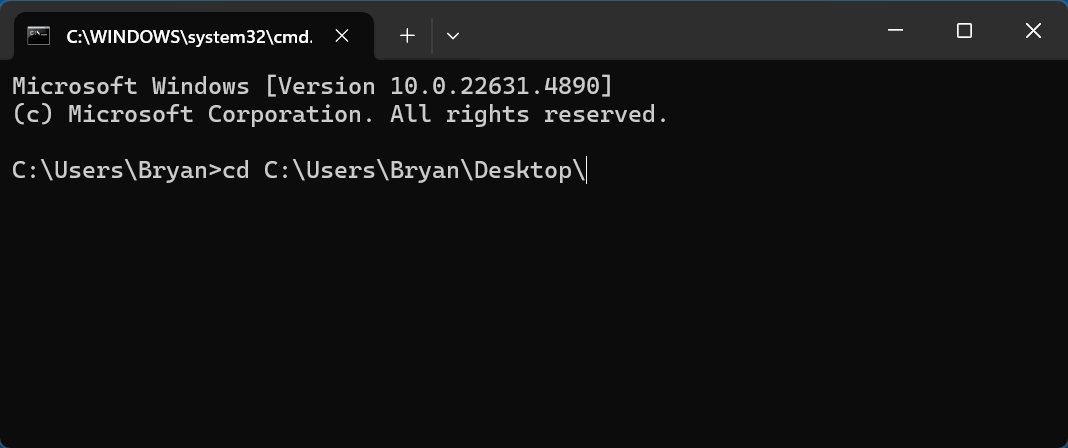
Step 2. Navigate to the File's Directory: To access the location where your file is stored, use the cd command. For instance:
cd C:\Users\Bryan\Desktop\
Step 3. Hide the File: Type the following command and press Enter:
attrib +h "filename.ext"
Example: If your file is named secret.txt, the command would be:
attrib +h "test.docx"

This will make the file hidden.
Method 3. Hide Files on Windows 11 Using PowerShell
PowerShell provides another method to manage file attributes.
Steps to Hide a File Using PowerShell:
Step 1. Open PowerShell: Press Windows + X and select Windows Terminal (Admin).
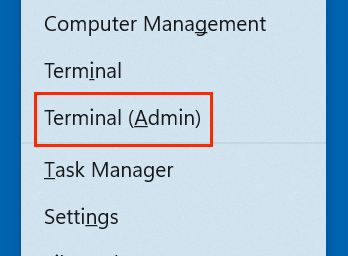
Alternatively, search PowerShell in the Start menu and select Run as administrator.
Step 2. Navigate to the File Location: Use the cd command similar to CMD:
cd C:\Users\Bryan\Desktop\
Step 3. Hide the File: Run the following command:
Set-ItemProperty -Path "C:\Users\Bryan\Desktop\test1.docx" -Name Attributes -Value Hidden
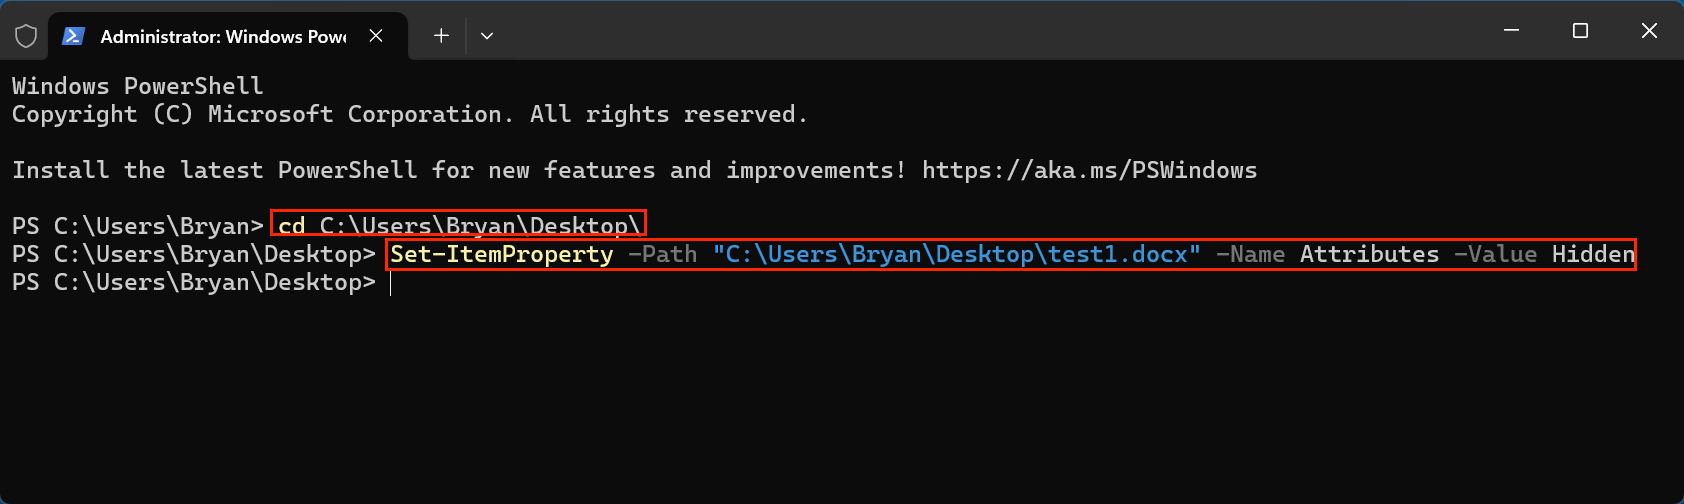
This will make the file hidden from File Explorer.
3 Methods to Unhide a File/Folder on Windows 11
If you need to access a hidden file, you can easily make it visible again using the following methods.
Method 1. Unhide Files on Windows 11 Using File Explorer
Steps to Unhide a File in File Explorer:
Step 1. Open File Explorer: Press Windows + E.
Step 2. Enable Hidden File View:
- Click on View in the toolbar.
- Select Show > Hidden items to reveal hidden files.

Step 3. Locate the Hidden File: Navigate to the folder where the file is stored.
Step 4. Right-Click the File and Open Properties:
- Disable the Hidden Attribute: Uncheck the Hidden box.
- Apply Changes and Confirm: Click Apply, then OK.
Method 2. Unhide Files on Windows 11 Using Command Prompt (CMD)
Steps to Unhide a File Using CMD:
Step 1. Open CMD as Administrator: Follow the same steps as before.
Step 2. Navigate to the File's Directory, for example:
cd C:\Users\Bryan\Desktop\
Step 3. Unhide the File:
attrib -h "filename.ext"
Example:
attrib -h "test.docx"

The file will now be visible again.
Method 3. Unhide Files on Windows 11 Using PowerShell
Steps to Unhide a File Using PowerShell:
Step 1. Open PowerShell as Administrator.
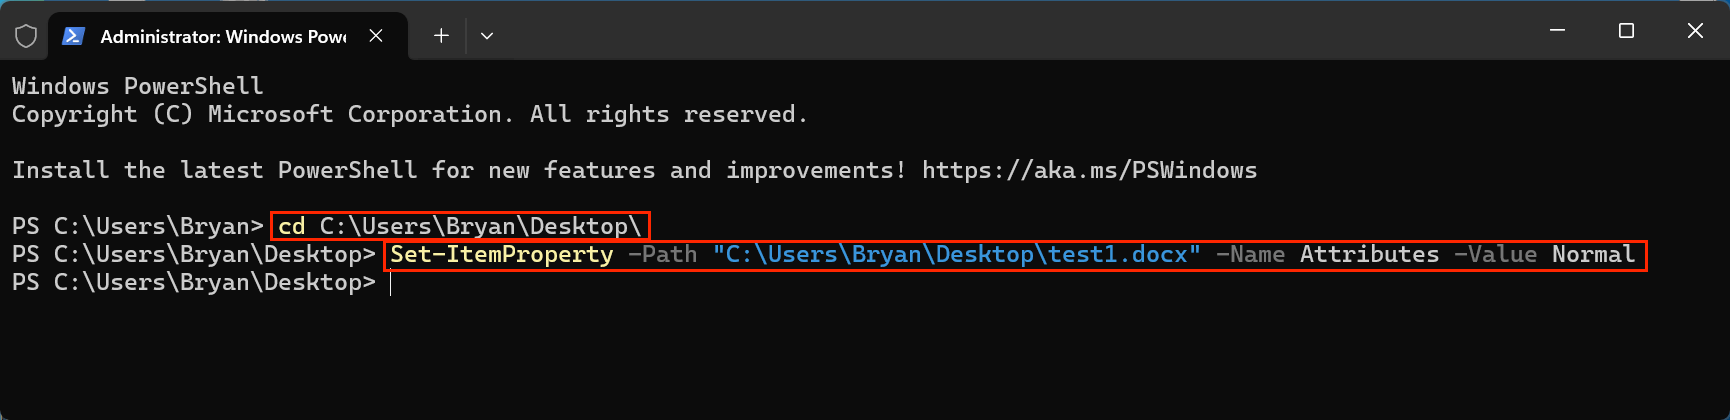
Step 2. Navigate to the File's Directory:
cd C:\Users\Bryan\Desktop\
Step 3. Unhide the File:
Set-ItemProperty -Path "C:\Users\Bryan\Desktop\test1.docx" -Name Attributes -Value Normal
Additional Tips and Troubleshooting:
▪️ What to Do If a File Stays Hidden
Sometimes, even after following the steps to unhide a file, it may still remain invisible in File Explorer. Here are a few reasons why this could happen and how to fix them:
1. Ensure Hidden Files Are Set to Be Visible in File Explorer
- Open File Explorer (Windows + E).
- Click on View in the top menu.
- Select Show > Hidden Items to ensure that Windows is set to display hidden files.
- If the file is still not visible, proceed to the next steps.
2. Remove System and Hidden Attributes Using Command Prompt
In some cases, files may also be marked as system files, which makes them invisible even when hidden items are enabled in File Explorer. To check and remove this setting:
- Open Command Prompt as Administrator
- Press Windows + R, type cmd, and press Enter.
- Alternatively, search for Command Prompt in the Start menu and choose Run as administrator.
- Navigate to the Folder Where the File Is Stored
- Use the cd command to access the directory:
cd C:\Users\YourUsername\Documents
- Use the cd command to access the directory:
- Remove the Hidden and System Attributes
- Type the following command and press Enter:
attrib -s -h "filename.ext"
- Replace filename.ext with your actual file name.
- Example:
attrib -s -h secret.txt
- This command removes both the hidden and system attributes, making the file visible again.
- Type the following command and press Enter:
3. Restart File Explorer or the Computer
- Sometimes, changes take effect only after restarting File Explorer. To do this:
- Press Ctrl + Shift + Esc to open Task Manager.
- Scroll down to Windows Explorer (or File Explorer).
- Right-click and choose Restart.
- If the file is still not visible, restart your computer and check again.
▪️ Hiding Files with Extra Security
If you want to hide a file and make it even harder to find, you can apply both the hidden and system attributes together.
1. Mark a File as Both Hidden and a System File
Using Command Prompt, you can assign both attributes to a file:
attrib +s +h "filename.ext"
For example:
attrib +s +h secret.txt
- This makes the file completely invisible in File Explorer, even when "Show hidden files" is enabled.
- Windows treats it as a critical system file, making it less likely to be accidentally altered or deleted.
2. Unhiding a File with Both System and Hidden Attributes
To make a file visible again, you need to remove both attributes:
attrib -s -h "filename.ext"
For example:
attrib -s -h secret.txt
This restores the file to its normal state, allowing it to appear in File Explorer.
▪️ Using Third-Party Software for Advanced File Hiding
If you need stronger security than what Windows 11 provides by default, consider using third-party software. These tools not only hide files but also offer password protection, encryption, and additional security layers.
1. Wise Folder Hider
- Free software designed for hiding files and folders.
- Allows users to set a password to prevent unauthorized access.
- Files remain hidden even when using Command Prompt or PowerShell.
2. VeraCrypt (For Encryption & Hiding)
- A powerful open-source encryption tool.
- Allows users to encrypt files, folders, or even entire partitions.
- Even if someone finds the hidden file, it will be completely unreadable without a password.
3. Folder Lock
- Provides advanced security features, including file hiding, password protection, and encryption.
- Supports cloud backup, ensuring data safety even if your computer is compromised.
Why Use Third-Party Software?
While Windows 11's built-in file hiding tools are convenient, they do not provide complete security. Anyone familiar with attrib commands or File Explorer settings can easily unhide a file. Third-party tools offer:
- Stronger protection with passwords.
- Encryption, making files unreadable without decryption.
- Additional security features like stealth mode, secure delete, and cloud backup.
▪️ Hiding an Entire Drive for Maximum Privacy
If you want to completely hide an entire drive from appearing in File Explorer, you can do so using Disk Management or Command Prompt.
1. Hiding a Drive Using Disk Management
- Press Windows + R and type diskmgmt.msc, then press Enter.
- Locate the drive you want to hide.
- Right-click the drive letter and select Change Drive Letter and Paths.
- Click Remove to un-assign the drive letter.
- The drive will no longer be visible in File Explorer.
2. Hiding a Drive Using Command Prompt
- Open Command Prompt as Administrator.
- Type the following commands:
diskpart
- This opens the Disk Partition tool.
- Next, list all available volumes:
list volume
- Identify the volume number of the drive you want to hide, then type:
select volume X
- Replace X with the correct volume number.
- Finally, remove the drive letter:
remove letter=X
- Example:
remove letter=D
- The drive will no longer appear in File Explorer.
- Example:
3. Unhiding the Drive
To make the drive visible again:
- Open Command Prompt as Administrator.
- Run the following commands:
diskpart
list volume
select volume X
assign letter=X- Replace X with the original drive letter.
▪️ When to Use Hiding vs. Encryption
If your goal is simple privacy, hiding files using Windows' built-in tools is sufficient. However, if you're dealing with sensitive data such as financial records, business documents, or personal information, encryption is a better option.
How to Recover Hidden or Missing Files on Windows 11?
If you can't find the hidden files or lost files on your Windows 11 PC, you can use data recovery program - such as Donemax Data Recovery to get the lost files back.
Step 1. Click Download button below to download and install Donemax Data Recovery on your computer. It can help you recover hidden files, deleted/formatted/lost files from any hard drive.
Step 2. Open Donemax Data Recovery, select the drive where you lose your files.

Step 3. Click on Scan button to deeply scan the drive and find all recoverable files including hidden files, existing files, inaccessible files, deleted/formatted/lost files.
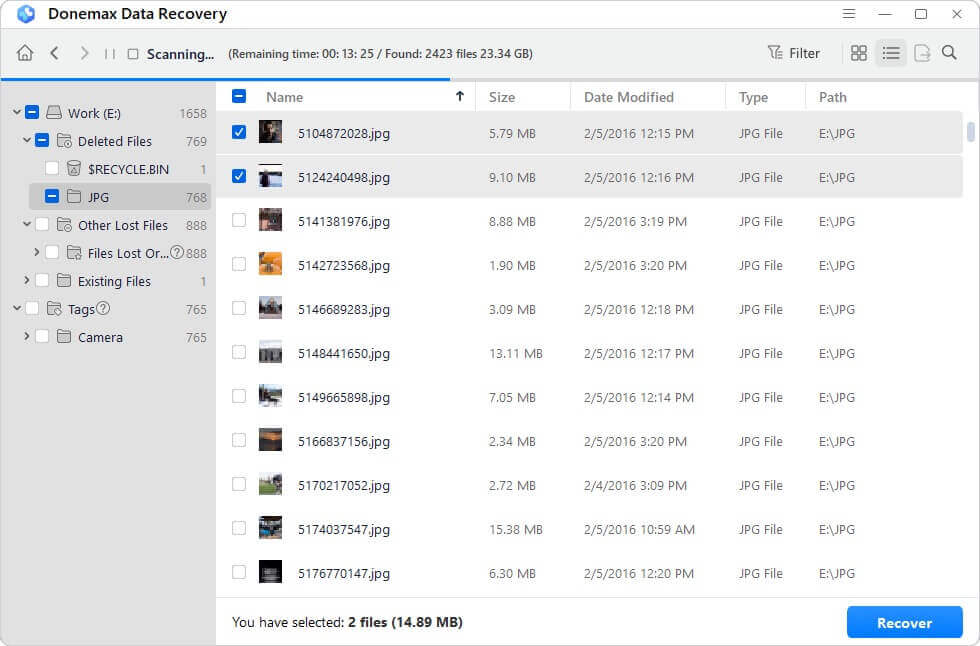
Step 4. After scanning, you can preview the recoverable files. Then find and select the wanted files, click on Recover button to save them.

Conclusion
Hiding and unhiding files in Windows 11 is simple and effective for managing privacy and organization. While File Explorer provides an easy method, using Command Prompt and PowerShell allows for additional control.
For users who require more security, applying system attributes or using third-party encryption tools can add extra protection. If a file remains hidden, checking File Explorer settings or using CMD to remove system attributes can help.
Mastering these techniques will give you greater control over file visibility and security on Windows 11.
Donemax Data Recovery
One of the best data recovery programs to recover deleted, formatted or lost data from PC, Mac, HDD, SSD, USB drive, SD card, camera, RAID, Sever or other storage devices.
Related Articles
- Oct 23, 2024How to Format a Drive to FAT32?
- Feb 05, 20258 Methods to Fix SSD Not Showing Up on Windows 10
- Aug 20, 2025Windows Boot Repair Tool: Guide to Fix Startup Problems
- Feb 19, 2025Format SD Card with Command Prompt (CMD)/Diskpart: A Comprehensive Guide
- Nov 29, 2024How to Automatically Empty Recycle Bin on Windows 11/10?
- Nov 18, 2025How to Use Command Prompt to Format a Drive on Windows 11/10/8/7?

Contributing Writer
Maria
Maria is one of the senior writers & editors of Donemax who lives and works in Sydney, Australia. She loves PC, Mac and Internet Technology. She has 6 years of writing articles about data recovery on PC/Mac, disk cloning solution, data eraser and computer OS optimization, etc. She is also interested in testing various software and digital products.

Editor in chief
Gerhard Chou
In order to effectively solve the problems for our customers, every article and troubleshooting solution published on our website has been strictly tested and practiced. Our editors love researching and using computers and testing software, and are willing to help computer users with their problems