Written byCharlesUpdated on Feb 20, 2025
How to Use Command Prompt to Format a Drive on Windows 11/10/8/7?
Approved byGerhard Chou
PAGE CONTENT:
Formatting a drive is a necessary task when preparing a new disk for use or wiping an existing disk for a fresh start. While graphical user interfaces (GUIs) make this process straightforward, there are times when using the Command Prompt is faster, more efficient, or the only available option - especially when troubleshooting or working with problematic drives. This guide will take you through the step-by-step process of using Command Prompt to format a drive on Windows computer.
Command Prompt (CMD) is a command-line interpreter in Windows operating systems. It allows users to perform various tasks by typing commands, providing a more direct and flexible method than using graphical interfaces. Formatting a drive using Command Prompt might seem intimidating at first, but it offers more control and is an essential skill for advanced users, IT professionals, and even everyday users who want to ensure their storage devices are properly managed.
There are several reasons to use Command Prompt for formatting:
- Speed and Efficiency: CMD allows for quick execution without navigating through multiple windows.
- Control: Offers advanced options like specifying file systems and partition sizes.
- Troubleshooting: Useful when graphical tools fail or when working with non-functional drives.
👉 Important: Formatting a drive erases all data on it. Ensure you have backed up any important files before proceeding.
Prepare for Formatting a Drive Using CMD:
Before starting the formatting process, there are a few prerequisites you need to ensure:
- Administrator Access: Formatting drives requires administrative privileges. Make sure you have the necessary permissions.
- Backup Important Data: Once formatted, all data on the drive will be lost. Back up any critical files before proceeding.
- Identify the Correct Drive: Selecting the wrong drive can result in accidental data loss. Double-check the drive letter and size to ensure you're working with the correct drive.
Steps to Format a Drive Using Command Prompt (cmd, diskpart)
Open Command Prompt (Run as administrator)
The first step in using Command Prompt to format a drive is to launch it with administrator rights.
Steps to Open Command Prompt:
- Using Run:
- To launch the Run dialog, press Win + R.
- To launch Command Prompt as an administrator, type cmd and hit Ctrl + Shift + Enter.
![Formatting a drive using Command Prompt]()
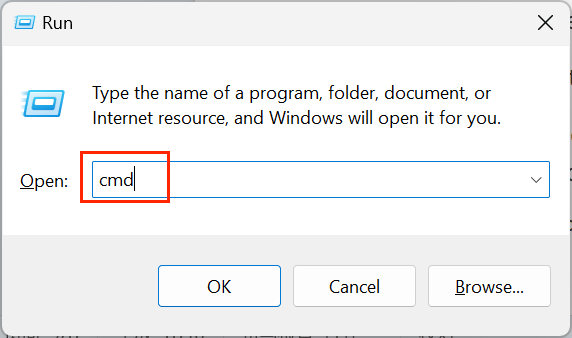
- Using Search:
- Press the Windows key or select the Start menu.
- In the search bar, type cmd, or Command Prompt.
- Choose Run as administrator from the menu when you right-click the Command Prompt application.
![Formatting a drive using Command Prompt]()
Once Command Prompt is open, you'll see a black window with a blinking cursor, ready for your commands.
7 Steps to Format a Drive Using Command Prompt
Formatting a drive through Command Prompt involves several key steps, each of which is crucial for ensuring the process is completed correctly without risking data loss or corruption. Below is an in-depth look at each step, explaining not just the "how" but also the "why" behind each command.
1. List Available Drives
Before formatting, it is essential to identify all the available drives on your system. This step ensures you select the correct drive, avoiding accidental formatting of important data.
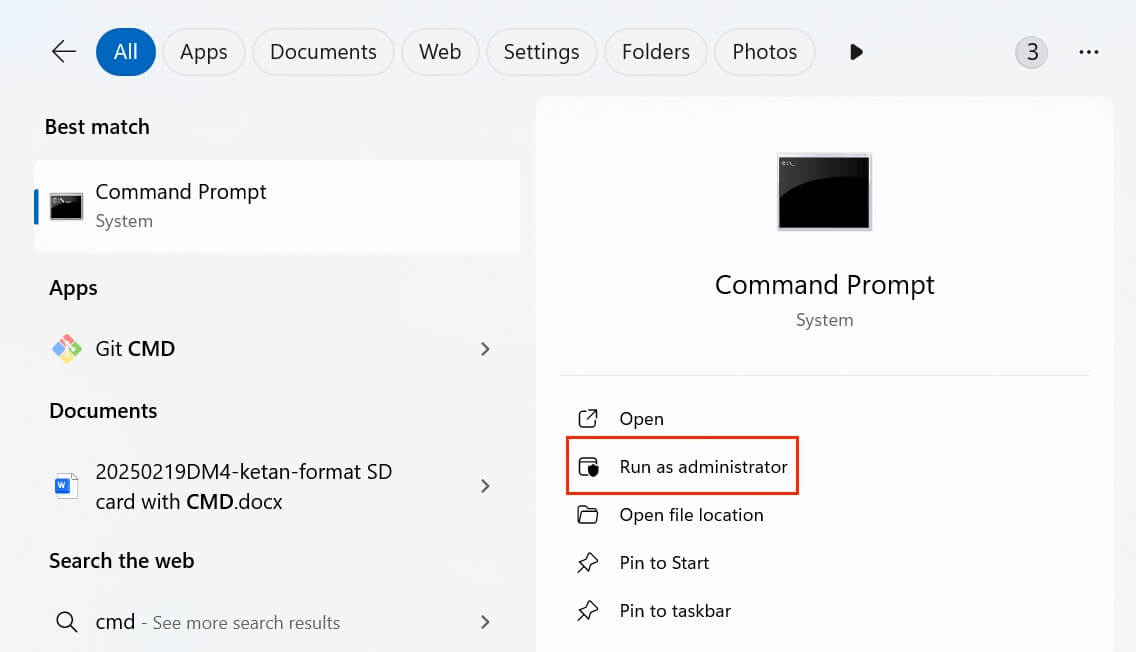
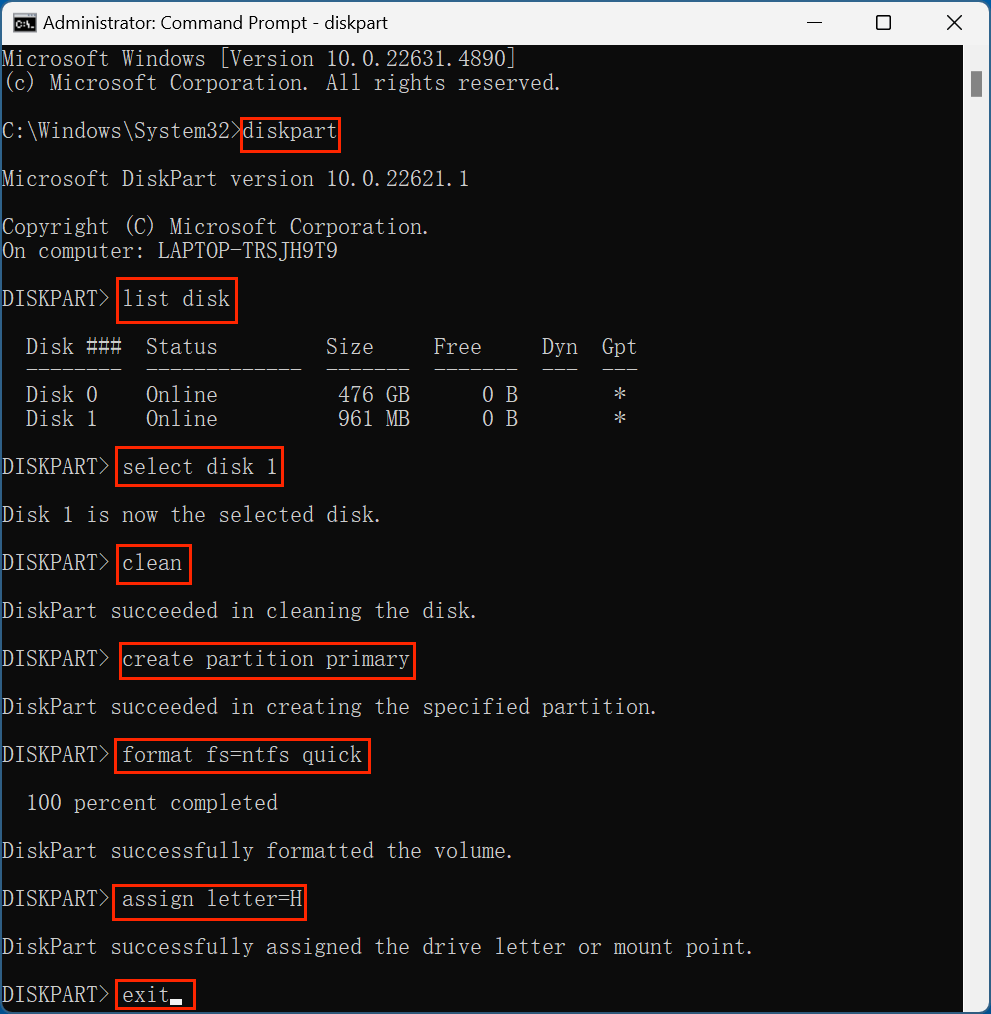
When you run:
Diskpart
you are entering a powerful disk management utility provided by Windows. Diskpart operates outside the graphical interface, offering more control over disk operations. It is particularly useful when dealing with problematic drives that the GUI-based Disk Management tool might not recognize properly.
Next, the command:
list disk
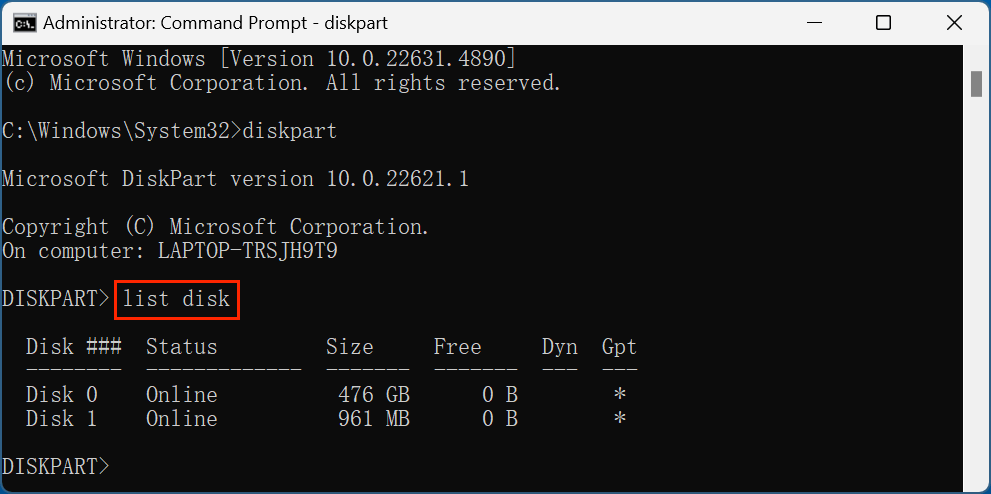
displays all connected drives, each with a unique identifier (e.g., Disk 0, Disk 1, Disk 2). The output will show essential details like disk size and status, which help you distinguish between your system drive, external drives, and other connected storage devices.
Why This Step Matters:
- Prevents Mistakes: Selecting the wrong drive can lead to data loss.
- Essential for Multi-Disk Systems: For systems with multiple drives, this step clarifies which disk is which.
- Checks Drive Status: Sometimes, drives may not be initialized or may show errors. Listing them helps in early detection of such issues.
2. Select the Target Drive
After identifying the correct disk, you need to select it to perform operations on it. For example:
select disk 1
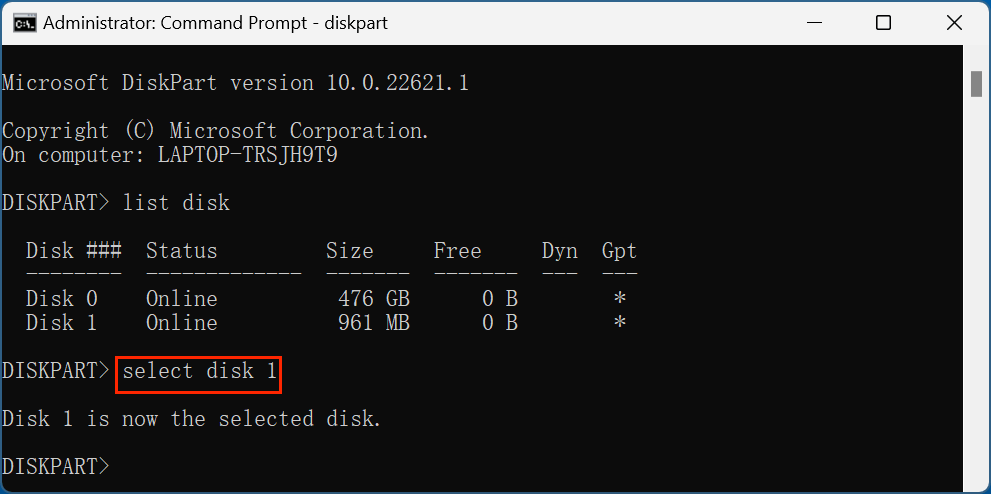
This tells Diskpart to focus all subsequent commands on Disk 1.
Why This Step Matters:
- Ensures Correct Targeting: All operations will be performed on the selected disk, ensuring that no other drives are accidentally affected.
- Prepares the Drive for Formatting: Diskpart requires you to explicitly select a disk before performing any changes.
Tip: Always double-check the disk number, especially if you have multiple drives connected. A simple mistake here can cause irreversible data loss on critical drives.
3. Clean the Drive (Optional)
The clean command is a powerful option that wipes all partitions and data from the selected drive:
Clean
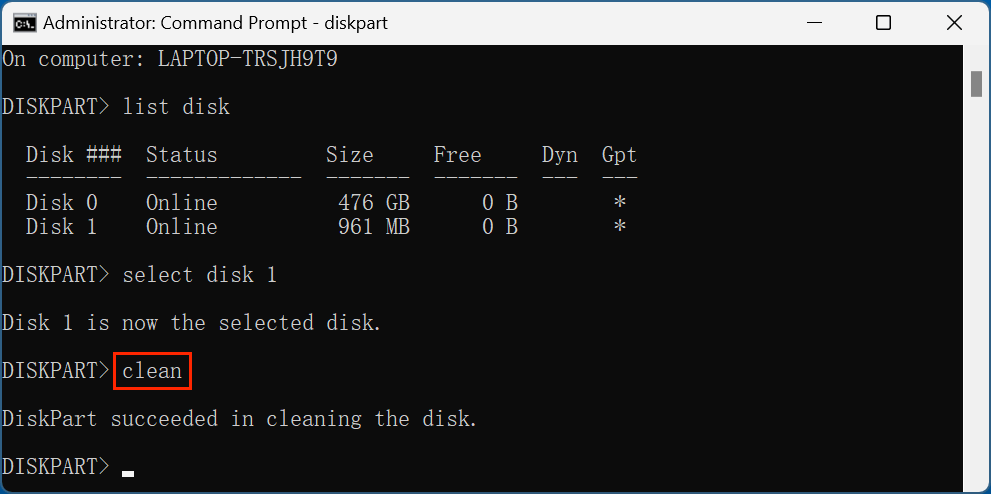
This command removes everything, leaving the disk in an unallocated state, similar to how it would appear if it were brand new.
When to Use This Step:
- Preparing a New Disk: If you're setting up a new disk, clean ensures no hidden partitions or data remain.
- Removing Errors: Sometimes, drives may have partition errors or corrupt data that prevent proper formatting. clean solves this by starting from scratch.
- Changing Partition Styles: If you need to switch from MBR (Master Boot Record) to GPT (GUID Partition Table) or vice versa, clean is necessary.
⚠️ Caution: Once executed, the clean command cannot be undone. Always verify your target drive before using this command.
4. Create a Partition
Creating a partition is the next crucial step. A partition is essentially a division of the disk where data will be stored. Without a partition, a disk cannot be formatted or used.
create partition primary
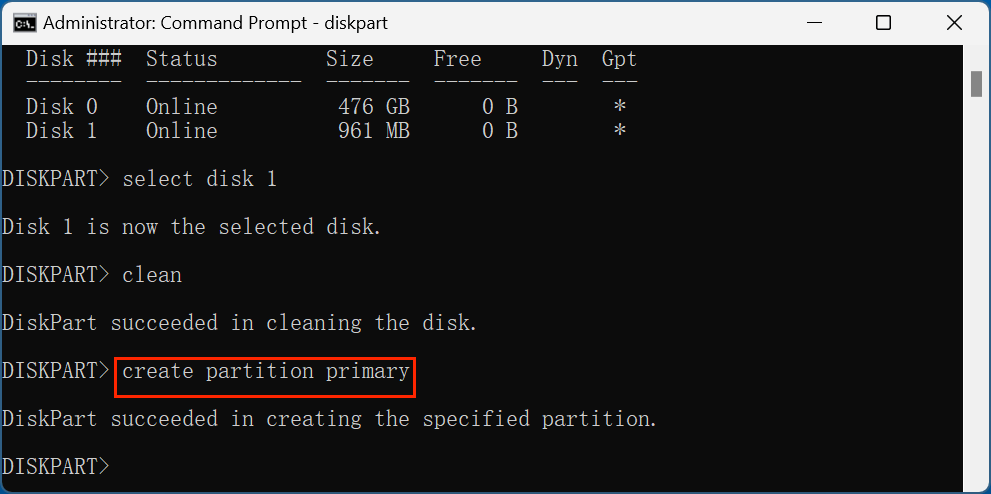
This command creates a primary partition, which is the main partition on the disk where data will be stored.
Why This Step Matters:
- Essential for Usage: A drive without a partition cannot store files or be recognized by Windows.
- Flexible Storage Management: Creating multiple partitions can help organize data (e.g., separating system files from personal data).
- Prepares for Formatting: Formatting can only be done on an existing partition.
💡 Tip: If you need multiple partitions, you can create them by specifying the size. For example:
create partition primary size=50000
This command creates a 50GB partition, allowing the rest of the disk to be partitioned separately.
5. Format the Drive
Formatting sets up the file system, which determines how data is stored and retrieved. The most common file systems in Windows are:
- NTFS: Supports large files, security features like encryption, and is ideal for modern Windows systems.
- FAT32: Offers greater compatibility with older systems and non-Windows devices but has limitations like a 4GB file size cap.
Commands:
format fs=ntfs quick
or
format fs=exfat quick
format fs=fat32 quick
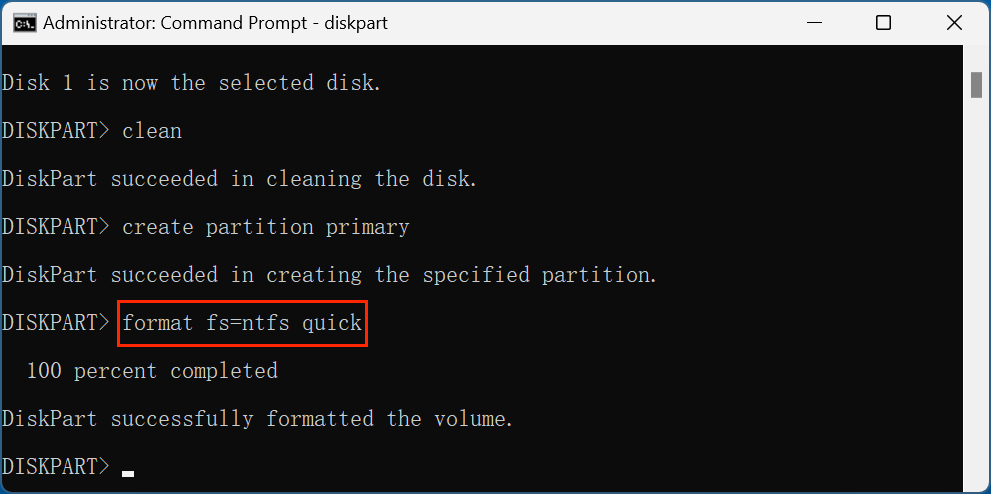
The quick parameter speeds up the process by skipping a thorough scan for bad sectors.
Why This Step Matters:
- Prepares the Disk for Use: Without formatting, the partition is unusable.
- Determines File System: The choice between NTFS and FAT32 affects compatibility, performance, and file size limits.
- Quick vs. Full Format: A quick format is faster but does not check for bad sectors. A full format takes longer but ensures the disk is free from errors.
💡 Tip: If you're formatting a large drive for the first time or suspect it has issues, omit the quick parameter to perform a full format:
format fs=ntfs
This ensures any bad sectors are marked and avoided, though it takes longer to complete.
6. Assign a Drive Letter
Assigning a drive letter makes the formatted partition accessible through Windows File Explorer.
assign letter=H
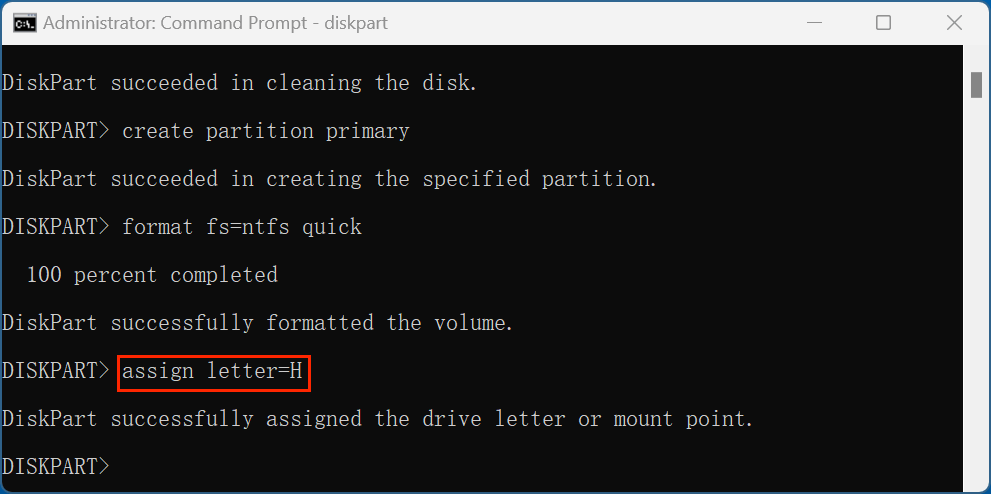
This command assigns the letter H: to the drive, making it available under This PC or My Computer.
Why This Step Matters:
- Enables Access: Without a drive letter, the formatted partition remains invisible in File Explorer.
- User Convenience: Assigning specific letters helps in organizing and accessing multiple drives (e.g., D: for data, E: for external storage).
- Customizable: You can choose any available letter. Windows typically assigns the next available letter automatically if you don’t specify one.
Tip: Avoid assigning letters already used by network drives or other resources to prevent conflicts.
7. Exit Diskpart
Finally, exiting the Diskpart utility is as simple as:
Exit
This returns you to the main Command Prompt window. You can close CMD entirely by typing exit again or simply closing the window.
Why This Step Matters:
- Confirms Completion: Exiting Diskpart indicates that all operations are finished.
- Prepares Drive for Use: After exiting, the drive is ready and available in Windows for use.
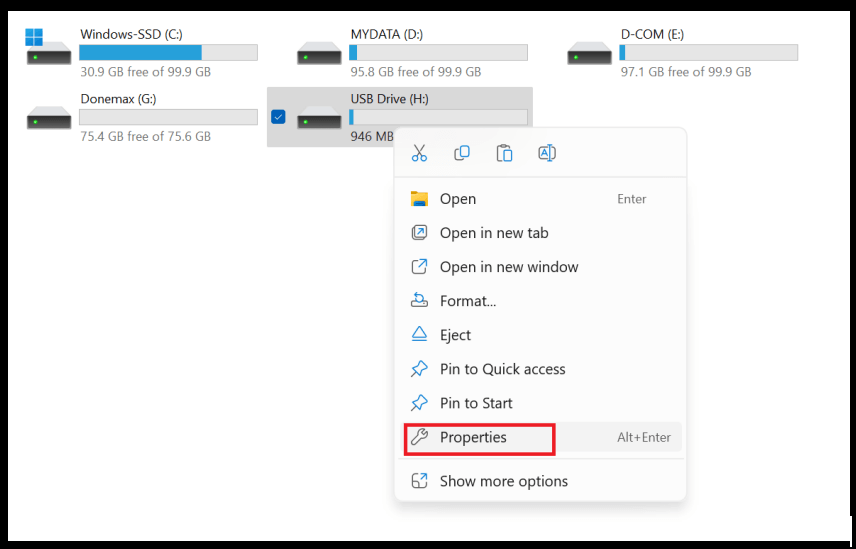
Verify the Formatted Drive after Formatting It Using CMD
Once the drive is formatted, you should verify it to ensure everything is in order.
Steps to Verify:
- Open File Explorer by pressing Win + E.
- Under This PC, you should see the newly formatted drive with the assigned letter.
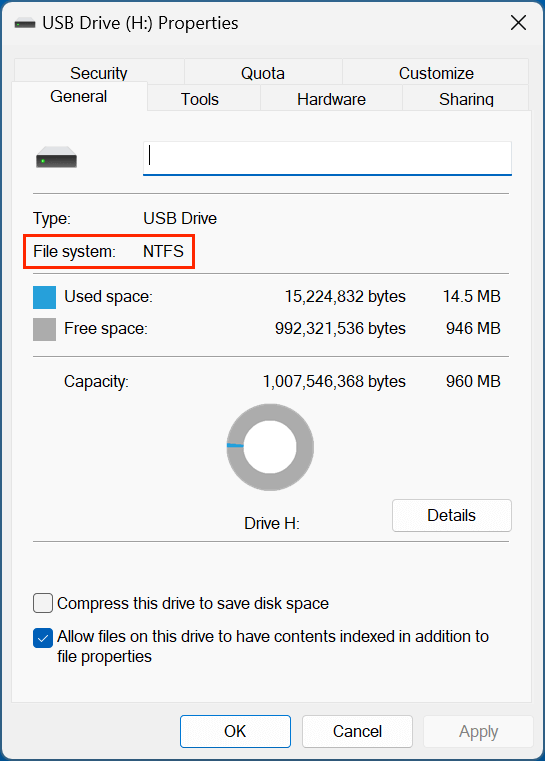
- Right-click on the drive and select Properties.
![Formatting a drive using Command Prompt]()
- Check the File System to ensure it's formatted as intended (e.g., NTFS or FAT32).
![Formatting a drive using Command Prompt]()
- Confirm the drive's capacity and free space.
If everything looks correct, your drive is ready for use.
Troubleshooting Common Issues of Using CMD to Format a Drive
Even if you follow every step exactly, you may still run into some typical problems. Here are few and their solutions:
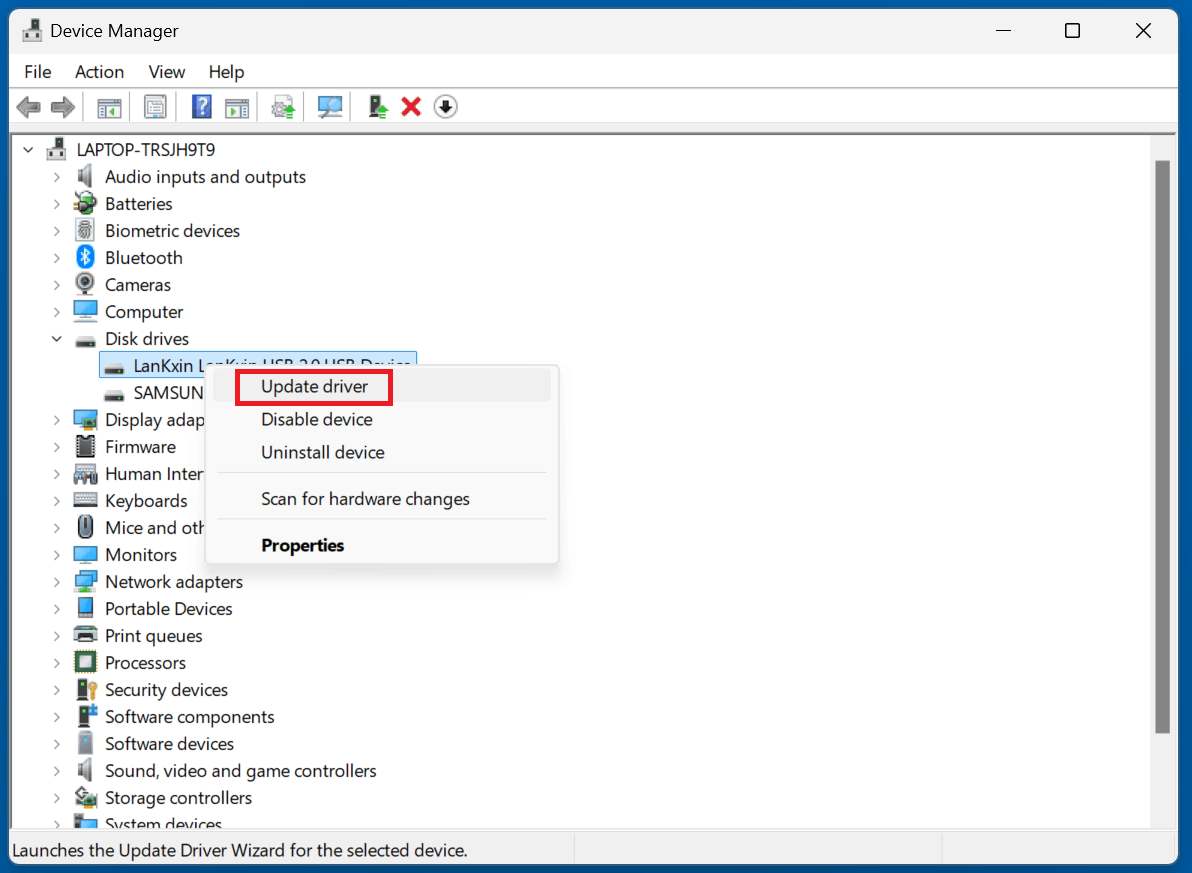
1. Drive Not Detected
Cause: The drive might not be connected properly, or there might be driver issues.
Solution:
- Reconnect the drive and ensure it is properly connected.
- Update the disk drivers via Device Manager.
![Formatting a drive using Command Prompt]()
- Use the list disk command again to see if the drive appears.
2. Incorrect Drive Selected
Cause: Mistakenly selecting the wrong drive can lead to data loss.
Solution:
- Always double-check the drive number using list disk.
- Verify the size and ensure it matches your target drive.
3. Permissions Error in Command Prompt
Cause: Running Command Prompt without administrative privileges.
Solution:
- Reopen Command Prompt as an administrator using the methods described in Section III.
4. Format Command Not Recognized
Cause: Typing errors or using unsupported parameters.
Solution:
- Ensure all commands are typed exactly as shown.
- Refer to diskpart help for additional guidance.
💡 Note: If you can't format the hard drive using CMD, you can use other methods to format the drive. For example, data erasure program - Donemax Data Eraser can help you securely wipe and format any drive on Windows PC.
Best 5 Methods to Format a Hard Drive on Windows PC
You can format a hard drive on Windows 11 using Command Prompt, PowerShell, File Explorer, Disk Management, third-part tools, etc.
How to Recover Lost Data from a Drive Which Is Formatted by CMD/Diskpart?
If you have not backed up your drive and lost important files, you can use data recovery program to unformat the drive and get all lost files back. Donemax Data Recovery is a powerful data recovery program. It can help in securely and completely recovering lost files from a drive which has been formatted by Command Prompt/diskpart.
Step 1. Download and install Donemax Data Recovery on your computer, ensure the formatted drive is connected to the computer.
Step 2. Open Donemax Data Recovery, select the formatted drive to start data recovery.

Step 3. Click on Scan button to deeply scan the drive and find all deleted/formatted/lost files.
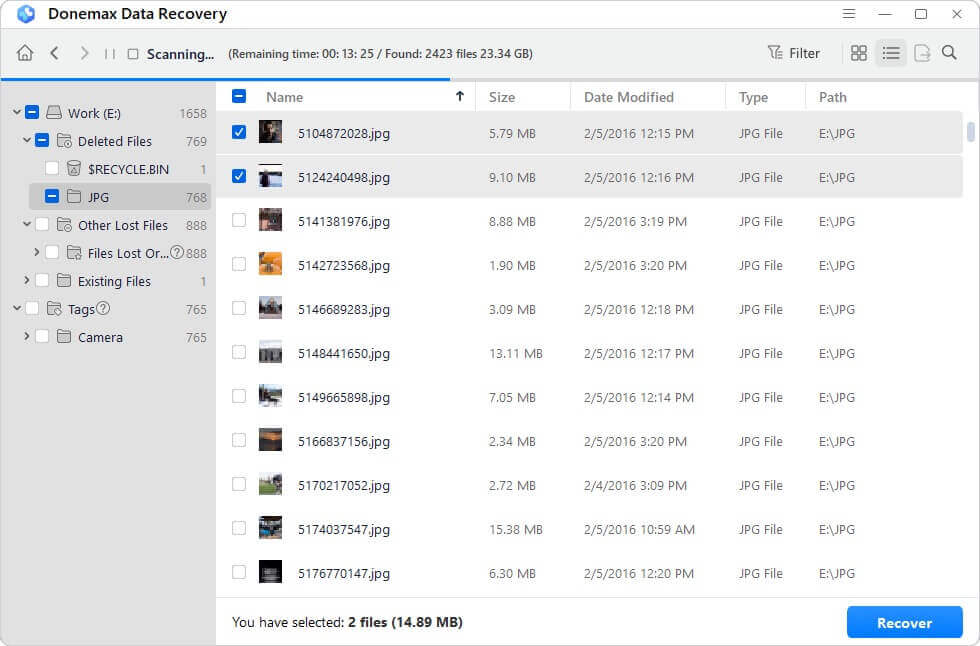
Step 4. Once the scan is completed, you can preview all recoverable files. Then select the wanted files, click on Recover button to save them.

Conclusion
Formatting a drive using Command Prompt might seem like a daunting task, but with the right steps, it becomes a straightforward process. The method provides more control, especially when dealing with stubborn drives or situations where graphical tools are unavailable.
Key Steps Recap:
- Open Command Prompt as Administrator.
- Use diskpart to manage disks.
- Select the correct disk and clean it if necessary.
- Create a partition and format it using the desired file system.
- Assign a drive letter and verify the formatted drive.
By mastering the use of Command Prompt for disk management, you enhance your technical skills and gain greater control over your system's storage solutions. Whether you're an IT professional, a tech enthusiast, or a casual user, this skill is invaluable for maintaining and managing storage devices effectively.
Donemax Data Recovery
One of the best data recovery programs to recover deleted, formatted or lost data from PC, Mac, HDD, SSD, USB drive, SD card, camera, RAID, Sever or other storage devices.
Related Articles
- Feb 07, 2025How to Fix Crucial SSD Not Detected/Not Showing Up?
- Feb 18, 20257 Solutions to Fix Internal Drive Not Showing Up on Windows Without Losing Data
- Feb 20, 2025Convert RAW to NTFS with CMD (Command Prompt) – A Complete Guide
- Nov 20, 2024Files Become Shortcuts: How to Fix and Prevent It
- Jan 17, 2025Fix Corrupted File System – A Comprehensive Guide
- Oct 21, 2024Disk Management Not Loading or Not Responding on Windows: Fix It

Contributing Writer
Charles
Charles, who lives in Sydney, Australia, is an editor & writer of Donemax Team. He is good at writing articles related with Apple Mac computers, Windows operating systems, data recovery, data erasure, disk clone and data backup, etc. He loves reading and playing tennis in his spare time and is interested in testing new digital devices such as mobile phones, Macs, HDDs, SSDs, digital cameras, etc.

Editor in chief
Gerhard Chou
In order to effectively solve the problems for our customers, every article and troubleshooting solution published on our website has been strictly tested and practiced. Our editors love researching and using computers and testing software, and are willing to help computer users with their problems