Before we start: The article will show you how to install and use NTFS-3G on Mac. However, the tool is hard to install and use for some users. To enable NTFS writable access on Mac easily, you can choose Donemax NTFS for Mac. The software is a user-friendly and reliable NTFS for Mac tool.
PAGE CONTENT:
File systems determine the structure of data and how the operating system interacts with it. However, the file system is not universal. For example, NTFS is a file system primarily for Windows operating systems. Support for NTFS on non-Windows systems like macOS is limited.

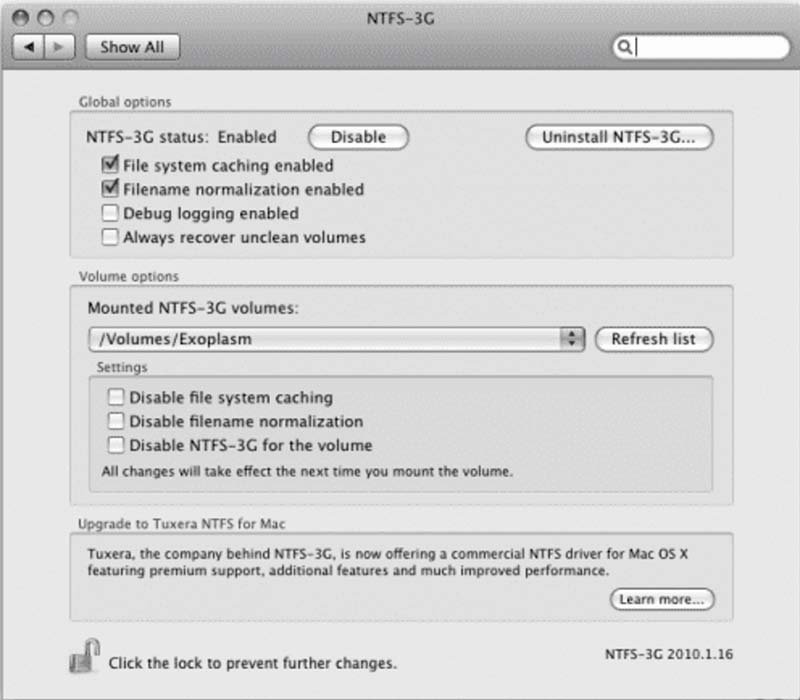
This is where NTFS-3G comes in. NTFS-3G is an open-source software driver that allows macOS to read from and write to NTFS-formatted drives. In this article, we will look at NTFS-3G. We will discuss why it matters, how to install it, and how to use it. We will also share some best practices for smooth operation.
What is NTFS-3G?
NTFS-3G stands for "NTFS Third Generation." It is an open-source software that works on many platforms. It lets you read and write NTFS partitions on systems that do not support NTFS, like macOS. NTFS-3G was created as part of the FUSE project. FUSE stands for Filesystem in Userspace. It lets regular users create and mount file systems. They do not need to change kernel code.

NTFS-3G connects the NTFS file system to the operating system. It allows for both reading and writing files. NTFS-3G lets users work with NTFS-formatted drives like they are part of the macOS system. This is different from the usual read-only support that macOS provides.
The NTFS-3G driver works in userspace. This means it runs in user-level processes, not in the kernel. This makes it more flexible and portable across different platforms. The developers distribute the software under the GPL (General Public License), ensuring it remains free and open-source.
Why Use NTFS-3G on Mac?
When you have a dual-boot setup with Windows and macOS, you might have trouble accessing and changing data. This can also happen with external drives that are formatted as NTFS. macOS don't natively support NTFS for writing operations. Filesystems like FAT32 and ExFAT are often used because they work well across different platforms. However, these file systems have their limitations, such as file size and partition size restrictions.
NTFS-3G solves this problem by enabling macOS to access and modify data on NTFS-formatted drives without data loss. NTFS-3G is a useful tool for transferring files between Windows and Mac computers. It also lets you use an NTFS-formatted external drive on both Windows and macOS systems.
Key use cases for NTFS-3G include:
- Dual-boot systems: When you run both Windows and macOS on the same computer, NTFS-3G helps you access NTFS partitions. This makes it easy to transfer files between the two operating systems.
- External drives: Many external hard drives and USB flash drives come preformatted with NTFS for compatibility with Windows systems. NTFS-3G allows you to use these drives on macOS without losing write functionality.
- Data recovery: Sometimes, NTFS-3G can help you access and recover data from a damaged NTFS partition. This is useful when native tools cannot open it.
How Use NTFS-3G on Mac?
#1. Installing NTFS-3G
Installing NTFS-3G is a simple process. However, the steps may vary a bit based on your operating system.
macOS doesn't include NTFS write support out of the box, so installing NTFS-3G on a macOS system requires a few extra steps. The process uses Homebrew, a popular package manager for macOS. It also uses FUSE for macOS, which helps NTFS-3G work correctly. Step-by-Step Installation for macOS:
- Install Homebrew: Homebrew is a popular package manager for macOS. It makes installing programs easier. Launch Terminal and type the following command to install it:
/bin/bash -c "$(curl -fsSL https://raw.githubusercontent.com/Homebrew/install/HEAD/install.sh)"
- Install FUSE for macOS: NTFS-3G relies on FUSE (Filesystem in Userspace) to interact with NTFS partitions. You can install FUSE for macOS using Homebrew:
brew install macfuse
📒 Note: When you install FUSE for macOS, you may need to give extra system permissions. You might also have to restart your computer because of changes in how the system handles kernel extensions. Follow any on-screen instructions.
- Install NTFS-3G: With FUSE installed, you can now install NTFS-3G. Run the following command to install it via Homebrew:
brew install ntfs-3g
- Mount NTFS Drives: After installation, you should be able to use NTFS-3G to mount NTFS partitions. If you need to mount a drive manually, you can use the following command:
sudo /usr/local/bin/ntfs-3g /dev/diskXsY /Volumes/NTFS
Replace /dev/diskXsY with the correct disk identifier for your NTFS partition. To find the correct disk identifier, you can use the Disk Utility or run diskutil list in the Terminal.
Troubleshooting Installation on macOS:
- Permission Issues: On newer macOS versions, Apple's system integrity protection (SIP) can cause problems with installing or using NTFS-3G. If you have problems, try turning off SIP for a short time. Experts do not recommend this for regular use. You can also follow the advice from the FUSE or NTFS-3G communities.
- Reinstall FUSE and NTFS-3G: If NTFS-3G isn't working as expected, try reinstalling both FUSE and NTFS-3G:
brew uninstall ntfs-3g
brew uninstall macfuse
brew install macfuse
brew install ntfs-3g
#2. Using NTFS-3G
Once NTFS-3G is installed, you can begin using it to mount NTFS drives. The process for mounting NTFS partitions will vary depending on whether you are doing it manually or automatically.
Option 1. Mounting NTFS Drives Manually
To manually mount an NTFS drive, you'll use the mount command on macOS.
- Plug in your NTFS drive.
- Open Terminal and type the following command to mount the NTFS drive:
sudo /usr/local/bin/ntfs-3g /dev/diskXsY /Volumes/NTFS
Replace /dev/diskXsY with the correct disk identifier.
Option 2. Automating NTFS Mounting
On macOS, there are no permanent mounting options. However, third-party tools like Donemax NTFS for Mac can help. The software can automate NTFS drive mounting and provide write support.
#3. Best Practices for Using NTFS-3G
When using NTFS-3G, following some best practices can help ensure smooth operation:
- Always safely eject your drives: Avoid data corruption by ensuring drives are safely unmounted before disconnecting them.
- Keep backups: As with any third-party solution, NTFS-3G can sometimes experience bugs or issues. Keeping backups of important data is always a good idea.
- Avoid mounting at boot: In some cases, automatic mounting of NTFS partitions can lead to issues with system stability. It's safer to mount drives manually when needed.
NTFS-3G Alternative
While NTFS-3G is the most popular tool for working with NTFS on non-Windows systems, there are alternatives available.
1. Native NTFS support (macOS): macOS now includes a read-write NTFS driver, although it is not as reliable or feature-rich as NTFS-3G.
2. Donemax NTFS for Mac: A commercial solution that offers full NTFS read-write support on macOS. It is a paid option but offers better integration and performance.
3. mount_ntfs (macOS): This is a built-in solution for macOS. However, it usually only allows read-only access unless changed.
Donemax NTFS for Mac is an easy-to-use NTFS for Mac too. Compared with NTFS-3G, Donemax NTFS for Mac is much easier to use and more powerful. It can easily and quickly add NTFS read-write support on Mac.
Step 1. Download and install Donemax NTFS for Mac on your Mac.
Step 2. Open Donemax NTFS for Mac and select the NTFS disk, click on Enable Writable button.

Conclusion
NTFS-3G is an essential tool for anyone running macOS who needs to interact with NTFS-formatted drives. It provides seamless read/write access to NTFS partitions. Valuable for users with dual-boot setups, external drives, or shared data across different platforms. NTFS-3G is a great choice for cross-platform file system compatibility. It has easy installation steps, strong features, and many users.
By following the steps above, users can make the most of NTFS-3G or Donemax NTFS for Mac. This will help ensure a smooth and efficient experience when working with NTFS partitions on different operating systems.
Related Articles
- Dec 17, 2024Can Mac Write Data to NTFS Drive?
- Dec 25, 2024How to Fix External Hard Drive Read-Only on macOS Catalina [7 Solutions]
- Dec 12, 2024Using NTFS Drives on macOS High Sierra: Methods for Read-Write Access
- Aug 15, 2023Fixed: Can't Delete Files from An USB Flash Drive on Mac
- Dec 06, 2024Seagate NTFS Driver for Mac: Unlock Seamless Compatibility
- Jun 11, 2025How to Remove Everything of iBoysoft NTFS for Mac?

Coco Lin
Coco has been a writer and a chief programmer at Donemax software since 2018. Over 10 years of experience of writing troubleshooting articles in the software industry, she is passionate about programming and loves to providing solutions to Windows and Mac users. Also she enjoys music and palying tennis in her free time.

Gerhard Chou
In order to effectively solve the problems for our customers, every article and troubleshooting solution published on our website has been strictly tested and practiced. Our editors love researching and using computers and testing software, and are willing to help computer users with their problems


