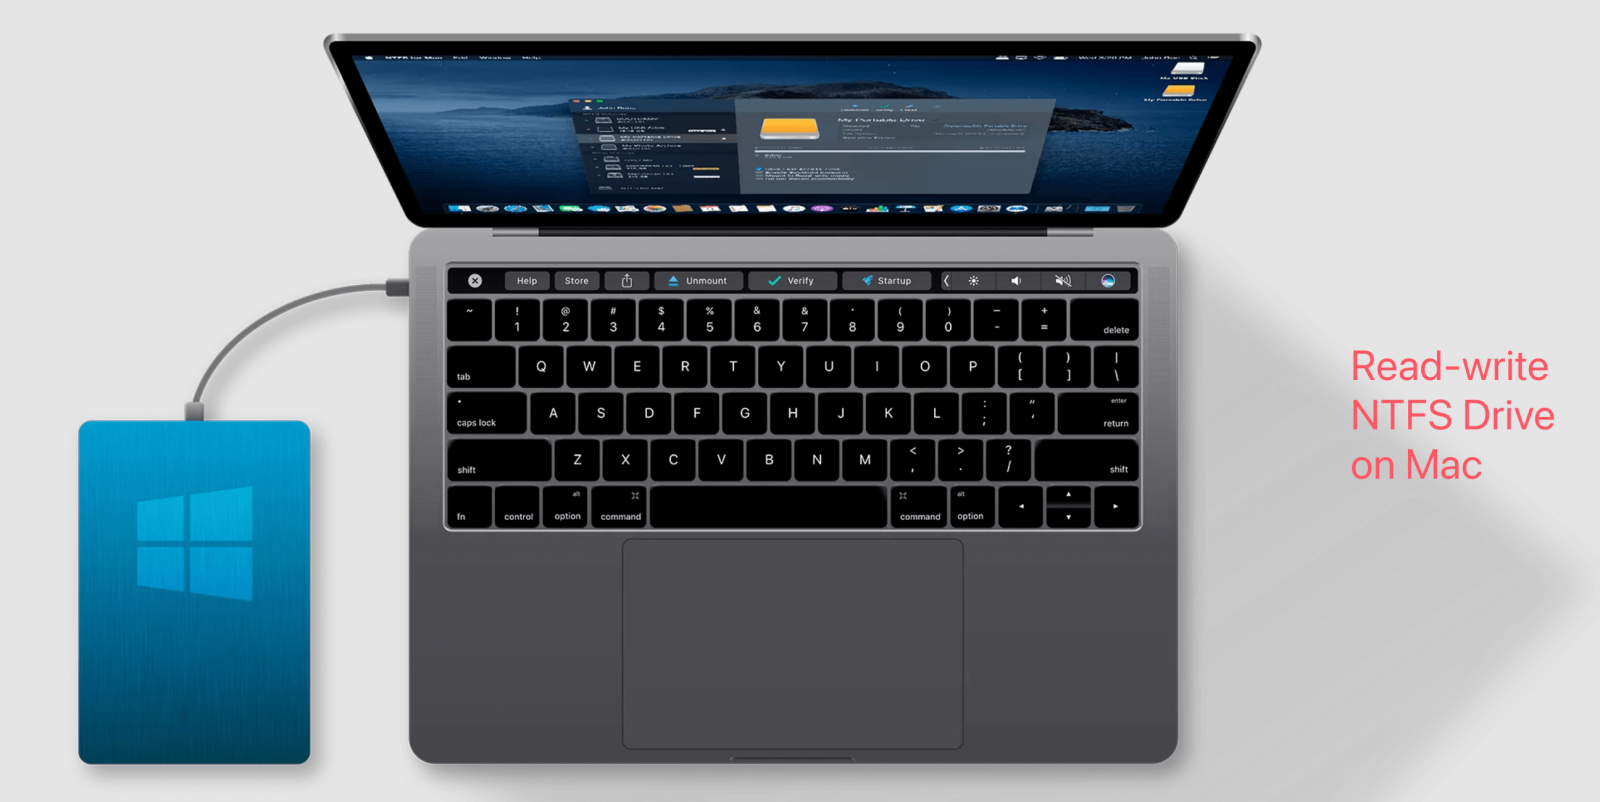
Before we start: It is possible to read-write NTFS on Mac with third-party NTFS for Mac tool - such as Donemax NTFS for Mac. It is a reliable NTFS driver which grants full read-write access to NTFS drive on Mac without any limitation.
PAGE CONTENT:
In the world of data storage, NTFS (New Technology File System) is one of the most widely used file systems, especially in Windows environments. With sophisticated features like file permissions, encryption, and compression, NTFS is the standard file system for contemporary Windows editions. However, when it comes to macOS, things become a bit tricky. While macOS can read NTFS-formatted drives, it does not natively support writing to these drives.
This limitation can be frustrating for users who need to exchange files between a Mac and a Windows system or for those who use an external NTFS drive for storing data. In this article, we'll explore the methods, pros, cons, and precautions you need to know about to make the process as smooth as possible.
Understand NTFS and macOS Compatibility
NTFS was introduced by Microsoft in 1993 as part of the Windows NT operating system, and it has since become the standard file system for all versions of Windows. It supports large file sizes, improved security, and file permissions, making it ideal for storing system files and user data in modern computing environments. On the other hand, macOS, Apple's operating system, uses the HFS+ file system (and now APFS, Apple File System) for its internal storage.
By default, macOS can only read NTFS-formatted drives but cannot write to them. This is because Apple did not want to risk potential data corruption or other issues arising from cross-platform file system compatibility. While macOS provides native read-only support for NTFS, it does not allow you to modify, delete, or add files to an NTFS drive without additional software or workarounds.
For many users who need to work with both Mac and Windows systems, the inability to write to NTFS drives can be a significant hindrance. Thankfully, there are several methods available to bypass this limitation and allow full read-write access to NTFS drives on Mac.
Methods to Enable Read-Write Access to NTFS on Mac
There are a few ways to accomplish this on Mac so that you can read-write NTFS drives. Let's break them down into three primary methods: using third-party NTFS for Mac software, using macOS Terminal (experimental), and using open-source solutions.
Method 1: Use Reliable NTFS for Mac Tool
One of the easiest and most reliable way is by using third-party software. Several commercial programs are available that provide full NTFS write support for macOS.
Donemax NTFS for Mac is one of the best NTFS for Mac tools. It can quickly add NTFS read-write support to macOS and allow you to read-write NTFS drive without any limitation.
Step 1. Download and install Donemax NTFS for Mac, it is a 100% safe, powerful and easy-to-use NTFS for Mac tool.
Step 2. Open Donemax NTFS for Mac, select the NTFS drive, click on Enable Writable button.

Then you can read-write any NTFS drive on your Mac.
More third-party NTFS drivers:
Paragon NTFS for Mac
Paragon NTFS for Mac is a well-known tool that allows macOS users to read and write to NTFS drives seamlessly. It integrates directly with macOS, and once installed, it works just like any other native file system on the Mac. The software supports both macOS Monterey and macOS Big Sur, as well as older versions of macOS.
Steps to Install and Use Paragon NTFS for Mac:
- Download and install Paragon NTFS for Mac from the official website.
- After installation, restart your Mac.
- Plug in your NTFS-formatted external drive.
- The drive should now be accessible in Finder, and you can read and write to it like any other drive on macOS.
Pros:
- Ease of use: The installation process is straightforward, and the software integrates seamlessly into macOS.
- Reliable performance: Paragon NTFS for Mac provides fast and stable read-write access.
- Support for large files: It supports large file sizes, which is essential for users working with high-resolution videos, disk images, or large data backups.
Cons:
- Cost: Paragon NTFS for Mac is a paid software with a free trial, but after the trial period, you need to purchase a license.
- Limited features in the trial version: Some features may be restricted during the trial period.
Tuxera NTFS for Mac
Tuxera NTFS for Mac is another popular software option that provides full read-write support for NTFS drives on macOS. It's based on the open-source NTFS-3G project, but with additional features like improved performance and support for large files.
Steps to Install and Use Tuxera NTFS for Mac:
- Download and install Tuxera NTFS for Mac from the Tuxera website.
- Restart your Mac after installation.
- Connect your NTFS-formatted external drive to the Mac.
- The drive will now be accessible in Finder, and you can perform read-write operations.
Pros:
- Fast and reliable: Tuxera offers stable and high-performance file access.
- Easy integration: It integrates into macOS just like native file systems, with no special configurations required.
- Support for large files and multiple drives: It can handle large files and multiple NTFS drives without any issues.
Cons:
- Paid software: Tuxera NTFS for Mac is also a paid tool with a free trial period.
- May be slower on older macOS versions: Some users have reported slower speeds on older versions of macOS.
Method 2: Using macOS Terminal (for old OS X versions)
If you're comfortable with the Terminal and are willing to take a more technical approach, macOS does allow you to enable read-write access to NTFS drives through its built-in command-line tools. However, this method is experimental, and it's not recommended for casual users or those who are not comfortable with using the Terminal.
⚠️ Warning: Modifying system settings through the Terminal can be risky, and there's a chance that your data may become corrupted or that other system issues could arise. Always back up your data before proceeding with this method.
Steps to Enable NTFS Write Access Using Terminal:
- Open Terminal on your Mac by going to Utilities via Applications.
- Type the following command to disable System Integrity Protection (SIP) temporarily:
sudo csrutil disable
- Restart your Mac.
- Connect your NTFS-formatted drive to your Mac.
- In Terminal, type the following command to mount the NTFS drive with write access:
sudo mount -t ntfs -o rw,auto,nobrowse /dev/disk# /Volumes/YourDrive
(Replace /dev/disk# with the correct disk identifier for your NTFS drive, which you can find by typing diskutil list in Terminal.)
- Your NTFS drive should now have read-write access. You can access it in Finder by navigating to /Volumes.
Pros:
- No need for third-party software: This method does not require any external applications.
- Free: It doesn't cost anything, as it uses built-in macOS tools.
Cons:
- Risk of data corruption: This method is not fully supported by macOS, and there's a risk of data corruption if the process is not followed correctly.
- Requires technical knowledge: The Terminal commands and modifying system settings can be intimidating for some users.
- Temporary changes: You may need to repeat this process each time you restart your Mac, as the changes are not persistent.
Method 3: Using Open-Source Solutions [Low Success Rate]
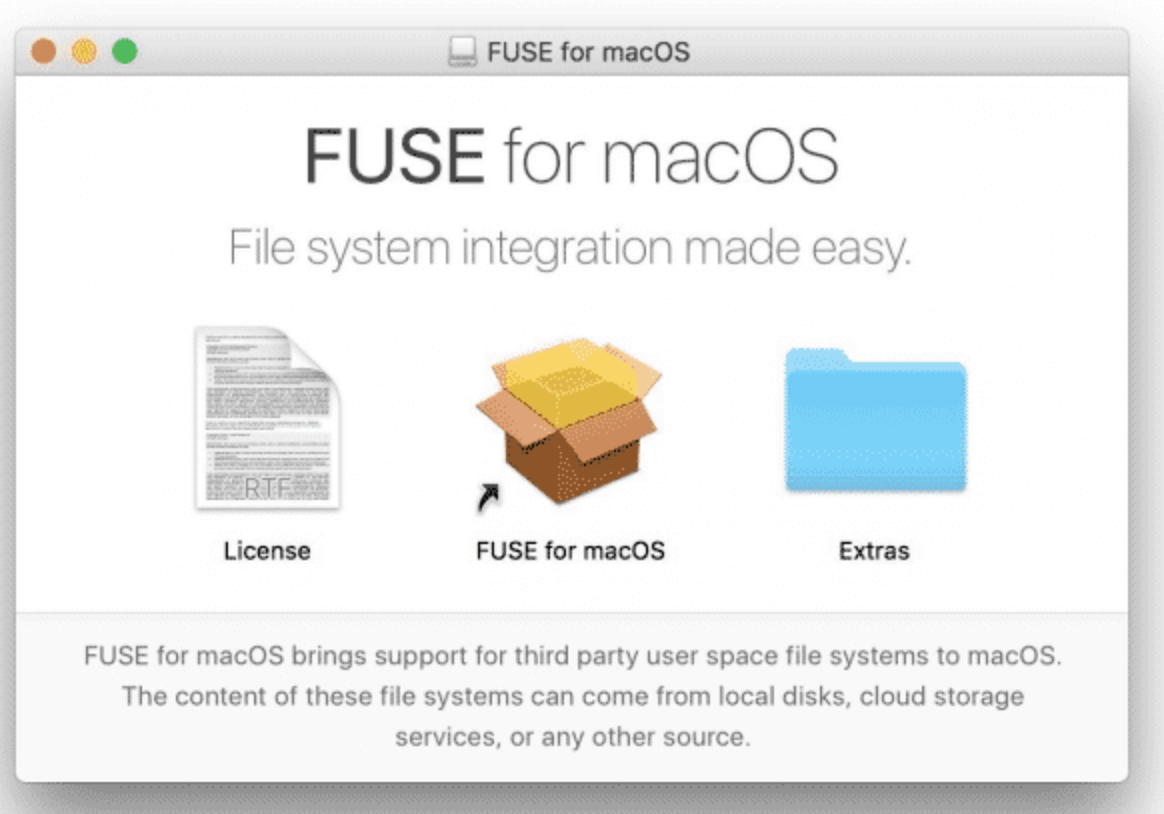
For those who prefer open-source solutions, there's an option to use FUSE for macOS, a free software package that enables macOS to support additional file systems, including NTFS. FUSE relies on community contributions, and its performance can vary depending on the system and the setup.
Steps to Use FUSE for macOS:
- Download and install FUSE for macOS from the official website.
![Read-Write NTFS Drive on Mac]()
- Install NTFS-3G, which is the open-source software that enables NTFS support through FUSE.
- After installation, configure FUSE and NTFS-3G to mount your NTFS drive with read-write access.
Pros:
- Free and open-source: No cost for using FUSE and NTFS-3G.
- Customizable: Being open-source, you can modify the software and contribute to its development if you're familiar with programming.
Cons:
- Technical setup: FUSE and NTFS-3G require more technical knowledge to install and configure.
- Less polished: Open-source solutions may not be as user-friendly or stable as commercial alternatives.
Best Practices and Precautions
When enabling read-write access to NTFS drives on Mac, it's important to follow best practices to ensure data integrity and system stability:
- Backup Data: Always back up important data before making changes to your file system settings or installing third-party software.
- Use Reliable Tools: If you opt for third-party software, choose well-known, reputable tools to minimize the risk of bugs or data loss.
- Be Cautious with Terminal: If you're using Terminal commands, make sure you follow the instructions carefully. Terminal modifications can lead to serious issues if done incorrectly.
- Avoid Frequent Use of NTFS: If possible, consider reformatting your drive to a file system like exFAT, which offers better compatibility with both Mac and Windows without the need for additional software.
Alternatives to NTFS for Mac Compatibility:
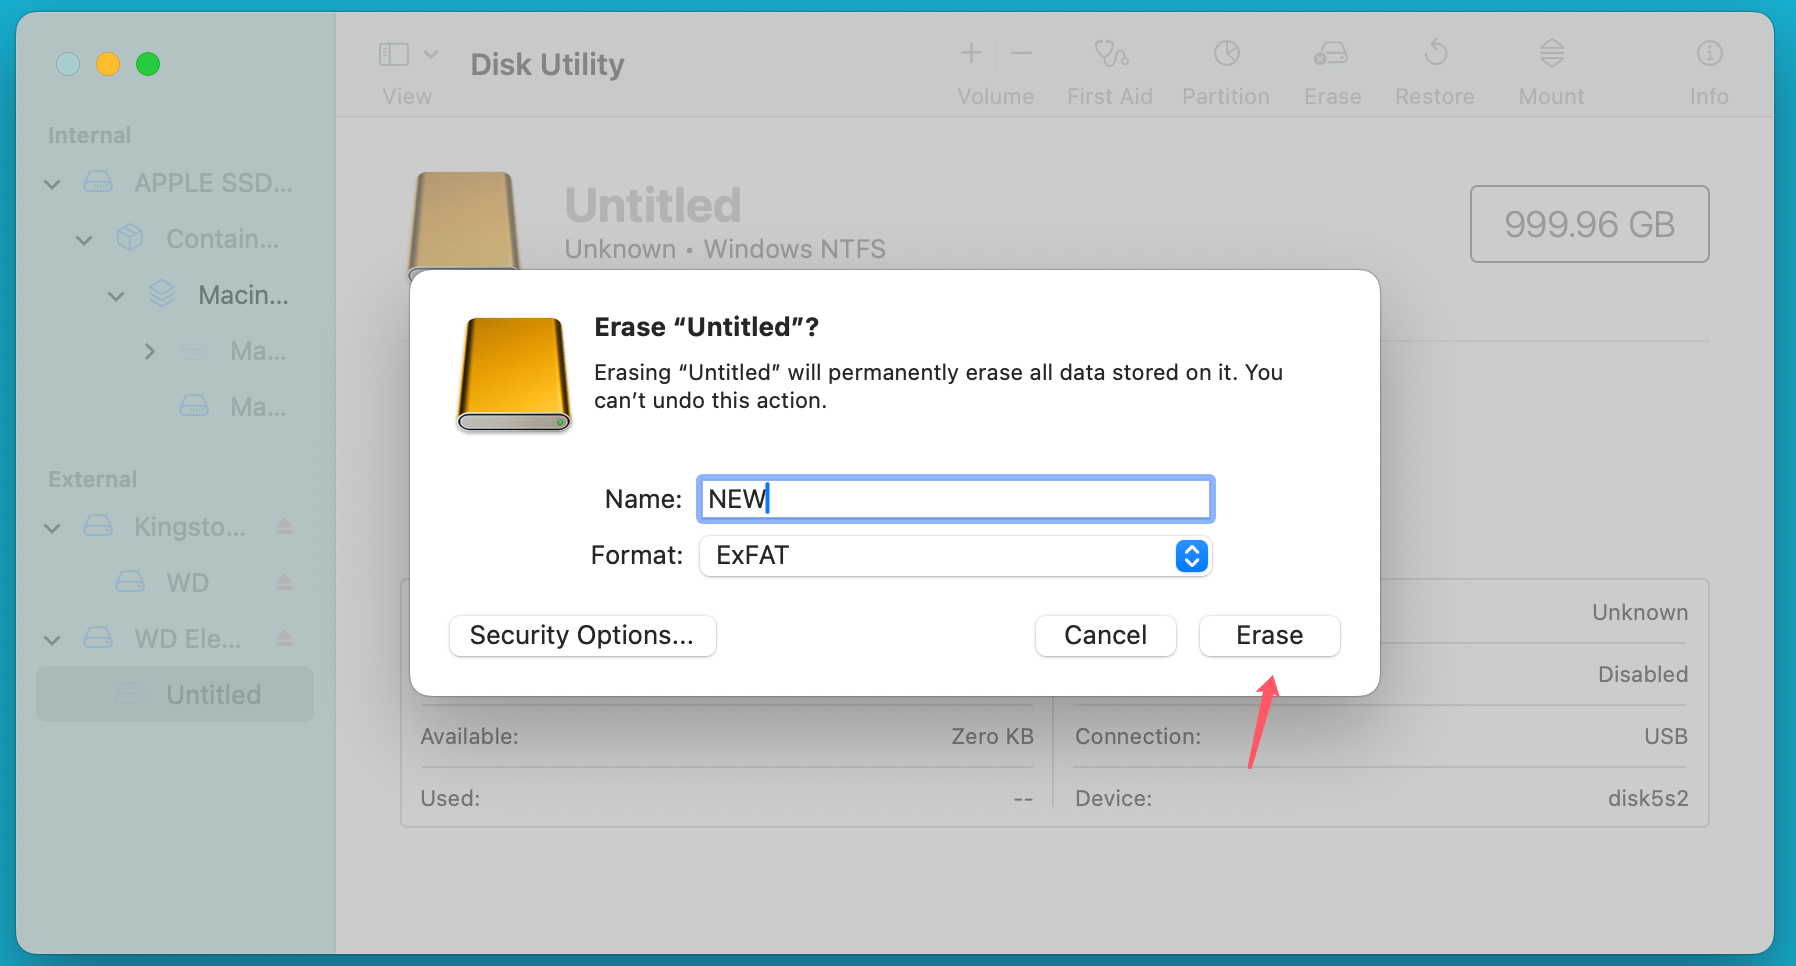
If the process of enabling NTFS write support on Mac seems complicated or unreliable for your needs, there are alternative solutions to consider. One popular option is ExFAT, a file system supported by both Mac and Windows without the need for third-party software. ExFAT allows for large file sizes and is a good choice for external drives that you intend to use across different platforms.
Steps to format the NTFS drive to ExFAT on Mac:
- Connect the NTFS drive to your Mac.
- Go to Applications > Utilities > Disk Utility, open Disk Utility.
- Select the NTFS drive, click Erase.
- Select ExFAT as the file system.
- Click Erase again.
![Read-Write NTFS Drive on Mac]()
Conclusion
NTFS is an essential file system for Windows users, but macOS users face challenges when trying to write to NTFS drives. Fortunately, there are several solutions available to enable read-write access to NTFS drives on Mac. Whether you choose third-party software, use Terminal commands, or go the open-source route, each method has its pros and cons. By following the right steps and taking precautions, you can ensure that your data remains safe and that you can work with NTFS drives seamlessly on your Mac.

Donemax NTFS for Mac
An easy-to-use NTFS for Mac tool to help you enable writable for NTFS drives on Mac so that you can read-write NTFS drives on Mac without any limitation. It also can help you mount, format, repair, rename, open drive on your Mac.
Related Articles
- Jun 10, 2025Best 5 NTFS Driver for M4 (M4/M4 Pro/M4 Max) Mac
- Dec 05, 2024SYSGeeker NTFS for Mac Review, How to Use It, Best Alternative
- Dec 03, 2024Can I Run First Aid on NTFS Drive on Mac? How to Fix Crashed NTFS Drive on Mac?
- Jun 30, 2023How to Write Data to NTFS Drive on Mac?
- Jun 12, 2025How to Format and Unformat An NTFS Hard Drive on Mac?
- Jan 06, 2025Top 6 NTFS software for mac

Christina
Christina is the senior editor of Donemax software who has worked in the company for 4+ years. She mainly writes the guides and solutions about data erasure, data transferring, data recovery and disk cloning to help users get the most out of their Windows and Mac. She likes to travel, enjoy country music and play games in her spare time.

Gerhard Chou
In order to effectively solve the problems for our customers, every article and troubleshooting solution published on our website has been strictly tested and practiced. Our editors love researching and using computers and testing software, and are willing to help computer users with their problems

