Before we start: Donemax NTFS for Mac is a reliable NTFS for Mac tool. You can use it to enable writable for NTFS drives on Mac, then you can delete files from any NTFS drive on Mac without any limitation.
PAGE CONTENT:
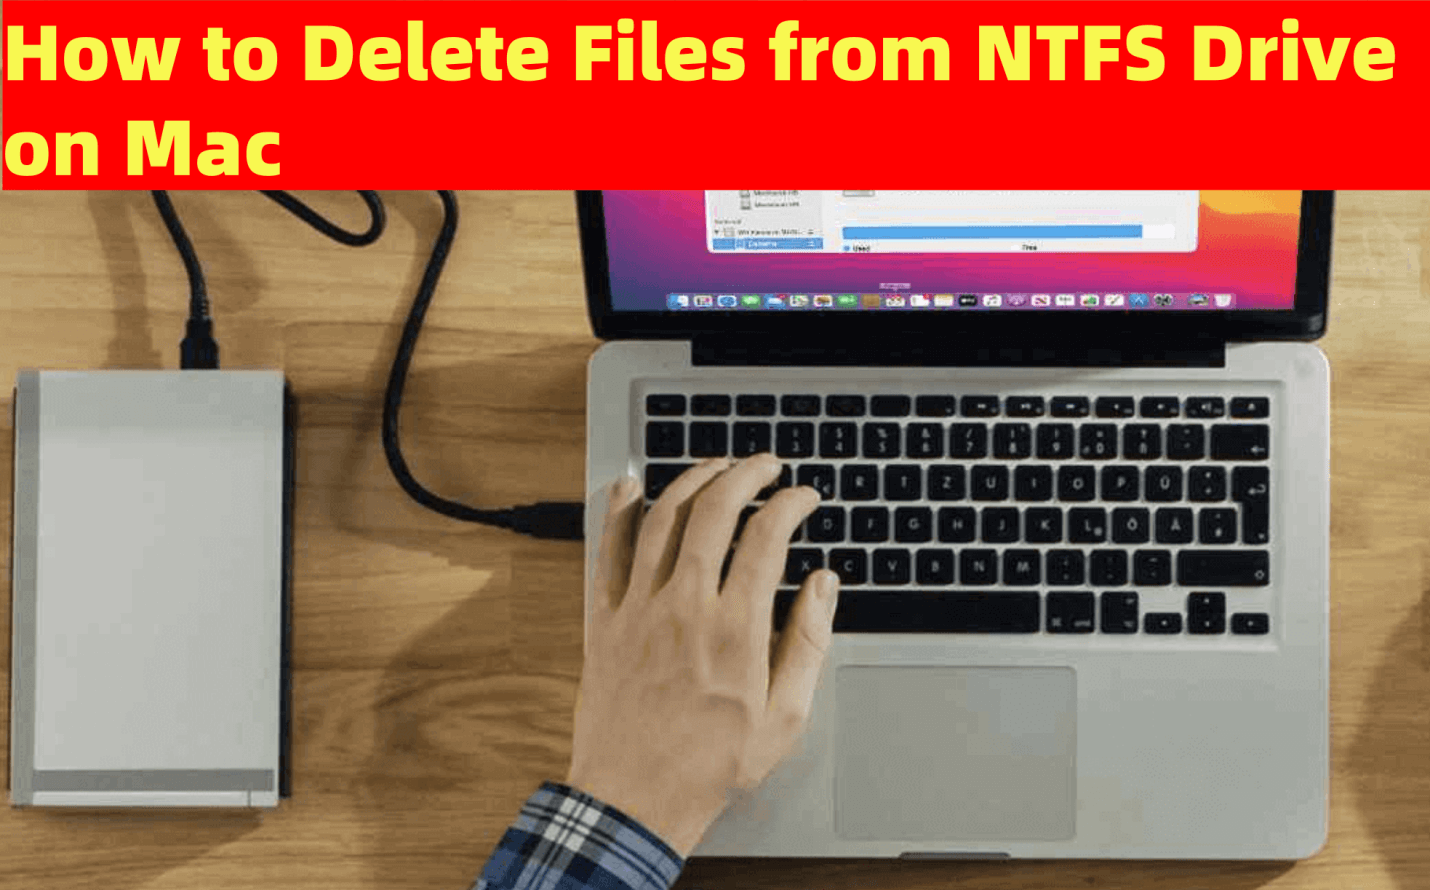
Managing NTFS drives on macOS can be a challenge, as Apple's operating system provides limited support for this Windows-native file system. If you've ever tried to delete a file from an NTFS drive on your Mac, you've likely encountered frustration due to its read-only limitations. Fortunately, there are solutions that allow you to overcome these restrictions. In this detailed guide, we'll explore how to delete files from an NTFS drive on Mac, covering various methods, tools, and safety precautions.
Understand NTFS and macOS Compatibility
The NTFS (New Technology File System) was developed by Microsoft as a robust file system for Windows. It supports advanced features like journaling, large file support, and security permissions. While NTFS is highly efficient for Windows systems, macOS has limited compatibility with it.
By default, macOS provides read-only access to NTFS drives. This means you can view and copy files but cannot modify or delete them directly. This limitation exists because NTFS is proprietary to Microsoft, and macOS does not natively support write or deletion operations for NTFS drives. If you're a Mac user dealing with NTFS drives regularly, it's essential to understand the methods available to enable full functionality.
Default Options on macOS
Out of the box, macOS allows you to access NTFS drives in a limited capacity. Here's what you can do with the default tools:
- Read Files: You can view and copy files from an NTFS drive.
- Disk Utility: This built-in macOS tool can help you format an NTFS drive to a compatible file system like ExFAT or APFS. However, formatting erases all data on the drive, making it impractical for those who want to keep their files intact.
If you need to delete files or make changes without reformatting the drive, you'll need additional tools or methods, which we'll explore next.
3 Methods to Enable NTFS Write/Deletion Access on Mac
To delete files from an NTFS drive on Mac, you'll need to enable write access. Here are the most effective methods:
1. Install NTFS Driver
Enabling write and delete functionality on NTFS drives is most straightforward with third-party software. These tools are designed to provide seamless integration between macOS and NTFS file systems. Here's a closer look at the options available, how they work, and why they're a practical choice for most users.
Why Choose Third-Party NTFS Driver?
Third-party NTFS drivers simplify the process of managing NTFS drives on macOS. Unlike manual methods, which can be complex and prone to errors, these tools automate the process of enabling write and delete access. They are particularly beneficial for users who frequently switch between macOS and Windows systems and need a hassle-free solution.
Top Third-Party NTFS Drivers for Mac
1. Donemax NTFS for Mac
Donemax NTFS for Mac is known for its reliability and speed. It allows full read/write access to NTFS drives while maintaining high file transfer speeds comparable to native macOS file systems. It also supports automatic mounting of NTFS drives whenever they are connected.
2. Tuxera NTFS for Mac
Tuxera NTFS emphasizes stability and includes advanced caching mechanisms to ensure safe data transfers. It is ideal for users dealing with large files or prolonged usage.
3. Mounty for NTFS
Mounty is a lightweight, free application that leverages macOS's experimental NTFS write support. While it's not as fast or feature-rich as Donemax NTFS for Mac or Tuxera, it's an excellent option for occasional NTFS drive use.
Steps to Use Third-Party Software (such as Donemax NTFS for Mac) for File Deletion:
- Install the Software: Download and install the software of your choice. For example, you can download and install Donemax NTFS for Mac on your Mac.
- Connect the NTFS Drive: Plug the drive into your Mac. The software will automatically detect it.
- Enable Writable: Open Donemax NTFS for Mac, select the NTFS drive, click on Enable Writable button.
![Donemax NTFS for Mac]()
- Open the Drive in Finder: Locate the NTFS drive in the Finder sidebar. If it doesn't appear, check the software's interface for mounting options.
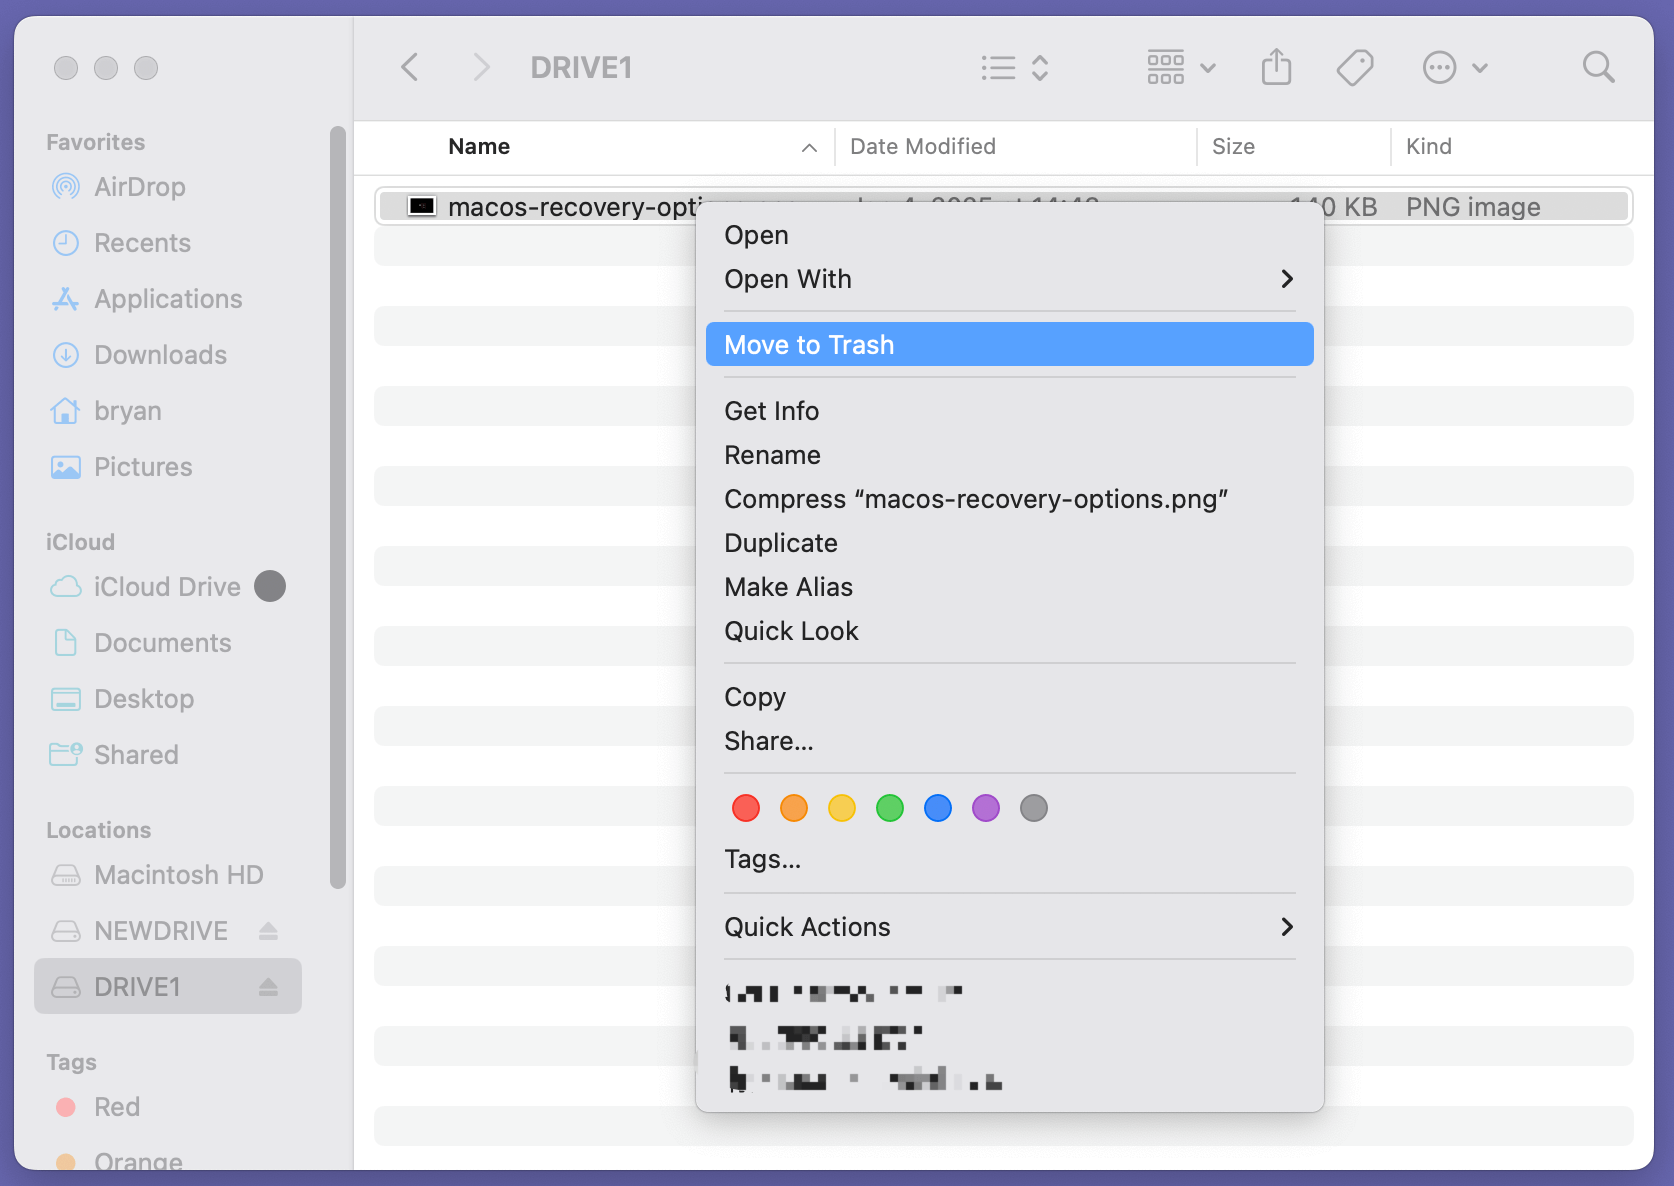
- Delete Files: Navigate to the files you wish to delete. Right-click on the file and select "Move to Trash" or drag it to the Trash.
![delete files from an NTFS drive on Mac]()
- Empty the Trash: Confirm the deletion by emptying the Trash to permanently remove the files from the drive.
Advantages of Using Third-Party Software
- User-Friendly: Minimal setup and easy-to-use interfaces make these tools accessible to all users.
- Reliable: Third-party software is designed for stability and high performance, reducing the risk of data corruption.
- Time-Saving: These tools automate the process of enabling write access, eliminating the need for manual commands.
Limitations of Third-Party Software
- Cost: Most high-quality NTFS drivers are paid, which might not be ideal for occasional users.
- Dependence on Software Updates: Compatibility with newer macOS versions may require regular updates from the software developer.
- Performance Variability: Free options like Mounty may lack the speed and reliability of paid alternatives.
When to Use Third-Party Software
Third-party tools are best suited for users who:
- Regularly work with NTFS drives on their Mac.
- Require stable and high-speed file operations.
- Prefer a simple, plug-and-play solution over manual configuration.
2. Use Terminal (only for old OS X versions)
If you're comfortable with command-line tools, macOS's Terminal can enable NTFS write access. However, this method is not officially supported by Apple and carries risks of data corruption.
Steps to Enable NTFS Write Access with Terminal:
- Connect the NTFS Drive: Plug the drive into your Mac.
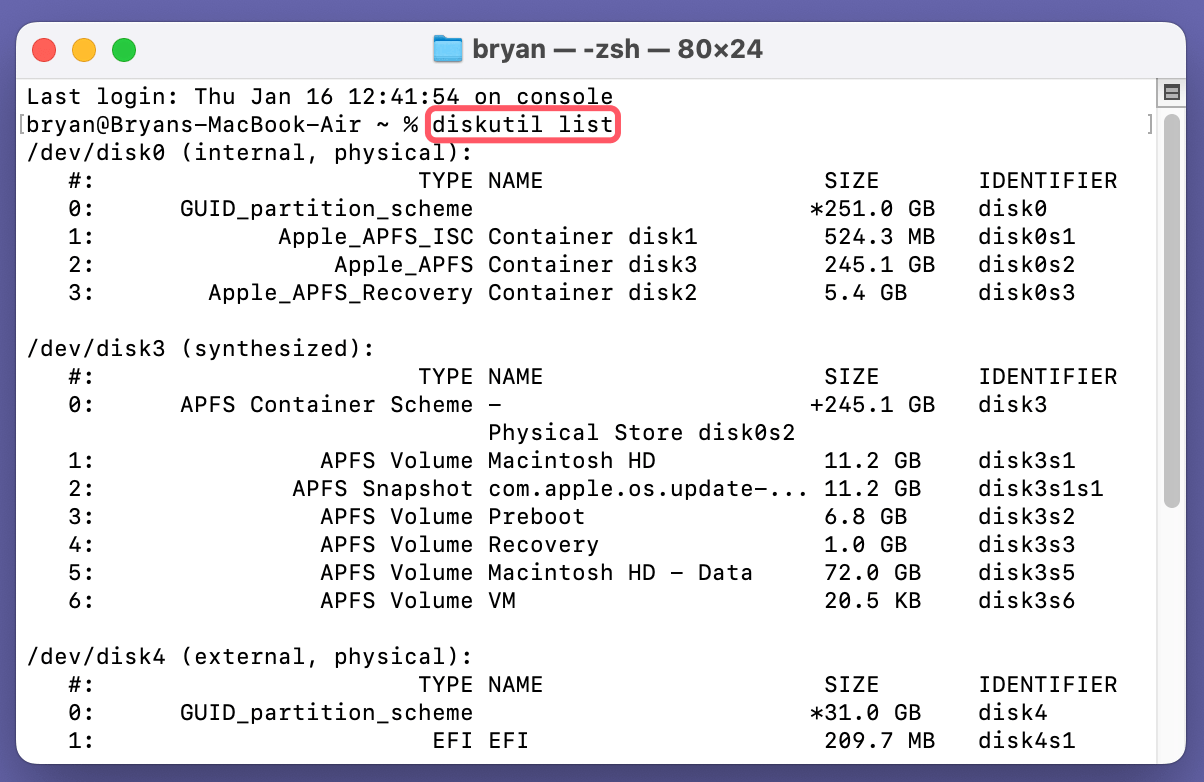
- Identify the Drive: Open Terminal and type:
diskutil list
![delete files from an NTFS drive on Mac]()
Note the identifier for your NTFS drive (e.g., /dev/disk2s1).
- Create a Mount Directory: Create a folder to mount the drive:
sudo mkdir /Volumes/NTFS
- Mount the Drive with Write Access:
sudo mount -t ntfs -o rw,auto,nobrowse /dev/disk2s1 /Volumes/NTFS
Replace /dev/disk2s1 with your drive identifier.
- Access the Drive: Navigate to /Volumes/NTFS in Finder.
Pros:
- Free method.
- No need for third-party software.
Cons:
- Risk of data corruption.
- Complex for non-technical users.
- Limited support and stability.
3. Format the Drive (Erase Everything)
If you frequently use the NTFS drive on Mac and don't need to retain its current file system, reformatting it to a macOS-compatible system is a viable option.
Steps to Format the Drive:
- Open Disk Utility (found in Applications > Utilities).
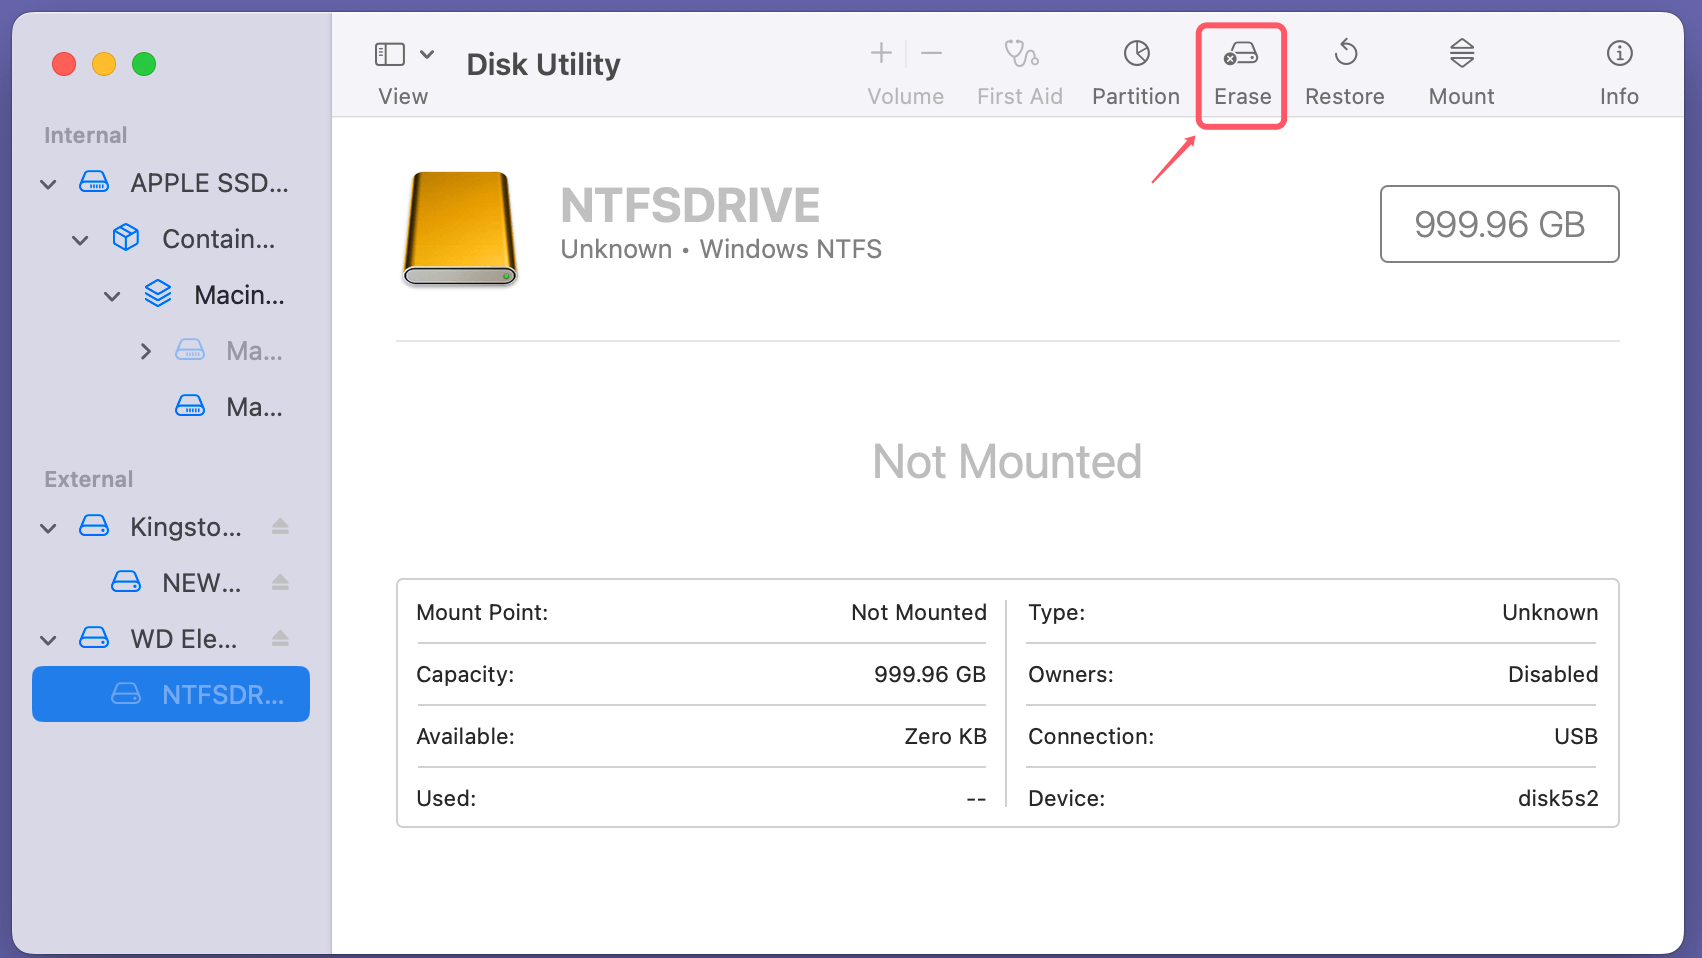
- Select the NTFS drive from the list.
- Click Erase.
![delete files from an NTFS drive on Mac]()
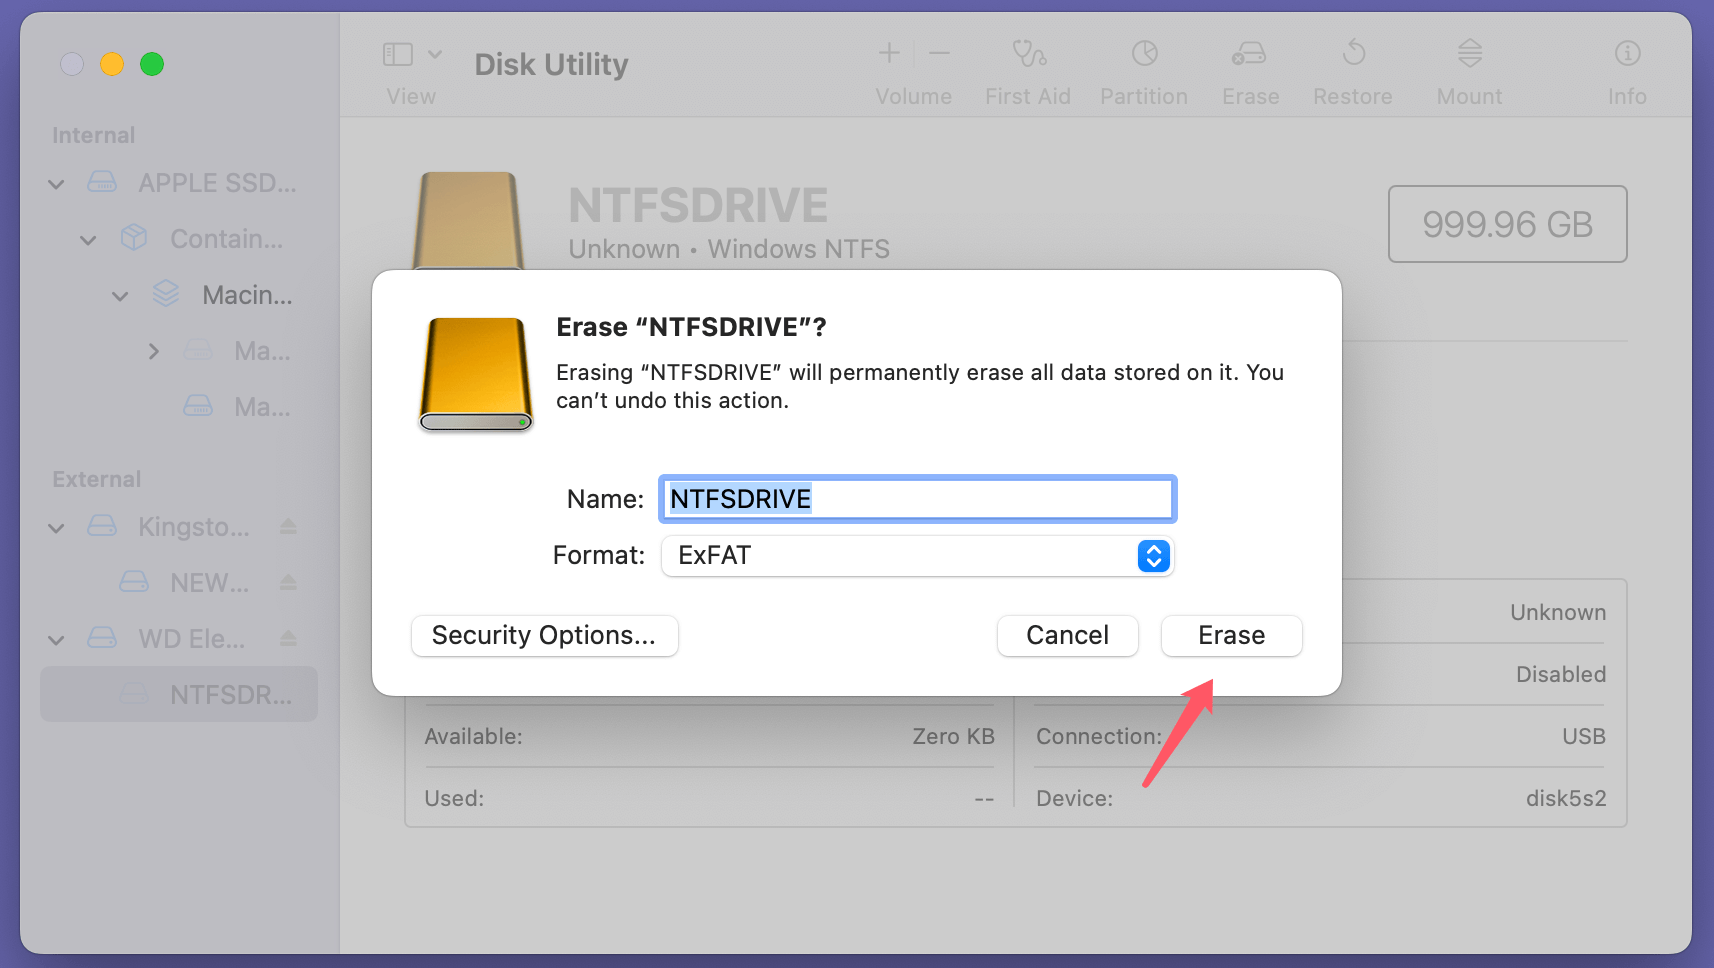
- Choose a new file system:
- ExFAT: Compatible with both macOS and Windows.
- APFS: Optimized for macOS but incompatible with Windows.
- Confirm the action to reformat the drive.
![delete files from an NTFS drive on Mac]()
Pros:
- Long-term solution for macOS compatibility.
- No need for additional software.
Cons:
- Erases all data on the drive.
- Requires transferring data beforehand.
💡 Note: If you lose data due to erasing the NTFS drive, just use Mac data recovery software - such as Donemax Data Recovery for Mac to help you get the lost data back.
Step-by-Step Guide to Delete Files from NTFS Drive on Mac
Once you've enabled NTFS write access using one of the above methods, follow these steps to delete files:
- Open the NTFS Drive: Use Finder to navigate to the drive after connecting it to your Mac.
- Locate the File(s) to Delete: Browse the drive and select the files you want to remove.
- Delete the Files: Drag the files to the Trash or use the right-click menu to delete them.
- Empty the Trash: Confirm the deletion by emptying the Trash to free up space on the drive.
Safety Precautions and Best Practices
To ensure data safety and avoid potential issues when working with NTFS drives, follow these best practices:
- Backup Important Data: Always create a backup of critical files before attempting to modify or delete data on an NTFS drive.
- Use Trusted Software: Only download NTFS drivers from reputable sources to avoid malware or compatibility issues.
- Avoid Unnecessary Formatting: Reformat drives only when necessary and after backing up data.
- Check Compatibility: Ensure that your NTFS driver is updated and compatible with your version of macOS.
Troubleshooting Common Problems
If you encounter issues while trying to delete files from an NTFS drive, here's how to resolve them:
- Permission Denied Errors:
- Cause: The NTFS driver may not be configured correctly.
- Solution: Restart the NTFS software or recheck write access settings.
- NTFS Drive Not Showing Up:
- Cause: The drive may not be properly mounted.
- Solution: Use Disk Utility to verify and repair the drive.
- Files Not Deleting Despite Write Access:
- Cause: Corrupted files or incomplete NTFS driver installation.
- Solution: Reinstall the NTFS driver and retry.
Conclusion
Deleting files from an NTFS drive on Mac requires enabling write access, as macOS's default settings limit NTFS functionality. Whether you choose third-party software for simplicity, Terminal for a technical approach, or reformatting for long-term compatibility, the method you select depends on your needs and technical comfort level. By following the steps outlined in this guide, you can efficiently manage NTFS drives on your Mac while ensuring data safety and performance.
With the right tools and precautions, NTFS drives can be seamlessly integrated into your macOS workflow, allowing you to delete files and manage data without hassle.

Donemax NTFS for Mac
An easy-to-use NTFS for Mac tool to help you enable writable for NTFS drives on Mac so that you can read-write NTFS drives on Mac without any limitation. It also can help you mount, format, repair, rename, open drive on your Mac.
Related Articles
- Jul 06, 2023External Hard Drive Not Mounting on Mac, How to Fix It?
- Jan 19, 2024Fix Crucial External SSD Read-Only On Mac
- Feb 08, 2024Lexar Portable SSD Is Read-Only on Mac, Fix It Now
- Jan 06, 2025Top 6 NTFS software for mac
- Dec 25, 2024NTFS Extension for Mac, NTFS Driver for Mac, NTFS Plugin for Mac
- Sep 06, 2023What Can Mac Do on NTFS Drive?

Charles
Charles, who lives in Sydney, Australia, is an editor & writer of Donemax Team. He is good at writing articles related with Apple Mac computers, Windows operating systems, data recovery, data erasure, disk clone and data backup, etc. He loves reading and playing tennis in his spare time and is interested in testing new digital devices such as mobile phones, Macs, HDDs, SSDs, digital cameras, etc.

Gerhard Chou
In order to effectively solve the problems for our customers, every article and troubleshooting solution published on our website has been strictly tested and practiced. Our editors love researching and using computers and testing software, and are willing to help computer users with their problems

