Before we start: macOS can read NTFS drives natively. To write data to a NTFS drive, you need to install a third-party Microsoft NTFS driver. Donemax NTFS for Mac is an easy-to-use NTFS driver. It can quickly grant full read-write access to NTFS drive on Mac.
PAGE CONTENT:
Data storage is essential for computing and it's important to make sure it's compatible with devices. Especially, it's important when switching between operating systems like Windows and macOS.
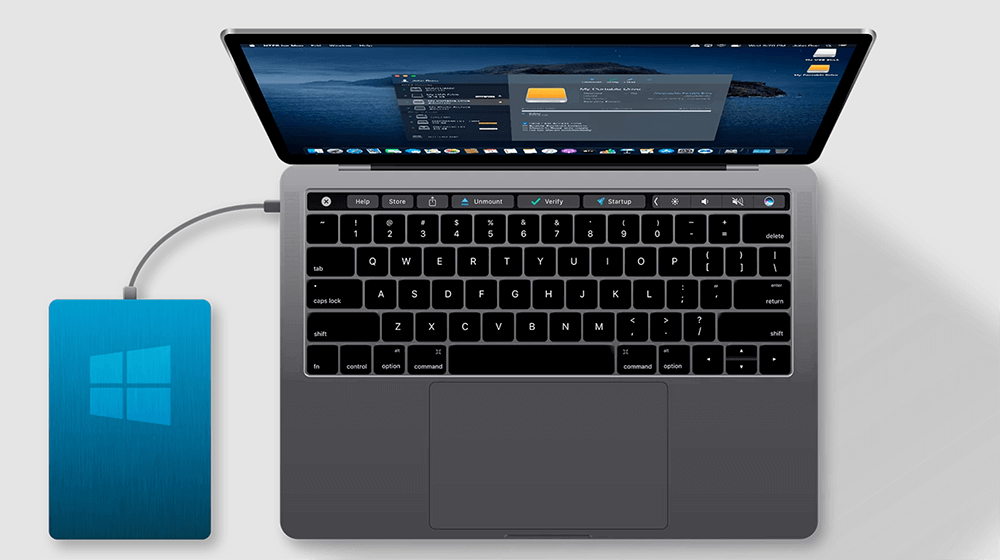
A common challenge many macOS users face is working with NTFS drives. This article shows whether macOS can read NTFS drives. Also the guide will display the available solutions and practices for a better experience.
What is NTFS?
NTFS, or New Technology File System, is a reliable file system for Windows. It has since become the default file system for Windows operating systems because of its advanced features.
- File Security: NTFS supports file permissions and encryption, making it ideal for sensitive data.
- Large File Support: It can handle files larger than 4GB, unlike older file systems like FAT32.
- Journaling: NTFS maintains a log of changes to prevent data corruption during unexpected events like power failures.
- Compression and Quotas: It allows file compression and storage quotas.
NTFS is feature-rich and robust but it is primarily for Windows. So, it's not compatible with other operating systems, like macOS.
macOS and NTFS Compatibility
Out of the box, macOS has limited support for NTFS. Here's how macOS interacts with NTFS drives:
- Read-Only Access: macOS can read files on NTFS drives without additional software. This means you can copy files from NTFS drive to Mac. Also, you can open and view files from the NTFS drive on Mac. However, you cannot edit, delete or add new files to the drive.
- No Native Write Support: Apple doesn't provide native write support for NTFS, likely because of licensing and compatible considerations.
To full read-write access to NTFS drives, this limitation is frustrating. However, there are several workarounds to bridge the gap.
How to Access NTFS Drives on macOS?
Option 1: Native Read-Only Access
The easiest way to work with NTFS drives on macOS is to utilize the system's native read-only support.
Steps for Native Read-Only Access:
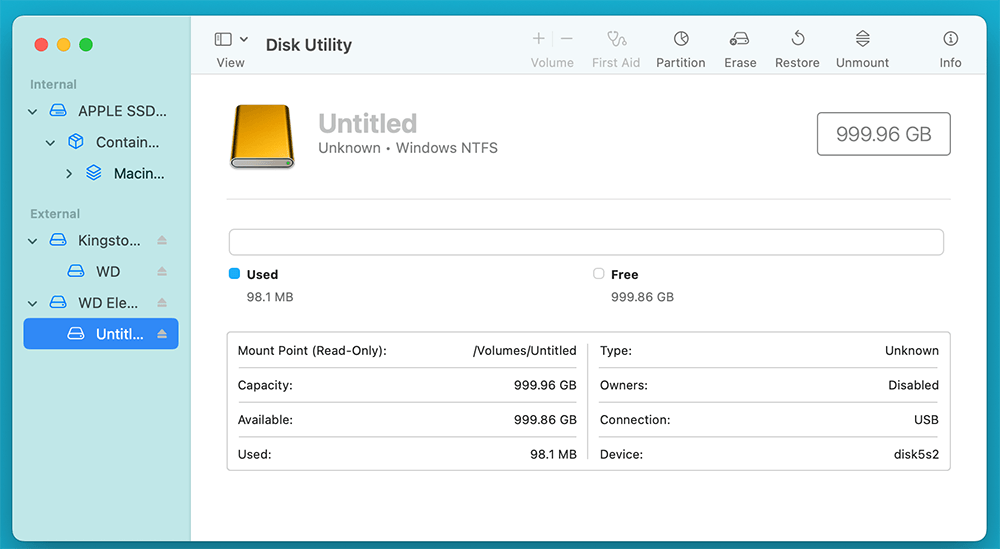
- Connect the NTFS Drive to Your Mac: Use the appropriate USB or Thunderbolt port. If the drive doesn't appear in Finder, check and try to mount it in Disk Utility.
![Steps for Native Read-Only Access]()
- Locate the Drive: NTFS drives typically display in Finder's left-hand sidebar or as icons on your desktop.
- Access and Copy Files: Open the drive and navigate to the desired files. Copy them to your Mac's storage for editing or other purposes.
Pros
- No Installation Required: This method doesn't require additional tools or drivers.
- Safe and Reliable: No risk of accidental data corruption on the NTFS drive.
Cons:
- Limited Functionality: Users cannot edit, delete, or add files directly to the drive.
- Inconvenient for Regular Use: Frequent file transfers to and from your Mac can become time-consuming to edit files.
Option 2: Third-Party Software
Third-party NTFS for Mac tools enable full read-write access. The tools allow you to edit existing files or add new ones directly on the NTFS drive.
1. Donemax NTFS for Mac
Donemax NTFS for Mac is a 100% safe, powerful and easy-to-use NTFS for Mac tool. It can mount NTFS drive on Mac, grant full read-write access to NTFS drive on Mac, etc.
Step 1. Download and install Donemax NTFS for Mac on your Mac, then connect the NTFS drive to your Mac.
Step 2. Open Donemax NTFS for Mac, then select the NTFS drive, click on Enable Writable button.
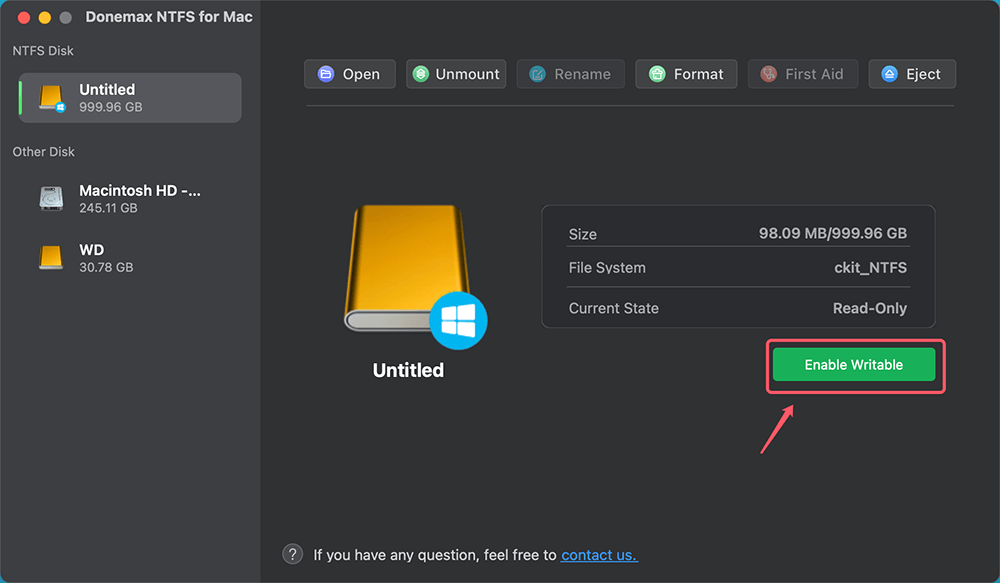
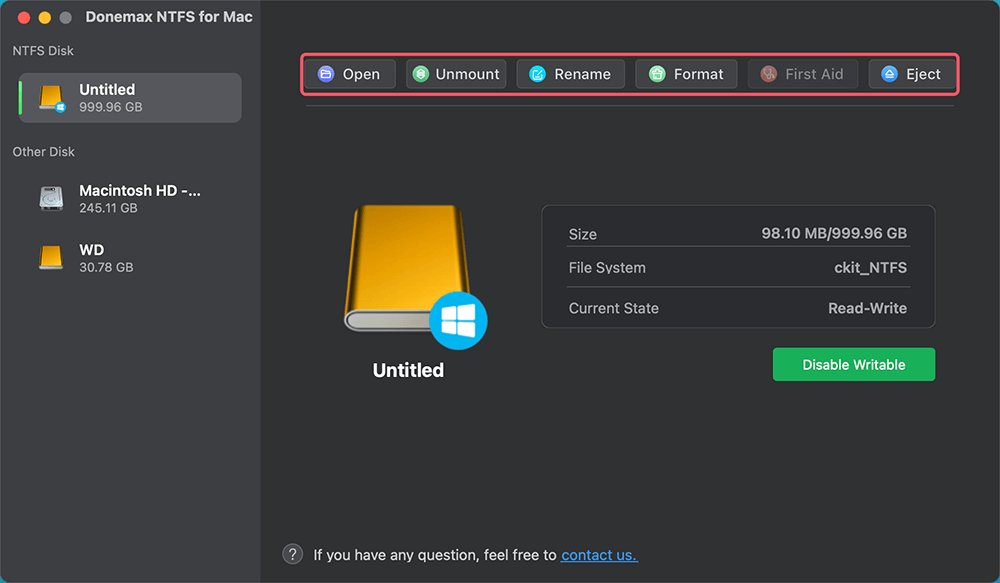
This tool also can help you mount drive, fix damaged drive. Also, it can open external storage device, eject USB drive, reformat external hard drive on Mac, etc.
Pros
- Reliable to enable NTFS writable access for NTFS on Mac.
- Format drive to NTFS file system on Mac.
- Additional disk management options available.
- Offer full-function free trial version.
- Support the latest macOS versions.
- Fast performance for basic file transfers.
Cons:
- Free trial is time litmied.
2. Paragon NTFS for Mac
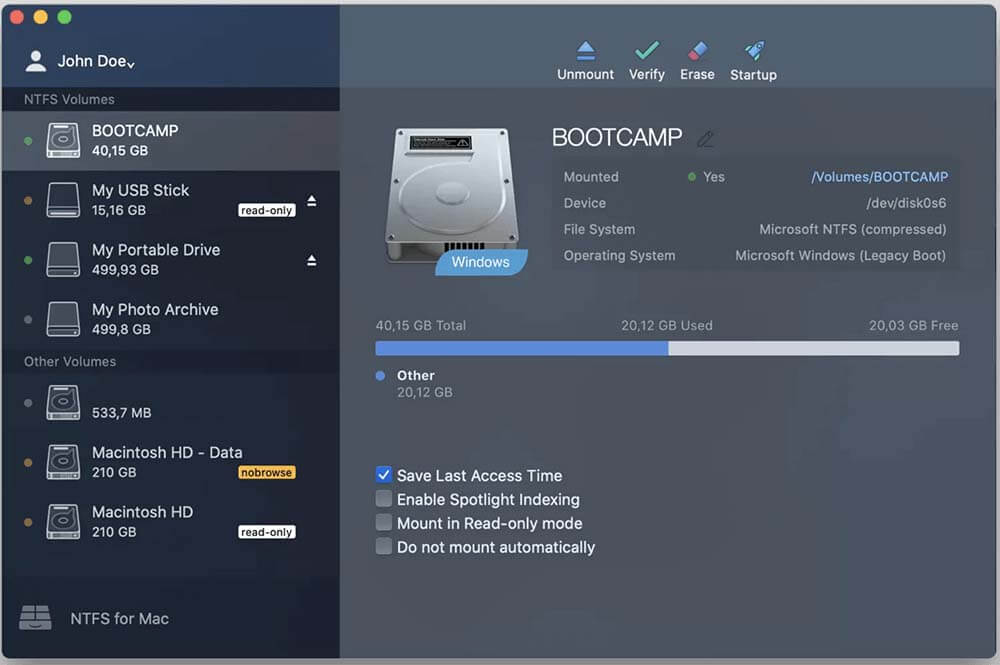
Installation and Setup:
- Visit Paragon's official website and a trial version is available before purchasing.
- Run the installer and give the necessary permissions when installing.
- After installation, connect your NTFS drive. Paragon automatically mounts it with full read-write access.
Performance and Usability: Paragon offers near-native performance, with minimal latency during file operations. It integrates seamlessly with macOS, making the NTFS drive behave like any other storage device.
Pros
- Full read/write support for NTFS on Mac.
- Easy to install and use.
- Fast file transfer speeds.
Cons:
- Paid version required for long-term use.
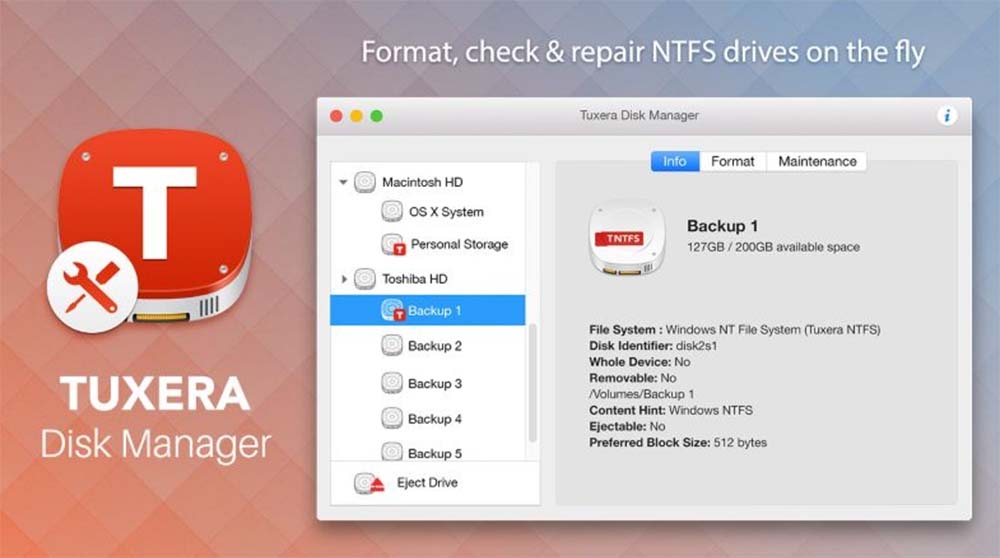
3. Tuxera NTFS for Mac
Installation and Setup:
- Download Tuxera NTFS from its official website. Like Paragon, it offers a free trial.
- Install the software and restart your Mac if prompted.
- Once installed, your NTFS drive will mount with full read-write access.
Additional Features
Tuxera includes a tool for checking and repairing NTFS volumes. This is particularly useful for troubleshooting corrupted drives.
Performance:
While slightly slower than Paragon in handling large files, Tuxera is more than sufficient for everyday tasks.
Pros
- Smart caching ensures quick and secure data transfers.
- Handles encrypted NTFS drives with ease.
- Simple and straightforward setup.
Cons:
- While performance is good, it may lag slightly behind Donemax in speed tests.
- Affordable option but still requires payment.
4. Mounty for NTFS
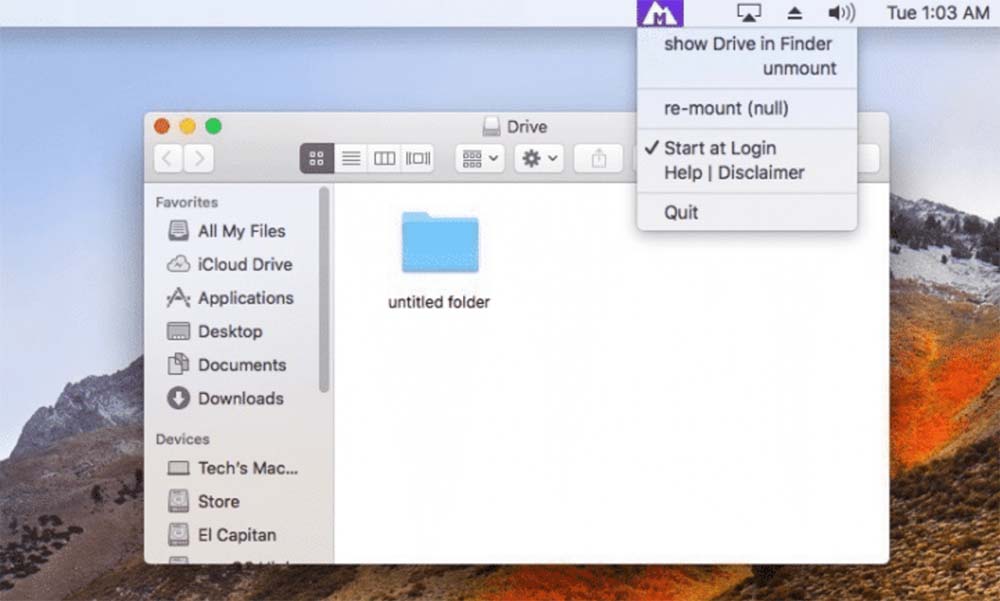
Mounty is a lightweight, free utility for enabling write access to NTFS drives.
Installation and Setup:
- Download Mounty from its official website or the Mac App Store.
- Connect your NTFS drive. Mounty will automatically detect and remount it with write access.
Pros
- Free to Use: Ideal for users who don’t want to spend money on third-party tools.
- Easy to Install: The setup process is quick and straightforward.
Cons:
- Performance Limitations: Write speeds are slower compared to Paragon or Tuxera.
- Basic Functionality: Mounty doesn't have advanced features such as disk repair or management tools.
Option 3: Enabling Experimental NTFS Write Support
For advanced users, macOS includes a hidden feature that allows experimental write support for NTFS drives. There might be risks and is not proper for critical tasks.
Detailed Steps:
- Connect the NTFS Drive: Use a USB or compatible port.
- Launch Terminal: Open Terminal from the Applications > Utilities folder.
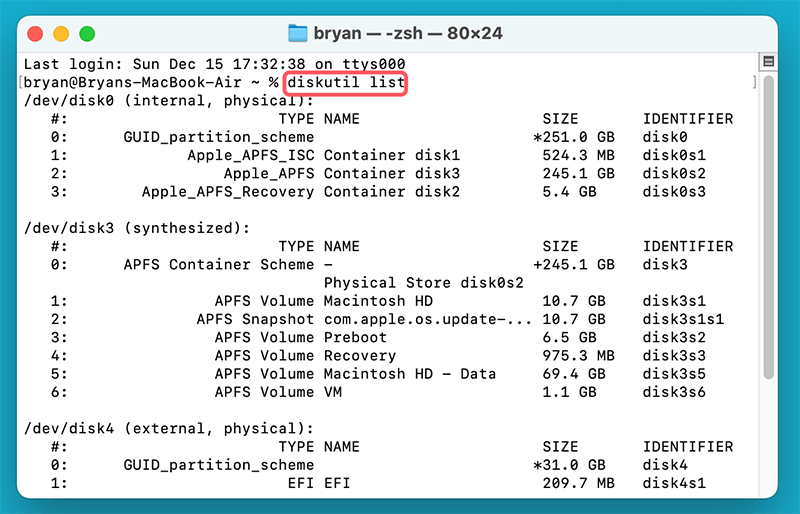
- Identify the Drive:
- Type diskutil list in Terminal and press Enter.
![Type diskutil list in Terminal and press Enter]()
- Locate your NTFS drive in the output. Note its identifier, such as /dev/disk2s1.
- Type diskutil list in Terminal and press Enter.
- Edit the File System Table:
- Type sudo nano /etc/fstab to open the file system table.
- Add the following line:
LABEL=YourDriveName none ntfs rw,auto,nobrowse
Replace YourDriveName with your drive’s name.
- Save Changes: Press Control + O to save the file, then Control + X to exit.
- Access the Drive:
- Open Finder, press Command + Shift + G, and enter /Volumes to access the drive.
Risks and Drawbacks:
- Data Corruption: Write operations can fail, leading to corrupted files.
- Limited Support: This method is not official solution from Apple. It may not work reliably on newer macOS versions.
This method is proper for users who need a temp solution. And they are willing to accept potential risks.
Option 4: Formatting the Drive
Reformatting an NTFS drive is a long-term solution to compatible between macOS and Windows. However, it's important to back up all data before proceeding, as formatting erases everything on the drive.
File System Comparisons:
- ExFAT: Ideal for users who frequently switch between macOS and Windows.
- FAT32: Suitable for older devices or drives used for smaller files.
- APFS: Best for macOS-exclusive drives.
Formatting Steps:
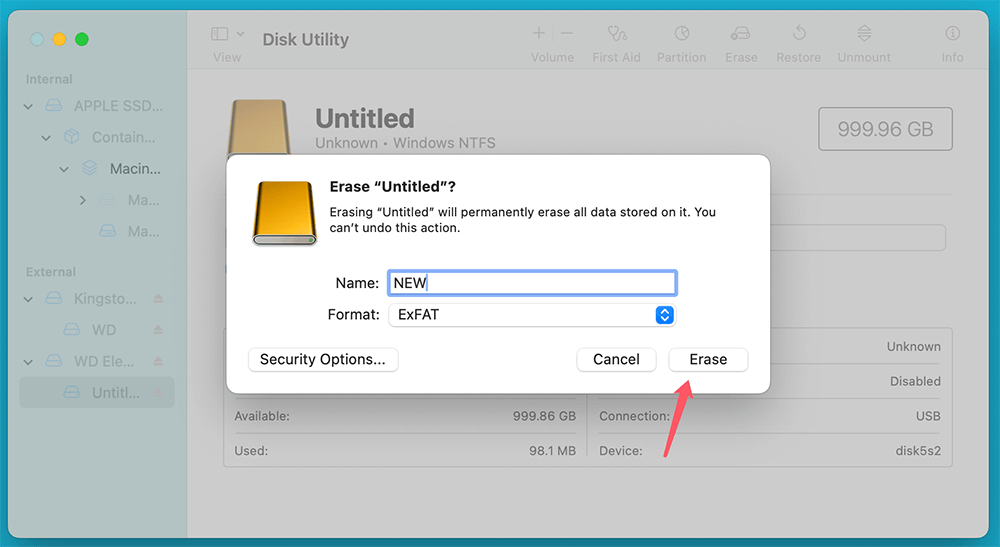
- Open Disk Utility: Go to Applications > Utilities > Disk Utility.
- Select the Drive: Click the drive in the left-hand sidebar.
- Erase the Drive: Click the Erase button, choose a file system (e.g., ExFAT), and name the drive. Click Erase to begin formatting.
![Formatting Steps]()
- Verify the Format: Once formatting is complete, the drive will appear in Finder with the selected file system.
When to Format:
- The NTFS drive is not used for Windows-exclusive features like permissions or encryption.
- The drive is primarily for file sharing between macOS and Windows.
Best Practices for Using NTFS Drives on macOS
- Choose the Right Solution:
- For occasional use: Stick with macOS's native read-only access.
- For frequent use: Invest in reliable third-party software.
- For cross-platform usage: Consider reformatting to ExFAT.
- Backup Your Data:
- Always maintain backups before making changes to drive settings or formats.
- Avoid Experimental Methods:
- Unless you're experienced, don't enable macOS's experimental NTFS write support.
- Use Reliable Software:
- Stick to reputable third-party tools to minimize risks or compatible issues.
Conclusion
While macOS can read NTFS drives natively, its lack of write support can be limiting for users who need full access. Thankfully, several solutions exist, ranging from third-party software to reformatting drives. Each option has its pros and cons, so the best choice depends on your specific needs.
Related Articles
- May 13, 2025NTFS Driver for M2 Chip Mac – Guide 2025
- Sep 26, 2024Why Can't Format My External Hard Drive to NTFS on Mac? How to Fix It?
- Dec 13, 2024How to Use NTFS Drive on macOS Sonoma: A Comprehensive Guide
- Feb 08, 2024Lexar Portable SSD Is Read-Only on Mac, Fix It Now
- Sep 11, 2023Can't Copy Files from Mac to External SSD? Fix It Now
- Dec 05, 2024Force Mount NTFS Drive on Mac: A Comprehensive Guide

Lucien
Lucien is a writer and a chief programmer of Donemax software who has worked in the company for 5+ years. He has written much of the content on the site and devotes to providing troubleshooting and solution for Windows and Mac users including disk cloning, data recovery, migration, eraser, error fixes.

Gerhard Chou
In order to effectively solve the problems for our customers, every article and troubleshooting solution published on our website has been strictly tested and practiced. Our editors love researching and using computers and testing software, and are willing to help computer users with their problems

