Before we start: Donemax NTFS for Mac is a reliable NTFS tool. It can quickly mount NTFS drive on Mac and grant full read-write access to any NTFS drive on Mac. If the NTFS drive is not showing up or not mounting on your Mac, just try this tool.
PAGE CONTENT:
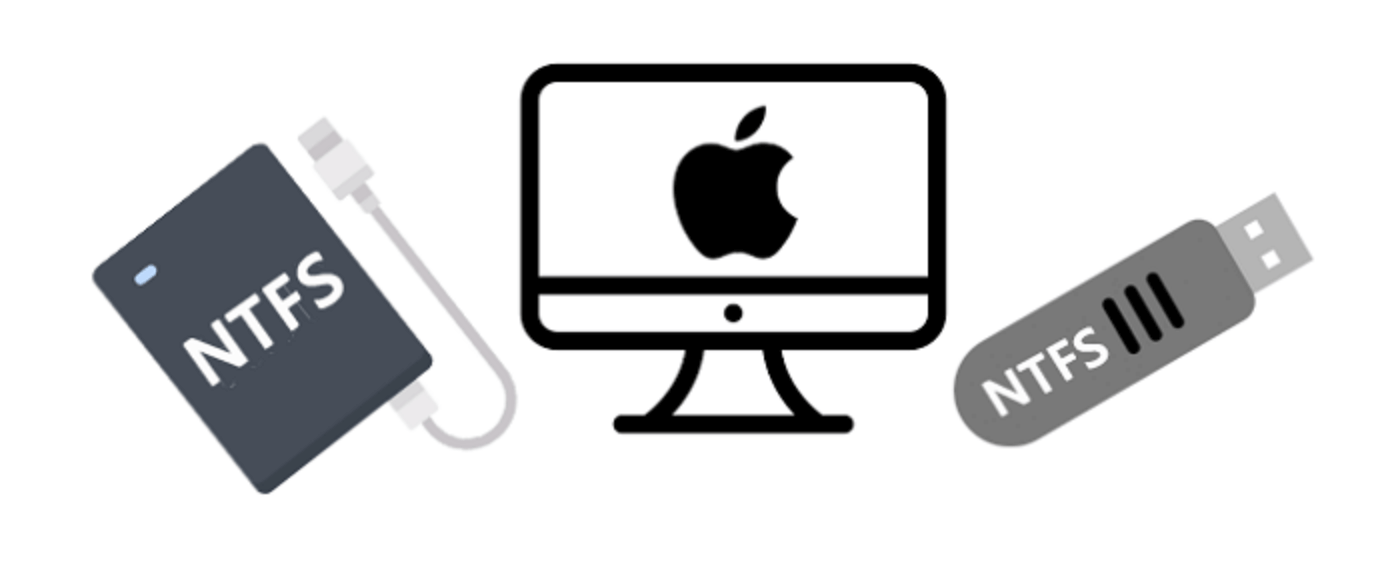
If you've ever tried to plug an NTFS drive into your Mac and found it unresponsive or read-only, you're not alone. This is a common issue for many Mac users, especially those who need to transfer files between macOS and Windows devices. NTFS, or New Technology File System, is widely used in Windows but has limited compatibility with macOS, creating barriers for users working across platforms.
This article explains why NTFS drives are not recognized by Mac, how to solve this issue, and provides best practices to prevent compatibility problems.
What is NTFS, and Why is it Incompatible with Mac?
Understanding NTFS:
NTFS, short for New Technology File System, was developed by Microsoft in the 1990s as a replacement for the older FAT file systems. It introduced advanced features like support for large files, file compression, encryption, and access control lists. These features make it a robust choice for Windows users.
Why macOS Has Limited Support for NTFS:
Apple's macOS can detect NTFS drives, but it only supports them in read-only mode. This means you can view the contents of an NTFS drive but cannot modify, delete, or add files. This limitation stems from NTFS being proprietary to Microsoft, and Apple has not licensed the rights to provide full write support for the file system.
For most users, this limitation becomes apparent when they plug in an NTFS-formatted external drive and find they can't save files to it. Sometimes, macOS might not even recognize the drive, leaving users frustrated.
Why You Might Face This Issue:
- Using an NTFS-Formatted Drive on macOS: External hard drives and USB drives preformatted with NTFS are common. When plugged into a Mac, these drives may show up in Finder but remain inaccessible for editing.
- Incompatibility for Cross-Platform File Sharing: Sharing files between Windows and macOS becomes challenging because Windows users often rely on NTFS for its advanced features. However, macOS lacks the full read/write support required for seamless interaction.
- Outdated macOS Software or Drive Errors: Sometimes, even the default read-only access may fail due to software bugs or errors on the NTFS drive, leading to it being completely unrecognized.
How to Resolve NTFS Drive Not Detected Issues on macOS?
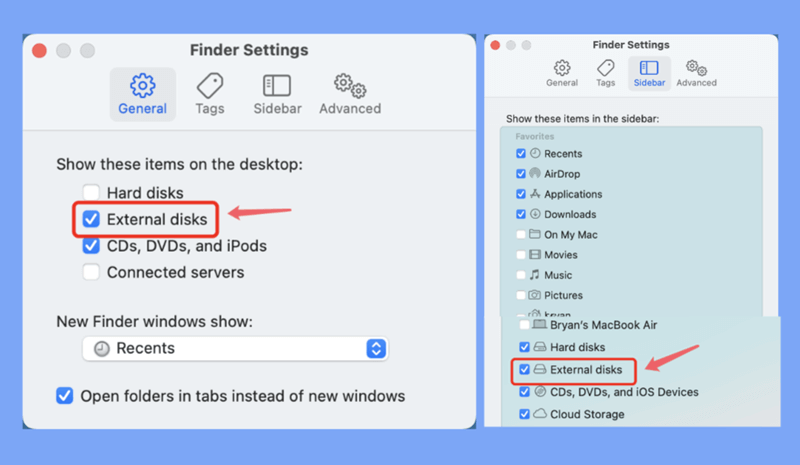
#1 Select External disks in Finder Settings
If the NTFS drive is recognized by Disk Utility, not showing up on Mac desktop or Finder's sidebar, you can check the Finder Settings.
- Open a Finder, click Finder on Apple menu.
- Choose Settings.
- Click General and Sidebar, ensure External disks is selected.
![NTFS drives are not recognized by Mac]()
Then check if you can see the NTFS drive on Mac desktop and Finder.
#2 Enable Read-Only Access
The simplest solution for casual users is to enable read-only access. macOS already supports this by default. Here's how you can view the contents of an NTFS drive:
- Connect the NTFS drive to your Mac.
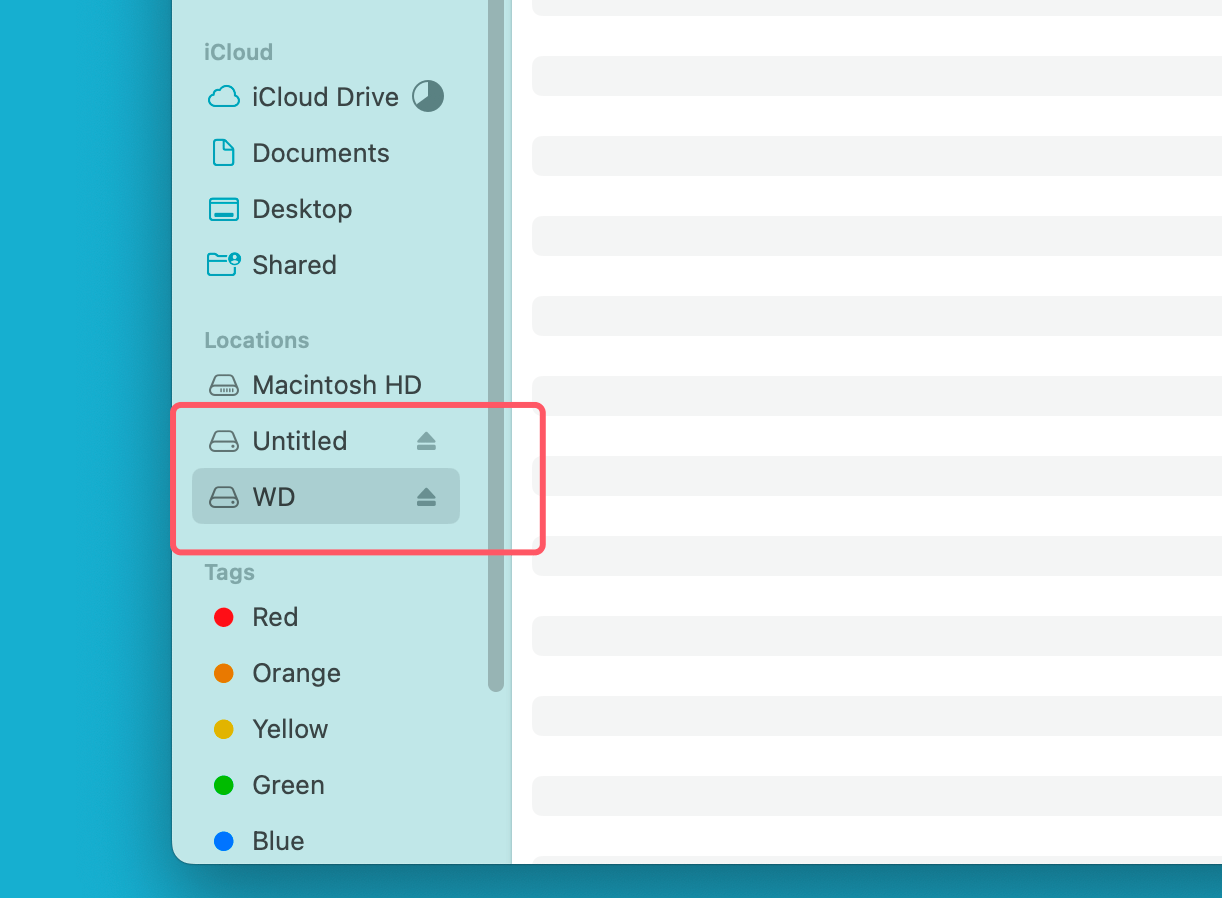
- Open Finder, and the drive should appear under the Devices or Locations section.
- Double-click the drive to browse its contents in read-only mode.
![NTFS drives are not recognized by Mac]()
While this option is easy, its limitation is clear-you cannot add, modify, or delete files.
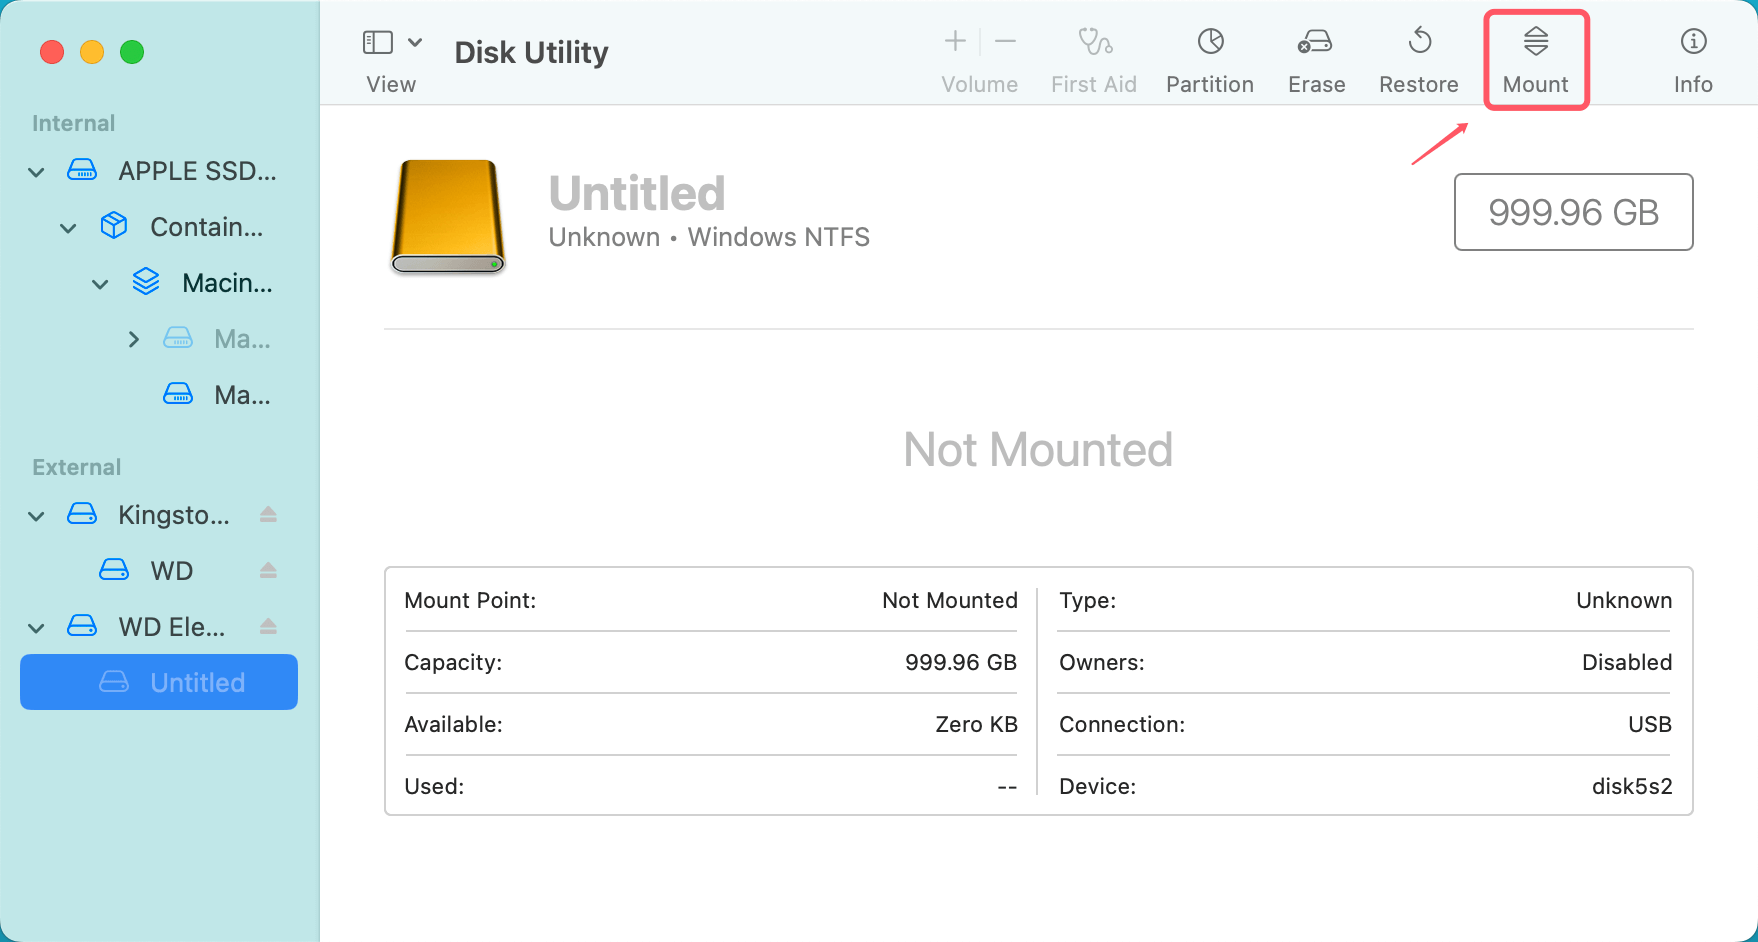
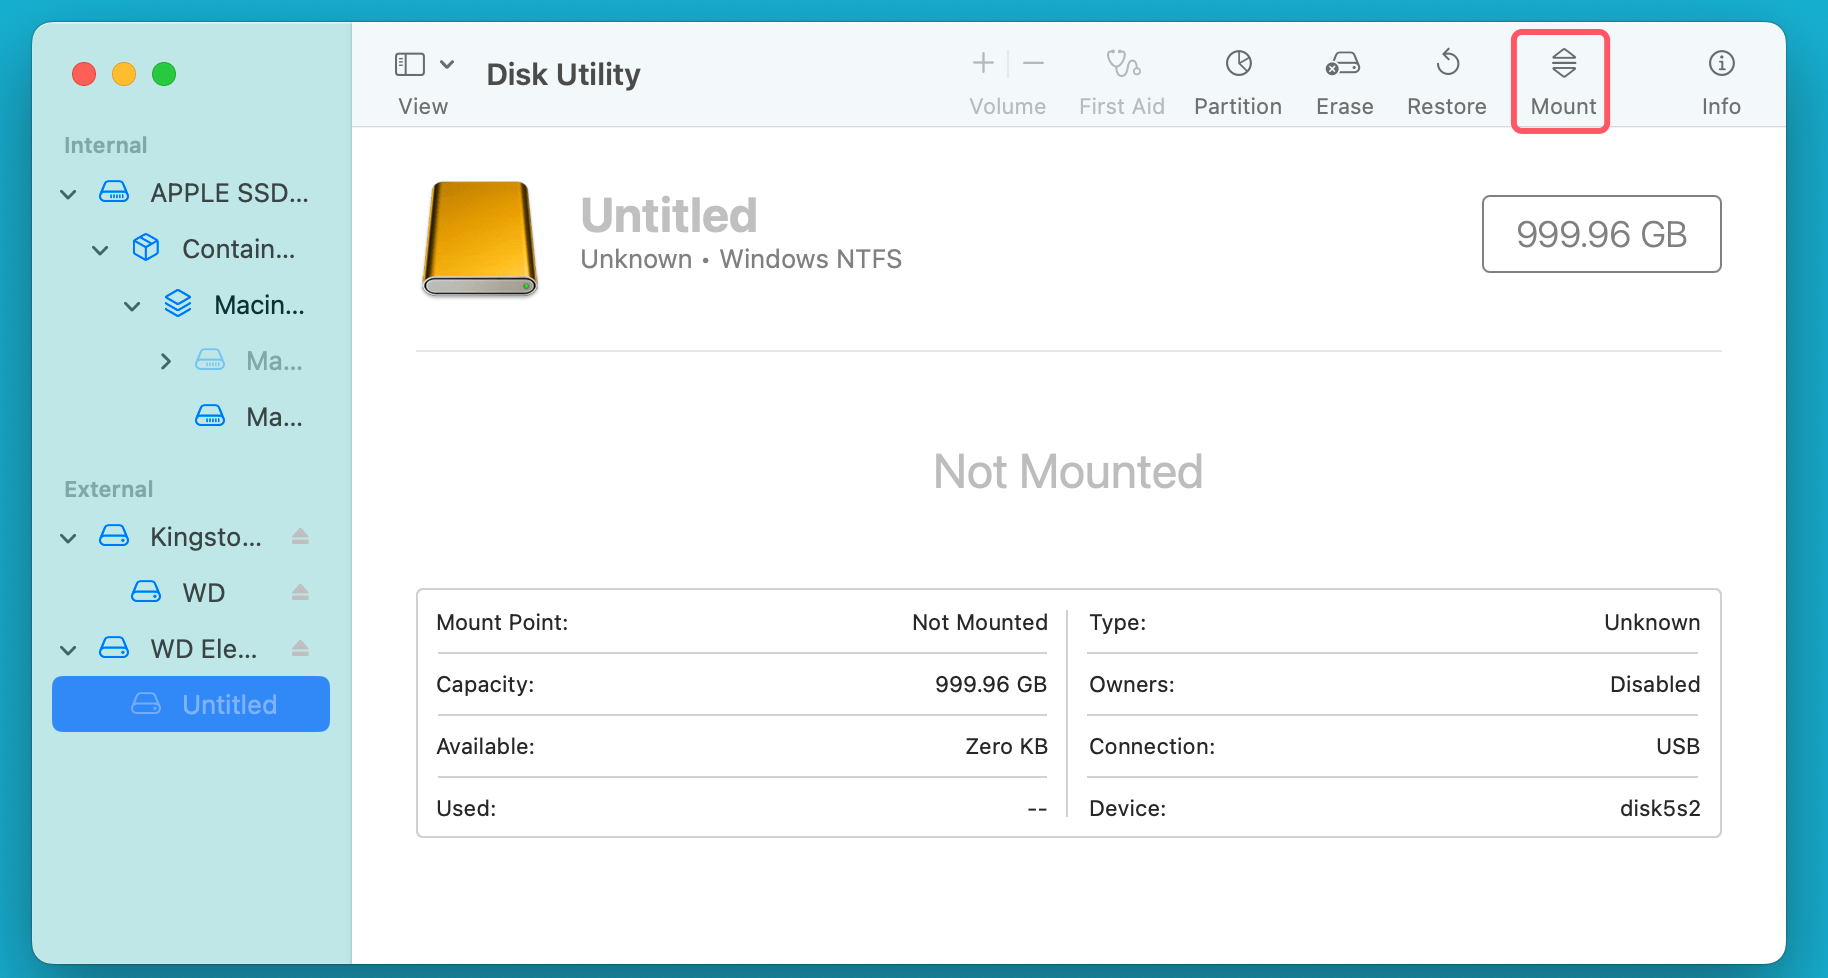
If the NTFS drive is not mounted, try to mount it via Disk Utility.
#3 Use Third-Party Software for Full Access
For Mac users who need complete read/write access to NTFS drives, third-party software is the most effective solution. These tools essentially bypass macOS's native limitations and enable the system to write to NTFS drives, making them behave like native drives on the system. While macOS only offers read-only access to NTFS-formatted drives, third-party drivers provide the missing functionality for a smooth user experience.
Donemax NTFS for Mac is one of the best NTFS for Mac tools. It can securely and quickly add NTFS read-write support on Mac.
Step 1. Download and install Donemax NTFS for Mac on Mac, then connect the NTFS drive to the Mac.
Step 2. Open Donemax NTFS for Mac, then select the NTFS drive, click on Enable Writable button. After this, you can read-write NTFS drive without any limitation.

Step 3. If the NTFS drive is not mounted, click on Mount button.

#4 Format the Drive to a Compatible File System
If you regularly use the drive on both macOS and Windows, consider reformatting it to a file system compatible with both platforms.
Recommended File Systems:
- ExFAT: Supports large file sizes and is compatible with both macOS and Windows. (for 32GB or bigger device.)
- FAT32: An older system with wide compatibility but a 4GB file size limit.
How to Reformat the Drive:
⚠️ Warning: Reformatting will erase all data on the drive. Backup your files first.
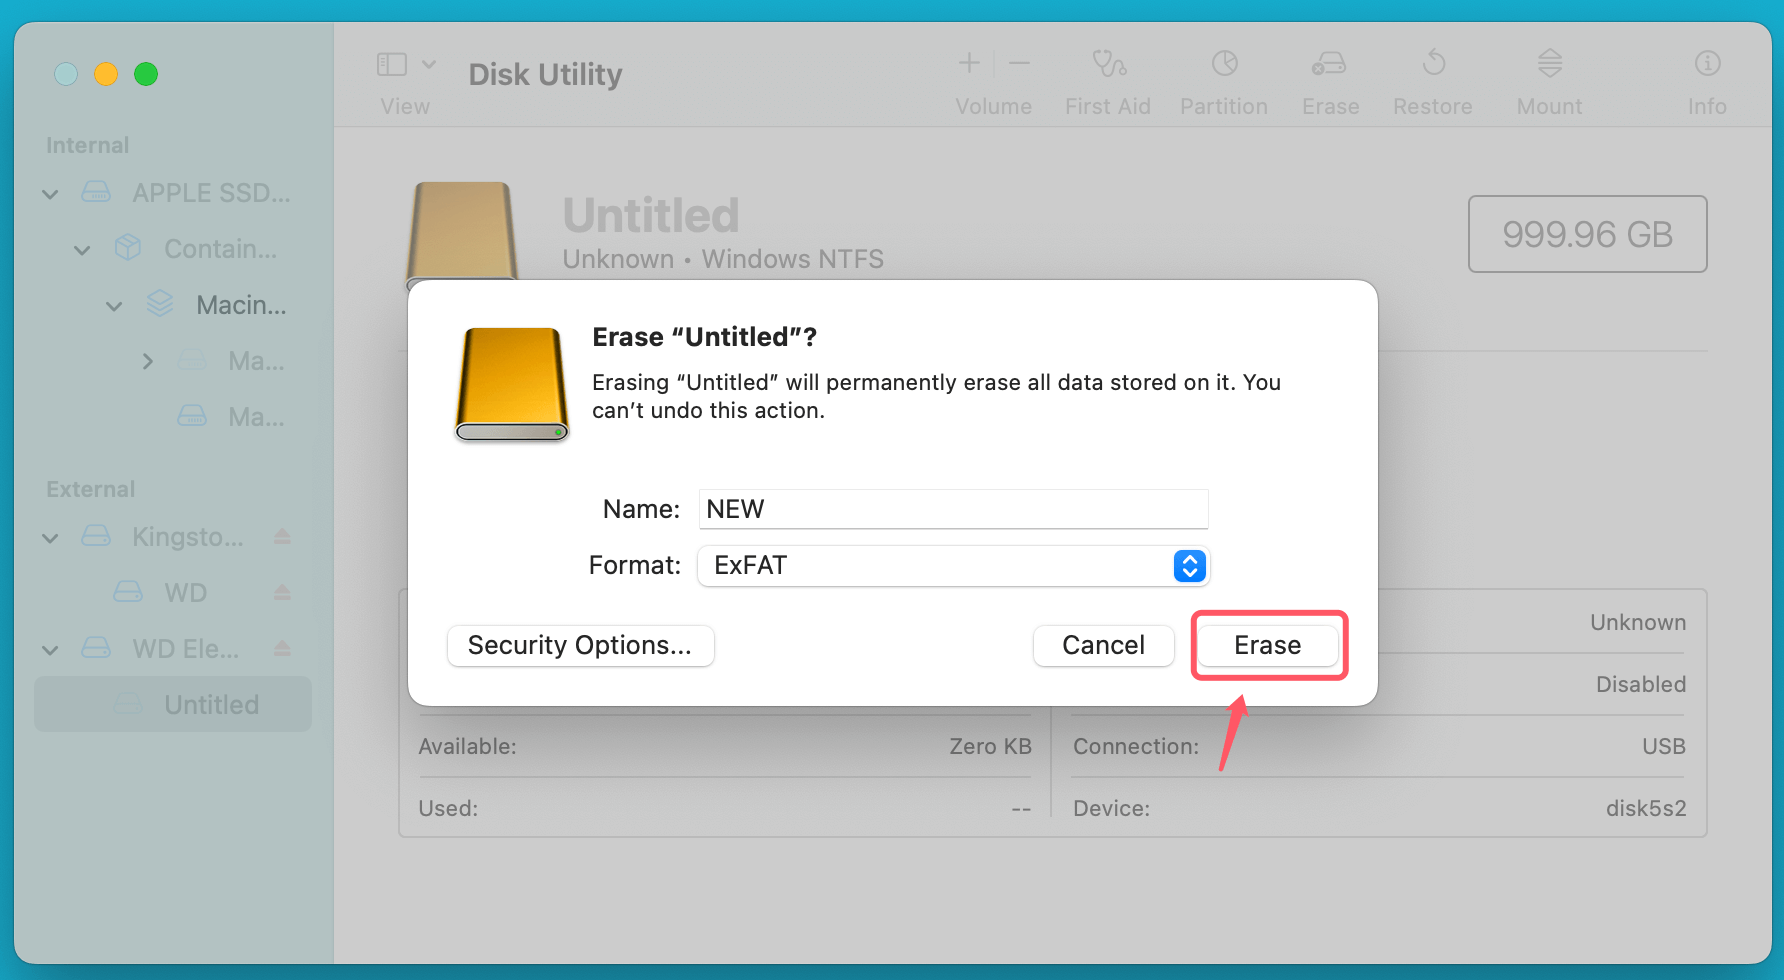
- Open Disk Utility on your Mac.
- Select the NTFS drive in the left sidebar.
- Click Erase at the top.
- Choose a new format: ExFAT or FAT32.
- Click Erase to format the drive.
![NTFS drives are not recognized by Mac]()
After reformatting, the drive will work seamlessly on macOS and Windows.
Pros:
- Eliminates the need for third-party software.
- Ensures cross-platform compatibility.
Cons:
- Data loss during reformatting.
- Limited advanced features compared to NTFS.
#5 Use Command-Line Tools (for old OS X versions)
For tech-savvy users, macOS's Terminal can be used to enable NTFS write support. However, this method is not officially supported by Apple and carries risks.
Steps to Enable NTFS Write Support via Terminal:
sudo mkdir /Volumes/NTFS
sudo mount -t ntfs -o rw,auto,nobrowse /dev/disk2s1 /Volumes/NTFS
The NTFS drive will now appear in the /Volumes/NTFS directory.
- Connect the NTFS drive to your Mac.
- Open Terminal.
- Type the following command to list your drives:
diskutil list
- Note the identifier for your NTFS drive (e.g., disk2s1).
- Run the following commands to remount the drive in write mode:
⚠️ Warning: This method may cause file corruption or drive errors. Use it only for temporary needs.
Troubleshooting Common Problems
1. NTFS Drive Not Appearing in Finder
- Check if the drive is listed in Disk Utility. If it appears but isn't mounted, click Mount.
![NTFS drives are not recognized by Mac]()
- Ensure the drive is functional by testing it on a Windows machine.
2. Errors While Using Third-Party Tools
- Update the software to ensure compatibility with the latest macOS version.
- Restart your Mac and reconnect the drive.
3. Corrupted NTFS Drive
- Run diagnostics using third-party tools like Donemax NTFS for Mac.
- Repair the drive on a Windows machine using the chkdsk command:
chkdsk /f X:
(Replace X: with the drive letter.)
Best Practices to Avoid NTFS Compatibility Issues
- Choose the Right File System
If you frequently switch between macOS and Windows, format drives to ExFAT or FAT32.
- Use Cloud Storage for File Sharing
Cloud services like Google Drive or Dropbox eliminate the need for physical drives.
- Keep Software Updated
Regularly update macOS and third-party tools to avoid compatibility problems.
- Backup Your Data
Always maintain backups before modifying drives or formatting.
Conclusion
While NTFS drives can present challenges on macOS, there are multiple solutions to bridge the gap. Whether you prefer third-party software, reformatting, or command-line methods, the best choice depends on your needs and technical expertise. By understanding the limitations and implementing the right solution, you can ensure seamless file sharing between Windows and macOS.
To avoid future compatibility issues, plan your file system choices based on your usage patterns. Whether you're a casual user or a professional working across platforms, these tips will save you time and frustration.
FAQs About Fixing NTFS Drive Not Detected or Not Recognized by Mac
1. How to fix NTFS drive is not showing up on Mac?
Ensure the NTFS drive is connected to the Mac correctly. Then check Finder Settings:
- Open Finder, click Finder on Apple menu.
- Choose Settings.
- When Finder Settings opens, click Sidebar and General.
- Select External disks.
- Check if you can see the NTFS drive on Desktop or Finder.
2. How to fix NTFS drive is not mounting on Mac.
Here are two solutions:
- Open Disk Utility, select the NTFS drive, click on Mount button.
- If the NTFS drive is not mounted on Apple silicon Macs, just use third-party NTFS for Mac tool. It will force mount the NTFS drive on your Mac.
3. How to format a NTFS drive for Mac?
- Open Disk Utility.
- Select the NTFS drive, click Erase.
- Select ExFAT or APFS, Mac OS Extended as the file system.
- Click Erase again.
4. What is the best NTFS driver for Mac?
Here is the list of top 5 NTFS driver for Mac:
- Donemax NTFS for Mac
- Mounty for Mac
- NTFS-3G
- DoYourData NTFS for Mac
- Paragon NTFS for Mac

Donemax NTFS for Mac
An easy-to-use NTFS for Mac tool to help you enable writable for NTFS drives on Mac so that you can read-write NTFS drives on Mac without any limitation. It also can help you mount, format, repair, rename, open drive on your Mac.
Related Articles
- Dec 17, 2024Can Mac Write Data to NTFS Drive?
- Jun 30, 2023How to Write Data to NTFS Drive on Mac?
- Sep 06, 2024How to Use a Windows NTFS Drive on Mac? 5 Solutions
- Dec 02, 2024How to Remove Everything of iBoysoft NTFS for Mac from Your Mac?
- Nov 12, 2024Best 3 NTFS Driver for macOS Mojave
- Dec 06, 2024NTFS-3G, What Is It, How to Use It to Read-write NTFS Drive on Mac?

Christina
Christina is the senior editor of Donemax software who has worked in the company for 4+ years. She mainly writes the guides and solutions about data erasure, data transferring, data recovery and disk cloning to help users get the most out of their Windows and Mac. She likes to travel, enjoy country music and play games in her spare time.

Gerhard Chou
In order to effectively solve the problems for our customers, every article and troubleshooting solution published on our website has been strictly tested and practiced. Our editors love researching and using computers and testing software, and are willing to help computer users with their problems
