Written byMariaUpdated on Mar 19, 2025
Fix The Disk You Attached Was Not Readable by This Computer on Mac
Approved byGerhard Chou
Tip: Before fixing The disk you attached was not readable by this computer error on Mac, you can recover inaccessible and lost files from the disk. Donemax Data Recovery for Mac is a powerful data recovery application. It can completely recover all inaccessible/lost files, and can repair corrupted disk on Mac.
PAGE CONTENT:
Encountering the error message "The disk you attached was not readable by this computer" on your Mac can be problematic for you, especially when you need to access important files. This issue can occur for several reasons, including disk corruption, file system incompatibility, or hardware-related problems.
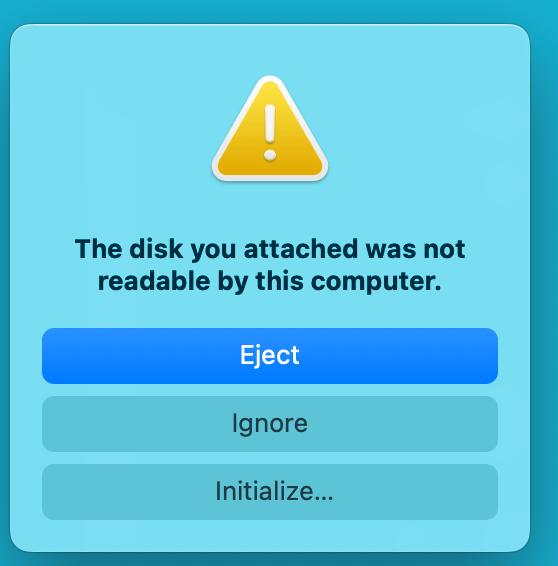
If you see this error, macOS will typically provide three options: Eject, Ignore, or Initialize. While clicking "Initialize" will take you to Disk Utility, this alone may not always resolve the problem.

In this article, we'll explore the possible causes of this error and provide detailed step-by-step solutions to fix it.
Basic Causes of the Error: The disk you attached was not readable by this computer
Prior moving into the solutions, it is important to understand why this error occurs. Here are some of the most common reasons:
1. Corrupted or Damaged Drive
If the disk has been improperly removed, suffered a power failure, or has bad sectors, it may become unreadable. Corruption can prevent macOS from recognizing the disk.
2. Incompatible File System
Mac computers primarily use APFS, Mac OS Extended (HFS+), and ExFAT. If the external drive is formatted in NTFS (Windows default), macOS may not be able to read it without additional software.
3. Disk Formatting Issues
The drive may not have a recognizable partition scheme or may have been formatted incorrectly, preventing it from being accessed on a Mac.
4. Physical Damage to the Drive
A failing or physically damaged hard drive, SSD, or USB flash drive might not be detected by your Mac.
5. Faulty USB Cable or Port
Sometimes, the issue is as simple as a damaged cable or a malfunctioning USB port.
6. macOS Software Issues
Outdated macOS versions or disk utility errors may prevent proper recognition of the external disk.
Quick fixes for The disk you attached was not readable by this computer:
1. Check the Connection
- Unplug the external drive and reconnect it.
- Try using another USB port.
- Use another USB cable or adapter.
- If you're using a USB hub, connect the drive directly to your Mac.
2. Restart Your Mac
Usually, macOS may be refreshed and short-term problems fixed with a simple restart.
3. Check if the Drive Appears in Disk Utility
- Open Disk Utility from Utilities via Applications.
- Check if the disk is listed on the left panel.
- If it appears but is grayed out, try mounting it manually.

4. Test the Drive on Another Computer
Connect the disk to another Mac or a Windows PC to see if it is detected. If the drive works on another computer, the issue might be with your Mac.
Recover Data from Unreadable Disk Before Fixing It on Mac
Before fixing The disk you attached was not readable by this computer error on Mac, you'd better recover inaccessible or lost files from the unreadable disk. Donemax Data Recovery for Mac is a powerful application. It offers deep scan to deeply scan the unreadable disk and find all recoverable files.
Step 1. Download and install Donemax Data Recovery for Mac.
Step 2. Open Donemax Data Recovery for Mac from Launchpad, then select the unreadable disk to start data recovery.

Step 3. Click on Scan button to deeply scan the disk and find all recoverable files including existing files, inaccessible files, deleted/formatted/lost files, etc.

Step 4. Once the scan gets finished, you can preview all recoverable files. Then select the wanted files, click on Recover button to save them.

Methods to Fix "The disk you attached was not readable by this computer" Issue on Mac
Method 1: Use Disk Utility to Repair the Disk
Disk Utility has a built-in feature called First Aid that can fix minor disk issues.
Steps:
- Open Disk Utility.
- Select the unreadable drive from the list.
- Click First Aid and then Run.
![Fix The Disk You Attached Was Not Readable by This Computer on Mac]()
- Wait for macOS to scan and repair the disk.

If First Aid finds errors and fixes them, try reconnecting your disk to see if it's readable.
Method 2: Mount the Drive Manually
If the external disk is not mounted, macOS won't recognize it.
Steps:
- Open Disk Utility.
- Select the external drive.
- Click the Mount button at the top.
![Fix The Disk You Attached Was Not Readable by This Computer on Mac]()

If the drive mounts successfully, you should be able to access your files.
Method 3: Check and Change File System Compatibility
If your drive is formatted in NTFS, macOS won't be able to write to it natively and may have trouble reading it.
Solutions1: Use third-party software like Donemax NTFS for Mac to read/write NTFS drives.
Step 1. Download and install Donemax NTFS for Mac, and connect the NTFS drive to the Mac.
Step 2. Open Donemax NTFS for Mac, then select the NTFS drive, click on Mount button to force mount the NTFS drive on your Mac.

Step 3. Click on Enable Writable button so that you can read-write the NTFS drive on the Mac.

Solution 2: Reformat the Drive
If none of the previous methods work, reformatting your drive is often the only way to make it usable again. However, be aware that reformatting will erase all data on the disk, so it should only be done if all recovery options have been exhausted or if you have a backup of important files.
Choosing the Right File System:
Before reformatting, you must decide which file system is best for your needs:
| File System | Best For | Mac/Windows Compatibility |
|---|---|---|
| Mac OS Extended (HFS+) | Older Macs, Time Machine backups | Mac only |
| APFS | SSDs, newer macOS systems | Mac only |
| ExFAT | External drives shared between Mac and Windows | Both Mac & Windows |
- If you only use the drive with Mac, choose APFS or Mac OS Extended (Journaled).
- If you share the drive with Windows, use ExFAT for better compatibility.
- Avoid FAT32 unless necessary, as it has a 4GB file size limit.
When Should You Reformat?
You should consider reformatting your drive if:
- Disk Utility's First Aid cannot repair the drive.
- The drive does not mount even after multiple attempts.
- The file system is corrupted beyond repair.
- The disk is using an incompatible format such as RAW or NTFS (without NTFS drivers).
- The drive shows as uninitialized in Disk Utility.
How to Reformat Your Drive?
Follow these steps to erase and reformat the drive using Disk Utility:
Step 1: Open Disk Utility: Go to Disk Utility via Applications from Utilities.

Step 2: Select the Drive: Find your external drive in the left-hand sidebar.

If you don't see the drive, click View > Show All Devices.

Step 3: Erase the Drive: At the window's top, select Erase.

Step 4: Choose a File System: In the Format dropdown, select:
- APFS for SSDs and newer macOS versions.
- Mac OS Extended (Journaled) for traditional hard drives.
- ExFAT if you need Windows compatibility.

Step 5: Select the Scheme: Under Scheme, select GUID Partition Map (recommended for Mac).
Step 6: Confirm and Erase: Click Erase, then wait for the procedure to finish.

Step 7: Reconnect and Test: Once the formatting is finished, try reconnecting your drive to see if it's readable.
What If You Need to Recover Data Before Reformatting?
If you need to recover files before erasing, use a data recovery tool like:
- Donemax Data Recovery for Mac (Mac & Windows)
- EaseUS Data Recovery Wizard
- Stellar Data Recovery
These tools can scan and recover files from a corrupted or unrecognized disk before formatting.
Alternative: Format the Drive Using Terminal
If Disk Utility fails, you can format the drive using Terminal:
- Open Terminal from Utilities via Applications.
![Fix The Disk You Attached Was Not Readable by This Computer on Mac]()
- Type the following command to list all drives:
diskutil list
- Find the disk identifier for your external drive (e.g., disk4).
- Use the following command to format it as ExFAT:
diskutil eraseDisk ExFAT MyDriveName /dev/disk4
![Fix The Disk You Attached Was Not Readable by This Computer on Mac]()
(Replace MyDriveName with your desired drive name and disk2 with your actual disk identifier.)


This method is useful when Disk Utility does not work.
Reformatting your drive should be your last resort if all other fixes fail. Choosing the correct file system ensures that your disk remains usable for your specific needs. Always backup your data before formatting and use recovery software if necessary.
Method 4: Check for Hardware Issues
If the disk is still unreadable, it may have a hardware defect.
Things to Try:
- Use another USB cable or adapter – A faulty cable can prevent the drive from being detected.
- Try another Mac or PC – If the drive works on another device, the problem is with your Mac.
- Listen for unusual noises – Clicking sounds from an HDD may indicate mechanical failure.
If your drive has physical damage, seek professional data recovery services.
Preventive Measures to Avoid Disk Becomes Unreadable on Mac
To avoid this issue in the future, follow these best practices:
1. Always Eject External Drives Properly
Before disconnecting an external drive, always eject it properly:
- On the desktop, right-click the drive and choose Eject.
- Or, open Finder, locate the drive, and click Eject.

2. Regularly Back Up Important Files
Use Time Machine or a cloud backup service to prevent data loss.
3. Use Compatible File Formats
If you use a drive between Mac and Windows, format it as ExFAT to ensure full compatibility.
4. Keep macOS and Disk Software Updated
Software updates can fix bugs that cause disk recognition issues.
Conclusion
The error "The disk you attached was not readable by this computer" can be frustrating, but in most cases, it can be fixed with the solutions outlined above. Start with basic troubleshooting, such as checking cables and ports, then try Disk Utility's First Aid. If the issue persists, consider file system compatibility, reformatting the drive, or checking for hardware failures.
If none of these solutions work, you may need professional help to recover your data.
By following best practices like safe ejection, regular backups, and using compatible formats, you can prevent this issue in the future.
Donemax Data Recovery for Mac
Donemax Data Recovery for Mac is one of the best Mac data recovery software. It is easy-to-use and can help in recovering deleted, formatted, inaccessible or lost data from Mac HDD/SSD, external disk, USB drive, SD card, camera or other storage devices.
Related Articles
- Mar 21, 2025[8 Fixes] Fix Seagate Ultra Compact SSD Not Mounting on Mac
- Aug 07, 2024How to Format SD Card on Mac?
- Mar 17, 20257 Solutions to Fix Seagate Expansion Portable Hard Drive Not Mounting on Mac
- Dec 17, 2024How to Clean Install macOS High Sierra?
- Feb 22, 2025Memory Card Not Working on Mac? Fix It Without Losing Data
- Feb 07, 2025(7 Solutions Solved) Can't Format or Erase an SD Card on Mac

Contributing Writer
Maria
Maria is one of the senior writers & editors of Donemax who lives and works in Sydney, Australia. She loves PC, Mac and Internet Technology. She has 6 years of writing articles about data recovery on PC/Mac, disk cloning solution, data eraser and computer OS optimization, etc. She is also interested in testing various software and digital products.

Editor in chief
Gerhard Chou
In order to effectively solve the problems for our customers, every article and troubleshooting solution published on our website has been strictly tested and practiced. Our editors love researching and using computers and testing software, and are willing to help computer users with their problems