Written byChristinaUpdated on Apr 07, 2025
Troubleshoot The Volume is Not Compatible with This Update on Mac [7 Fixes]
Approved byGerhard Chou
PAGE CONTENT:
Updating macOS is essential for keeping your Mac secure, running smoothly, and compatible with the latest software. However, Mac users sometimes encounter an error message that says: "The volume is not compatible with this update." This issue can be daunting, especially if you are trying to install a crucial update, downgrade macOS, or perform a clean reinstall.

This error occurs when the system detects incompatibility between the update and the target drive. It may be due to an unsupported macOS version, an incorrect disk format, partition issues, or other drive-related problems.
In order to assist you properly install macOS on your Mac, we will examine the potential causes of this problem and offer detailed solutions in this article.
Causes of the Error "The volume is not compatible with this update"
Before fixing "The volume is not compatible with this update" on your Mac, it's important to understand the possible reasons behind this issue:
1. Incompatible macOS Version
Each Mac model supports only certain macOS versions. If you're trying to install an update that isn't compatible with your hardware, you'll receive this error. This commonly happens when attempting to:
- Install a macOS version that is too new for your device
- Downgrade to an older macOS version that isn't officially supported
- Install macOS on a Mac that lacks the required firmware updates
2. Incorrect File System Format
macOS updates require the disk to be formatted with the correct file system. Modern macOS versions (macOS High Sierra and later) require APFS (Apple File System), whereas older versions require Mac OS Extended (Journaled). If the update doesn't support the file system format of the target drive, you will encounter this error.
3. Startup Disk Issues
Corruption, missing partitions, or improperly formatted startup disks can interfere with macOS installation. The issue may arise due to:
- A damaged or missing Recovery Partition
- Corrupt system files or disk errors
- Partition table misconfiguration
4. Firmware Compatibility
Newer macOS updates require firmware updates that may not be installed on your Mac. If your firmware is outdated, macOS might not recognize the drive as compatible.
5. External Drive Installation Issues
If you're trying to install macOS on an external drive, compatibility issues may arise due to:
- The drive being formatted incorrectly
- The external disk not supporting macOS booting
- Security settings preventing installation on external media
Now that we understand the causes, let's move on to troubleshooting.
How to Fix "The Volume is Not Compatible with This Update" on Mac?
Fix 1. Check Mac Compatibility
The first step is to verify if your Mac supports the macOS version you're trying to install.
Steps to Check macOS Compatibility:
- Click on the Apple menu () > About This Mac.
![The volume is not compatible with this update]()
- Note down your Mac model and year.
![The volume is not compatible with this update]()
- Visit Apple's official macOS compatibility page: https://support.apple.com/macos
- Check whether your Mac is listed as compatible with the macOS version you're trying to install.

For example, macOS Sequoia only supports these Macs:
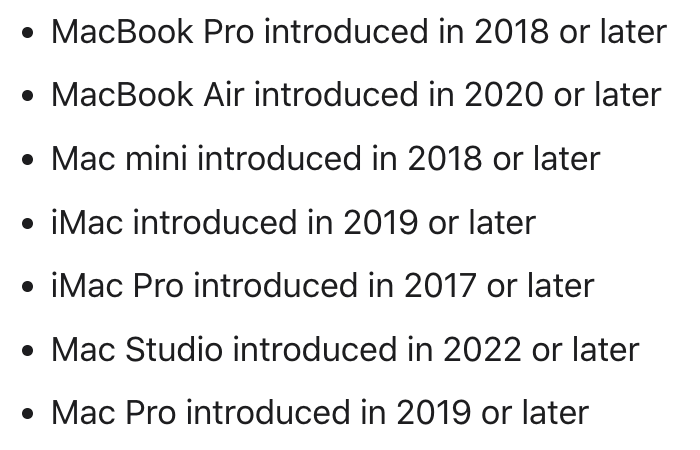
If your Mac is not supported, consider installing an older, compatible macOS version.
Fix 2. Check and Format the Drive Properly
If your disk uses an incompatible format, you need to reformat it.
Steps to Check File System Format:
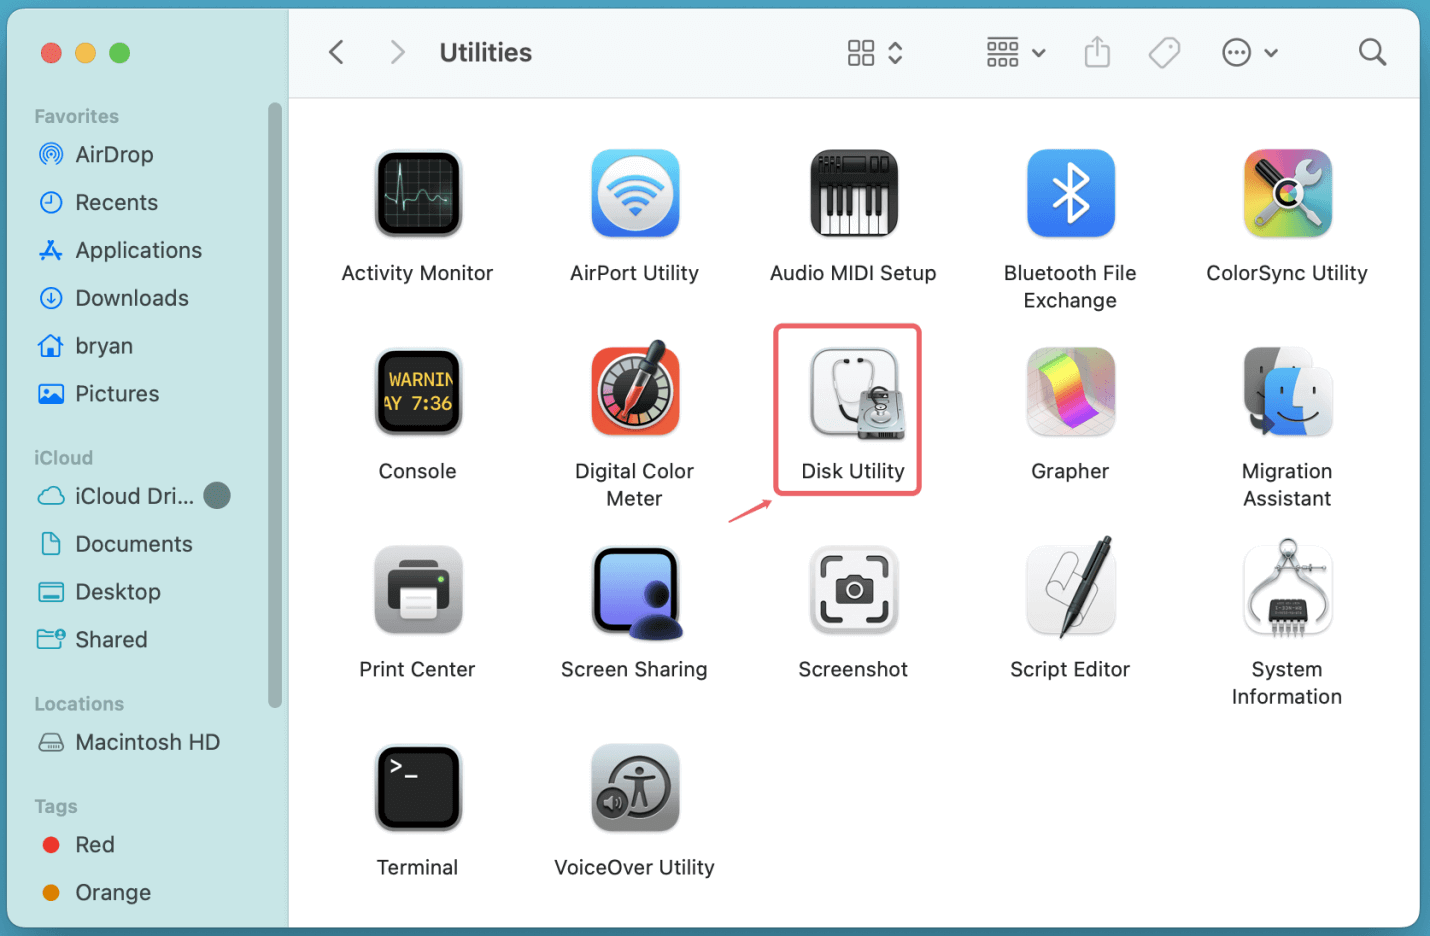
- Open Disk Utility via Applications from Utilities.
![The volume is not compatible with this update]()
- Select the disk where you want to install macOS.
- Check the format:
- If it's Mac OS Extended (Journaled) but you're installing macOS High Sierra or later, you may need to convert it to APFS.
- If it's APFS but you're installing an older macOS version, you may need to erase and reformat it as Mac OS Extended (Journaled).
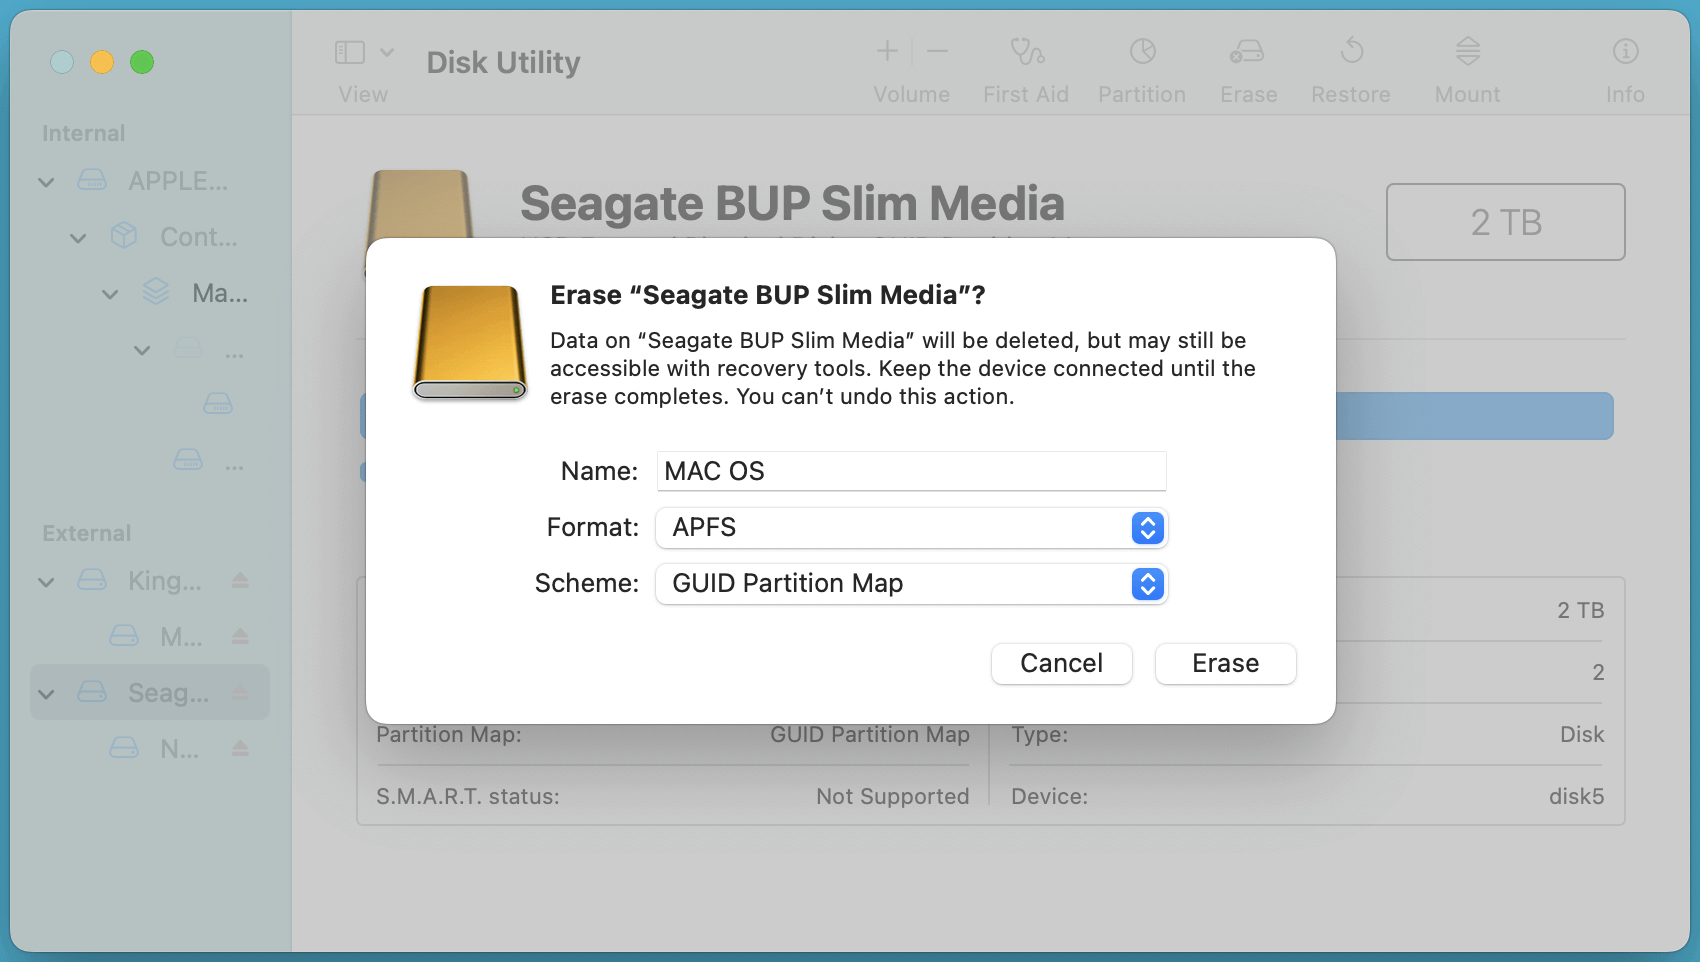
Steps to Reformat the Drive (Warning: Data Loss):
- Select the drive in Disk Utility.
- Click Erase and choose the correct format.
- Select Erase and watch for the procedure to finish.
![The volume is not compatible with this update]()
Once done, try installing macOS again.
💡 Note: If you are going to install macOS on the internal disk, start the Mac into macOS Recovery mode, choose Disk Utility to reformat it to APFS or Mac OS Extended.
Fix 3. Repair the Startup Disk
If your disk has errors, repairing it may resolve the issue.
Steps to Repair the Disk Using Disk Utility:
- Boot into macOS Recovery Mode:
- For Intel-based Mac: Hold down Command (⌘) + R after restarting your Mac until the Apple logo shows.
- For Apple silicon Mac: Shut down your Mac, then press and hold Power button until it boots into macOS Recovery mode, choose Options, click Continue.
- Choose your startup disk by selecting Disk Utility.
- Select Run after selecting First Aid.
![The volume is not compatible with this update]()
- If errors are found, follow the on-screen instructions to repair the disk.

Once repaired, try reinstalling macOS.
Fix 4. Use macOS Recovery Mode to Reinstall macOS
If the update won't install, try reinstalling macOS via Recovery Mode.
Steps to Reinstall macOS:
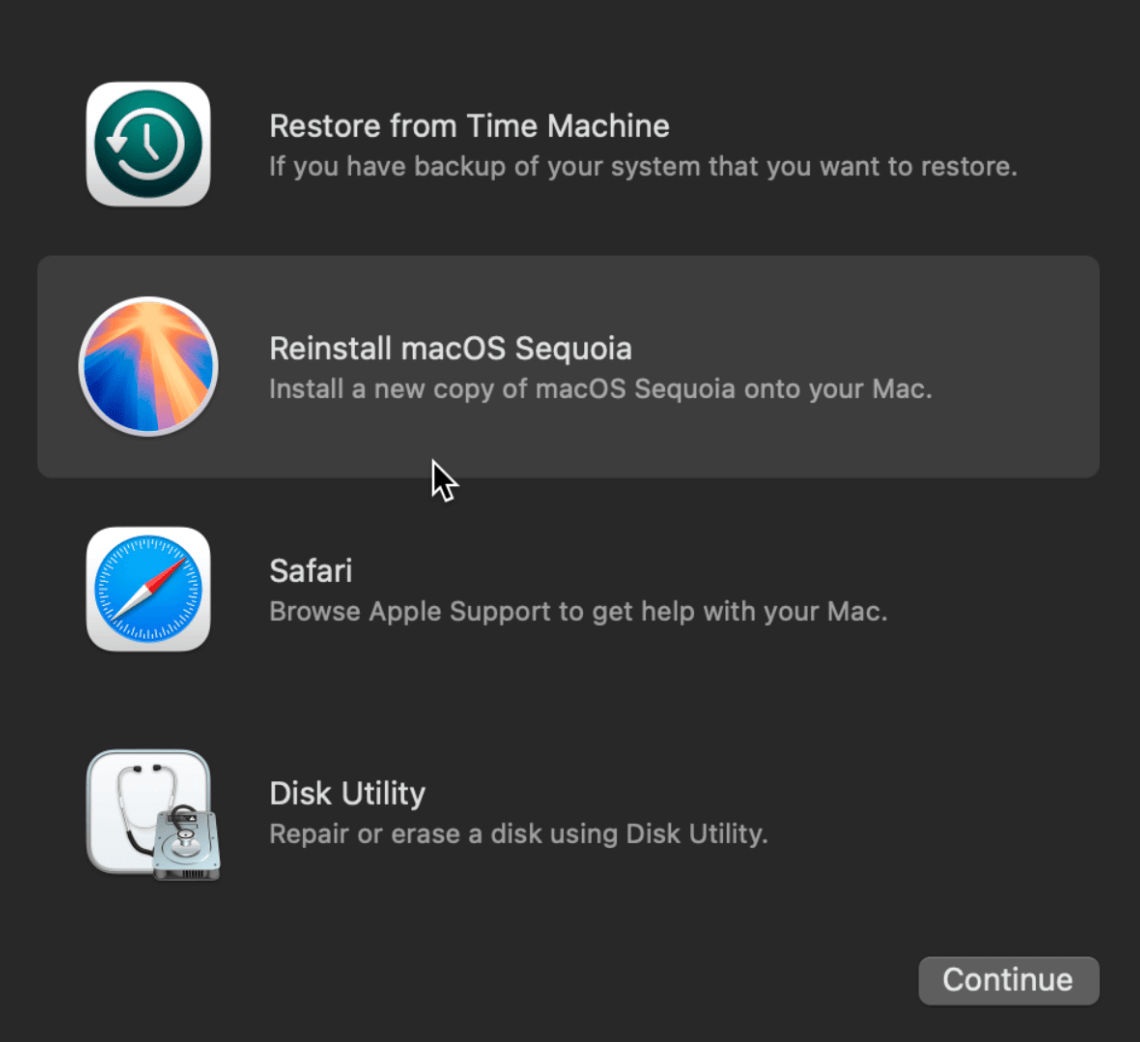
- Hold down Command (⌘) + R or Power button after restarting your Mac until the Apple logo appears.
- Select Reinstall macOS and follow the on-screen instructions.
![The volume is not compatible with this update]()
- Choose the correct startup disk for installation.
If the error persists, consider erasing the disk and performing a clean install.
Fix 5. Create a Bootable macOS Installer (If Needed)
If you're unable to install macOS through Recovery Mode, or the installation keeps failing with the "The volume is not compatible with this update" error, you may need to create a bootable macOS installer. This method allows you to install macOS from an external USB drive, bypassing issues related to the internal drive or recovery partition.
Why Create a Bootable macOS Installer?
A bootable macOS installer is useful in the following situations:
- Recovery Mode is unavailable or corrupt – If your Mac's Recovery Partition is missing or damaged, a bootable USB installer provides an alternative way to reinstall macOS.
- The macOS update fails repeatedly – If the system update isn’t working through System Preferences or the Mac App Store, installing macOS from a bootable drive can bypass these issues.
- You want to install macOS on multiple Macs – Instead of downloading the macOS installer on each Mac, you can use a single bootable USB drive to install macOS on multiple devices.
- You are downgrading macOS – If you need to install an older version of macOS, creating a bootable installer allows you to perform a clean installation without relying on internet recovery.
- You need to format the disk before installation – A bootable installer allows you to completely erase your startup disk before reinstalling macOS.
Requirements for Creating a Bootable macOS Installer
Before you proceed, ensure you have:
- A USB flash drive (16GB or larger)
- A Mac with an internet connection
- A macOS installer downloaded from Apple
- Basic familiarity with Terminal commands
Step-by-Step Guide to Create a Bootable macOS USB Installer
Step 1: Download the macOS Installer
You need to download the version of macOS that you want to install. Apple provides official macOS installers through the Mac App Store or Terminal.
To download macOS:
- Open System Settings > General > Software Update, or visit the Mac App Store and search for your desired macOS version.
- Click Download and wait for the installer to finish downloading.
- The installer will be saved in Applications as:
- Install macOS Sequoia.app
- Install macOS Sonoma.app
- Install macOS Ventura.app
- Install macOS Monterey.app
- Install macOS Big Sur.app
Alternatively, you can download specific macOS versions using the following Terminal command:
softwareupdate --fetch-full-installer --full-installer-version 13.0
(Replace 13.0 with the version number you need.)
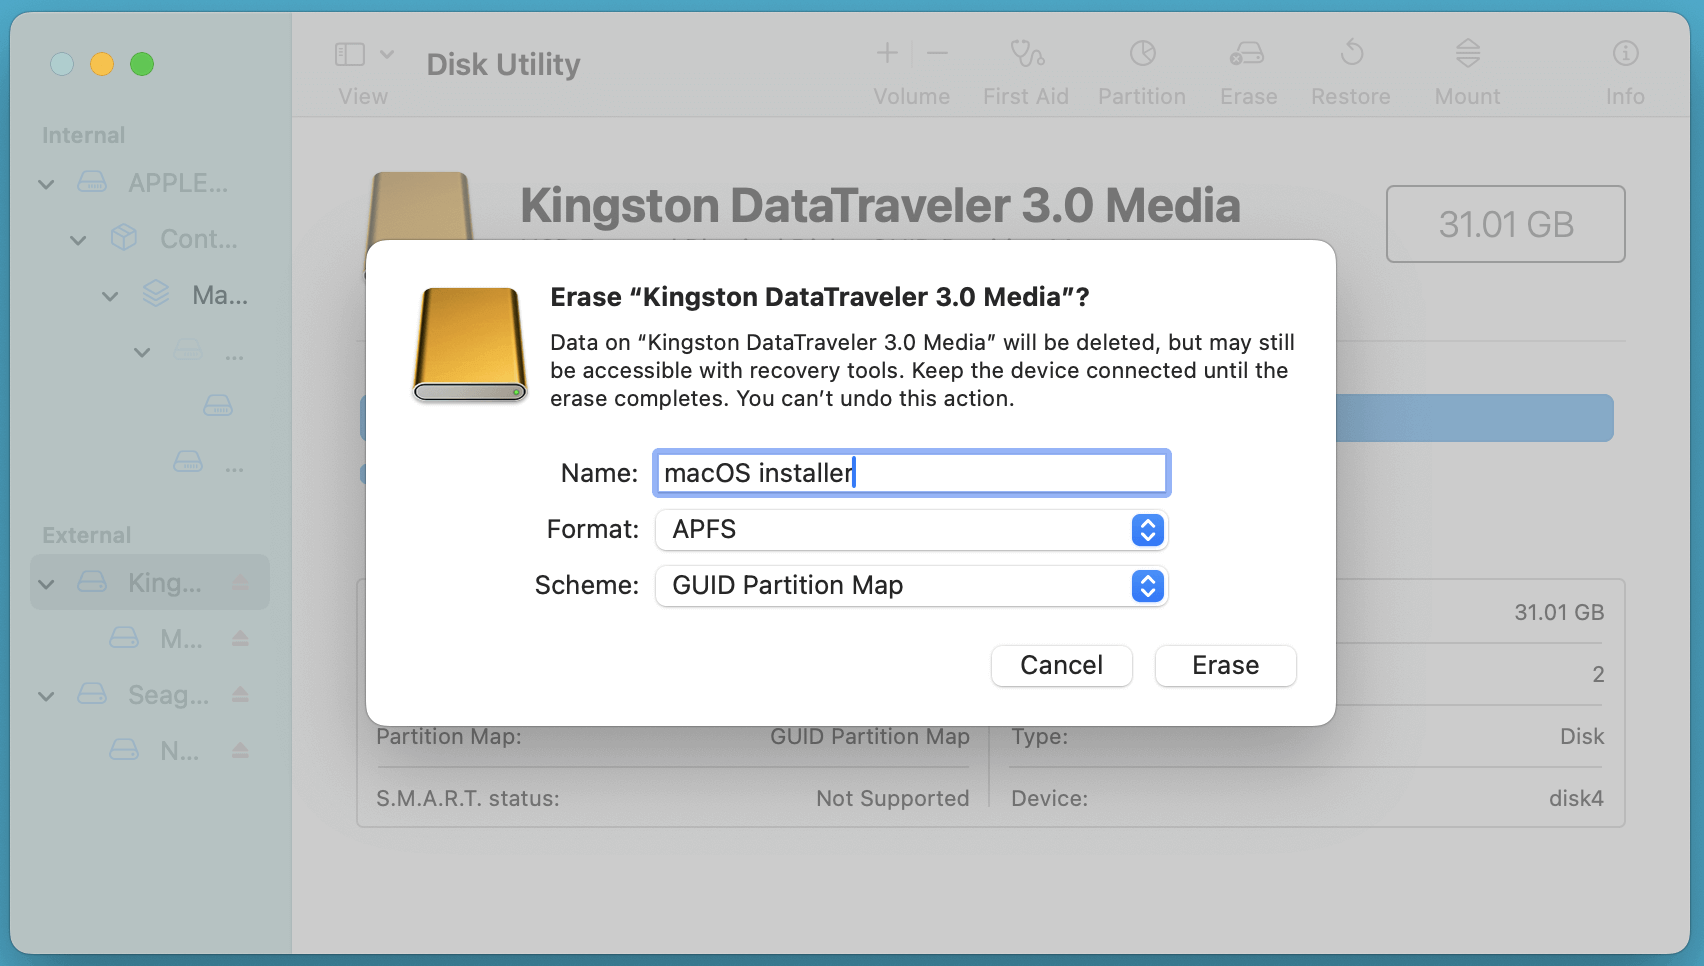
Step 2: Format the USB Drive
Next, you need to format the USB drive correctly so it can be used to install macOS.
- Open Disk Utility from Utilities via Applications.
- Select your USB drive from the left sidebar.
- Click Erase and choose the following options:
- Name
- Format
- Scheme
- Click Erase, then Done.
![The volume is not compatible with this update]()
Step 3: Create the Bootable macOS Installer Using Terminal
Now, you'll use Terminal to create the bootable USB installer.
- Open Terminal from Utilities via Applications.
- Type the following command based on the macOS version you downloaded. Replace MyVolume with your USB drive name
- When prompted, enter the administrator password for your Mac by pressing Enter.
- The process will take several minutes. Once completed, you will see a message confirming that the bootable installer has been created.
Step 4: Install macOS Using the Bootable USB Drive
Once the bootable macOS installer is ready, you can use it to install macOS.
1. Boot from the USB Drive
- Connect your Mac to the bootable USB drive.
- Hold down the Option (⌥) key after restarting your Mac (for Intel-based Mac). If you are using an Apple silicon Mac, press and hold Power button until it boots into macOS Recovery mode.
- You will see the Startup Manager screen.
- Select the USB installer drive (it may be labeled as "Install macOS [version]").
- Press Enter to boot from the installer.
2. Erase and Reinstall macOS
Once the macOS installer loads:
- Click Disk Utility and select your startup disk.
- Click Erase, choose APFS (for newer macOS) or Mac OS Extended (Journaled) (for older macOS), and click Erase.
- Close Disk Utility and return to the macOS Utilities window.
- Select Install macOS, then follow the on-screen instructions to complete the installation.
🔗 Related link: how to create an USB installer for macOS and use it to install macOS.
Troubleshooting Common Bootable Installer Issues
1. The USB Drive Is Not Showing in Startup Manager
Solution: Try using a different USB port, ensure the drive is correctly formatted, and retry the process.
2. 'Command Not Found' Error in Terminal
Solution: Ensure the macOS installer is in the Applications folder and that you typed the command correctly.
3. Installation Stuck or Frozen
Solution: If the installer gets stuck, force restart your Mac and try again. If issues persist, reset NVRAM and SMC before retrying.
Fix 6. Reset NVRAM and SMC (If Installation Fails)
Resetting NVRAM and SMC can resolve persistent installation issues.
Steps to Reset NVRAM:
- Turn Off your Mac.
- Press and hold Option (⌥) + Command (⌘) + P + R for approximately 20 seconds after turning it on.
Steps to Reset SMC (For Intel Macs):
- Turn Off your Mac.
- For ten seconds, hold down the Shift + Control + Option + Power buttons.
- Release the keys and turn on your Mac.
Now, try installing macOS again.
Fix 7. Seek Apple Support (If All Else Fails)
If none of the above solutions work, it may be time to contact Apple Support.
How to Get Help from Apple:
- Visit the official Apple support page: https://support.apple.com
- Schedule an appointment at an Apple Store
- Call AppleCare for assistance
Preventive Measures for Future Updates
To avoid running into this error in the future, follow these best practices:
- Check macOS compatibility before updating
- Backup your data before installing a new macOS version
- Keep your disk format consistent with macOS requirements
- Use Time Machine for easy restoration if issues arise
💡 Note: If you have lost data due to fixing The volume is not compatible with this update on Mac, just use data recovery software - such as Donemax Data Recovery for Mac to help recover all deleted/erased files.
Conclusion
The "The volume is not compatible with this update" error can be caused by compatibility issues, incorrect disk formatting, partition errors, or outdated firmware. By following the troubleshooting steps outlined in this guide - checking compatibility, reformatting the disk, using Recovery Mode, and creating a bootable installer - you should be able to resolve the issue and install macOS successfully.
If all else fails, Apple Support can provide further assistance. Keeping your Mac up to date and well-maintained will help prevent similar errors in the future.
Donemax Disk Clone for Mac is a powerful disk cloning application. It can help you create bootable clone backups for your Mac and make USB installer for macOS.
Donemax Disk Clone
An award-winning disk cloning program to help Windows users and Mac users clone HDD/SSD/external device. It also can create full bootable clone backup for Windows PCs and Macs.
Related Articles
- Dec 25, 2024How to Resize and Partition SSD on Mac?
- Mar 26, 2025Turn On or Turn Off Mac Firewall: A Complete Guide
- Nov 21, 2024Create Bootable USB Installer for macOS Sierra
- Mar 06, 2025Repair an External Hard Drive with Terminal on Mac
- Oct 11, 2024What is First Aid? How to Run First Aid to Repair Disk on Mac?
- Jan 02, 2025Fix AppleAPFSMedia Uninitialized Without Losing Data on Mac

Contributing Writer
Christina
Christina is the senior editor of Donemax software who has worked in the company for 4+ years. She mainly writes the guides and solutions about data erasure, data transferring, data recovery and disk cloning to help users get the most out of their Windows and Mac. She likes to travel, enjoy country music and play games in her spare time.

Editor in chief
Gerhard Chou
In order to effectively solve the problems for our customers, every article and troubleshooting solution published on our website has been strictly tested and practiced. Our editors love researching and using computers and testing software, and are willing to help computer users with their problems