Written byCharlesUpdated on Apr 10, 2025
[7 Solutions] Fix Mac Trash Put Back Not Working | Can't Put Back Files on Mac
Approved byGerhard Chou
Before we start: With Mac data recovery software, you can easily recover permanently deleted files or erased files on Mac. Here, you can download and install Donemax Data Recovery for Mac and run it to help you recover lost files on Mac if Put Back not working or you can't restore the files from the trash bin.
PAGE CONTENT:
If you are a Mac user, you're probably familiar with the convenience of the "Put Back" option in the Trash. It allows you to quickly restore a deleted file to its original location - perfect for those accidental deletions. But what happens when this feature doesn't work? You click the right mouse button expecting to see "Put Back," and it's grayed out or missing altogether. If you're currently facing this frustrating issue, don't worry - this guide will walk you through all the reasons why it happens and how to fix it.
- Fix no Put Back option when right-click files in Mac trash.
- Fix Mac Trash's Put Back is greyed out.
- Fix files couldn't be put back in trash bin on Mac.
- Fix can't find deleted files in Mac trash bin.
Understand the "Put Back" Feature on macOS
The "Put Back" option in macOS is a built-in feature that helps users recover deleted files by returning them to their original folders. When you delete a file using Command + Delete or drag it to the Trash, macOS typically stores metadata about the original file location. If this information is available, you can right-click the file in the Trash and select Put Back.
This feature streamlines the process of recovering mistakenly deleted files and eliminates the need to remember or search for the file's original directory.
Common Reasons Why "Put Back" Is Not Available
The "Put Back" option can become unavailable or unresponsive for several reasons. Let's look at the most common scenarios that cause this problem:
1. Deleted from External or Network Drive
If you delete a file from an external drive, USB, SD card, or a network location, macOS often can't track the original path. The system only retains original path data for files deleted from internal storage.
2. Original Path No Longer Exists
If you've reorganized or renamed folders after deleting a file, or if the volume/folder it came from has been removed, the "Put Back" feature won't know where to send the file.
3. Trash Partially Emptied or Manually Moved Files
If you've emptied part of the Trash or used third-party cleaner apps, metadata linking files to their original locations may be missing or corrupted.
4. Permission Issues
In rare cases, user permissions prevent the system from accessing the Trash's metadata or the destination folder.
5. System Glitch or Corruption
macOS glitches or a corrupted user account might interfere with normal Trash operations.
How to Fix "Can't Put Back Files" on Mac? [7 Solutions]
Now that we've covered the causes, let's dive into step-by-step fixes to restore your files when the "Put Back" option isn't working.
Solution 1. Check File Origin
The first thing to verify is where the file was deleted from. If it came from an external device or a network share, you may not be able to use "Put Back."
Fix:
- Manually move the file to the correct location.
- Use Finder to recreate the path (if you remember it) and drop the file there.
Solution 2. Use "Get Info" to Identify the Original Location
If the file was deleted from the internal drive, try finding out where it originally came from.
Steps:
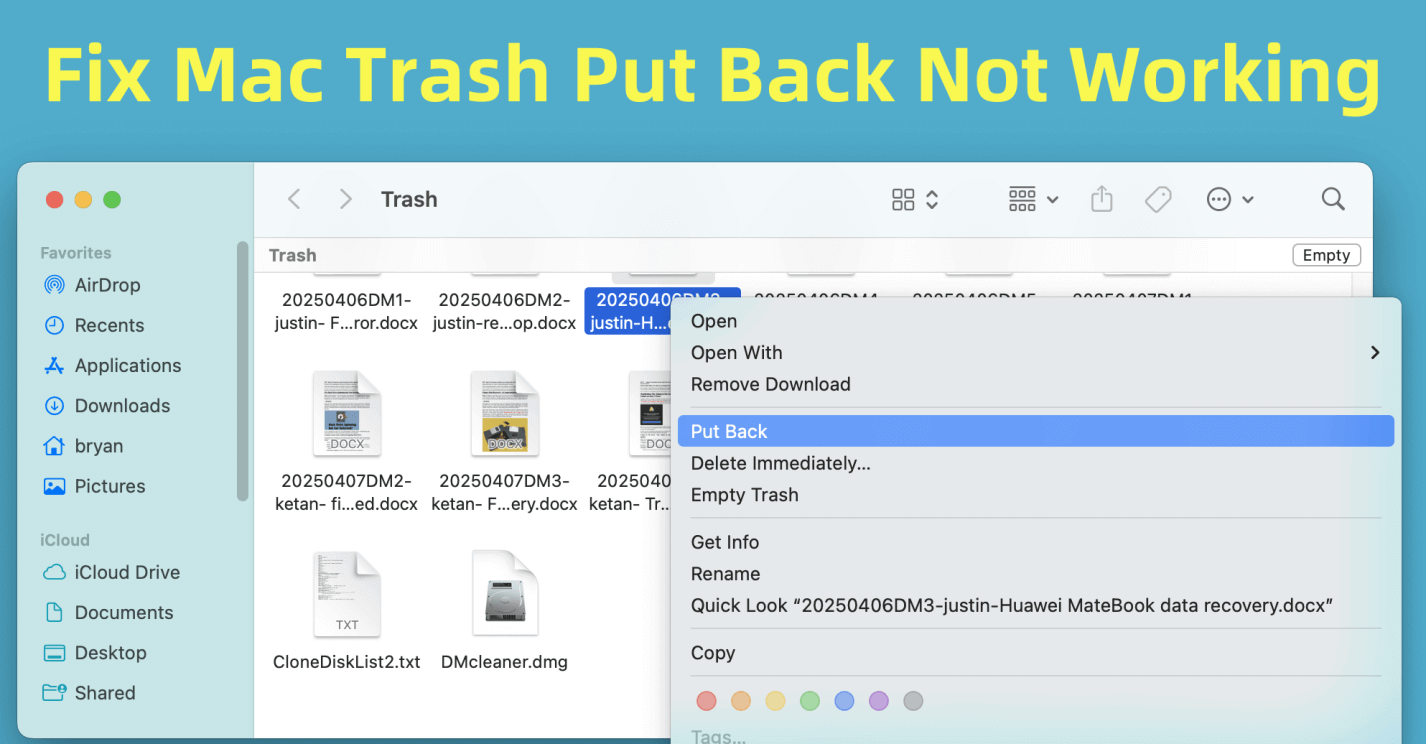
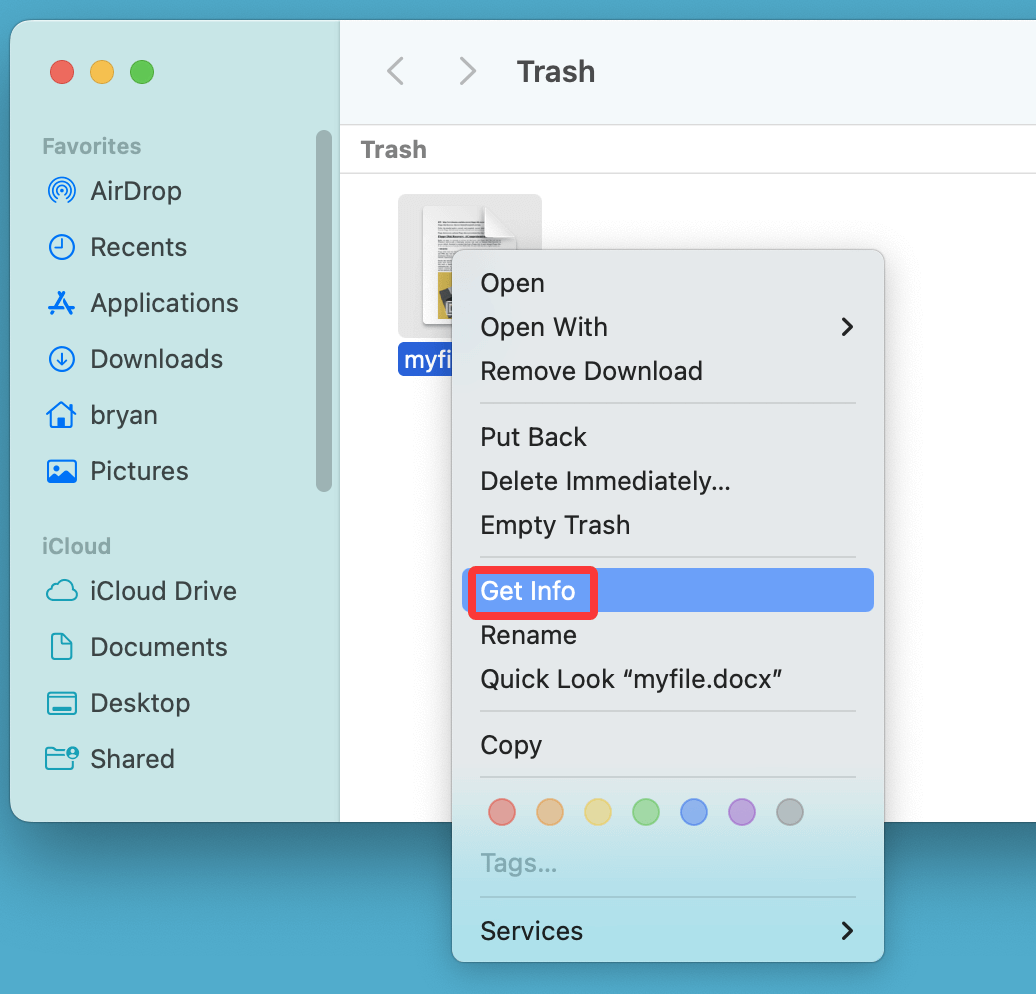
- Open Trash.
- Right-click the file and select "Get Info."
![Fix Mac Trash Put Back Not Working]()
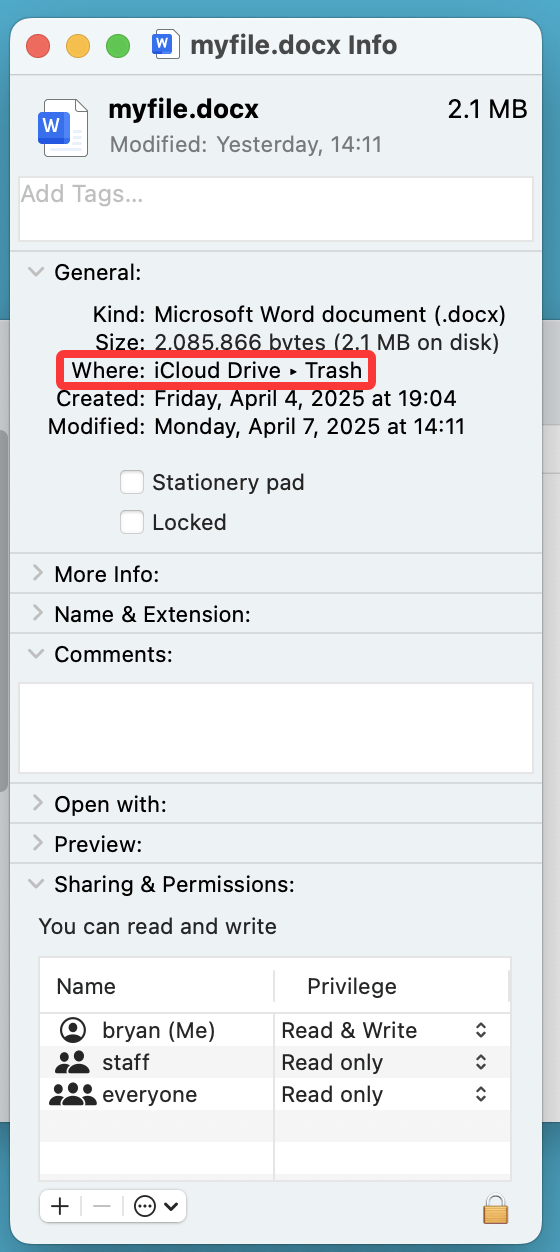
- Look at the "Where" section. This might still contain the original folder path.
![Fix Mac Trash Put Back Not Working]()
- Open Finder and navigate to that folder.
- Manually drag and drop the file from Trash to that folder.
This mimics the "Put Back" behavior.
Solution 3. Drag and Drop Manually
If metadata is missing but you know where the file belongs, simply restore it by dragging.
How-To:
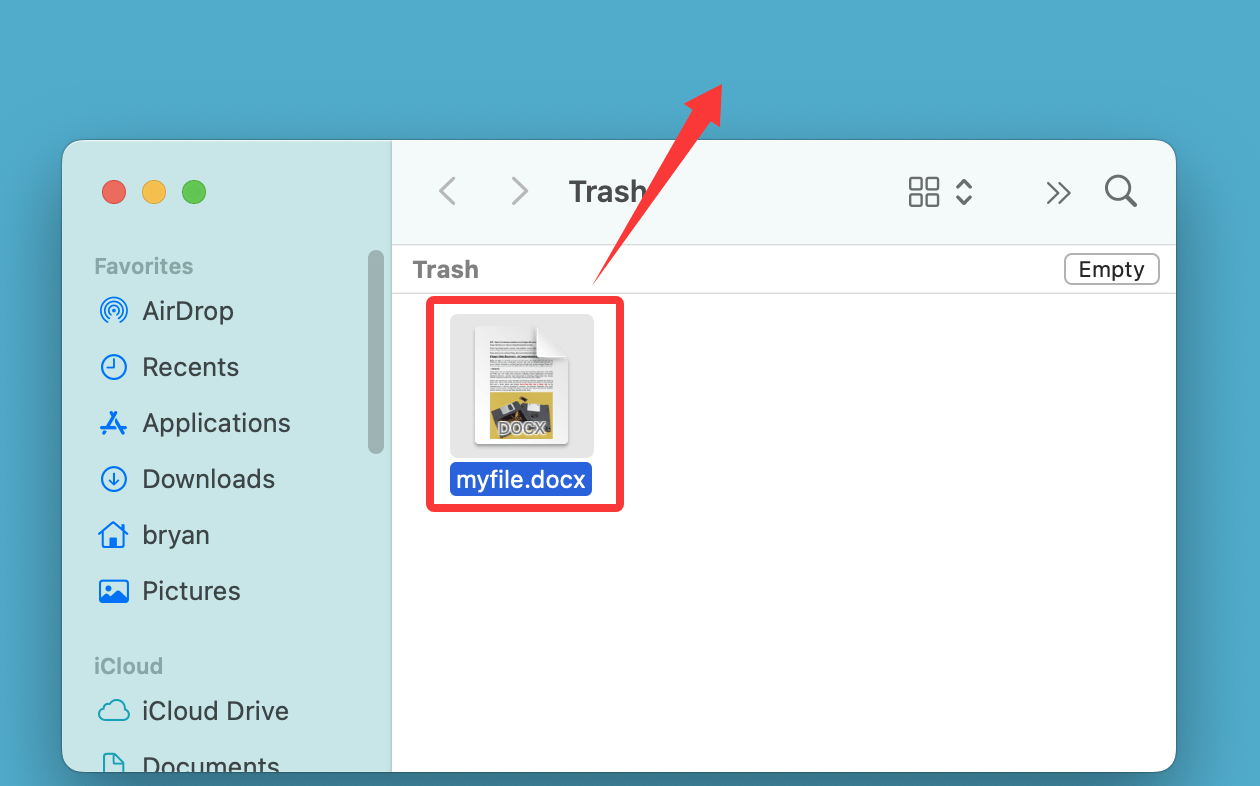
- Click and hold the file in Trash.
- Drag it to the correct folder in Finder or onto the desktop.
![Fix Mac Trash Put Back Not Working]()
While this lacks automation, it restores the file just the same.
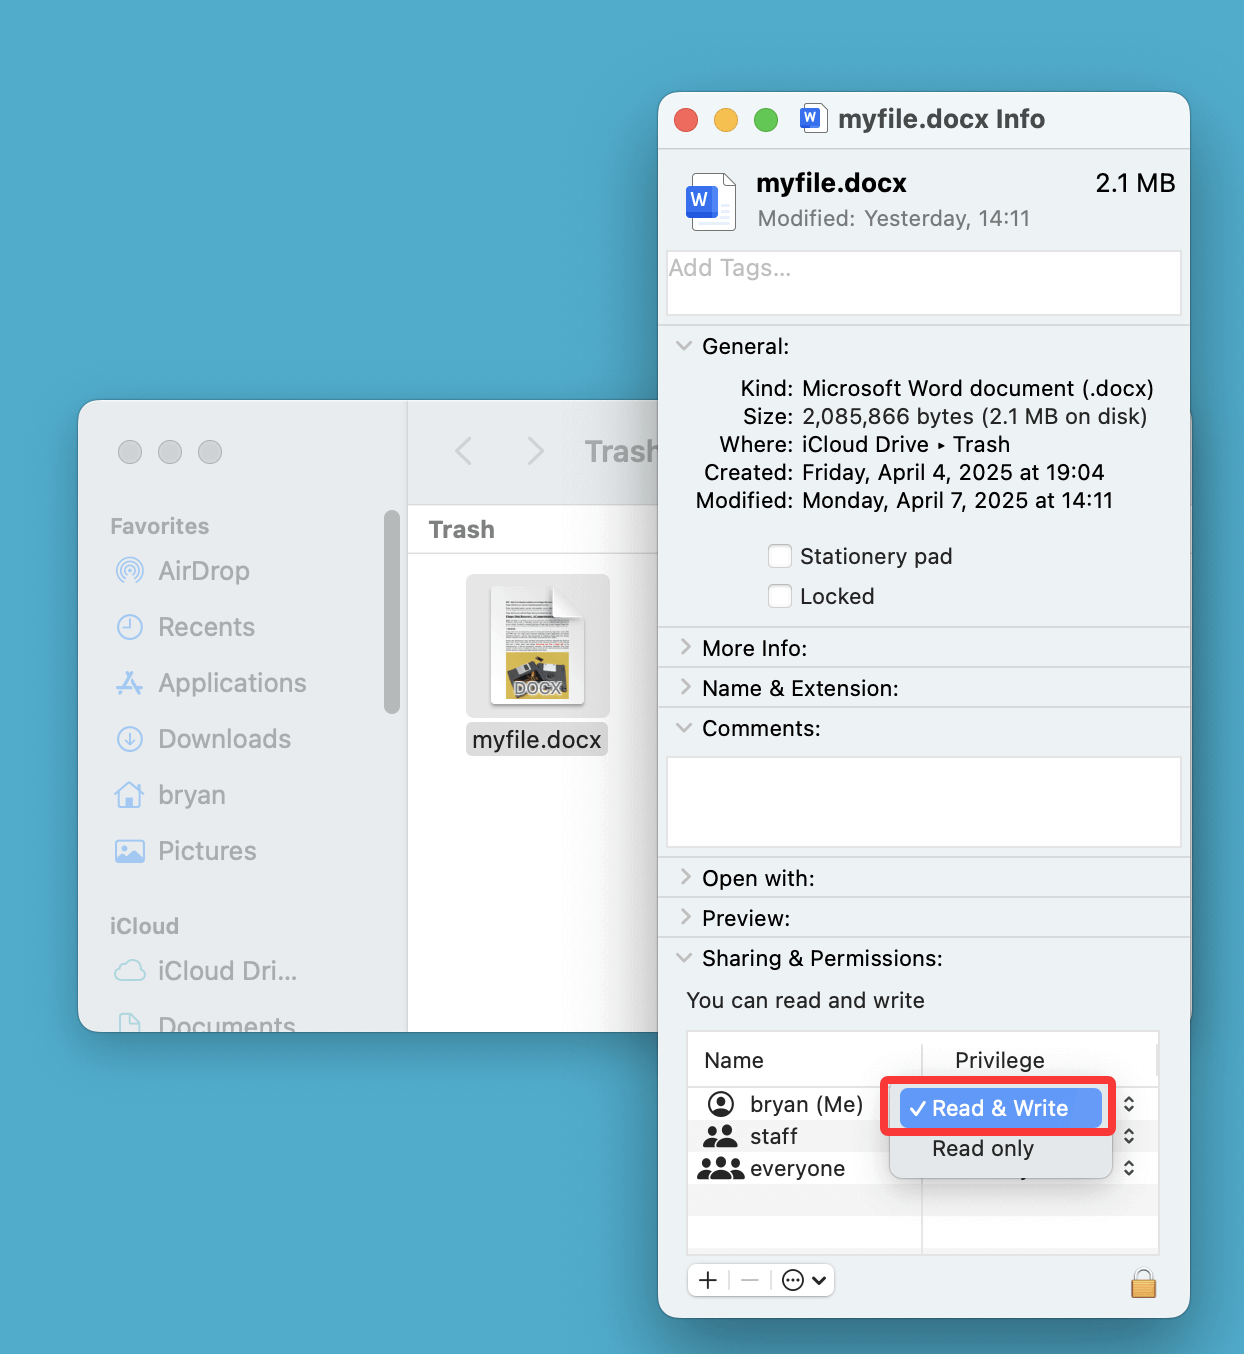
Solution 4. Check and Fix File Permissions
Sometimes, you don't have permission to restore the file to its original location.
Steps to Fix:
- Right-click the file and choose Get Info.
- At the bottom, find Sharing & Permissions.
- Click the lock icon and enter your admin password.
- Ensure your account has Read & Write access.
![Fix Mac Trash Put Back Not Working]()
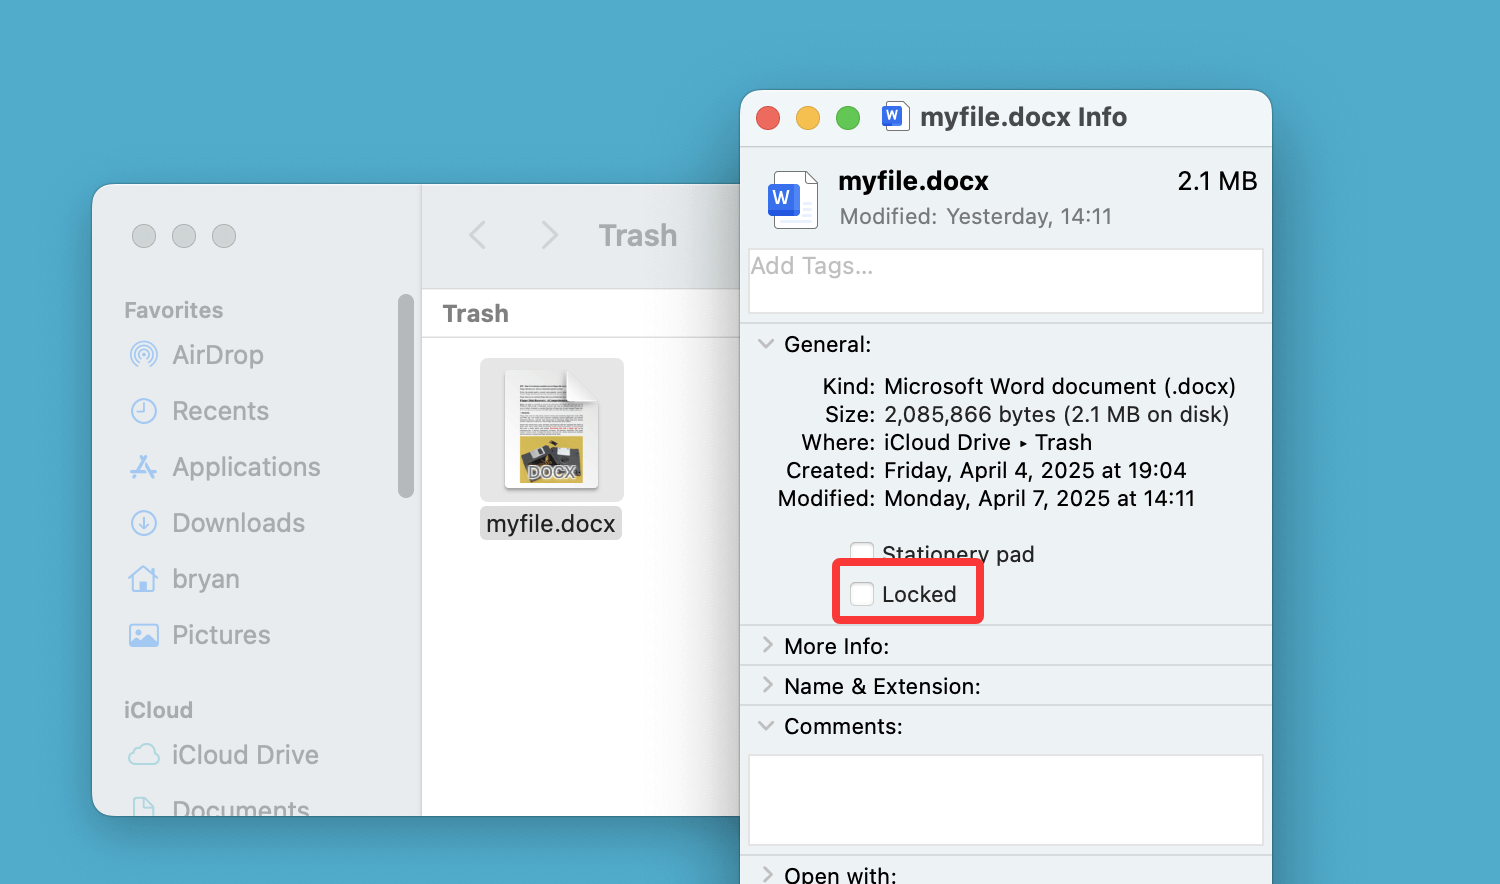
- If not, change the privilege level and try again.
- Ensure the file is not locked.
![Fix Mac Trash Put Back Not Working]()
Solution 5. Reset NVRAM and SMC
NVRAM and SMC store system settings. Resetting them can fix odd behaviors like a missing "Put Back" option.
Reset NVRAM (for Intel Macs):
- Turn Off your Mac.
- Press Option + Command + P + R as soon as you turn it on.
- Hold the keys for 20 seconds.
Reset SMC (Intel Macs only):
- Turn Off Mac.
- At the same time, press and hold the Power button and Shift + Control + Option.
- Turn on your Mac after releasing all the keys.
For Apple Silicon Macs, a simple restart resets both automatically.
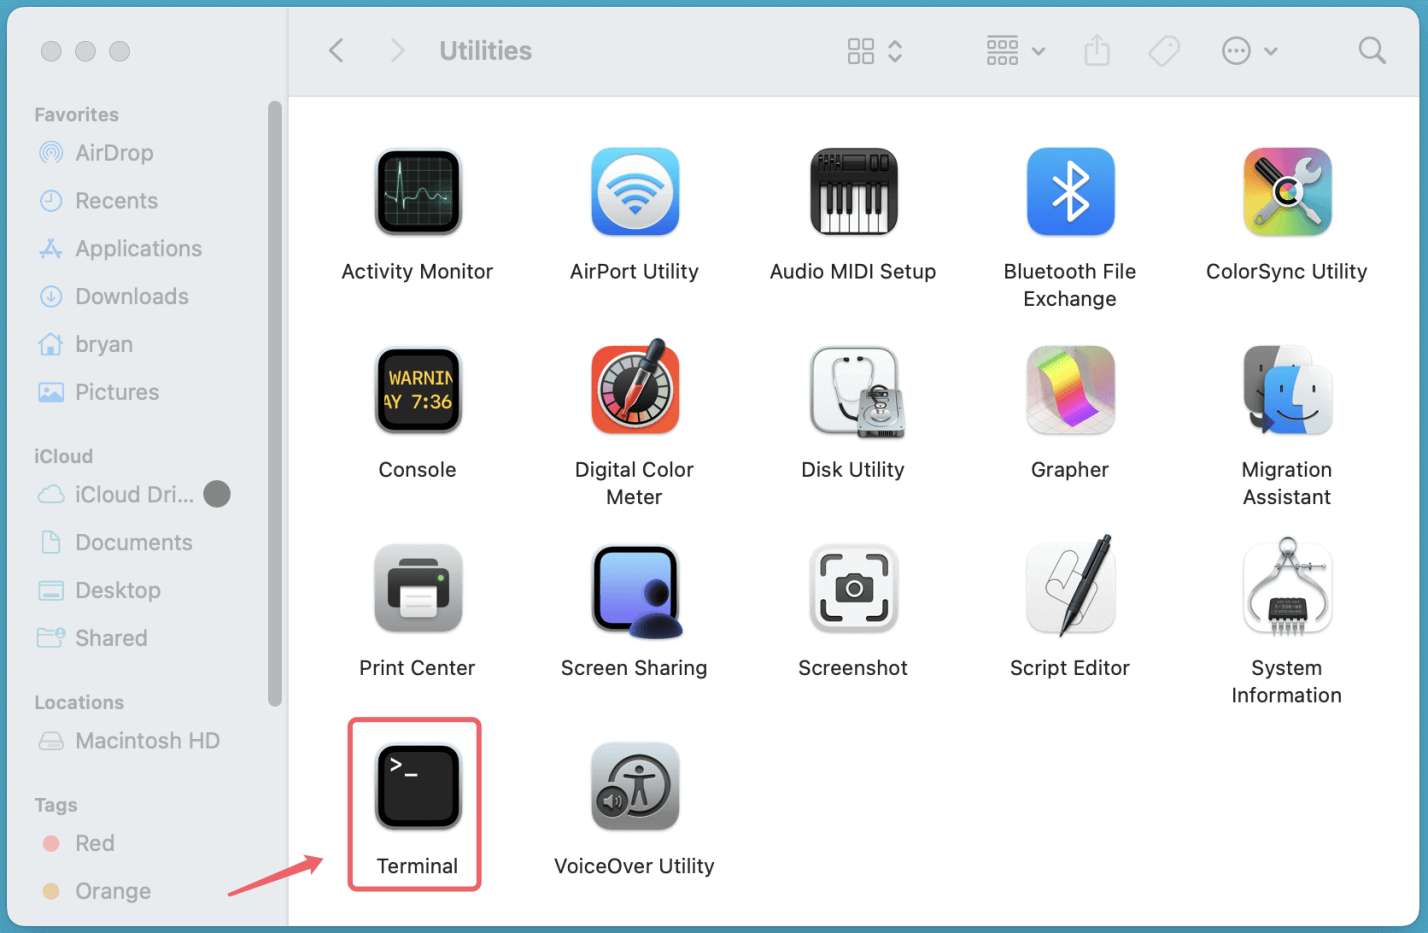
Solution 6. Use Terminal to Move Files from Trash
If the Finder is uncooperative, Terminal gives you direct access.
Steps:
- Open Terminal from Utilities via Applications.
![Fix Mac Trash Put Back Not Working]()
- Enter:
cd .trash
- Move file to a specific folder:
mv filename.extension ../
![Fix Mac Trash Put Back Not Working]()
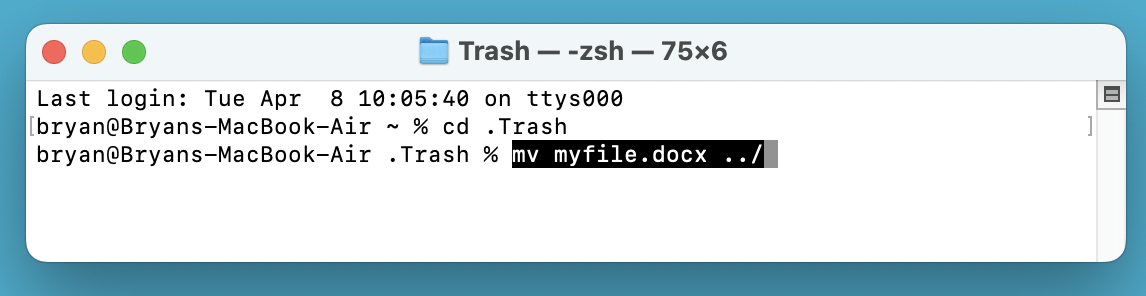
Replace "filename.extension" with your actual file name and format extension.
This manually restores the file.
Solution 7. Repair Disk with Disk Utility
A corrupted file system could prevent macOS from recognizing metadata used by "Put Back."
How-To:
- Open Disk Utility from Utilities via Applications.
![Fix Mac Trash Put Back Not Working]()
- Select your main drive (usually Macintosh HD).
- Click First Aid and confirm to run.
![Fix Mac Trash Put Back Not Working]()

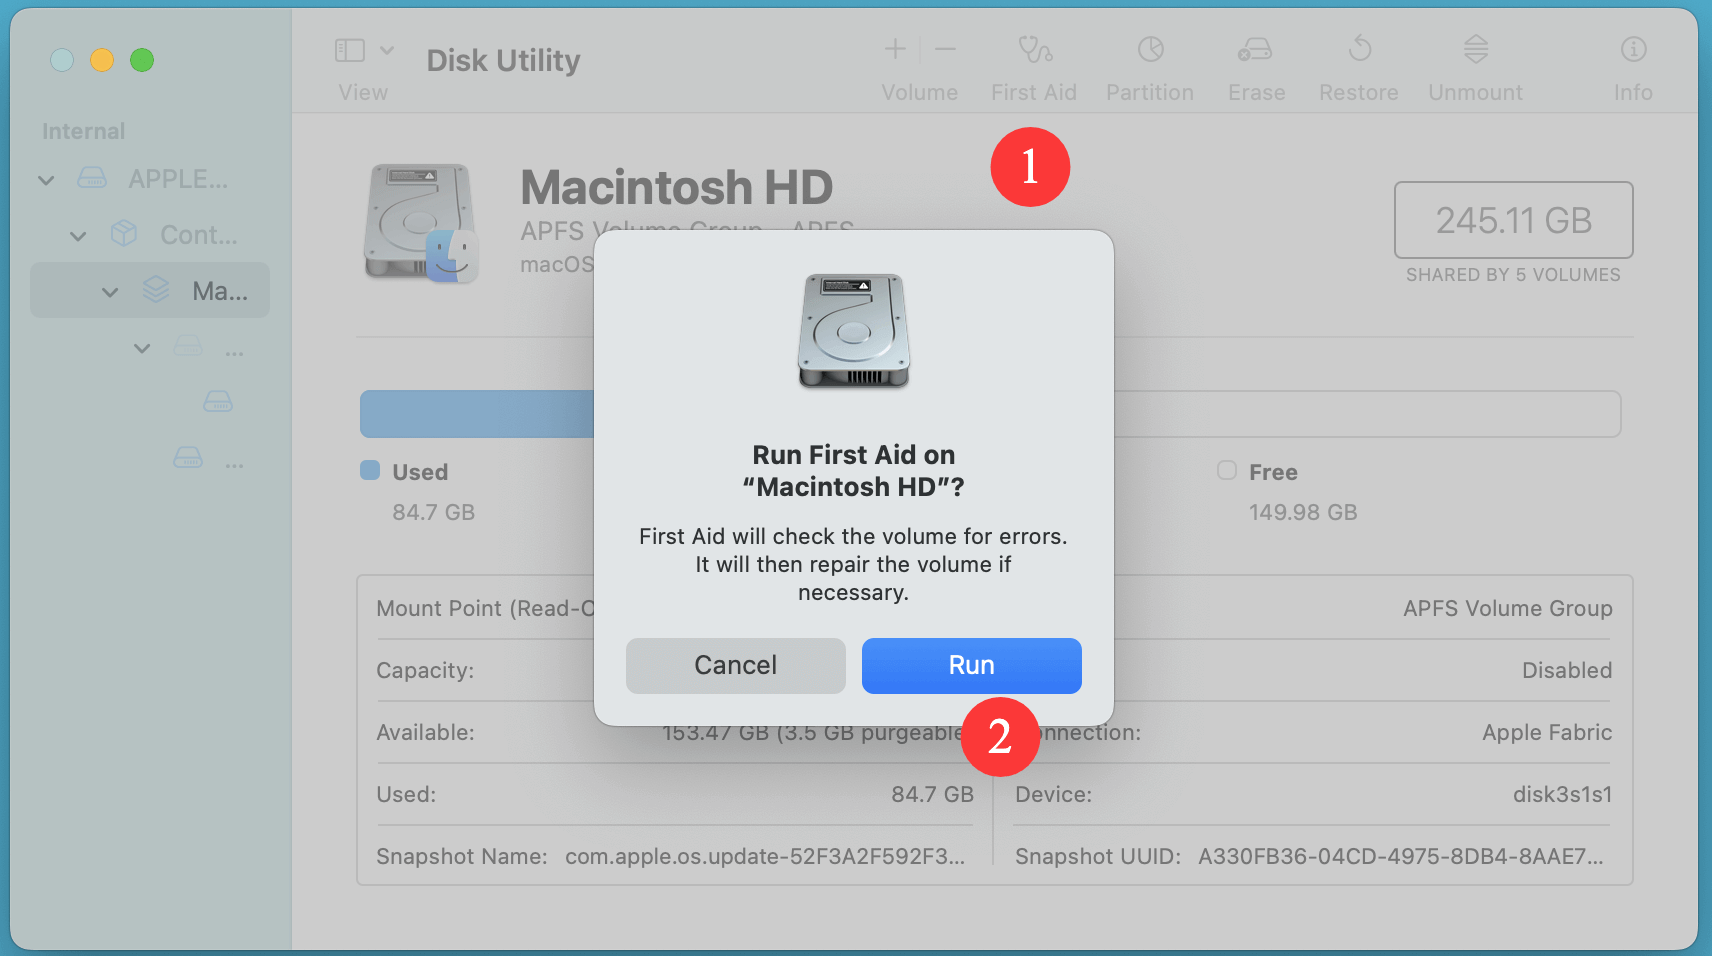
Let the utility scan and fix any logical errors.
Bonus Fix: Use a Different User Account
To determine whether the problem is system-wide or user-specific, try logging into a different user account.
Steps:
- Go to System Settings > Users & Groups.
![Fix Mac Trash Put Back Not Working]()
- Create a new admin account.
- Log in and check if "Put Back" works in that user's Trash.
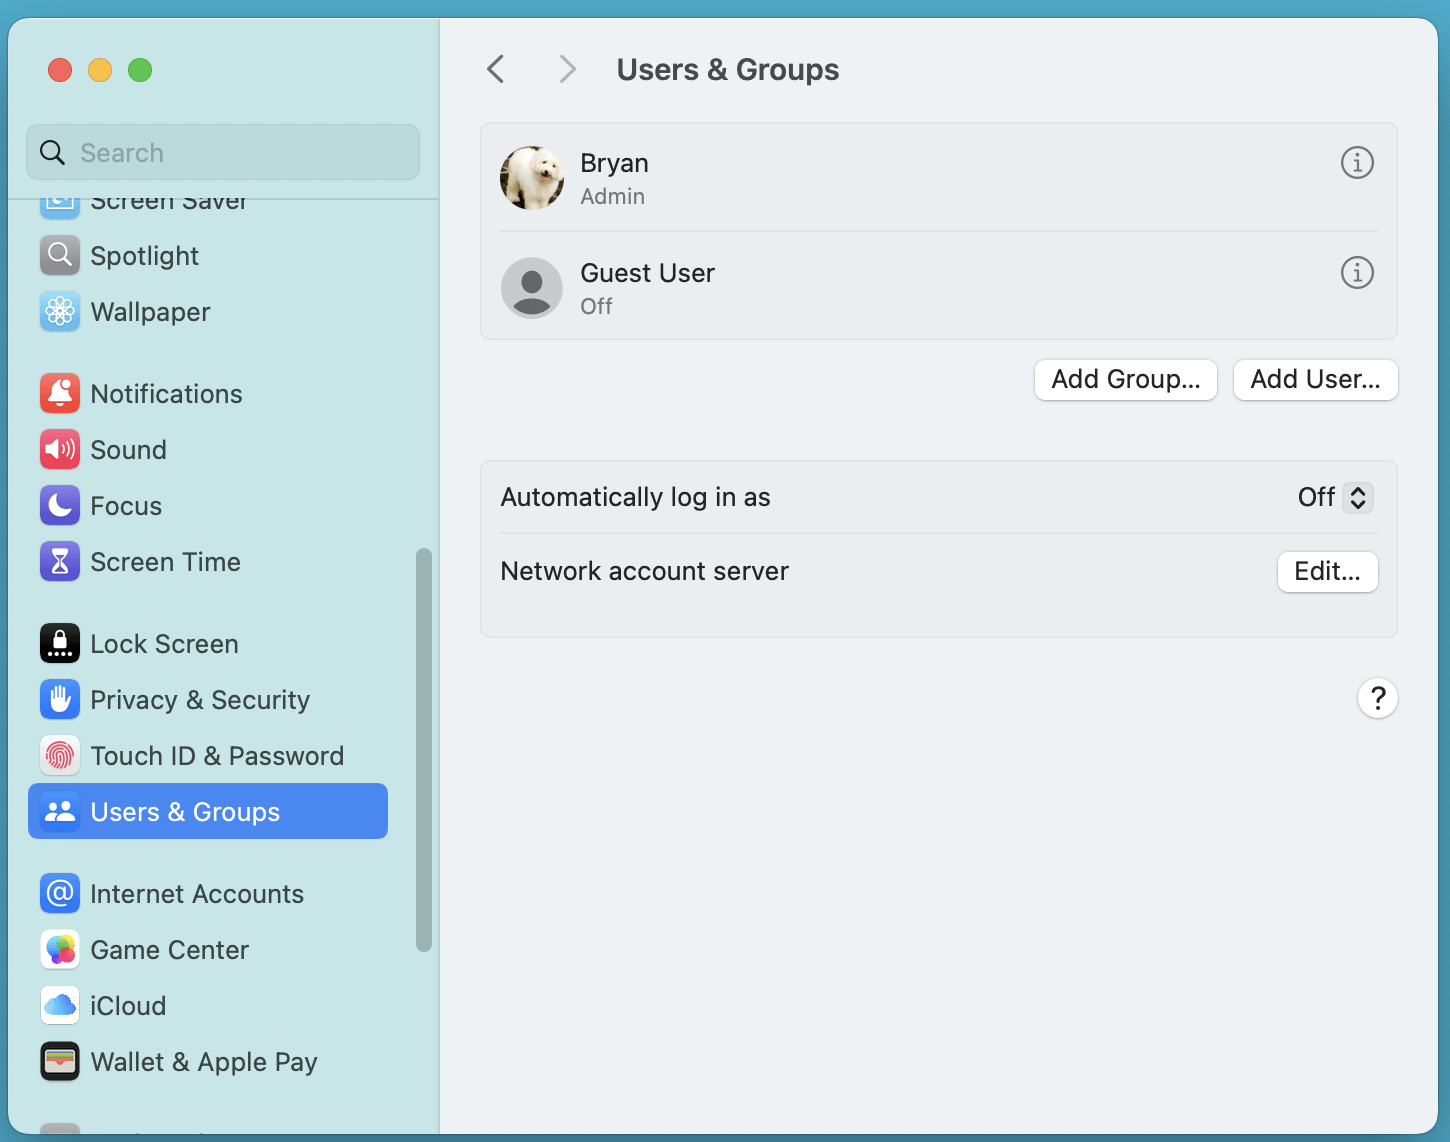
If it works, your original user account might be corrupted.
Recover Deleted/Lost Files on Mac Using Data Recovery Software
If the file was removed from the Trash or the original metadata is completely lost, you may need a data recovery tool to get it back.
Donemax Data Recovery for Mac is one of the best Mac data recovery software which is able to securely and completely recover lost data on Mac or from external storage device.
Donemax Data Recovery for Mac
- Recover deleted/formatted/lost files from Mac's internal disk and external disk, USB flash drive, memory card, digital camera, etc.
- Recover lost data from a corrupted drive on Mac.
- Recover files from emptied trash bin on Mac.
Step 1. Download and install Donemax Data Recovery for Mac on your Mac, run it from Launchpad. Select the drive where you lose your files to start scan.

Step 2. Click on Scan button to deeply scan the selected drive and find all deleted/formatted or lost files.

Step 3. Once the scan is completed, you can preview the recoverable files. Then select the wanted files, click on Recover button to save them.

How to Prevent This Issue (Mac Put Back Not Working) in the Future?
While it's helpful to know how to fix this issue, it's even better to prevent it altogether. Here are some tips:
1. Avoid Deleting Files from External Drives
Files deleted from external drives often lose metadata. If you must delete, consider doing it directly from the external device's Trash (if supported).
2. Use Time Machine
Time Machine automatically backs up your Mac hourly, daily, and weekly. If a file is missing or can't be put back, Time Machine can restore it in seconds.
3. Keep Folder Names Consistent
Avoid renaming or deleting folders you frequently use. It helps preserve the file path integrity macOS depends on for "Put Back."
4. Avoid Third-Party Cleaner Apps
Some apps clear Trash in non-standard ways and remove metadata macOS needs. Stick to the built-in macOS cleaning tools.
5. Use Cloud Backup Services
Google Drive, Dropbox, or iCloud Drive offer version history and deleted file recovery for cloud-stored files.
Additional Troubleshooting Tips
If the steps above don't solve your problem, try these additional troubleshooting options:
Step 1: Check for File System Errors Using fsck
You can run a file system check using fsck, a Unix utility, via the Terminal.
- Restart your Mac and hold Command + S to enter Single User Mode.
- In the Terminal, type fsck -fy and press Enter.
- Wait for the system to check and repair your file system, if needed.
- Type reboot to restart your Mac.
Step 2: Boot in Safe Mode
If you continue to have issues, try booting your Mac in Safe Mode:
- Turn Off your Mac.
- Hold down the Shift key while pressing the Power button.
- When the login window appears, release the key.
- In Safe Mode, macOS performs automatic disk repairs, and you can attempt to move files again.
Step 3: Contact Apple Support
If the issue persists, it may be time to contact Apple Support. They can help diagnose more complex problems that may require professional intervention.
Conclusion
The "Put Back" feature is incredibly useful, but when it fails, it can be both confusing and frustrating. Whether it's due to deleted metadata, an external drive origin, or system glitches, there are always ways to work around the issue.
Start with manual fixes such as dragging the file to its original folder or using the "Get Info" method. If that doesn't work, escalate to command-line solutions, permission adjustments, or even full disk scans using third-party recovery tools. And most importantly, take steps to prevent the issue from happening again by backing up your files and avoiding risky file deletions.
With these tools and techniques, you'll never have to worry about losing important files again - even if "Put Back" refuses to cooperate.
Donemax Data Recovery for Mac
Donemax Data Recovery for Mac is one of the best Mac data recovery software. It is easy-to-use and can help in recovering deleted, formatted, inaccessible or lost data from Mac HDD/SSD, external disk, USB drive, SD card, camera or other storage devices.
Related Articles
- Nov 11, 2024How to Recover Screen Recordings on Mac?
- Apr 10, 2025[4 Methods] Recover ARW Files on Mac: A Complete Guide
- Jun 11, 2024Best Free Seagate Data Recovery Software for Mac
- Jun 06, 2023Top 6 Best Recuva Alternatives for Mac in 2025
- Dec 31, 2024Can't Find a File on Mac? Get It Back By Searching or Recovering
- Dec 31, 2024No Files on USB Drive on Mac, How to Get the Lost Files Back?

Contributing Writer
Charles
Charles, who lives in Sydney, Australia, is an editor & writer of Donemax Team. He is good at writing articles related with Apple Mac computers, Windows operating systems, data recovery, data erasure, disk clone and data backup, etc. He loves reading and playing tennis in his spare time and is interested in testing new digital devices such as mobile phones, Macs, HDDs, SSDs, digital cameras, etc.

Editor in chief
Gerhard Chou
In order to effectively solve the problems for our customers, every article and troubleshooting solution published on our website has been strictly tested and practiced. Our editors love researching and using computers and testing software, and are willing to help computer users with their problems