Written byStevenUpdated on Oct 02, 2024
How to Wipe Startup Disk on macOS Sequoia?
Approved byGerhard Chou
PAGE CONTENT:
It is important to erase the startup disk on your Mac if you want to sell it, fix problems that won't go away, or start over. This process ensures that all your personal information is deleted safely, protecting your privacy and speeding up your Mac. In this complete guide, we'll show you every step of the way to erase your startup disk on macOS Sequoia.
We can help you with everything from backing up your files to erasing the disk safely and reinstalling macOS. Whether you've used a Mac before or this is your first time, our step-by-step instructions will help you safely complete this important task. Following this guide will make your Mac clean and ready for use. Now, let's start and ensure your Mac is in great shape!
Importance of Wiping the Startup Disk
It's important to know why sometimes you need to wipe the startup disk:
- Security
All the information on your startup disk is erased when you do this. You must do this to sell or give away your Mac. With the right tools, you can regain some of your data even after you delete files and empty the trash. By wiping the file, you ensure no one else can access your personal information.
- Performance
Over time, your Mac may gather many files and programs you don't need. These things can slow down your system and make it work less well. Wiping the startup disk starts over and can often fix speed issues that won't go away.
- Troubleshooting
If you're having problems that won't go away no matter what you do, wiping the startup disk and loading macOS again might help. This process can fix problems if system files get damaged or tools stop working properly.
Steps to Wipe the Startup Disk on macOS Sequoia
#1 Make a backup of your data
Before you wipe your macOS Sequoia's startup disk, you'd better make a full backup of your Mac. You can use the following methods to back up your Mac:
- Back up your Mac with Time Machine.
- Clone your Mac to an external hard drive and make a full bootable clone backup.
- Back up your data to iCloud or other cloud storage.
Donemax Disk Clone for Mac is a powerful yet easy-to-use disk cloning program. It can help you create a full backup for macOS Sequoia.
Step 1. Download and install Donemax Disk Clone for Mac.
Step 2. Connect an external hard drive to the Mac. Open Donemax Disk Clone for Mac, choose OS Clone mode. Select the external hard drive as the destination drive.
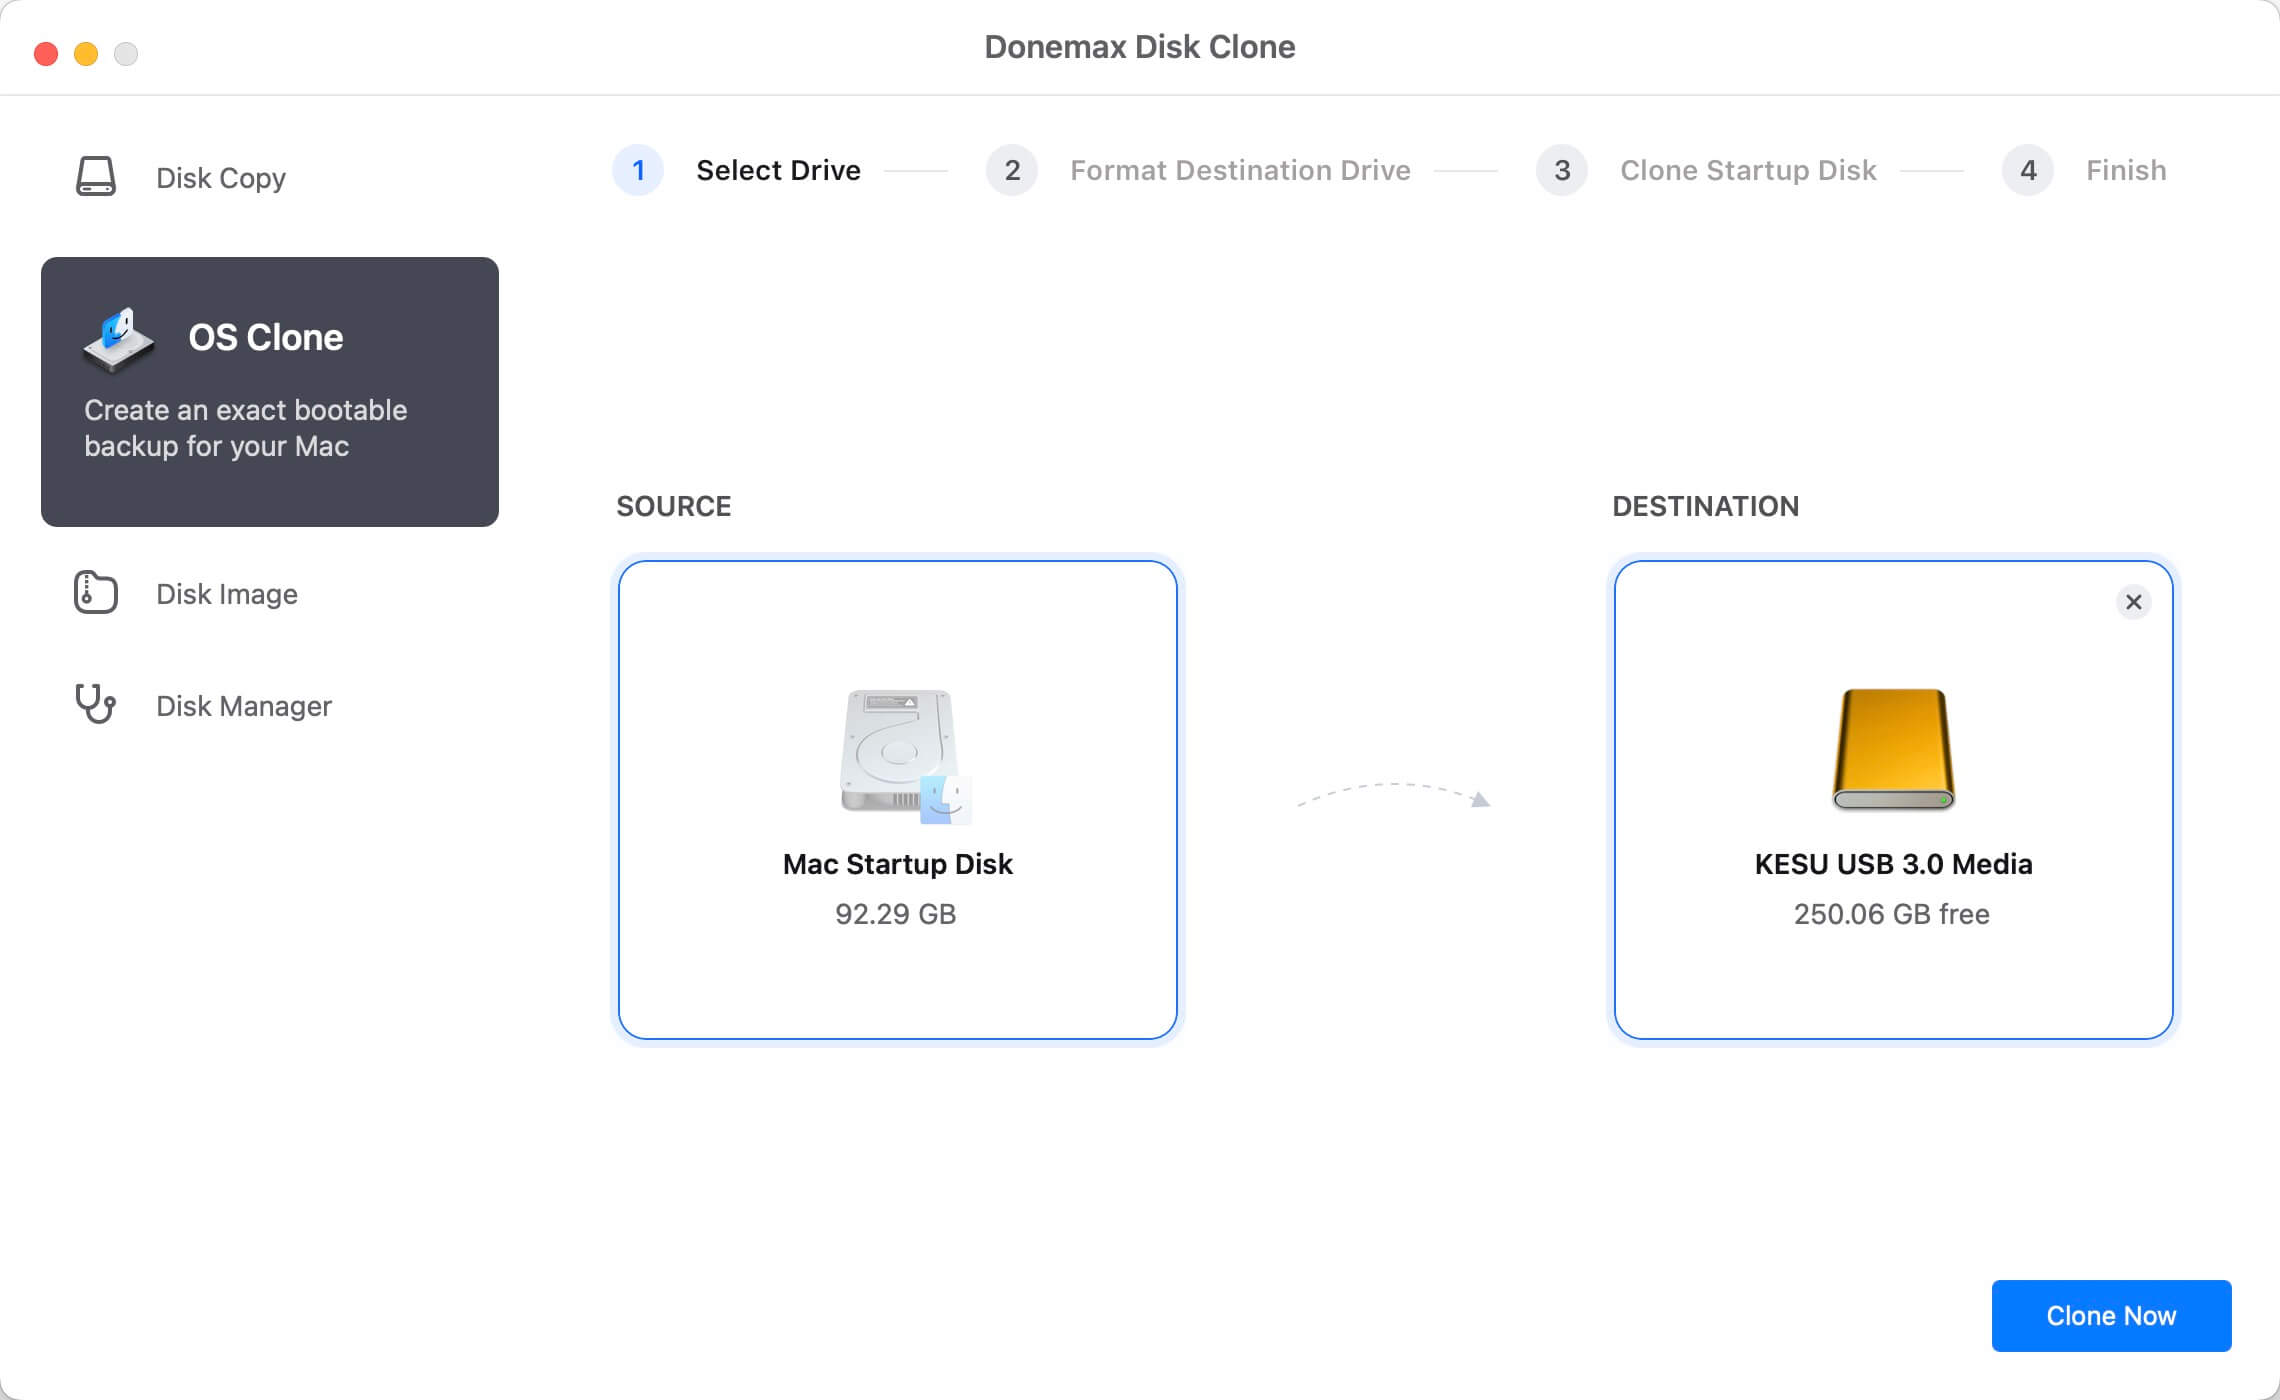
Step 3. Click on Clone Now button to clone all data including macOS Sequoia, user data, settings, apps, and other data from your Mac to the external hard drive. It will make a full bootable clone backup.

#2 Boot into macOS Recovery
Fist of all, shut down the Mac, then press and hold the Power button until you see "Loading Startup Options," then choose Options and click on Continue button.
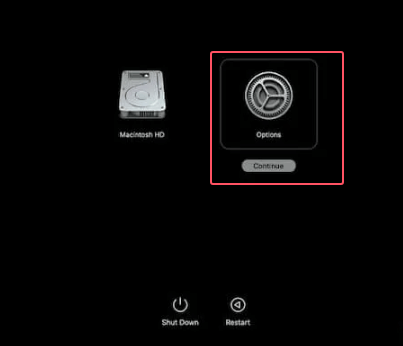
Select a user account and enter the password to open Recovery app.
#3 Erase the Startup Disk
- Open Disk Utility
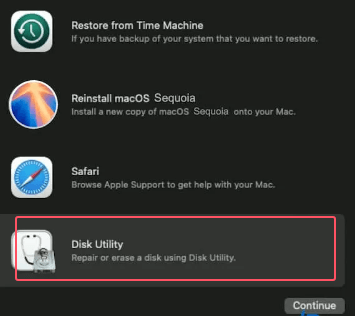
Pick "Disk Utility" from the list of macOS Recovery tools and click "Continue." Disk Utility will start and show you a list of all the linked disks and volumes.
- Select the Startup Disk
In Disk Utility, find your starting disk. It's often called "Macintosh HD." To make the starting disk stand out, click on it.
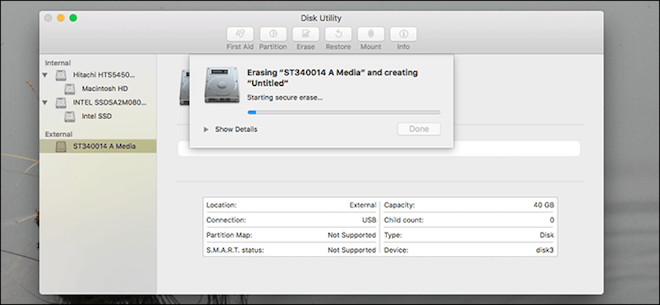
- Erase the Disk
The "Erase" button is at the top of the Disk Utility window. Select the starting disk and click it. For example, "Macintosh HD" is a name to give the disk. Select APFS as the Format (file system).
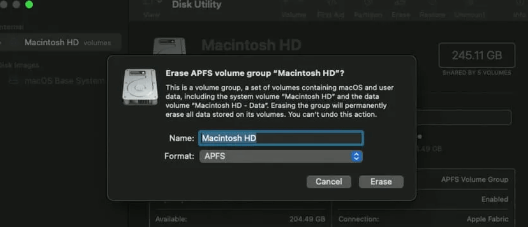
Then click Erase again to start erasing the startup disk.
#4 Reinstall macOS
1. To close Disk Utility, go to the menu bar and choose "Disk Utility" > "Quit Disk Utility." You can also click the red "Close" button in the upper left corner.
2. It will take you back to the window for the macOS Recovery tools.
3. Pick "Reinstall macOS Sequoia" from the list of options in the macOS Recovery tools window, then click "Continue."
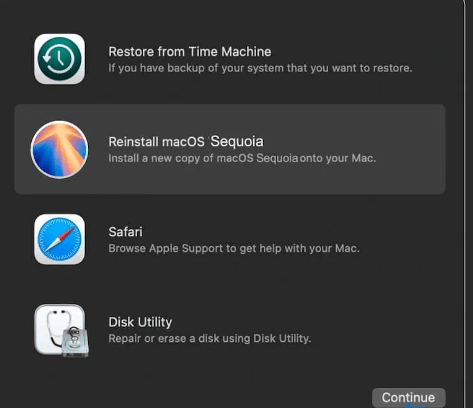
4. This choice will begin the process of putting the operating system again on a disk that has just been wiped clean.
5. To reinstall macOS, follow the steps shown on the screen. It means agreeing to the terms and conditions and picking the disk where you want to install macOS. This disk should be the starting disk you just erased.
6. The latest version of macOS Sequoia will be downloaded and put on your disk by the installation process. Ensure your Mac is online during this process because it needs to download the files it needs to install.
#5 After the Reinstallation
At the end of the process, your Mac will restart and ask you to set it up as if it were brand new. To finish the basic setup, do these things:
- Choose the language and area you want to use from the list.
- Pick it from the list to connect to the Wi-Fi network.
- You can move data from a copy, another Mac, or a Windows PC.
- Follow the steps on the screen if you want to move info. If it's not, choose "Don't send any data now."
- Use your Apple ID to log in. You can then access your apps, iCloud, and other Apple services.
- You can make an Apple ID now if you don't already have one.
- You must read and agree to the terms and conditions to move forward.
- Make an account and password for your Mac. This is your main account, which you'll use to log in and manage the computer.
Note: Please note that the data which is erased from the startup disk is not lost for good and can be recovered by Mac data recovery software.
Recover Lost Data from Erased Hard Drive
The erased data can be recovered by Mac data recovery software. Just use it to deeply scan the erased drive and get all lost data back.
Following these steps, you can be sure that your startup disk is completely erased and that macOS Sequoia is installed properly. This process keeps your info safe and starts over so everything works at its best.
Permanently Wipe Data Before Selling Your Mac
If you will sell or donate your Mac, you'd better permanently wipe all data from it. After erasing the startup disk, you can use a disk wipe app to wipe free disk space of the disk to permanently wipe all deleted/erased/lost data so that no data is recoverable.
Step 1. Download and install the best macOS Sequoia disk wipe software - Donemax Data Eraser for Mac.
Step 2. Open Donemax Data Eraser for Mac, then chose Erase Free Space mode. Select the internal disk - such as Macintosh HD.
Step 3. Click on Erase Now button to wipe free disk space of the startup disk, permanently erasing all deleted/erased/lost data.

Note: Once the data is erased by Donemax Data Eraser for Mac, the data is lost for good, cannot be recovered by any method.
Conclusion:
It is very important to wipe the startup disk on macOS Sequoia to keep your Mac safe, improve its speed, and make it easier to fix problems. You can safely delete your files, restart macOS, and set up your Mac as if it were brand new by following these detailed steps.
This process keeps your personal information safe and gives your system a fresh start, improving it overall. This guide shows you how to safely and quickly delete your starting disk, whether you're getting ready to sell your Mac or want to start over. Do these things to keep your Mac in great shape.
Related Articles
- Nov 25, 2024How to Permanently Erase Data on macOS Monterey – A Comprehensive Guide
- Nov 04, 2024Factory Reset macOS Sequoia: A Comprehensive Guide
- Apr 09, 2024How to Format or Wipe WD External Hard Drive on Mac?
- Nov 13, 2023How to Permanently Erase Data from Mac Startup Disk?
- May 24, 2024Top 7 Best Disk Wiping Software For Mac
- Aug 21, 2023How to Permanently Erase Files and Folders on Your Mac?

Contributing Writer
Steven
Steven has been a senior writer & editor of Donemax software since 2020. He's a super nerd and can't imagine the life without a computer. Over 6 years of experience of writing technical solutions and software tesing, he is passionate about providing solutions and tips for Windows and Mac users.

Editor in chief
Gerhard Chou
In order to effectively solve the problems for our customers, every article and troubleshooting solution published on our website has been strictly tested and practiced. Our editors love researching and using computers and testing software, and are willing to help computer users with their problems