Written byLucienUpdated on Jul 08, 2024
APFS Drive Not Mounting on Mac, Fix It Now
Approved byGerhard Chou
PAGE CONTENT:
The Apple File System (APFS), which came with macOS High Sierra in 2017, makes Apple products faster, safer, and more reliable. However, users sometimes have the annoying problem of an APFS drive failing to mount on a Mac, which means the data on the drive can't be accessed. To effectively fix this problem, you must first understand what is causing it.
This article details finding and fixing an APFS drive that won't mount on your Mac. It covers everything from simple checks to more advanced recovery methods. These steps will help you get back to your important data and ensure that your APFS drives work better and more reliably, whether you're having problems with software or hardware.
Why is it not possible to mount an APFS Drive on Mac?
One possible cause of the APFS container not mounting is corruption in the file directory or volume header. Take an APFS volume, for example; its root tree isn't legitimate.
These three components must be satisfied before the operating system can mount the APFS container, which is necessary whenever we wish to access or store new data on an APFS volume. Attacks by viruses, deletions of critical system files by accident, power outages, hazardous ejection, and other incorrect procedures can all lead to these corruptions.
Diagnosing the issue
It's important to correctly identify the problem before trying to fix it. Here are some steps that will help you figure out what's wrong:
1. Check Physical Connections
Make sure that the drive is connected to your Mac properly. If you still have trouble connecting, use a different wire or port.
2. Verify Power Supply
If you're using an external drive, ensure it has enough power. A normal USB port can't give some drives the power they need.
3. Check for Drive Recognition
Check the left of Disk Utility (Applications > Utilities > Disk Utility) to see if the drive is there. If it does, write down if it's greyed out or what problem message it has.
4. Use System Information
Go to the Apple menu > "About This Mac," then "System Report," and then "USB" (or "Thunderbolt," if your drive is connected that way). See if your drive is on the list. If it's not, there could be a problem with the gear.
Fixing the APFS Drive Not Mounting on Mac Issue
The right fix can be made once the problem has been identified. There are a few ways to fix the issue below:
Method 1: Using Disk Utility
Disk Utility comes with macOS, which can help you fix many drive problems
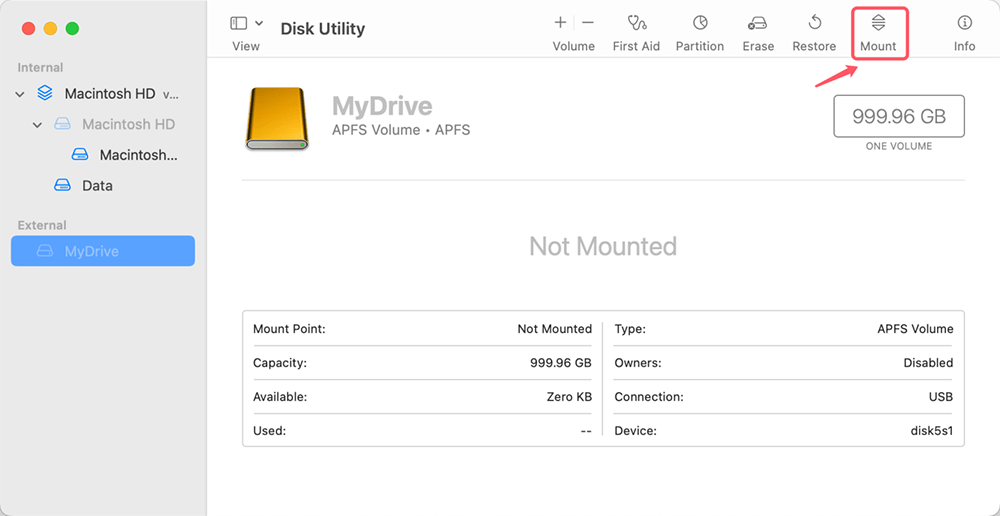
Step 1: Open Disk Utility
- Start by going to Applications > Utilities > Disk Utility.
- In the sidebar, find your APFS drive. Click on Mount button. If the Mount button is grayed out, try to repair it with First Aid.
![Open Disk Utility]()
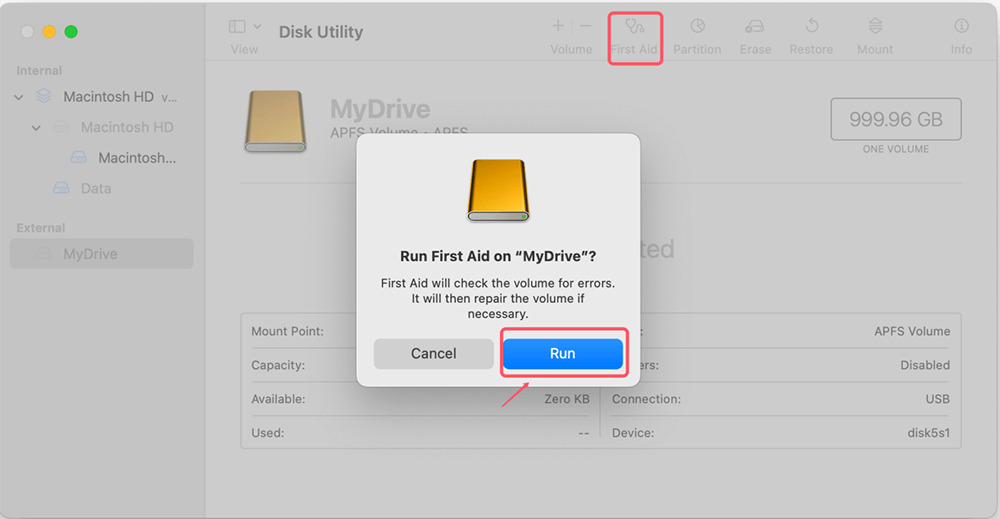
Step 2: Run First Aid
- Click "First Aid" on the drive you want to use.
- To start First Aid, follow the steps shown on the screen.
- Disk Utility will look for problems on the drive and try to fix them.
![Run First Aid]()
Method 2: Using Terminal
Terminal can give you more advanced ways to fix and solve drive problems.
Step 1: Open Terminal
- Launch the Terminal by going to Applications > Utilities > Terminal.
Step 2: Check Drive Status
- You need to type diskutil list and press Enter.
- Pick out your APFS drive from the list.
Step 3: Attempt to Mount the Drive
- Type diskutil mount /dev/diskX (where "X" should be the name of your drive, like disk2).
- Check to see if the drive mounts by pressing Enter.
Step 4: Force Mount (If Necessary)
- Type sudo diskutil mountDisk /dev/diskX (change "X" with the name of your drive) if the drive still won't mount.
- If asked, type in your password and press Enter. Then check to see if the drive boots.
Method 3: Resetting NVRAM/PRAM
Some system problems can be fixed by resetting the NVRAM or PRAM.
Step 1: Shut Down Your Mac
- Turn off everything on your Mac.
Step 2: Reset NVRAM/PRAM
- Hold down Option, Command, P, and R as soon as you turn on your Mac.
- Press and hold the keys for 20 seconds, then let go.
Method 4: Using macOS Recovery
Some tools in macOS Recovery can help you fix or restart macOS.
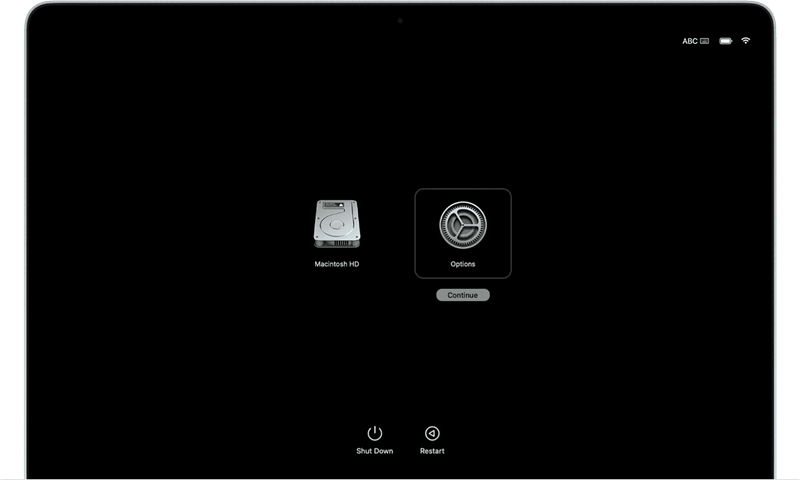
Step 1: Enter Recovery Mode
- Turn your Mac back on and hold down Command + R (for Intel Mac) or Power button (for Apple silicon Mac) until the Apple sign appears or you see macOS Recovery screen. Choose Options, click on Continue button.
![Enter Recovery Mode]()
Step 2: Open Disk Utility
- In the Utilities window for macOS, choose Disk Utility and click Start.
- Follow the steps in Method 1 to mount the drive using Disk Utility.
Step 3: Reinstall macOS (If Necessary)
- If the drive can be mounted in recovery mode but not in normal mode, you should install macOS again.
Recover Unmountable APFS Drive Data on Mac
Donemax Data Recovery for Mac is the best APFS recovery software that lets us recover lost data from APFS files that can't be mounted or damaged. It can also get back deleted or lost data from an APFS folder, an APFS drive that has been formatted, an external hard drive, a USB flash drive, an SD card, a memory card, a pen drive, and so on. It can also get back data deleted or lost from an APFS hard drive that can't be mounted, read, or accessed.
Step 1. Download and install Donemax Data Recovery on your Mac. Make sure the APFS drive is connected to your Mac.
Step 2. Select the APFS drive after opening Donemax Data Recovery for Mac.

Step 3. Click on Scan button to deeply scan the APFS drive.

Step 4. Preview and recover lost files after scanning.

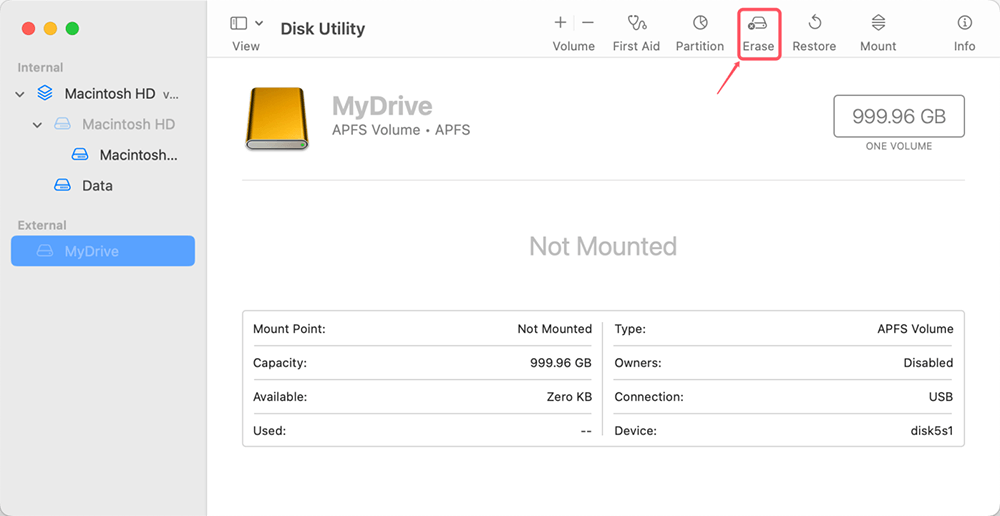
When the data recovery is done, please use the disk tool to choose the unmounted APFS drive and then click the "Erase" button to format it. After the format is done, the unmounted APFS drive will work again.
Conclusion:
It can be scary when an APFS drive doesn't mount on a Mac, but if you take the right steps, you can usually fix the problem and get to your files again. There are many ways to solve the problem, such as using Disk Utility to check physical connections and handling APFS snapshots and Terminal commands. Resetting NVRAM and SMC, updating macOS, and getting help from an expert data recovery service can also help.
By doing these steps and taking precautions like making regular backups and using safe removal methods, you can reduce the number of mounting problems in the future and make sure that your APFS drives work better.
FAQs About Fixing Unmounted APFS Drive on Mac
1. How to mount an APFS drive on Mac?
- Open Disk Utility.
- Select the target drive.
- Click on Mount button.
If it still does not work, just click on First Aid button to repair the APFS drive.
2. How to recover lost data from unmounted APFS drive?
Data recovery software can help you recover lost data from unmounted APFS drive or erased APFS drive:
- Download and install Donemax Data Recovery for Mac.
- Open Donemax Data Recovery for Mac, select the APFS drive.
- Click on Scan button.
- Preview and recover lost files.
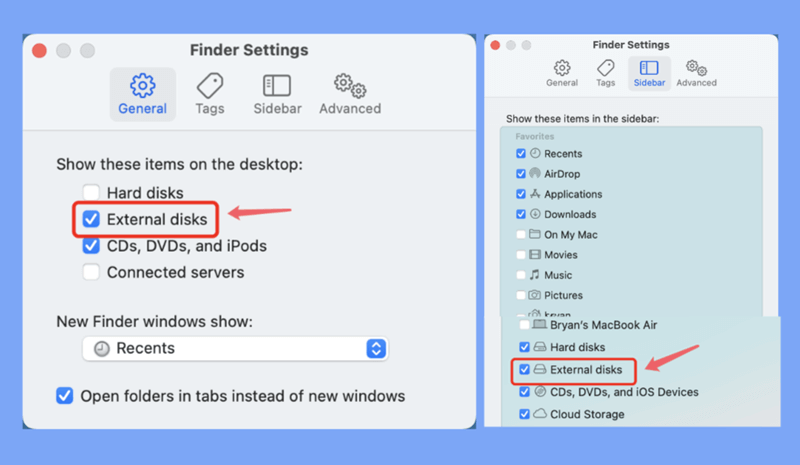
3. How to fix APFS drive not showing up on Mac?
- Open a Finder on Mac.
- Click Finder on Apple menu and choose Settings.
- Open Finder Settings.
- Click General and Sidebar.
- Select External disks.
![Select External disks]()
Related Articles
- Dec 18, 2024How to Use SanDisk Professional G-DRIVE on Mac?
- Feb 24, 2025Fix a Damaged or Dead USB Flash Drive Without Losing Data
- Feb 18, 2025Fix Unknown USB Device (Device Descriptor Request Failed): A Comprehensive Guide
- Dec 05, 2024How to Add an APFS Volume on Mac: A Comprehensive Guide
- Dec 16, 2024My Brand New External Hard Drive is Read-Only on Mac, How to Fix This Issue?
- Feb 17, 2024How to Format SK Hynix Beetle X31 SSD for Mac?

Contributing Writer
Lucien
Lucien is a writer and a chief programmer of Donemax software who has worked in the company for 5+ years. He has written much of the content on the site and devotes to providing troubleshooting and solution for Windows and Mac users including disk cloning, data recovery, migration, eraser, error fixes.

Editor in chief
Gerhard Chou
In order to effectively solve the problems for our customers, every article and troubleshooting solution published on our website has been strictly tested and practiced. Our editors love researching and using computers and testing software, and are willing to help computer users with their problems