PAGE CONTENT:
Storage devices are vital to our daily lives in this digital age, whether we use them for work or fun. It is known for being reliable and fast; the SK Hynix Beetle X31 SSD is a cutting-edge storage option. If you have a Mac and want to format this SSD to work best with your system, you're in the right place.
Let's take a moment to talk about what makes the SK Hynix Beetle X31 SSD unique before we start formatting it. The read and write speeds on this SSD are lightning-fast, which makes it perfect for jobs that need fast storage.

It has storage sizes ranging from small to large, so it can meet the needs of various users, from casual users to professionals who work with large files. In this guide, We'll show you how to format the SK Hynix Beetle X31 SSD for your Mac.
Why Format SSD for Mac?
Formatting a storage device for Mac ensures it works well with Apple's operating system. Users can easily use macOS's features, such as Time Machine backups, FileVault security, and more, on the SK Hynix Beetle X31 SSD after formatting it for Mac.
Formatting also prepares the SSD for file systems that only work on macOS, like APFS (Apple File System), making it faster and more reliable. It ensures that the SSD works perfectly with Macs, giving users a smooth experience and letting them maximize their storage options on macOS devices.
- Format SK Hynix Beetle X31 SSD to fix read-only issue.
- Format SK Hynix Beetle X31 SSD when it is not mounting on your Mac.
- The SK Hynix Beetle X31 SSD gets crashed, format it on your Mac.
- Format SK Hynix Beetle X31 SSD for both Windows and macOS.
- Format SK Hynix Beetle X31 SSD before selling or donating it.
- Remove useless data from SK Hynix Beetle X31 SSD.
Steps to Format SK Hynix Beetle X31 SSD for Mac
Step 1. Connect SK Hynix Beetle X31 SSD to your computer.
First, use a USB-C or Thunderbolt connection that works with your Mac to connect the SK Hynix Beetle X31 SSD. Make sure that the link is safe.
Step 2. Backup important data.
It's important to back up any important data on the SSD before you start the formatting process. If you don't want to lose your files, have a backup before you format.
Step 3. Open Disk Utility on your Mac.
Go to your Mac and open Disk Utility. Disk Utility is in the "Applications" folder in the "Utilities" folder. You can also use Spotlight to find it quickly.
Step 4. Select the SK Hynix Beetle X31 SSD.
The left side of Disk Utility shows a list of available drives and folders. From the list, find and choose the SK Hynix Beetle X31 SSD.
Step 5. Format SK Hynix Beetle X31 SSD.
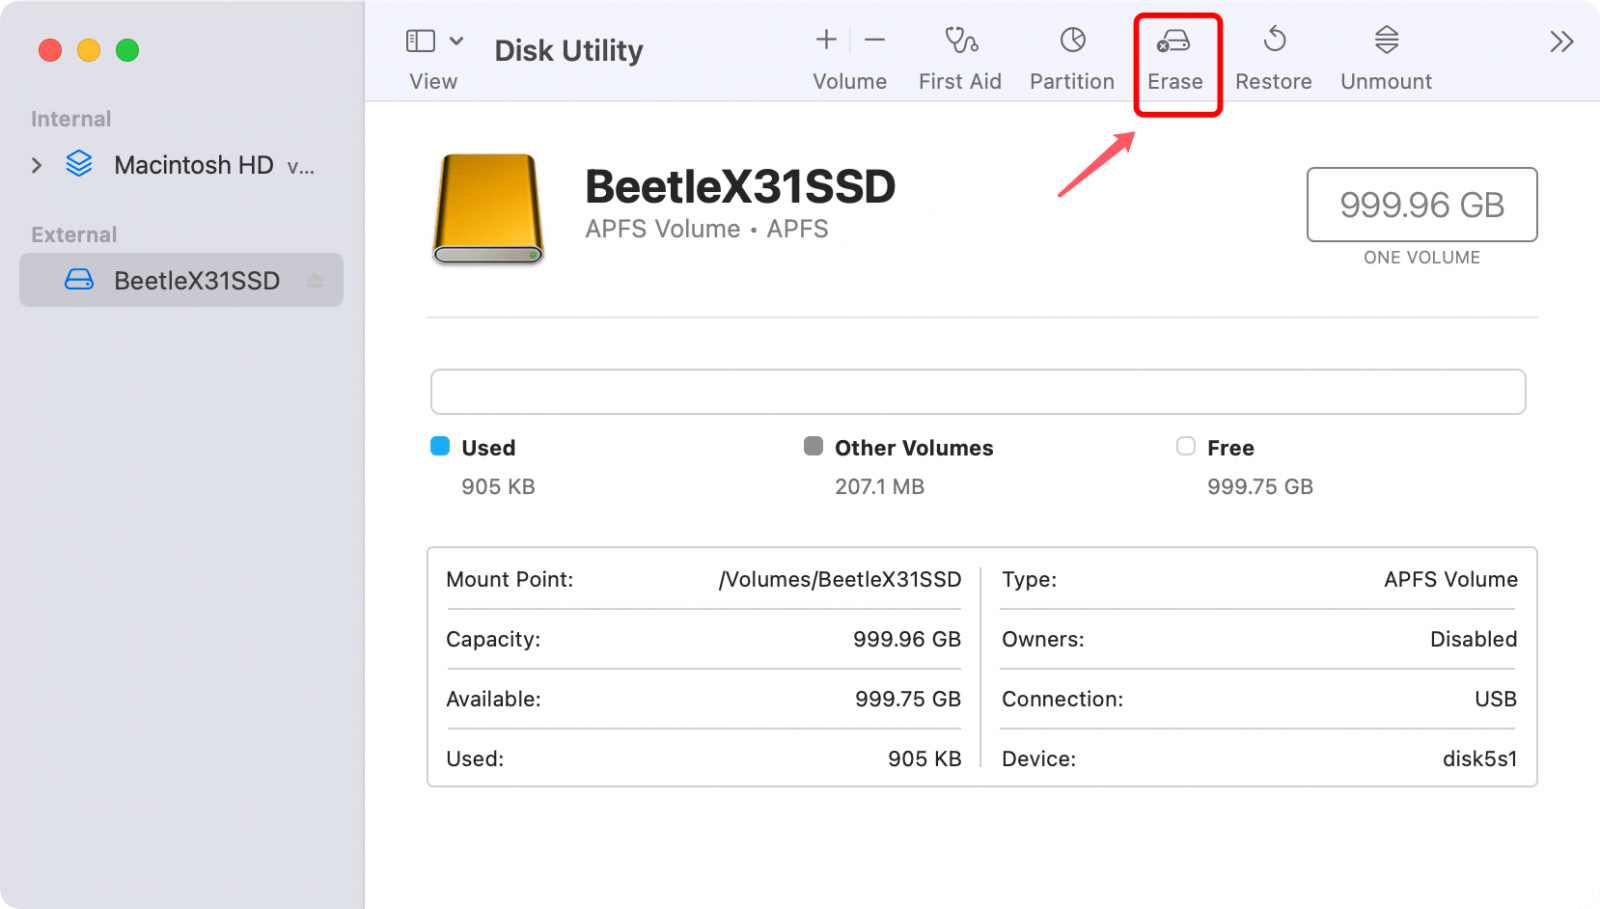
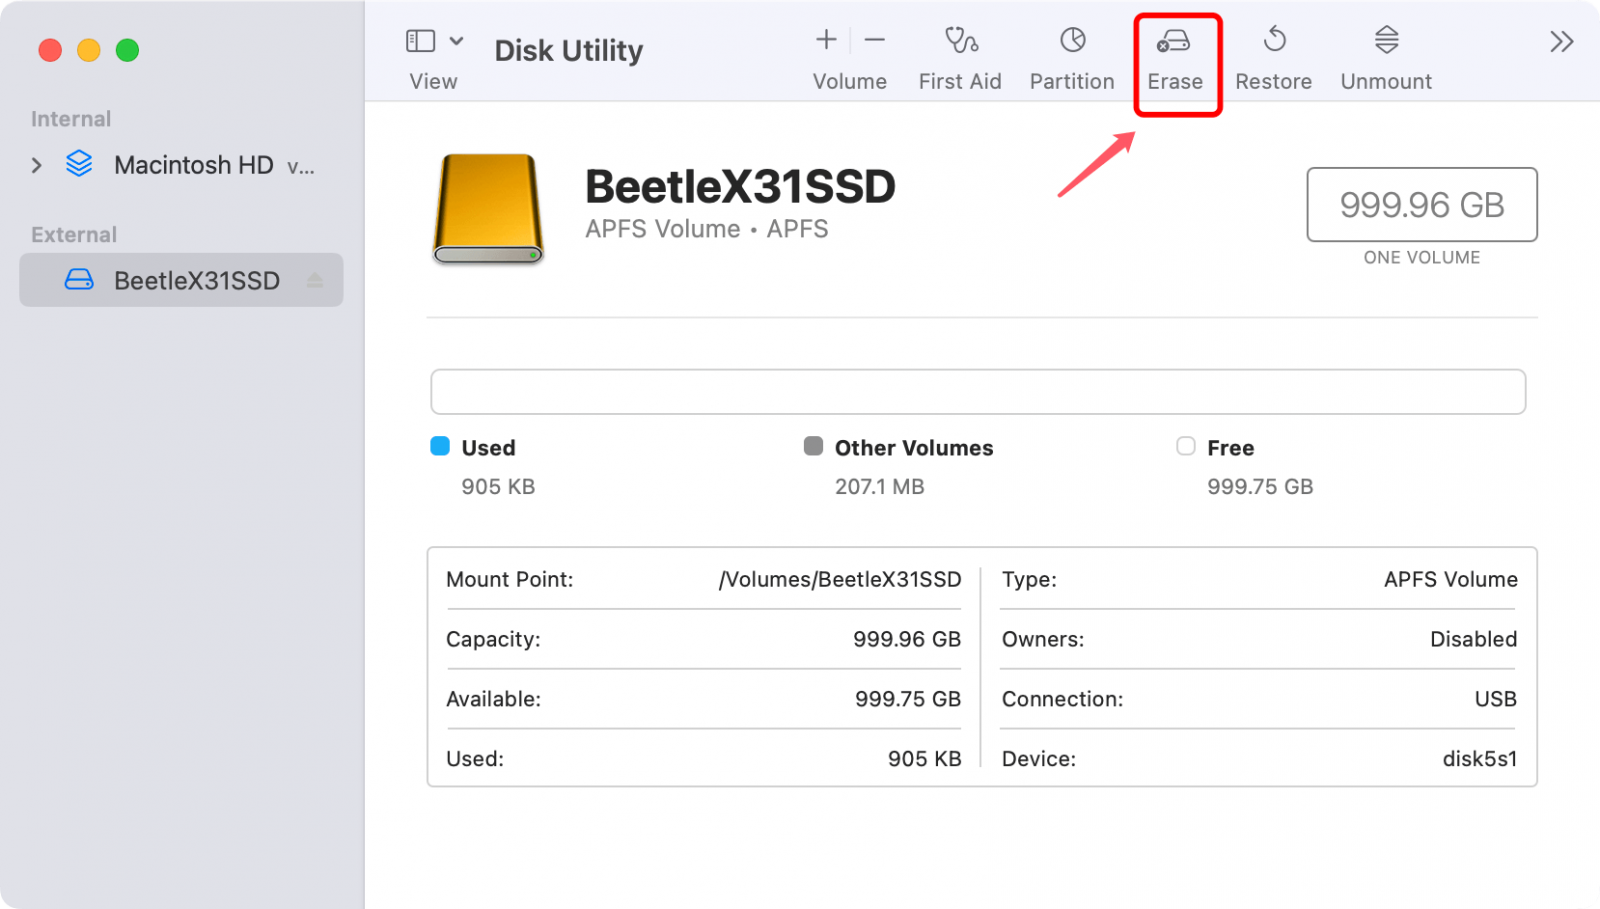
Choose the "Erase" button at the top of the Disk Utility window once the SSD has been chosen.
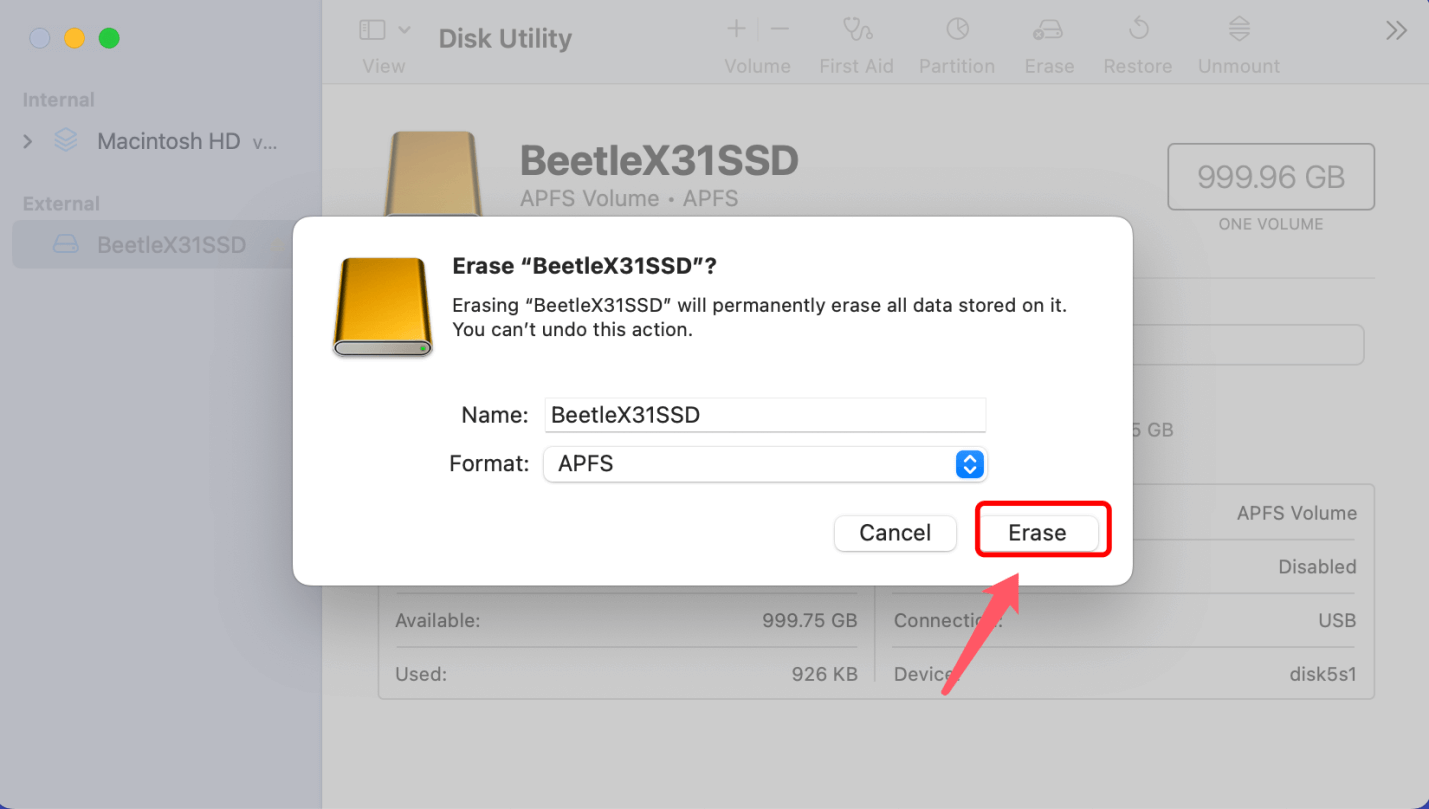
Pick the format you want for the SSD in the erase box. Choose "APFS" (Apple File System) as the format for the best speed and compatibility with macOS. If you want to use the SK Hynix Beetle X31 SSD on both Windows and macOS, just select ExFAT.
Check the settings for erasing again to make sure they are right. When you're ready, click "Erase" to start the formatting. Disk Utility will erase the SSD and format it based on your chosen choices.
Step 6. Finish the process.
Wait until Disk Utility is done formatting the drive. When it's done, you'll see a message letting you know that the SSD has been formatted and is ready to use with your Mac.
Step 7. Eject SSD
Once the formatting is done, you can safely remove the SK Hynix Beetle X31 SSD from your Mac. To do this, click the "eject" button next to the SSD's name in Disk Utility or drag the SSD icon to the Trash.
Optimize SK Hynix Beetle X31 SSD for Mac
Correct setup is very important if you want your SK Hynix Beetle X31 SSD to work at its best on your Mac. If you follow the steps in this guide, you can ensure that your SSD is ready to use with macOS and get the most out of its exceptionally fast read and write speeds. Doing everything right is important so your SSD works well with your Mac.
It includes copying your important files and picking the right format and partition scheme. Knowing why formatting is important and doing what it says to do will help you get the most out of your SK Hynix Beetle X31 SSD and make storage on your macOS-powered devices run more smoothly and efficiently.
FAQs About Formatting SK Hynix Beetle X31 SSD for Mac
1. How to format SK Hynix Beetle X31 SSD for Mac?
- Connect the SK Hynix Beetle X31 SSD to your Mac.
- Go to Launchpad > Other, find and open Disk Utility.
- Select the SK Hynix Beetle X31 SSD and click Erase.
- Select a file system, then click Erase again.
- Once the process gets finished, click Done.
![format SK Hynix Beetle X31 SSD for Mac]()
2. How to recover lost data from a formatted SK Hynix Beetle X31 SSD on Mac?
It is recommended to back up your data before formatting your SK Hynix Beetle X31 SSD. However, if you’ve lost data from your SK Hynix Beetle X31 SSD and don’t have a backup, you still can get the lost data back using data recovery software.
- Download and install data recovery software - Donemax Data Recovery on your computer. Then open it.
- Select the SK Hynix Beetle X31 SSD.
- Click on Scan button to deeply scan the SK Hynix Beetle X31 SSD.
- After scanning, select the wanted files and save them by clicking on Recover button.
![format SK Hynix Beetle X31 SSD for Mac]()
3. Can I use a SK Hynix Beetle X31 SSD with NTFS file system on Mac without formatting?
Yes, you can install a third-party NTFS for Mac tool, then open it on your Mac. Just select the NTFS SK Hynix Beetle X31 SSD and click Enable Writable button. Then you can use the NTFS SK Hynix Beetle X31 SSD on your Mac without any limitation, including writing data to the SK Hynix Beetle X31 SSD on Mac.

4. How to fix damaged SK Hynix Beetle X31 SSD on Mac?
- Connect the SK Hynix Beetle X31 SSD to your Mac.
- Open Disk Utility.
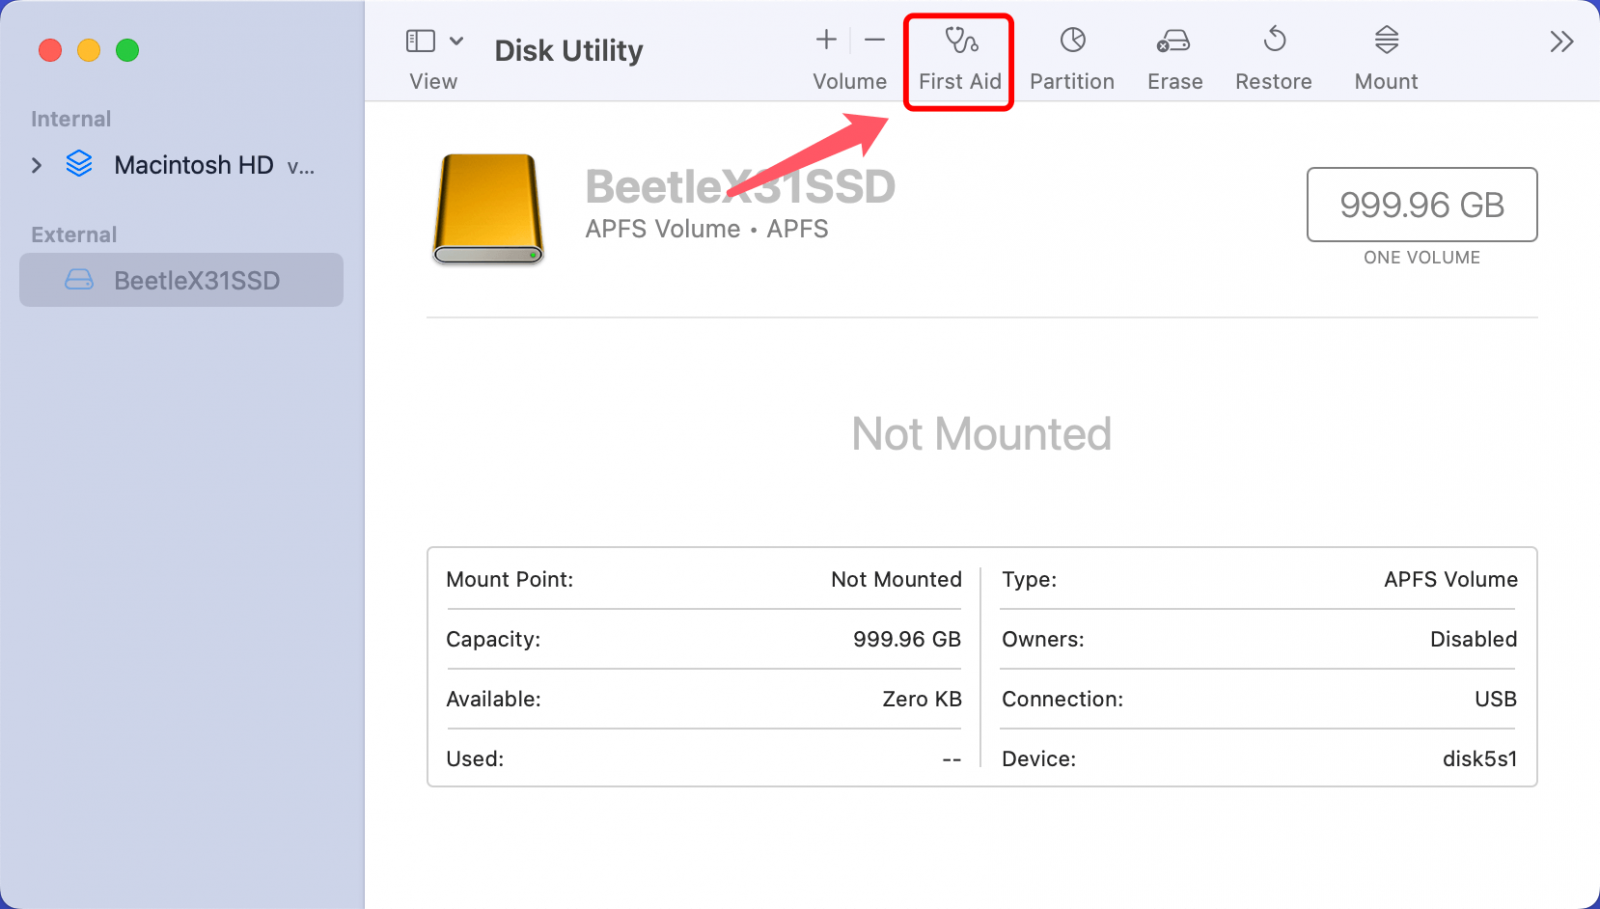
- Select the SK Hynix Beetle X31 SSD and click on First Aid button.
- Repair the damaged SK Hynix Beetle X31 SSD.
![format SK Hynix Beetle X31 SSD for Mac]()
5. SK Hynix Beetle X31 SSD is not mounting on Mac, how to fix this issue?
Open Disk Utility on Mac, then select the SK Hynix Beetle X31 SSD, click on Mount button.
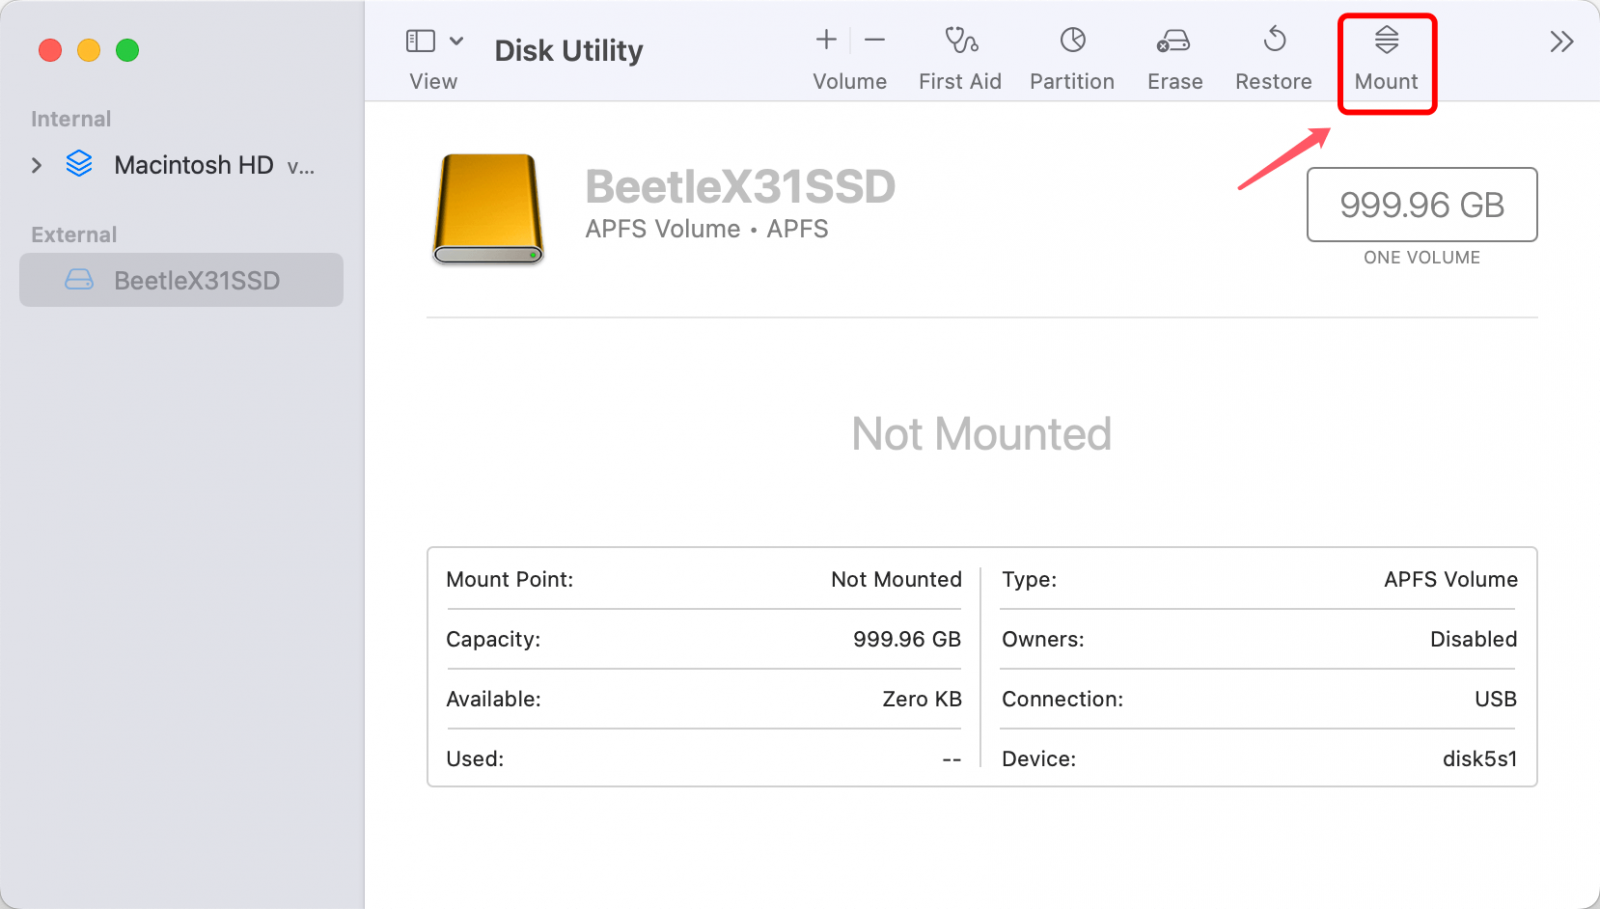
If mount button is greyed out, just click Erase or First Aid to repair it.
Conclusion:
In conclusion, formatting the SK Hynix Beetle X31 SSD for Mac ensures it works perfectly with Apple's operating system. Users can make data safer and easier to access using macOS features like Time Machine backups and FileVault protection.
Formatting also prepares the SSD for file systems that only work on macOS, like APFS, increasing its speed and stability. Following the steps in this guide, you can properly format your SK Hynix Beetle X31 SSD for Mac. It will let you use all its features and make storage on your macOS-powered devices run smoothly.
Related Articles
- Mar 11, 2025How to Format Seagate One Touch HDD or SSD: A Step-by-Step Guide
- Jun 29, 2023How to Format A Hard Drive to NTFS on Mac?
- Jun 29, 2024Crucial Portable SSD Not Mounting on Mac, Fix It Now
- Feb 05, 2025Fix/Repair Unallocated External Hard Drive without Losing Data
- Jan 02, 2025Fix External Hard Drive Not Showing Up After Force Ejecting: A Detailed Guide
- Mar 31, 2025[11 Fixes] Fix Seagate External Hard Drive Not Recognized by Mac – Guide 2025

Lucien
Lucien is a writer and a chief programmer of Donemax software who has worked in the company for 5+ years. He has written much of the content on the site and devotes to providing troubleshooting and solution for Windows and Mac users including disk cloning, data recovery, migration, eraser, error fixes.

Gerhard Chou
In order to effectively solve the problems for our customers, every article and troubleshooting solution published on our website has been strictly tested and practiced. Our editors love researching and using computers and testing software, and are willing to help computer users with their problems
