Before we start: Donemax NTFS for Mac is an easy-to-use and powerful Mac disk management tool. It can help you mount or force mount any drive including NTFS USB drive on Mac and grant full read-write access to NTFS drives on Mac.
PAGE CONTENT:
In today's digital world, USB drives have become indispensable for transferring and storing data. However, encountering a USB drive that refuses to mount on your Mac can be both frustrating and concerning. Fortunately, this issue is usually solvable with some troubleshooting steps and tools. In this article, we'll explore the reasons behind this problem and guide you through fixing it. By the end, you'll have a comprehensive understanding of how to resolve USB mounting issues and prevent them in the future.
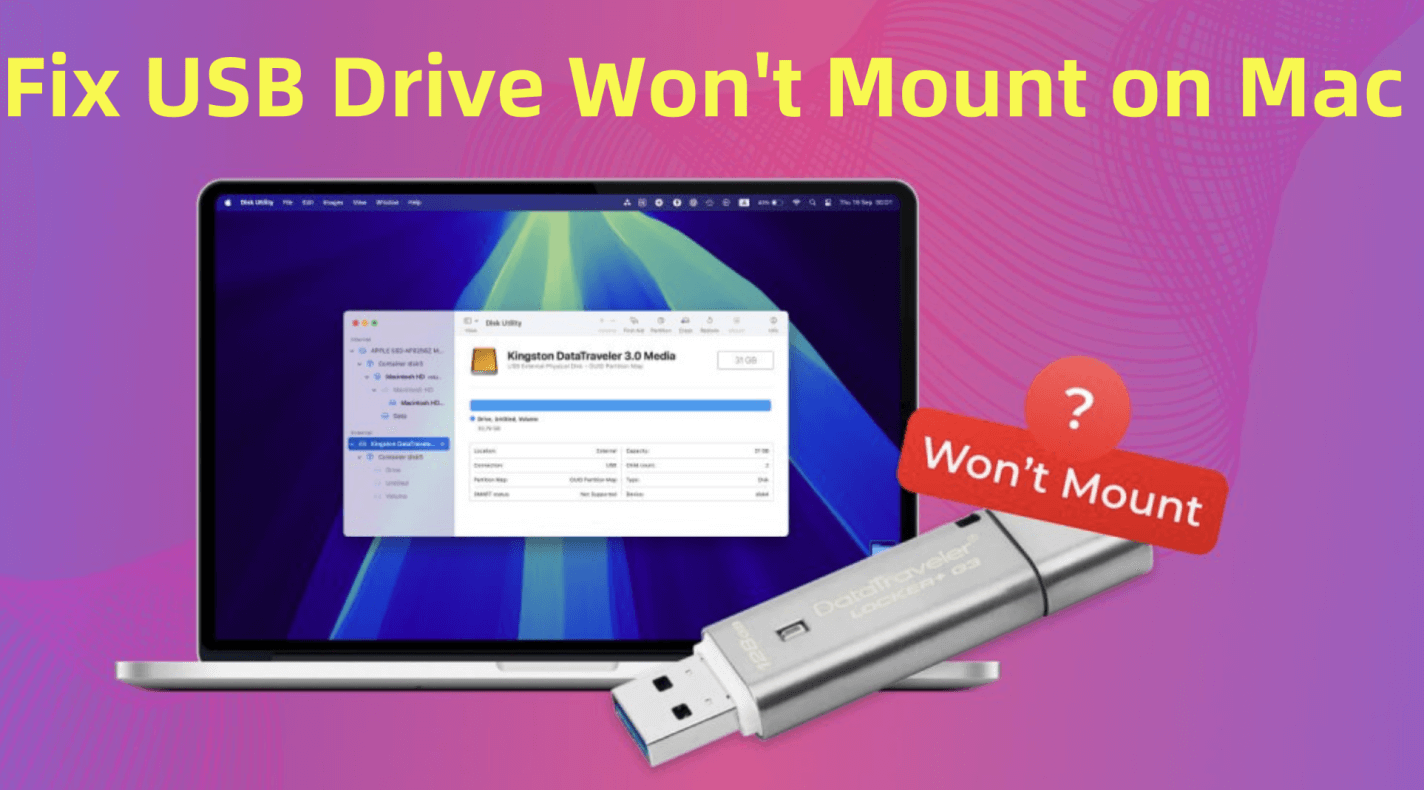
Why USB Drive Won't Mount on Mac?
To fix a USB drive that won't mount on a Mac, it's essential to understand what "mounting" means. When you connect a USB drive to your Mac, the operating system assigns it a directory so you can access its contents through Finder. If a drive doesn't mount, macOS doesn't recognize it as accessible storage, leaving you unable to view or retrieve its files.
Common reasons for a USB drive not mounting include:
- File System Incompatibility: If the USB drive uses a file system that macOS doesn't support, it may fail to mount.
- Corruption: The drive may have become corrupted due to improper ejection or other issues.
- Hardware Problems: A damaged port, cable, or drive itself could prevent mounting.
- macOS Glitches: Temporary software errors or outdated systems can interfere with mounting.
Now that we've identified potential culprits, let's dive into the solutions.
How to Fix USB Drive Won't Mount on Mac?
#1 Preliminary Checks
Before delving into advanced fixes, rule out simple problems that might be preventing your USB drive from mounting:
- Check the Physical Connection: Ensure the USB drive is firmly inserted into the port. A loose connection might prevent the Mac from detecting it. Try using a different USB port or cable to see if the issue persists.
- Test on Another Device: Plug the USB drive into another computer, whether it's a Mac or a PC. If the drive works there, the issue might be specific to your Mac.
- Inspect for Damage: Examine the USB drive and cable for visible signs of damage. A cracked casing or bent connector could render the device inoperable.
- Ensure macOS is Updated: An outdated operating system can sometimes cause hardware compatibility issues. Go to System Preferences > Software Update or System Settings > General > Software Update and install the latest updates.
If these basic checks don't resolve the problem, it's time to try specific troubleshooting techniques.
#2 Quick Fixes to Try First
- Restart Your Mac: A simple restart often resolves minor system glitches. Unplug the USB drive, restart your Mac, and reconnect the drive.
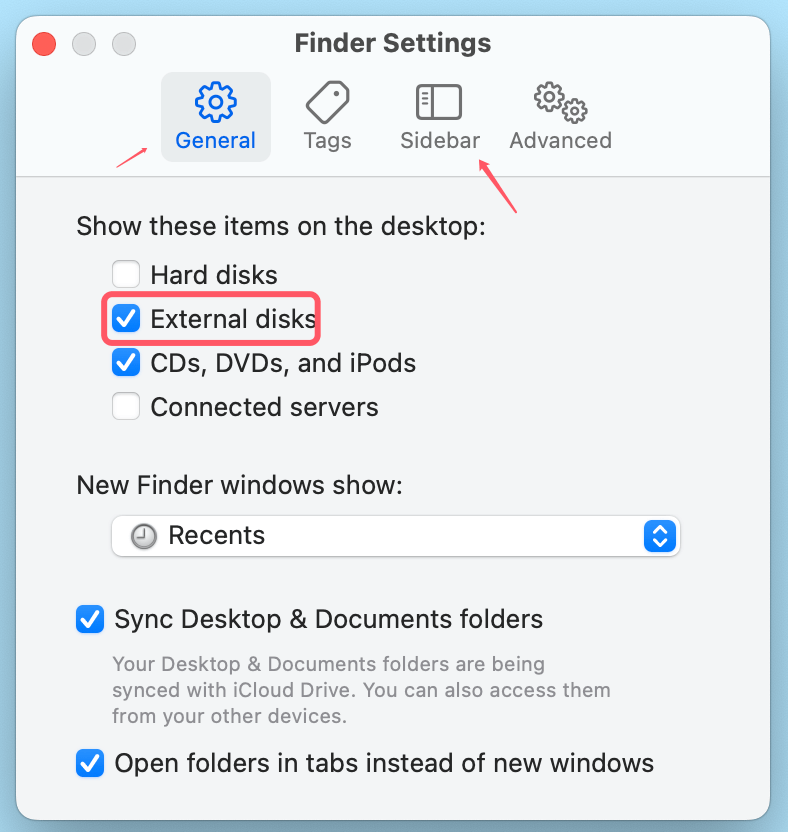
- Check Finder Settings: Sometimes, your Mac recognizes the USB drive, but it doesn't appear in Finder or on desktop.
- Open Finder.
- Go to Finder > Settings.
- When Finder Settings window opens, click General and Sidebar.
- Ensure External Disks is checked.
![Fix USB Drive Won't Mount on Mac]()
- Look for the Drive in Disk Utility: Open Disk Utility (Applications > Utilities > Disk Utility) to check if the drive is listed. If it appears, proceed with mounting or repairing the drive (detailed below).
#3 Use Disk Utility
Disk Utility is one of macOS's most powerful tools for diagnosing and resolving storage device issues. It allows you to view, manage, and repair drives connected to your Mac. If your USB drive is not mounting, Disk Utility is the first place you should look after performing basic checks. Here's a deeper dive into how to use Disk Utility to address the problem.
Checking for the USB Drive:
- Access Disk Utility
- Navigate to Applications > Utilities > Disk Utility or search for it using Spotlight.
- Once open, look at the left-hand panel, which lists all storage devices connected to your Mac.
- Recognizing the USB Drive
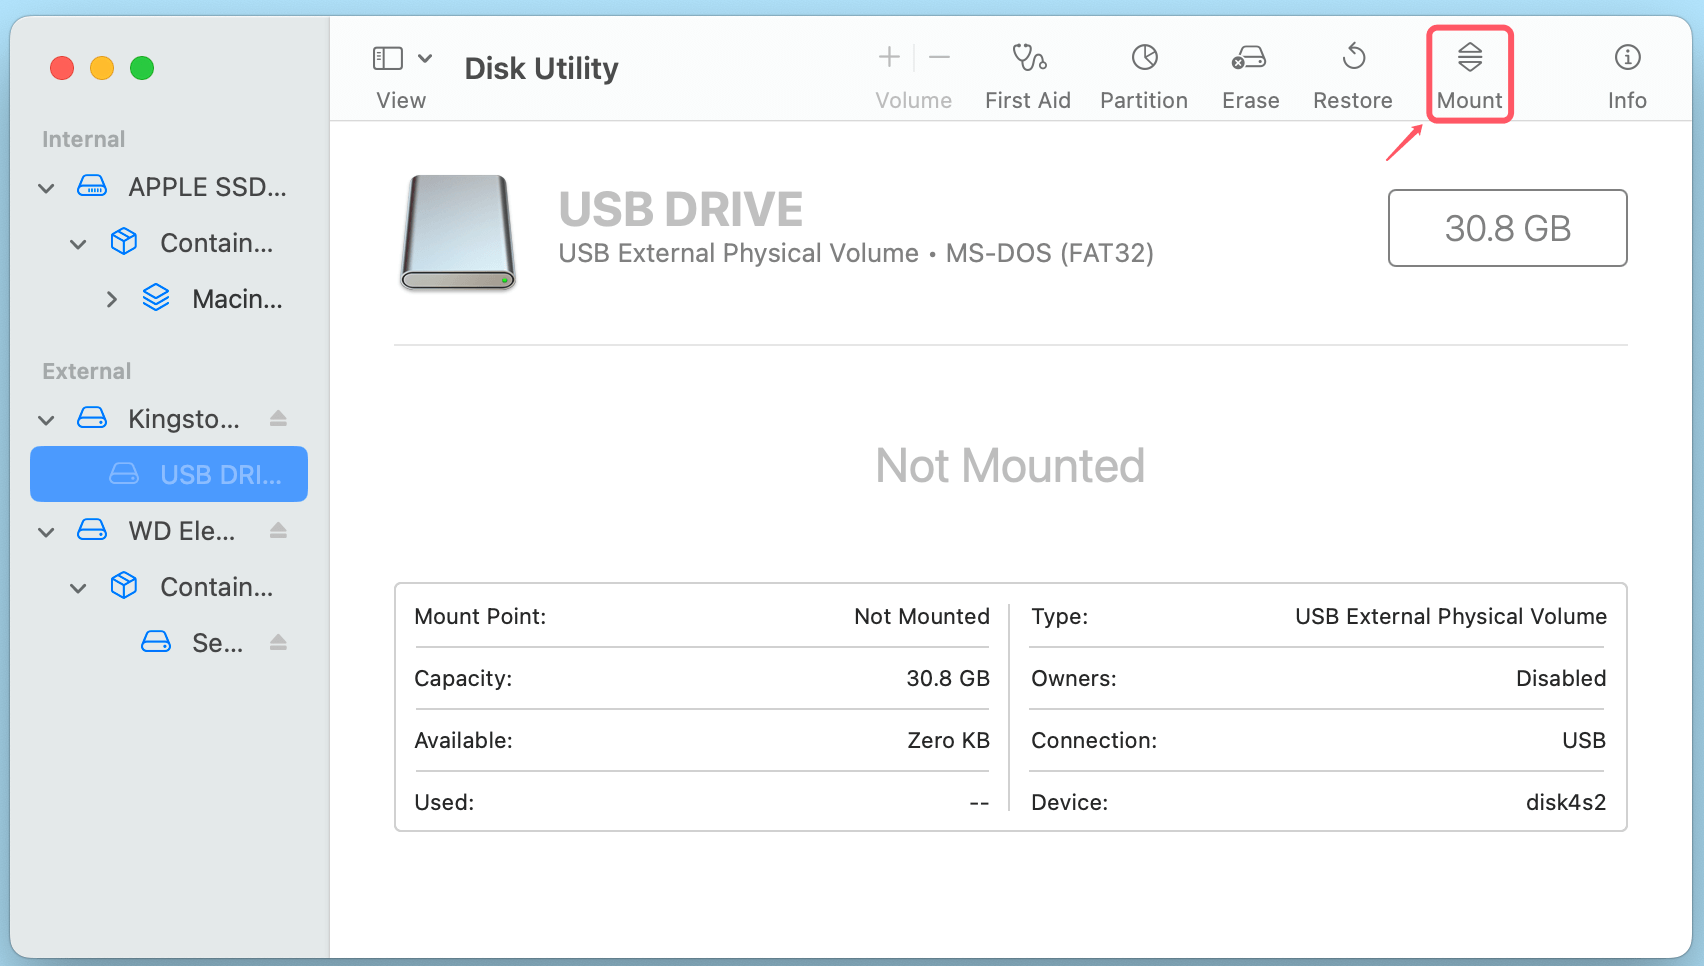
- If the USB drive appears but is greyed out, macOS recognizes it as connected hardware, but it hasn't been mounted.
- If the drive doesn't appear at all, this could indicate a more severe hardware or software problem. In such cases, revisit your connections, test the drive on another device, or consider advanced tools like Terminal commands to check for hidden devices.
Running First Aid:
First Aid is a built-in feature of Disk Utility designed to check for and repair errors on storage devices. Corruption or file system errors can prevent your USB drive from mounting, and First Aid often resolves such issues.
- How to Run First Aid
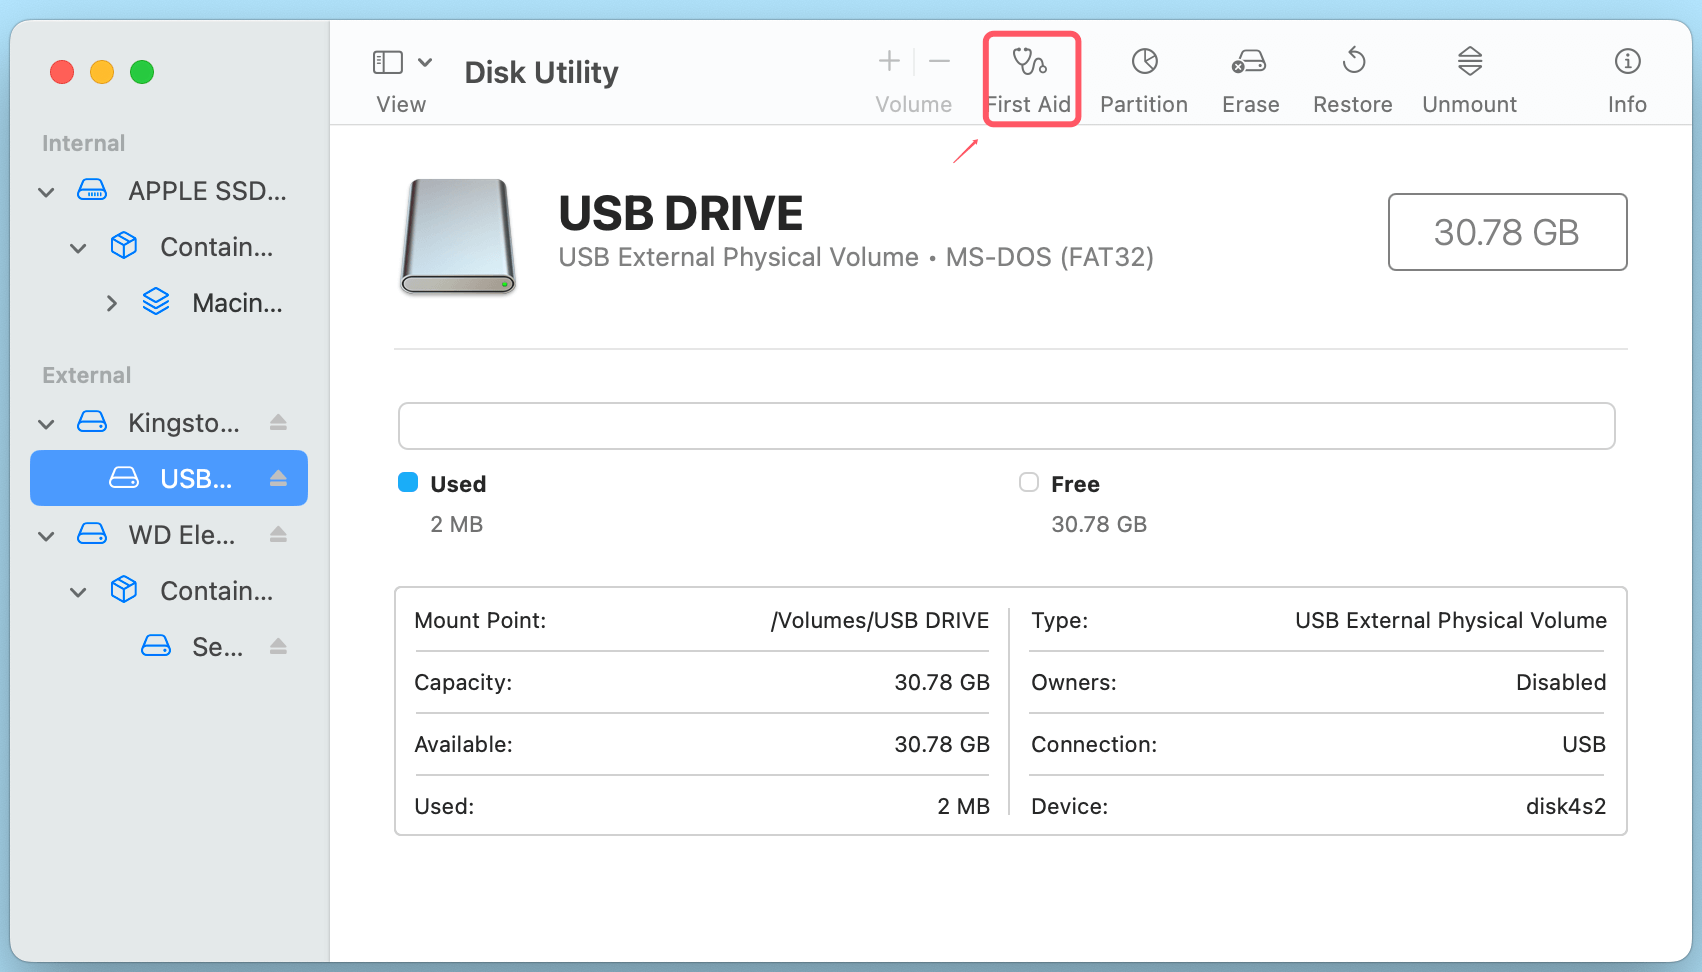
- In Disk Utility, select your USB drive from the left-hand panel.
- Click the First Aid button in the top toolbar.
![Fix USB Drive Won't Mount on Mac]()
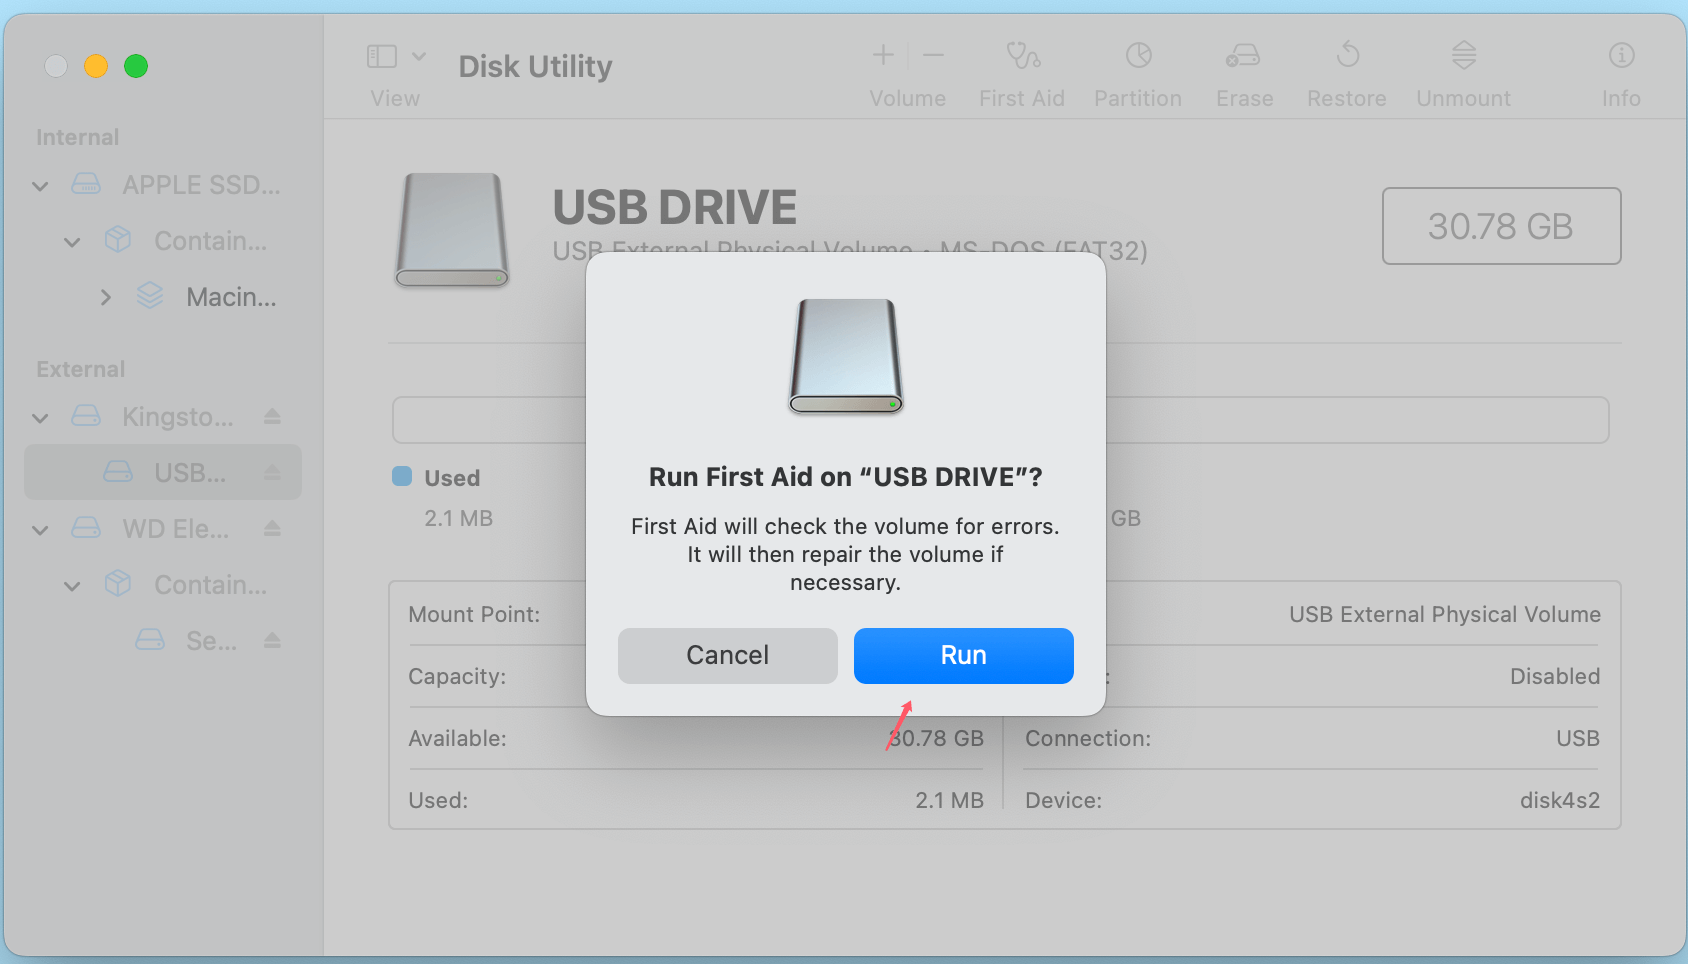
- Confirm by clicking Run when prompted.
![Fix USB Drive Won't Mount on Mac]()
- What First Aid Does: First Aid checks the drive's file system for errors, repairs issues if possible, and ensures the structure of the drive is intact. For example, if your USB drive wasn't ejected properly in the past, First Aid can resolve the residual errors left behind by the abrupt disconnection.
- Interpreting Results
- If First Aid completes successfully, you’ll see a message stating that the drive has been repaired or no errors were found.
- If First Aid reports errors that it cannot fix, your drive might require reformatting (discussed later), or you may need professional recovery services.
Manually Mounting the Drive:
If your USB drive appears in Disk Utility but isn't mounted, you can attempt to mount it manually.
- Steps to Manually Mount the Drive
- Select your USB drive from the left-hand panel.
- Click the Mount button in the toolbar.
![Fix USB Drive Won't Mount on Mac]()
- What Happens When You Mount a Drive: Mounting assigns a location in macOS where the USB drive’s data can be accessed. If the drive mounts successfully, it will appear in Finder and become accessible for reading and writing.
- When Manual Mounting Fails: If the manual mounting process fails, there could be deeper issues with the drive's file system or compatibility. This is when more advanced solutions, such as Terminal commands or reformatting, come into play.
Reformatting the Drive in Disk Utility:
Reformatting should be your last resort if all other Disk Utility solutions fail. It's a drastic step because it erases all the data on the drive, but it can fix severe file system corruption or configuration issues that prevent mounting.
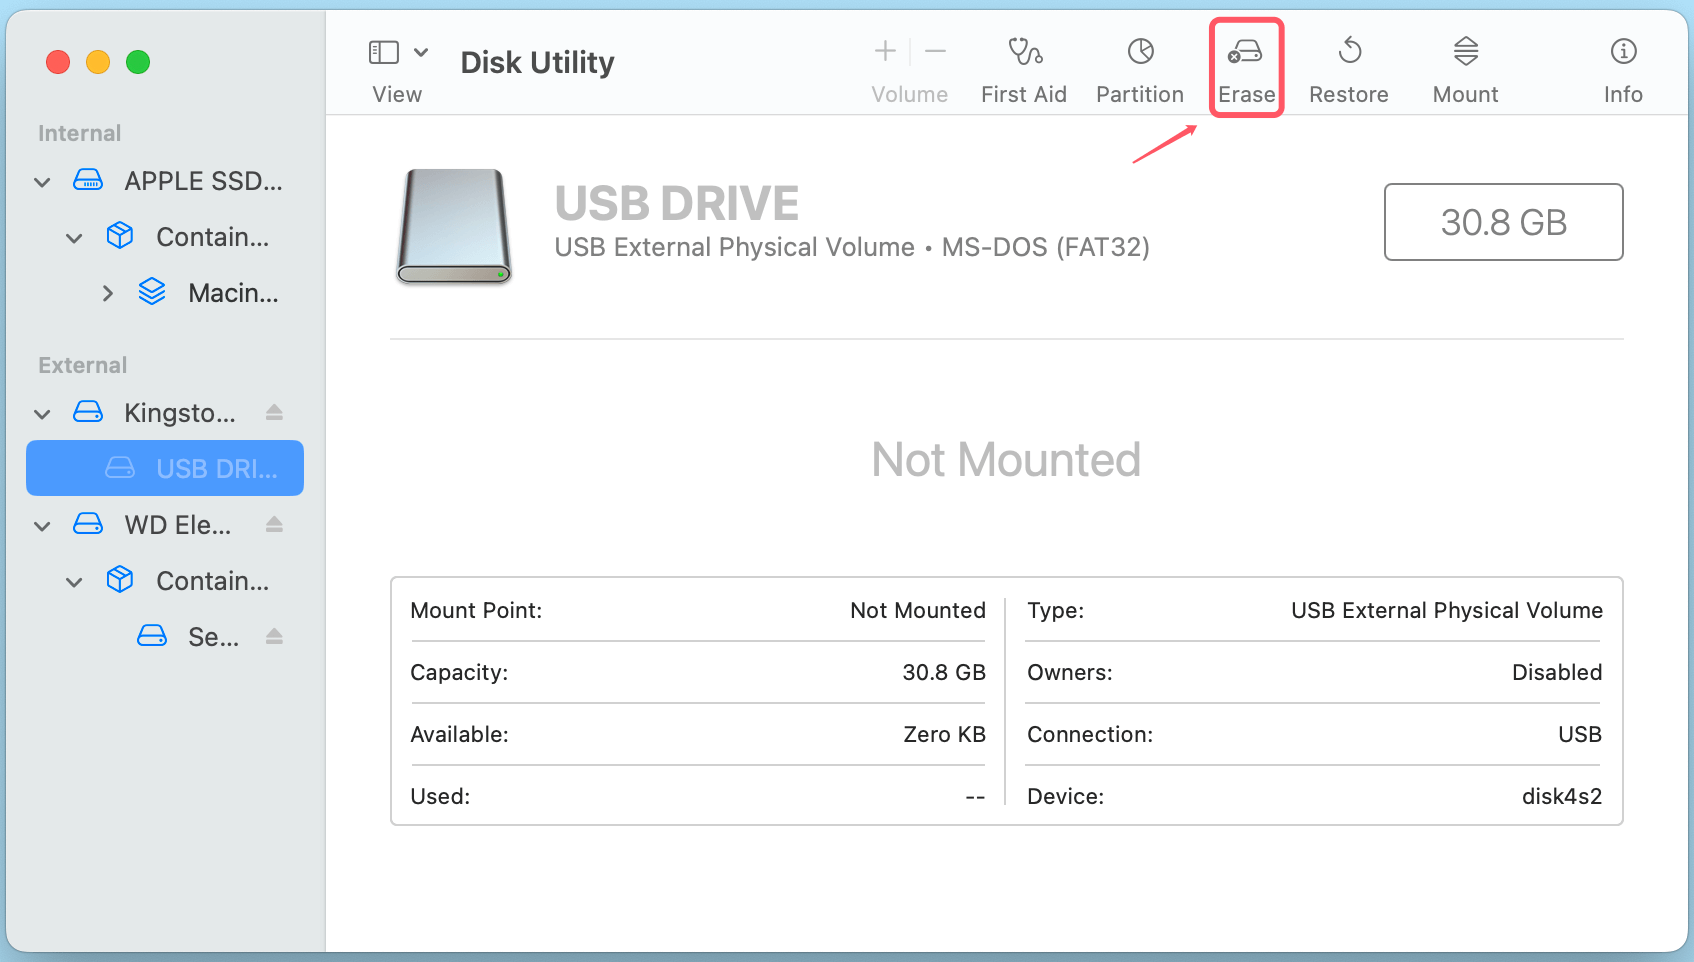
- Steps to Reformat a Drive
- Select the USB drive in Disk Utility.
- Click the Erase button in the toolbar.
![Fix USB Drive Won't Mount on Mac]()
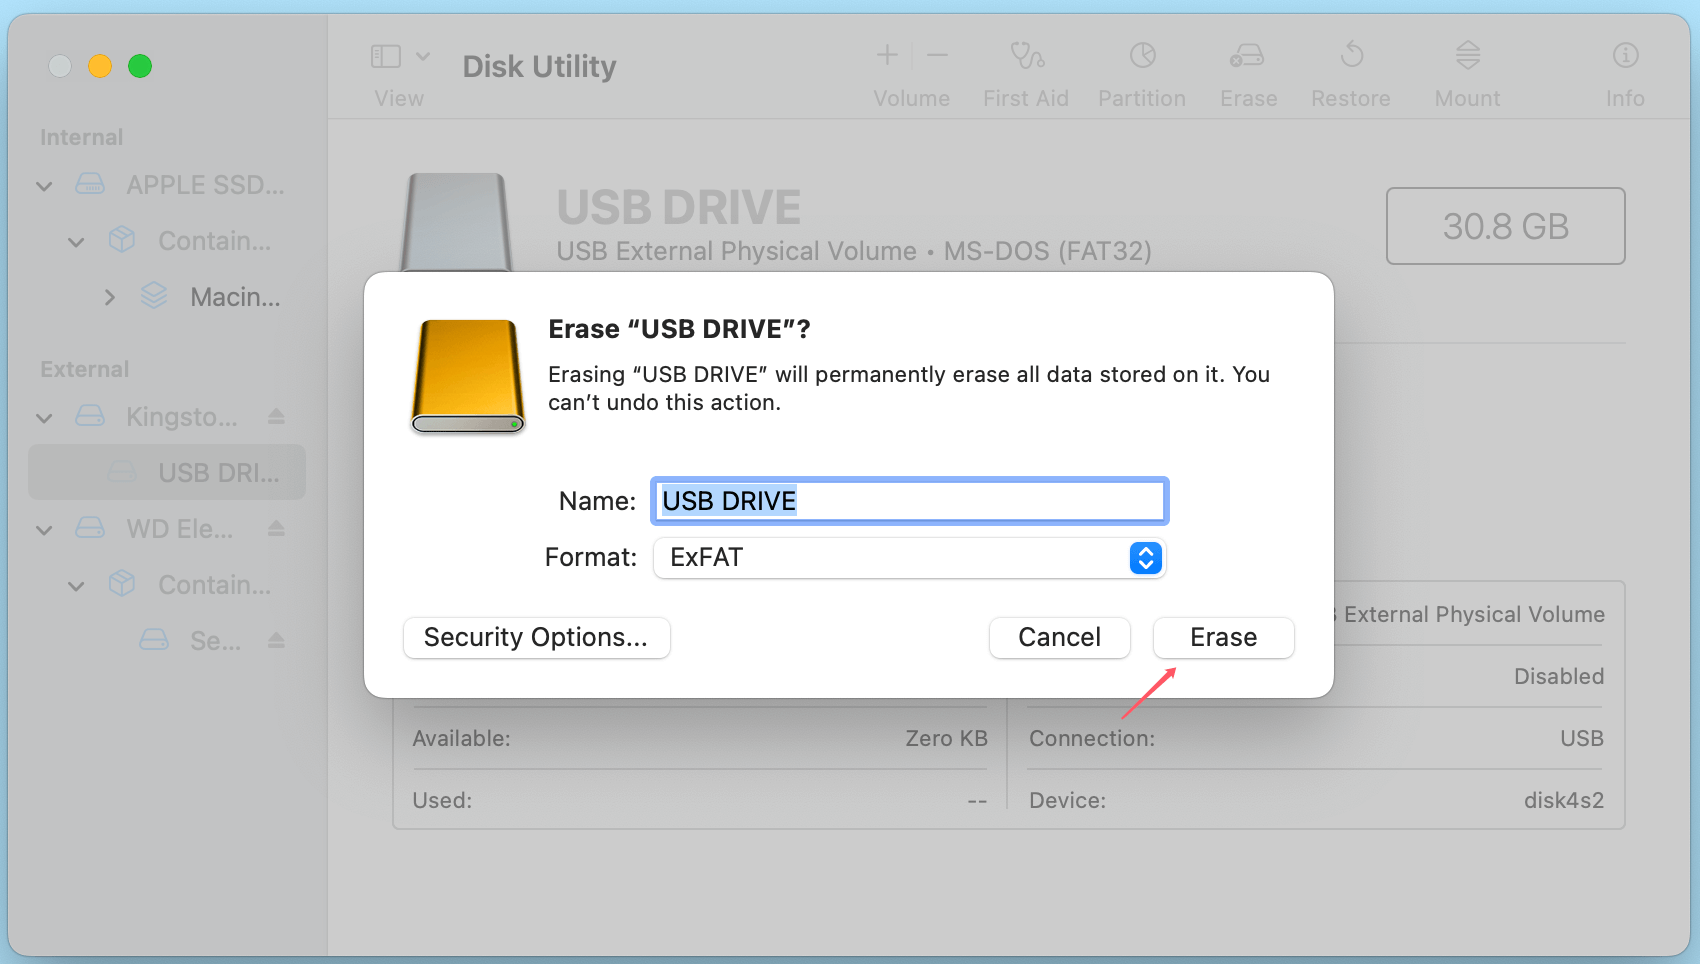
- Choose a compatible file system format:
- APFS: Ideal for macOS-only environments with modern features like snapshots.
- Mac OS Extended (Journaled): A traditional choice for macOS systems.
- ExFAT: Best for drives used across macOS and Windows.
- Name the drive (optional) and click Erase.
![Fix USB Drive Won't Mount on Mac]()
- Recovering Data Before Reformatting: If possible, use data recovery software like Donemax Data Recovery for Mac before reformatting to retrieve important files.
🔗 Also read: how to recover lost data from erased or unmounted USB drive on Mac.
- Reformatting Successfully: Once reformatting is complete, your USB drive should mount automatically and appear in Finder. Be sure to test the drive by transferring files to ensure it's functioning correctly.
Disk Utility is a robust tool that often resolves mounting issues without requiring additional software. By leveraging its features effectively, you can fix most USB drive problems and get back to your work with minimal disruption.
#4 Check System Settings
If the USB drive still won't mount, the issue might lie in your system settings.
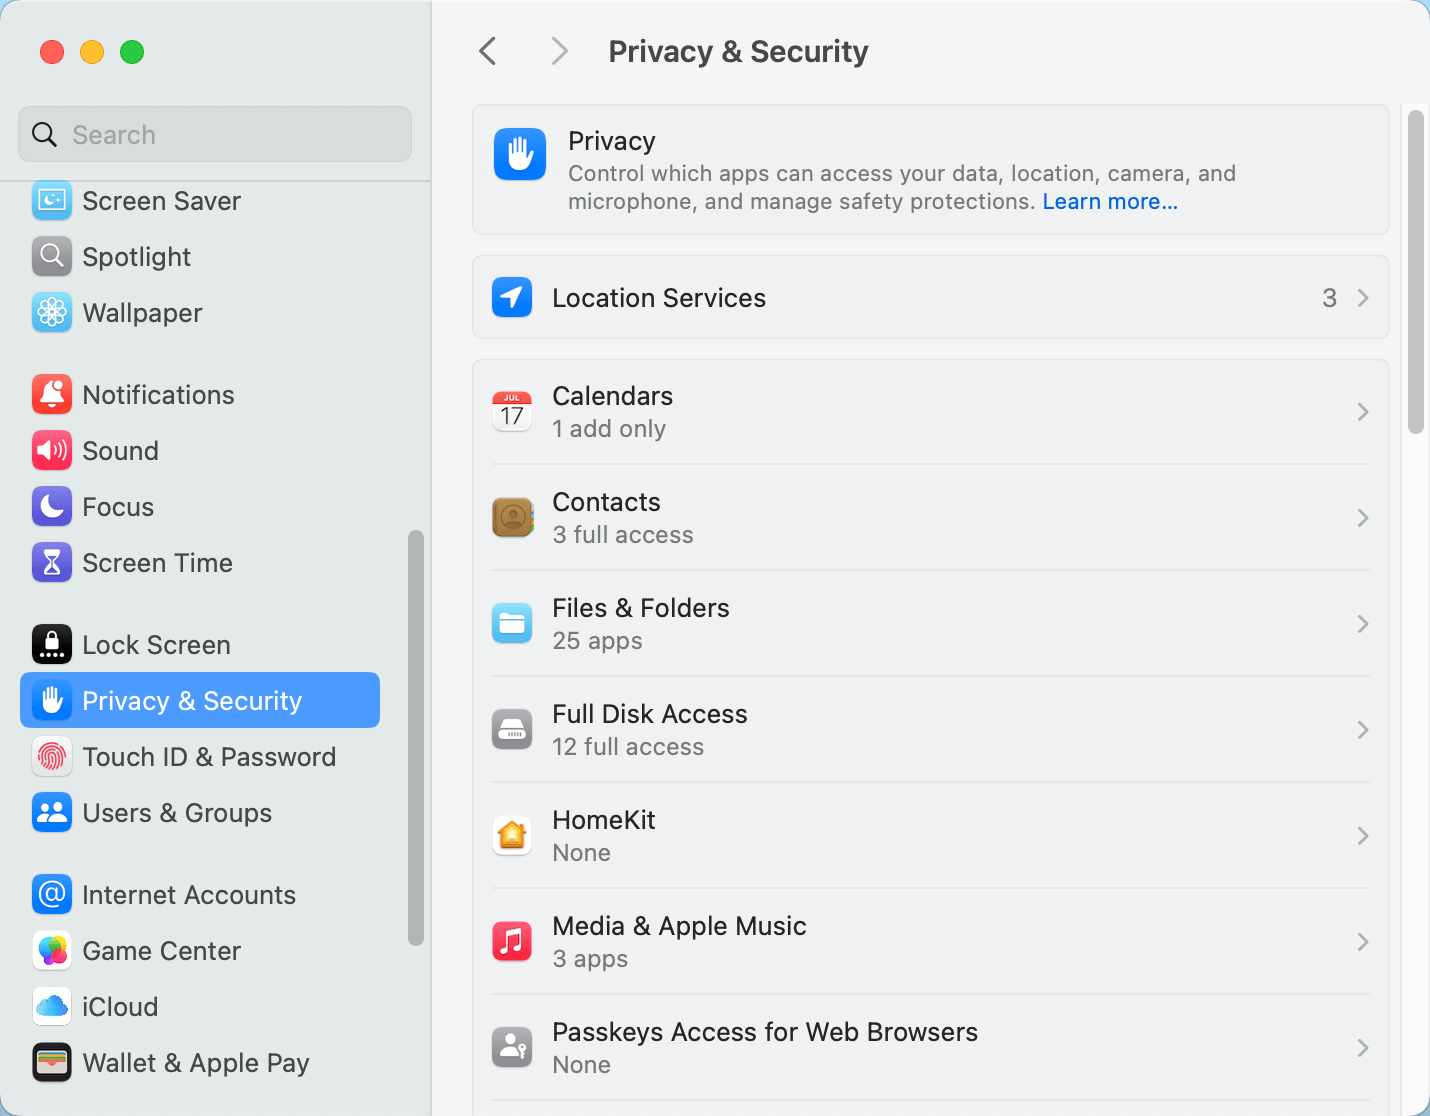
1. Privacy and Security Settings
Sometimes, macOS restricts access to new devices for security reasons.
- Go to System Settings > Privacy & Security.
![Fix USB Drive Won't Mount on Mac]()
- Ensure no settings block external drives under sections like Full Disk Access or Accessibility.
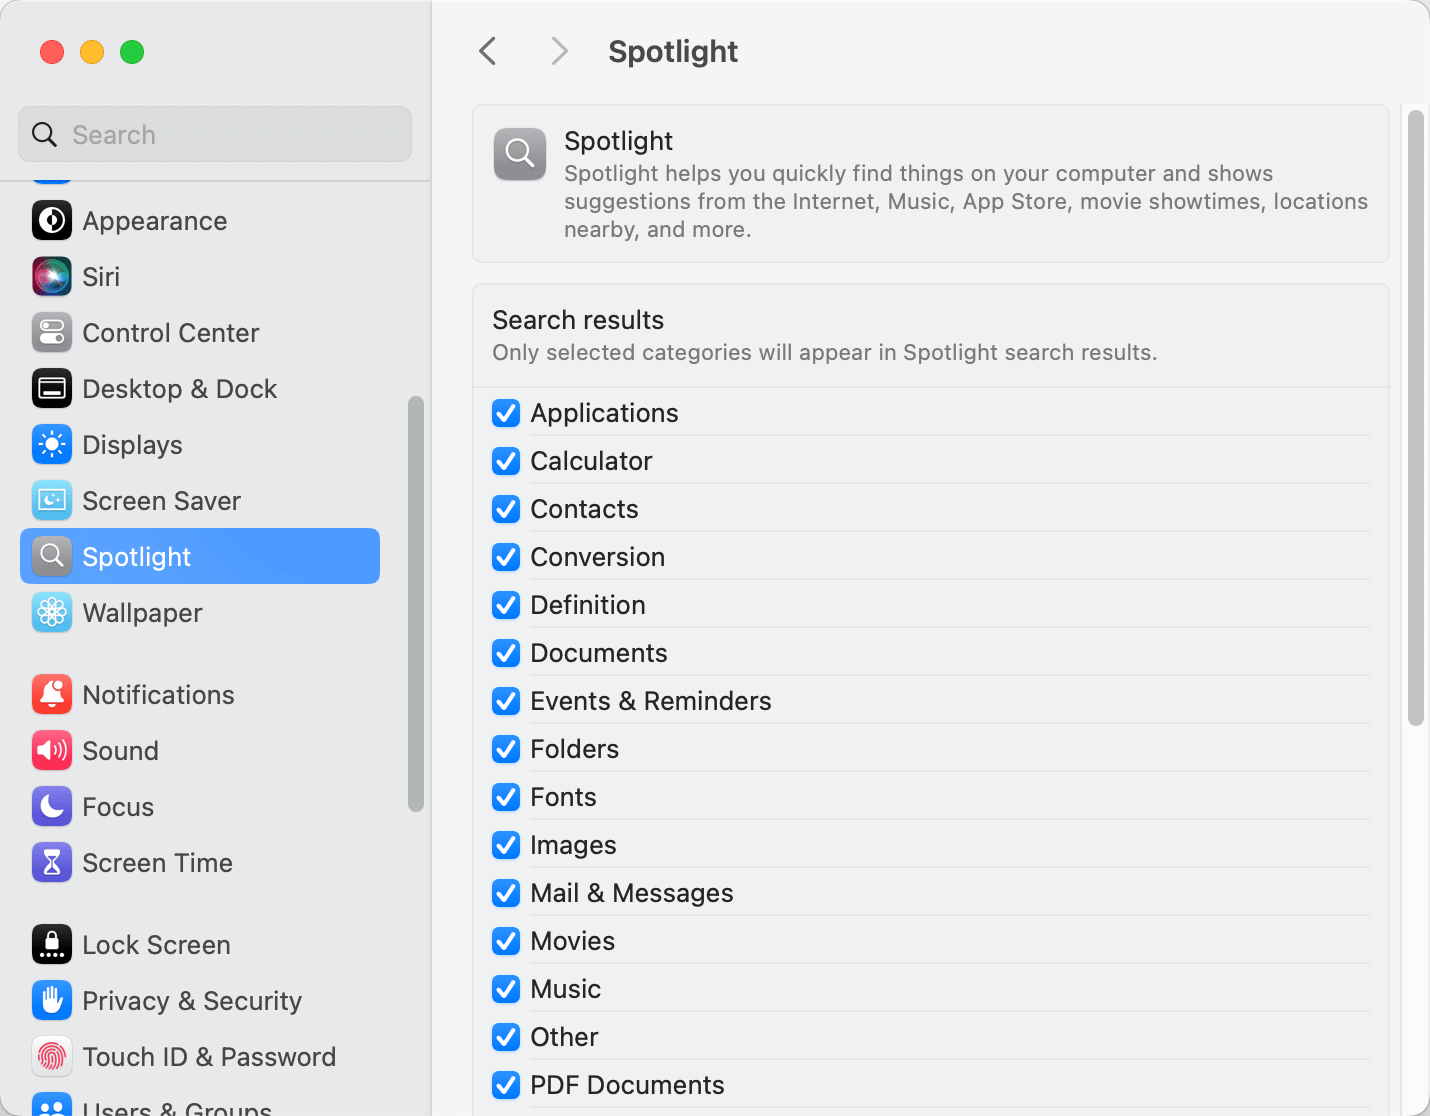
2. Spotlight Indexing
If Spotlight indexing is disabled or encountering an error, it might prevent the drive from mounting.
- Go to System Settings > Spotlight and ensure external drives aren’t excluded.
![Fix USB Drive Won't Mount on Mac]()
#5 Advanced Troubleshooting
For more stubborn cases, advanced techniques may be necessary.
1. Use Terminal to Mount the Drive
The Terminal allows for manual drive operations.
- Open Terminal (Applications > Utilities > Terminal).
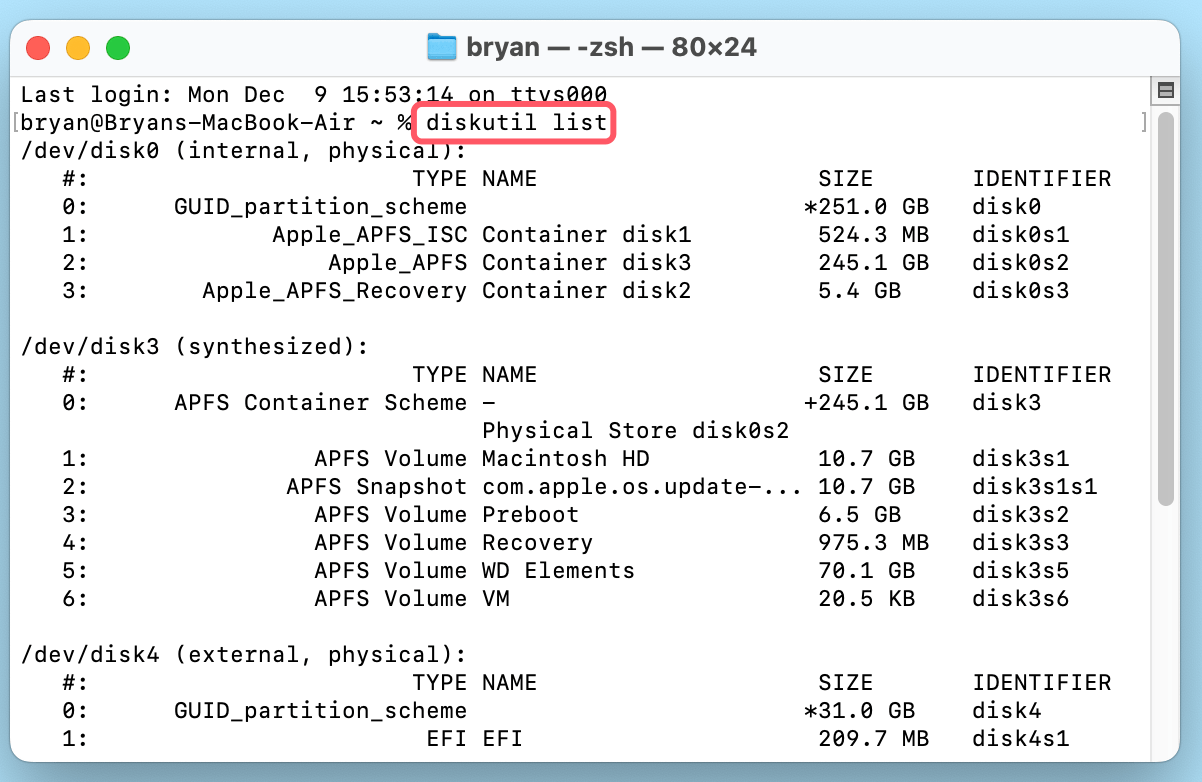
- Type diskutil list and press Enter.
![Fix USB Drive Won't Mount on Mac]()
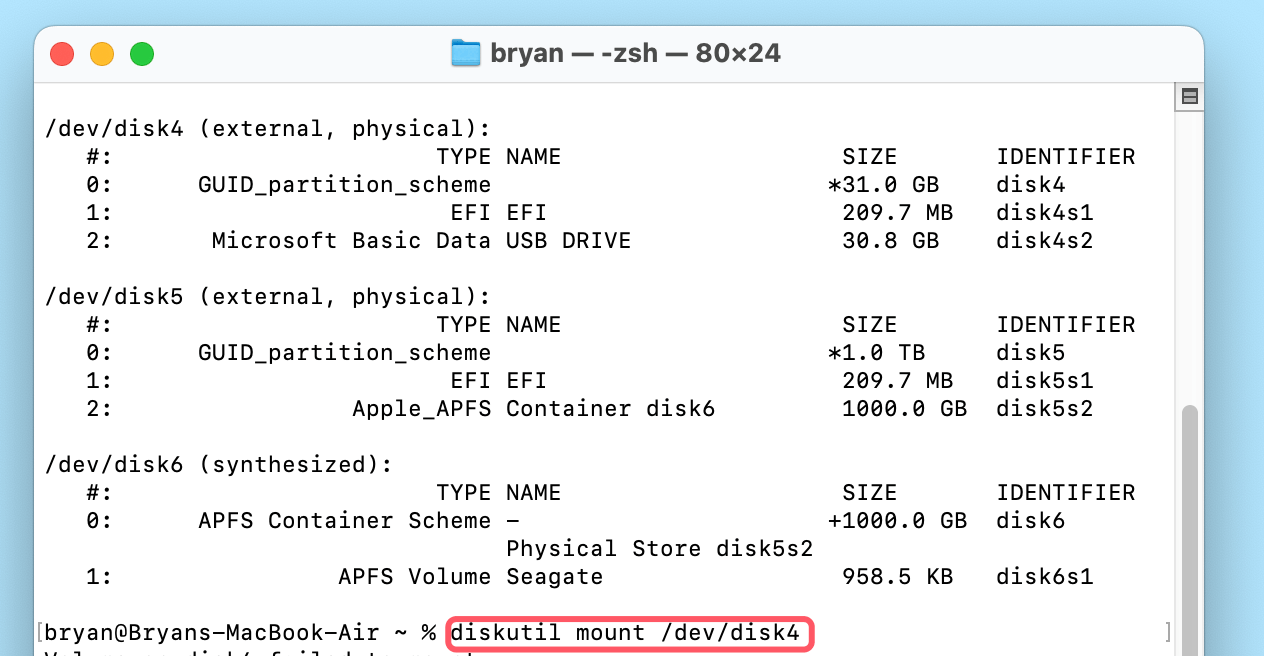
- Look for your USB drive in the list and note its identifier (e.g., disk4).
- Type diskutil mount /dev/disk4 (replace disk4 with your drive's identifier) and press Enter.
![Fix USB Drive Won't Mount on Mac]()
- Check Finder to see if the drive is accessible.
2. Reformat the Drive
If the drive appears in Disk Utility but won't mount, reformatting it might be necessary. Warning: Reformatting erases all data on the drive.
- Open Disk Utility and select the drive.
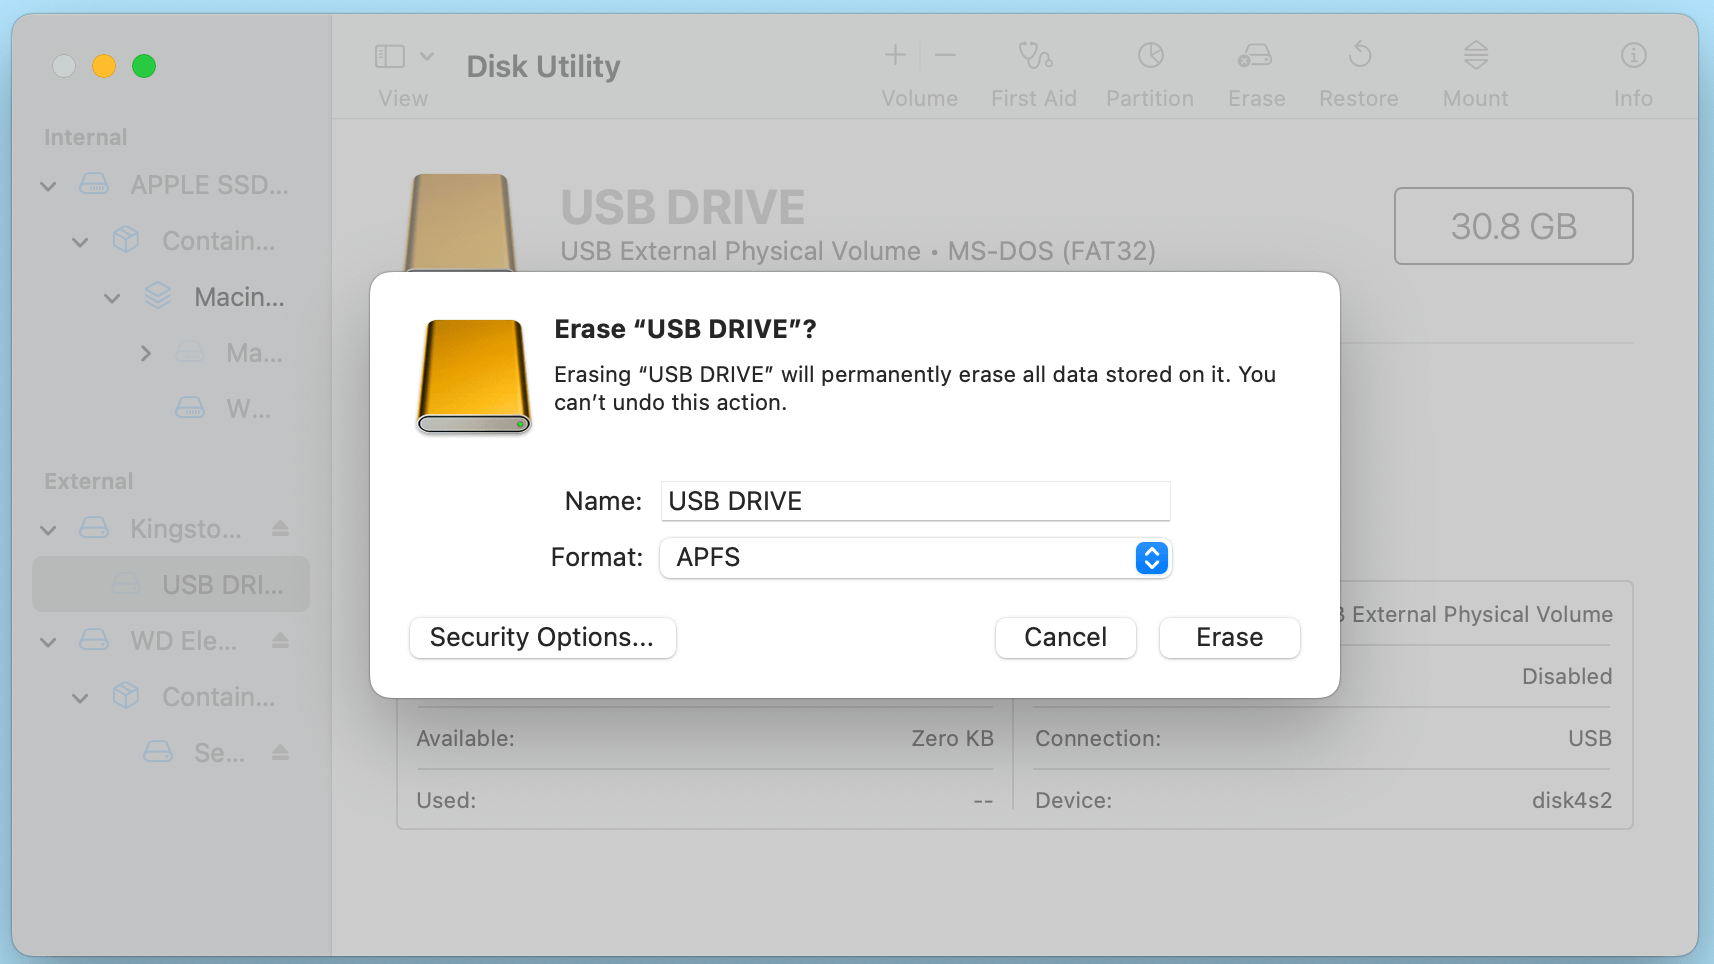
- Click Erase in the toolbar.
- Choose a format compatible with macOS, such as Mac OS Extended (Journaled) or APFS.
- Click Erase and wait for the process to complete.
![Fix USB Drive Won't Mount on Mac]()
#6 Use NTFS for Mac Tool
If the USB drive is an NTFS drive, you can use third-party NTFS for Mac tool to force mount it on your Mac.
Step 1. Download and install the NTFS for Mac tool - Donemax NTFS for Mac on your Mac.
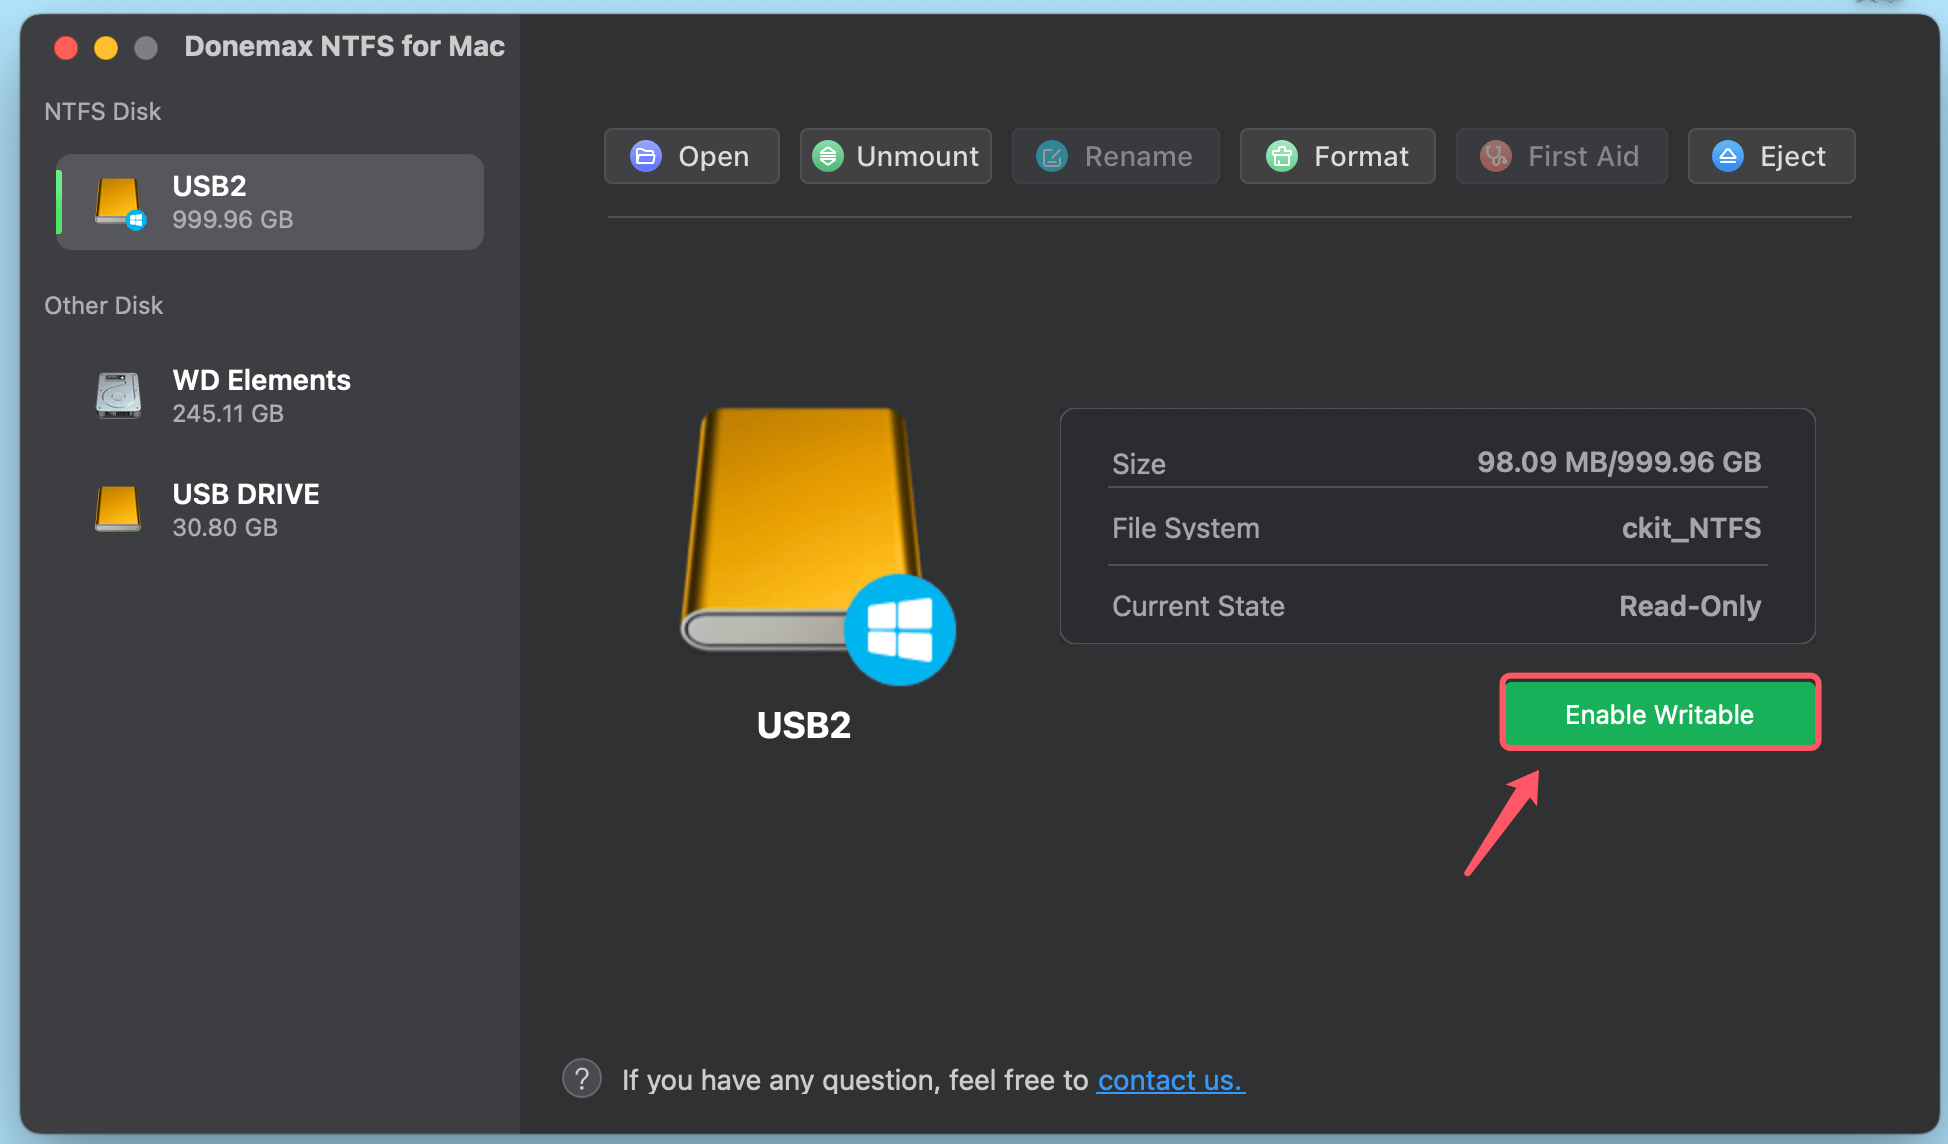
Step 2. Open Donemax NTFS for Mac, select the NTFS USB drive, click on Enable Writable button so that you can read-write the NTFS drive on your Mac.
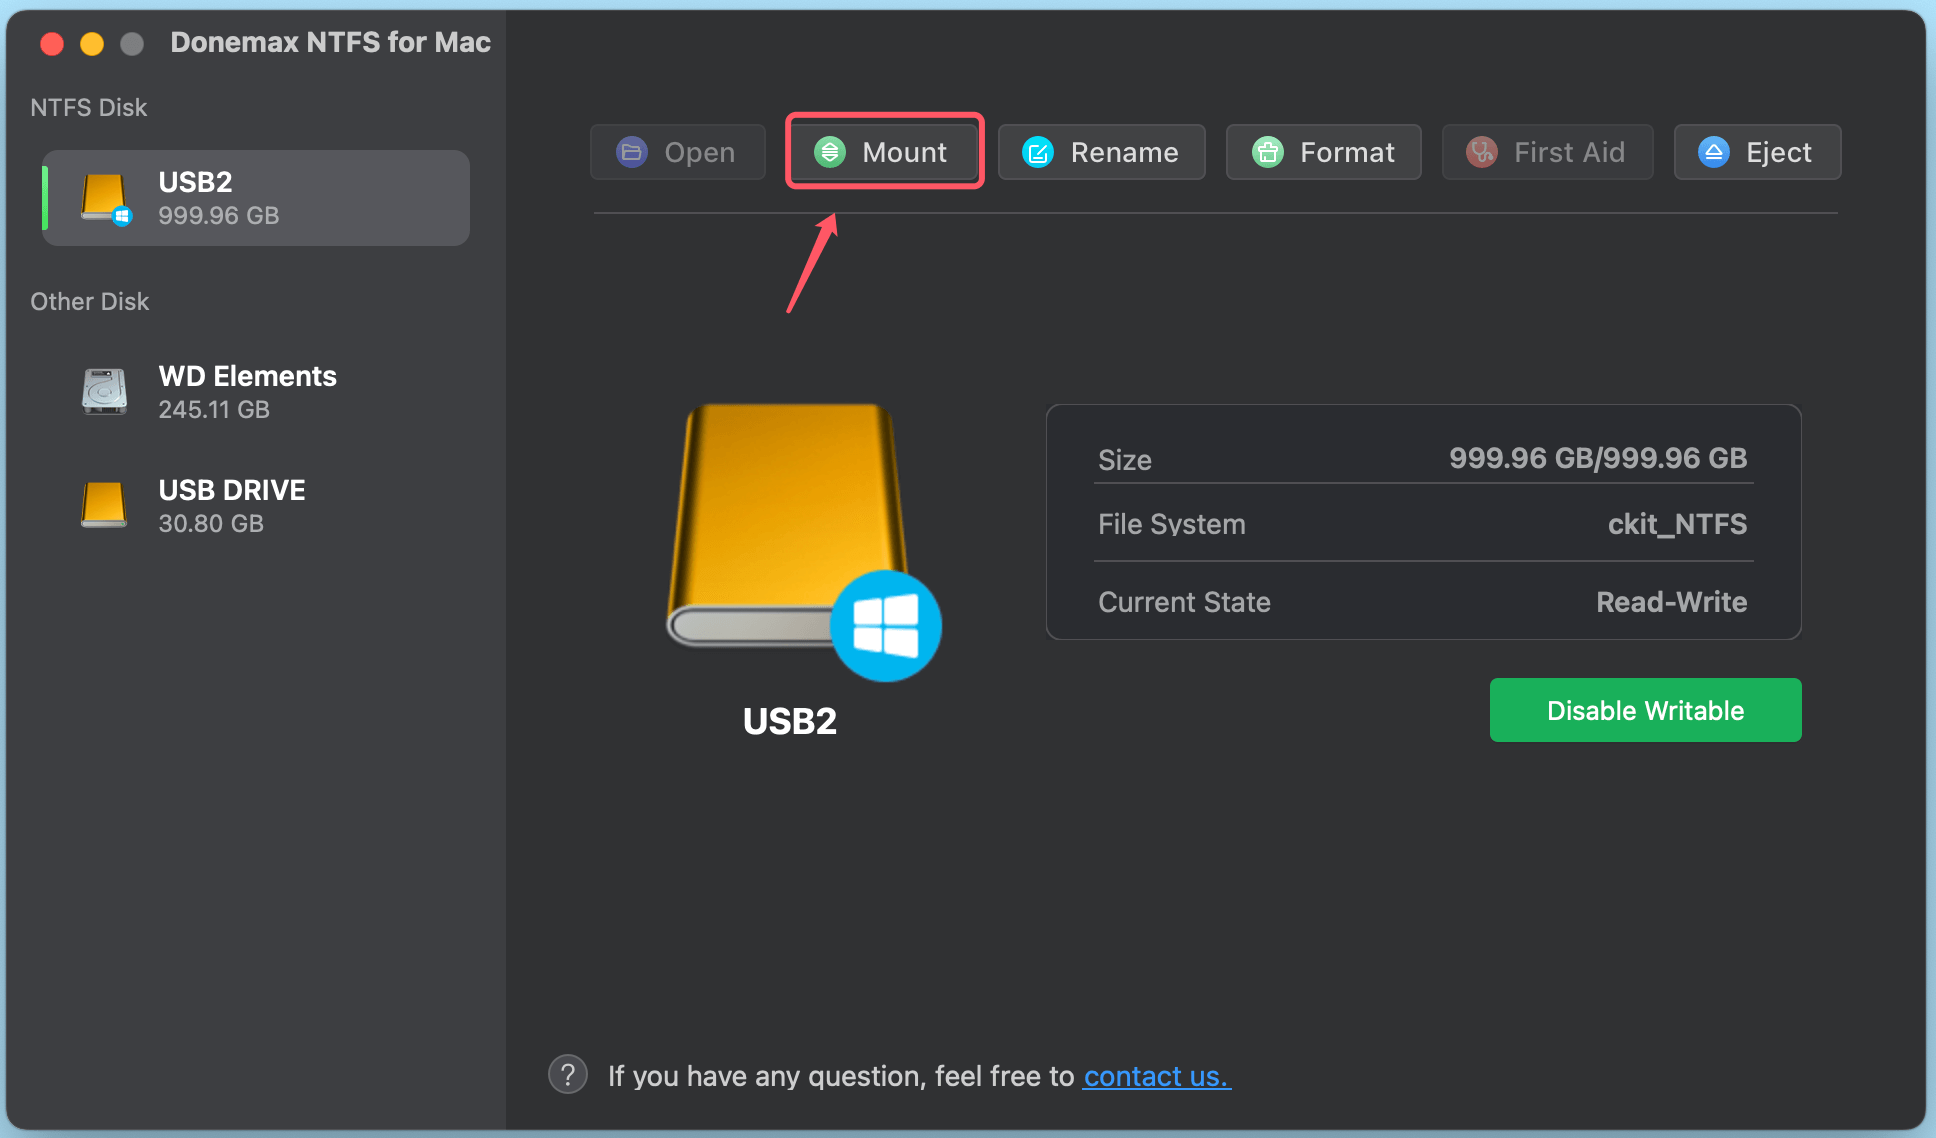
Step 3. Click on Mount button to mount the NTFS USB drive on your Mac.
#7 When All Else Fails
If the USB drive still doesn't mount, it might have severe hardware or data corruption issues.
1. Data Recovery Options
Specialized software can help recover data from unmounted USB drives.
Step 1. Download and install Donemax Data Recovery for Mac on your Mac.
Step 2. Open Donemax Data Recovery for Mac, select the unmounted USB drive to start data recovery.

Step 3. Click on Scan button to find all recoverable files including existing files, inaccessible files, deleted or erased files, etc.

Step 4. Once the scan is completed, you can preview all recoverable files. Then select the wanted files, click on Recover button to save them.

2. Professional Data Recovery Services
If software fails, consider taking your drive to a professional data recovery service. These services can often retrieve data from even severely damaged drives.
3. Contact Apple Support or the Drive Manufacturer
If the issue seems hardware-related, reach out to Apple or the drive’s manufacturer for support.
Prevent Future USB Not Mounting on Mac Issues
To avoid running into USB drive mounting problems in the future, follow these best practices:
- Always Eject Drives Safely
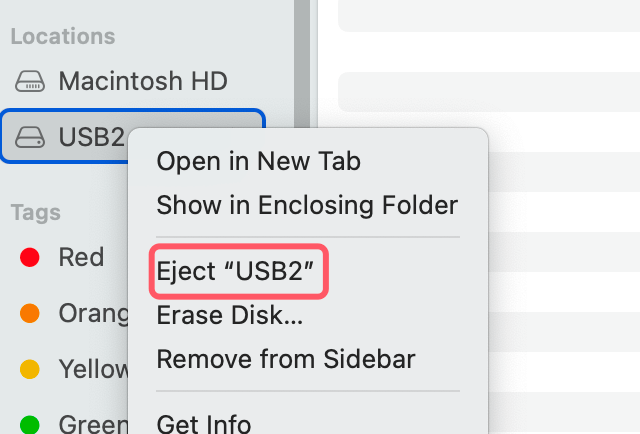
Never remove a USB drive without ejecting it first. Right-click the drive in Finder and select Eject, or drag it to the Trash.
![Fix USB Drive Won't Mount on Mac]()
- Regularly Back Up Data
Backing up your USB drive's contents ensures you won't lose data if the drive fails. Use macOS's Time Machine or a cloud storage service.
- Choose Compatible File Systems
When formatting USB drives, select a file system compatible with macOS, such as APFS, Mac OS Extended, or ExFAT (for cross-platform use).
- Keep Your Mac Updated
Regularly update macOS to maintain compatibility with new hardware and resolve software bugs.
- Handle Drives Carefully
Avoid dropping or exposing your USB drive to extreme temperatures, as physical damage can render it unusable.
Conclusion
A USB drive that won't mount on a Mac can be a frustrating experience, but with the right approach, it's usually fixable. By following the steps outlined in this guide, you can diagnose and resolve the issue, ensuring your valuable data remains accessible. From simple checks to advanced troubleshooting and professional help, you have a variety of options at your disposal.
Remember, proper care and regular backups are key to preventing future problems. So, the next time your USB drive acts up, you'll know exactly what to do. Stay proactive, and happy troubleshooting!

Donemax NTFS for Mac
An easy-to-use NTFS for Mac tool to help you enable writable for NTFS drives on Mac so that you can read-write NTFS drives on Mac without any limitation. It also can help you mount, format, repair, rename, open drive on your Mac.
Related Articles
- Nov 18, 2024Mac Not Charging, Fix It Now
- Nov 12, 2024Fix 'Your iCloud Storage is Almost Full' on Mac
- Dec 25, 2024Unable to Delete Files from External Hard Drive on Mac? 6 Solutions
- Nov 27, 2024How to Fix RAW External Hard Drive, USB Drive, SD Card on Mac?
- Dec 25, 2024Why Can't I Edit My External Hard Drive on Mac? [4 Methods]
- Jan 17, 2025Fusion Drive Appears as Two Drives in Finder: How to Fix It on Mac?

Christina
Christina is the senior editor of Donemax software who has worked in the company for 4+ years. She mainly writes the guides and solutions about data erasure, data transferring, data recovery and disk cloning to help users get the most out of their Windows and Mac. She likes to travel, enjoy country music and play games in her spare time.

Gerhard Chou
In order to effectively solve the problems for our customers, every article and troubleshooting solution published on our website has been strictly tested and practiced. Our editors love researching and using computers and testing software, and are willing to help computer users with their problems
Hot Donemax Products

Clone hard drive with advanced clone technology or create bootable clone for Windows/Mac OS.

Completely and easily recover deleted, formatted, hidden or lost files from hard drive and external storage device.

Certified data erasure software - permanently erase data before selling or donating your disk or any digital device.
